RVCLR-68C - Interface vidéo pour véhicule CRUX - Free user manual and instructions
Find the device manual for free RVCLR-68C CRUX in PDF.

User questions about RVCLR-68C CRUX
0 question about this device. Answer the ones you know or ask your own.
Ask a new question about this device
Download the instructions for your Interface vidéo pour véhicule in PDF format for free! Find your manual RVCLR-68C - CRUX and take your electronic device back in hand. On this page are published all the documents necessary for the use of your device. RVCLR-68C by CRUX.
USER MANUAL RVCLR-68C CRUX
Vehicle Applications
Late 2015 to 2016 Land Rover vehicles with InControl, Version 4 radio.
Notes
- Only for vehicles WITHOUT factory rear-view camera.
- Compatible with NTSC cameras only.
Navigation / Radio Compatibility
"InControl" Touch Screen Navigation radios, Version 4.

text_image
TV 1 2 3 4 5 6 7 8 9 Radio CD AUX TV-CVDVersion 1
text_image
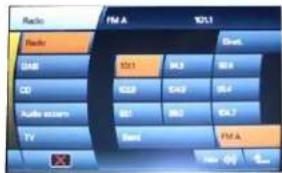
Radio FM A 10:1 Radio GND 32.1 44.5 58.8 CD 42.9 64.9 54.7 Audio zoom 32.1 58.3 64.7 TV Semi FM A No. 0% 4...Version 2
text_image
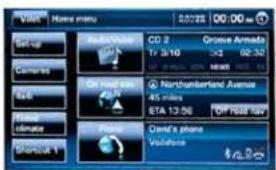
Weather Valee Home menu 00:22 00:00 Set-up Camera Sat Flood climate Shortout 1 CD 3 17.5/10 On road bus Northumberland Avenue 45 miles STA 13:56 OFF POST 18W David's phone VolatistaVersion 3
text_image
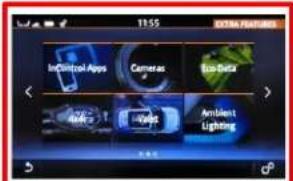
11:55 InControl Apps Cameras Bio-Data Ambient Lighting d²Version 4
Parts Included

RVCLR-68C
CAN Interface
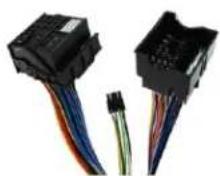
LR-68C Harness

Fakra Adaptor
1/5
031516
Crux Interfacing Solutions 6860 Canby Avenue, Suite 116, Reseda, CA 91335

www.cruxinterfacing.com tel. #: (818) 609-9299 fax #: (818) 996-8188
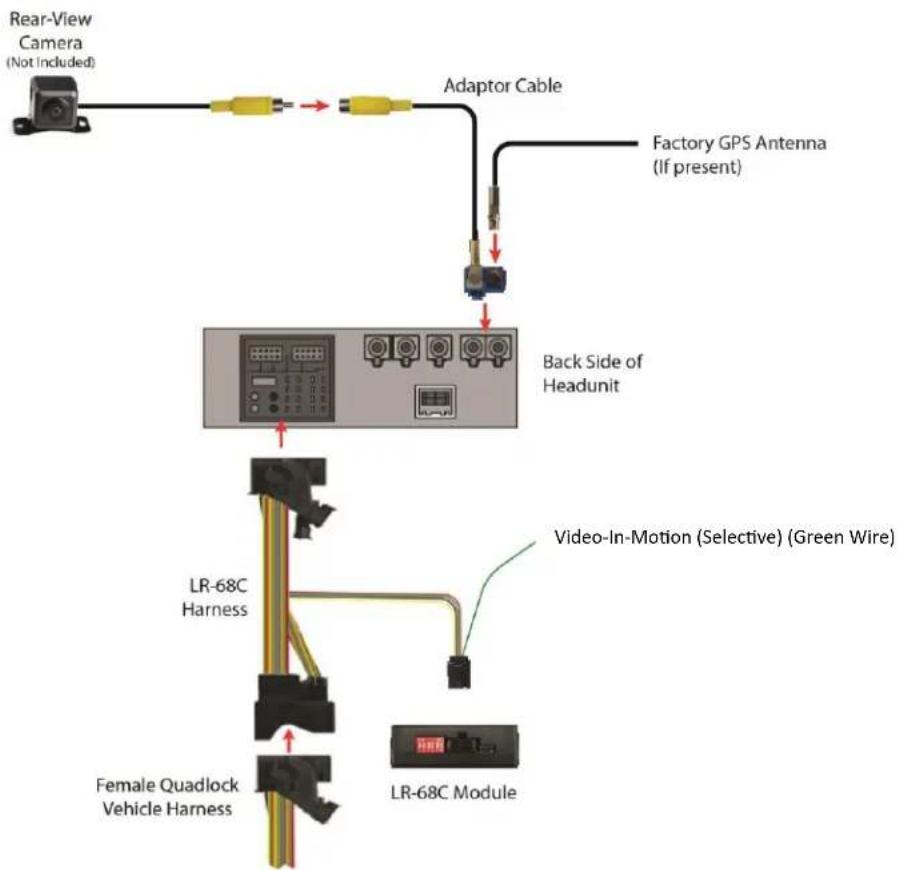
Wiring Diagram
flowchart
graph TD
    A["Rear-View Camera (Not Included)"] --> B["Adaptor Cable"]
    B --> C["Factory GPS Antenna (If present)"]
    B --> D["Back Side of Headunit"]
    D --> E["Video-In-Motion (Selective) (Green Wire)"]
    D --> F["LR-68C Harness"]
    D --> G["Female Quadlock Vehicle Harness"]
    E --> H["LR-68C Module"]
Installation Instructions
| Function | Pin-No. |
| CAN-HIGH (Yellow) | Pin 3 (chamber B) |
| CAN-LOW (Blue) | Pin 9 (chamber B) |
| +12V Constant (Red) | Pin 13 |
| Ground (Black) | Pin 11 |
Please note that the given information must be verified by the installer. Crux Interfacing assumes no liability for changes in wire color or pin assignments made by the vehicle manufacturer.

text_image
1 5 9 13 4 8 12 16 FUSE A B 1 6 7 12 1 6 7 122/5
031516
Crux Interfacing Solutions
6860 Canby Avenue, Suite 116,
Reseda, CA 91335

www.cruxinterfacing.com
tel. #: (818) 609-9299
fax #: (818) 996-8188
DIP Switch Setting
| Vehicle/ navigation | Dip 1 | Dip 2 | Dip 3 | Dip 4 | Dip 5 | Dip 6 |
| Video-in-motion permanent | ON | OFF | OFF | OFF | ON | ON |
| Video-in-motion selective* | OFF | OFF | OFF | OFF | ON | ON |
*With DIP1 set to OFF, the Green wire is used to activate the video-in-motion function.
DIP switch functions
Dip 1 – (ON / OFF) Activate Video-In-Motion
Dip 2 – (OFF) Factory Rear-view camera present
Dip 3 – (OFF) no function
Dip 4 – (OFF) no function
Dip 5 – (ON) CAN-bus termination resistor on the vehicle side
Dip 6 – (ON) CAN-bus termination resistor on the headunit side
Setting DIP 2 to ON codes the factory rear-view camera input which is located on the blue double Fakra male connector of the head unit. When reverse gear is engaged, the navigation will automatically switch to this input.
Connecting the RVCLR-86C to the Headunit

Connect female 8 Pin Molex connector of the LR-86C harness to male 8 Pin Molex connector of the Module.
Transfer Quadlock connector of vehicle harness from rear of the headunit into the male Quadlock connector of the LR-86C harness.

Plug female Quadlock connector of the LR-86C harness into male Quadlock socket on the rear of the headunit.

text_image
Back Side of Headunit LR-68C Harness Female Quadlock Vehicle Harness 1 2 3 LR-68C Module3/5
031516
Crux Interfacing Solutions 6860 Canby Avenue, Suite 116, Reseda, CA 91335

www.cruxinterfacing.com tel. #: (818) 609-9299 fax #: (818) 996-8188
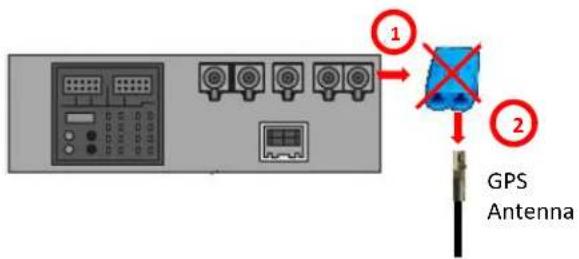
Connection the GPS antenna (if present) and aftermarket rear-view camera:
text_image
GPS Antenna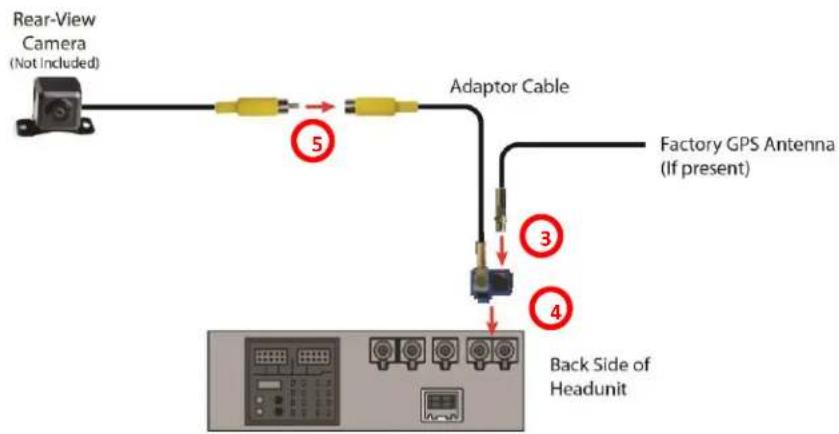
text_image
Rear-View Camera (Not Included) Adaptor Cable Factory GPS Antenna (If present) 5 3 4 Back Side of HeadunitIf present, disconnect the original blue double Fakra socket from the Headunit.
2 Remove the silver Fakra plug insert from the blue Fakra plastic case (to remove the plug insert, you have to break the housing. This is no longer needed).
3 Plug in the original silver Fakra plug insert in to the free slot of the adapter.
4 Connect the double Fakra socket of the Fakra adapter cable to the double blue Fakra connector on the rear of the headunit.
5 Connect the video RCA of the rear-view camera to the female RCA connector of Fakra adapter cable.
Activation of the Video-In-Motion function
The video-in-motion can be activated and deactivated by DIP 1 or by the loose green wire on the harness when connected to a +12V ACC source.
Video-in-motion permanent
With DIP1 to ON the video-in-motion function is activated permanently without disturbing the navigation performance.
Video-in-motion selective
With DIP1 set to OFF, the green wire is used to activate and deactivate the video-in-motion function.
Connect a toggle switch between the green wire and +12V ACC.
• +12V = Video-in-motion is activated
- 0V = Video-in-motion is not activated
"InControl" Touch Screen Navigation radio, Version 4

text_image
11:14 AM HOME I Like to Move... Climate Outside: 8°C Ramon's iPhone TELUS 118 Ave NW 1.6km 1:16AM5/5
031516
Crux Interfacing Solutions
6860 Canby Avenue, Suite 116,
Reseda, CA 91335

www.cruxinterfacing.com
tel. #: (818) 609-9299
fax #: (818) 996-8188