
RFM-CVN1 - Video Interface CRUX - Free user manual and instructions
Find the device manual for free RFM-CVN1 CRUX in PDF.


| Product Type | Video Interface |
| Brand | CRUX |
| Model | RFM-CVN1 |
| Input Connectors | RCA composite video, 3.5mm audio, optional HDMI (depending on vehicle) |
| Output Connectors | OEM radio screen (LVDS or RGB), RCA video out |
| Supported Video Formats | NTSC, PAL, 720p, 1080i |
| Power Supply | 12V DC (vehicle battery) |
| Power Consumption | 5W typical |
| Dimensions (L x W x H) | 100 x 60 x 25 mm |
| Weight | 80 g |
| Operating Temperature | -20°C to 70°C |
| Color | Black |
| Compatible Vehicles | Select Chrysler, Dodge, Jeep, RAM models with OEM navigation |
| Main Function | Add aftermarket camera or video source to factory screen |
| Installation Type | Plug-and-play, no cutting or splicing required |
| Included Accessories | Interface module, wiring harness, RCA cables, manual |
| Warranty | 1 year limited |
| Certifications | CE, RoHS |
Frequently Asked Questions - RFM-CVN1 CRUX
User questions about RFM-CVN1 CRUX
0 question about this device. Answer the ones you know or ask your own.
Ask a new question about this device
Download the instructions for your Video Interface in PDF format for free! Find your manual RFM-CVN1 - CRUX and take your electronic device back in hand. On this page are published all the documents necessary for the use of your device. RFM-CVN1 by CRUX.
USER MANUAL RFM-CVN1 CRUX
- Adds a reverse camera input, 6 video plus 1 audio/video inputs.
- Uses the steering wheel controls buttons to toggle between the sources.
- Includes side mirror mounted camera pods with adjustable angle cameras.
- Turn signals automatically triggers the corresponding side camera.
- Turn signal camera trigger can be turned on or off by using the SWC button.
- Forced view function on cameras (except side cameras).
- Ability to toggle from back-up camera to cargo camera and trailer camera while in reverse gear.
PARTS INCLUDED:

RFM-CVN1 Module RFM-CVN1 Harness CVS-CVN Side Mirror Mounted
Cameras
OPTIONAL ADD-ON CAMERAS:
Optional add on cameras are available to complete the multi-view capability of the RFM-CVN1. Cameras available and sold separately include: (More cameras can be found at www.cruxinterfacing.com)

CFF-01 Bullet Type Front Camera
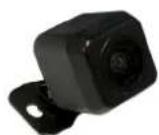
CFF-02 Square Body Front Camera

CFF-03 Grille Mount Front Camera

CUL-16 Universal Lip Mount Camera

INSTALLATION DIAGRAM:
![graph TD A["TO RADIO"] --> B["Gray 22-PIN (MALE)"] A --> C["WHITE 22-PIN (MALE)"] A --> D["GRAY 22-PIN (FEMALE)"] A --> E["WHITE 22-PIN (FEMALE)"] B --> F["CRUX Device"] C --> F D --> F E --> F F --> G["Audio/Video Input"] F --> H["Audio/Video Output"] G --> I["Front and Rear Camera Power Output 12V…](/content/2026/06/1249732/images/fe7035eac16bf7f080b4ccdf6dff1bc4e3a7c854d9b5f529f3b4993c0e719951.jpg)
DIP SWITCH SETTINGS:
| DIP# | ON | OFF |
| 1 | No Function – Leave OFF | |
| 2 | Front Camera ON | Front Camera OFF |
| 3 | Left Camera ON | Left Camera OFF |
| 4 | Right Camera ON | Right Camera OFF |
| 5 | Cargo Camera ON | Cargo Camera OFF |
| 6 | Trailer Camera ON | Trailer Camera OFF |
| 7 | AUX A/V ON | AUX A/V OFF |
| 8 | Set to ON | |
OPERATION:
Installation example is on a 2018 Dodge Grand Caravan.
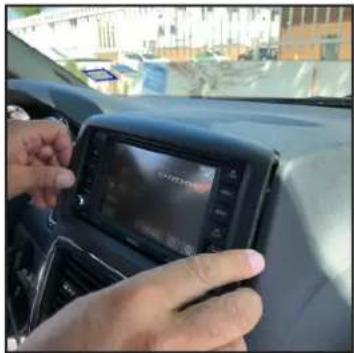
- Carefully remove the radio trim. Use a plastic pry tool to release the clips.
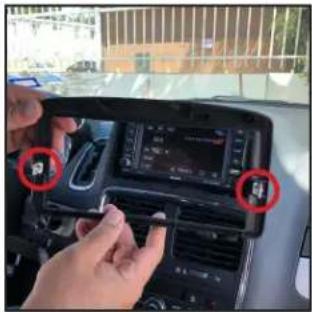
- Note that the radio trim is held in place by 2 clips on the sides.

- Remove the 4 screws holding the radio. 4. Remove the radio and unplug the factory connectors. Set the radio aside for now.
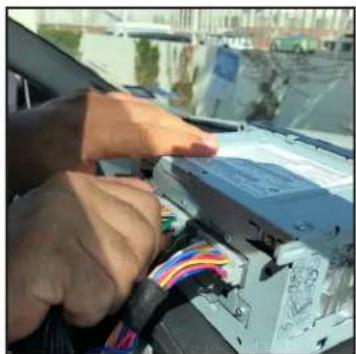

-
Mate the RFM-CVN1 T-harness between the radio and factory radio harness.
-
Determine what cameras will be installed in the system and install the cameras per manufacturers installation instructions. Run the camera cables towards the radio. Camera power will be provided at the RFM-CVN1 harness.

- To install the CSV-CNV side mirror mounted camera, remove the door panel.

- Remove the side mirror and pop out the panel under it.

- Pop in the CSV-CVN camera into the panel hole and run the cable through the corner sail and down inside the door panel.
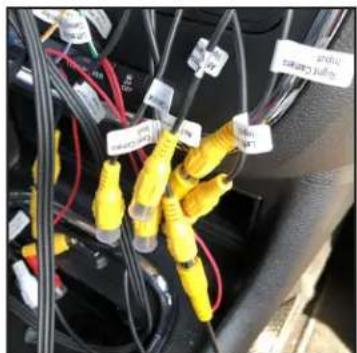
- Plug in the camera RCAs to the RFM-CVN1 harness. Set the DIP switches ON for the camera inputs to be used.

- Connect the camera power to the corresponding camera power wire provided by the RFM-CVN1 harness.

- If the AV Input feature will be used, plug in the unit to the AV Input RCAs on the RFM-CVN1 harness.

- To force view and toggle between the cameras, press and hold the middle button on the right side steering wheel control. Each press will toggle to the camera that is set to ON on the DIP switches. See page 2 for DIP switch settings.

- To turn off the automatic triggering of the side mirror cameras, move the turn signal switch to the camera to be turned off and press the left side SWC middle button for 3-5 seconds. Repeat the process to turn it back on.
To enter AV mode, press the MEDIA button on the radio.

Audio/Video Mode
Press the VIEW VIDEO button on the screen.


Front View
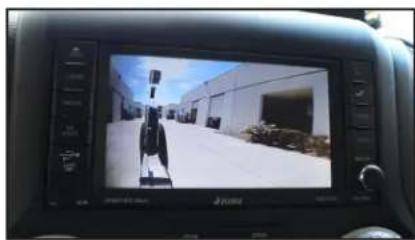
Passenger side blind spot view
VEHICLE APPLICATIONS:
DODGE
2018 – Up Caravan
Must have panel opening under side mirror to use the CSV-CVN camera


Brand : CRUX
Model : RFM-CVN1
Category : Video Interface