KAWLMCRVLA - Vacuum Cleaner Kogan - Free user manual and instructions
Find the device manual for free KAWLMCRVLA Kogan in PDF.

User questions about KAWLMCRVLA Kogan
0 question about this device. Answer the ones you know or ask your own.
Ask a new question about this device
Download the instructions for your Vacuum Cleaner in PDF format for free! Find your manual KAWLMCRVLA - Kogan and take your electronic device back in hand. On this page are published all the documents necessary for the use of your device. KAWLMCRVLA by Kogan.
USER MANUAL KAWLMCRVLA Kogan
natural_image
Technical line drawing of a mechanical assembly with mounting bracket and housing (no text or symbols)KOGAN LOCKABLE FULL MOTION CARAVAN TV MOUNT
(SUITABLE FOR 13" - 32" TVS)
KAWLMCRVLA
SAFETY & WARNINGS
Read the entire instruction manual before you start installation and assembly. If you have any questions regarding any of the instructions or warnings, contact your local distributor for assistance.
CAUTION: Use with products heavier than the rated weights indicated may result in instability causing possible injury.
- Please closely follow the assembly instructions. Improper installation may result in damage or serious personal injury.
- Safety gear and proper tools must be used. This product should only be installed by professionals.
- This product is designed to be installed on solid concrete walls, masonry walls or wood stud walls.
- Make sure that the supporting surface will safely support the combined weight of the equipment and all attached hardware and components.
• Use the mounting screws provided and DO NOT OVER TIGHTEN mounting screws. - This product contains small items that could be a choking hazard if swallowed. Keep these items away from children.
- This product is intended for indoor use only. Using this product outdoors could lead to product failure and personal injury.
- Never exceed the maximum load capacity of 15kg or it may result in product failure or personal injury.
IMPORTANT: Ensure that you have received all parts according to the component checklist prior to installation. If any parts are missing or faulty, contact your place of purchase for a replacement.
MAINTENANCE: Check that the product is secure and safe to use at regular intervals (at least every three months).

text_image
75x75 100x100 32" MAX 15kg (33lbs) RATEDCOMPONENTS
natural_image
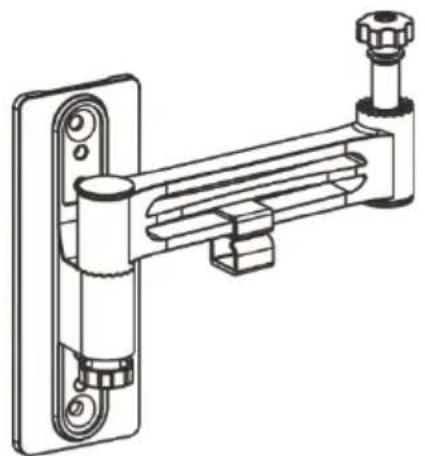
Technical line drawing of a mechanical clamp or bracket assembly (no text or symbols)A Mount (x1)
natural_image
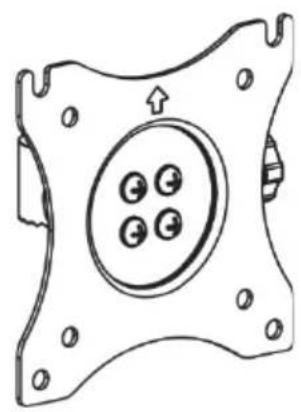
Technical line drawing of a mechanical component with four circular holes and mounting holes (no text or symbols)B Wall plate (x1)

C Screw covers (x2)

D Spirit level (x1)

E Allen Key (x1)

M-A (x4)
M4x14

M-B (x4)
M5x14

M-C (x4)
D5

W-A (x2)
W-B (x2)
Tools required for installation (not supplied)
 |  |  |  |
| Phillips head screwdriver | Stud finder | Pencil | Drill |
INSTALLING MOUNT TO WALL
Step 1
Unscrew the adjustment knobs on the mount (A).

natural_image
Technical line drawing of a mechanical assembly with labeled component A (no text or symbols beyond label)Step 2
Drywall / plaster: Using a pencil and spirit level, mark the desired position for the mount on your wall, using the wall mount to serve as a stencil for the hole positions. Use a stud finder first to check positions of wall studs and ensure the position is free from electrical wiring.
Using a drill, create the pilot holes. For drywall, use a 4.5mm or 3/16" drill bit, drilling 55mm deep. Position the wall mount in line with the pilot holes and secure to the wall using screws (W-A). Do not use the wall anchors.
Place screw covers (C) after securing.

text_image
Technical diagram showing five different tool and component views with dimensional annotations in millimeters.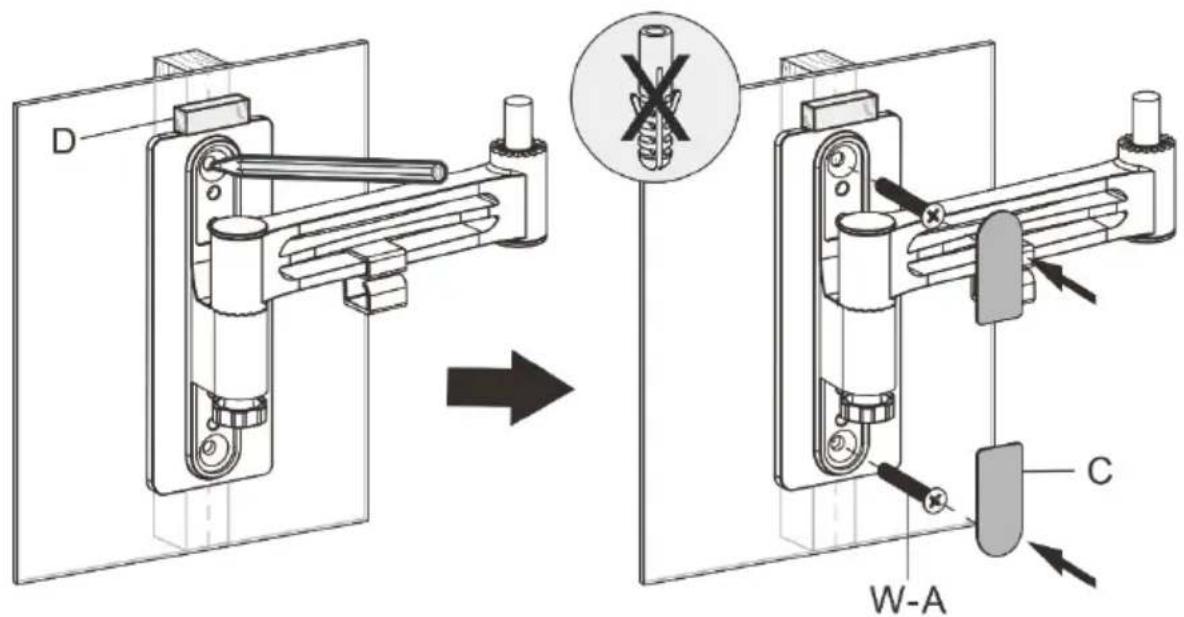
text_image
D W-A C
text_image
Diagram showing six-step electrical circuit components with labeled parts and symbolsMasonry / concrete:
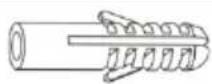
Using a pencil and spirit level, mark the desired position for the mount on your wall, using the wall mount to serve as a stencil for the hole positions. Using a drill, create the pilot holes. Use a 10mm or 3/8" drill bit, drilling 55mm deep. Insert wall anchors (W-B) into the drilled holes. Position the wall mount in line with the holes and secure to the wall using screws (W-A).
Place screw covers (C) after securing.

text_image
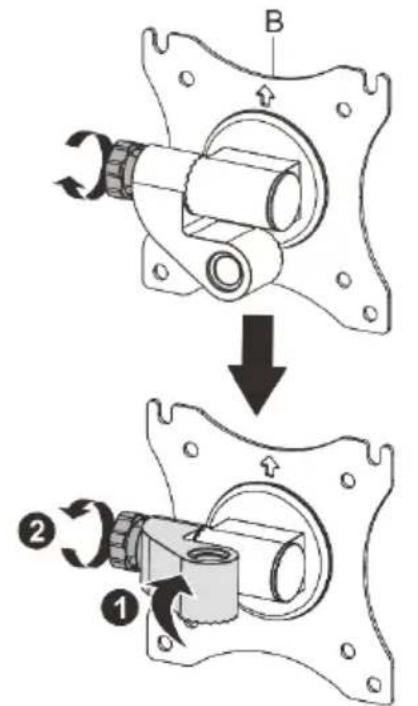
Technical diagram illustrating a mechanical assembly process with labeled components and tool paths, including 3D views and assembly details.INSTALLING BRACKET TO TV
Prepare the bracket (B) by unscrewing the adjustment knob and positioning as shown below.
text_image
Technical diagram showing mechanical assembly steps with labeled components and directional arrows indicating motionAlign the bracket with your TV's VESA holes and secure using supplied screws (M-A or M-B, depending on required length) and washers (M-C).

text_image
Diagram showing three types of screw and nut icons: checkmark, cross, and screwdriver with plus symbol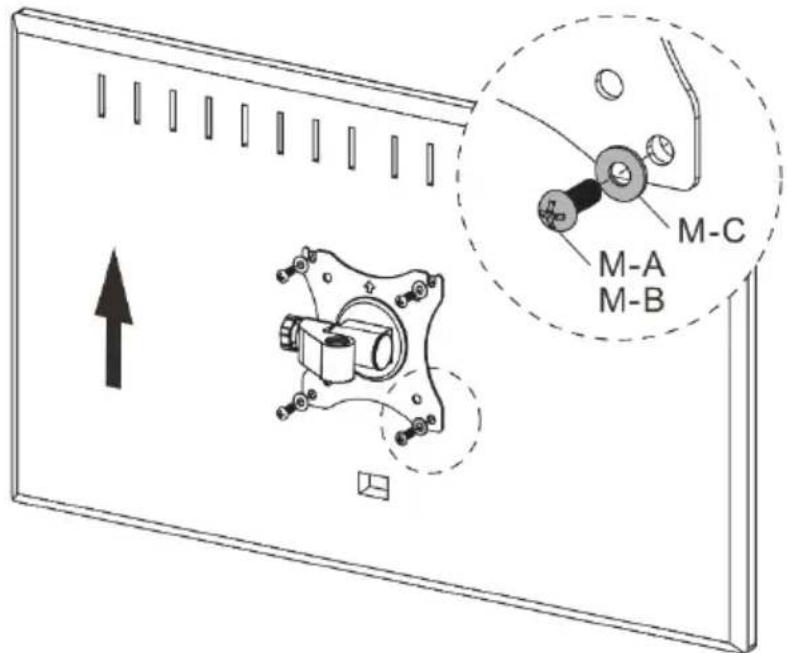
text_image
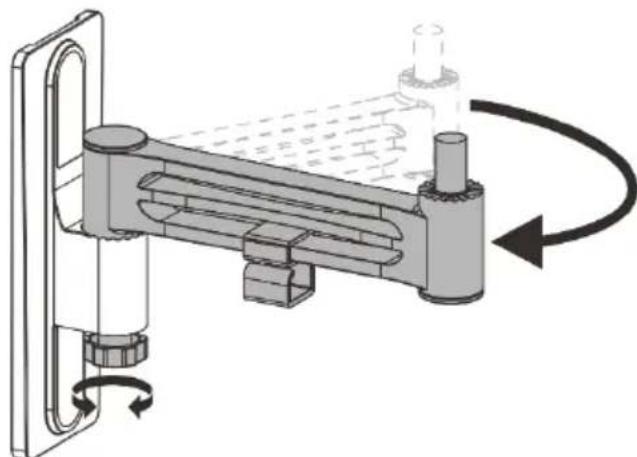
Technical diagram showing mechanical assembly with labeled components M-A, M-B, and M-C, including an upward arrow and magnified detail view.Loosen the mount arm via the adjustment knob and position as shown below.
natural_image
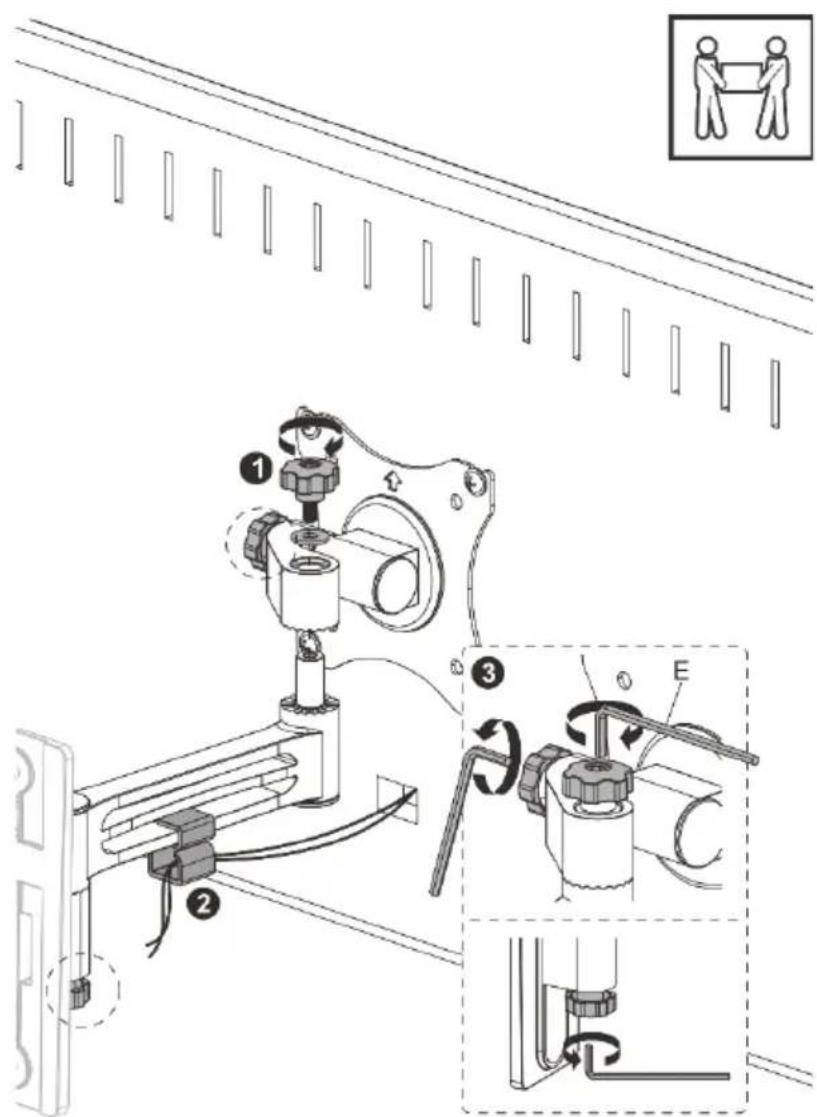
Mechanical assembly diagram showing a rotating component with directional arrows indicating motion (no text or symbols)Lift and place the TV with bracket installed onto the wall mount arm and secure with adjustment knobs (1). Two people should carry the TV to prevent damage.
Once in place, use the cable clips for cable management (2), then when all cables are in place and mount position is ready to be “locked in”, use the Allen key (E) to tighten adjustment knobs (3).
text_image
Technical diagram illustrating mechanical assembly steps with labeled components and directional arrows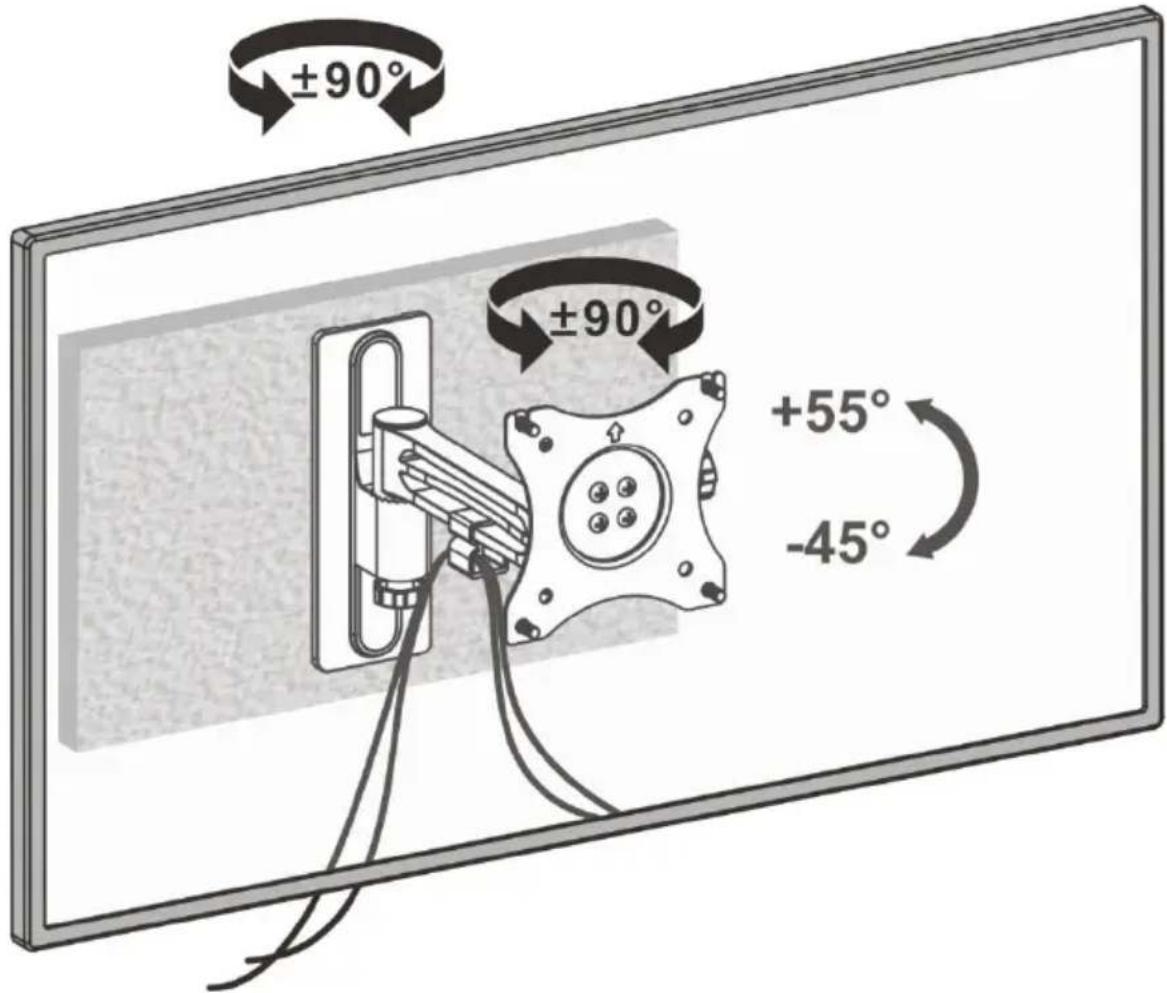
text_image
±90° ±90° +55° -45°See above for angle limits
NOTES
Need more information?
We hope that this user guide has given you the assistance needed for a simple set-up.
For the most up-to-date guide for your product, as well as any additional assistance you may require, head online to help.kogan.com
kogan.com