AT-VTP-FMK-10-BL - Switch Atlona - Free user manual and instructions
Find the device manual for free AT-VTP-FMK-10-BL Atlona in PDF.

User questions about AT-VTP-FMK-10-BL Atlona
0 question about this device. Answer the ones you know or ask your own.
Ask a new question about this device
Download the instructions for your Switch in PDF format for free! Find your manual AT-VTP-FMK-10-BL - Atlona and take your electronic device back in hand. On this page are published all the documents necessary for the use of your device. AT-VTP-FMK-10-BL by Atlona.
USER MANUAL AT-VTP-FMK-10-BL Atlona
Flush Mount Kits for Velocity Touch Panels
AT-VTP-FMK-10-BL
natural_image
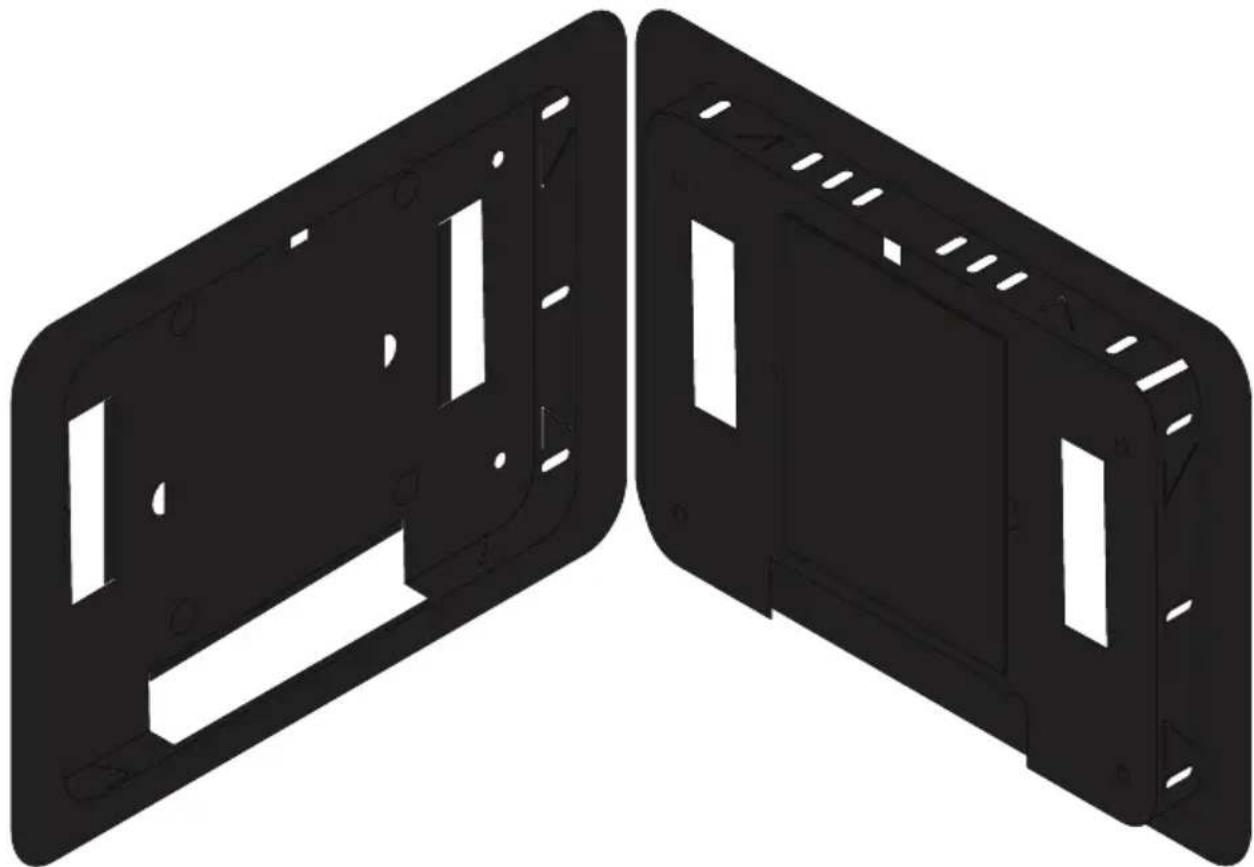
Two black plastic enclosure panels with cutouts and mounting holes, shown side by side (no text or symbols)The Atlona AT-VTP-FMK-10 is a flush mount kit for Velocity™ 10" touch panels. It allows the touch panel to be recessed into a wall so the panel face is virtually flush with the wall surface. The VTP-FMK-10 kit fastens to the wall with adjustable metal tabs and the touch panel attaches to the mount via four magnets. These magnets secure the touch panel to the enclosure when in use while also allowing it to easily be removed for maintenance if necessary. The VTP-FMK-10 is available in black and compatible with Velocity 10" touch panels including the AT-VTP-1000VL and AT-VTPG-1000VL.
Package Contents
1 x AT-VTP-FMK-10-BL
1 x Perforated Wall Cutout Template
4 x Magnets
4 x Plastic Washers
4 x Screws
Mounting Instructions
Use the following steps to install the AT-VTP-FMK into the wall.
- Remove the inner two cut outs from the Perforated Wall Cutout Template. Just the outer ring should remain.

text_image
should remain. 8.56 inch 283.5 mm 10.2 mm 272 mm 5.41 inch 137.5 mm 7.26 inch 197 mm 10.4 mm 197.5 mm 10.4 mm 10.4 mm 10" Cutout Ring- Trace the inside edge of the cutout ring onto the wall.
- Cut and remove the traced part of the wall.

natural_image
3D diagram showing a pencil drawing into a rectangular frame, with no text or symbols present- Pull the Ethernet cable through the hole in the wall and thread it through the VTP-FMK.
- Slide the VTP-FMK into the hole in the wall until it is pressed fully against the wall.

natural_image
Two technical illustrations showing a cable being inserted into a device frame, with no visible text or symbols.- Press a screwdriver into the triangle metal flaps of the unit to secure the VTP-FMK into the wall. There are 8 triangles to press in, two on each side.

natural_image
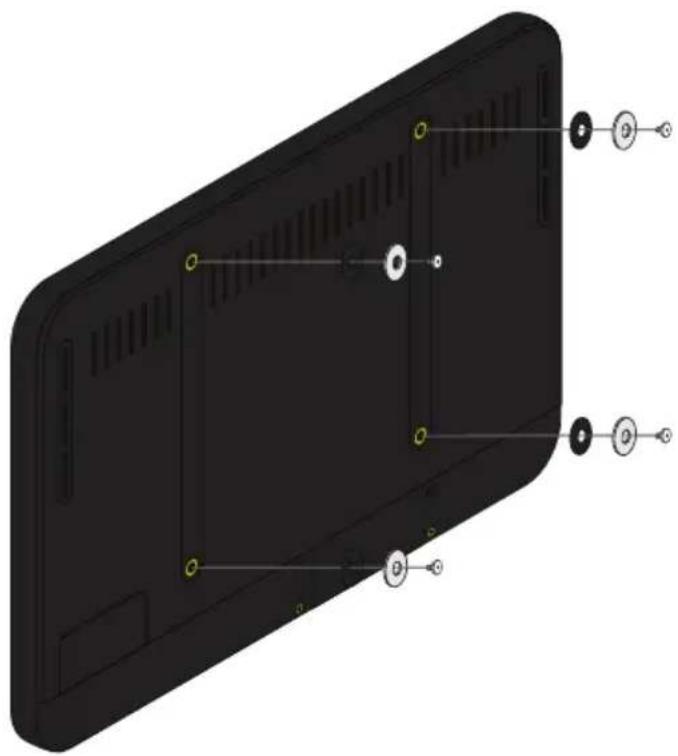
Two technical illustrations of a device with a screwdriver inserted into a black panel, showing internal wiring and mounting holes (no text or symbols present)- *Optional* If mounting screws are installed in the Velocity Touch Panel, remove them from the back of the unit.
- Thread the screw into the magnet first, followed by the washer.
- Screw the group into the back of the Velocity Touch Panel.
natural_image
3D model of a black rectangular device with internal components and labeled ports (no text or symbols beyond basic labels)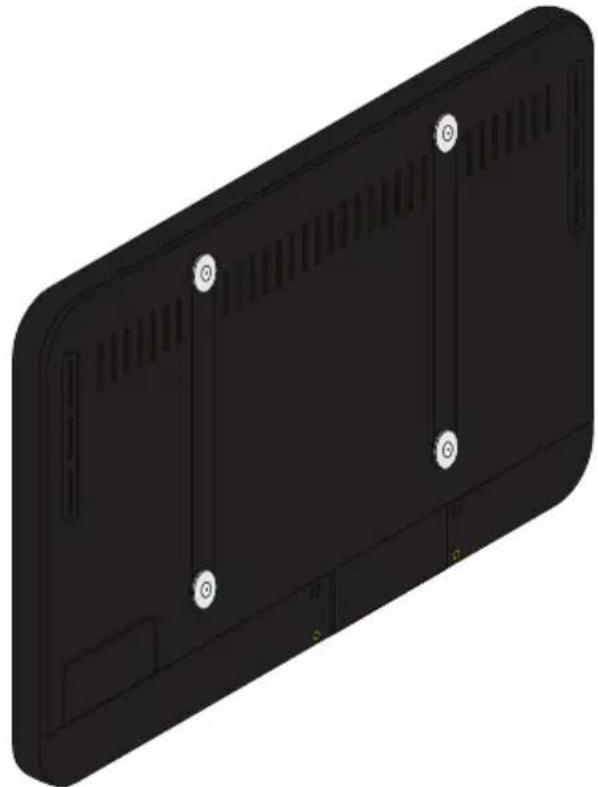
natural_image
3D rendering of a black rectangular electronic device with ventilation slots and mounting holes (no text or symbols)- Connect the Ethernet cable into the port on the back of the Velocity Touch Panel.
- Slide the Ethernet cable back into the wall as the Velocity Touch Panel is mounted into the VTP-FMK. The magnets will secure the Velocity Touch Panel to the VTP-FMK.
natural_image
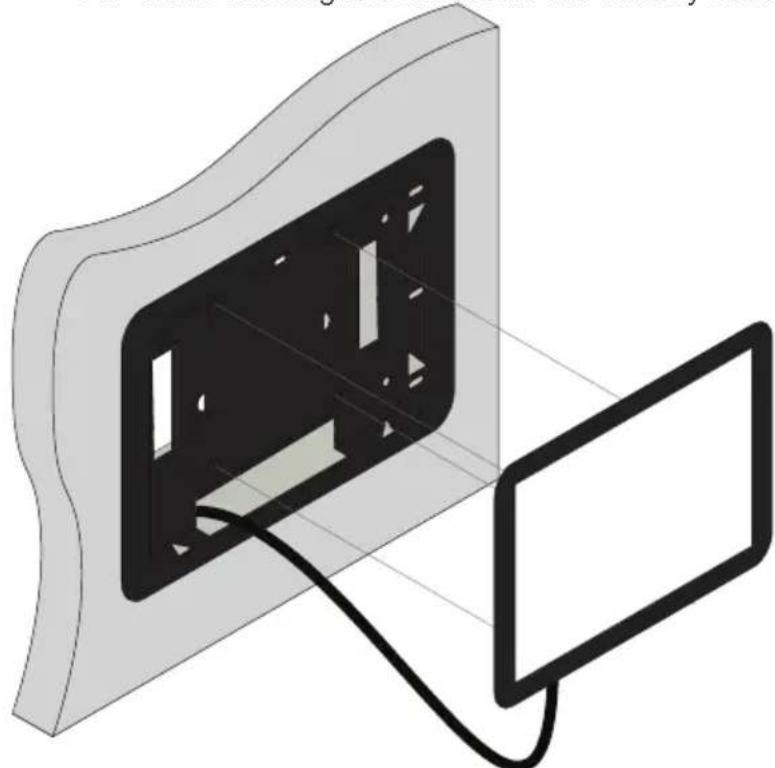
Illustration of a device with a black panel and cable, connected to a screen (no text or symbols)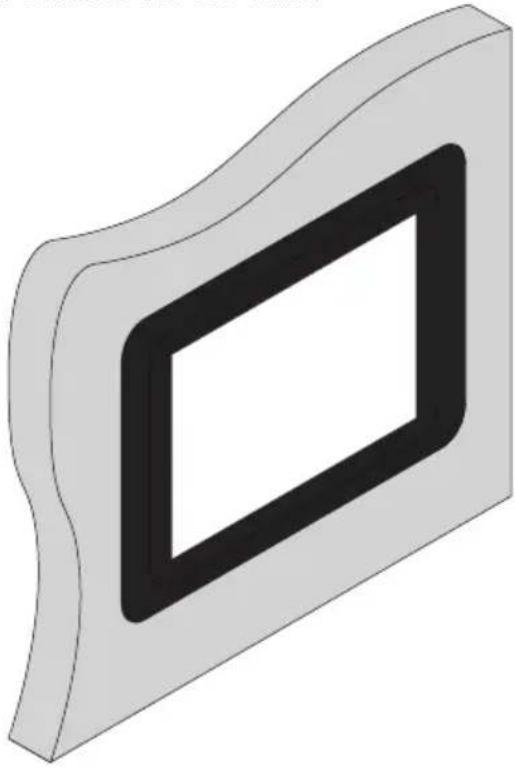
natural_image
3D rendering of a rectangular frame with a black inner rectangle, no text or symbols presentPanel Removal
If the panel needs to be removed from the flush mount, it can be done using two methods: corner press or included suction cup.
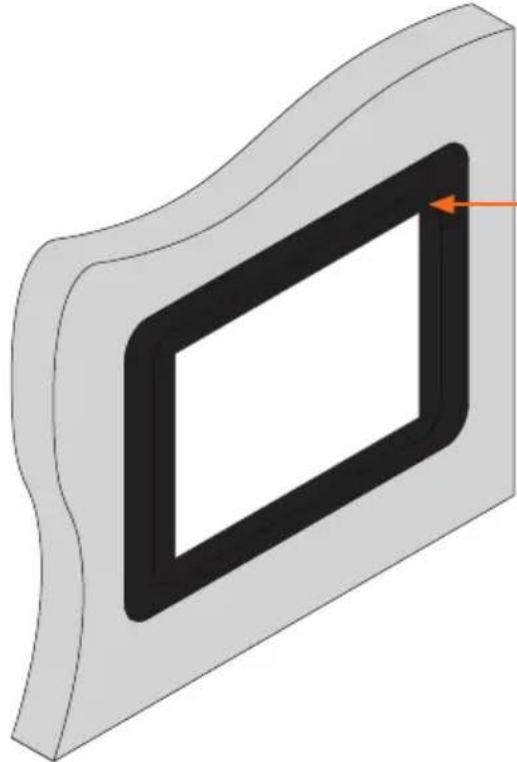
natural_image
3D diagram of a rectangular frame with a black inner rectangle and an orange arrow pointing to it (no text or symbols)Press a finger into the top right corner. The left side of the panel will pop out and the panel can be removed.
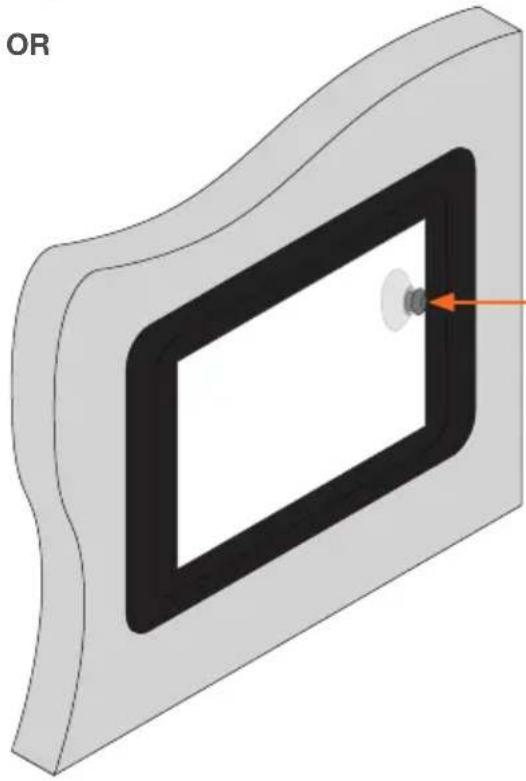
natural_image
3D diagram of a rectangular device with a circular component and an orange arrow pointing to it (no text or symbols)Attach the included suction cup to the Velocity Touch Panel and gently pull the panel off the VTP-FMK.
Warranty
To view the product warranty, use the following link or QR code: https://atlona.com/warranty/.

text_image
QR code image containing encoded data, no visible human-readable textVersion 2

ATLONA.
a PANDUIT company
US International
atlona.com • 408.962.0515 • 41.43.508.4321
© 2023 Atlona Inc. All rights reserved. "Atlona" and the Atlona logo are registered trademarks of Atlona Inc. All other brand names and trademarks or registered trademarks are the property of their respective owners. Pricing, specifications and availability subject to change without notice. Actual products, product images, and online product images may vary from images shown here.
25360-R2