DMF Tyxal+ - Motion detector DELTA DORE - Free user manual and instructions
Find the device manual for free DMF Tyxal+ DELTA DORE in PDF.

User questions about DMF Tyxal+ DELTA DORE
0 question about this device. Answer the ones you know or ask your own.
Ask a new question about this device
Download the instructions for your Motion detector in PDF format for free! Find your manual DMF Tyxal+ - DELTA DORE and take your electronic device back in hand. On this page are published all the documents necessary for the use of your device. DMF Tyxal+ by DELTA DORE.
USER MANUAL DMF Tyxal+ DELTA DORE
Wireless outdoor barrier motion detector


natural_image
Simple line drawing of a test tube with a cap (no text or symbols)
- Contents


Instructions
Important Product Information

Straps
Hook & Loop
2. Presentation
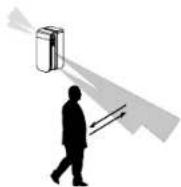
TYXAL+ DMF is a passive infrared motion detector, designed to detect the infrared radiation emitted by human bodies.
This motion detector aims to protect the outside of a building by detecting intrusions prior to penetration into the premises. As soon as a presence is detected, it raises the alarm.
TYXAL+ DMF has an automatic system to protect it against being opened or ripped from its mount.
It is also equipped with anti-masking detection, to prevent attempts to mask the lens.
• Paired with a control unit:
- alarm signal
- pre-alarm signal: as soon as a person enters the protected zone, an audible and visual signal (outdoor siren) warns you of the imminent alarm.
Note
This product detects temperature differences between moving and background targets within the detection zone.
If the target remains motionless, the motion detector cannot detect it. This may affect the detector's maximum detection range.
3. Location
For optimal operation, please comply with the following recommendations:
In the event of non-compliance, the product may present malfunctions or may not function optimally.

text_image
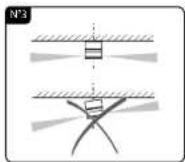
N°1 0,8 m~1.2 mInstallation heights between 0.8 and 1.2 m: lateral detection, max. range 12 m.
- Location

Install the motion detector vertically, with its high detection zones parallel to the ground.
If the detector is installed at an angle, detection reliability may be compromised. An integrated spirit level enables optimal installation.
Install the motion detector vertically, with both high and low detection zones parallel to the wall.
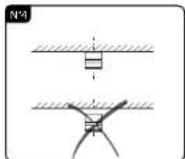
To ensure the device functions properly, attach the motion detector to the wall.

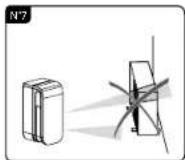
Do not direct the detector towards moving objects (leaves, bushes, flags, etc.).
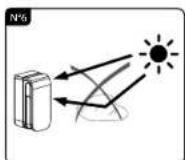
Do not direct the lower detection zone towards reflecting surfaces (puddle, window, etc.).
Do not install close to a heat pump or heat evacuation outlet (dryer, etc.).
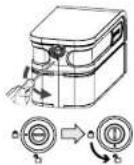
4. Mounting 5. Activation
Only the blue parts are actionable.
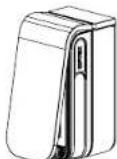
① Unlatch the top cover to open it.
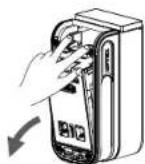
② Press on the blue strips to separate the detector from its base.

natural_image
Cross-sectional diagram of a refrigerated cylindrical device with internal components, shown against a brick wall background (no text or symbols)③ Secure the base to the mount using suitable screws and dowels. The tamper alarm is triggered when the base is broken and rests on the wall.
natural_image
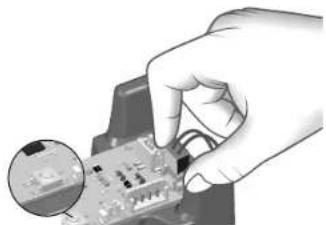
Hand holding a small electronic circuit board with an inset magnified view (no text or symbols visible)
Plug the battery cable into the card connector. Set the (Tyxal+) alarm control panel to 'pending pairing', then press the pairing button on the card. Important: only the blue/green wires must be connected to the wireless card (and not the grey/yellow wires).
② Reposition the sensor/electronic card on the base Attention: lock the detector part by pushing the blue strips until you hear a "click".
③ Close the cover
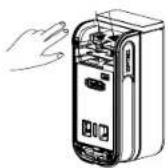
4 A 3-minute detection test launches automatically. Check that you are detected by moving into the detection zone.
⑤ With each detection, the LED flashes for 5 seconds. Test mode automatically stops after 3 minutes and the system returns to "Normal" mode.
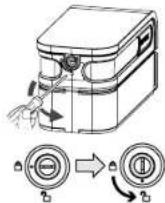
6. Detector range settings for each side
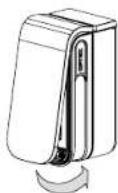
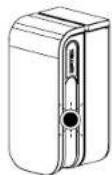
Depending on your installation, the detection beams can be offset from the wall (3 degrees). To do this, slide the compartment to reveal the "AWAY WALL" message (see image below). The detection distance can be configured separately for the right and the left side.
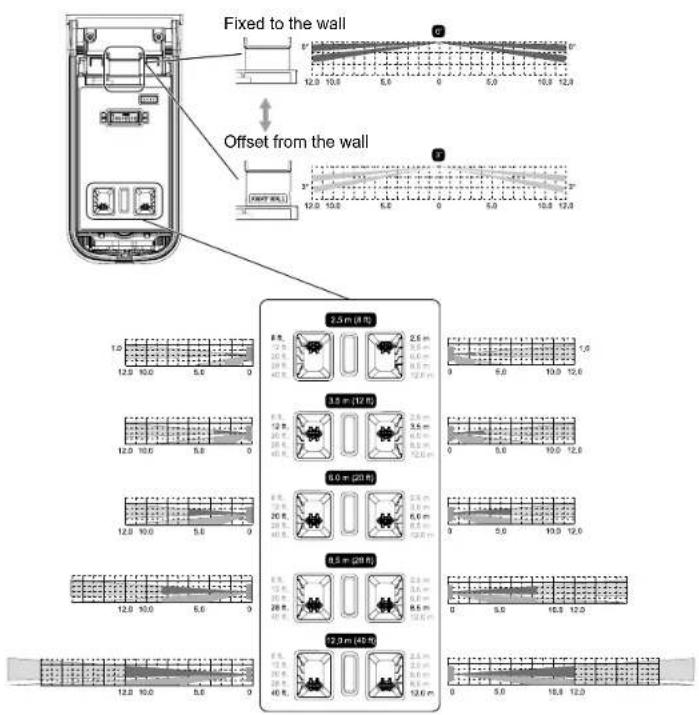
text_image
Fixed to the wall Offset from the wall 2.5 m (810) 3.5 m (1200) 6.0 m (2000) 8.5 m (4000) 7.0 m (4500)7. Detection sensitivity settings
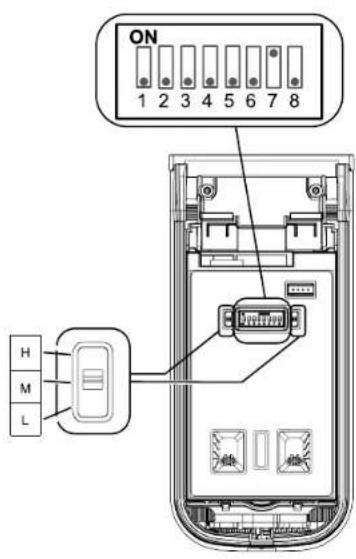
text_image
ON 1 2 3 4 5 6 7 8 H M LSwitch settings
The switches must be positioned towards the bottom during normal operation.
Switch 7: anti-masking function
• OFF position: Function inactive
• ON position: Function active
The masking of the lens is indicated by an Auto-Protection fault.
Detection sensitivity settings
The sensitivity can be independently adjusted for each side, (L) left and (r) right, to 3 positions:
• L (low),
• M (medium).
• H (high).
The chosen position will depend on
environmental conditions.
<We recommend that you set the sensitivity level
to H (high):
- When the detection beams were tilted horizontally.
- When higher sensitivity is required towards the end of the detection zone (12 m).
to L (low):
- When the device is installed in a mediocre location (bad conditions).
- When there is a high risk of faulty detection.
High sensitivity:
The detection sensitivity can be increased by toggling switches 4 (left side) and 5 (right side) to ON.

text_image
Left side Switch 4 Right side, switch 5 High sensitivity ON ON H M L Small H M L Large8. Operation with an alarm system
• Pairing with an alarm system
- Pre-alarm
- Selection of triggering method
• Test
Read system installation guide

9. Battery replacement
The LED flashes continuously, the battery is dead.
IMPORTANT: Before opening the unit, the alarm control unit must be in Maintenance mode (refer to system installation guide).
① Unlatch the top cover to open it.


② Press on the blue strips to separate the detector from its base.
- Troubleshooting
| Problem Probable cause | Sustainable | |
| The LED flashes continuously. | Incorrect power supply. | Change the battery. |
| Triggered detection without any objects moving | The motion detector was not installed perpendicular to the ground. | Install the motion detector correctly. |
| A reflecting object is located within the detection zone. | Eliminate all reflecting surfaces from the detection zone. | |
| The lower beam is longer than expected. | Check and readjust the detection beam. | |
| The lower detection beam is exposed to direct sun rays or to car headlights. | Readjust the detection beam so it is no longer exposed to direct light sources. | |
| Presence of a heat source (heating device, etc.) in the detection zone that may cause the temperature to change. | Readjust the detection beam or eliminate the heat source in the detection zone. | |
| An object is moving (washing hung up on a line, plants, etc.). | Readjust the detection beam or remove moving objects. | |
| In the event of heavy rain, water may pour through the detection zone (overflowing gutter, roof/terrace/balcony drainage, etc.) | Readjust the detection beam so it is no longer directly exposed to the flowing water. | |
| The sensitivity setting is too high. | Ability to reduce the sensitivity: - select L rather than M or H - check that switches 4 and 5 are set to OFF. | |
| Occasionally no detection. | Occasionally no detection. | Readjust the detection beam correctly. |
| Sensitivity is set to L (low). | Readjust the sensitivity level to M (medium) or H (high). | |
Caractéristiques techniques / Technical characteristics / Technische Daten Caratteristiche tecniche / Características técnicas / Technische kenmerken
 | 2xLS 14500 - 3.6 V / 5.2 Ah - Lithium |
 | |
| Consumption stand-by : 16 μAConsumption : 8 mA max / 3,6 Vcc | |
 |  [868.7 - 869.2] MHz100 m -> 300m [868.7 - 869.2] MHz100 m -> 300m |
| Maximum power radio < 10 mW,receiver category: 2 | |
 |  |
| [46WR] |  |
| IP |  |
| [TRSD] |  |
| [GRND] | 92,8 x 199,7 x 98,7 mm[73TG] 550 gr. |
 Important productinformation (3) Important productinformation (3) | |
CE
www.deltadore.com