SSK-CIVIC4DR - Car accessory Soundskins - Free user manual and instructions
Find the device manual for free SSK-CIVIC4DR Soundskins in PDF.

| Product Type | Car Interior Accessory Kit |
| Brand | Soundskins |
| Model | SSK-CIVIC4DR |
| Compatibility | Honda Civic 4-Door (Sedan) 2016-2021 |
| Material | High-density foam with butyl rubber adhesive |
| Quantity | 4 pieces |
| Dimensions (each) | Approx. 10 x 12 inches (25.4 x 30.5 cm) |
| Total Weight | 1.5 lbs (0.68 kg) |
| Installation Method | Peel and stick, no special tools required |
| Primary Function | Reduces road noise and vibration, improves audio quality |
| Sound Reduction | NRC 0.5 (sound absorption coefficient) |
| Temperature Range | -40°F to 200°F (-40°C to 93°C) |
| Color | Black with silver foil |
| Package Contents | 4 pre-cut mats, installation instructions |
| Warranty | 1 year limited warranty |
| Country of Origin | USA |
| Adhesive Type | Pressure-sensitive butyl rubber |
| Flame Retardant | Yes, meets FMVSS 302 |
| Maintenance | Wipe with damp cloth, avoid solvents |
| Safety | Non-toxic, odorless after curing |
Frequently Asked Questions - SSK-CIVIC4DR Soundskins
User questions about SSK-CIVIC4DR Soundskins
0 question about this device. Answer the ones you know or ask your own.
Ask a new question about this device
Download the instructions for your Car accessory in PDF format for free! Find your manual SSK-CIVIC4DR - Soundskins and take your electronic device back in hand. On this page are published all the documents necessary for the use of your device. SSK-CIVIC4DR by Soundskins.
USER MANUAL SSK-CIVIC4DR Soundskins
Sedan Door Kit Instructions

natural_image
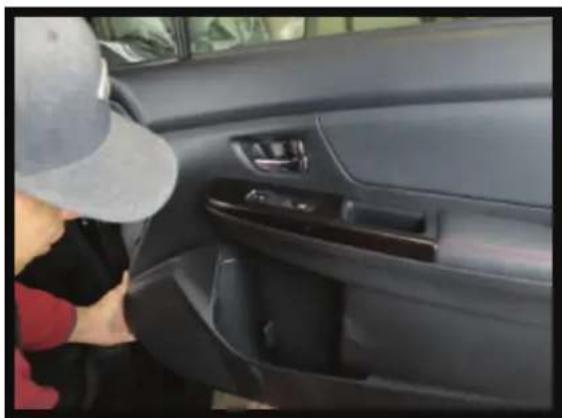
Interior view of a car showing a hand interacting with the dashboard and seatbelt (no visible text or symbols)- Start by locating the fastening hardware on the door panel, take the appropriate screw driver and remove.
natural_image
Interior view of a car showing the dashboard and side door (no visible text or symbols)- Once all the screws are removed you can take off the door panel gently watching that you don't break any of the clips or mounting hardware.

natural_image
Close-up of gloved hands performing a medical procedure on a patient's hand (no visible text or symbols)- Pull the panel away slowly and unplug any electrical connections.
natural_image
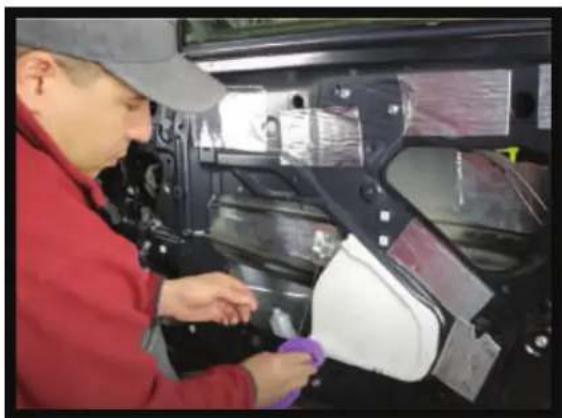
Worker in red uniform and gray cap inspecting a car interior with visible engine compartment (no text or symbols)- Now you are ready to prep the metal surface using a microfiber cloth, Acetone (use a breathing mask), and wipe away any moisture, oil, debris or etc. Then let air dry for an appropriate time. The point is to get the surface clean to ensure material glue contact.
natural_image
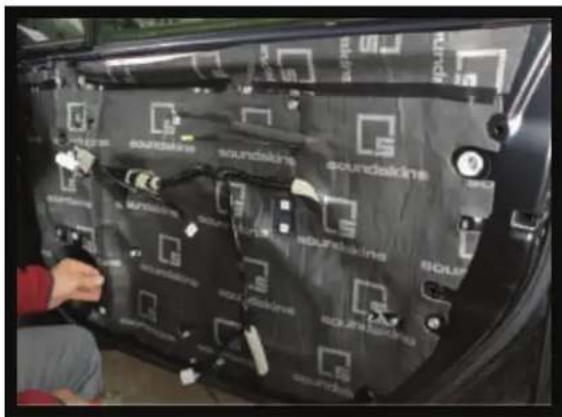
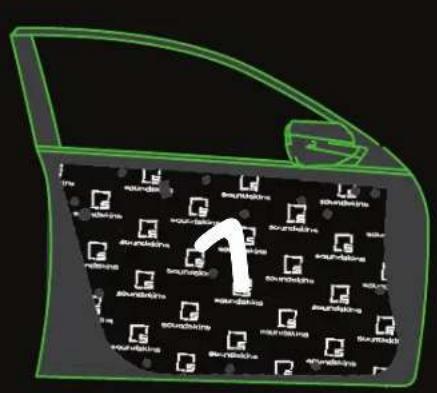
Interior view of a car showing a person adjusting a sound skis panel with visible buttons and sensors (no text or symbols on the panel itself)- When the surface is dry and clean, locate the piece of the kit with the label on the back that coincides with the door you're working on. Make sure it lines up and is correct before you pull the white cover paper off. After you confirm the right piece, pull off the white paper and start placing the material at the top and work your way down. Most important is that the material is pushed down completely and that no air is trapped. Use a razor blade point or household needle to release air. Repeat these steps for all door panels.
natural_image
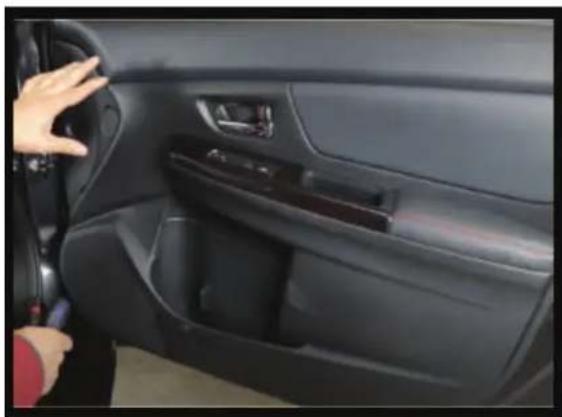
Interior view of a car showing the dashboard and steering wheel (no visible text or symbols)- Now you are ready to place the door panel back on your door. All necessary openings will be available after you have applied the Soundskins material. Secure door panel with all screws and you are now ready to hit the road.
ENJOY!
Soundskins USA
13452 Alondra Blvd, Cerritos, Ca 90703
Phone: 562.689.5151
Email: info@soundskinsglobal.com
www.SoundSkinsGlobal.com
Recommended Installation Instructions
A. Prepping the Surface
After removing interior door panels you are ready to clean the metal areas that will be insulated. If the metal has "new" look without imperfections then take a microfiber cloth and wipe away any dust and debris. If the metal is showing signs of age like rust then we recommend using Acetone with a breathing mask to wipe off debris and loose particles. A shop vacuum might be needed to remove loose debris on the floorboard.
B. Installing Panels
Now that you have a clean surface you are ready to start applying the sheets. We recommend a roller to release air pockets that might be lingering from trapped air. You want to make sure that you have rolled those out to the edge and all the material has a good seal to the metal surface. Make sure all pieces are installed and inspected before reinstalling the interior.
text_image
Diagram of a car interior with labeled parking areas and directional arrows indicating movement or movement.
text_image
2
natural_image
Top-down line drawing of a car with green outline lines, no text or symbols present
text_image
3
text_image
A1) Driver Front Door Panel
2) Driver Rear Door Panel
3) Passenger Front Door Panel
4) Passenger Rear Door Panel