RFYXZ-K8 - Speaker Rockford Fosgate - Free user manual and instructions
Find the device manual for free RFYXZ-K8 Rockford Fosgate in PDF.

User questions about RFYXZ-K8 Rockford Fosgate
0 question about this device. Answer the ones you know or ask your own.
Ask a new question about this device
Download the instructions for your Speaker in PDF format for free! Find your manual RFYXZ-K8 - Rockford Fosgate and take your electronic device back in hand. On this page are published all the documents necessary for the use of your device. RFYXZ-K8 by Rockford Fosgate.
USER MANUAL RFYXZ-K8 Rockford Fosgate
YAMAHATXZ®DASH KIT FOR PMX COMPACT DIGITAL MEDIA RECEIVERS
Installation assistance available at:
RFTECH
www.rockfordsgate.com/rtech
Dear Customer,
Congratulations on your purchase of the world's finest brand of audio products. At Rockford Fosgate we are fanatics about musical reproduction at its best, and we are pleased you chose our product. Through years of engineering expertise, hand craftsmanship and critical testing procedures, we have created a wide range of products that reproduce music with all the clarity and richness you deserve.
For maximum performance we recommend you have your new Rockford Fosgate product installed by an Authorized Rockford Fosgate Dealer, as we provide specialized training through Rockford Technical Training Institute (RTTI). Please read your warranty and retain your receipt and original carton for possible future use.
Great product and competent installations are only a piece of the puzzle when it comes to your system. Make sure that your installer is using 100% authentic installation accessories from Rockford Fosgate in your installation. Rockford Fosgate has everything from RCA cables and speaker wire to power wire and battery connectors. Insist on it! After all, your new system deserves nothing but the best.
To add the finishing touch to your new Rockford Fosgate image order your Rockford accessories, which include everything from T-shirts to hats.
Visit our web site for the latest information on all Rockford products;
www.rockfordfosgate.com
or, in the U.S. call 1-800-669-9899 or FAX 1-800-398-3985. For all other countries, call +001-480-967-3565 or FAX +001-480-966-3983.
Table of Contents
2 Introduction
3 Specifications
4 Mounting
5-11 Installation
12 Warranty
If, after reading your manual, you still have questions regarding this product, we recommend that you see your Rockford Fosgate dealer. If you need further assistance, you can call us direct at 1-800-669-9899. Be sure to have your serial number, model number and date of purchase available when you call.
PRACTICE SAFE SOUND
Continuous exposure to sound pressure levels over 100dB may cause permanent hearing loss. High powered auto sound systems may produce sound pressure levels well over 130dB. Use common sense and practice safe sound.
Safety
This symbol with "WARNING" is intended to alert the user to the presence of important instructions. Failure to heed the instructions will result in severe injury or death.

WARNING
This symbol with "CAUTION" is intended to alert the user to the presence of important instructions. Failure to heed the instructions can result in injury or unit damage.

CAUTION
- To prevent injury and damage to the unit, please read and follow the instructions in this manual. We want you to enjoy this system, not get a headache.
- If you feel unsure about installing this system yourself, have it installed by a qualified Rockford Fosgate technician.
- Before installation, disconnect the battery negative (-) terminal to prevent damage to the unit, fire and/or possible injury.

text_image
10.5" (267mm) Rockford Josgate 5.3" (135mm)Main Dash Bezel
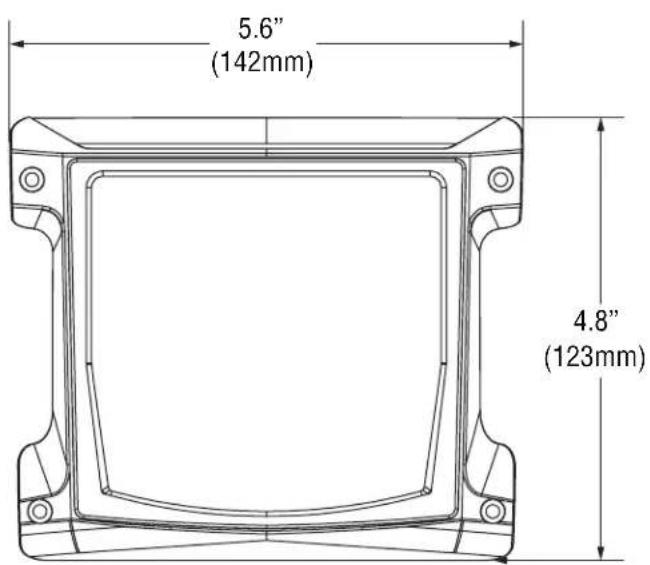
text_image
5.6" (142mm) 4.8" (123mm)PMX-2 Carrier PMX-0 Carrier
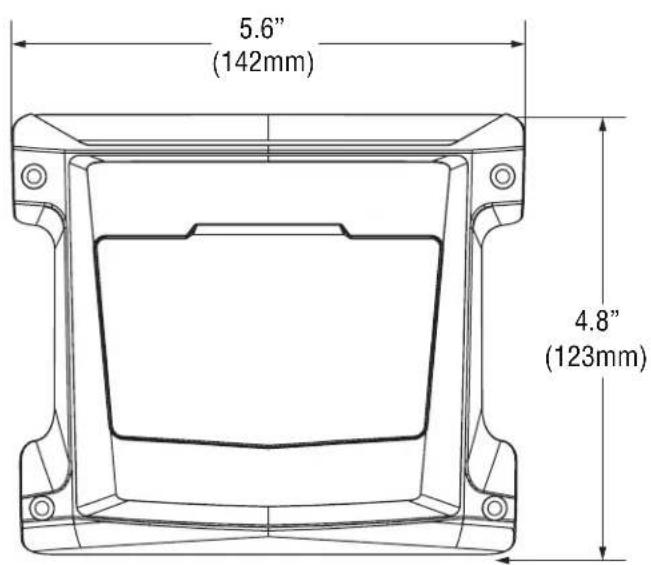
text_image
5.6" (142mm) 4.8" (123mm)PMX-2 Mounting Option

text_image
Mounting Screw PMX-2 Source Unit (not included) Mounting Screw PMX-2 Carrier Main Dash Bezel Nut Main Dash BezelPMX-0 Mounting Option

text_image
Mounting Screw Metal Bracket Foam Gasket (included with PMX-0) PMX-0 Source Unit (not included) PMX-0 Carrier Mounting Screw Main Dash Bezel Nut Main Dash BezelContents
- Main Dash Bezel
• (4) Butt Connectors - PMX-2 Carrier
• (8) Carrier Mounting Screws - PMX-0 Carrier
• (4) Maine Dash Bezel Nuts - PMX-2 Vehicle Harness
- Drill Guide
- PMX-0 Vehicle Harness
• Center Pocket Grommet - PMX-0 Power Harness
- Installaton Guide
Installation Tools
The following is a list of suggested tools needed for installation:
- 7mm Socket
- 10mm Socket
- Drill
- Ratchet and Extensions
- 3/16" Drill Bit
- 10mm Box Wrench
- 2" Hole Saw
- Flat Blade Screwdriver
- Wire Crimper
- Panel Tool
- Wire Stripper
- 3mm Allen Wrench
- 4mm Allen Wrench
Installation Considerations
This section focuses on some considerations for installing your Yamaha YXZ dash kit. This manual will illustrate the installation process with a 2016 Yamaha YXZ1000R with a RFYXZ-PMXDK dash kit.
If you feel unsure about installing this system yourself, have it installed by a qualified technician.

WARNING
When drilling holes, make sure what is on the other side. Be sure that any electrical, fuel lines or any other important components are free and clear from the area.

CAUTION
Before installation, disconnect the battery negative (-) terminal to prevent damage to the unit, fire and/or possible injury.

CAUTION
Before beginning any installation, follow these simple rules:
- Be sure to carefully read and understand the instructions before attempting to install this source unit dash kit.
- Consult your UTV's service manual for model specific information. Models may differ from year to year depending on factory options and aftermarket accessories added.
- These dash kits are specifically designed to work with Rockford Fosgate's PMX series compact digital media receivers.
- With the addition of an amplifier or source unit, be sure that your current charging system is in proper working order.
- Visit rockfordfosgate.com for more comprehensive product information.
- Visit our YouTube channel for comprehensive installation videos.
Installation Videos

2016 & Up YXZ1000R/YXZ1000R SS w/ PMX-2

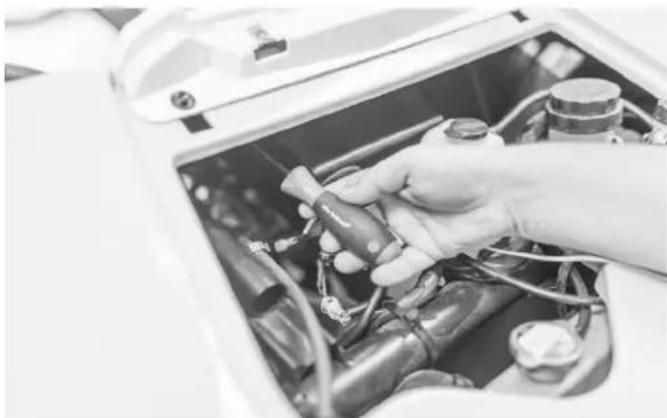
natural_image
Close-up of a hand using a screwdriver to adjust or install a white vehicle component, with no visible text or symbols.Step 1 - Remove Hood
Using a 4mm allen wrench, loosen the screws holding the hood in place and remove the hood from the vehicle.
natural_image
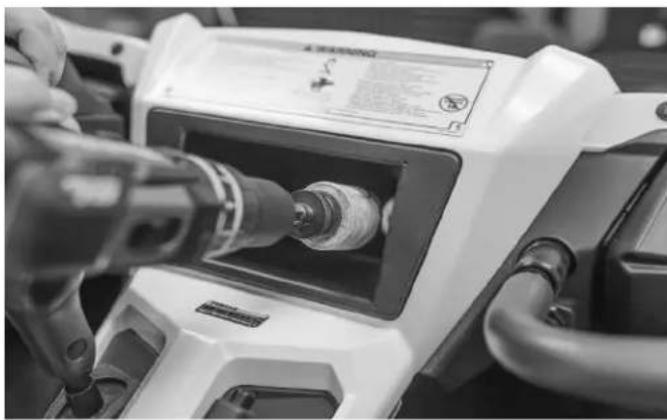
Close-up of hands operating a white industrial machine with a drill bit, no visible text or symbolsStep 2 - Drill Access Hole in Center Pocket
Once the hood is removed, you will need to drill a 2" access hole inside the center pocket of the vehicle. This can be accomplished by using a regular drill and hole saw from the inside of the vehicle drilling toward the front of the YXZ (as shown).

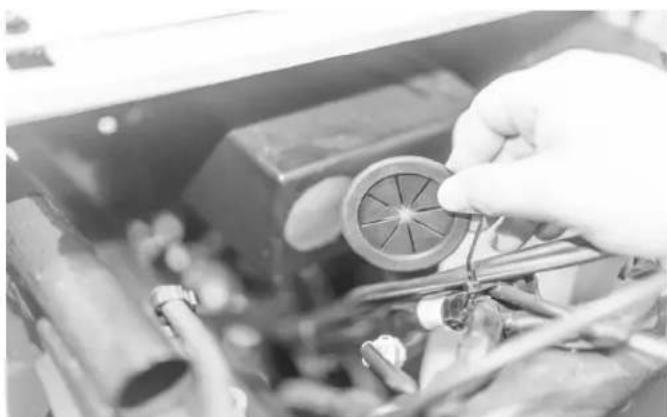
natural_image
Interior view of a stainless steel kitchen sink with a circular vent and handle (no text or symbols visible)NOTE: If you happen to have a right angle drill, you can drill from under the hood toward the interior of the vehicle.

natural_image
Close-up of hands using a tool to clean or repair electronic components on a device (no visible text or symbols)Step 3 - Use Drill Guide
Next, take the drill guide template and overlay it on top of the center pocket. Mark the (4) hole locations that will need to be drilled for the main dash bezel.
natural_image
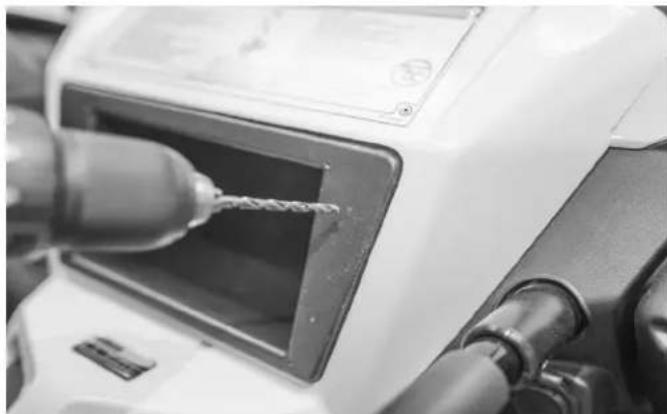
Close-up of a white electric motor with a drill bit being inserted, no visible text or symbolsStep 4 - Drill Main Dash Bezel Mounting Holes
Once the holes are clearly marked, drill the (4) holes using a 3/16" bit.
natural_image
Close-up of hands assembling a mechanical component with wires and a circular component (no visible text or symbols)Step 5 - Insert Grommet Into Pocket Access Hole
Now insert the supplied rubber grommet onto the center pocket from underneath the hood.

natural_image
Close-up of hands working on an automotive electrical panel with cables and components (no visible text or symbols)Step 6 - Insert Vehicle Harness
Using the supplied PMX-2 vehicle harness, insert the 12-pin plug end through the grommet. This end plugs into the PMX-2 source unit.
natural_image
Close-up of a hand adjusting automotive electrical components with wires and tools (no visible text or symbols)Step 7 - Locate Cigarette Lighter Power Connector
Locate the cigarette lighter power connector wire under the hood and unplug the harness. This will be your power and ground source for the PMX-2 vehicle harness.
NOTE: Refer to your vehicle's owner's guide for exact location.
natural_image
Close-up of hands connecting electrical cables to a mechanical component (no visible text or symbols)Step 8 - Connect Harness to Cigarette Lighter Power Connector
Simply plug in the PMX-2 harness into the plugs.
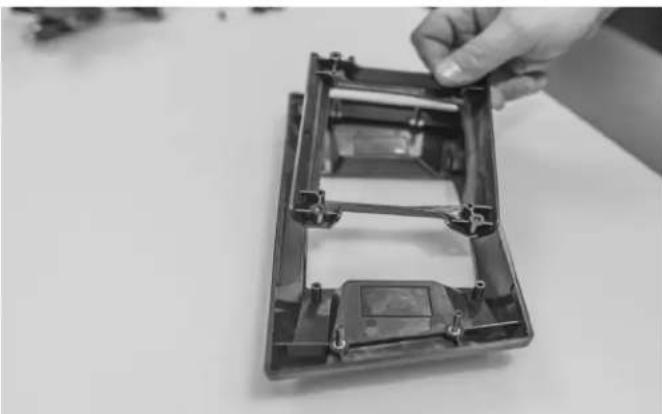
natural_image
Hand holding a transparent plastic enclosure with internal components (no text or symbols visible)Step 9 - Mount Carrier to Main Dash Bezel
Take the PMX-2 carrier and mount it to the main dash bezel. Use the supplied screws to attach the carrier to the bezel. The screws are a 3mm allen socket.
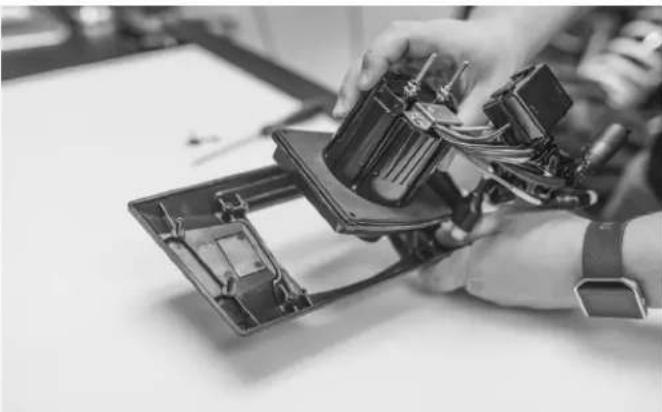
natural_image
Close-up of hands assembling electronic components with visible wiring and internal structure (no text or symbols)Step 10 - Mount PMX-2 to Carrier
Insert the PMX-2 face into the backside of the carrier.
NOTE: Do NOT install the PMX-2 trim bezel that comes with the source unit. If it is, the PMX-2 will not mount correctly into the carrier.
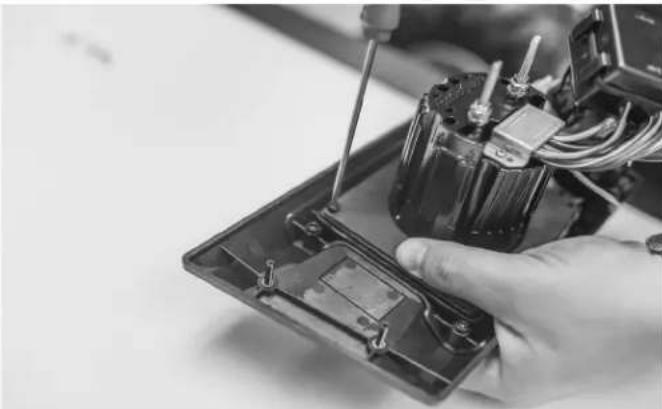
natural_image
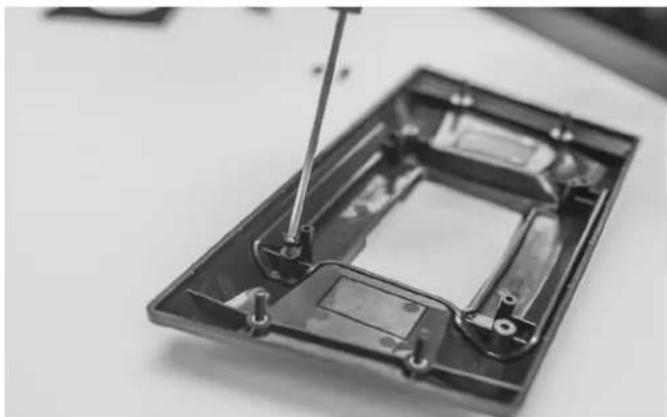
Close-up of a hand using a screwdriver to switch an electrical component into a black plastic housing (no visible text or symbols)Step 11 - Secure Source Unit to Main Dash Bezel
Secure the source unit with the supplied screws with a 3mm allen driver.

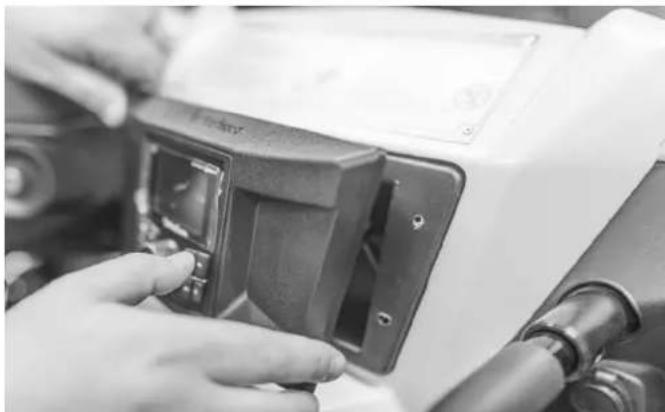
natural_image
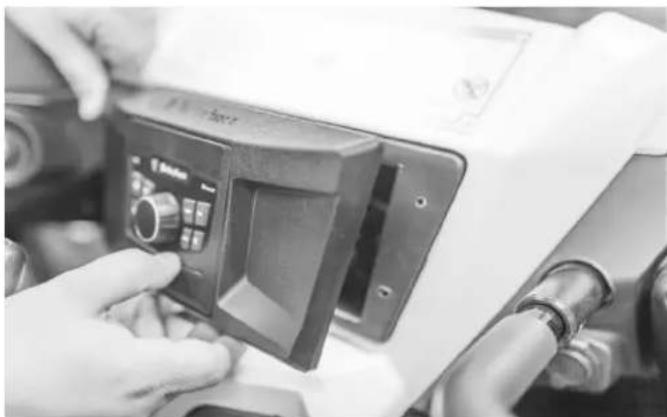
Close-up of hands installing or adjusting a component with a connector, next to an open device (no visible text or symbols)Step 12 - Plug PMX-2 Into Vehicle Harness
Take the PMX-2 bezel assembly and plug it into the harness in the center pocket.
natural_image
Close-up of hands adjusting a black plastic electrical switch component (no visible text or symbols)Step 13 - Place Main Dash Bezel Assembly
Place the bezel and radio assembly over the center pocket. Insert the studs into the (4) holes that were previously drilled.

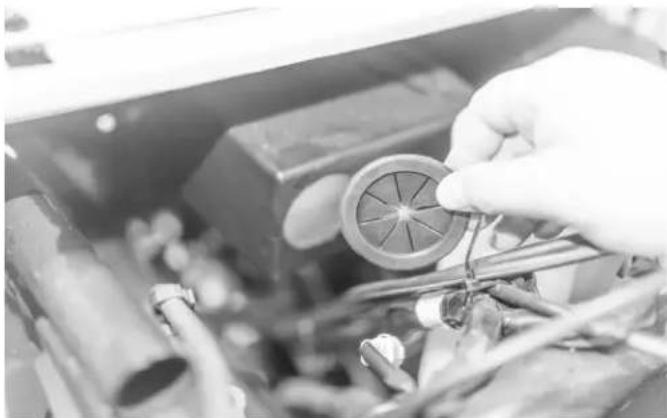
natural_image
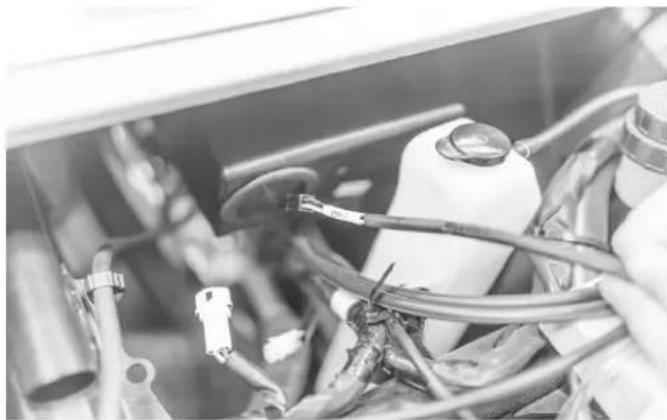
Close-up of a hand adjusting automotive components in a vehicle engine compartment (no visible text or symbols)Step 14 - Secure Bezel
Secure the bezel from the hood side with supplied nuts using a 7mm socket or nut driver.
The unit is now powered and ready for additional speaker connections. This wire harness is designed to work specifically with Rockford Fosgate Yamaha YXZ wire harnesses.
2016 & Up YXZ1000R/YXZ1000R SS w/ PMX-0

natural_image
Close-up of a hand using a screwdriver to adjust or install a white vehicle component (no visible text or symbols)Step 1 - Remove Hood
Using a 4mm allen wrench, loosen the hood bolts and remove the hood from the vehicle.

natural_image
Close-up of hands operating a precision optical instrument with a tool inserted (no visible text or symbols)Step 2 - Drill Access Hole in Center Pocket
Once the hood is removed, you will need to drill a 2" access hole inside the center pocket of the vehicle. This can be accomplished by using a regular drill and hole saw from the inside of the vehicle drilling toward the front of the YXZ (as shown).

natural_image
Interior view of a stainless steel kitchen sink with a circular vent and metal fittings (no text or symbols visible)NOTE: If you happen to have a right angle drill, you can drill from under the hood toward the interior of the vehicle.

natural_image
Close-up of hands using a tool to adjust or install a white electronic device (no visible text or symbols)Step 3 - Use Drill Guide
Next, take the drill guide template overlay it on top of the center pocket. You will need to mark the (4) hole locations that will need to be drilled for the main dash bezel.

natural_image
Close-up of a mechanical device with a drill bit inserted, showing no visible text or symbols.Step 4 - Drill Main Dash Bezel Mounting Holes
Once the holes are clearly marked, drill the (4) holes using a 3/16" bit.
natural_image
Close-up of hands assembling a mechanical component with visible wiring and a circular component (no text or symbols)Step 5 - Insert Grommet Into Pocket Access Hole
Now insert the supplied rubber grommet onto the center pocket from underneath the hood.
natural_image
Close-up of mechanical components with hoses and connectors (no visible text or symbols)Step 6 - Insert Vehicle Harness
Using the supplied PMX-0 vehicle harness, insert the 4-pin plug end through the grommet. This end plugs into the PMX-0 source unit.

natural_image
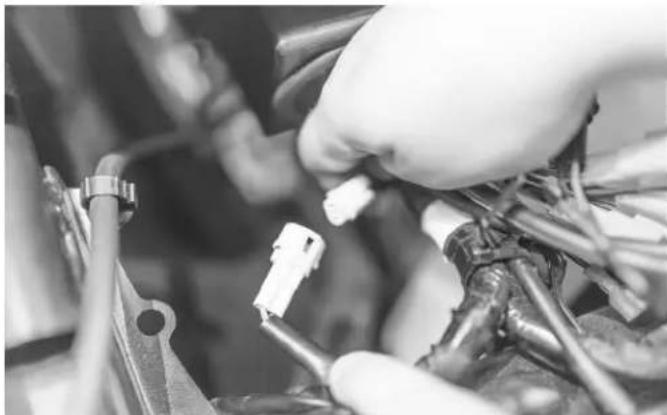
Close-up of a gloved hand inserting a small white connector into a mechanical assembly (no visible text or symbols)Step 7 - Locate Cigarette Lighter Power Connector
Locate the cigarette lighter power connector wire under the hood and unplug the harness. This will be your accessory power source and ground for the PMX-0 vehicle harness.
NOTE: Refer to your vehicle's owner's guide for exact location.

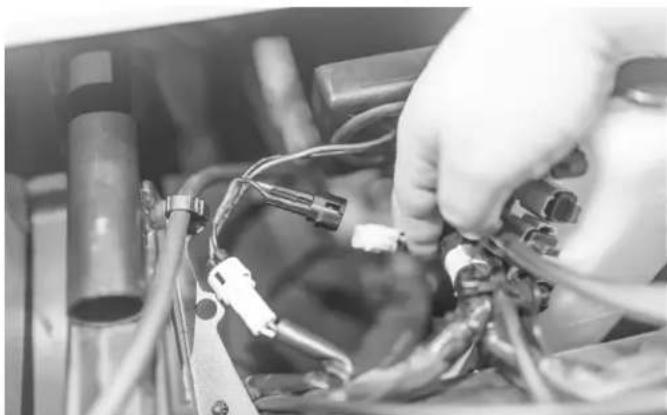
natural_image
Close-up of hands installing or adjusting a small electronic component with wires and connectors (no visible text or symbols)Step 8 - Connect Harness to Cigarette Lighter Power Connector
Simply plug in the PMX-0 harness into the plugs.
natural_image
Close-up of a mechanical component with a screwdriver inserted, showing internal structure (no text or symbols visible)Step 9 - Mount Carrier to Main Dash Bezel
Take the PMX-0 carrier and mount it to the main dash bezel. Use the supplied screws to attach the carrier to the bezel. The screws are a 3mm allen socket.

natural_image
Close-up of electronic components including a black electrical switch and two rectangular panels with connectors (no visible text or symbols)Step 10 - Apply Foam Gasket
Apply the supplied foam gasket that came with the PMX-0 the back of the unit.

natural_image
Close-up of hands installing a component on an electronic device (no visible text or symbols)Step 11 - Mount PMX-0 to Carrier
Place the PMX-0 into the carrier and place the supplied metal bracket over the PMX-0 with the Rockford logo facing outward as shown above.
natural_image
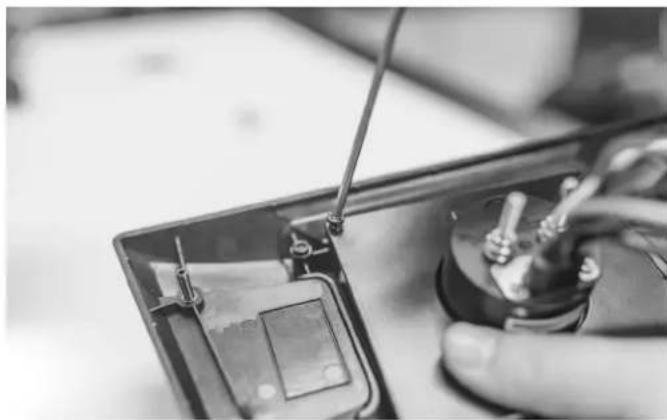
Close-up of a hand using a screwdriver to switch an electronic component into a circuit board (no visible text or symbols)Step 12 - Secure Source Unit to Main Dash Bezel
Use the supplied screws with a 3mm allen driver.

natural_image
Close-up of hands assembling electronic components with wires and tools (no visible text or symbols)Step 13 - Connect PMX-0 Power Harness
Using the supplied butt connectors, connect the supplied PMX-0 power harness to the source unit with a pair of wire crimpers.

natural_image
Close-up of hands assembling electronic components with wires and tools (no visible text or symbols)Step 14 - Plug PMX-0 Into Vehicle Harness
Take the PMX-0 bezel assembly and plug it into the harness in the center pocket.
NOTE: Be sure to make any RCA cable connections for amplifiers to the PMX-0 at this time.
natural_image
Close-up of hands operating a mechanical control panel with tubing (no visible text or symbols)Step 15 - Place Main Dash Bezel Assembly
Place the bezel and radio assembly over the center pocket. Insert the studs into the (4) holes that were previously drilled.
natural_image
Close-up of a hand adjusting components inside an open electrical device (no visible text or symbols)Step 14 - Secure Bezel
Secure the bezel from the hood side with supplied nuts using a 7mm socket or nut driver.

natural_image
Close-up of a mechanical component with a coiled cable and attached bracket (no text or symbols visible)Step 15 - Battery Connection
The last wire connection that needs to be run is the Yellow power wire to the battery. The easiest way to run this wire is to remove the center console and passenger transmission tunnel panel. To do this, the passenger seat will need to be removed first, then the center console. The panel that surrounds the shifter needs to have one plastic rivet removed to make it easier to remove the transmisson tunnel.
Once connected, the unit is now powered and ready for amplifier connections. Refer to the PMX-0 manual for wiring schematics.
Rockford Corporation offers a limited warranty on Rockford Fosgate products on the following terms:
Length of Warranty
POWER Amplifiers – 2 Years
BMW® Direct Fit Speakers – 2 Years
PUNCH® & PRIME® Amplifiers – 1 Year
Speakers, Signal Processors, Accessories and Capacitors – 1 Year
All marine, motorcycle, motorsport products - 2 Years
Any Factory Refurbished Product – 90 Days (receipt required)
What is Covered
This warranty applies only to Rockford Fosgate products sold to consumers by authorized Rockford Fosgate dealers in the United States of America. Products purchased by consumers from an Authorized Rockford Fosgate Dealer in another country are covered only by that country's Distributor and not by Rockford Corporation.
Who is Covered
This warranty covers only the original purchaser of Rockford product purchased from an authorized Rockford Fosgate dealer in the United States. In order to receive service, the purchaser must provide Rockford with a copy of the receipt stating the customer name, dealer name, product purchased and date of purchase.
Products found to be defective during the warranty period will be repaired or replaced (with a product deemed to be equivalent) at Rockford's discretion.
What is Not Covered
- Damage caused by accident, abuse, improper installation, operations, theft, water (on non-Element Ready products).
- Any cost or expense related to the removal or reinstallation of product.
- Service performed by anyone other than Rockford or an authorized Rockford Fosgate service center.
- Any product which has had the serial number defaced, altered, or removed.
- Subsequent damage to other components.
- Any product purchased outside the U.S.
- Any product not purchased from an authorized Rockford Fosgate dealer. Refer to rockfordfosgate.com dealer locator for more detail.
Limit on Implied Warranties
Any implied warranties including warranties of fitness for use and merchantability are limited in duration to the period of the express warranty set forth above. Some states do not allow limitations on the length of an implied warranty, so this limitation may not apply. No person is authorized to assume for Rockford Fosgate any other liability in connection with the sale of the product.
How to Obtain Service
Please call 1-800-669-9899 for Rockford Customer Service. You must obtain an RA# (Return Authorization number) to return any product to Rockford Fosgate. You are responsible for shipment of product to Rockford.
EU Warranty
This product meets the current EU warranty requirements, see your Authorized dealer for details.