Mimo Monitors

Adapt-IQV MCT-215HPQ - Monitor Mimo Monitors - Free user manual and instructions

Find the device manual for free Adapt-IQV MCT-215HPQ Mimo Monitors in PDF.

📄 36 pages English EN Download 💬 AI Question
Notice Mimo Monitors Adapt-IQV MCT-215HPQ - page 2
Pick your language and provide your email: we'll send you a specifically translated version.

User questions about Adapt-IQV MCT-215HPQ Mimo Monitors

0 question about this device. Answer the ones you know or ask your own.

Ask a new question about this device

The email remains private: it is only used to notify you if someone responds to your question.

No questions yet. Be the first to ask one.

Download the instructions for your Monitor in PDF format for free! Find your manual Adapt-IQV MCT-215HPQ - Mimo Monitors and take your electronic device back in hand. On this page are published all the documents necessary for the use of your device. Adapt-IQV MCT-215HPQ by Mimo Monitors.

USER MANUAL Adapt-IQV MCT-215HPQ Mimo Monitors

Adapt-IQ 21.5" User's Manual

Model: MCT-215HPQ

Mimo Monitors Adapt-IQV MCT-215HPQ - Adapt-IQ 21.5" User's Manual - 1

natural_image Scenic mountain landscape with a lake and lush greenery under a clear blue sky (no text or symbols visible)

Please keep this manual for future reference.

TABLE OF CONTENTS

PAGE

DECLARATION....1

PRODUCT INSTRUCTIONS....1

POWERING ON THE PRODUCT....2

INSERTING THE SD CARD....2

INSERTING USB DEVICES....2

HOME SCREEN....3

SYSTEM BAR......6

APPLICATIONS....9

LANGUAGE....10

DATE & TIME....11

VOLUME....12

BRIGHTNESS....12

SCHEDULED POWER ON/OFF....13

WI-FI....17

ETHERNET....18

BLUETOOTH....19

VIRTUAL KEYBOARD....21

SWITCH INPUT METHODS....22

TAKE PHOTOS & SHOTS....23

SURF ONLINE....26

BROWSE FILES....27

PLAY MEDIA....28

INSTALL & UNINSTALL APPS....29

INSTALL APPS....29

UNINSTALL APPS....32

RESET TO FACTORY DEFAULT....33

Declaration

√ Please read the instructions carefully before equipment installation and using the device.
√ Do not put the product in high temperature, humid or dusty environment.
√ Do not drop, crash or break down this product.
Do not power off the device when it's formatting or upgrading, otherwise it will cause operation system error.
√ This product is not waterproof.
√ Use only approved add-on enhancements.

Technical diagram showing front, top, and side views of a remote control panel with mountain landscape and labeled buttons

  1. Camera (optional): 2M or 5M pixels camera
  2. SD Card Slot / Cover: support external SD card
  3. Micro-USB Port: support Micro-USB 2.0
  4. VESA Mount Holes: for installing the bracket
  5. Speakers: audio output
  6. Function Keys (Vol+ / Vol- / Up / Down / Exit)

  7. AC/DC In Jack: powered by 12V/3A AC/DC input

  8. IR Receiver & LED Indicator

IR Receiver: support remote control

LED Indicator:

Power supply ONRed then turn Green after kernel boot up.
Power supply OFFLED light off.
  1. USB Port x 2: support USB 2.0 Host type A

  2. RS232 Port x 2: in RJ45 connector form

  3. S/PDIF Port: support S/PDIF audio output
  4. Headset + Microphone Jack
  5. 10/100Mbps RJ45 Ethernet Port: support Ethernet connection
  6. Power Switch: switch power ON/OFF
  7. WiFi Receiver

Power on the Product

Step 1 Plug the power source into the AC/DC in jack (#8 in Product Instruction).

Step 2 Switch the power switch (#15) on the bottom of this product to ON.

Insert SD Card

This product supports external SD card. Please insert your SD card into the SD Card Slot (#2 in Product Instruction) on the top of this product.

Insert USB Devices

This product supports USB and Micro-USB to deal with your files.

USB

Plug your USB memory into the USB port (#10 in Product Instruction) on the bottom of this product, and then you can do the file operations via the File Browser. (See in Browse Files).

Micro-USB

Connect the Micro-USB port (#4 in Product Instruction) on the bottom of this product and the USB port on your computer with a Micro-USB-to-USB cable.

Click the "Turn on USB storage" button in the "USB mass storage" window that pops up automatically to make the device memory visible in your computer.

Home Screen

In the home screen, you can long-press the blank space to change the wallpaper or drag widgets to desktop.
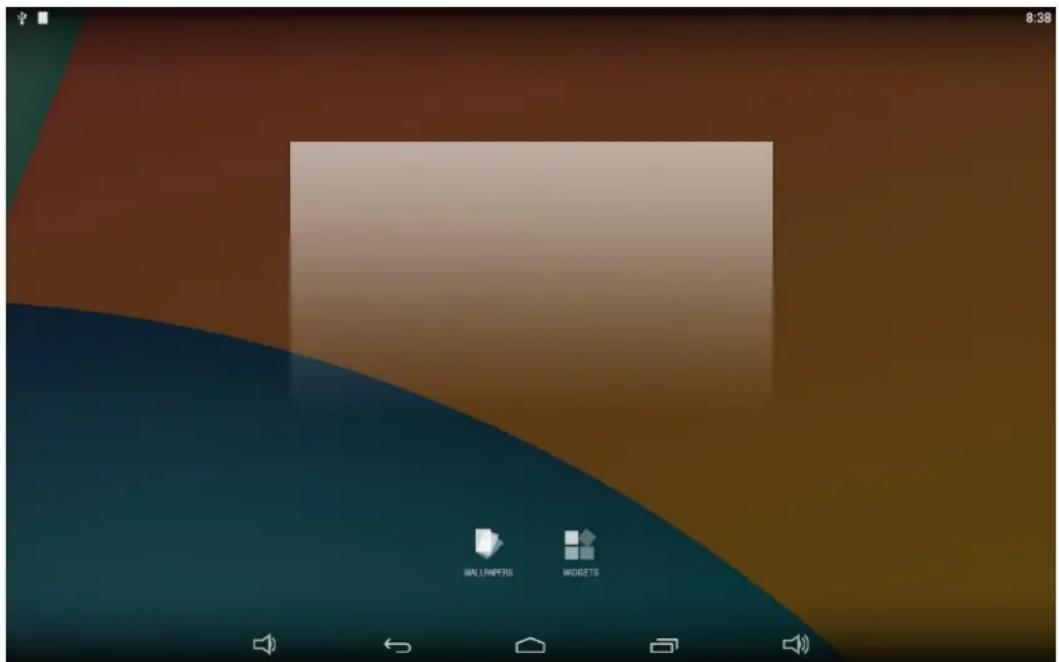
8:38 WALLIMPERS WIDGETS

Change Wallpaper:

  1. Click "WALLPAPER".

Set wallpaper Pick image Black Hole Bubbles

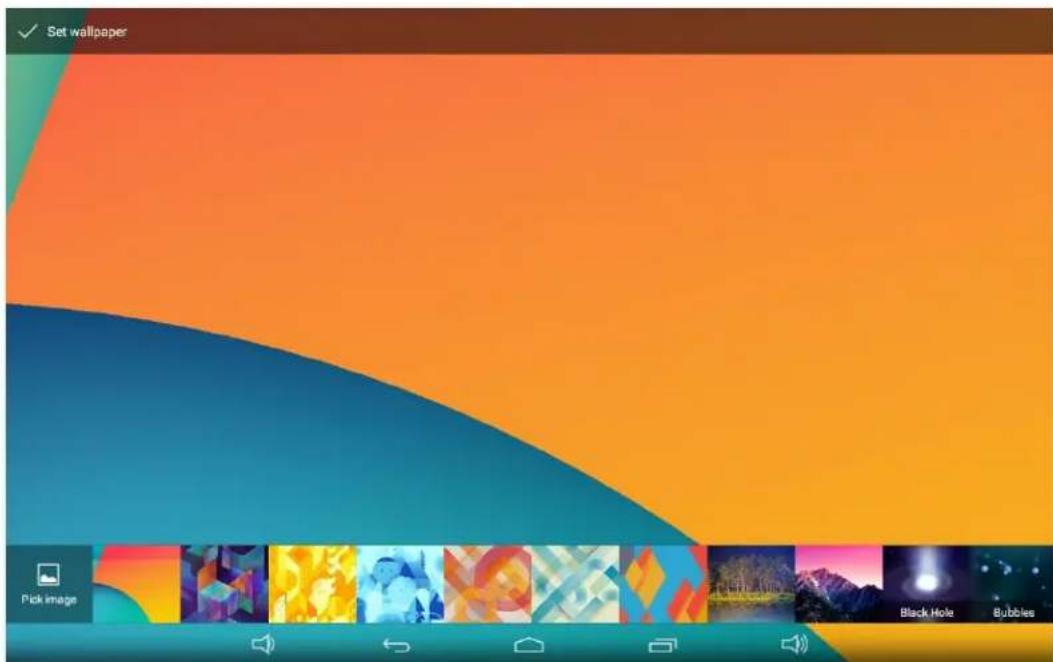
  1. Select one picture from system presets or your own pictures.

Set wallpaper Pick Image Black Hole Bubbles

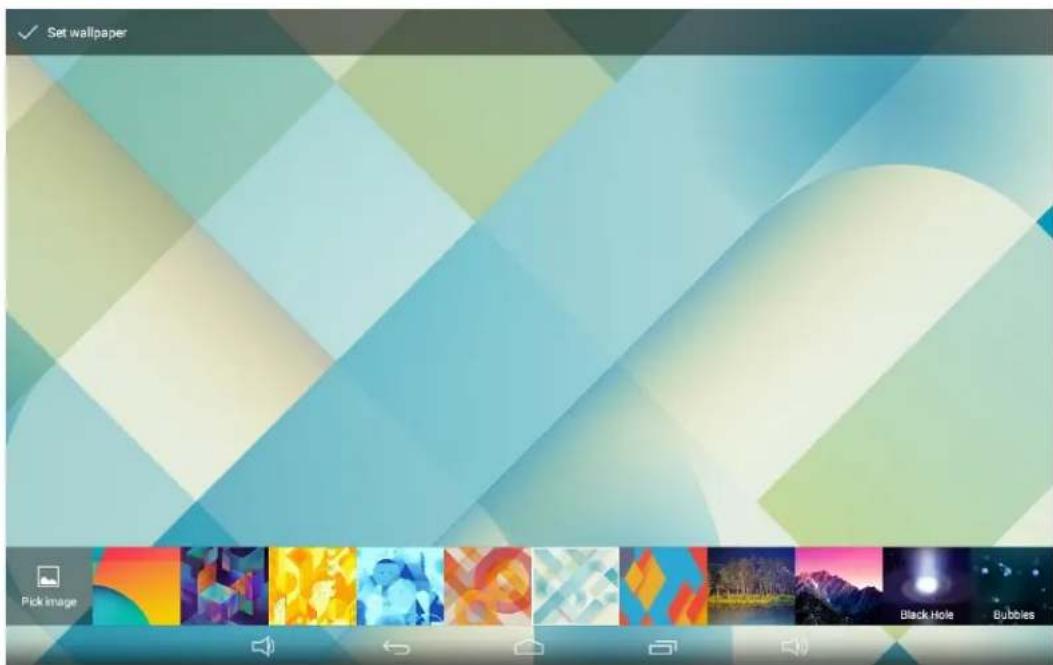
  1. Click "Set wallpaper" on the upper-left corner of the screen to apply the wallpaper.
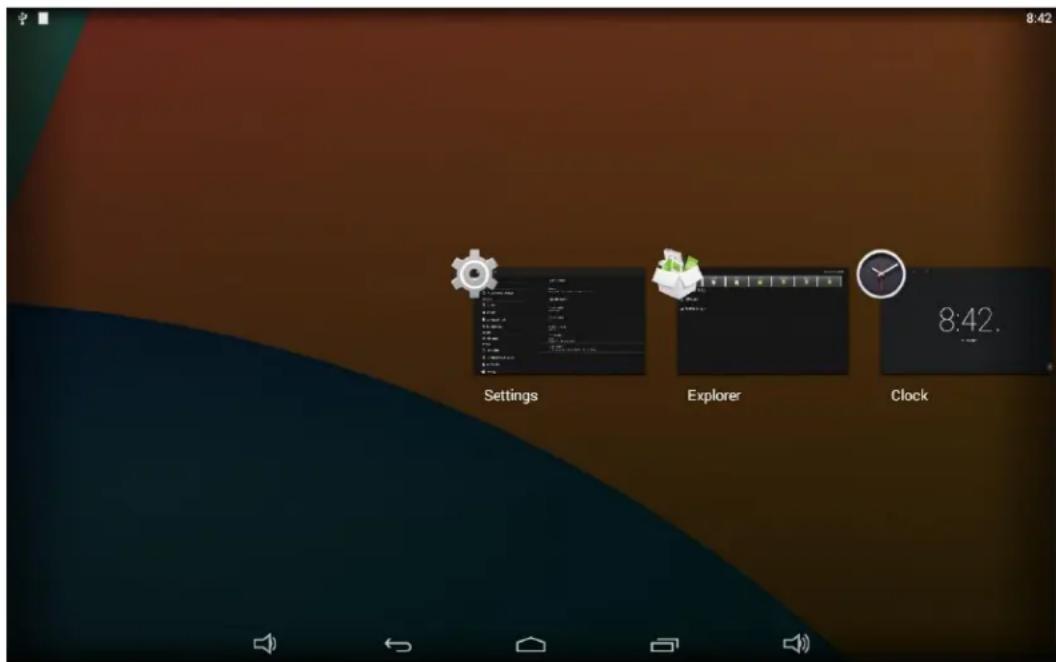
Add Widgets:

  1. Click "WIDGETS".

8:39 Analog clock 2×2 Bookmark 1×1 Bookmarks 2×2 Calendar 2×2 10:08 FRI, OCTOBER 06 Contact 1×1 Digital clock 3×2 Direct dial 1×1 Direct message 1×1

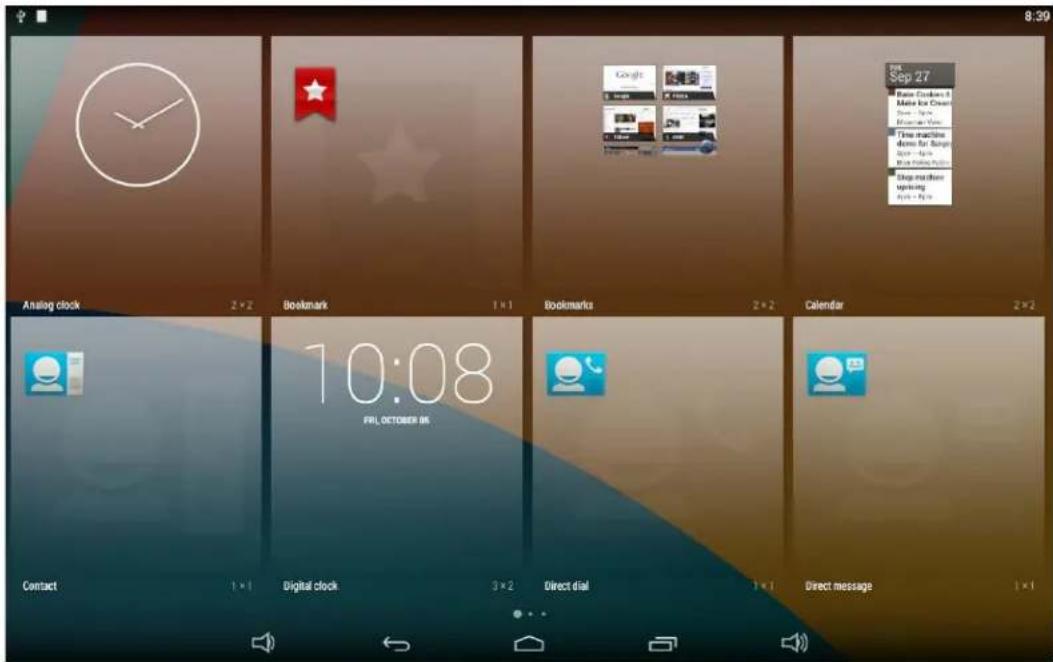
  1. Long-press a widget and drag it to desktop.

App info 10:08 FRI, OCTOBER 05 FRI, OCTOBER 05

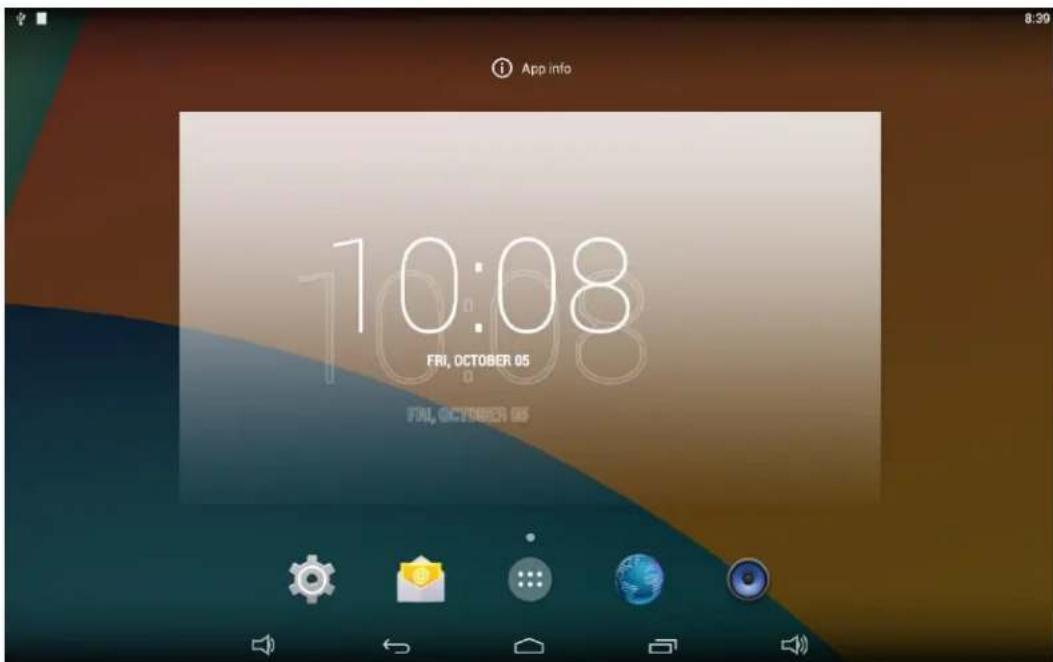
  1. A dialog prompts you to allow adding a widget for the first time. Check the checkbox and then click "Create".

Create widget and allow access? After you create the widget, Launcher3 can access all data it displays. ✓ Always allow Launcher3 to create widgets and access their data Cancel Create

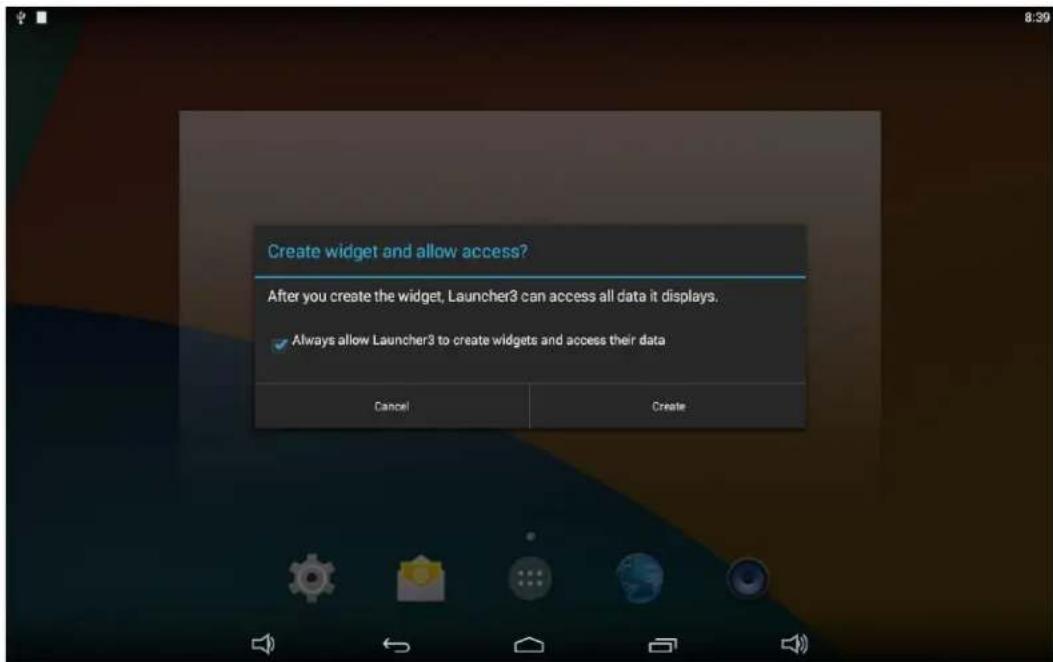
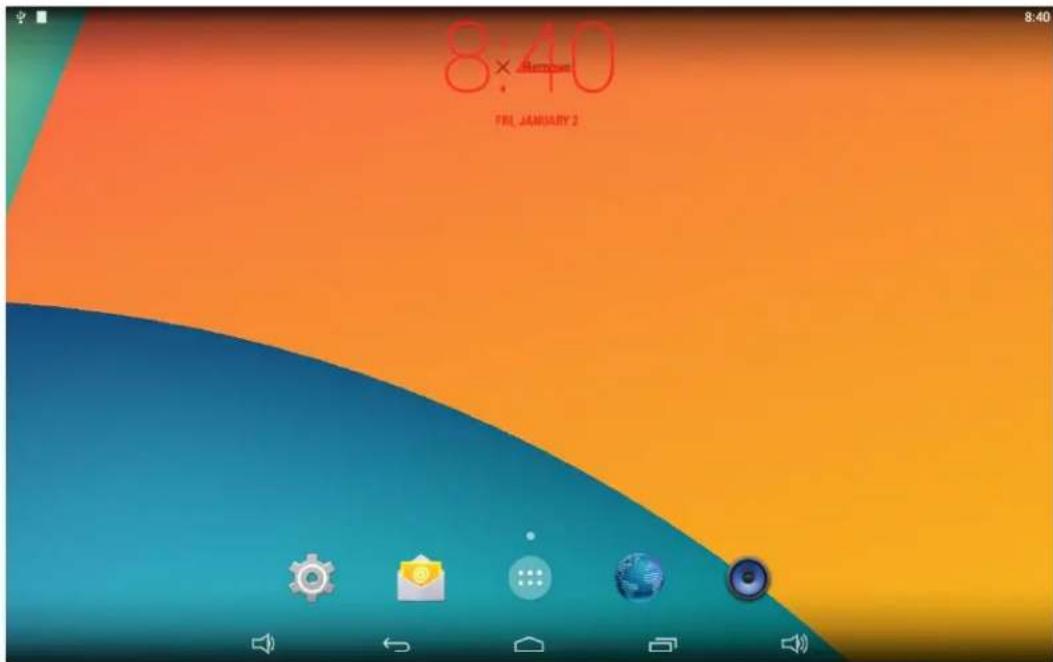
  1. If you want to remove an icon, long-press the widget and drag it onto "×Remove" at the top of the screen and drop it until it turns red.

8:40 FIR, JANUARY 2

System Bar

1 2 3 4 5

Mimo Monitors

info@mimomonitors.com

Sales: 1-855-YES-MIMO (937-6466)

Mimo Monitors Adapt-IQV MCT-215HPQ - Navigation Buttons - 2

  1. Volume-: Decrease the system volume.
  2. Back: Return to the previous page.
  3. Home: Return to the home screen.
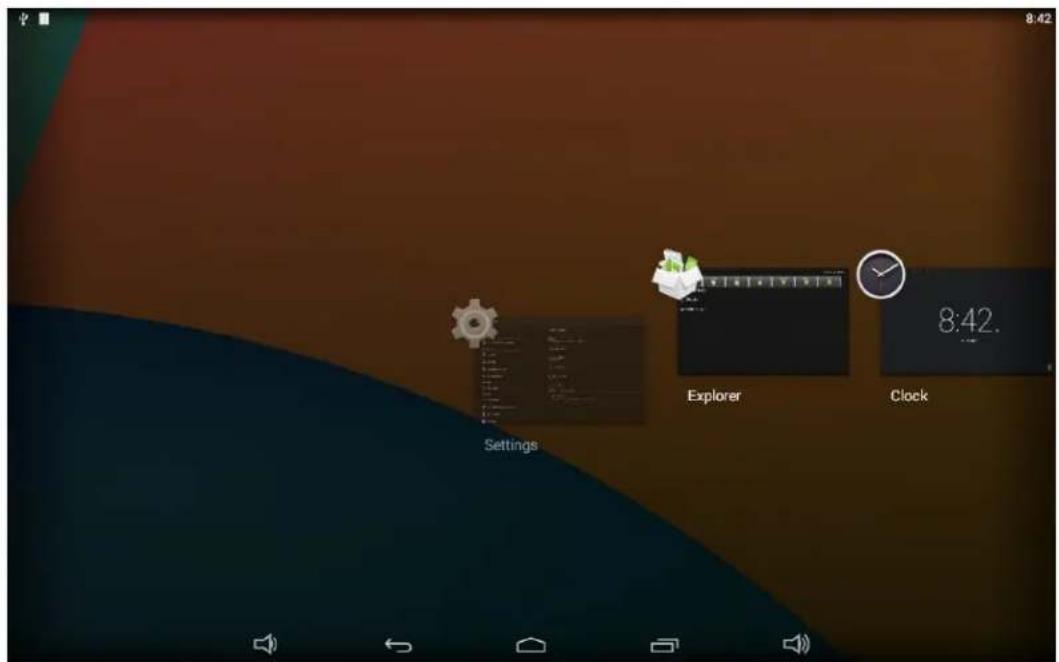
  4. Recents: Switch between recently used apps.

Settings Explorer Clock 8:42.

To remove an app from the list, you could long-press the icon to select "Remove from list".
Settings Explorer Clock 8:42. Remove from list App info

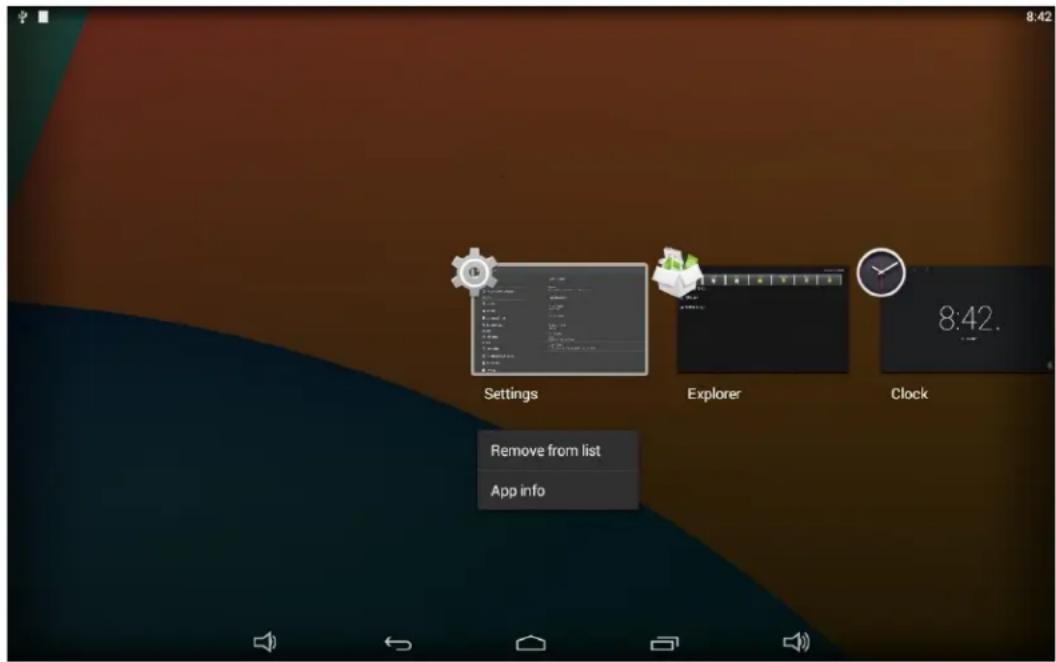
Or swipe the app item up or down to remove it.

Settings Explorer Clock 8:42.

  1. Volume+: Increase the system volume.

Status Notifications

Ψ 8:46

Status bar at top of the screen displays system status, such as time, Wi-Fi, SD card and USB connection etc.

Pull down the upper-left corner to open the status window.

8:43 FRL JANUARY 2 USB connected Touch to copy files to/from your computer. USB debugging connected Touch to disable USB debugging.

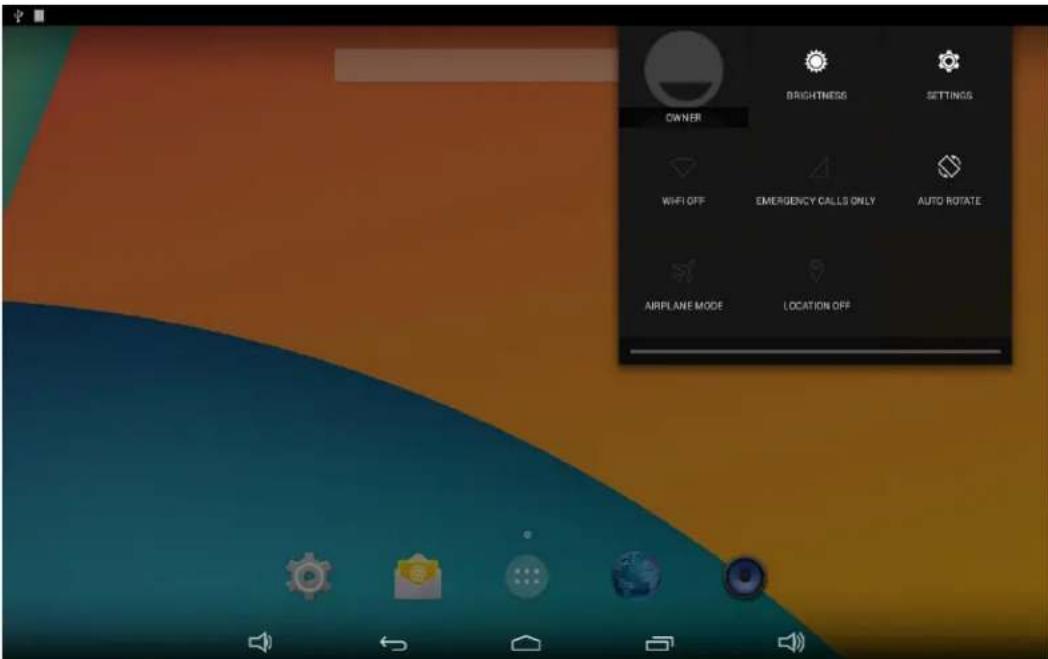
Pull down the upper-right corner to open the shortcuts window which contains brightness adjustment, Wi-Fi, auto rotate, airplane mode and

Mimo Monitors

info@mimomonitors.com

Sales: 1-855-YES-MIMO (937-6466)

location switch, and system settings entrance.
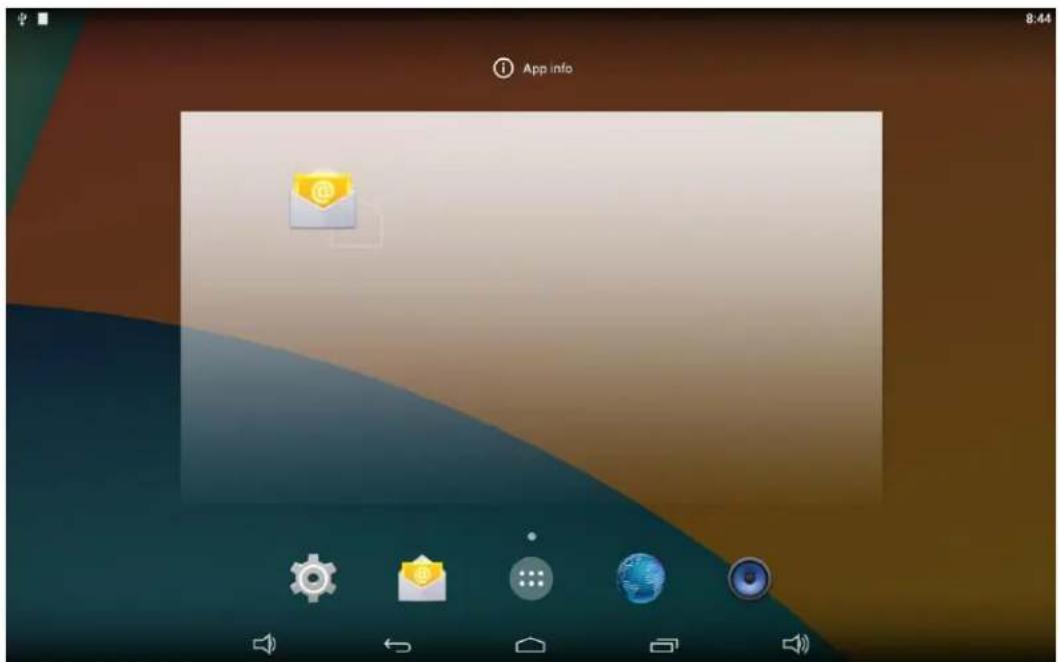
OWNER BRIGHTNESS SETTINGS WWFI OFF EMERGENCY CALLS ONLY AUTO ROTATE AIRPLANE MODE LOCATION OFF

Applications

Click at the bottom of home screen to enter the applications page.

Apkinstaller Browser Calculator Calendar Camera Clock Downloads Email Explorer Gallery Movie Studio Music People Search Settings Sound Recorder Video

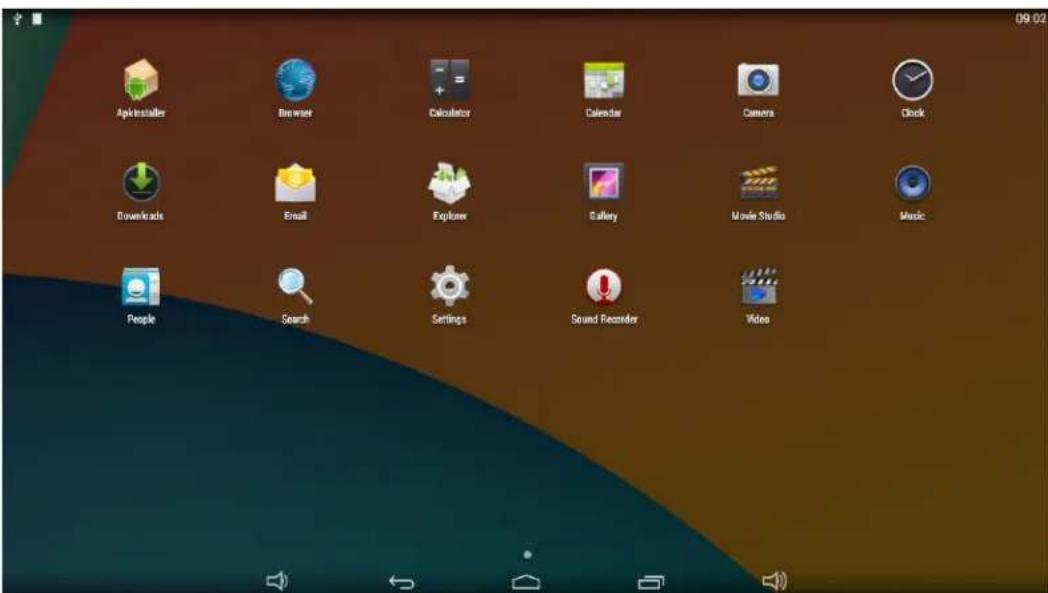
The installed applications will be shown here and you can open an app by clicking its icon.

To find an app easily, you can create a shortcut by long-pressing of the icon and drag it to the home screen.
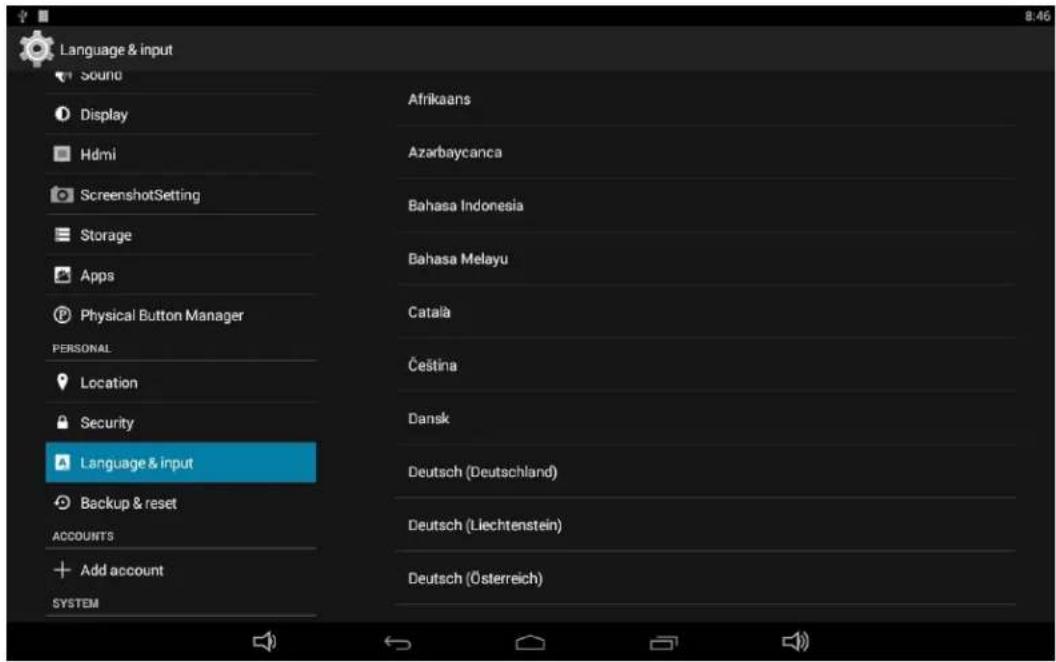
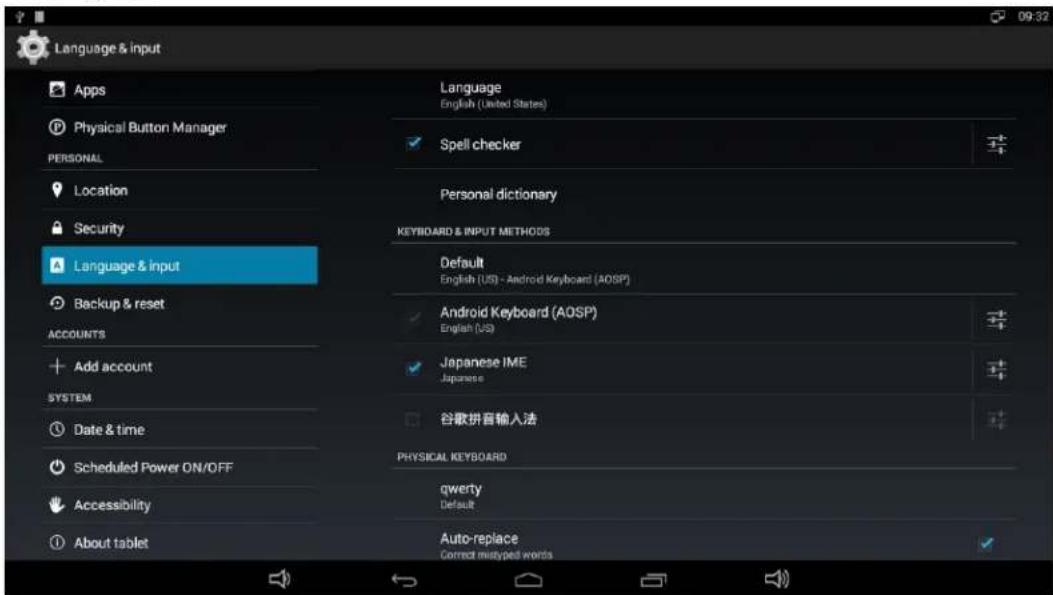
App info 8:44

Language

In the App list, click "Settings" to open the system setting app, and select the option "Language & input".

Language & input Sound Display Hdmi ScreenshotSetting Storage Apps Physical Button Manager PERSONAL Location Security Language & input Backup & reset ACCOUNTS Add account SYSTEM Language English (United States) Spell checker Personal dictionary KEYBOARD & INPUT METHODS Default English (US) - Android Keyboard (AOSP) Android Keyboard (AOSP) English (US) Japanese IME Japanese 谷歌拼音输入法 SPEECH Text-to-speech output MOUSE/TRACKPAD Pointer speed

Click the first option "Language" under "Language & input", and then you can change the system language according to your preference.

Language & input Sound Display Hdmi ScreenshotSetting Storage Apps Physical Button Manager PERSONAL Location Security Language & input Backup & reset ACCOUNTS Add account SYSTEM Afrikaans Azarbaycanca Bahasa Indonesia Bahasa Melayu Català Čestina Dansk Deutsch (Deutschland) Deutsch (Liechtenstein) Deutsch (Österreich)

Date & Time

In the App list, click "Settings" to open the system setting app, and select the option "Date & time".

Date & time Apps Physical Button Manager PERSONAL Location Security Language & input Backup & reset ACCOUNTS Add account SYSTEM Date & time Scheduled Power ON/OFF Accessibility About tablet Automatic date & time Use network-provided time Automatic time zone Use network provided time zone Set date 12/8/2015 Set time on 10 Select time zone GMT+68.80, Table Standard Time Use 24-hour format 13:00 Choose date format 12/31/2015

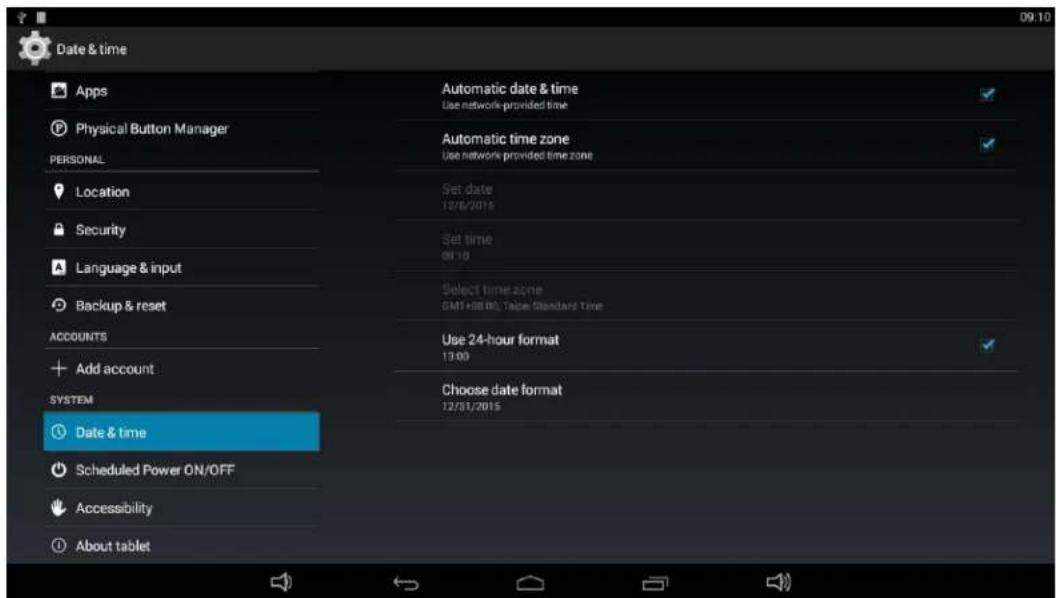
If you enabled the option "Automatic date & time" under "Date & time", system date and time will be synchronized automatically with network time when you connected a Wi-Fi network.

If you want to set the time manually, you need to disable "Automatic date & time" and "Automatic time zone".

Date & time Apps Physical Button Manager PERSONAL Location Security Language & input Backup & reset ACCOUNTS Add account SYSTEM Date & time Scheduled Power ON/OFF Accessibility About tablet Automatic date & time Use network-provided time Automatic time zone Use network-provided time zone Set date 12/8/2015 Set time 09:11 Select time zone GMT+08:00, Taipei Standard Time Use 24-hour format 13:00 Choose date format 12/31/2015

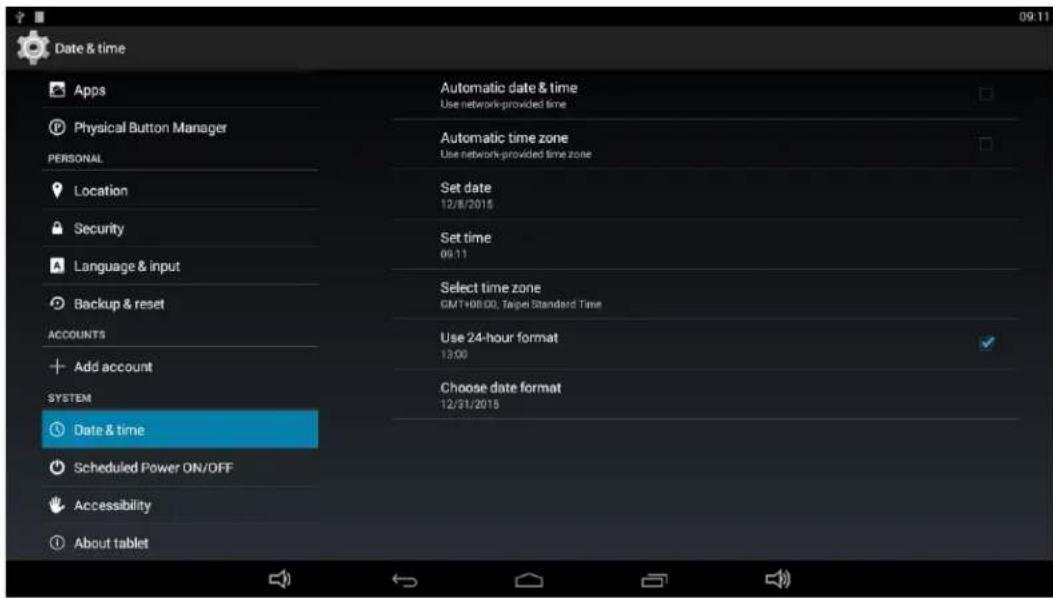
In this option, you can also set time zone, time notation and date format.

Volume

On the system bar, click the Volume- icon to decrease the system volume, and click the Volume+ icon to increase the system volume. Or you can press the function keys (#7 in Product Instruction) at the lower-right corner on the back of the product to adjust the volume.

Brightness

Pull down the upper-right corner of the screen to open the shortcuts window, and then click "Brightness".

OWNER BRIGHTNESS SETTINGS WIFI OFF EMERGENCY CALLS ONLY AUTO ROTATE AIRFLANE MODE LOCATION OFF

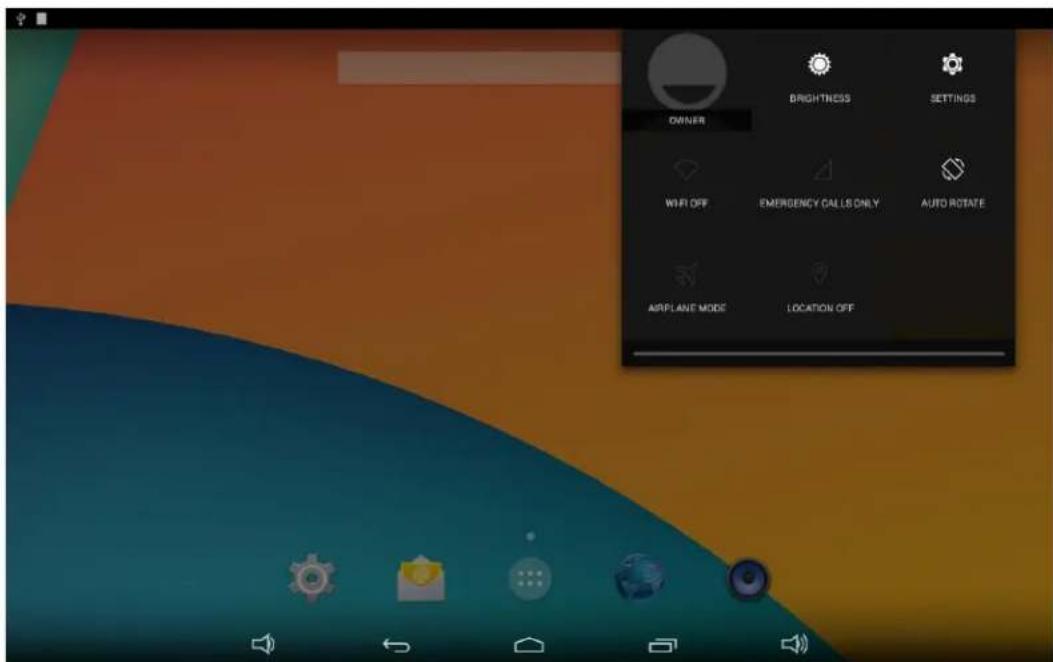
Slide the brightness button to adjust the brightness of the screen, or turn on Auto switch to automatically adjust the display's brightness to the appropriate level for the current ambient light.

AUTO

Scheduled Power On/Off

This function is used to power the device on and off automatically at the set time.

In the App list, click "Settings" to open the system setting app, and select the option "Scheduled Power ON/OFF".

Scheduled Power ON/OFF Apps Physical Button Manager PERSONAL Location Security Language & input Backup & reset ACCOUNTS Add account SYSTEM Date & time Scheduled Power ON/OFF Accessibility About tablet Set Scheduled Power On/Off Clocks

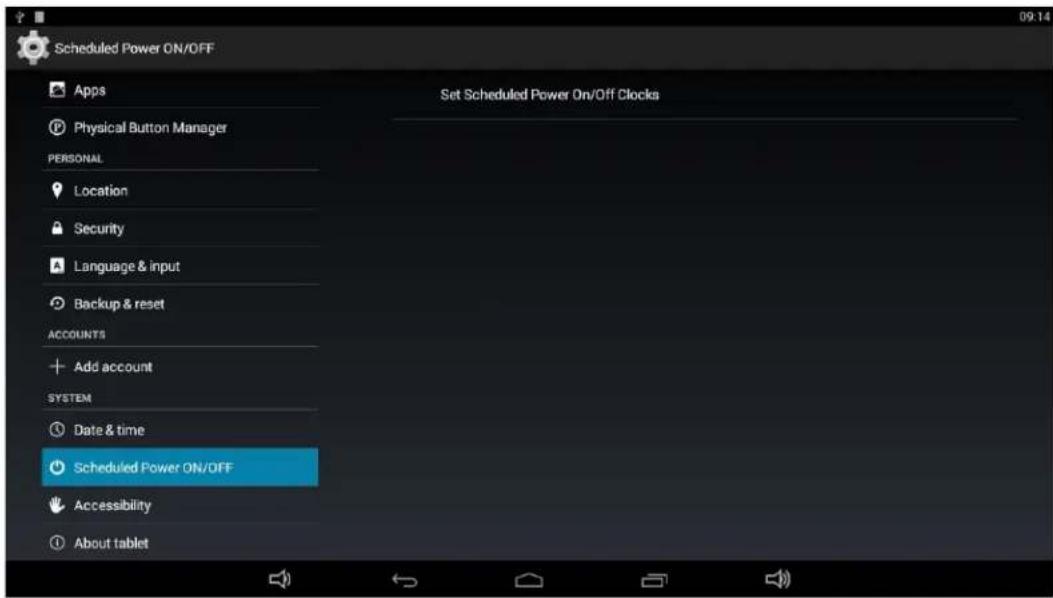
Click the single option "Set Scheduled Power On/Off Clocks".
Scheduled Power ON/OFF ON 00:00 OFF 00:00

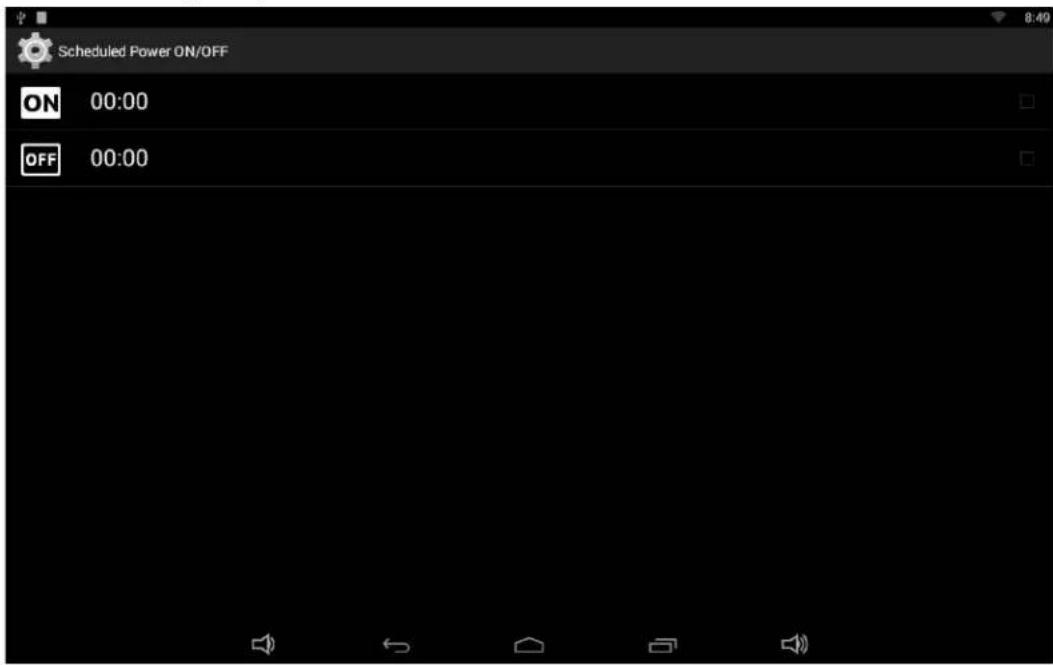
The top row is for power on clocks, and the following row is for power off clocks. Click the top row to enter the settings of power on clocks.

Set Power On Clock Time 00:00 Repeat Never

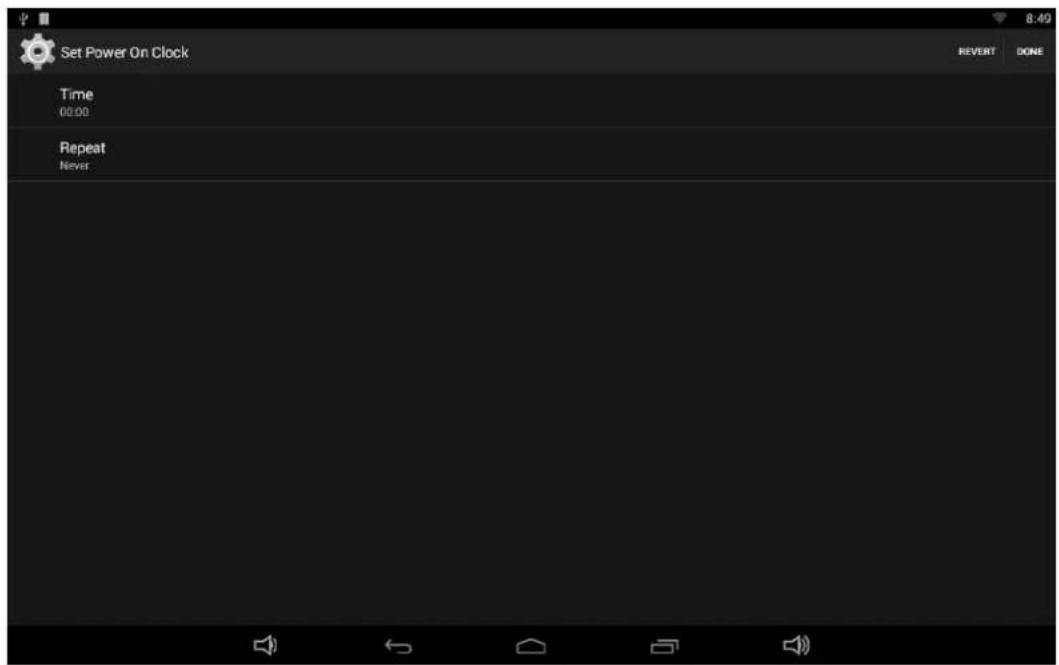
Click the option "Time" to set the power on time of this device.

Set Power On Clock Time 00:00 Repeat Never Set time 7 59 8 00 AM 9 01 PM Done

Click the option "Repeat" to select the days which will power on this device at the set time.

Set Power On Clock Time case Repeat Never Repeat Monday Tuesday Wednesday Thursday Friday Saturday Sunday Cancel OK

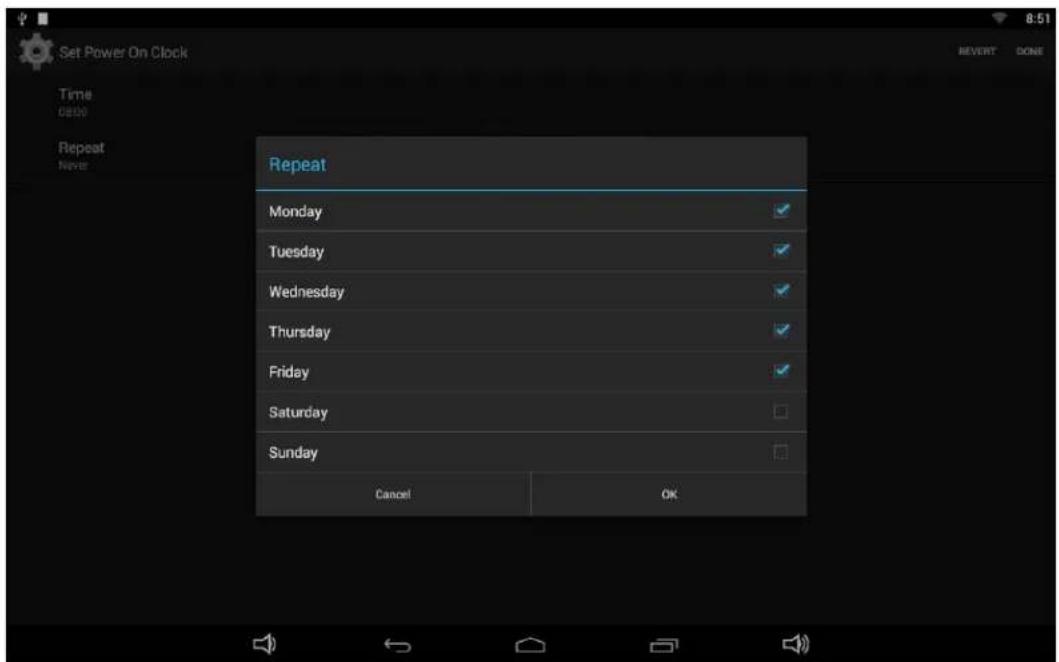
After setting, click "Done" at the upper-right corner of the screen to save them.

Set Power On Clock Time 08:00 Repeat Mon, Tue, Wed, Thu, Fri

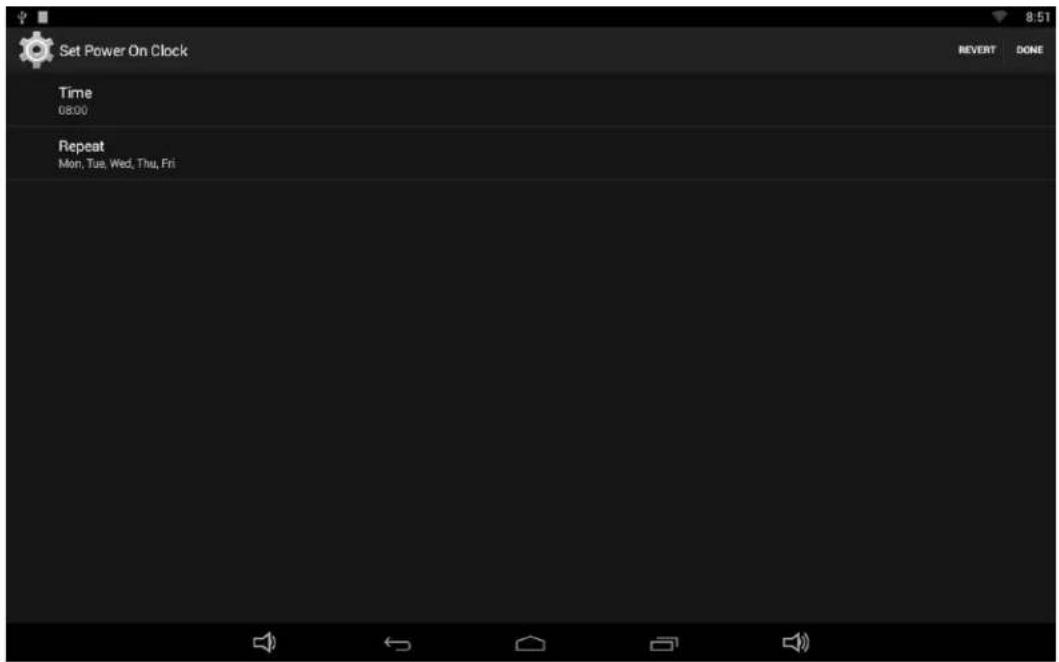
You will see the power on option checked after saving the settings.

Scheduled Power ON/OFF ON 08:00 Mon, Tue, Wed, Thu, Fri OFF 00:00

For power off clocks, you can set them as same as power on clocks.

Scheduled Power ON/OFF ON 08:00 Mon, Tue, Wed, Thu, Fri OFF 21:00 Mon, Tue, Wed, Thu, Fri

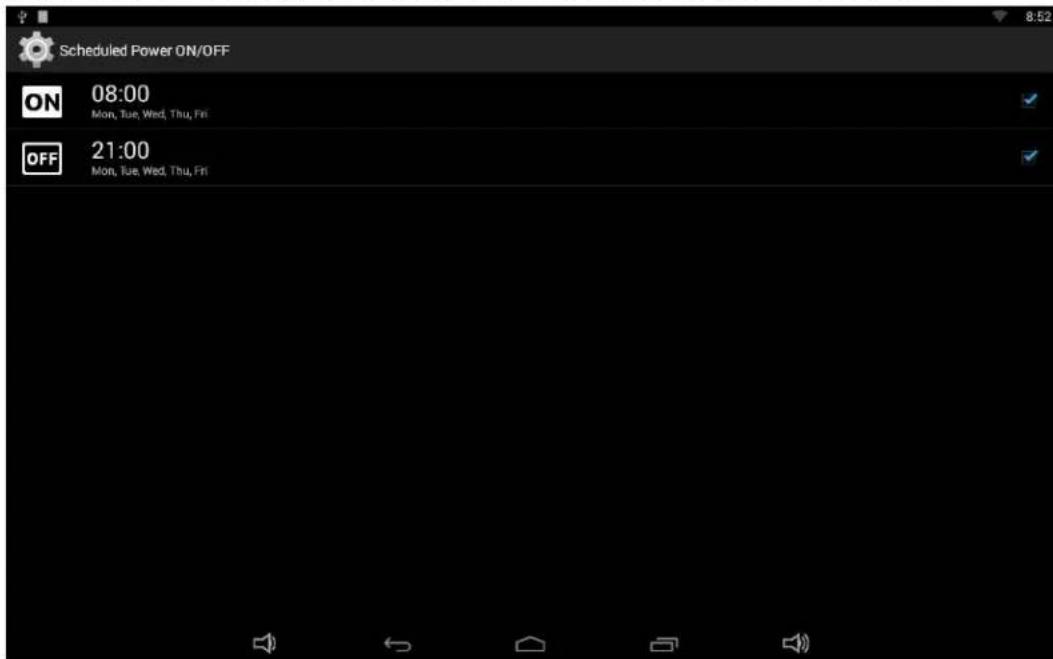
After the settings, the device will be powered off at set time, and powered on again when achieves the appointed time.

Wi-Fi

In the App list, click "Settings" select the option "Wi-Fi".

Mimo Monitors Adapt-IQV MCT-215HPQ - Wi-Fi - 1

to open the system setting app, and

Wi-Fi WIRELESS & NETWORKS Wi-Fi ON Bluetooth OFF Data usage More... DEVICE Sound Display Hdmi ScreenshotSetting Storage Apps Physical Button Manager PERSONAL Location Leo-Giga Connected MiniRouter Secured with WPA/WPA2 (WPS available) OpenWrt-vpn Secured with WPA2

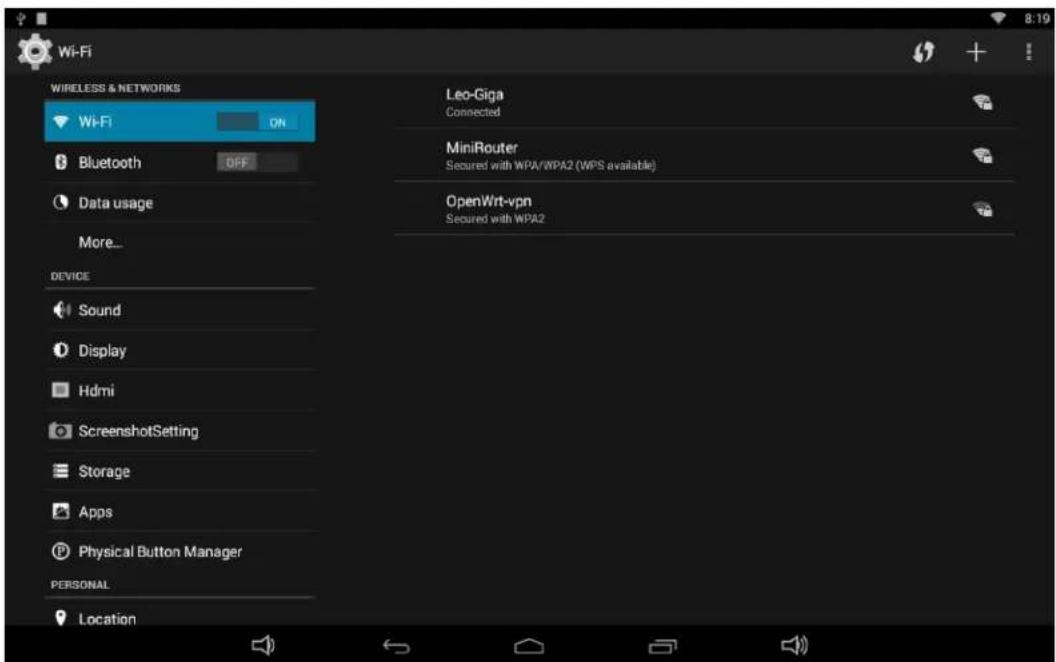
Switch the Wi-Fi button to ON. The product will scan available wireless networks automatically. Select a network under Wi-Fi networks and input the password to connect.

Ethernet

In the App list, click "Settings" to open the system setting app, select the option "More", and then select "Ethernet" at the right side.

Wireless & networks WIRELESS & NETWORKS Wi-Fi OFF Bluetooth OFF Data usage More... DEVICE Sound Display Hdmi ScreenshotSetting Storage Apps Physical Button Manager PERSONAL Airplane mode NFC Allow data exchange when the tablet touches another device Android Beam Unavailable because NFC is turned off Tethering & portable hotspot VPN Ethernet Mobile networks

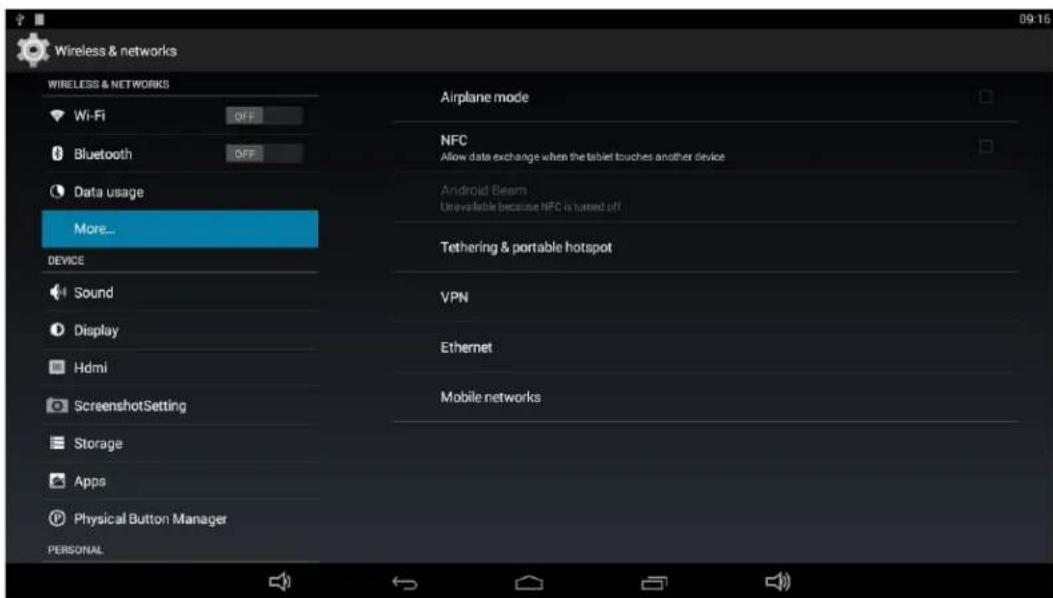
Check "Use Ethernet" and plug the Internet cable into the Ethernet port (#14

in Product Instruction). If Wi-Fi is on, please turn off Wi-Fi to allow Ethernet working.

Wireless & networks WIRELESS & NETWORKS Wi-Fi OFF Bluetooth OFF Data usage More... Device Sound Display Hdmi ScreenshotSetting Storage Apps Physical Button Manager PERSONAL Use Ethernet Connected IP address 192.168.13 124 MAC address 96.48.f5.bdb0:23 Static IP Settings

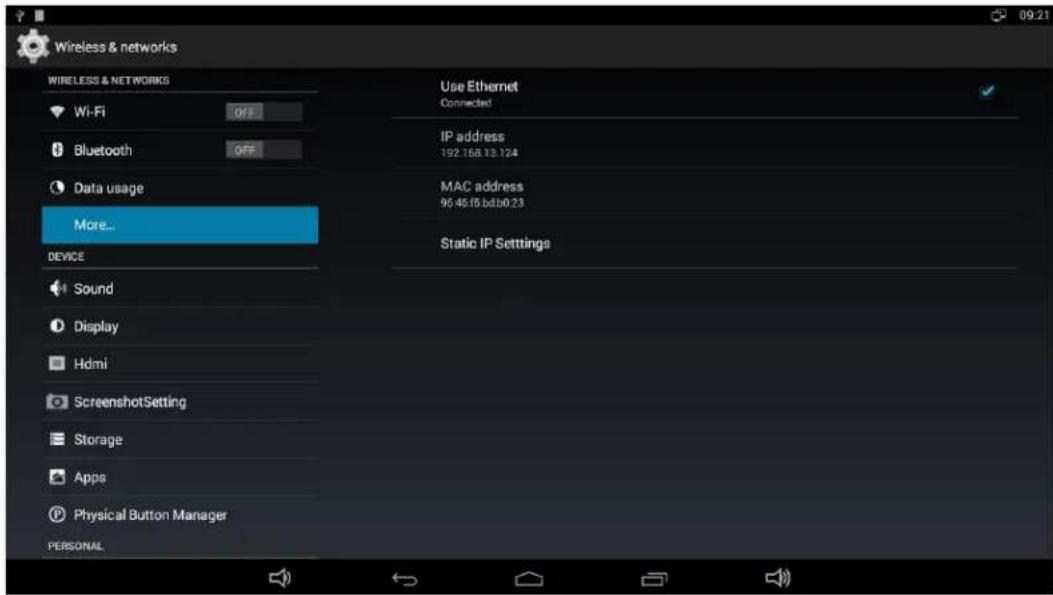
If you are Static IP user, please set the configurations manually.
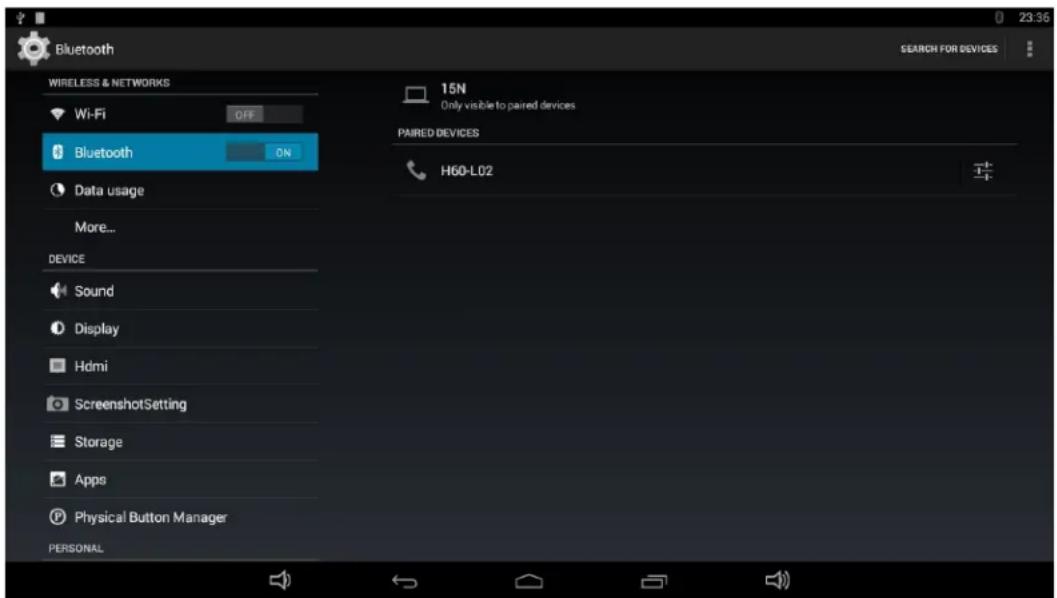
Bluetooth

In the App list, click "Settings" to open the system setting app, and select the option "Bluetooth".

Bluetooth WIRELESS & NETWORKS Wi-Fi OFF Bluetooth DN Data usage More... DEVICE Sound Display Hdmi ScreenshotSetting Storage Apps Physical Button Manager PERSONAL 16N Not visible to other Bluetooth devices AVAILABLE DEVICES H60-L02 23:35 SEARCH FOR DEVICES

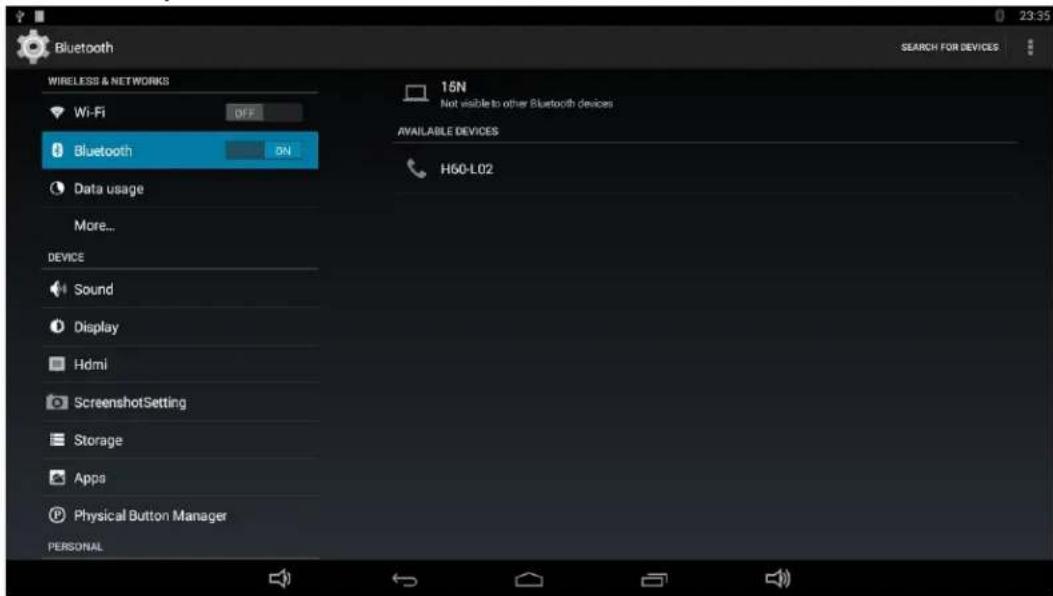
Switch the Bluetooth button to ON. The product will scan ambient available Bluetooth devices automatically.

If you want to pair another Bluetooth device, select it from the "Available

Devices" list, and then click "Pair" in the pop-up window. At the same time, click "Pair" in the pop-up window of the Bluetooth device to be paired.

Bluetooth WIRELESS & NETWORKS Wi-Fi 15N Not visible to other Bluetooth devices AVAILABLE DEVICES Data usage More... DEVICE Sound Display Hdmi ScreenshotSetting Storage Apps Physical Button Manager PERSONAL No nearby Bluetooth devices were found. Bluetooth pairing request To pair with: H60-L02 Make sure it is showing this passkey: 492173 Cancel Pair

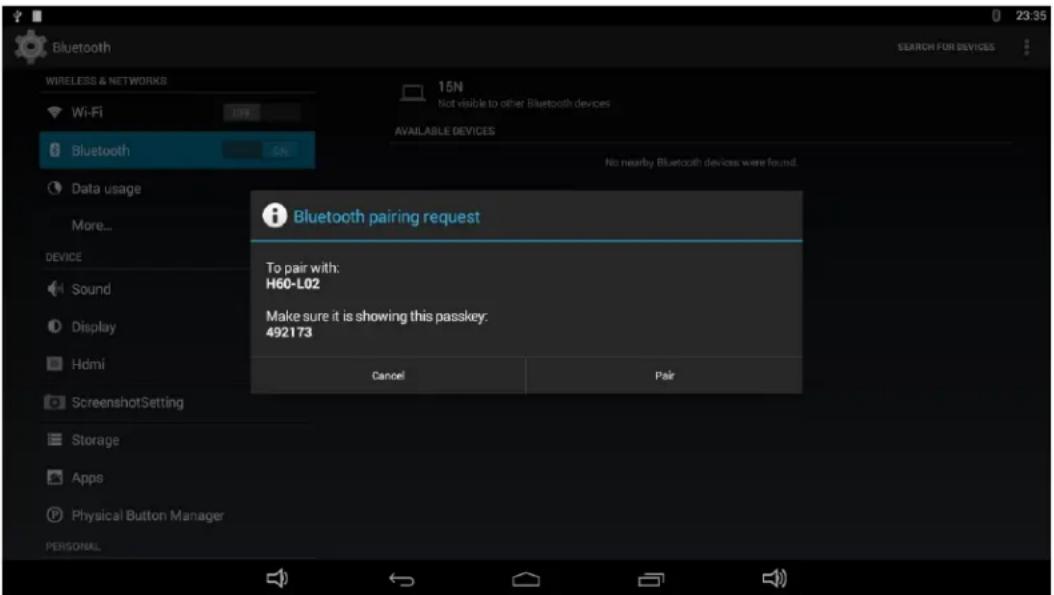
After pairing, the paired device will be moved to the "Paired Devices" list.

Bluetooth WIRELESS & NETWORKS Wi-Fi OFF Bluetooth ON Data usage More... DEVICE Sound Display Hdmi ScreenshotSetting Storage Apps Physical Button Manager PERSONAL 15N Only visible to paired devices PAIRED DEVICES H60-L02 23:36 SEARCH FOR DEVICES

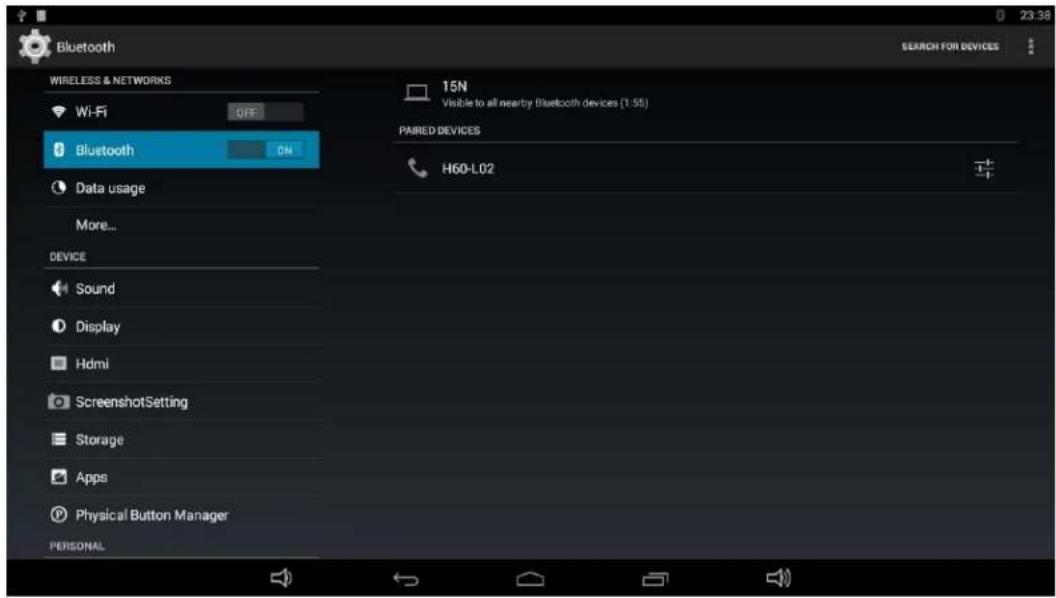
If you want to be paired by another Bluetooth device passively, click the Bluetooth name at the top. When the summary will changed to “Visible to all nearby Bluetooth devices (Visibility timeout)”, this Bluetooth name can be scanned by other Bluetooth devices until the countdown to the end.

Bluetooth WIRELESS & NETWORKS Wi-Fi OFF Bluetooth ON Data usage More... DEVICE Sound Display Hdmi ScreenshotSetting Storage Apps Physical Button Manager PERSONAL 15N Visible to all nearby Bluetooth devices (1:55) PAIRED DEVICES H60-L02 23.38

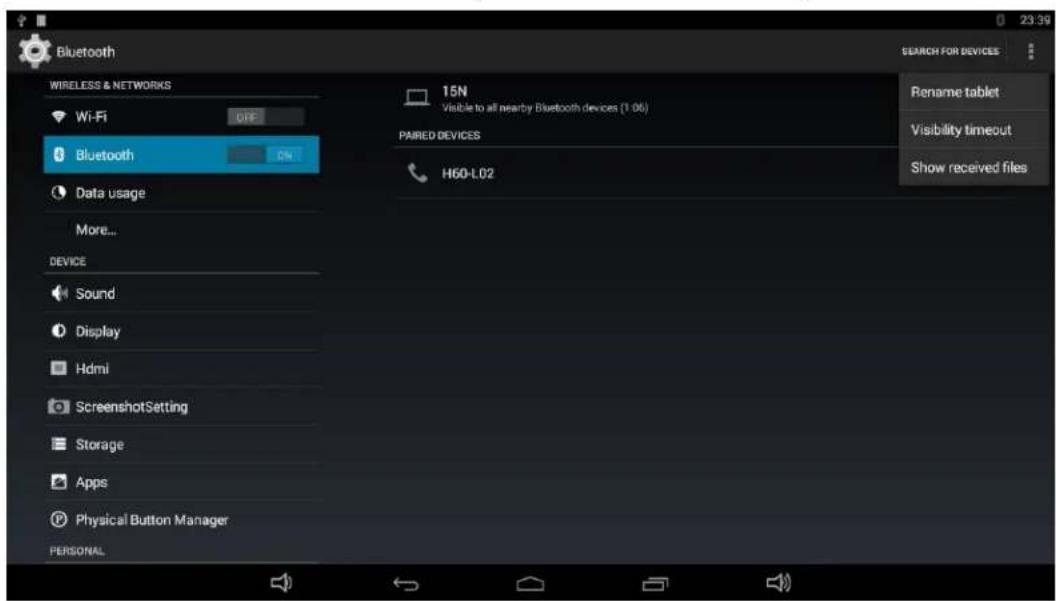
The Bluetooth name and visibility timeout can be changed in the menu.
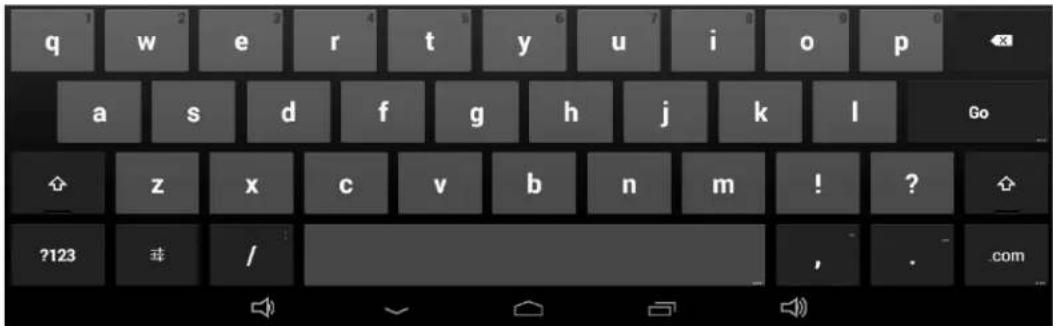
Bluetooth WIRELESS & NETWORKS Wi-Fi OFF Bluetooth ON Data usage More... DEVICE Sound Display Hdmi ScreenshotSetting Storage Apps Physical Button Manager PERSONAL 15N Visible to all nearby Bluetooth devices (1.06) PAIRED DEVICES H60-L02 Rename tablet Visibility timeout Show received files

Virtual Keyboard

The device provides a virtual keyboard for typing. You can use it as a real one.

When you click in a text input box, the virtual keyboard will appear at the bottom of the screen.

To collapse the virtual keyboard, you can click the icon in the system bar.

about.blank about.blank

q w e r t y u i o p a s d f g h j k l Go z x c v b n m ! ? ?123 / , . com

Switch Input Methods

In any text input box, pull down the upper-left corner of the screen to see the status window, and click "Choose input method".

9:12 SAT, JANUARY 1 Choose input method English (US) - Android Keyboard (ADSP) USB connected Touch to copy files to/from your computer. USB debugging connected Touch to disable USB debugging.

Select an input method from the pop window.

Choose input method Hardware Physical keyboard English (US) Android Keyboard (AO SP) Japanese Japanese IME Set up input methods

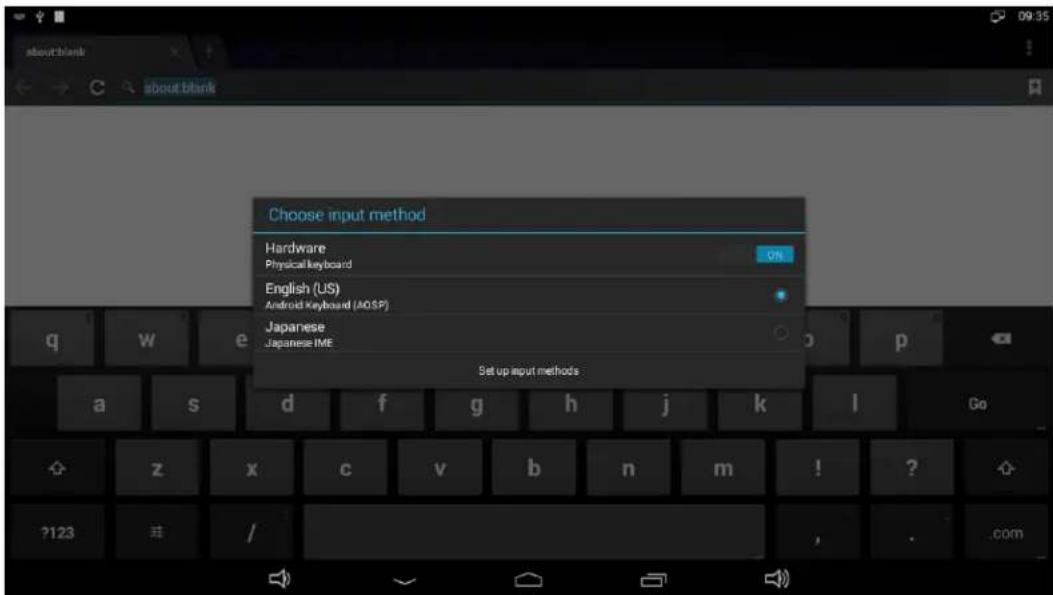
If the keyboard icon is invisible, please check whether the installed input method is selected in the "Language & input" option under the system setting app.

Language & input Apps Physical Button Manager PERSONAL Location Security Language & input Backup & reset ACCOUNTS Add account SYSTEM Date & time Scheduled Power ON/OFF Accessibility About tablet Language English (United States) Spell checker Personal dictionary KEYBOARD & INPUT METHODS Default English (US) - Android Keyboard (AQSP) Android Keyboard (AQSP) English (US) Japanese IME Japanese 谷歌拼音输入法 PHYSICAL KEYBOARD qwerty Default Auto-replace Correct mytyped words

Take Photos & Shots

Front 2M or 5M pixels camera is an optional accessory. In the App list, open "camera" Click the capture button to take a photo.

Mimo Monitors Adapt-IQV MCT-215HPQ - Take Photos & Shots - 1

natural_image Grid-patterned surface with a blue circular highlight and camera icon (no text or symbols)

Click above the capture button to change camera settings.
Camera menu interface showing track position and camera mode options

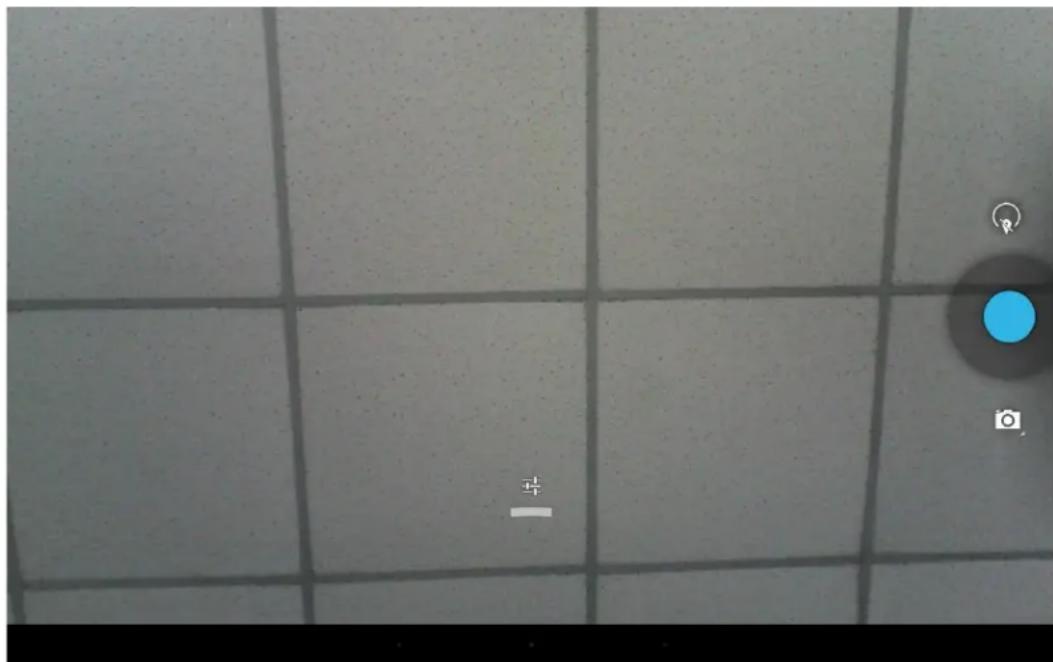
Click 📁 to open detail settings. From left to right in the picture are: location on/off, countdown timer, picture size, white balance, and scene mode.

MORE OPTIONS R D □ SCE

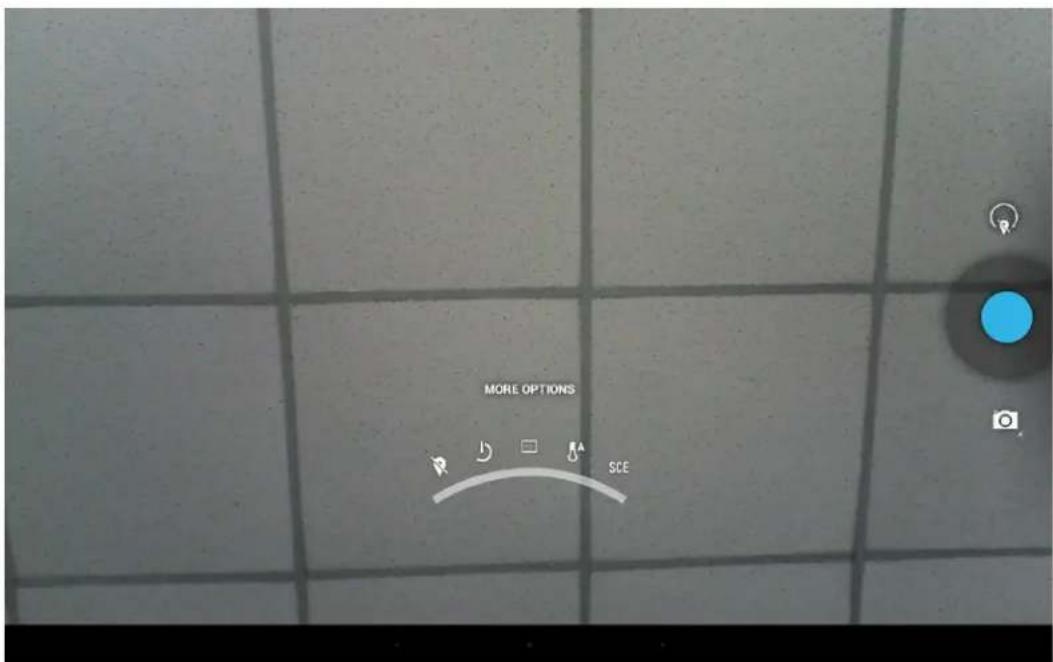
Click or under the capture button to switch take photos or videos.

Mimo Monitors Adapt-IQV MCT-215HPQ - Take Photos & Shots - 4

natural_image Grid-patterned surface with a blue circular button and two small icons on the right (no text or symbols)

Click the capture button ● to shooting a video.
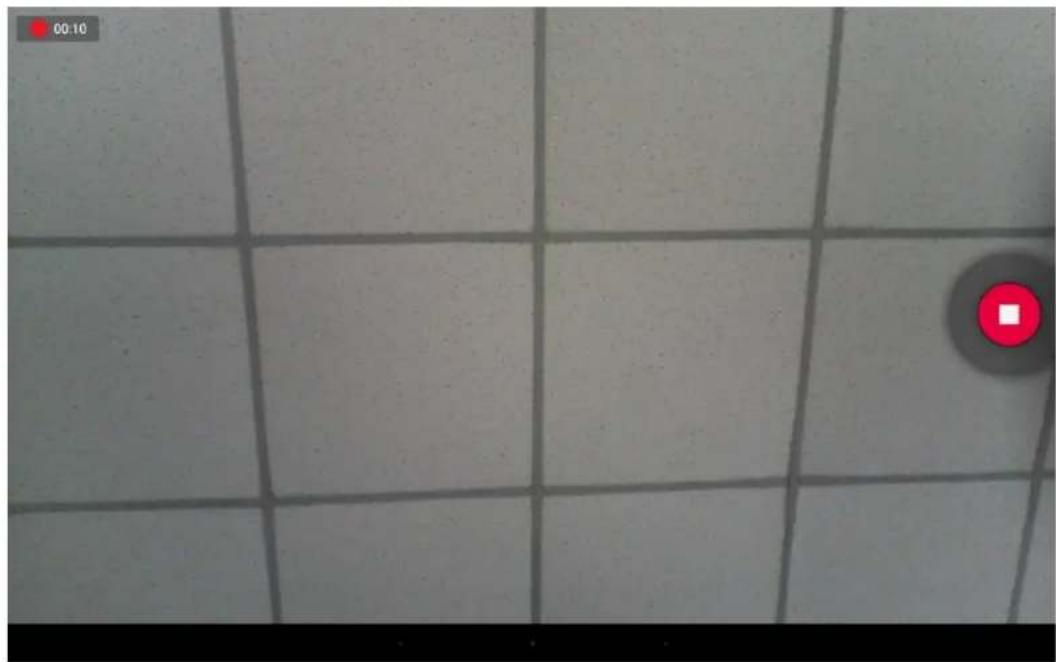
Mimo Monitors Adapt-IQV MCT-215HPQ - Take Photos & Shots - 5

natural_image Grid pattern with a red circular indicator light on the right side (no text or symbols)

Click the capture button to stop the shot.
Mimo Monitors Adapt-IQV MCT-215HPQ - Take Photos & Shots - 6

natural_image Grid-patterned tiled surface with a red square marker and a black circle in the corner (no text or symbols)

Surf Online

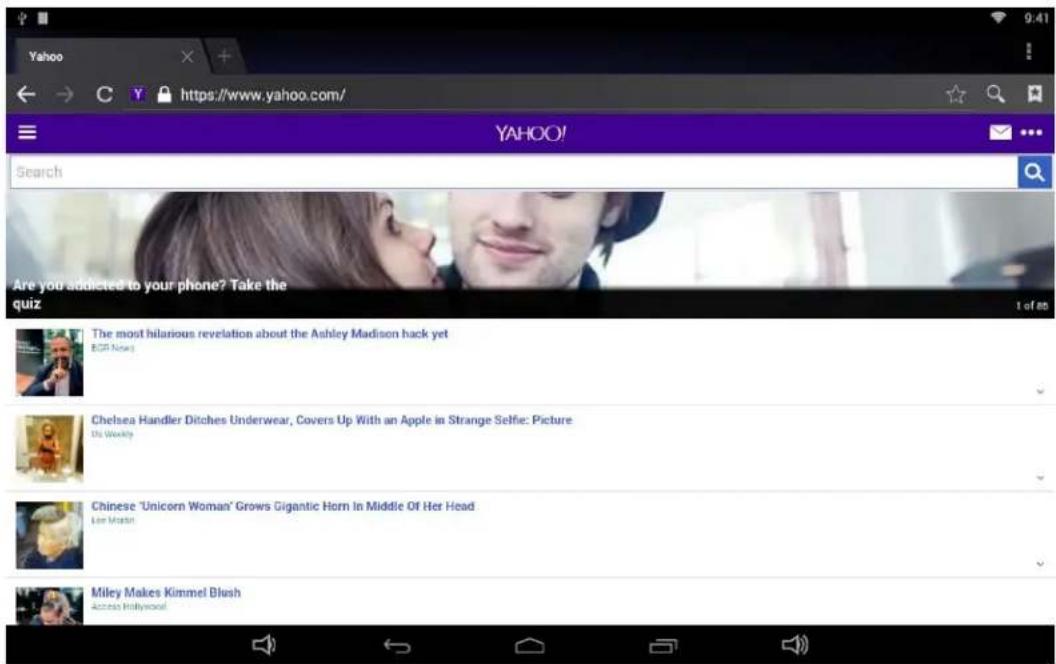
In the App list, open "Browser"

When connecting the device to a network, you can visit websites, play online media or download files via the browser.

In a browser window, enter in a URL in the address bar and click "Go" in the

virtual keyboard to go. You can also click + to add new tabs to make multiple tabs opened simultaneously.

YAHOO! Search Are you addicted to your phone? Take the quiz The most hilarious revelation about the Ashley Madison hack yet EGP Nosey Chelsea Handler Ditches Underwear, Covers Up With an Apple in Strange Selfie: Picture Us Weekly Chinese 'Unicorn Woman' Grows Gigantic Horn In Middle Of Her Head Lee Martin Miley Makes Kimmel Blush Access Hollywood

Browse Files

In the App list, open "Explorer"

Mimo Monitors Adapt-IQV MCT-215HPQ - Browse Files - 1

to view local files.

SD card MANAGE APPLICATIONS Home LevelUp Multi Editor NewFolder Back Next .LOST.DIR 2015-01-07 04:25:44 | drw apk 2015-01-24 13:36:32 | drw cloudplayer 2015-03-18 12:43:22 | drw content 2015-01-07 12:24:42 | drw Documents 2015-02-13 17:55:32 | drw FOUND.000 2015-03-18 12:36:18 | drw LoadTest 2013-01-30 14:18:58 | drw LOST.DIR 2015-01-12 17:26:40 | drw Screenshots 2000-01-01 09:21:28 | drw test

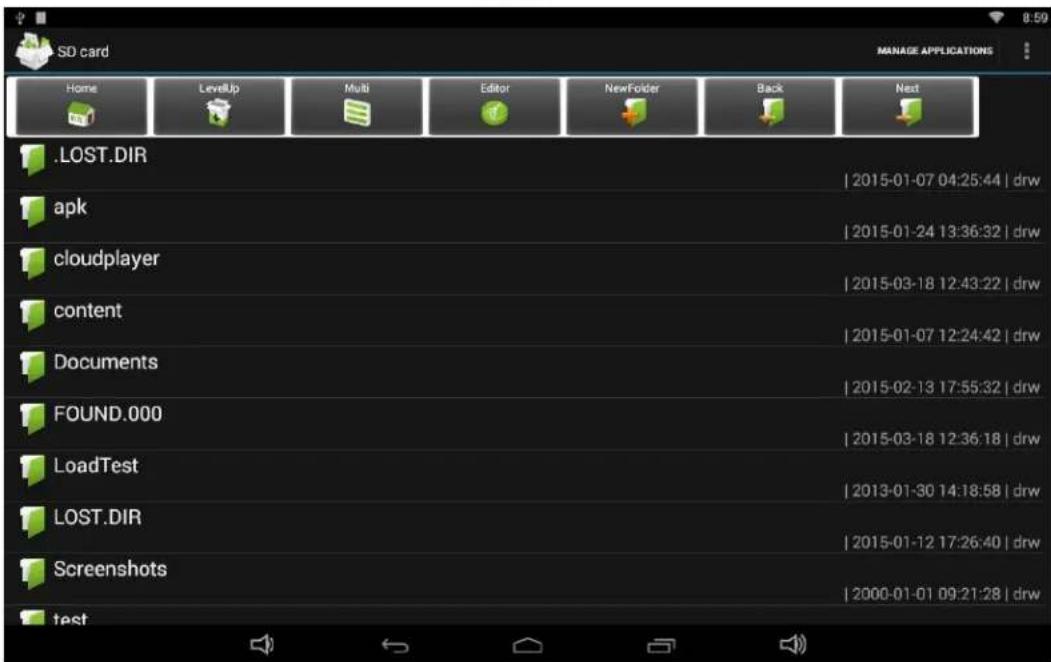
Long-press a file or folder to do file operations, such as copy, delete, move (cut), paste, rename, send (share) and create shortcut.

SD card MANAGE APPLICATIONS Home LewfUp Multi Editor NewFolder Back Next .LOST.DIR apk cloudplayer content Documents FOUND.000 LoadTest LOST.DIR Screenshots test Copy Delete Move Paste Rename Send Create shotcut Cancel 2015-01-07 04:25:44 | drw 2015-01-24 13:36:32 | drw 2015-03-18 12:43:22 | drw 2015-01-07 12:24:42 | drw 2015-02-13 17:55:32 | drw 2015-03-18 12:36:18 | drw 2015-01-30 14:18:58 | drw 2015-01-12 17:26:40 | drw 2000-01-01 09:21:28 | drw

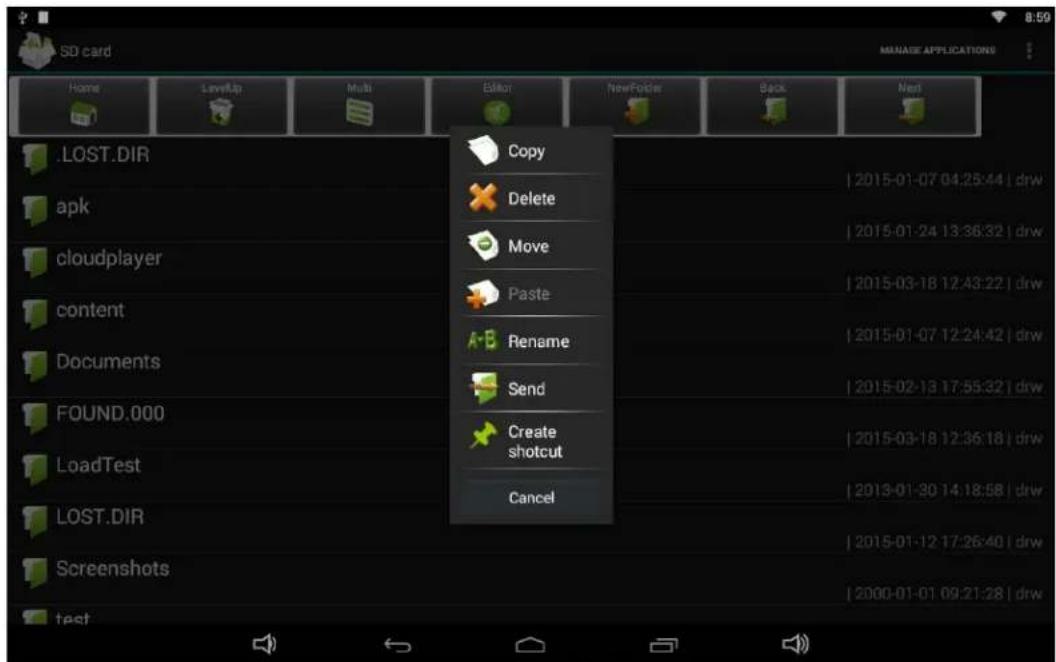
If you want to select several files/folders at once, click "Muti" in the menu, and then select files/folders. The selected files/folders will be highlighted in blue.

SD card MANAGE APPLICATIONS Home LevelUp Multi Editor NewFolder Back Next .LOST.DIR 2015-01-07 04:25:44 | drw apk 2015-01-24 13:36:32 | drw cloudplayer 2015-03-18 12:43:22 | drw content 2000-01-01 09:34:24 | drw Documents 2015-02-13 17:55:32 | drw FOUND.000 2015-03-18 12:36:18 | drw LoadTest 2013-01-30 14:18:58 | drw LOST.DIR 2015-01-12 17:26:40 | drw Screenshots 2000-01-01 09:21:28 | drw test

Click "Editor" in the menu to operate the selected files/folders.

Play Media

With the provided apps, you can play your media files on your storage, such

as pictures, music and videos.

Mimo Monitors Adapt-IQV MCT-215HPQ - Play Media - 1

Picture Player:

Support JPG, BMP, GIF, JPEG, PNG.

Mimo Monitors Adapt-IQV MCT-215HPQ - Picture Player: - 1

Music Player:

Support MP1, MP2, WMA, WAV, AAC, OGG, APE, FLAC.

Mimo Monitors Adapt-IQV MCT-215HPQ - Music Player: - 1

Video Player:

Support MKV, TS, FLV, AVI, VOB, MPG, DAT, ASF, RM, MOV, 3GP, MP4, WMV.

Install & Uninstall Apps

Install Apps

Before installing an app, please download the app (.apk) to via the browser, or copy a downloaded app to the device from your computer.

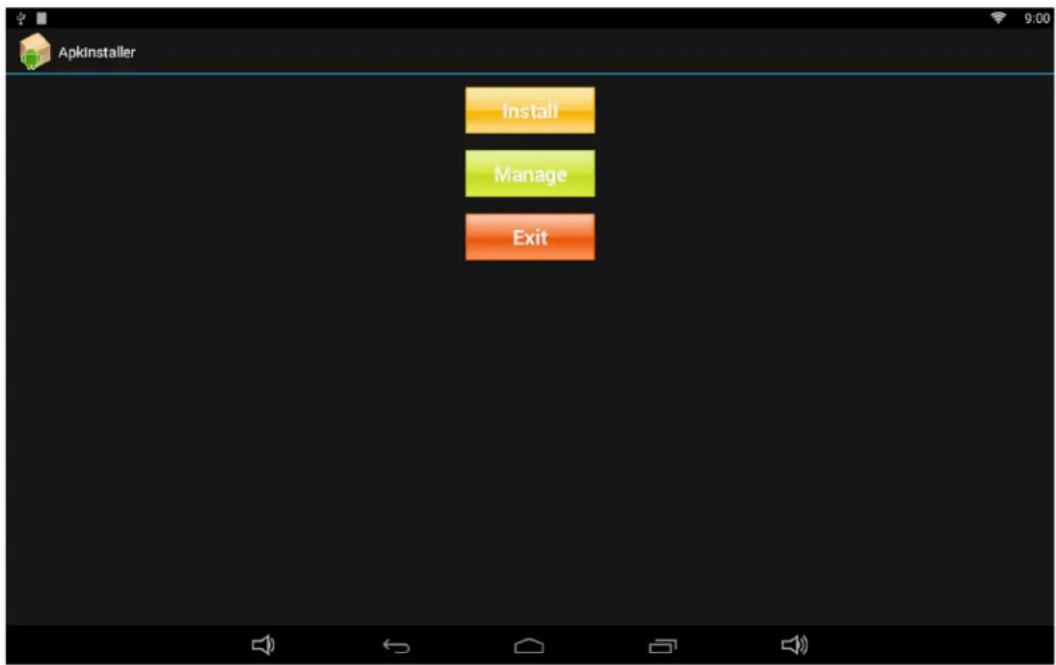
Then you can open "ApkInstaller" downloaded app.

Mimo Monitors Adapt-IQV MCT-215HPQ - Install Apps - 1

in the App list to install the

Click "Install" button.

Apkinstaller Install Manage Exit

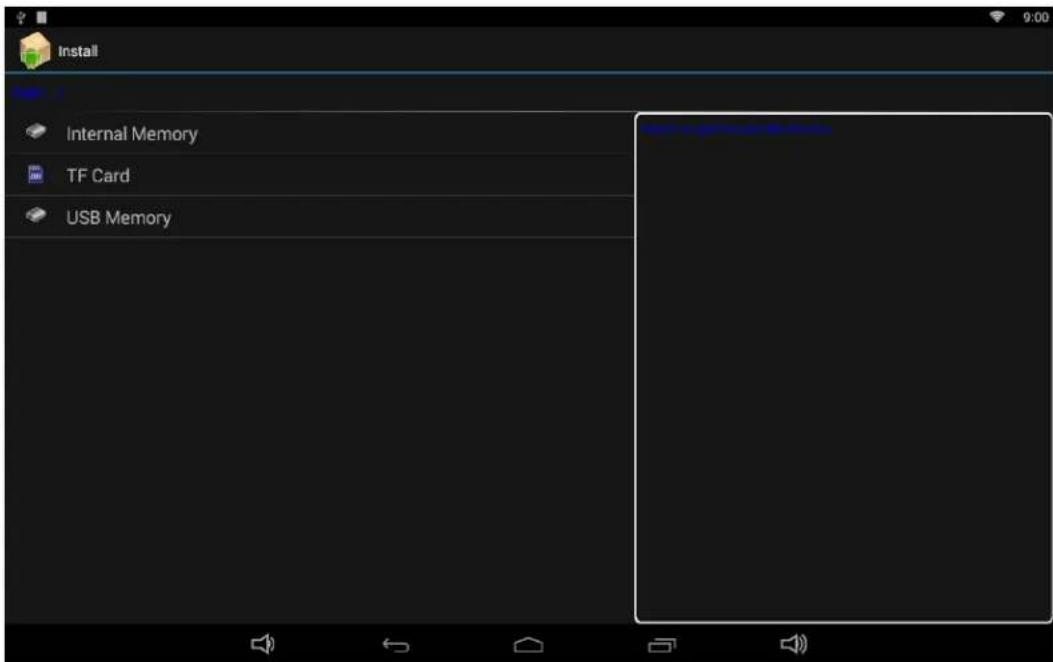
Choose the installation file's location.

Install Internal Memory TF Card USB Memory

The apk files will be automatically scanned in the right side list.
Install CloudPlayer_v0.8.0.apk R4050_V1.3.1.apk Wi-Catch-V1.2.apk Google_Input_3.1.0.58073826.apk Documents Work Files videonpix USB-Burning-tool-v1.6.22 TESTMV apk LoadTest Screenshots test content

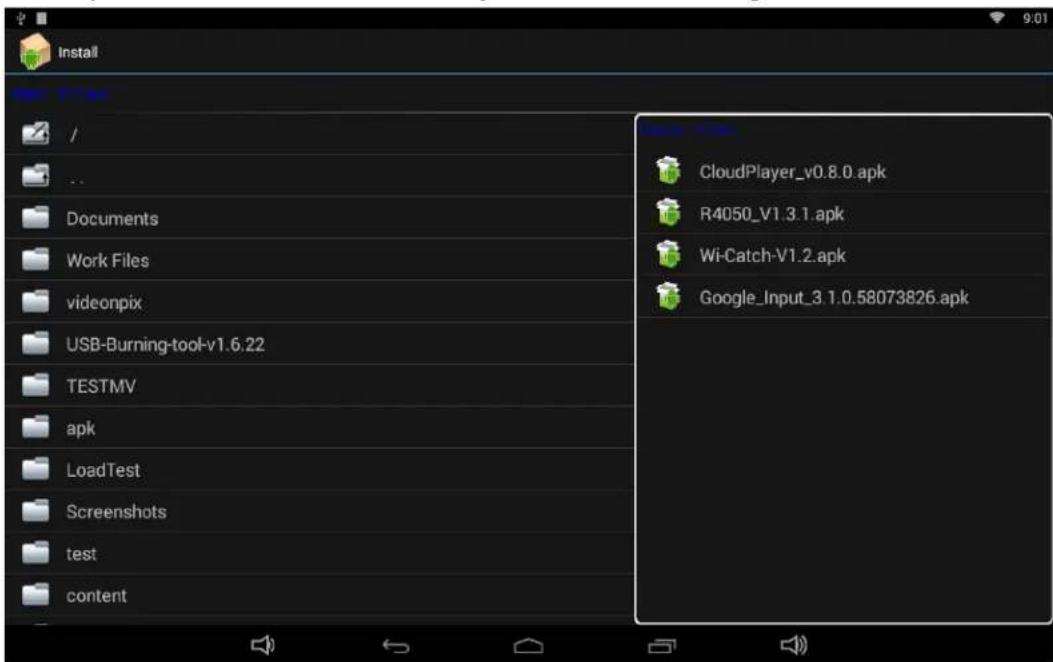
Click the apk you want to install.

Google Pinyin Input Do you want to install this application? It will get access to: PRINACY record audio read your contacts add or remove accounts find accounts on the device use accounts on the device read terms you added to the dictionary DEVICE ACCESS full network access view network connections run at startup Cancel Next

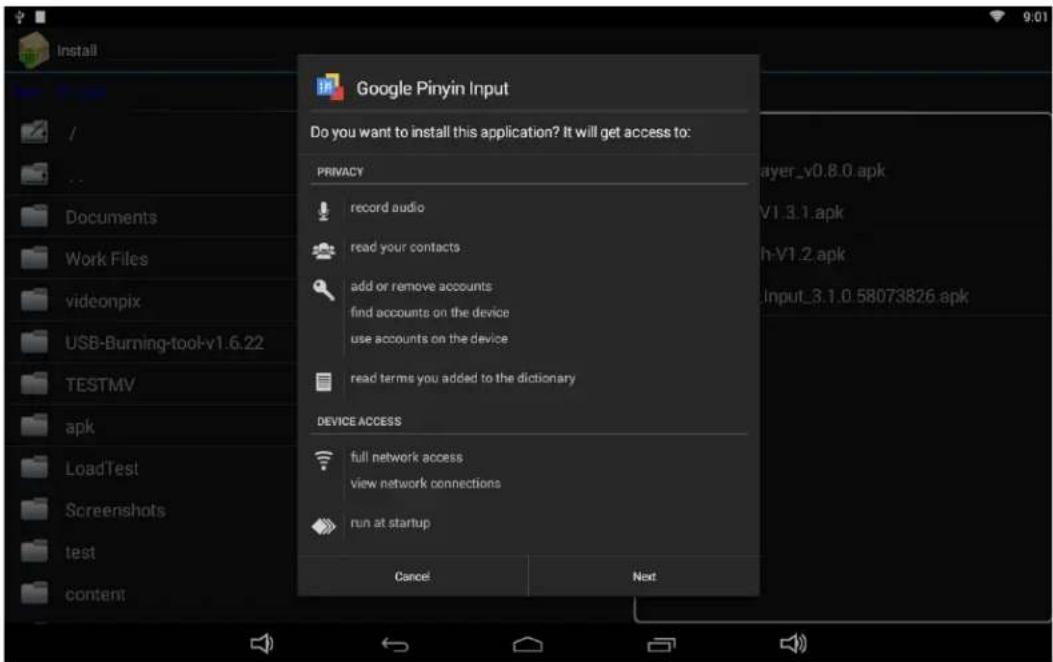
Click "Install" or "Next" until it turns to "Install", and then waiting for installation finished.

Google Pinyin Input ✓ App installed. Done Open

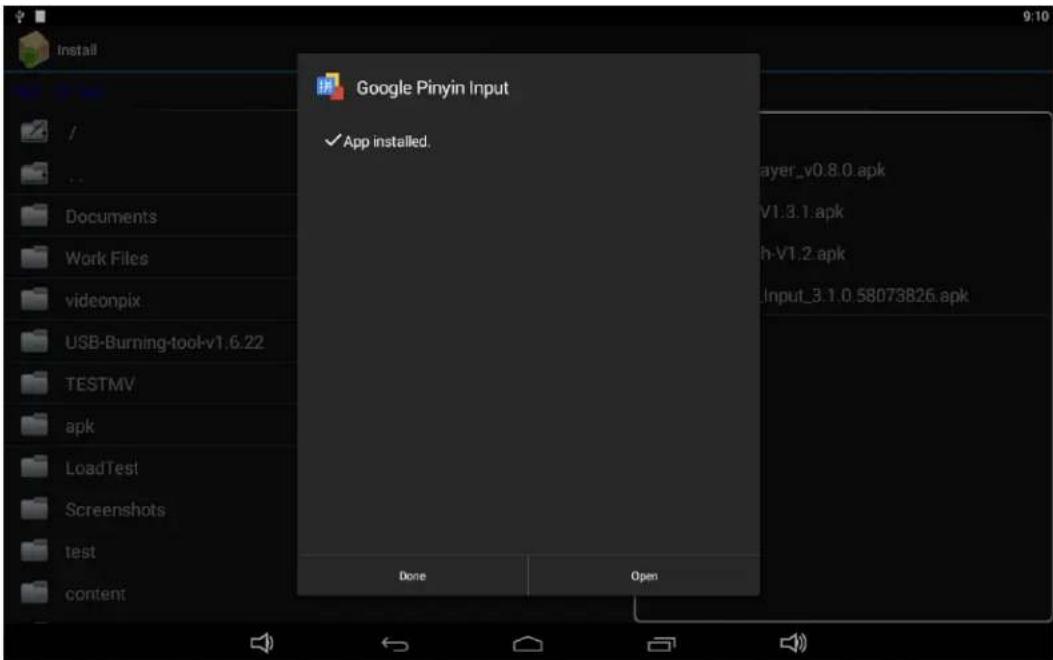
You can also download an android app market, and install the apps via the market.

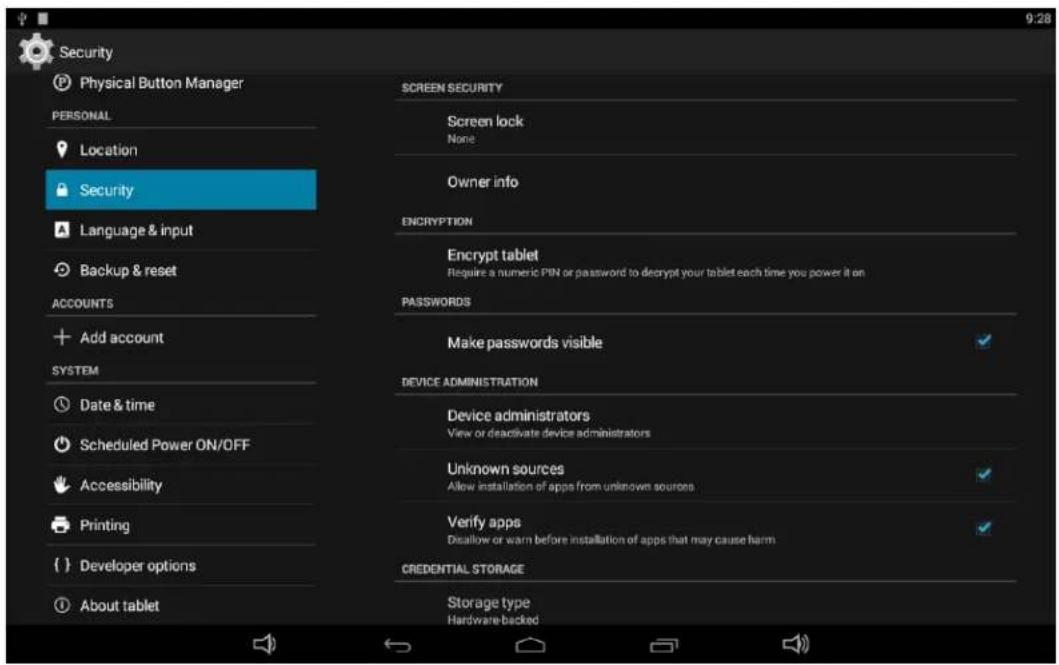
If "Install blocked" is prompted when installing an app, please open "Settings" and select the option "Security", allow "Unknown sources" and then back to reinstall the app.

Security Physical Button Manager PERSONAL Location Security Language & input Backup & reset ACCOUNTS Add account SYSTEM Date & time Scheduled Power ON/OFF Accessibility Printing Developer options About tablet SCREEN SECURITY Screen lock None Owner info ENCRYPTION Encrypt tablet Require a numeric PIN or password to decrypt your tablet each time you power it on PASSWORDS Make passwords visible DEVICE ADMINISTRATION Device administrators View or deactivate device administrators Unknown sources Allow installation of apps from unknown sources Verify apps Disallow or warn before installation of apps that may cause harm CREDENTIAL STORAGE Storage type Hardware-backed

Uninstall Apps

To uninstall an app, please open "Settings" in the App list and select the option "Apps". In this option, you will see the installed apps list.

Apps ScreenshotSetting Storage Apps Physical Button Manager PERSONAL Location Security Language & input Backup & reset ACCOUNTS Add account SYSTEM Date & time Scheduled Power ON/OFF Accessibility 9:10 DOWNLOADED ON SD CARD Google Pinyin Input 23.27MB Internal storage 1.15MB used 889MB free

Click the app you want to remove to enter the detail page.

Apps ScreenshotSetting Storage Apps Physical Button Manager PERSONAL Location Security Language & input Backup & reset ACCOUNTS Add account SYSTEM Date & time Scheduled Power ON/OFF Accessibility Google Pinyin Input version 3.1.0.58073825 Force stop Uninstall Show notifications STORAGE Total 23.27MB App 23.27MB USB storage app 0.00B Data 0.00B SD card 0.00B Move to SD card Clear data CACHE Cache 0.00B Clear cache LAUNCH BY DEFAULT No defaults set. Clear defaults PERMISSIONS

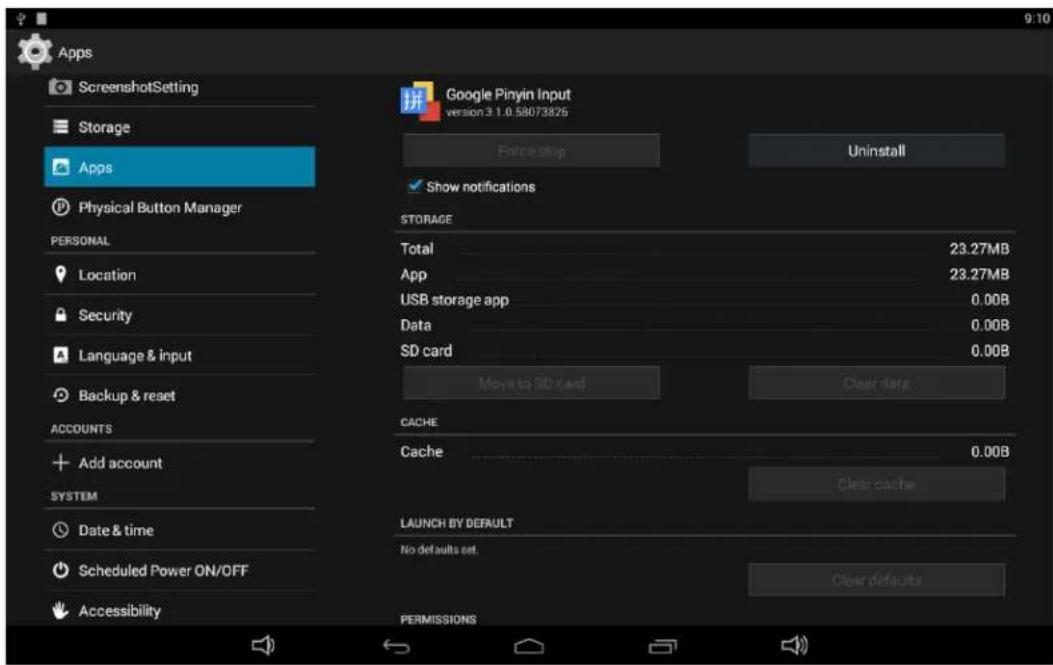
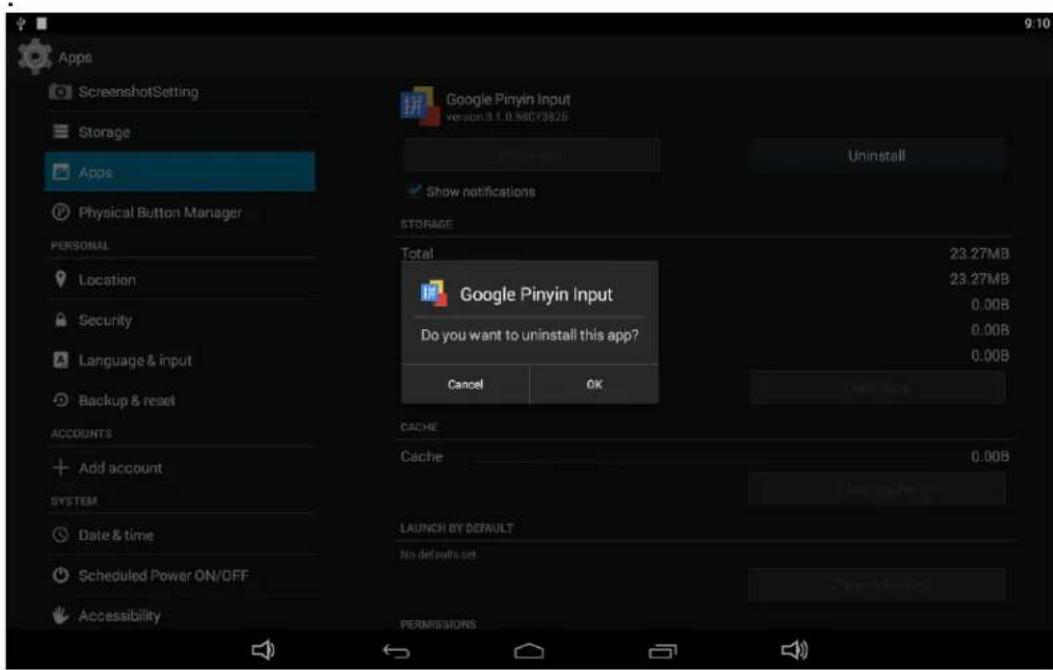
Click the "Uninstall" button and select "OK", and then waiting for uninstallation finished.

Apps ScreenshotSetting Storage Apps Physical Button Manager PERSONAL Location Security Language & input Backup & reset ACCOUNTS Add account SYSTEM Date & time Scheduled Power ON/OFF Accessibility Google Pinyin Input version 3.1.0.58073826 Uninstall Show notifications STORAGE Total 23.27MB 23.27MB 0.00B 0.00B 0.00B 0.00B Cancel OK CACHE Cache 0.00B LAUNCH BY DEFAULT No defaults set PerMISSIONS

Reset to Factory Default

Please make sure to back up the important data before resetting the device. In the App list, click "Settings" to open the system setting app, and

select the option "Backup & reset".

Backup & reset Apps Physical Button Manager PERSONAL Location Security Language & input Backup & reset ACCOUNTS Add account SYSTEM Date & time Scheduled Power ON/OFF Accessibility About tablet PERSONAL DATA Factory data reset Erases all data on tablet

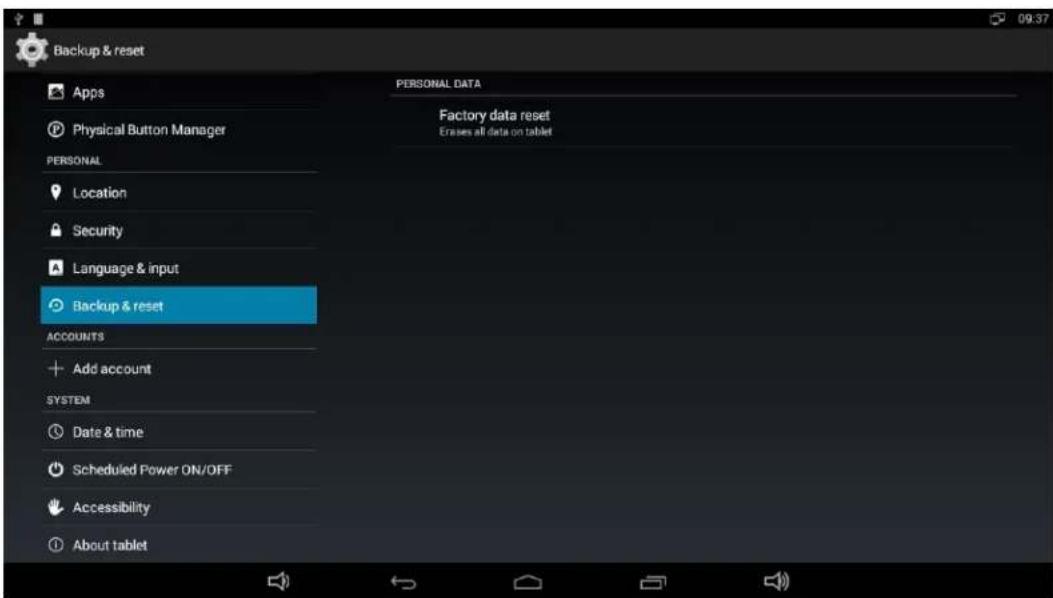
Click "Factory data reset".

Backup & reset Apps Physical Button Manager PERSONAL Location Security Language & input Backup & reset ACCOUNTS Add account SYSTEM Date & time Scheduled Power ON/OFF Accessibility About tablet This will erase all data from your tablet's internal storage, including: Your Google account System and app data and settings Downloaded apps To clear music, pictures, and other user data, the SD card needs to be erased. Erase SD card Erase all the data on the SD card, such as music or photos Reset tablet

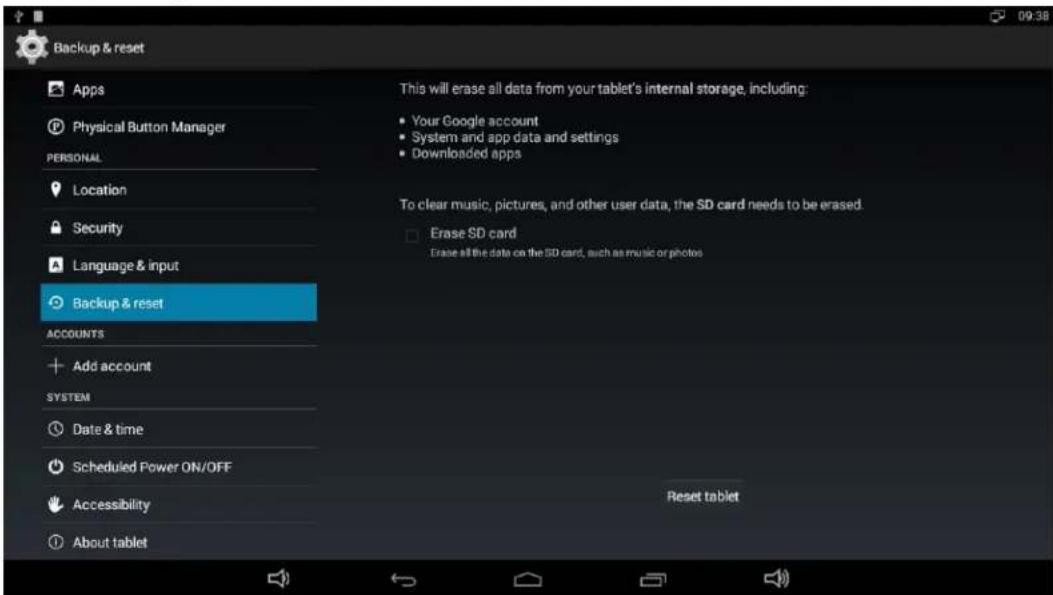
Click "Reset tablet" button.

Backup & reset Apps Physical Button Manager PERSONAL Location Security Language & input Backup & reset ACCOUNTS Add account SYSTEM Date & time Scheduled Power ON/OFF Accessibility About tablet Erase all your personal information and downloaded apps? You can't reverse this action! Erase everything

Click "Erase everything" button, and then waiting system reboots and resets to factory default.

Manual assistant
Powered by Anthropic
Waiting for your message
Product information

Brand : Mimo Monitors

Model : Adapt-IQV MCT-215HPQ

Category : Monitor