SHD-3000F5 - Security Camera Hanwha - Free user manual and instructions
Find the device manual for free SHD-3000F5 Hanwha in PDF.

User questions about SHD-3000F5 Hanwha
0 question about this device. Answer the ones you know or ask your own.
Ask a new question about this device
Download the instructions for your Security Camera in PDF format for free! Find your manual SHD-3000F5 - Hanwha and take your electronic device back in hand. On this page are published all the documents necessary for the use of your device. SHD-3000F5 by Hanwha.
USER MANUAL SHD-3000F5 Hanwha
In-Ceiling Plenum Housing
Installation Manual
SHD-3000F5
TABLE OF CONTENTS
Overview....3
What's Included....3
Installation Instructions ....4
How to install....4
Product Specifications....10
OVERVIEW
This In-CEILING HOUSING is a mounting ADAPTOR that is designed to mount PNM-9000VQ in built-in style on a double-layer ceiling. The housing is UL2820 Plenum rated when properly installed.
WHAT'S INCLUDED
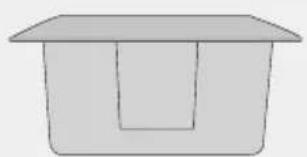
natural_image
Simple line drawing of a rectangular container with a lid (no text or symbols)HOUSING
SAFETY BRACKET (1EA)
SAFETY WIRE (1SET)
TEMPLATE (1EA) INSTALLATION MANUAL
INSTALLATION INSTRUCTIONS
- Select an installation position or place that can endure more than 4 times of the total weight of the installation structure.
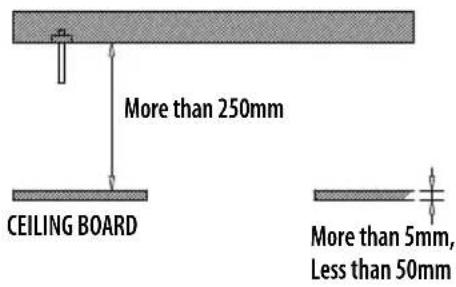
- At least 250mm or more of spare height is required above the CEILING BOARD.
- CEILING BOARD's thickness should be less than 50mm.
- Be sure to secure the SAFETY WIRE to avoid a product fall.
- If you want to attach the camera to the ADAPTOR, use the only provided SCREWS. (SCREWS are shipped with PNM-9000VQ. To learn how to use them, see Step 3 on page 5.)
- CEILING BOARD must be able to sustain the weight of at least 10 kg.
text_image
More than 250mm CEILING BOARD More than 5mm, Less than 50mmHOW TO INSTALL
- Place the TEMPLATE on the CEILING BOARD and drill a guided hole.
1 Remove the round filling ("C") from the TEMPLATE.
2 Place TEMPLATE A onto the CEILING BOARD to which you will attach the ceiling mount ADAPTOR and drill a hole of ∅326mm in diameter.
See the figure below for the hole shape.

text_image
Ø326mm "C" TEMPLATE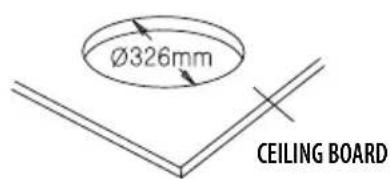
text_image
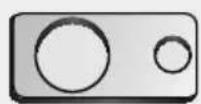
Ø326mm CEILING BOARD- Remove the CAP and NUT that fit to the size of the HOLE you are going to use.
natural_image
Technical line drawing of a mechanical component with no visible text or symbols- Remove the Dome Cover and Mounting Plate according to the Disassembling section in the PNM-9000VQ manual.
- Join the MOUNTING PLATE to the Housing using the SCREWS shipped with PNM-9000VQ.
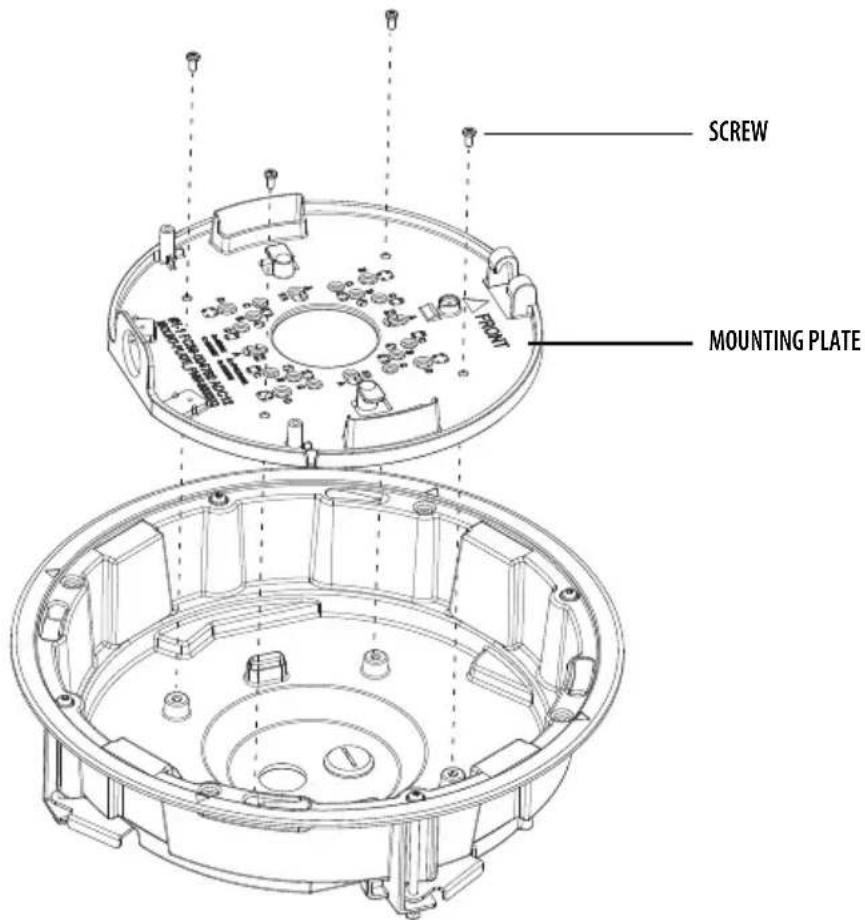
text_image
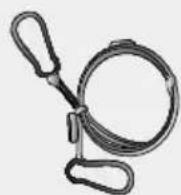
SCREW MOUNTING PLATE- Fix the ANCHOR BOLT onto the concrete CEILING, and secure the SAFETY WIRE to the ANCHOR BOLT as below:
1 Tighten the NUT ("N1") on the ANCHOR BOLT.
② Insert the provided SAFETY BRACKET into the ANCHOR BOLT.
3 Tighten two NUTs ("N2", "N3") onto the ANCHOR BOLT.
4 Hook and fix one end of the SAFETY WIRE onto the SAFETY BRACKET.
5 Hook and fix the other end of SAFETY WIRE onto the HOUSING as shown below:
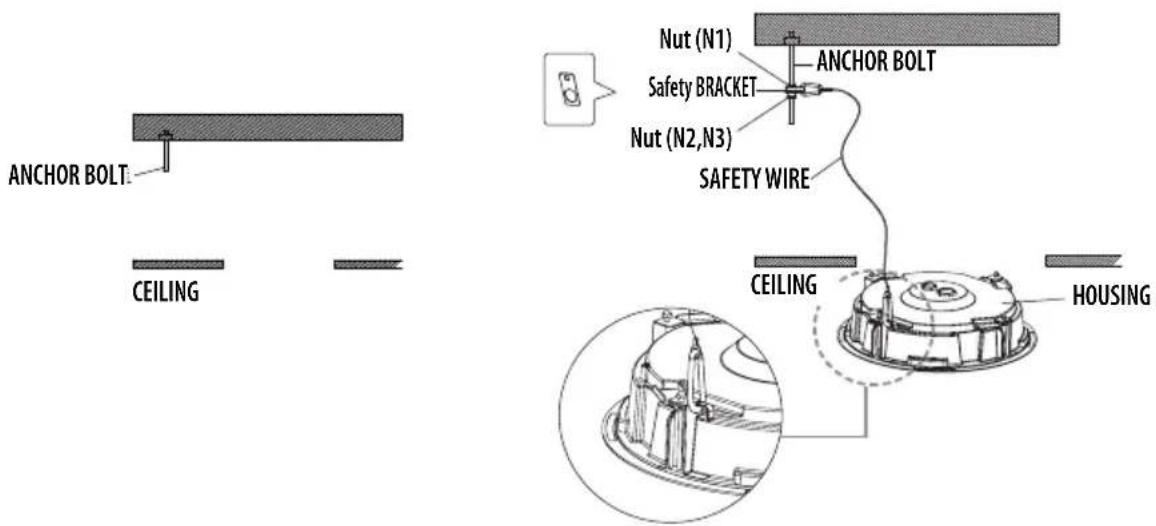
text_image
ANCHOR BOLT: CEILING Nut (N1) ANCOR BOLT Safety BRACKET Nut (N2,N3) SAFETY WIRE CEILING HOUSING
■ The ANCHOR BOLTs and nuts are not included in the product package.
■ ANCHOR BOLTS must be able to sustain the weight of at least 30 kg.
If you proceed without following the instructions in the manual, that is if you work with the camera body already attached from the beginning, the safety wire could exceed its limit and be broken if the housing is accidentally dropped, which could result in an accident.
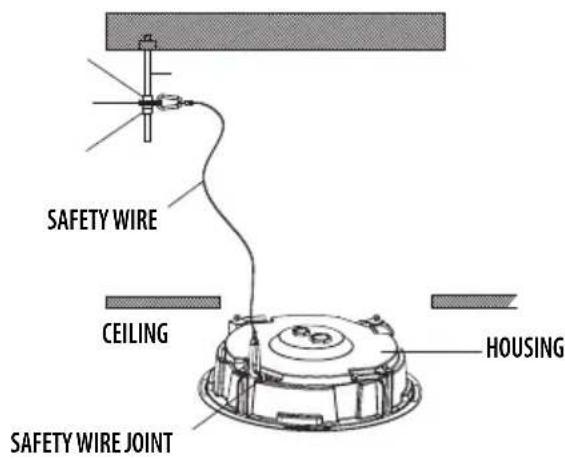
6 After fixing the SAFETY WIRE to the HOUSING, tighten the screw in the SAFETY RING to the end.
- In the case that a pipe is to be connected to the External Cable hole, the pipe must be inserted within the depth of 15 ~mm or less.
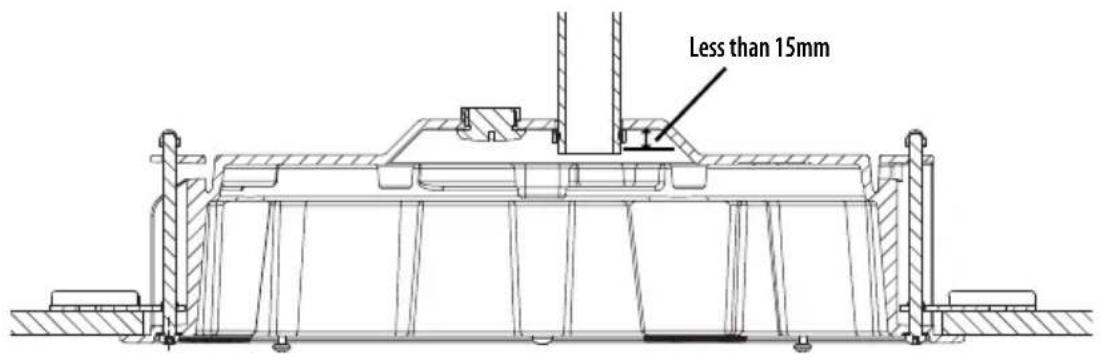
text_image
Less than 15mm6_SHD-3000F5
- To connect to the camera, insert the external cable through the Cable hole on the housing to the inside of the housing as shown in the figure.

■ Refer to the installation manual of the camera that you want to install, and prepare necessary cables for camera connection.
text_image
SAFETY WIRE CEILING HOUSING SAFETY WIRE JOINT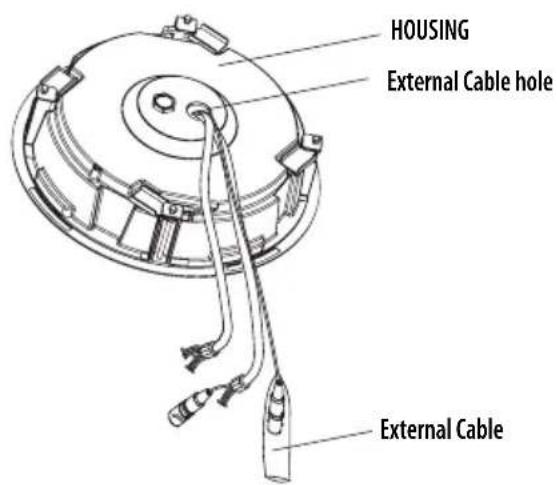
text_image
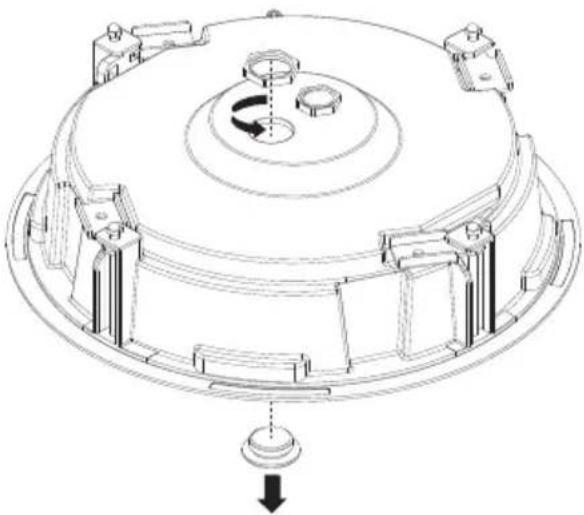
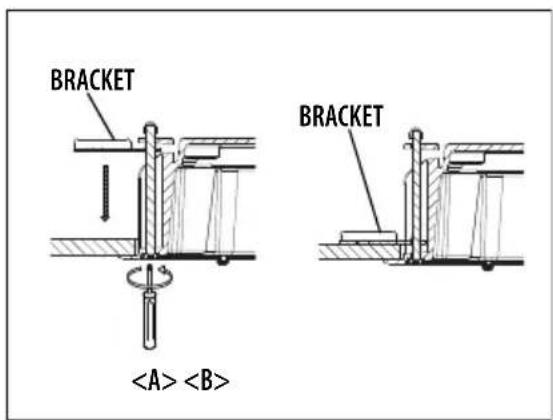
HOUSING External Cable hole External Cable- Push the HOUSING inside the CEILING through the CEILING hole, and tighten the SCREWs (x2) clockwise to fix the HOUSING on the CEILING.
(The BRACKET will be positioned from to as shown.)

■ Ensure that the HOUSING is firmly secured to the CEILING BOARD.

text_image
SAFETY WIRE BRACKET HOUSING BRACKETSCREW Turn clockwise
- Proceed with the rest of the installation process for PNM-9000VQ according to the sections next to Disassembling in the PNM-9000VQ manual.
text_image
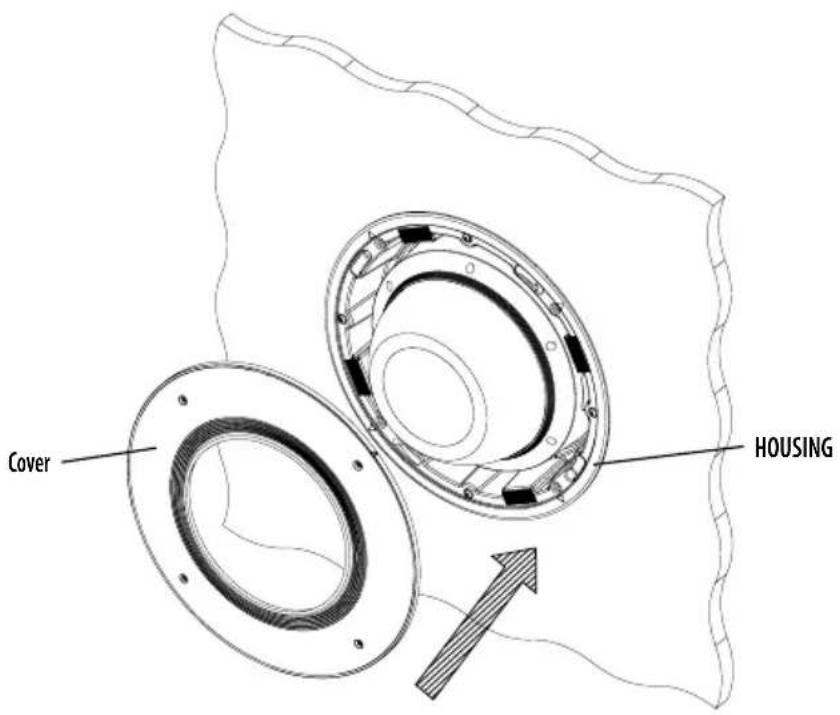
Cover HOUSING- Align and attach the COVER to the HOUSING following the arrow, and push it hard so that four Hook & Loop Fasteners are firmly attached to it.
text_image
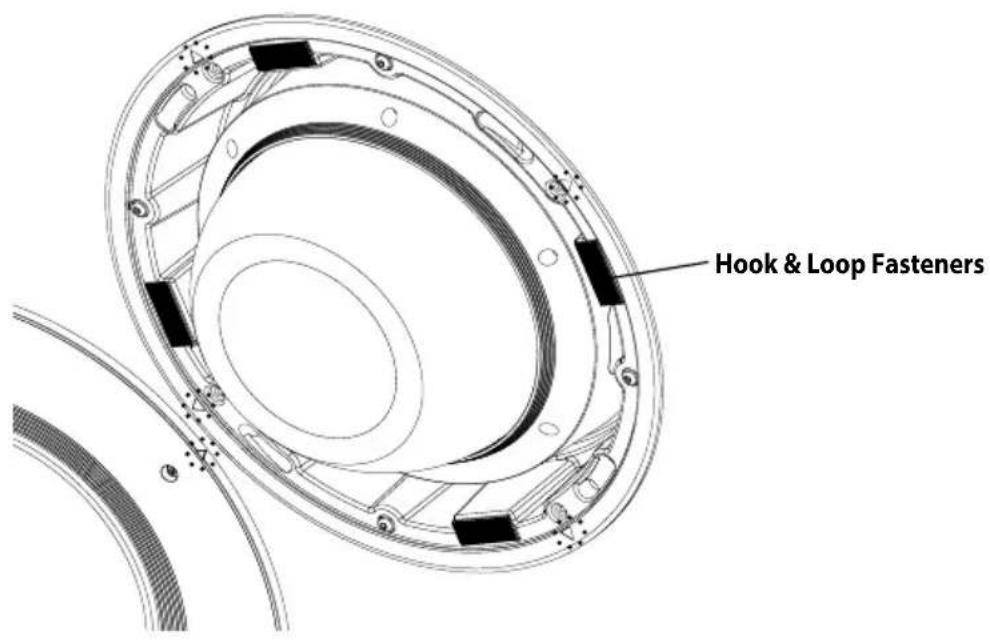
Hook & Loop Fasteners- When all Hook & Loop Fasteners are attached, tighten the four SCREWS on the COVER to fix it to the HOUSING.

■ Since Hook & Loop Fasteners are lightly attached to the surface, they can easily be detached. Therefore, the screws need to be tightened immediately after attaching the Hook & Loop Fasteners.
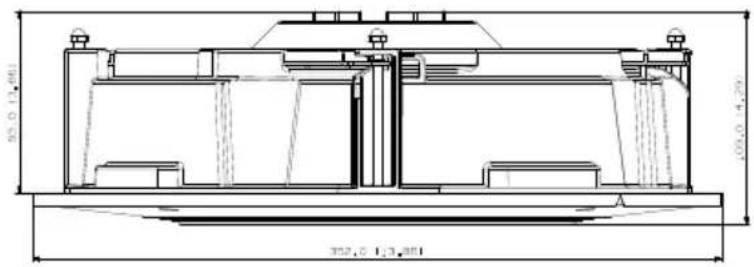
PRODUCT SPECIFICATIONS
| Item Specifications | |
| Dimension (mm) ∅352 | X H109 |
| Weight | 2550g (5.62 lbs) |
| Temperature | -10°C ~ 55°C (14°F ~ 131°F) |
| Material | Aluminum, UL2820 Plenum rated |
| Color White (Cover) | |
Unit: mm (Inches)
text_image
352,0 1/3,301 100,0 1/4,201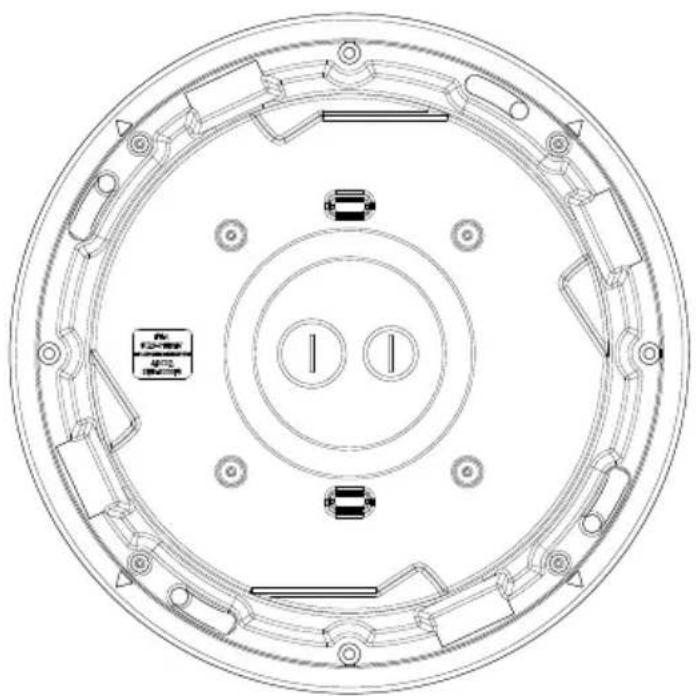
natural_image
Technical line drawing of a circular mechanical component with internal components and mounting holes (no text or symbols)MEMO
Head Office
6, Pangyo-ro 319 beon-gil, Bundang-gu, Seongnam-si,
Gyeonggi-do, 463-400 Rep. of KOREA
Tel: +82.70.7147.8753 Fax: +82.31.8018.3740
www.hanwha-security.com
Hanwha Techwin America
500 Frank W. Burr Blvd. Suite 43 Teaneck, NJ 07666
Toll Free +1.877.213.1222 Direct +1.201.325.6920
Fax +1.201.373.0124
www.hanwhasecurity.com
Hanwha Techwin Europe
Heriot House, Heriot Road, Chertsey, Surrey, KT16 9DT, United Kingdom
Tel +44.1932.57.8100 Fax +44.1932.57.8101
www.hanwha-security.eu