5960-75206T-BRN - Table Hooker - Free user manual and instructions
Find the device manual for free 5960-75206T-BRN Hooker in PDF.

User questions about 5960-75206T-BRN Hooker
0 question about this device. Answer the ones you know or ask your own.
Ask a new question about this device
Download the instructions for your Table in PDF format for free! Find your manual 5960-75206T-BRN - Hooker and take your electronic device back in hand. On this page are published all the documents necessary for the use of your device. 5960-75206T-BRN by Hooker.
USER MANUAL 5960-75206T-BRN Hooker
ASSEMBLY INSTRUCTION
ITEM# 5960-75206B-BLK Balcones 60in Friendship Table Base 5960-75206T-BRN Balcones 60in Table Top w/2-12in Leaves
** Please make sure you have all parts indicated below prior to assembly. This unit is heavy and can best be assembled with the help of two or more people.
| NO. | HARDWARE LIST | Q'TY | |
| A | ALLEN WRENCH | 1 | |
| B | 45MM BOLT | 12 | |
| C | LOCK WASHER | 24 | |
| D | FLAT WASHER | 24 | |
| E | 100MM BOLT | 12 | |
natural_image
Technical line drawing of a rectangular frame and a simple side table with decorative legs (no text or symbols)
natural_image
Line drawing of a decorative table with a rectangular frame and a side table with ornate legs (no text or symbols)
Diagram 1
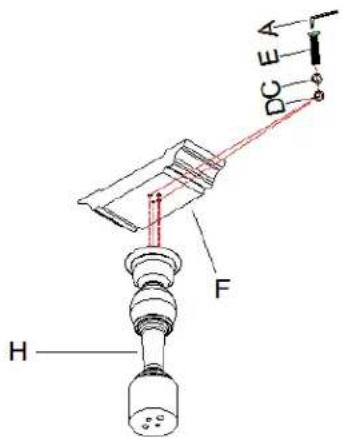
Diagram 2
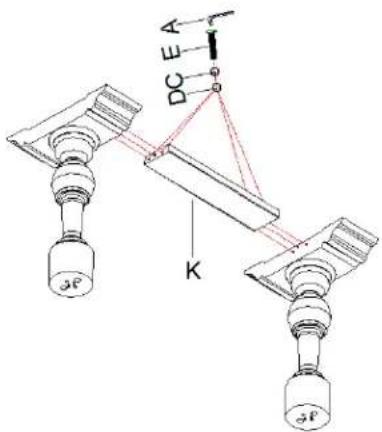
Diagram 3
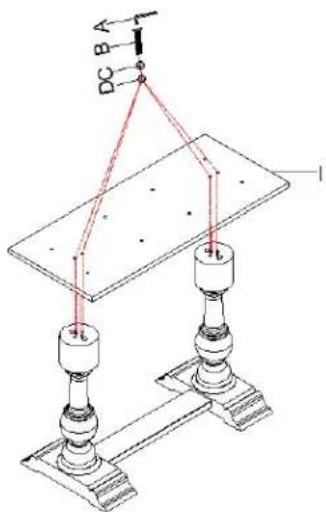
Diagram 4
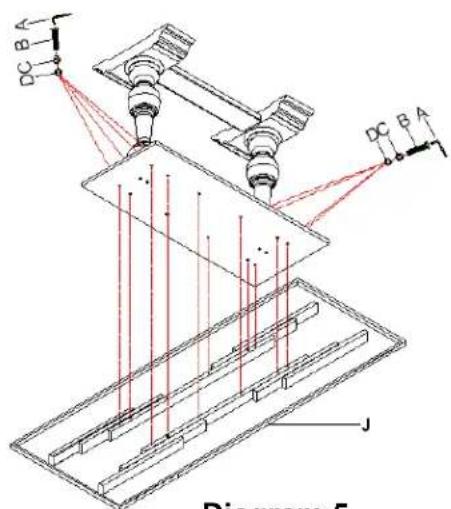
Diagram 5
Note:
- Leaves cannot be switchable. Follow numbers on leaves and top when assemble.
- Height of this table can be adjusted with or without the extension blocks.
Assembly steps with extension blocks:
- Tighten extension blocks (G) on posts by inserting bolts (E), lock washers (C) and flat washers (D), sure bolts with allen wrench (A) in clockwise direction. (See Diagram 1)
- Screw posts (H) to bases (F) by using bolts (E), lock washers (C) and flat washers (D), secure with allen wrench (A) in clockwise direction. (See Diagram 2)
- Attach stretcher (K) to bases with bolts (E), lock washers (C) and flat washers (D), sure all by allen wrench (See Diagram 3)
- Attach mounting plate (I) to post by using bolts (B), lock washers (C) and flat washers (D), tighten all with allen wrench (A). (See Diagram 4)
- Place table top (J) upside down on a soft surface to prevent it from being scratched. Put whole base onto top to make sure all pre-drilled holes are in alignment, well insert bolts (B), lock washers (C) and flat washers (D), tighten bolts by turning with allen wrench (A) in clockwise direction. (See Diagram 5)
- Turn table upright.
Assembly steps without extension blocks:
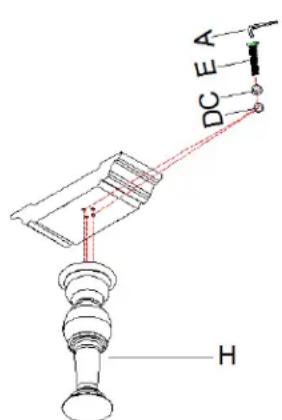
Diagram 6
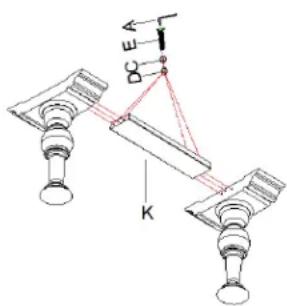
Diagram 7
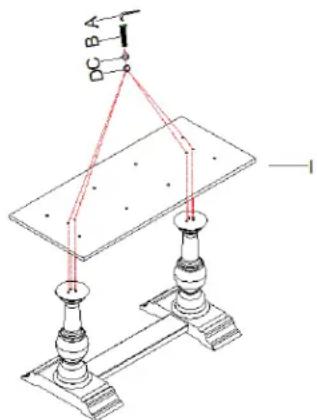
Diagram 8
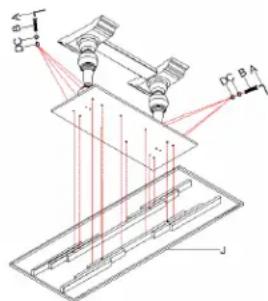
Diagram 9
- Remove extension blocks from posts directly, then assemble table as the above steps. (See Diagram 6 & 7 & 8 & 9)
Instruction for table leaves:
- There are latches at the bottom of table top, turn off the latches as shown in Diagram 10.
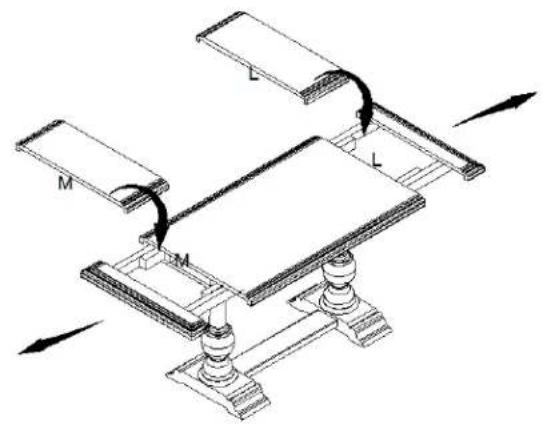
- Pull out table top as the arrow direction shown in Diagram 11.
- Follow numbers on table leaves and top, place table leaves between and push table tops together.
- Turn on latches. (see Diagram 10)
- Take opposite actions to remove table leaves.
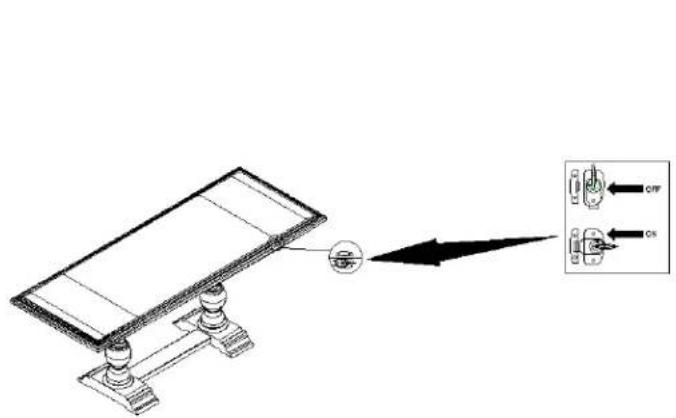
Diagram 10
natural_image
Mechanical assembly diagram showing a frame with two plates labeled 'M' and a central platform, connected by rotating arrows (no text or symbols present)Diagram 11
Cleaning Instruction: Clean finished parts with a damp cloth using a mild dishwashing liquid and water solution. Polish the finish with soft cloth and an industry recognized furniture polish.