5751-75206-95 - Table Hooker - Free user manual and instructions
Find the device manual for free 5751-75206-95 Hooker in PDF.

User questions about 5751-75206-95 Hooker
0 question about this device. Answer the ones you know or ask your own.
Ask a new question about this device
Download the instructions for your Table in PDF format for free! Find your manual 5751-75206-95 - Hooker and take your electronic device back in hand. On this page are published all the documents necessary for the use of your device. 5751-75206-95 by Hooker.
USER MANUAL 5751-75206-95 Hooker
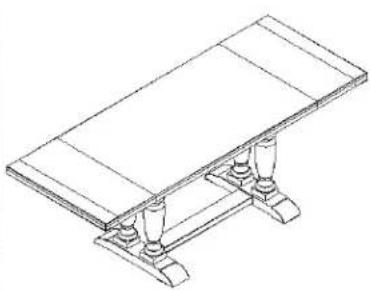
** Please make sure you have all parts indicated below prior to assembly. This table is heavy and can best be assembled with the help of two or more people.
| NO | HARDWARE LIST | Q'TY | |
| A | ALLEN WRENCH | 1 | |
| B | 5/16*50MM BOLT | 4 | |
| C | LOCK WASHER | 24 | |
| D | FLAT WASHER | 24 | |
| E | 5/16*200MM BOLT | 4 | |
| F | 5/16*80MM BOLT | 8 | |
| G | 5/16*35MM BOLT | 8 | |
natural_image
Isometric line drawing of a rectangular table with three legs and a base (no text or symbols)
natural_image
Line drawing of a simple wooden table with four legs and a flat top (no text or symbols)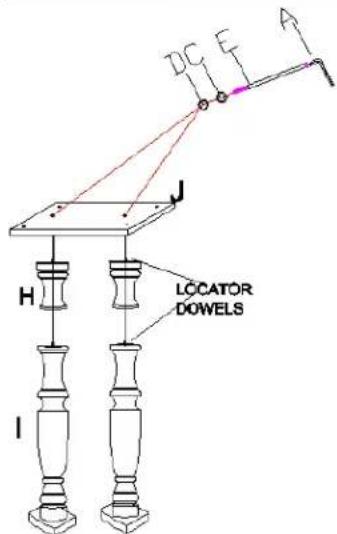
Diagram 1
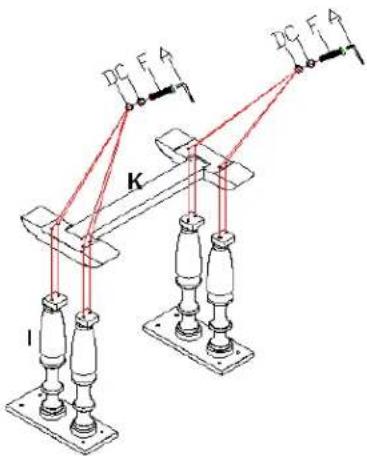
Diagram 2
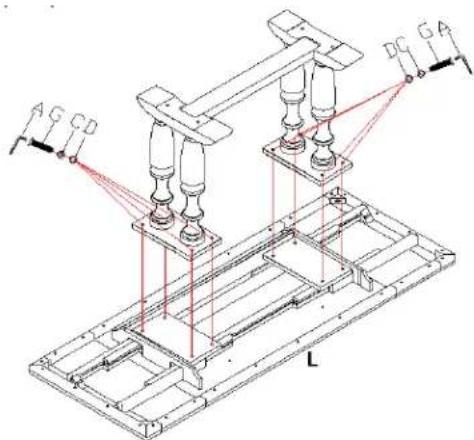
Diagram 3
Note:
- Leaves cannot be switchable. Follow numbers on leaves and top when assemble
- Height of this table can be adjusted with or without extension block. (30" and 36" heights)
Assembly steps with extension blocks:
-
Attach extension blocks (H) to posts (I), then attach mounting plate (J) to posts with extension blocks (H) by using bolts (E), lock washers (C) and flat washers (D), tighten all with allen wrench (A). (See Diagram 1)
-
Attach stretcher (K) to posts (I) with bolts (F), lock washers (C) and flat washers (D), sure all by allen wrench (A)(See Diagram 2)
- Place table top (L) upside down on a soft surface to prevent it from being scratched. Put whole base onto top to make sure all pre-drilled holes are in alignment, well insert bolts (G), lock washers (C) and flat washers (D), tighten bolts by turning with allen wrench (A) in clockwise direction. (See Diagram 3)
- Turn table upright.
Assembly steps without extension blocks:

Diagram 4
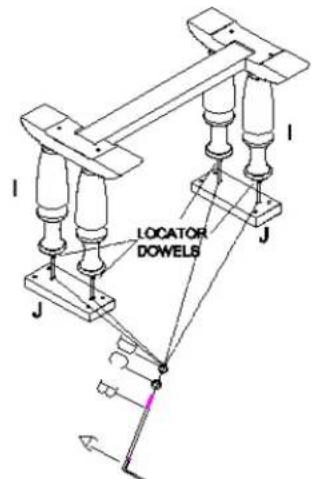
Diagram 5
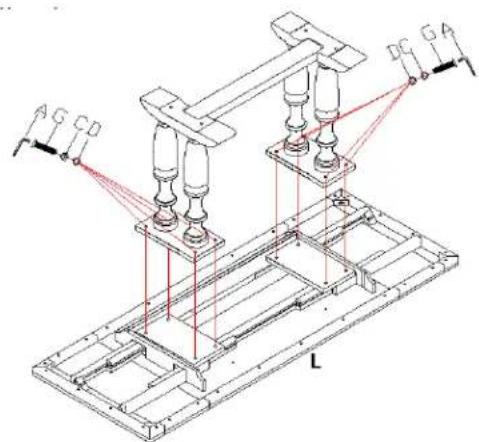
Diagram 6
- Unscrew bolts (E), lock washers (C) and flat washers (D) from mounting bridge (J). Then remove the extension blocks (H) from the posts (I) directly, (See Diagram 4)
- Attach mounting plate (J) to posts by using bolts (B), lock washers (C) and flat washers (D), tighten all with allen wrench (A). (See Diagram5)
- Place table top (L) upside down on a soft surface to prevent it from being scratched. Put whole base onto top to make sure all pre-drilled holes are in alignment, well insert bolts (G), lock washers (C) and flat washers (D), tighten bolts by turning with allen wrench (A) in clockwise direction. (See Diagram 6)
- Turn table upright.
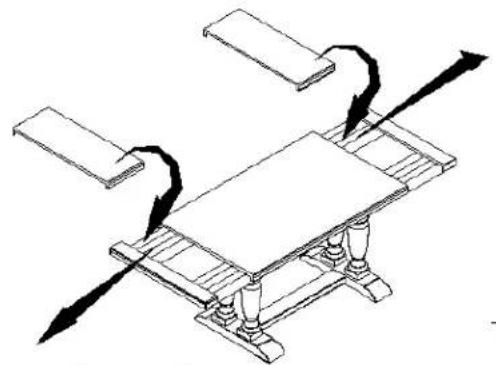
Instruction for table leaves:
- There are latches at the bottom of table top, turn off the latches as shown in Diagram 7.
- Pull out table top as the arrow direction shown in Diagram 8.
- Place table leaves between and push table tops together.
-
Turn on latches. (see Diagram 7)
-
Take opposite actions to remove table leaves.
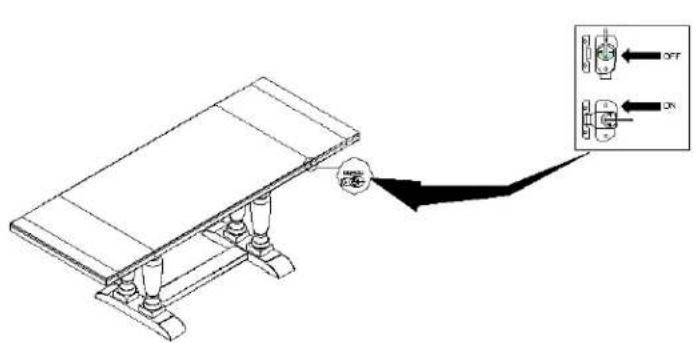
Diagram 7
natural_image
Diagram of a table with directional arrows indicating movement or force, no text or symbols presentDiagram 8
Cleaning Instruction: Clean finished parts with a damp cloth using a mild dishwashing liquid and water solution. Polish the finish with soft cloth and an industry recognized furniture polish.