
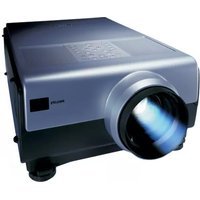
cClear XG1 - Projector PHILIPS - Free user manual and instructions
Find the device manual for free cClear XG1 PHILIPS in PDF.
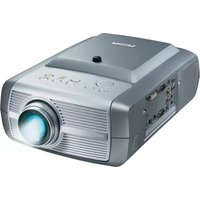


| Brand | Philips |
| Model | cClear XG1 |
| Product Type | Video Projector (Multimedia) |
| Resolution | SVGA (800x600) or XGA (1024x768) - not specified, typical for series |
| Brightness | Approx. 2000-3000 ANSI lumens (estimated based on lamp power) |
| Lamp | 200 W replacement lamp (LCA 3123/00) |
| Lamp Life | Average lamplife (approx. 2000-3000 hours) - indicator when near end |
| Input Signals | Analog VGA (RGB), Digital DVI-D, Component (YPbPr), S-Video, Composite CVBS, USB, RS-232 |
| Connections | Data 2 (VGA), Data 1 (DVI-I), USB (upstream), PS/2, RS-232, Video/CVBS, S-Video, Component (RCA), Audio L/R, Audio Out |
| Horizontal Scan Rate | 15-108 kHz |
| Vertical Refresh Rate | 50-120 Hz |
| Bandwidth | 140 MHz |
| Keystone Correction | Vertical and horizontal (digital scaling) |
| Digital Zoom | 4x, 9x, 16x |
| Picture Modes | Wide screen, Super Zoom 4:3, 4:3, Movie Expand 14:9, Movie Expand 16:9, 16:9 Subtitles |
| PIP / Double Window | Picture-in-Picture and side-by-side projection |
| Audio | Built-in speaker, stereo audio input, bass/treble controls |
| Remote Control | Laser pointer with mouse control (requires USB or PS/2 connection) |
| Features | Auto Source, SmartDimmer (lamp power reduction), SmartSave (auto standby), SecurityMax (PC theft deterrence), Wireless image transfer (cClear Wireless version only) |
| Maintenance | Clean dust filter every 100 hours; clean lens with soft brush; lamp replacement required after life expiry |
| Dimensions (approx.) | 300 × 200 × 100 mm (typical for class) |
| Weight (approx.) | 3-4 kg (estimated) |
| Power Consumption | Approx. 300 W (lamp 200 W + electronics) |
| Safety | Laser pointer: Do not look into beam; Kensington lock slot |
Frequently Asked Questions - cClear XG1 PHILIPS
User questions about cClear XG1 PHILIPS
0 question about this device. Answer the ones you know or ask your own.
Ask a new question about this device
Download the instructions for your Projector in PDF format for free! Find your manual cClear XG1 - PHILIPS and take your electronic device back in hand. On this page are published all the documents necessary for the use of your device. cClear XG1 by PHILIPS.
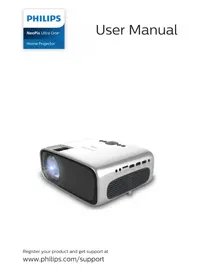
USER MANUAL cClear XG1 PHILIPS
Philips multimedia projector cClear

USB UNIVERSAL SERIAL BUS
English User guide
Index

1. Introduction
4-5
Packaging contents 4
Optional accessories 5
Service accessories 5
2. Functional overview
6-11
Controls 6-9
Remote control 10
Connections 11
3. Set up
12-14
Positioning the projector and screen 12
Switching the projector on and off 12
Adjusting the focus and size of the image 13
Adjusting the vertical angle of the projector 13
Keystone correction 13
Moving/transporting the projector 14
Preparation 14
Moving/transporting the projector 14
Inserting the batteries in the remote control 14
4. Installation
15-23
General information 15
Computer input 15
RS-232 connection 15
Universal Serial Bus (USB) 15
External monitor connection 16
Wireless image transfer (Clear Wireless version only) 16
Video input 16
Connecting to a computer 17-19
Analog connection 17
Connection to an external monitor 18
Digital connection 19
Connecting to video equipment 20-22
CVBS (Video) 20
S-VHS (S-Video) 20
Scart connection 20
Component/HDTV (Pr,Y, Pb/ Cr,Y, Cb) 21
Scart connection (RGBS) 22
Connecting to audio equipment 23
Index
5. Operation 24-40
Preparation 24
General 24
Messages 24-25
Direct key feedback 24
Feedback messages 25
Error messages 25
Warning messages 25
Some examples 18
On Screen Display Menu 26-40
Menu tree 26-28
General explanation 29
Computer adjustments 30-31
Picture adjustments 30
Display adjustments 31
Component/Video/S-Video adjustments 31-32
Picture adjustments 31
Display adjustments 32
General adjustments/settings 33
Settings 33
Audio adjustments 33
General settings 25 27
Examples 34-40
Digital-Zoom/Magnification 34
Auto image 34
Horizontal size 34
Shift 34
Picture in picture (PIP) / Double window 35
PIP / Double window - Possible combinations 36-38
Picture Format 38
Loading your own personal start-up screen 39
Restarting the projector 40
6. Maintenance 41-43
Cleaning 41
Cleaning the cabinet 41
Cleaning the lens 41
Cleaning the dust filter 41
Lamp 42
Lamp replacement 43
Resetting the lamplife time 43
7. Troubleshooting 44-47
1. Introduction

Congratulations on your purchase of one of the most sophisticated and reliable products on the market today. We are sure that, used properly, it will bring you years of enjoyment. You will want to keep this manual handy, as it is a convenient source of information about your projector. For your own protection and prolonged operation of your projector, please read the enclosed Safety Sheet.
Packaging contents
Please confirm that the following items are packed in the projector box. They are provided to help you use or set up your projector.


Projector - Lens cap Projector - Lens cap Laser pointer remote cClear - XG1 Brilliance cClear - XG1 Wireless control + batteries 2 x cClear - SV10 AAA Zinc Carbon, 1.5 V
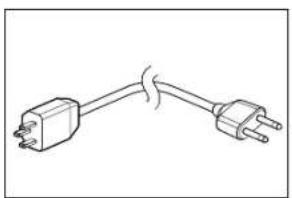


Mains Lead Integrated VGA/USB Cable Audio/Video RCA Cable
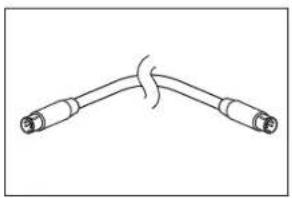

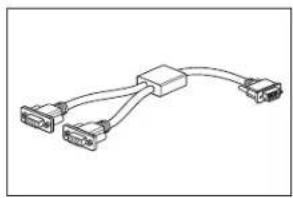
S-Video Cable DVI-I Cable VGA-Y Cable


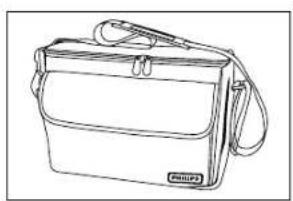
DVI-I/VGA adapter
Scart/RCA Audio Video adapter (not for USA version)
Softbag
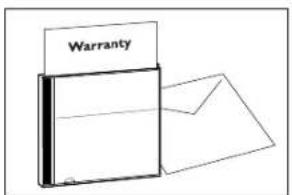

Cd-rom (with Projection Assistant, Warranty card, SecurityMax, User Guide, Data sheet and more.)
Quick set up Card and Safety Sheet
1. Introduction
Optional accessories
The following accessories are available via the dealer from whom you purchased your Philips projector.
• LCA 3123/00 - 200 W replacement lamp - 8670 931 23009 • LCA 2211/00 - Ceiling mount - 8670 922 11009 • LCA 5310/00 - Monitor Y-cable - 8670 953 10009 • LCA 5300/00 - VGA extension cable (15 m) - 8670 953 0009 • LCA 5312/00 - Scart/RCA Component Video adapter - 8670 953 12009
Service accessories
The following accessories are available via the Philips Projectors Service organisation only:
- Compact remote Control - 3139 228 60500 • Laser pointer remote Control - 3139 228 60550 • Dust filter - 3122 434 01570 • Mains lead USA - 4822 321 11294 • Mains lead Euro - 1822 321 11399 • Mains lead UK - 4822 321 11431
- Integrated VGA/USB cable - 3122 438 75120 • MAC adapter (option) - 4822 263 21201 • Audio/Video RCA cable (cinch) - 4822 320 12281 • SCART/RCA Audio Video adapter - 2422 033 00345
- User Guide (CD-ROM) - 3122 438 71130
2. Functional overview
Controls >

A(udio)/V(ideo) Mute ①
Mutes sound and picture of the projector.
Source ②
Selects the current projection source: Auto, RGB sync, YPbPr, RGB sog, S-Video, Video, Multimedia, Wireless (only available on cClear Wireless version), DVI-RGB, DVI-YPbPr. The button toggles between the nine/ten signals.
Volume - / + ③
Adjusts the volume.
Menu ④
Activates and deactivates the menu.
OK ⑤
Confirms actions in the menu when the menu is on screen.
Standby/ Standby indicator ⑥
Switches the projector in or out of the Power/Standby mode. The Standby indicator (text on button/ring around button):
— lights up orange when the projector is warming up; - lights up red when the projector is in Power/Standby mode; — lights up green as when the projector is operating; — slowly blinks orange when the projector is cooling down.
Temperature indicator ⑦
— Lights up red in case of temperature error.
- Flashes in case of fan error.
Lamp indicator ⑧
— Lights up green when the lamp is on. — Lights up orange when lamp life has almost expired. — Lights up red when lamp life has expired. — Fast blinks red when lamp start has failed.
IR sensor ⑨
Receives the signals from the remote control.
Keystone ⑩
Corrects picture distortion of the horizontal and vertical keystone type by internal scaling.
Cursor Control ⑪
Manipulate the mouse cursor on the connected computer as long as the menu is not active. When the menu is active the Cursor Control controls the menu cursor to navigate through the OSD menu. The cursor control works with up/down and left/right button operation.
Note
The Cursor Control can only function as a mouse cursor when projector and computer are connected via the USB or PS/2 connectors. Make sure your operating system supports USB or PS/2.
2. Functional overview
Controls >

Focus ring ⑫ Adjusts the focus of the projected image.
Zoom ring ⑬ Adjusts the size of the projected image.
2. Functional overview
Controls >

Power indicator ⑭
cClear Wireless version only
Lights up green when wireless operation is activated.
Ready indicator ⑮
Lights up green when the projector operates in a wireless network.
WLAN indicator 16 (Wireless Local Area Network)
Lights up green when wireless connection has been made.
Reset 17 Note
Resets all network settings to the default settings.
The Reset button is recessed to prevent accidental resets of the network settings. To reset: Insert e.g. a paperclip into the small hole marked Reset and gently press the Reset button. Do not use excessive force to press the RESET button for this could damage the button.
2. Functional overview
Controls <
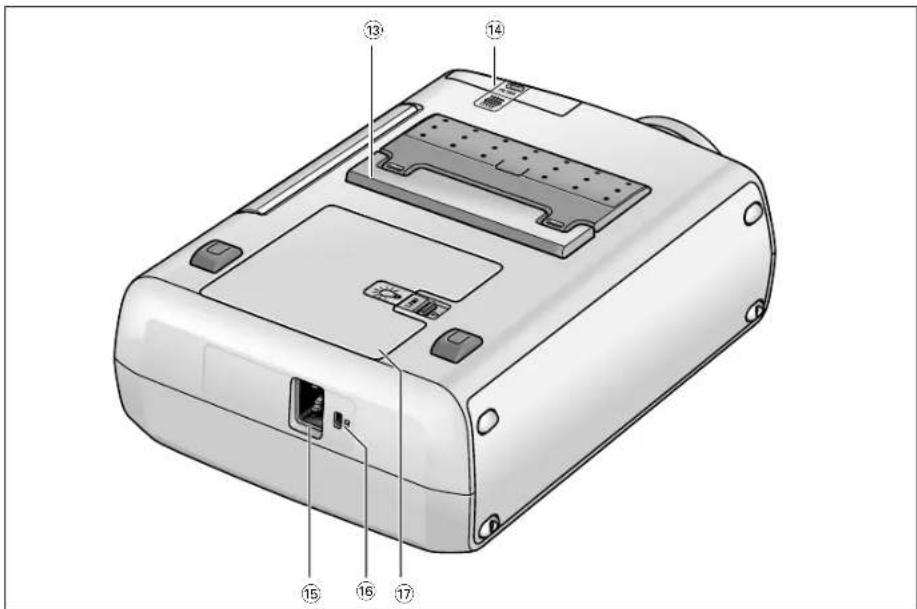
Height/Level adjuster ⑬ To adjust the vertical angle of the projector.
Dust filter ⑭
Mains inlet socket ⑮ To connect the projector to the mains.
Lock slit ⑯ To insert an optional locking device (Kensington lock).
Lamp compartment ⑰
2. Functional overview
Remote control <

Laser ① Activates the laser pointer to indicate items on the screen.
Note: The laser pointer sends out a laser beam. Do not look into this beam!
Mouse Left/Right ② Function as the Left and Right mouse keys of your pc when USB or PS/2 connection has been made.
- Volume + ③ Adjusts the volume.
Menu ④ Activates and de-activates the menu.
A(udio)/V(ideo) Mute ⑤ Mutes sound and picture of the projector.
Source ⑥ Selects the current projection source: Auto, RGB sync, YPbPr, RGB sog, S-Video, Video, Mutimedia, Wireless (only available on cClear wireless version), DVI-RGP, DVI-YPbPr. The button toggles between the nine/ten signals.
Window Mode ⑦ Selects projection from one or two input sources. The button toggles between:
- Default - only images from current source projected
- Double Window - images from two sources projected next to each other

- PIP - images from second source projected within currently shown image.

Window Select ⑧ Selects the window for which you wish to change settings when in PIP or Double Window mode.
Stand by On ⑨ Switches the projector in or out of the Power/Standby mode.
Cursor Control ⑩ Manipulates the mouse cursor on the connected computer as long as the menu is not active. When the menu is active the Cursor Control controls the menu cursor to navigate through the OSD menu. The cursor control works with up/down and left/right button operation.
Note The Cursor Control can only function as a mouse cursor when projector and computer are connected via the USB or PS/2 connectors. Make sure your operating system supports USB or PS/2.
OK ⑪ Confirms actions in the menu when the menu is on screen.
Laser pointer ⑫ Exit point of laser pointer.
2. Functional overview
Connections <

Data source connections
Data 2 ① Input socket to connect to the analog (VGA) Data out terminal of a computer.
Data 1 (DVI) ② Input socket to connect to the digital (DVI) Data out terminal of a computer.
Data Audio 1/2 ③ Input sockets to connect to the Audio out terminal of the computer connected to Data 2 or Data 1(DVI).
USB (upstream) ④ In-/Output socket to connect a PC or Apple Macintosh computer equipped with a USB downlink connection. When USB connection is used the mouse cursor on the connected computer can be controlled via the projector remote control. Audio information from the computer will be heard via the projector speaker. Note When the bSure2 Brilliance projector is connected to the computer via the USB socket,
PS/2 ⑤ In-/Output socket to connect a PC or Apple Macintosh computer equipped with a PS/2 connection. When PS/2 connection is used the mouse cursor on the connected computer can be controlled via the projector remote control.
RS-232 ⑥ Input socket to connect to the RS-232 output socket of RS-232 control systems. When RS-232 connection is used the projector can be operated via the RS-232 control system.
Video source connections
Video Audio L/R ⑦ Input sockets to connect to the Audio out sockets of a video recorder, laser disc player, video camera or TV with A/V output socket.
CVBS (Video) ⑧ Input socket to connect to the Video out socket of a video recorder, Laser Disc player, video camera, DVD player, or TV with AV output socket. This socket can be connected to CVBS output sockets.
Audio Out ⑨ Output socket to connect to the Line Input sockets of an amplifier or stereo system.
Component in (R/Pr/Cr - G/Y - B/Pb/Cb) ⑩ Input sockets to connect to DVD- and HDTV-video equipment These sockets can be connected to the following output sockets: RGB-Y, YCbCr, YPbPr (480p, 720p, 1080 i).
S-Video ⑪ Input socket to connect to the S-Video out socket of a S-VHS video recorder, a VCR, Laser Disc player, DVD player, video camera or TV with AV output socket. This socket can be connected to a S-Video/S-VHS (Y/C) output socket.
3. Set up >
Positioning the projector and screen

- Place the projector on a stable, level surface, out of direct sunlight and away from sources of excessive dust, dirt, heat, water, moisture, vibration and strong magnetic fields.
- Allow sufficient cooling of the product by keeping all air inlets and outlets clear from obstructions.
- Position the projector in such a way that viewers cannot look directly into the projector light beam.
- Choose a screen size suitable for the number of viewers and the size of the room. Picture quality is best when you sit directly in front of the projector screen.
- The projector can be used for front projection, rear projection, and ceiling projection applications. As a default factory setting, the projector has been set up for front projection. You can change to rear or ceiling projection via the 'Mirror' function in the 'Picture' menu.
- For more information on the projection properties of the projector, please check the 'Projector Assistant' program on the CD-ROM.
Switching the projector on and off


1. Insert the mains lead into the projector's mains inlet socket and connect it to the wall outlet.
- The Standby indicator lights up red; the projector is now in Power/Standby mode.
2. Remove the lens cap.
3. Press the Standby button on the projector or remote control to switch the projector on.
- The Standby indicator lights up orange.
- When the projection lamp is on, the Standby indicator lights up green and the start-up screen appears for several seconds.
4. Press the Standby button to switch the projector back into Power/Standby mode.
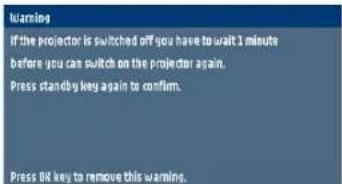
- The Standby Warning screen will appear for 20 seconds.
- The Standby Warning screen can be removed by pressing the OK button.
5 Press the Standby button again to confirm.
- The projector will now go into Power/Standby mode.
You can also press the Standby button twice in succession to switch the projector into Power/Standby mode immediately.
3. Set up
6 To switch off the mains supply completely, disconnect the mains lead.
— Save energy! Please put the projector in the Power/Standby position if you are not going to use the projector for more than 15 minutes. - When no signal inputs are detected for 30 minutes, the projector automatically switches to Power/Standby ('SmartSave' - SV10 and XG1 Brilliance versions only). This setting can be changed in the 'Settings' menu. — Before disconnecting the mains lead, make sure that the cooling fan has stopped (about 3 minutes after the projector has been switched to Power/Standby).
Adjusting the focus and size of the image
Adjusting the vertical angle of the projector

Keystone correction
- Use the Zoom ring to adjust the size of the image.
- Use the Focus ring to adjust the focus of the image.
To raise:
- Keep button A pressed and lift to raise the projector.
- The Height/Level Adjuster B will come out.
To Lower:
- Keep button A pressed and gently lower the projector.
- Use the Focus Ring and Zoom Ring to readjust the focus and size of the image.
If projector and screen are not properly lined up, the picture will be distorted, producing a keystoned image (picture top width larger than picture bottom width or vice versa/picture left side width larger than picture right side width or vice versa). When a keystoned image occurs the image ratio (4:3, 16:9) will still be guaranteed (only when the projector is positioned straight in front of the screen). This is especially important when the projector is being used together with an 'intelligent whiteboard'.
'Keystone correction' allows you to correct picture distortion of the vertical and horizontal keystone type by internal scaling.
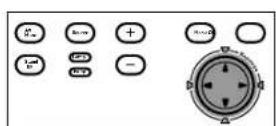
- Use Keystone Δ to heighten the image in vertical direction.
- Use Keystone ∇ to lower the image in vertical direction.
- Use Keystone ▷ to widen the image in horizontal direction.
- Use Keystone ◀ to narrow the image in horizontal direction.
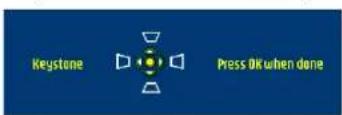
- As soon as the Keystone key is pressed, the Keystone feedback window will appear on the screen.
- The Keystone correction function is also accessible through the 'Keystone' option in the 'Settings' menu of the On Screen Display (OSD) menu.
3. Set up
Moving/transporting the projector
Preparation
1 Press the Standby button twice to put the projector in Power/Standby. — The Standby indicator starts blinking orange. 2 Wait until the cooling fan has stopped (about 3 minutes after the projector has been put in Standby) and disconnect the mains lead and all other cables. 3 Put the lens cap back in place to prevent dust, dirt or other contamination from harming or damaging the front of the projector lens when moving the projector. Never place the projector on the side where the connections are located.
Moving/transporting the projector
The projector contains many glass and precision parts. If you need to transport the projector, please follow these packing instructions to prevent accidental damage to the projector.
- When you are hand-carrying the projector, be sure to use a carrying case like the softbag supplied.
- When shipping the projector, use the original packaging material if possible. If you do not have the original packaging, use equivalent materials, placing plenty of cushioning around the projector.
- When transporting the projector as freight or checked luggage, first put it in a carrying case, then pack it in a firm box, using cushioning around the case.
Inserting the batteries in the remote control
Note
1 Push and slide the lid in the direction of the arrow. 2 Install two 'AAA' batteries as indicated inside the battery compartment. 3 Replace the lid and snap it into place.
The maximum range of the remote control is approximately 15 m (± 50 feet).
4. Installation
General
General information
Computer input
The computer input is suitable for both Apple Macintosh computers (Power Book and Power Mac) as well as for IBM compatible PCs. The projector is Microsoft (R), Windows (R) 95/98/ME/2000/XP compatible and accepts input signals from all computers that meet following specifications:
- Multi scan VGA-SXGA • Horizontal scan rate: 15-108 kHz • Vertical refresh rate: 50-120 Hz • Bandwidth: 140 MHz • Display Data Channel DDC: 1/2B
Analog (VGA) connection
The data (VGA) output of IBM compatible PCs can be connected directly to the Data 2 input of the projector using standard data cables. When connecting the projector to a Macintosh computer equipped with a 2-row, 15-pin connector, a VGA/MAC adaptor (available at your PC store) is required. If your computer is equipped with a 3-row connector, no adaptor is needed.
The Data 2 input socket accepts input signals of the following formats: 480p, 720p, 1080i, RGBHV, and RGBSOG.
Digital (DVI) connection
The DVI input socket (Data 1) allows direct digital connection to your computer. Digital-to-analog conversion by means of an adaptor is therefore no longer necessary, and the computer is automatically optimized to work with the projector, resulting in the highest possible picture quality. The socket is also backward compatible with analog computers (via the DVI-I/VGA adapter supplied) and accepts input signals of the following formats: RGBHV (analog), RGBSOG (analog), and DVI (digital).
RS-232 connection
When RS-232 connection is used, the projector can be operated via an RS-232 control system, and the projector status can be checked on the control system screen. See the RS-232 protocol file (ProjectorMax) on the CD-ROM on how to include projector commands in an external control system.
Universal Serial Bus (USB)
The Universal Serial Bus (USB) connector allows you to connect to computers equipped with a USB interface, resulting in real hot plug and play presentation.
Mouse control:
By connecting USB, the mouse function on the Remote Control automatically gets installed.
You can now manipulate the mouse cursor on the computer and on the screen, using Cursor Control on the remote control. The Mouse Left/Right keys on the remote control function as Left and Right mouse keys of your PC.
Audio (only with bSure2 Brilliance version);
Audio information from the computer will be heard via the projector speaker.
Drag and drop facility:
Drag and drop via the remote control works slightly differently than via the PC mouse. Here's how:
- Use Cursor Control to select the item to be moved.
- Press and keep pressed Mouse Left.
- Use Cursor Control to move the selected item. Then release Mouse Left.
- The item will now be moved.
- Press Mouse Left when the item reaches the required location.
- The item will now be dropped.
Theft deterrence (PC only)
The SecurityMax™ application, supplied on the CD-ROM, allows you to take a number of precautions against unauthorized use of your projector. Once the application is installed, you can, for example, set your own code-protected personal start-up screen and shutdown timer which make theft unattractive to any potential thief. You only need to run the SecurityMax™ software on the PC that is connected to your projector via the Universal Serial Bus. For this feature, see the 'SecurityMax' user guide on the CD-ROM.
4. Installation
General information
Notes
— Mouse control and 'drag and drop' is also possible when PS/2 connection has been made. - Based on the specific hardware and software configuration available, Apple Macintosh computer users could experience incomplete or erratic USB functionality. These problems are not related to the performance of your projector.
External monitor connection
A separate external monitor (or a second projector) can be connected to the projector, using the VGA-Y cable supplied. The image projected is simultaneously shown on the monitor, even when the projector is in Power/Standby or Off mode.
Wireless image transfer
(Clear Wireless version only)
The 'PresenterMax' application, supplied on the CD-ROM, allows wireless transmission of screen images and graphic files from your computer (PC only) to the projector. For installation and operation see the 'PresenterMax' user guide on the CD-ROM.
Note
'PresenterMax' can also be downloaded directly from the projector via Internet Explorer. For this see the 'PresenterMax' user guide on the CD-ROM.
Video input
The projector accepts the input signal of all major video formats: CVBS: NTSC 3.58, 4.43, PAL B, G, D, H, I, N, M and SECAM B, D, G, K, K1, L. S-VHS:Y/C. Component video: RGBY, 480i, 576i, 480p, 720p and 1080i. EDTV/HDTV: 480p, 575p, 720p/(50/60), 1035i/(30), 1080i/(25/30/AUS), 1080p/(30).
The projector will recognize these standards and adapt to them automatically. With the 'Picture Format' feature you can select one of six picture format options: wide screen, super zoom 4:3, 4:3, movie expand 14:9, movie expand 16:9, 16:9 subtitles.
Stereo Audio Output
A standard 3.5 mm audio plug is available for connecting external audio equipment via a standard 3.5 mm stereo plug. Constant ('Line') or variable ('Regulated') audio output volume can be selected in the 'Audio' menu.
CAUTION
Always switch off projector and external equipment before making any connections.
4. Installation
Connecting to a computer >

Analog connection
1. Connect the Data (out) socket of the computer to the Data 2 socket of the projector and secure the plugs by tightening the thumb screws. For this, use the VGA/USB cable supplied (1a). 2. Connect the USB/USB Audio (upstream) socket of the projector to the USB downstream port of the computer. For this, use the VGA/USB cable supplied (1b). Or: 2. Connect the PS/2 (out) socket of the projector to the PS/2 (in) socket of the computer. For this, use an optional PS/2 cable (2).
- You can now manipulate the mouse cursor on the computer and on the screen, using Cursor Control on the remote control. When using the USB connection, make sure Windows 98, Windows ME, Windows 2000 or Windows XP is installed on the computer.
- The display settings of the computer will be changed to fit the capability of the projector.
- Audio information from the computer will now be heard via the projector speaker (only with bSure2 Brilliance version).
- When no USB connection has been made, you can connect the Audio out socket of the computer to the Data 2 Audio socket of the projector. For this use an optional audio cable (3). – Audio information from the computer will now be heard via the projector speaker.
- When switching on, first switch on the projector and then the PC.


4. Installation > Connecting to a computer
Connecting to an external monitor
1. Connect the VGA Y connector marked 'Projector' (4a), of the VGA Y-cable supplied, to the Data 2 socket of your projector. 2. Connect the VGA cable supplied (1a) between the computer and the VGA Y connector marked 'Computer' (4b). 3. Connect the VGA Y connector marked 'Monitor' (4c) to the VGA cable (5) of the monitor. 4. Switch on your Computer, projector and external monitor. — The image projected is simultaneously shown on the monitor.
4. Installation
Connecting to a computer >

Digital connection
1. Connect the DVI (out) socket of the computer to the Data 1 (DVI) socket of the projector and secure the plugs by tightening the thumb screws. For this, use the DVI cable supplied (4). 2. Connect the USB/USB Audio (upstream) socket of the projector to the USB downstream port of the computer. For this, use the VGA/USB cable supplied (1b).
or:
2 Connect the PS/2 (out) socket of the projector to the PS/2 (in) socket of the computer. For this, use an optional PS/2 cable (2).
- You can now manipulate the mouse cursor on the computer and on the screen, using Cursor Control on the remote control. When using the USB connection, make sure Windows 98, Windows ME, Windows 2000 or Windows XP is installed on the computer.
- The display settings of the computer will be changed to fit the capability of the projector.
- Audio information from the computer will now be heard via the projector speaker (only with bSure2 Brilliance version).
- When no USB connection has been made, you can connect the Audio out socket of the computer to the Data 1 Audio socket of the projector. For this use an optional audio cable (3). — Audio information from the computer will now be heard via the projector speaker.
DVI to VGA connection
If your computer is not equipped with a DVI output:
1 Connect the DVI/VGA adaptor (4) supplied to the Data 1 (DVI) socket of the projector. 2 Connect the VGA/USB cable supplied (5) to both adaptor and Data out socket of the computer. 3 Make the other connections as described above. - When switching on, first switch on the projector and then the PC.
4. Installation
Connecting to video equipment >

CVBS (Video)
1 Connect the Video (out) socket of a VCR, Laser Disc player, video camera or TV to the CVBS (Video in) socket of the projector. For this, use the video/audio connection cable (1a) supplied.
2 Connect the Audio out L/R sockets of the VCR, Laser Disc player, video camera or TV to the Video/Audio (in) L/R sockets of the projector. For this, use the audio/video connection cable (1b) supplied.
S-VHS (S-Video)
1. Connect the S-Video (out) socket of a S-VHS video recorder, Laser Disc player, video camera, or TV to the S-Video (in) socket of the projector. For this, use the supplied S-Video connection cable (2).
2. Connect the Audio out L/R sockets of the S-VHS video recorder, Laser Disc player, video camera, or TV to the Video/Audio (in) L/R sockets of the projector. For this, use the supplied audio/video connection cable (1b).
Scart connection
Scart adapter (not for USA version)
CVBS (Video)
1. Connect the supplied Scart/RCA Audio Video adapter to the Scart connector of the VCR, Laser Disc player, video camera, or TV. 2. Plug the supplied video/audio connection cable into both the adapter and the CVBS and Video/Audio (in) L/R sockets of the projector.
Scart adapter (not for USA version)
S-VHS
3. Plug the supplied S-Video connection cable into the VCR and the S-Video socket of the projector.
4. Installation
Connecting to video equipment >

Component/HDTV
Pr/Cr, Y, Pb/Cb
1. Connect the Component in sockets (Pr/Cr, Y, Pb/Cb) of the projector to the appropriate output sockets of your Component- or HDTV-video equipment (Pr, Y, Pb / Cr, Y, Cb). For this, use the supplied audio/video connection cable (1).
2. If required, you can connect the Audio out L/R sockets of the Component- or HDTV-video equipment to the Video/Audio (in) L/R sockets of the projector. For this, use an optional audio connection cable (2).
Audio information from the Component- or HDTV-video equipment will be played via the projector speaker.
4. Installation
Connecting to video equipment
Scart connection


RGBS
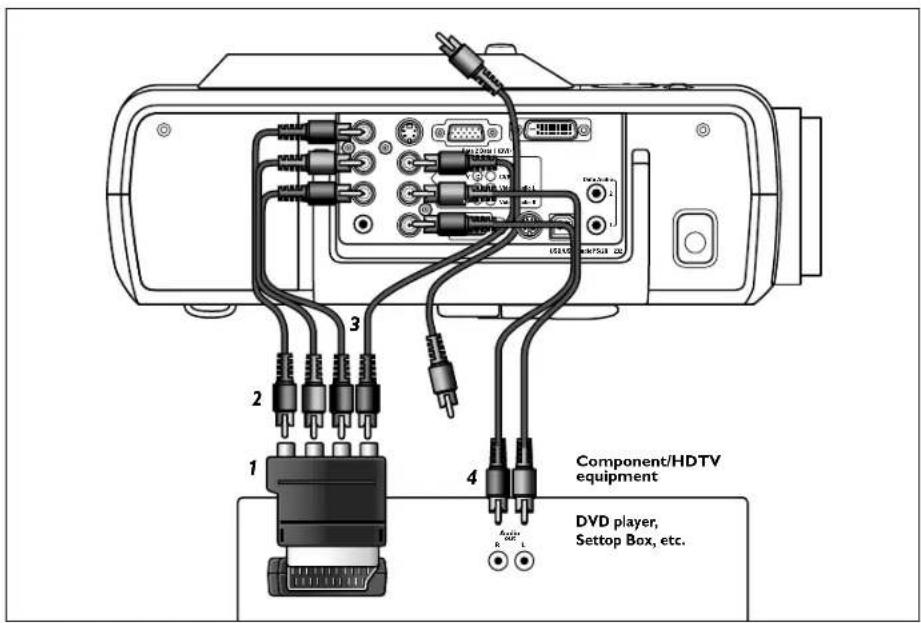
1. Connect an optional Scart/RCA Component Video adapter (1) to the Scart connector of your Component- or HDTV-video equipment. 2. Connect the Component in sockets of the projector (Pr/Cr, Y, Pb/Cb) to the R, G, and B outputs of the adapter. For this, use the audio/video connection cable supplied (2). 3. Connect the Video input of the projector to the Y output of the adapter. For this, use an optional audio/video connection cable (3). 4. Select 'RGB sync' or 'RGB sog' input by pressing the Source button.
- 'RGB sync' or 'RGB sog' appears on the screen.
- If required, you can connect the Audio out L/R sockets of the Component- or HDTV-video equipment to the Video/Audio (in) L/R sockets of the projector. For this, use an optional audio connection cable (4).
- Audio information from the Component- or HDTV-video equipment will be played via the projector speaker.
4. Installation
Connecting to audio equipment


1. Connect the Audio in L/R sockets of an amplifier or stereo system to the Audio Out socket of the projector. For this, use an optional audio/video connection cable (1).
2. Press Menu.
- The menu bar appears on the screen.
3. Use Cursor Control to move to 'Audio'.
4 Select 'Audio Out' using Cursor Control and select 'On'.
- The volume can be adjusted using the Volume control of the amplifier or the Volume + keys of the remote control.
Always turn down the volume control of the connected amplifier before switching it on, to prevent damage to the speakers.
5. Operation
Preparation >
General

1 Press the Standby button on the projector or remote control to switch on the projector.
– The Standby indicator lights up orange. - When the projection lamp is on, the Standby indicator lights up green and the start-up screen (when enabled) appears for several seconds.
2 Switch on the computer or start video playback.
- A feedback message appears on the screen, indicating the selected source. 3 Use the Source button to select the required source: Auto, RGB sync, YPbPr, RGB sog, S-Video, Video, Multimedia, Wireless (only available on cClear wireless version), DVI-RGP, DVI-YPbPr.
Notes Messages
- When only one input source is connected, this source will automatically be selected ('Auto Source'). When more input sources are connected, the source with the highest priority will be selected: Auto, RGB sync, YPbPr, RGB sog, S-Video, Video, Multimedia, Wireless (only available on cClear wireless version), DVI-RGP, DVI-YPbPr. Source selection can also be done via the 'Source' option in the 'Settings' menu.
- Every 100 hours of use, the start-up screen will display a message to remind you to clean the dust filter.
Direct key feedback
Direct key feedback is given when settings/adjustments are made directly via the remote control or local keyboard. Feedback is given by means of a slider, a simple dialog or a list of options.
Sliders are used when setting e.g.:
- volume;
- picture size;
- brightness;
- contrast;
- colour tracking.
Dialogs are used when setting e.g.:
- horizontal/vertical keystone;
- mirror.
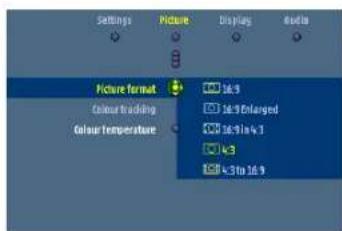
Lists are used when setting/selecting e.g.:
- smart picture;
- picture format;
- source; -language.

5. Operation
Prep
Feedback messages
Feedback messages are displayed in the top right corner of the screen. They are displayed e.g. when:
— a signal comes up or goes down; - an input source is changed; - the PIP input source is changed; - the Freeze, Mute or A/V Mute function is activated; - the Key lock, or Zoom function is (de-)activated; - the local keyboard or remote control is used when Key lock is activated.


Error messages
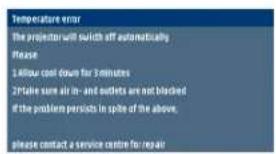
Error messages are displayed when there is a serious technical problem. They can occur at any time during operation and require immediate action. Error messages are displayed in the centre of the screen, indicating the problem and its possible solution. They are displayed e.g. when:
- a temperature error occurs. E.g. the internal temperature is too high. The message will appear together with the red blinking Error indicator.
- a fan error occurs. E.g. one of the fans has a failure;
- resolution or refresh rate is too high. Data source cannot be shown.


Warning messages
Warning messages are displayed in the top right corner of the screen. They are displayed e.g. when:
– lamplife time has almost expired; - lamplife time has expired.


5. Operation
On Screen Display Menu >
Menu tree
All video and data adjustments and settings (except A/V Mute) are done via On Screen Displays and with help of Menu, OK and Cursor Control on the projector or the remote control. The projector is set to standard settings at the factory. However, you can adjust these settings to suit your own preferences. The projector menu screens allow you to adjust the various projector settings (for both Computer and Video). For explanation and operation see next pages.

![graph TD A["Picture Brightness 0 (min) - 100 (max)"] --> B["Contrast 0 (min) - 100 (max)"] B --> C["Sharpness 0 - 1 - 0"] C --> D["Hue (NTSC only) - 0 - 100"] D --> E["Saturation 0 - 100"] E --> F["Mirror - A g ∀ B"] F --> G["Picture Format"] G --> H["4:3"] H --> I["movie expand 14:9"] H --> J["movi…](/content/2026/06/1202756/images/02203100f5032f71d98211b23cbfc1e7ae3eeb6180ba850a4a774cc1ca41ad23.jpg)


![graph TD A["Display"] --> B["Window mode"] B --> C["Default"] B --> D["Double Window"] B --> E["PIP"] A --> F["PIP Location"] F --> G["Image 1"] F --> H["Image 2"] F --> I["Image 3"] A --> J["PIP Format"] J --> K["Small"] J --> L["Medium"] J --> M["Large"] A --> N["Window select"] N --> O["Main, Sec…](/content/2026/06/1202756/images/12c59ea959ddcafcf56546687806fa3c4d2aaf314667c7669ce7d72f7d3006f3.jpg)
5. Operation
On Screen Display Menu >
COMPUTER MODE
Main menu Sub menu Setting


![graph TD A["Picture Brightness 0 (min) - 100 (max)"] --> B["Contrast 0 (min) - 100 (max)"] B --> C["Mirror"] C --> D["A B ∀ B"] E["Picture Format wide screen"] --> F["4:3"] F --> G["super zoom 4:3"] F --> H["movie expand 14:9"] F --> I["movie expand 16:9"] F --> J["16:9 subtitles"] K["Colour trackin…](/content/2026/06/1202756/images/42a29a02c003703091b34b167a2f50e0887ba09f29ba6b6b751f5096638a6de8.jpg)
![graph TD A["Display Window mode Default"] --> B["PIP Location"] B --> C["Double Window PIP"] A --> D["Window select Main, Second window"] D --> E["Freeze On Off"] D --> F["Zoom Off, 4x, 9x, 16x"] A --> G["Auto Image"] G --> H["Off On Horizontal Size: 0, 100; Phase: 0, 100; Shift: Cursor controlled S…](/content/2026/06/1202756/images/ee4b4e703b9b7b581d2cd718b937556a93284a35db48b45e34e9d0ba4dcf5914.jpg)
5. Operation
On Screen Display Menu >
Menu tree GENERAL ADJUSTMENTS/SETTINGS

Main menu Sub menu Setting![graph TD A["Settings Language Deutsch"] --> B["English"] A --> C["Français"] A --> D["Espanol"] A --> E["Italiano"] A --> F["Nederlands"] A --> G["Português"] A --> H["中文"] A --> I["Keystone"] I --> J["SmartDimmer On Off"] I --> K["Source Auto"] K --> L["RGB sync"] K --> M["YPbPr"] K --> N["RGB sog"…](/content/2026/06/1202756/images/9da50d40dffc33c025f1aa6659b16dca2df415210231320a2958cc4d53572747.jpg)

![graph LR A["Audio"] --> B["Volume"] B --> C["0"] B --> D["Bass"] D --> E["0"] D --> F["Treble"] F --> G["0"] F --> H["Mute"] H --> I["Off On"] H --> J["Audio out"] J --> K["Off On"]](/content/2026/06/1202756/images/5b8b3a083d6da08763323b8ef8130e0ce959cb5328fb754ff9fc83a7ca9b4cc9.jpg)
General explanation


5. Operation
On Screen Display Menu >
1 Press Menu.
– The menu bar appears on the screen.
The first item is highlighted and its sub menu is shown.
Depending on the selected source (Auto, RGB sync, YPbPr, RGB sog, S-Video, Video, Mutimedia, Wireless (only available on cClear wireless version), DVI-RGP, DVI-YPbPr) some options of the submenu may be disabled. This indicates that these functions:
- are not available in a certain mode,
– have no function for the selected source.
For example:
- Horizontal size under menu 'Settings' when Auto image is switched to ON.
- Hue under menu Picture when signaltype is not NTSC.
2 Use Cursor Control left and/or right to move the cursor to any other item in the menu bar.
- When more items are available than can be shown in one screen, this will be indicated by the bottom of the list. Move the cursor down to go to the next list of items. Move the cursor up to go back to the first list.
- When a selection list in a submenu contains more items than can be shown in one screen, this will be indicated by a list the bottom of the list. Move the cursor down to go to the next list of items. Move the cursor up to go back to the first list.
4 Adjustments are generally made by setting an on screen slider to the required value. For this use Cursor Control left/right. Confirm the adjustment by pressing OK.
Settings are generally made by selecting the required item from a list of options. For this use Cursor Control up/down. Confirm the setting by pressing OK.
5 Select the next item to be adjusted in the sub menu and adjust as described above.
6 Press Menu to close the On Screen Menu Display.
5. Operation
On Screen Display Menu >
Computer adjustments
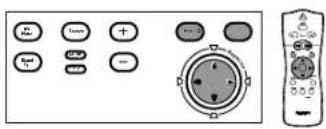


Note
For computer signal input, the following 'Picture' and 'Display' adjustments can be made.
Picture adjustments
- Press Menu and select 'Picture' in the menu bar. The following 'Picture' adjustments can now be made, following the instructions under 'General explanation':
- Brightness
adjusts brightness of the displayed picture;
- Contrast
adjusts the overall contrast intensity;
- Mirror
mirrors the picture for use of the projector in various positions with respect to the user(s) and the projection screen;
- Picture Format
selects one of six picture format options (wide screen, super zoom 4:3, 4:3, movie expand 14:9, movie expand 16:9, 16:9 subtitles);
- Colour tracking
selects between 'Vivid' and 'Natural' representation of colours in the picture.
'Vivid' is automatically set when computer input is used;
'Natural' is automatically set when video input is used.
- Colour Temperature
adjusts the overall colour impression from warm to cool.
The various colours (red, green and blue) can also be adjusted individually.
Tip for Windows users
To adjust size and phase correctly:
1 Select 'Start' and then 'Shut down' from the Windows Taskbar. 2 Adjust the projector's size control, so that no vertical bars are visible. 3 Now adjust the projector's phase control for maximum brightness of the projected image. 4 Press 'No' in the Windows shutdown screen to cancel the shutdown action.
Display adjustments
- Press Menu and select 'Display' in the menu bar. The following 'Display' adjustments can now be made, following the instructions under 'General explanation':
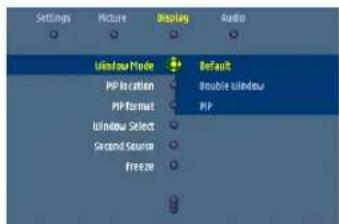
- Window mode
selects projection from one or two input sources.
Default - only images from current source projected
Double Window - images from two sources projected next to each other.
PIP (Picture In Picture) - images from second source projected within currently shown image.
- PIP location
Selects the location of the PIP window on the main window.
- Window select
Selects the window for which you wish to change settings when in Double Window mode.
- Freeze
Captures a moving picture (still picture).

5. Operation
On Screen Display Menu >
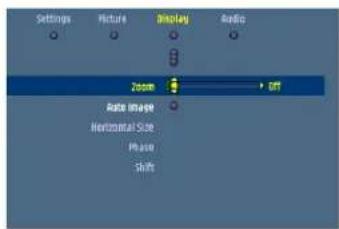
- Zoom enlarges a part of the picture. - Auto image automatically sizes and positions the image to fit optimally in the screen picture. - Horizontal size adjusts the computer image in a horizontal direction to make the image completely fill the screen. - Phase minimizes picture imperfections. When connecting the projector to your PC for the first time, be sure to adjust the phase control for optimal readability of the projected text. - Shift adjusts the computer image in horizontal and vertical direction to center it on the screen.
Component/Video/S-Video adjustments
For Component, Video and S-video input, the following 'Picture' and 'Display' adjustments can be made:

Picture adjustments
- Press Menu and select 'Picture' in the menu bar. The following 'Picture' adjustments can now be made, following the instructions under 'General explanation':
- Brightness Adjusts brightness of the projected image.
- Contrast Adjusts the overall contrast intensity.
- Sharpness Controls the contour impression of the projected image.
- Hue (only for NTSC) adjusts the tint of the projected image;
- Saturation adjusts the colour saturation of the projected image;
- Mirror mirrors the picture for use of the projector in various positions with respect to the user(s) and the projection screen;
- Picture Format selects one of six picture format options (wide screen, super zoom 4:3, 4:3, movie expand 14:9, movie expand 16:9, 16:9 subtitles);
- Colour tracking selects between 'Vivid' and 'Natural' representation of colours in the picture. 'Vivid' is automatically set when computer input is used; 'Natural' is automatically set when video input is used.
- Colour Temperature adjusts the overall colour impression from warm to cool. The various colours (red, green and blue) can also be adjusted individually.


5. Operation
On Screen Display Menu >
Display adjustments
- Press Menu and select 'Display' in the menu bar. The following 'Display' adjustments can now be made, following the instructions under 'General explanation':
- Window mode selects projection from one or two input sources. Default - only one source projected Double Window - two sources projected next to each other. PIP (Picture In Picture) - second source projected within currently projected source.
- PIP location selects the location of the PIP window on the main window;
- PIP format (LC 6285 only) selects the size of the PIP window: Small, Medium or Large;
- Window select; selects the window for which you wish to change settings when in Double Window mode or PIP mode;
- Second Source selects the source from which you wish to project the picture in the PIP window or Double window.
- Freeze captures a moving picture (still picture);
- Zoom enlarges a part of the picture;
5. Operation
On Screen Display Menu >
General adjustments/settings


The projector is equipped with the following functions to optimize its use and handling:
Settings
- Press Menu and select Settings in the menu bar. The following settings/adjustments can now be made for Computer, Component and Video/S-video input, following the instructions
under 'General explanation':
- Language selects the required menu language;
- Keystone correction corrects picture distortion of the horizontal and vertical keystone type by internal scaling;
- SmartDimmer reduces the luminosity of the lamp to eighty percent (if enabled);
- Source selects the current projection source: Auto, RGB sync, YPbPr, RGB sog, S-Video, Video, Mutimedia, Wireless (only available on cClear wireless version), DVI-RGP, DVI-YPbPr;
- System information The System Information sub menu contains an overview of the most relevant projector settings, including information on the hardware and software configuration;
- Factory settings resets all user settings to the default factory settings;
- Key lock de-activates all remote and local controls. To disable the keylock function, keep the OK button pressed for 10 seconds.
- Start-up screen displays (Default) or suppresses (Off) the default Philips start-up screen upon the projector's start up and to select (Custom) and store (Load) a start-up screen of your own choice.
- Lamp counter shows the operating time of the lamp, which can be reset after a new lamp has been installed.
- SmartSave selects the delay time for the projector to switch to Standby.
- Auto Source switches automatic source selection on or off.
- Feedback suppresses OSD messages. Warning or error messages however are never suppressed.
Audio adjustments
- Press Menu and select Audio in the menu bar. The following Audio adjustments can now be made for both Computer, Component and Video/S-video input, following the instructions under 'General explanation':
- Volume adjusts the sound level.
- Bass adjusts the bass tones.
- Treble adjusts the high tones.
- Mute mutes the sound of the projector.
- Audio out switches between fixed ('Line') or variable ('Regulated') volume output on the Audio Out socket of the projector.
Note: Volume can also be adjusted with the - Volume + keys on the remote control and local keyboard.
5. Operation
On Screen Display Menu >
Examples
The following settings/adjustments follow a slightly different procedure or may need some further explanation.


Digital-Zoom/Magnification
'Digital-Zoom' is used to enlarge a part of the picture.
1. Press Menu. - The menu bar appears on the screen. 2. Use Cursor Control to select 'Zoom' in the Display menu. 3. Use the Cursor Control to adjust the Zoom factor in the 'Magnification' slider (4x, 9x or 16x).
4. Press OK to confirm and exit the menu.
5. Use Cursor Control to select another section of the enlarged area ('Panning').
By pressing the Digital Zoom button on the remote control you enter directly into the zoom centre selection screen (step 4). When Digital Zoom is already active, pressing the Digital Zoom button will show the Magnification slider; pressing the Digital Zoom button twice will turn off Digital Zoom.
Auto image
The Auto Image function automatically sizes and positions the image to fit optimally in the screen picture. In addition it takes care of phase adjustment. It does not affect the selected picture format. When Auto Image is set to On, the Horizontal size, Shift and Phase options are greyed out.


Horizontal size
The Horizontal size function is used to size a computer image to make it fit the projected picture. When the OSD menu is active and the horizontal size option is selected, the level will be indicated graphically on a linear scale (slider). This function is only active when 'Auto image' is set to 'Off'.
Phase
The Phase function is used to minimise picture imperfections. When the OSD menu is active and the horizontal size option is selected, the level will be indicated graphically on a linear scale (slider). This function is only active when 'Auto image' is set to 'Off'.
Shift
The Shift function adjusts the computer image in horizontal and vertical direction to centre it on the screen. This function is only active when 'Auto image' is set to 'Off'.
1 Press Menu. – The menu bar appears on the screen. 2 Use Cursor Control to select 'Shift' in the 'Display' menu.

Philips Multimedia Projector
3 Press OK to activate Shift. 4 Use Cursor Control to position the computer image. 5 Press OK to confirm and store the adjustment. 6 If required, select the next item to be adjusted or press Menu to exit.


5. Operation
On Screen Display Menu >
Picture in picture (PIP) / Double window
'PIP' enables projection of a second picture in the currently projected picture. Double window enables projection of two pictures next to each other.
1 Use Cursor Control to select 'Window mode' in the Display menu and press OK. 2 Select 'PIP' or 'Double window' and confirm with OK
- If 'PIP' is selected, the PIP window will appear on the screen.
- If 'Double window' is selected, the screen will be divided into two windows. 3 Use Cursor control to select 'Second source' in the 'Settings' menu and press OK. 4 Use Cursor control to select the source from which you wish to project the picture in the PIP window or the second window. Confirm with OK.
- If you select 'Auto' the system will check if there is a source available. If such a source is found then its picture will be projected.
- Sources that are not connected or cannot be displayed are greyed out in the selection list. 5 Use Cursor Control to move to 'PIP location'. Confirm with OK. 6 Use Cursor Control to select the required position of the PIP window and confirm with OK. 7 With 'Window select' in the Display menu you can select the window ('Main window', 'Second Window') for which you wish to change settings. Confirm with OK.
8 To end 'PIP' or 'Double window' projection, select 'Default' in the 'Window mode' sub menu. Confirm with OK.
- The PIP window or Double window will disappear and normal projection continues.
Notes
- The required Window mode (Default, Double Window, PIP) can also be selected with 'Window mode' on the remote control.
- 'Main Window' and 'Second Window' can also be selected with Window Select on the remote control.
- The table on the next pages tells you which sources can be combined in PIP mode or Double window mode.
5. Operation
On Screen Display Menu >
PIP / Double window - Possible combinations
The following overview tells you which projection sources can (+) and cannot (−) be combined in PIP or Double window mode.

Current projection source Second source + / -
(in PIP window or second window)
| CVBS (2) S-Video - | R, G, B/CVBS -Y,Cb,Cr-Y,Pb,Pr+Data 2 -Data 1 (analog) +Data 1 (digital) +Wireless data - | |
| S-Video (3) | CVBS -R, G, B/CVBS -Y,Cb,Cr-Y,Pb,Pr +Data 2 -Data 1 - analog +Data 1 - digital +Wireless data - | |
| R, G, B/CVBS (1 + 2) | CVBS -S-Video -Y,Cb,Cr-Y,Pb,Pr -Data 2 -Data 1 - analog +Data 1 - digital +Wireless data - | |
| Y, Cb, Cr (1) | CVBS -S-Video -R, G, B/CVBS -Y,Pb,Pr -Data 2 -Data 1 (analog) +Data 1 (digital) +Wireless data - |
5. Operation
On Screen Display Menu >

Current projection source Second source + / -
(in PIP window or second window)
Y, Pb, Pr (1) CVBS +

S-Video +
R, G, B/CVBS -
Y,Cb,Cr-
Data 2 +
Data 1 (analog)
Data 1 (digital) -
Wireless data +
Data 2 (4)

CVBS
S-Video
R, G, B/CVBS -
Y,Cb,Cr-
Y,Cb,Pr +
Data 1 (analog) +
Data 1 (digital) +
Wireless data
Data 1- Analog (5)

CVBS +
S-Video +
R, G, B/CVBS +
Y,Cb,Cr +
Y,Cb,Pr
Data 2 +
Data 1 (digital) -
Wireless data +
Data 1- Digital (5)

CVBS +
S-Video +
R, G, B/CVBS +
Y,Cb,Cr +
Y,Cb,Pr
Data 2 +
Data 1 (analog)
Wireless data +
5. Operation
On Screen Display Menu >
Current projection source Second source + / -
(in PIP window or second window)
Wireless data
(cClear Wireless version only) CVBS -
S-Video -
R, G, B/CVBS -
Y,Cb,Cr-
Y,Cb,Pr+
Data 2 -
Data 1 (analog) +
Data 1 (digital) +
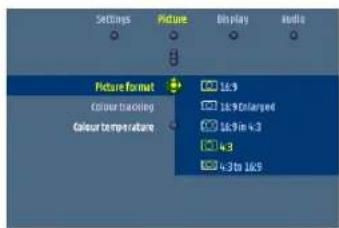
Picture Format
'Picture Format' is used to select one of six picture format options (wide screen, super zoom 4:3, 4:3, movie expand 14:9, movie expand 16:9, 16:9 subtitles). For both video signal and computer signal input the last selected picture format (before the projector was switched off) will be selected again.
1 Press Menu.


Note
- The menu bar appears on the screen. 2 Use Cursor Control to select 'Picture format' in the 'Picture' menu.
3 Use Cursor Control to select the required picture format (wide screen, super zoom 4:3, 4:3, movie expand 14:9, movie expand 16:9, 16:9 subtitles) and confirm by pressing OK.
— The picture format has now been set.
Due to the scaling of the image when the picture format is changed, it might be possible that a part of the actual image is missing at the top or the bottom of the screen. With Cursor Control you can adjust the position of the projected image upwards or downwards.
5. Operation
On Screen Display Menu >
Loading your own personal start-up screen
(for bSure2 Brilliance projectors only)
All settings described under 'General adjustments/settings' can be made, following the instructions under 'On Screen Display Menu - General explanation'. Loading your own personal start-up screen, however, follows a slightly different procedure, which we will describe hereafter. You can load any image as long as the size of the image does not exceed 128 KB. The more detailed the image is, the larger its size will be. The image must be projected on the screen.
1 Press Menu.
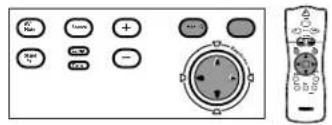


– The menu bar appears on the screen.
2 Use Cursor Control to move the cursor to 'Settings.'
3 Select 'Start-up screen' using Cursor Control.
4 Select 'Log capture' if you wish to load the currently shown image and store it as start-up screen.
- The menu bar disappears and the image is shown.
5 Press OK to display the capture window.
The capture window (red oblong) shows you what part of the image will be loaded.
6 With Cursor Control you can move the window to select the part of the image you wish to load.
- Press OK if you wish to resize the capture window in order to make the image fit in the window. You can use Cursor Control to adjust the size of the window.
7 Keep OK pressed for 3 seconds to confirm.
- 'Capturing' appears on the screen and the image will now be loaded. The loading time is dependent on the size of the image and may take up to a few minutes.
- When the image is loaded 'Capture complete' and 'Please reset projector' appear on the screen.
8 You will now have to reset the projector. For this see 'Resetting the projector' hereafter.


Note
5. Operation
On Screen Display Menu <
Restarting the projector
1 Press the Standby button twice in succession to switch the projector into the Power/Standby mode. 2 Wait until the cooling fan has stopped (about 3 minutes after the projector has been switched to Power/Standby). Then disconnect the mains lead to switch off the mains supply. 3 Connect the mains lead again and press the Standby button to switch the projector back into Power/Standby mode. - The Standby indicator lights up red, the projector is now in the Power/Standby mode. 4 Press any button on projector or remote control to switch on the projector. – The Standby indicator lights up orange. - When the projection lamp is on, the Standby indicator lights up green and your personal start-up screen appears.
Your personal start-up screen will appear each time the projector is switched on except when the SecurityMax™ application has been activated. The SecurityMax™ start-up screen will then appear.
6. Maintenance

Cleaning Caution
Switch off and disconnect the projector before cleaning.
1 Press the Standby button twice to switch off the projector. - The Standby indicator starts blinking orange. 2 Wait until the cooling fan has stopped (about 3 minutes after the projector has been put in Standby) and disconnect the mains lead and all other cables.
Cleaning the cabinet
- When the cabinet is dusty, clean it by gently wiping with a soft cloth.
- A chamois leather slightly moistened with water is sufficient for cleaning the housing.
- Do not use cleaning agents as they may harm the housing.
Cleaning the lens
- When the lens is dirty or dusty, first blow the dust off and then gently wipe with a soft brush or lens cleaning paper. Never touch the lens with your fingers.
- The lens is likely to become mouldy if left dirty.
Cleaning the dust filter
Make sure to clean the dust filter regularly.

1 Switch off the projector and wait until the cooling fan has stopped before disconnecting the projector. 2 Turn the projector over and place it on a soft surface. Never place the projector on the side where the connections are located! 3 Press tab A and remove filter holder B from the projector.
4 Press clamp C, open the holder and remove the filter.
5 While firmly holding the filter, gently remove any accumulated dust, from the dusty side, with a vacuum cleaner. 6 Press clamp C, put the filter back in place and release clamp C. Firmly press the filter edges in place. 7 Close the filter holder.

8 Press tab A and insert the filter B into the projector.

Notes
We advise you to clean the filter every 100 hours. Operating the projector without filter or with a torn or damaged filter may seriously damage the projector.
When the filter is damaged replace it with a filter of the same type (12 nc: 3122 434 0157 0).
The projector power cannot be switched on again unless the filter holder is installed correctly.
6. Maintenance

Lamp


When operation time reaches the last 100 hours of the average lamplife, the message 'Warning: lamplife has almost expired' will be displayed on the screen, each time the projector is switched on. The lamp indicator lights up orange.
The lamplife remaining can be checked using the OSD menu.
1 Press Menu.
– The menu bar appears on the screen.
2 Use Cursor Control to move the cursor to 'Settings'.
3 Use Cursor Control to select 'Lamp counter'.
- The remaining lamplife hours are displayed in the action window at the bottom of the screen.
- When the lamplife has expired, the lamp indicator lights up red and the message "Warning: lamplife has expired" is displayed on the screen.
Lamp replacement


1 Switch off the projector and wait until the lamp has cooled down (about 5 minutes) before disconnecting the projector. Remove the mains lead from both projector and wall socket. The mains lead must be disconnected from the projector otherwise the lamp door cannot be removed.
2 Turn the projector over and place it on a soft surface. Never place the projector on the side where the connections are located!
3 Push tab A to the right and remove the lamp door.
- When tab A is pressed the mains inlet socket will be partly closed. The lamp door therefore cannot be removed if the mains lead is not disconnected from the projector.
4 Read the caution and warning labels on the lamp holder.
5 Unscrew screw B.
6 Grasp the lamp holder handle and carefully pull the lamp holder out of the projector.
- Do not tilt. If the inner tube is broken, glass particles may fall out.
- Keep lamp holder opening to your right. Do not touch lamp or point lamp holder opening at anyone.
7 Carefully remove the new lamp housing from its package.

6. Maintenance
- Always use the same type of lamp: See 'Optional accessories' for the correct type of lamp for your projector.
- Do not touch lamp or point lamp housing opening at anyone.
- Do not drop, as the impact may cause the lamp to break. 8 Place the lamp holder in the guiding slots and insert into the lamp compartment. 9 Tighten screw B again.
10 Put the lamp door back in place and press tab A back in its original position.
Resetting the lamplife time
- The Mains inlet socket will open again.
11 Insert the mains lead into both the projector Mains inlet socket and the wall socket.
12 Press the Standby button to switch on the projector.
13 Reset the lamp life time (see 'Resetting the lamplife time').
14 Dispose of the old lamp in special chemical disposal bins.
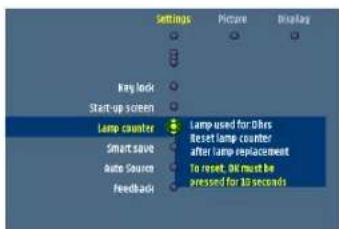
1 Press Menu.
– The menu bar appears on the screen.
2 Use cursor control to select 'Settings' in the menu bar.
3 Use cursor control to select 'Lamp counter' in the sub menu.
4 Press OK for 3 seconds to reset the lamp counter.
5 If required, select another item you wish to adjust or press Menu to exit.
7. Troubleshooting

If a fault occurs, first check the points listed below before taking the projector for repair. If you are unable to solve a problem by following these hints, consult your dealer or service organisation.
Warning
Under no circumstances should you try to repair the projector yourself as this could invalidate the guarantee.
Read as follows
Problem
- Possible cause
- Solution
Image is not or incorrectly displayed
General
- Mains lead is not correctly connected.
- Correctly connect mains lead.
- The filter holder is not installed correctly or is damaged.
- Install the filter holder correctly (see 'Cleaning the dust filter' under 'Maintenance').
- Lamp holder cover is not closed correctly or the lamp holder is damaged.
- Close the cover correctly (see 'Lamp replacement' under 'Maintenance').
- Signal cable not correctly connected.
- Connect signal cable correctly.
- The projector is in Off position.
- Press Standby to switch on the projector.
- A/V Mute active.
- Cancel A/V Mute.
- 'Shift' and/or 'Horizontal size' are not adjusted correctly.
- Adjust 'Shift' or 'Horizontal size' (see 'Display adjustment' under 'Operation' - 'On Screen Display Menu').
- Activate the 'Auto-image' function via the On Screen Display menu.
In Component Video mode
- 'Auto Image' has not selected the correct settings for 'Shift' and/or 'Horizontal Size'.
- Adjust 'Shift' or 'Horizontal size' (see 'Display adjustment' under 'Operation' - 'On Screen Display Menu').
- Activate the 'Auto-image' function via the On Screen Display menu.
- Reset all settings to the default factory settings with the 'Factory settings' option in the 'Settings' menu.
- Keystoning is applied on a high resolution component signal.
- Decrease keystoning until the image is correctly displayed. For this use the 'Keystone correction' option in the 'Settings' menu.
7. Troubleshooting
In Data mode
- Input resolution is too high (and keystoning is applied).
- If you wish to keep the keystone correction, decrease the input resolution until the image is correctly displayed. For this, refer to the User Guide or support information of the computer.
- If you wish to keep the input resolution as it is, decrease keystoning until the image is correctly displayed. For this, use 'Keystone correction' option in the 'Settings' menu.
- Input resolution is too high (and no keystoning is applied).
- Decrease the input resolution until the image is correctly displayed. For this, refer to the User Guide or support information of the computer.
In case of RGBS (Scart) connection
- RGBS is not selected or - Auto Source is activated (does not recognize RGBS).
- Select RGBS as projection source with the Source button on the projector or the remote control.
In case of external monitor connection
- In case of interference problems when connecting to an external monitor, applying long VGA cables or interference with certain monitor types, the use of an active splitter is recommended
Poor colour
- Adjust 'Brightness', 'Contrast', 'Saturation' or 'Hue' (see 'Picture adjustment' under 'Operation' - 'On Screen Display Menu').
- Reset all projector settings in the 'Settings' menu ('Factory settings').
Image is blurred
- Image is not focused.
- Adjust focus ring.
- Distance between projector and screen is not correct.
- Adjust the distance between the projector and the screen.
- Signal cable is not correctly connected.
- Connect signal cable correctly.
Picture rolls
– Signal cable is not correctly connected.
- Connect signal cable correctly.
No sound
- Audio cable is not correctly connected.
- Connect audio cable correctly.
— Volume is not adjusted properly.
- Adjust volume.
- (A/V-)Mute active.
- Cancel (A/V-)Mute.
In case of USB connection
- The CD-ROM player in your computer does not recognize the USB port of the computer as audio output.
- Select USB audio as active audio output on your computer. For this see the User Guide of the computer.
7. Troubleshooting
The projector does not react to commands from the remote control
- Distance is too large.
- Reduce distance.
- Batteries are exhausted.
- Replace batteries (see 'Inserting the batteries in the remote control').
- IR sensor is obstructed.
- Remove obstacle.
Indicators
Lamp indicator
- green: normal lamp condition.
- orange: lamp life has almost expired (less than 100 hours to go).
• See warning messages on the start up screen for details.
- red: lamp life has expired.
- Replace lamp. See 'Maintenance'.
- red (fast blinking): lamp start has failed.
- Disconnect projector from the mains. Reconnect and restart. If this does not resolve the problem, replace the lamp. See 'Maintenance'.
Temperature indicator
- red: temperature error.
- The projector will go into Power/Standby mode. Allow the projector to cool down; this may take up to 30 minutes. When the LED goes out, press any button to activate the projector again.
- fast blinking red: fan error.
- The projector will go into Power/Standby mode. Make sure the filter cover is closed properly; clean air inlets or dust filter and allow the projector to cool down; this may take up to 30 minutes. When the LED stops flashing, press any button to activate the projector again.
Standby indicator (text on Standby button/ring around Standby button)
- red: standby mode.
- green: operation mode.
- orange: warming up.
- slow blinking (orange): cooling down.
- Do not switch the projector off; it will restart the lamp automatically within a few seconds.
Picture too dark or bright with external monitor connected
- 'Monitor out' has been enabled, but the external monitor is not correctly connected (the picture on both displays is too bright).
- Connect the (optional) VGA Y-cable (See 'Connecting to an external monitor' under 'Installation').
- If the VGA Y-cable is correctly connected, verify whether the input impedance of the monitor is correctly set on 75 Ohm.
- 'Monitor out' has not been enabled, but the external monitor is connected (the picture on both displays is too dark).
- Enable the 'Monitor out' option. Press Menu and use cursor control to go to 'Settings' in the menu bar. Select 'Monitor out' and select 'On'.
No reaction when pressing keys on local keyboard or remote control
- 'Keylock' active.
- Press OK for 10 seconds to cancel 'Keylock.'
7. Troubleshooting
The mouse cursor does not react when using the cursor control on the remote control
General:
- Check that the batteries have been installed properly in the remote control and/or replace the batteries.
- Check that the projector receives the signals from the remote control.
- Check that the USB cable or PS/2 cable has been properly connected.
- Check that both projector and computer are switched on.
- Unplug the USB cable or PS/2 cable and then reconnect.
In case of PS/2 connection:
- The PS/2 mouse of the connected laptop has priority over the projector mouse loop through connection.
- Disable the PS/2 mouse of the laptop by selecting 'Disable in hardware profile' in the 'Windows Mouse Properties' of the laptop. Then restart 'Windows' on the laptop. The projector mouse loop through connection now has priority while the laptop mouse can still be used.
- Switch off all devices and then reconnect while you make sure that you:
- connect the PS/2 cable to PC and projector before switching on the PC;
- switch on the projector before switching on the PC;
- do not connect the USB cable when making the PS/2 connection.
- Also refer to the User Guide or support information of your computer.
In case of USB connection:
- Connect another USB device (mouse, scanner, webcam, etc.) and see if it works. If it does not work there is a problem with the computer.
- Also refer to the User Guide or support information of the computer.
- 'Windows' did not manage to install the driver correctly. In this case the 'Device manager' will contain a category 'Other devices'.
- Disconnect the projector.
- Remove all items listed under 'Other devices' in the 'Device manager'.
- Restart the computer.
- Reconnect the projector.
Computer asks for drivers
- In case the computer asks for monitor drivers, install the drivers on the CD-ROM supplied with the projector.
- In case the computer asks for a USB-device driver, install the required drivers from the CD-ROM supplied with the computer.
Image for personal start-up screen cannot be loaded
- The size of the image exceeds 128 KB.
- Reduce the size of the capture window.
- Select another image.
- PHILIPS MULTIMEDIA PROJECTOR CCLEAR
- INDEX
- INTRODUCTION
- FUNCTIONAL OVERVIEW
- SET UP
- INSTALLATION
- OPERATION
- MAINTENANCE
- TROUBLESHOOTING
- PACKAGING CONTENTS
- OPTIONAL ACCESSORIES
- SERVICE ACCESSORIES
- CONTROLS
- CCLEAR WIRELESS VERSION ONLY
- REMOTE CONTROL
- CONNECTIONS
- DATA SOURCE CONNECTIONS
- VIDEO SOURCE CONNECTIONS
- POSITIONING THE PROJECTOR AND SCREEN
- SWITCHING THE PROJECTOR ON AND OFF
- TO RAISE
- TO LOWER
- MOVING/TRANSPORTING THE PROJECTOR
- PREPARATION
- GENERAL INFORMATION
- COMPUTER INPUT
- RS-232 CONNECTION
- UNIVERSAL SERIAL BUS (USB)
- NOTES
- EXTERNAL MONITOR CONNECTION
- WIRELESS IMAGE TRANSFER
- NOTE
- VIDEO INPUT
- STEREO AUDIO OUTPUT
- CAUTION
- CONNECTING TO A COMPUTER
- ANALOG CONNECTION
- INSTALLATION > CONNECTING TO A COMPUTER
- CONNECTING TO AN EXTERNAL MONITOR
- DIGITAL CONNECTION
- DVI TO VGA CONNECTION
- CONNECTING TO VIDEO EQUIPMENT
- CVBS (VIDEO)
- S-VHS (S-VIDEO)
- SCART CONNECTION
- S-VHS
- COMPONENT/HDTV
- PR/CR, Y, PB/CB
- RGBS
- CONNECTING TO AUDIO EQUIPMENT
- DIRECT KEY FEEDBACK
- FEEDBACK MESSAGES
- ERROR MESSAGES
- WARNING MESSAGES
- ON SCREEN DISPLAY MENU
- COMPUTER MODE
- COMPUTER ADJUSTMENTS
- PICTURE ADJUSTMENTS
- TIP FOR WINDOWS USERS
- DISPLAY ADJUSTMENTS
- COMPONENT/VIDEO/S-VIDEO ADJUSTMENTS
- GENERAL ADJUSTMENTS/SETTINGS
- SETTINGS
- AUDIO ADJUSTMENTS
- EXAMPLES
- DIGITAL-ZOOM/MAGNIFICATION
- AUTO IMAGE
- HORIZONTAL SIZE
- PHASE
- SHIFT
- PICTURE IN PICTURE (PIP) / DOUBLE WINDOW
- PIP / DOUBLE WINDOW - POSSIBLE COMBINATIONS
- WIRELESS DATA
- PICTURE FORMAT
- LOADING YOUR OWN PERSONAL START-UP SCREEN
- RESTARTING THE PROJECTOR
- CLEANING THE CABINET
- CLEANING THE LENS
- CLEANING THE DUST FILTER
- WARNING
- READ AS FOLLOWS
- PROBLEM
- IMAGE IS NOT OR INCORRECTLY DISPLAYED
- GENERAL
- IN COMPONENT VIDEO MODE
- IN DATA MODE
- IN CASE OF RGBS (SCART) CONNECTION
- IN CASE OF EXTERNAL MONITOR CONNECTION
- POOR COLOUR
- IMAGE IS BLURRED
- PICTURE ROLLS
- NO SOUND
- IN CASE OF USB CONNECTION
- THE PROJECTOR DOES NOT REACT TO COMMANDS FROM THE REMOTE CONTROL
- INDICATORS
- LAMP INDICATOR
- TEMPERATURE INDICATOR
- STANDBY INDICATOR (TEXT ON STANDBY BUTTON/RING AROUND STANDBY BUTTON)
- PICTURE TOO DARK OR BRIGHT WITH EXTERNAL MONITOR CONNECTED
- NO REACTION WHEN PRESSING KEYS ON LOCAL KEYBOARD OR REMOTE CONTROL
- THE MOUSE CURSOR DOES NOT REACT WHEN USING THE CURSOR CONTROL ON THE REMOTE CONTROL
- IN CASE OF PS/2 CONNECTION
- COMPUTER ASKS FOR DRIVERS
- IMAGE FOR PERSONAL START-UP SCREEN CANNOT BE LOADED
Brand : PHILIPS
Model : cClear XG1
Category : Projector