
NMV-169 - Mp3 player Naxa - Free user manual and instructions
Find the device manual for free NMV-169 Naxa in PDF.


| Product Type | Digital MP4 Player with Camera and FM Radio |
| Brand | Naxa |
| Model | NMV-169 |
| Display | 2.4-inch TFT LCD, 220x176 pixels, 260,000 colors |
| Internal Memory | 512 MB or more (exact size varies) |
| Battery | 3.7V rechargeable lithium-ion, 400-500mA charger recommended |
| Operating Voltage | 3.5 - 4.2V |
| Signal-to-Noise Ratio | 90 dB |
| FM Distortion | 0.2% |
| Audio Playback | MP3 format, supports EQ modes (Normal, Rock, Pop, Classic, Soft, Jazz, DBB, User, SRS WOW, SRS WOW HD) |
| Video Playback | Supports video files (format not specified), resolution up to 320x240 |
| Image Viewing | JPEG format, thumbnail and list view, slideshow with effects |
| Radio | PLL Digital FM, supports auto search and preset stations (up to 20), requires earphone as antenna |
| Recording | Voice and FM recording, WAV format, adjustable quality |
| Camera | Photo resolution up to 1280x960, video resolution up to 320x240, white balance, brightness, effects, self-timer |
| E-Book Reader | TXT files, adjustable font size, auto-scroll, bookmark support (up to 32) |
| File Transfer | USB 2.0 connection, compatible with Windows XP/2K/ME/98/Linux9+/Mac OS 10 |
| Supported Languages | Simplified Chinese (default), English, Traditional Chinese, French, German, Dutch, Spanish, Czech, Danish, Polish, Romanian |
| Power Saving | Auto shut-off (10s-10min), sleep mode (10min-5hr), backlight timer (off/5-30s/1-5min) |
| Dimensions (approx.) | Approx. 90 x 40 x 10 mm (estimate based on typical MP4 players) |
| Weight (approx.) | Approx. 50 g (estimate) |
| Accessories | USB cable, earphones, user manual |
Frequently Asked Questions - NMV-169 Naxa
User questions about NMV-169 Naxa
0 question about this device. Answer the ones you know or ask your own.
Ask a new question about this device
Download the instructions for your Mp3 player in PDF format for free! Find your manual NMV-169 - Naxa and take your electronic device back in hand. On this page are published all the documents necessary for the use of your device. NMV-169 by Naxa.
USER MANUAL NMV-169 Naxa
NMV-169/ Digital MP4 Player with Camera, PLL Digital FM Radio and SD Card Slot.

natural_image
Red and white photo of a woman using a laptop, no visible text or symbols on the device itself.User Manual
BATTERY CHARGE:
The MP3 Player contains an internal 3.7V rechargeable battery that needs to be charged more using. When it is fully charged, this “fully charged” icon ( ) will be displayed in the upper right-hand corner of the device’s LCD display. With use, the bat’s charge will diminish.
When the battery capacity icon appears blank and begins to flash, this is a low battery indication and the battery's current is near empty. When this occurs, it is necessary to recharge the battery.
BATTERY SYMBOL FROM EMPTY ( ) TO FULL ( )
Whenever you cannot turn the unit on, □tery must be r=arged.
Connecting to PC
System Configuration
OS: Windows XP/2K/ME/98 (driver installation needed) /Linux9 and above /Mac OS 10
CPU: Pentium-133MHz at least
Memory: 32MB at least
Hard disk free space, 100MB at least
Video card: above 640*480, enhanced color at least (16 bits)
Connecting to PC
Connect the player to PC with the USB cable in power-off/on status; Disconnect the USB cable or delete the hardware on the PC, the system enters player's operation mode.
If do not disconnect USB cable, the system will stay in charging mode on its operation interface.
Low Power
When battery power is low, the player will prompt and enter Standby automatically. Please don't power on the player now, charge it instead.
Charger current specification recommended: 400-500mA.
File Storage
Files of different types should be stored under different directories. For example, music file should be stored under MUSIC dir. Record file stored under RECORD dir... Otherwise the applications unable to find the corresponding files.
NOTE:
Please switch off power when not using the player.
The unit will turn off by itself in stop mode to save the battery. Press and hold the “” button to RE-START.
To Exit from current mode to Main Menu, press and hold the “M”
Know your player

Keys Processing
MENU: Return; in any interface, short press to return to the previous level and while the audio/photo file is play /pause ,long press to enter into setting, while the video is in dir list, long press to enter into setting
◀◀: Previous; long press to rewind.
▶▶: Next; long press to fast forward.
Middle Button: /VOL; short press to show volume when playing audio / video file
▶ : PLAY/power on/off; play, pause and stop when playing audio/video file;
Notes:
-
If no particular description, when selecting menu items, ◀◀/▶▶ are used to select item, confirm and MENU return to the previous interface.
-
In playing application, press middle button to show volume bar, press ◀◀/▶▶ to adjust volume.
Key Operation
| Action Basic operations | |
| Short press Key pressing time less than 1.2 sec | |
| Long press Key pressing time more than 1.2 sec | |
| Hold Press the key and keep the key pressed |
Note: unless otherwise specified, press in this manual means short press.
Power On/Off
When the switch in on, long press ▶ to power on or off.
When the idle time reaches the power-off time set by the user, the player is powered off automatically.
Note: this function is ineffective when the player is connected to PC.
MAIN MENU—TO SELECT DIFFERENT MODES:
The factory default is “Music” mode and is the first to appear when the unit is turned on. Press ◀/▶ button to view choices:
Press ▶ to confirm your selection.
Music Mode:
Select "Music" on the main interface and press ▶ to enter the main interface.
Main Interface
12:35 AM

NOW PLAYING
All music
Aritst
Album
Genre
My music list
Dir list
Record list
Now Playing: list the music played last time and highlight the one from which exited last time. Time.
All Music: list all the music files stored under MUSIC directory in the player.
Artist: artist list; select one artist, the next level is the list of music by the artist. Unknown Artist saved the music by unidentified artist. The function of Unknown Album and Unknown Genre are the same.
Album: album list; select one album, the next level is the list of music in the album.
Genre: genre list; select one genre, the next level is the list of music of this genre.
My Music List: five lists in total; each list contains the music classified by user.
Dir List: Internal Memory. Internal Memory contains all music files in the player.
Record List: list all record files.
Music Playing Interface

Submenu and Basic Operation
In music playing interface, long press MENU to enter submenu, the items include:
- Play & Pause
Press ▶to switch between play and pause.
Note: black screen function will be shielded for lyric display.
- Rewind and Forward
When playing music or music is paused, long press ◀◀/▶▶ to fast rewind or forward.
- Change Music
Press ◀◀/▶▶ to switch to the previous or next music file.
- AB Repeat
Select
- Playback Mode
Select
6. Select EQ
The items includes: Normal, Rock, Pop, Classic, Soft, Jazz, DBB, User EQ, SRS WOW, SRS WOW HD
7. Set Sound
The items include:
Select
The operation of
8. Replay Times
Press ◀◀/▶▶ to adjust relay time from 1 to 10 or ∞.
9. Replay Intervals
The same as Replay Times, from 1sec to 7sec.
10. Variable Speed
Press ◀◀/▶▶ to change playing speed from -4 to 4.
11. Set Star Level
Press ◀◀/▶▶ to select among different star ratings.
12. Delete File
Select
INSTRUCTIONS FOR MUSIC DOWNLOAD
NOTE: YOU MUST HAVE AN MP3 FILE ON YOUR COMPUTER.THIS IS AN MP3 PLAYER. IT DOES NOT CREATE MP3 FILES.
THE CD DRIVER THAT ACCOMPANIED YOUR MP3 PLAYER DOES NOT NEED TO BE INSTALLED. THE FOLLOWING INSTRUCTIONS EXPLAIN COPYING AND DELETING MP3 FILES FROM YOUR COMPUTER.
- CONNECT MP3 PLAYER TO YOUR COMPUTER VIA USB ADAPTOR.
- TURN ON YOUR COMPUTER.
- DOUBLE CLICK ON "MY COMPUTER"
- DRIVE NAMED"REMOVABLE DISK" OR "MP3 PLAYER"-THIS IS YOUR MP3 PLAYER
- DOUBLE CLICK THE REMOVABLE DISK/MP3 PLAYER-THIS OPENS THE FOLDER.IT WILL SHOW ALL FILES CURRENTLY ON YOUR PLAYER.
- NEXT LOCATE YOUR MP3 FILES ON YOUR COMPUTER. MOST PEOPLE STORE
THEM IN THEIR"MY MUSIC"FOLDER
- ONCE YOUR MUSIC FOLDER/MP3 FILE FOLDER IS OPEN,CLICK ONCE TO HIGHLIGHT THE SONG YOU WANT TO SEND TO YOUR MP3 PLAYER.ONE OF THE FOLLOWING STEPS WILL COPY THE MP3 FILE.
A. RIGHT CLICK ON THE HIGHLIGHTED SONG, A BOX WILL COME UP, MOVE CURSOR TO "SEND TO "ANOTHER BOX WILL COME UP. IF YOU HAVE THE OPTION" REMOVABLE DISK"CLICK ON IT . THIS WILL SEND COPY OF MP3 FILE TO MP3 PLAYER.
B. IF YOU DO NOT HAVE"REMOVABLE DISK"LISTED, THEN CLICK ON "COPY".GO BACK AND REPEAT STEPS 3,4&5.RIGHT CLICK IN THE MIDDLE OF THE WINDOW. A BOX WILL OPEN. SELECT "PASTE". THIS WILL COPY MP3 TO PLAYER.
-
TO DELETE FILES-REPEAT STEPS 3,4&5.ALL FILES ON THE MP3 PLAYER WILL BE LISTED.CLICK ONCE AND HIGHLIGHT THE FILE YOU WANT TO DELETE.
-
HIT"DELETE"BUTTON OR RIGHT CLICK ON THE FILE.A BOX WILL OPEN.CLICK ON THE WORD "DELETE". IT WILL REMOVE THE MP3 FILE FROM YOUR PLAYER.
IF YOU NEED TO LEARN HOW TO CREATE AN MP3 FILE OR DOWNLOAD MP3 FILES, THERE ARE MANY RESOURCES ON THE INTERNET.
Movie Mode:
Select
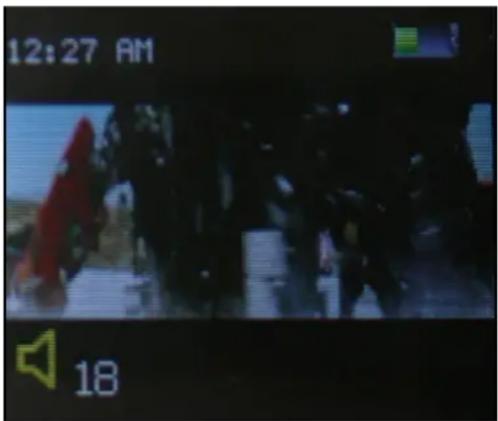
Main Menu
Now Playing: list the videos played last time and highlight the one from which exited last time.
The function is the same as that of
Dir List: the function is the same as that of
In video playing interface, press any key to show the top and bottom bar, displaying the playing
information of current video file and to execute the corresponding operation. The bar will disappear if no operation for 3 sec.
Submenu and Basic Operation
In dir list menu interface, long press MENU to enter submenu, it includes:
- Play & Pause
Press ▶ to switch between play and pause.
Note: black screen function is shield when playing video.
- Rewind and forward
When playing or pause video file, long press ◀◀/▶▶ to fast rewind and forward.
- Change File
When playing or pause video file, press ◀◀/▶▶ to switch to the previous or next file.
- Playback Mode
Playback mode includes: Sequence, Repeat One, Repeat All and Random
Photo Mode:
Select
Main Interface
Now Playing: the function and operation are the same as that of
Dir List: the function is the same as that of
View: set display mode of picture list, List Mode and Thumbnail Mode.
List Mode
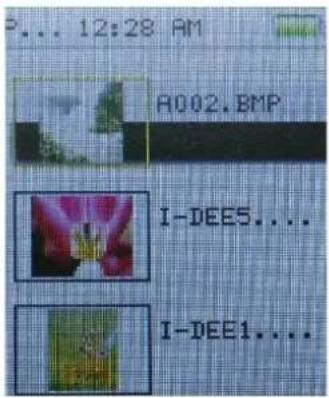
Thumbnail Mode

natural_image
Grid of four small photos showing different colors and shapes, no visible text or symbolsIn the List Mode, press ◀◀/▶▶ to move up and down, long press ◀◀/▶▶ to move fast up and down
In the Thumbnail Mode, press ◀◀/▶▶ to move left or right, long press ◀◀/▶▶ to move up and down.
Submenu and Basic Operation
When browsing a picture manually, long press MENU to enter submenu, it includes:
- Slide Interval
Select picture playing interval: 1-10 Sec.
2. Slide Effect
Select the special playing effect: Normal, Fly In, Chessboard, Cut, Erase, Louver, Random Line and Random.
3. Delete the File
Operation is the same as that of
THE CD DRIVER THAT ACCOMPANIED YOUR MP3 PLAYER DOES NOT NEED TO BE INSTALLED. THE FOLLOWING INSTRUCTIONS EXPLAIN COPYING AND" DELETING PHOTO FILES FROM YOUR COMPUTER.
- CONNECT USB CABLE BETWEEN THE UNIT AND COMPUTER
- TURN ON YOUR COMPUTER.
- DOUBLE CLICK ON "MY COMPUTER"
- DRIVE NAMED"REMOVABLE DISK" OR "MP3 PLAYER"-THIS IS YOUR MP3 PLAYER.
- DOUBLE CLICK THE REMOVABLE DISK/MP3 PLAYER-THIS OPENS THE FOLDER.IT WILL SHOW ALL FILES CURRENTLY ON YOUR PLAYER
- NEXT LOCATE YOUR PHOTO FILES ON YOUR COMPUTER.
- ONCE YOU HAVE FOUND YOUR PHOTO FILE, CLICK ONCE TO HIGHLIGHT THE PHOTO YOU WANT TO SEND TO YOUR MP3 PLAYER.
HOW TO COPY THE PHOTO FILE:
A. RIGHT CLICK ON THE HIGHLIGHTED PHOTO. A BOX WILL COME UP. MOVE CURSOR TO "SEND TO" AND ANOTHER BOX WILL COME UP. IF YOU HAVE THE OPTION "REMOVABLE DISK", CLICK ON IT. THIS WILL SEND PHOTO TO MP3 PLAYER.
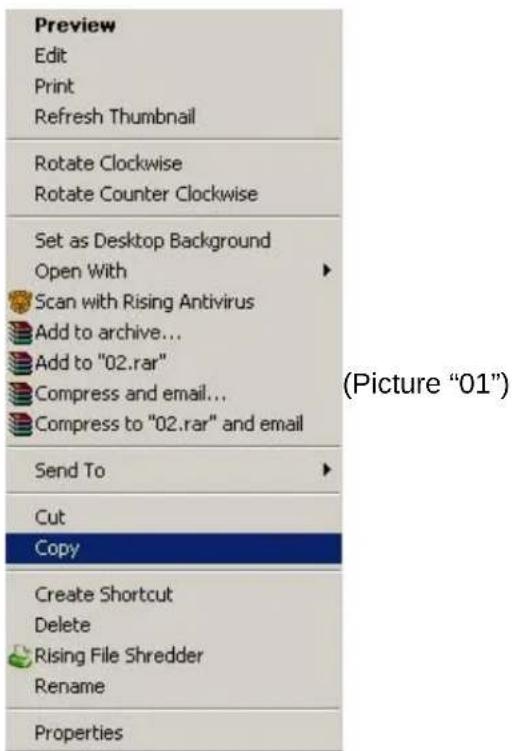
B. IF YOU DO NOT HAVE "REMOVABLE DISK"LISTED,THEN CLICK ON "COPY"(See Picture"01").GO BACK AND REPEAT STEPS 3,4&5. HIGHLIGHT THE IMAGE FILE AND RIGHT CLICK. A BOX WILL OPEN SELECT "PASTE" (see Picture "02")AND YOUR PHOTO WILL BE COPIED TO YOUR MP3 PLAYER.

- IF YOU WANT TO DELETE THE PHOTO, HIT "DELETE" BUTTON OR RIGHT CLICK ON THE PHOTO. A BOX WILL OPEN.CLICK ON THE WORD "DELETE" AND THE PHOTO WILL BE REMOVED FROM YOUR MP3 PLAYER.
Video Recorder
Select < Video Recorder> in the main application interface

Time recorded Time recordable
- Press ▶ to start recording and press it again to pause. Press MENU to exit, the system will automatically save the file before exit.
Long press MENU to enter the menu, including
1) Preview : Browse the recorded video
2) View parameter : includes White Balance, Brightness, Exposure mode, Special effect
3) Switch to DC : change to camera
4) White balance : Auto, Indoor, Outdoor
5) Brightness : from -3 to 3
6) Exposure mode : Auto, Indoor, Outdoor
7) Special effect : Off, Black & White, Sepia, Negative
8) Save path: internal memory
9) Resolution: 320*240,
10) Record quality: high, medium, low, auto-adapted; the default is high.
Camera
Select

- Press to take picture;
Long press MENU to enter the menu, including
1) Preview : Browse the taken photos
2) View parameter : includes White Balance, Brightness, Exposure mode, Special effect
3) Switch to DV : change to Video recording
4) White balance : Auto, Indoor, Outdoor
5) Brightness : from -1 to 1
6) Exposure mode : Auto, Indoor, Outdoor,
7) Special effect :off , Black& White , Septa , Negative ,
8) Save path: internal memory
9) Resolution: 320 × 240 , 640 × 480 , 1280 × 960 , the default is 1280 × 960
10) Self-timer: off, 5 sec, 10 sec, 15 sec, 20 sec. default is off.
11) Shutter sound: off, sound 1, sound 2, sound 3; default is sound 1.
12) Date stamp: off, date, date and time; default is off.
- Adjust focus: press ◀◀ to zoom in and press ▶▶ to zoom out.
EXTRA
Select
PC camera
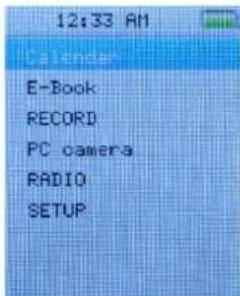
Calendar:
- Select Calendar and press
- Press to switch among Year,
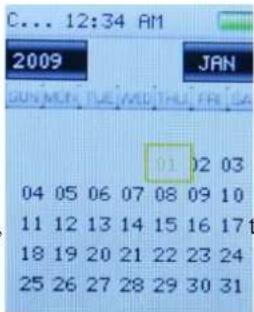
and long press◀◀/▶▶ to change value.
EBook
Select
Main Menu
Now playing: list the texts played last time and highlight the one from which exited last time. The function is the same as that of
Dir List: the function is the same as that of
Bookmark: list all the text having marks, supporting up to 32 tags.
Submenu and Basic Operation
In the text reading interface, press MENU to enter submenu, it includes:
Text Reading Interface:
12:00 AM

After the stealing of fire Zeus became increasingly unkind to men One day he ordered his son Hephaestus to build an image of a beautiful maiden out of clay He then asked the gods and goddesses to award her with different kinds of gifts Among others Athena clothed her in an attractive coat and Hermes gave her the power of telling lies A charming young lady she was the first woman that ever lived Zeus called her Pandora Because she had
20/50
- Play and Pause
In the reading interface, press ▶to switch between Auto Mode and Manual Mode. In

Manual Mode, the text will stop, press ◀◀/▶▶ to turn to the previous or next page.
Note: blank screen function is screened in text reading mode.
- Skip To
Press ◀◀/▶▶ to adjust reading percentage, jumping to the page corresponding to the set percentage. Step: 5%.
- Auto Play Gap
Set auto play interval. Press ◀◀/▶▶ to change the value from 3s to 15s. Step: 3s. The default gap is 6s.
- Font Size
Change font size: small, medium and large.
- Add Bookmark
The function and the operation are the same as
- Delete the File
The function and operation are the same as
THE CD DRIVER THAT ACCOMPANIED YOUR MP3 PLAYER DOES NOT NEED TO BE INSTALLED. THE FOLLOWING INSTRUCTIONS EXPLAIN COPYING AND DELETING VIDEO FILES FROM YOUR COMPUTER.
-
CONNECT USB CABLE BETWEEN THE UNIT AND COMPUTER
-
TURN ON YOUR COMPUTER.
-
DOUBLE CLICK ON "MY COMPUTER"
-
DRIVE NAMED"REMOVABLE DISK" OR "MP3 PLAYER"-THIS IS YOUR MP3 PLAYER.
-
DOUBLE CLICK THE REMOVABLE DISK/MP3 PLAYER-THIS OPENS THE FOLDER.IT WILL SHOW ALL FILES CURRENTLY ON YOUR PLAYER
-
NEXT LOCATE YOUR TXT FILES ON YOUR COMPUTER.
-
ONCE YOU HAVE FOUND YOUR TXT FILE, CLICK ONCE TO HIGHLIGHT THE TEXT YOU WANT TO SEND TO YOUR MP3 PLAYER:
A. RIGHT CLICK ON THE HIGHLIGHTED TXT FILEA BOX WILL COME UP. MOVE CURSOR TO "SEND TO" AMD ANOTHER BOX WILL COME UP. IF YOU HAVE THE OPTION "REMOVABLE DISK", CLICK ON IT. THIS WILL SEND TXT FILE TO MP3 PLAYER.
B. IF YOU DO NOT HAVE "REMOVABLE DISK"LISTED,THEN RIGHT CLICK ON "COPY"(see Picture "01").GO BACK AND REPEAT STEPS 3,4&5.
RIGHT CLICK ,SELECT "PASTE"(see Picture "02") AND YOUR TXT FILE WILL BE COPIED TO YOUR MP3 PLAYER.

(Picture "01")
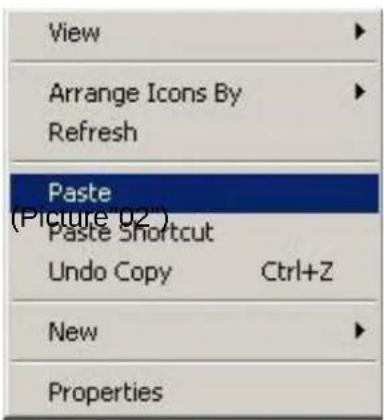
- IF YOU WANT TO DELETE THE TXT FILE, HIT "DELETE" BUTTON OR RIGHT CLICK ON THE FILE. A BOX WILL OPEN.CLICK ON THE WORD "DELETE" AND THE TXT WILL BE REMOVED FROM YOUR PLAYER.
Recordings
Select
Recording Interface
Current status: Standby,
Now Recording, Pause

Submenu and Basic Operation
In recording interface, it is in standby status, long press MENU to enter submenu, it includes:
if it is in recording status, long press MENU , the system will save the recording file and then return to standby status.
- Start\Pause\Stop Recording
Press ▶to switch between record and pause record. Press MENU, the system will prompt “Stop Record?”, select
When the recording pauses, long press MENU to save the recorded file.
- Record Format
Set the format of the recording file.
- Record Quality
Set record quality, low, medium and high.
- Record Gain
Adjust recording volume: Level 1-5.
Radio
Select < Radio> in the main interface to enter. Earphone must be plugged in before enter.
Radio Interface
In the playing interface, press to switch between Normal and Preset mode if channel been saved before.
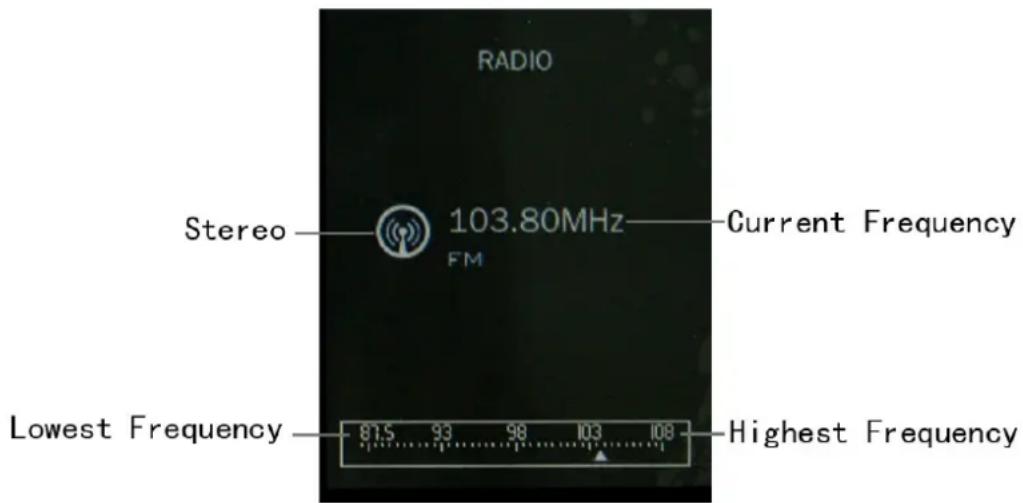
Submenu and Basic Operation
In Normal Mode, long press MENU to enter submenu, it includes:
Quality>,
- Listen In
Select this item to enter FM interface, the channel frequency is the one exited last time. If it is the first time, the frequency is default as 87.5MHz.
In Normal Mode, press ◀◀/▶▶ to decrease or increase one frequency point.
2. FM Record
Press ▶ to enter FM recording interface, the operation is the same as that of
The recorded file will be saved to
3. Record Quality
Function and operation is the same as that of
4 Record Gain
Adjust recording volume: Level 1-5.
5. Save Channel
Press to enter Save channel interface, it will show a list as CH01,CH02....select one of them and press will save the channel that you are listening in
6. Auto search:
select
7. Station List
List the saved stations. Select one station and press to enter the FM listening interface to listen. Support up to 20 stations per band.
Set up
Select
12:00 AM

Date & Time
Display
Power Saving
Language
Advanced
Date and Time
- Adjust Date
Set system date. Press ◀◀/▶▶ to change the value and press ▶to confirm and exit.
- Adjust Time
Set system time. Long press MENU to switch among hour, minute and AM/PM and press ◀◀/▶▶ to change the value. Press ▶to conform and exit.
Display
- Backlight
Off, 5, 10, 20S, 30S, 1M and 5M. If the backlight time is off, then no black screen. If it is not off, the screen will turn black if no operation during the set duration.
Power Saving
- Power Saving
Off, 10S, 30S, 1M, 3M, 5M and 10M. If the power saving is off, the player will not shut down automatically, if it is not off, the player will shut down in case no operation during the set duration.
2. Sleep Mode
Off, 10M, 30M, 1Hr, 2Hr, 3Hr, 4Hr and 5Hr. The player will shut down when the set time reaches.
Language
Support Simplified Chinese (default), Italian English Traditional Chinese, French, German, Dutch, Spanish, Czech, Danish, Polish, Romanian,
Advanced
Player Information
Show the player's basic information: Firmware Version, Total Space, Free Space
Format Memory
Format the player. Please save data before format.
System Check
Select to enter, the system prompts: "May require a few minutes to finish". Select Ok, the system starts self-check and shows "Self-checking..."
Reset
Select it and the system will prompt: "Reset default setting, system will shut down". Select Ok, then the settings of all applications will restore to the factory setting.
Firmware Upgrade
This player provides with firmware upgrading tool to upgrade or repair the firmware in the player.
- Download the latest firmware.
- Connect the player to PC's USB port correctly; make sure no other movable disks are connected to the PC at the same time.
3. Run this tool.
If the firmware in the player is in good condition, the tool will shift to firmware upgrading mode; it displays the information of the player's firmware such as version etc in the box on the upper left corner of the tool interface. Click button "Select new version firmware file" to select the firmware file to be upgraded. After the firmware file detected to be correct by the tool, it displays the information of the selected firmware such as version etc in the box on the upper right corner of the tool interface. Now click button "Start upgrading" to upgrade the firmware. If the internal firmware of the player has been damaged, the tool will change to firmware restoration mode. The version information of the player's internal firmware now will not be displayed in the box on the upper left corner of the software interface. It requires the user to select a correct firmware file to repair the damaged one. At the same time, the information such version etc of the firmware file to be repaired is displayed in the box on the upper right corner of the interface; click button "Start upgrading" to upgrade the firmware.
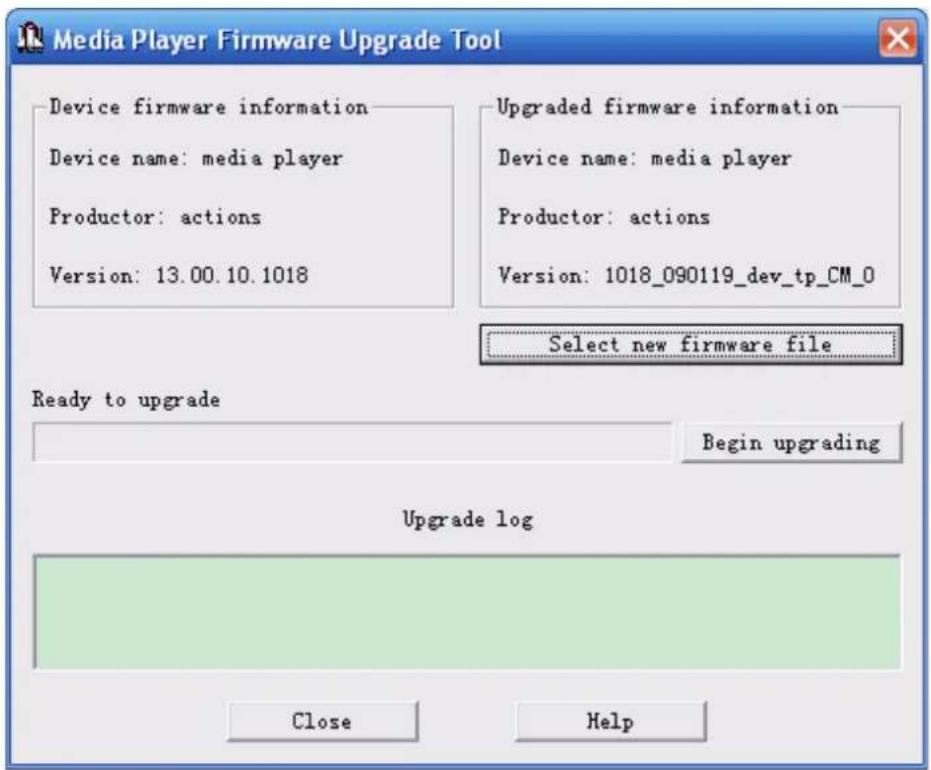
- Do not disconnect the player from the PC during firmware upgrading or repairing. After the upgrading is completed, a prompt “firmware upgrading succeeded, the program will exit automatically!” pops out. Now confirm, the tool will shut down and reset the player, the whole upgrading is completed.
FAQ
- Cannot turn on the player.
Check battery's remaining capacity. Connect USB cable or charger and try to turn on the player again.
- Cannot hear the voice via earphone.
Check whether volume is set to 0.
Check whether earphone has been plugged in the earphone slot.
- Serious noise
Check whether earphone plug is clean. Dirty plug may lead to noise.
Check whether the file is damage. Try other file. Damaged file may lead to serious noise and voice jump.
- Bad signal for FM Radio
Adjust the direction and place of the player, pull the earphone cable longer.
Check whether there is electronic equipment nearby. Electronic equipment may lead to signal electronic equipment.
- Clobber problem
Check whether the language is set correctly.
- Key does not work.
Check whether the player is locked.
- Cannot download file.
Check whether the connection between PC and the player is correct.
Check whether the memory space is full.
Check whether USB cable is damaged.
Factory Setting
| Music Start Level Level 0 | |
| Music Play Mode Sequence | |
| EQ Mode Normal | |
| Picture Mode Thumbnail | |
| Picture Play Mode Manual | |
| Slide Gap 0sec | |
| Record Type WAV | |
| Channel Frequency 87.5MHZ | |
| FM Band USA & Euro band | |
| Auto Reading Gap | 5 sec |
| Backlight Time | 10 sec |
| Backlight Brightness 5 | |
| Owner Unknown | |
| Off Time 0 sec | |
| Sleep 0 min. |
Specification
| Memory Space 512M or more | |
| Battery 3.7V lithium battery | |
| Operation Voltage. 3.5~4.2V | |
| S/N Ratio 90db | |
| FM Distortion 0.2% | |
| LCD 220*176 260,000 colors, | TFT screen |
- BATTERY CHARGE:
- Connecting to PC
- System Configuration
- Low Power
- File Storage
- NOTE:
- Know your player
- Keys Processing
- Notes:
- Key Operation
- Power On/Off
- MAIN MENU—TO SELECT DIFFERENT MODES:
- Music Mode:
- Main Interface
- Music Playing Interface
- Submenu and Basic Operation
- Select EQ
- Set Sound
- Replay Times
- Replay Intervals
- Variable Speed
- Set Star Level
- Delete File
- INSTRUCTIONS FOR MUSIC DOWNLOAD
- Movie Mode:
- Main Menu
- Photo Mode:
- Slide Effect
- Delete the File
- HOW TO COPY THE PHOTO FILE:
- Video Recorder
- Camera
- EXTRA
- Calendar:
- EBook
- 12:00 AM
- Recordings
- Recording Interface
- Radio
- Radio Interface
- FM Record
- Record Quality
- Record Gain
- Save Channel
- Auto search:
- Station List
- Set up
- Date and Time
- Display
- Power Saving
- Sleep Mode
- Language
- Advanced
- Player Information
- Format Memory
- System Check
- Reset
- Firmware Upgrade
- Run this tool.
- FAQ
- Factory Setting
Brand : Naxa
Model : NMV-169
Category : Mp3 player