
PT-LC70U - Video projector PANASONIC - Free user manual and instructions
Find the device manual for free PT-LC70U PANASONIC in PDF.


| Product Type | LCD Video Projector |
| Model | PT-LC70U |
| Native Resolution | 1024 x 768 (XGA) |
| Brightness | Not specified in manual; typical for this class ~1500-2000 ANSI lumens |
| Contrast Ratio | Not specified; typical ~400:1 |
| Lamp Life | Approximately 2000 hours (ET-LAC50 replacement) |
| Projection Lens | Manual zoom and focus |
| Compatible Input Signals | VGA, SVGA, XGA, SXGA, Macintosh, DTV (480i/p, 720p, 1080i), NTSC, PAL, SECAM, Component YPbPr |
| Input Connectors | RGB/YPbPr (D-sub 15-pin), S-Video, Video (RCA), Audio (3.5mm), RS-232C serial |
| Keystone Correction | Automatic (via simple stand) and manual via menu |
| Digital Zoom | Up to 5x with remote control |
| Freeze Function | Yes (mutes audio during freeze) |
| Shutter (Mute) Function | Yes (turns off picture and sound) |
| On-Screen Display Languages | English, German, French, Spanish, Italian, Japanese, Chinese |
| Power Supply | AC 100-240 V, 50/60 Hz (automatic universal) |
| Power Consumption (Standby) | Approximately 15 W when plugged in and off |
| Dimensions (W x H x D) | Not specified; approximate 12.5" x 3.7" x 10.5" (based on similar models) |
| Weight | Not specified; estimated ~6.6 lbs (3.0 kg) |
| Air Filter Cleaning Interval | Every 100 lamp hours |
| Projection Modes | Desk/Front, Desk/Rear, Ceiling/Front, Ceiling/Rear |
| Screen Compatibility | 4:3 and 16:9 (auto detection for S1 and DTV) |
| Accessories Included | Remote control (CR2025 battery), VGA cable, video cable, audio cable, lens cap, carrying bag, swivel stand, CD-ROM manual, quick reference guide, warranty card |
| Optional Accessories | Full-function remote (ET-RMLC50), replacement lamp (ET-LAC50), D-sub15-BNC5 adapter (ET-ADBNC), ceiling mount bracket (ET-PKC50) |
| Safety & Maintenance | Use grounded outlet, avoid liquids, clean lens with damp cloth, do not look into lens, unplug during storms, service by qualified personnel |
Frequently Asked Questions - PT-LC70U PANASONIC
User questions about PT-LC70U PANASONIC
0 question about this device. Answer the ones you know or ask your own.
Ask a new question about this device
Download the instructions for your Video projector in PDF format for free! Find your manual PT-LC70U - PANASONIC and take your electronic device back in hand. On this page are published all the documents necessary for the use of your device. PT-LC70U by PANASONIC.
USER MANUAL PT-LC70U PANASONIC
Operating Instructions
Model No. PT-LC70U

natural_image
Exterior view of a projector with ventilation grille and power control panel (no visible text or symbols on main body)Please read these instructions completely before operating this LCD Projector.
Dear Panasonic Customer:
This instruction manual provides all the necessary operating information that you might require. We hope it will help you to get the most performance out of your new product, that you will be pleased with your Panasonic LCD Projector.
For your own protection and prolonged operation of your LCD Projector, please be sure to read the “Important Safeguards” carefully, before use.
Things You Should Know
Caution:
This equipment has been tested and found to comply with the limits for a Class B digital device, pursuant to Part 15 of the FCC Rules. These limits are designed to provide reasonable protection against harmful interference in a residential installation. This equipment generates, uses, and can radiate radio frequency energy and, if not installed and used in accordance with the instructions, may cause harmful interference to radio communications. However, there is no guarantee that interference will not occur in a particular installation. If this equipment does cause harmful interference to radio or television reception, which can be determined by turning the equipment off and on, the user is encouraged to try to correct the interference by one or more of the following measures:
- Reorient or relocate the receiving antenna.
- Increase the separation between the equipment and receiver.
- Connect the equipment into an outlet on a circuit different from that to which the receiver is connected.
- Consult the dealer or an experienced radio/TV technician for help.
Things You Should Know
Declaration of Conformity
Model Number: PT-LC70U
Trade Name: Panasonic
Responsible party: Matsushita Electric Corporation of America.
Address: One Panasonic Way Secaucus New Jersey 07094
Telephone number: 1-800-528-8601
This device complies with Part 15 of the FCC Rules, Operation is subject to the following two conditions: (1) This device may not cause harmful interference, and (2) this device must accept any interference received, including interference that may cause undesired operation.
FCC Warning:
To assure continued FCC compliance, use only the provided grounded power supply cord and prevent undesirable interference, use only the provided shielded VGA cable with 2 ferrite cores while connecting LCD to computer and all other connecting cables should be shielded. Any changes or modifications not expressly approved by the party responsible for compliance could void the user's authority to operate this equipment.
Warning: (E.U. only)
To assure continued CE Mark compliance, use only the provided earthed power supply cord and prevent undesirable interference, use only the provided shielded VGA cable with 2 ferrite cores while connecting LCD to computer and all other connecting cables should be shielded.
Any changes or modifications not expressly approved by the party responsible for compliance could void the user's authority to operate this equipment.
Important Safeguards
CAUTION: Please read all of these instructions before you operate your LCD Projector. Save these instructions for future reference.
Electrical energy can perform many useful functions. This LCD Projector has been engineered and manufactured to meet applicable safety standards. But IMPROPER USE CAN RESULT IN POTENTIAL ELECTRICAL SHOCK OR FIRE HAZARDS. In order not to defeat the safeguards incorporated into this LCD Projector, observe the following basic rules for its installation, use and servicing.
1 Unplug the LCD Projector from the wall outlet before cleaning.
2 Do not use liquid cleaners or aerosol cleaners. Use a soft dry cloth to clean the LCD Projector unit. If the unit is very dirty, wet a cloth with neutral detergent, squeeze it tight, wipe the unit with it, and finish by wiping with a dry cloth. Do not use a chemical duster or polisher-cleaner because it can adversely affect the unit and peel the paint coat.
3 Do not use attachments not recommended by Panasonic, as they may cause hazards.
Important Safeguards
4 Do not use the LCD Projector near water; for example, near a bathtub, washbowl, kitchen sink, laundry tub, in a wet basement, near a swimming pool, etc. Never spill liquid into the LCD Projector.
5 Do not place the LCD Projector on an unstable cart, stand, or table. The LCD Projector may fall, which may cause serious injury to a child or an adult, and/or serious damage to the unit. Use only with a cart or stand recommended

natural_image
Silhouette of a person pushing a large box inside a circular frame (no text or symbols)by its manufacturer, as being suitable for use with the LCD Projector.
6 The LCD Projector equipment and cart combinations should be moved with care. Quick stops, excessive force, and uneven surfaces may cause the equipment and cart combination to overturn.
7 Slots and openings in the cabinet back and bottom are provided for ventilation. To ensure reliable operation of the LCD Projector and to protect it from overheating, these openings must not be blocked or covered. These openings should never be covered with cloth or other material. The bottom opening should not be blocked by placing the LCD Projector on a bed, sofa, rug, or other similar surface. The LCD Projector should not be placed near or over a radiator or heating vent. The LCD Projector should not be placed in a built-in installation such as a bookcase unless proper ventilation is provided.
Important Safeguards
8 The LCD Projector should be operated only from the type of power source indicated on the back of the LCD Projector or in the specifications. If you are not sure of the type of power supplied to your home, consult your LCD Projector dealer or local power company.
9 Do not allow anything to rest on the power cord. Do not place the LCD Projector where the cord will be walked on.
10 Follow all warnings and instructions marked on the LCD Projector.
11 As a safety feature, the LCD Projector is equipped with a 3-prong grounded plug. The 3-prong grounded plug will fit only into a grounding type power outlet. If the plug does not fit, use an adaptor that is properly grounded or have an electrician install a grounded type outlet. Do not attempt to modify this AC plug.
12 For added protection of the LCD Projector during a lightning storm, or when it is left unattended or not in use for long periods of time, unplug it from the wall outlet and disconnect any cable systems. This will prevent damage to the projector due to lightning and power-line surges.
13 Do not overload wall outlets and extension cords with too many products, because this can result in fire or electric shock.
Important Safeguards
14 Never push objects of any kind into the LCD Projector through cabinet slots as they may touch dangerous voltage points or short out parts, which could result in a fire or electric shock.
15 Do not attempt to service the LCD Projector yourself. Opening or removing covers may expose you to dangerous voltage or other hazards. Refer all servicing to qualified service personnel.
16 Unplug the LCD Projector equipment from the wall outlet and refer servicing to qualified service personnel under the following conditions:
A. When the power cord or plug is damaged or frayed.
B. If liquid has been spilled into the LCD Projector.
C. If the LCD Projector has been exposed to rain or water.
D. If the LCD Projector does not operate normally when you follow the operating instructions. Adjust only those controls that are covered by the operating instructions; improper adjustment of other controls may cause damage and will often require extensive work by a qualified technician to restore the LCD Projector to normal operation.
E. If the LCD Projector has been dropped or the cabinet has been damaged.
F. When the LCD Projector exhibits a distinct change in performance – this indicates a need for service.
Important Safeguards
17 Upon completion of any service or repairs to the LCD Projector, ask the service technician to perform a routine safety check to determine that the LCD Projector is in safe operating condition.
18 When replacement parts are required, be sure the service technician has used replacement parts specified by the manufacturer that have the same characteristics as the original parts. Unauthorized substitutions may result in fire, electric shock, or other hazards.
19 Air filter should be cleaned every 100 lamp on hours. The LCD Projector may become too hot if filter is not cleaned when required.
20 If lens becomes dirty, or smudged, clean with a clean, dampened cloth. Never touch the lens with your fingers.
21 Do not look directly into the aperture and lens while operating as this may result in damage to your eyes.
LCD Projector Features
1 Compact & Lightweight
A compact, lightweight liquid crystal projector with the mobility for mobile presentations as well.
2 Built-in Simple Stand
The Built-in Simple Stand makes it possible to match the projection angle with the basic use environment of your office with one-touch ease.
3 Attachable/Removable Swivel Stand
Flexible settings are possible because the projected image height and left/right tilt can be adjusted freely.
4 One-touch Auto Setup
One-touch image adjustments of RGB input can be made. The unit detects the condition (up/down) of the simple stand and automatically corrects keystone distortion.
5 Compatible with most Personal Computers
The RGB input accepts signals from VGA, SVGA, XGA, SXGA, and Macintosh compatible computers with no additional hardware.
6 Supports Component Video (YPBPR) Input
This unit supports progressive DVD and HDTV (480 i/480 p/625 i/720 p/1 080 i) when components are connected.
LCD Projector Features
7 Accommodates all International Broadcast Video Signal Formats
The LCD Projector accepts NTSC/PAL/SECAM/PAL-M/PAL-N/NTSC4.43 video signal formats.
8 Digital Zoom and Freeze Feature
With remote control operation, you can display a enlarged portion of the screen up to 5 times. You can also display a freeze frame (paused) screen.
9 On-board Card Type Wireless Remote Control
Keys necessary for basic operation have been simply arranged on this compact remote control which can be stored neatly in the unit.
10 On Screen Display
In addition to English, you can select German, French, Spanish, Italian, Japanese, and Chinese.
11 Automatic Universal Power Supply
This unit has an operating voltage range of AC 100 V - 240 V.
12 CD-ROM Manual
Because this is an electronic manual, by simply clicking on the link given for each item of information, you can go directly to the related page for instructions.
LCD Projector Features
13 Image Quality Select Feature, R/G/B Level Adjust Feature
With the Image Quality mode switch (Dynamic/Natural) you can also fine-adjust the white balance of the projected image.
14 Full Function Remote Control Unit for LCD Projector (optional)
A full function remote control unit for LCD Projector. with built-in wireless mouse and laser pointer is available.
15 Frontal Air Vent Design
Vented air will not blow on persons located to the side or in rear of the projector and light leakage will not be a problem with the Frontal Air Vent design.
Equipped with a variety of convenient functions
A variety of functions such as the following have been provided.
- A blue screen is projected (at start-up only) when no signal is being input.
- Freeze functions for video and audio signals can be toggled on and off.
•The input signal display function can be toggled on and off.
•16:9 (wide) screen projection is provided.
Contents of LCD Projector Box
Please confirm that the following items are packed in the LCD Projector box. They are provided to help you use or set up your LCD Projector.
(1) LCD Projector
(2) Wireless Remote Control Unit (LSSQ0275)
(3) CR2025 Lithium Battery (Included with the remote control unit)
(4) 9.8 ft UL/CSA Power Cord (LSJA0308)
(5) VGA Cable (LSJA0239)
(6) Video Cable (LSJA0074)
(7) Audio Cable (LSJA0240)
(8) Lens Cap (Included with the projector)
(9) Carrying Bag (LSFC0015)
(10) Swivel Stand (LSYC0219)
(11) CD ROM (Operating Instructions)
(12) Quick Reference Manual
(13) Warranty Card
(14) Service Center List
Product Information
LCD Projector
Labels on the unit are omitted.
■Top, right and front (In case Swivel stand is installed.)

■Back and bottom
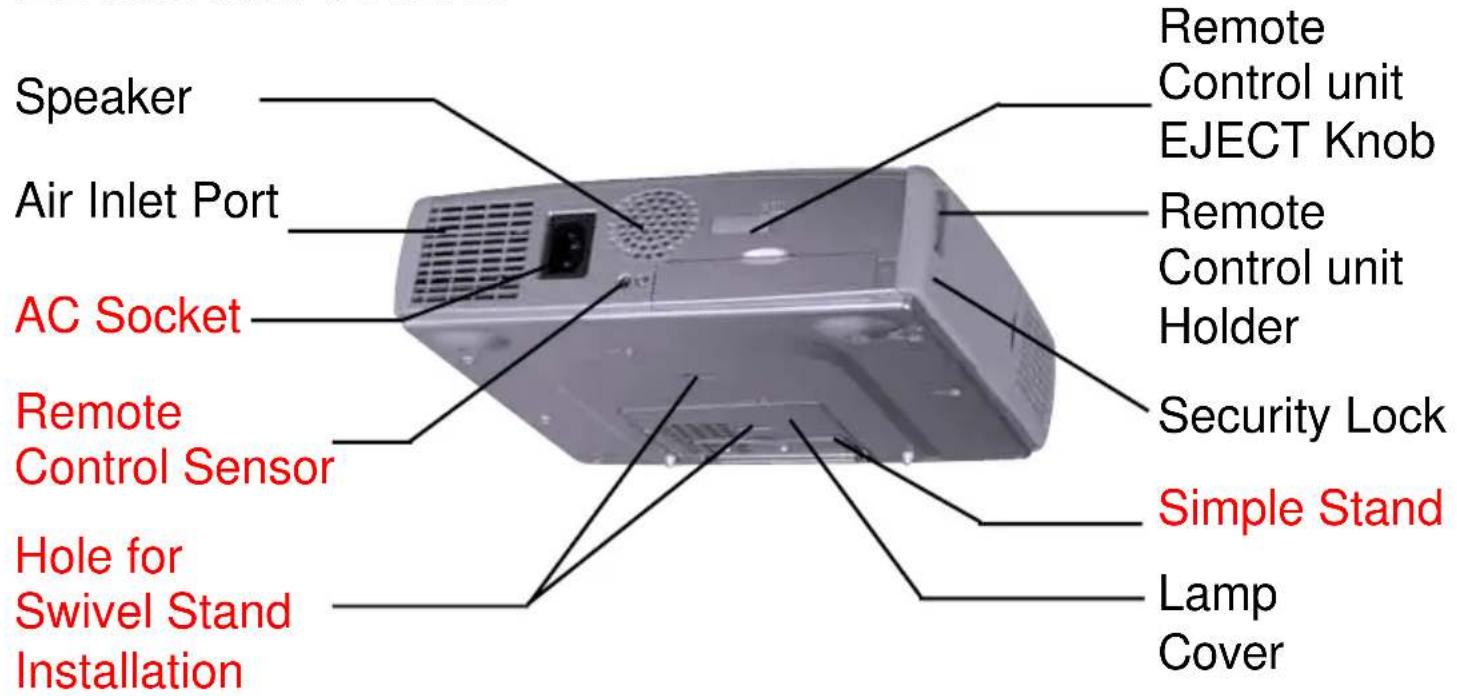
Product Information
LCD Projector
■Control panel

Product Information
LCD Projector
■Connector panel

Note
The serial connector which is on the terminal board of the projector conforms to the RS-232C interface specification, so that the projector can be controlled by a personal computer which is connected to this connector.
Product Information
Remote Control unit

Note
When you purchase the optional full functional remote control unit (ET-RMLC50), you can enjoy the wireless mouse and laser pointer features.
Before using the Remote Control Unit
Remote Control comes with battery inside. Please remove white protective film before use.
■Replacing the battery
Insert the new lithium battery making sure the polarities (+) and (-) are correct.
WARNING:
Replace battery with CR2025 only. Use of another battery may present a risk of fire or explosion.
Caution: Battery may explode if mistreated. Dispose of used battery promptly. Keep away from children. Do not recharge, disassemble or dispose of in fire.
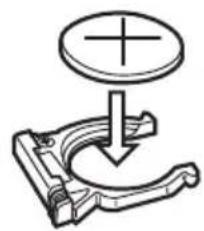
1 While pushing the battery holder tab to the left, pull out the battery holder.

2 Insert the battery into the battery holder so that the + side is facing upward.
natural_image
Pure mechanical diagram showing a circular component with a plus sign and a downward arrow, no text or symbols present.3 Insert the battery holder.

natural_image
Pure mechanical diagram showing a lever and pivot point without any text or symbolsNote
- Do not drop the remote control unit.
- Keep the remote control unit away from liquids.
- Remove the battery if not using the remote control unit for long periods.
Before using the Remote Control Unit
■Operating range
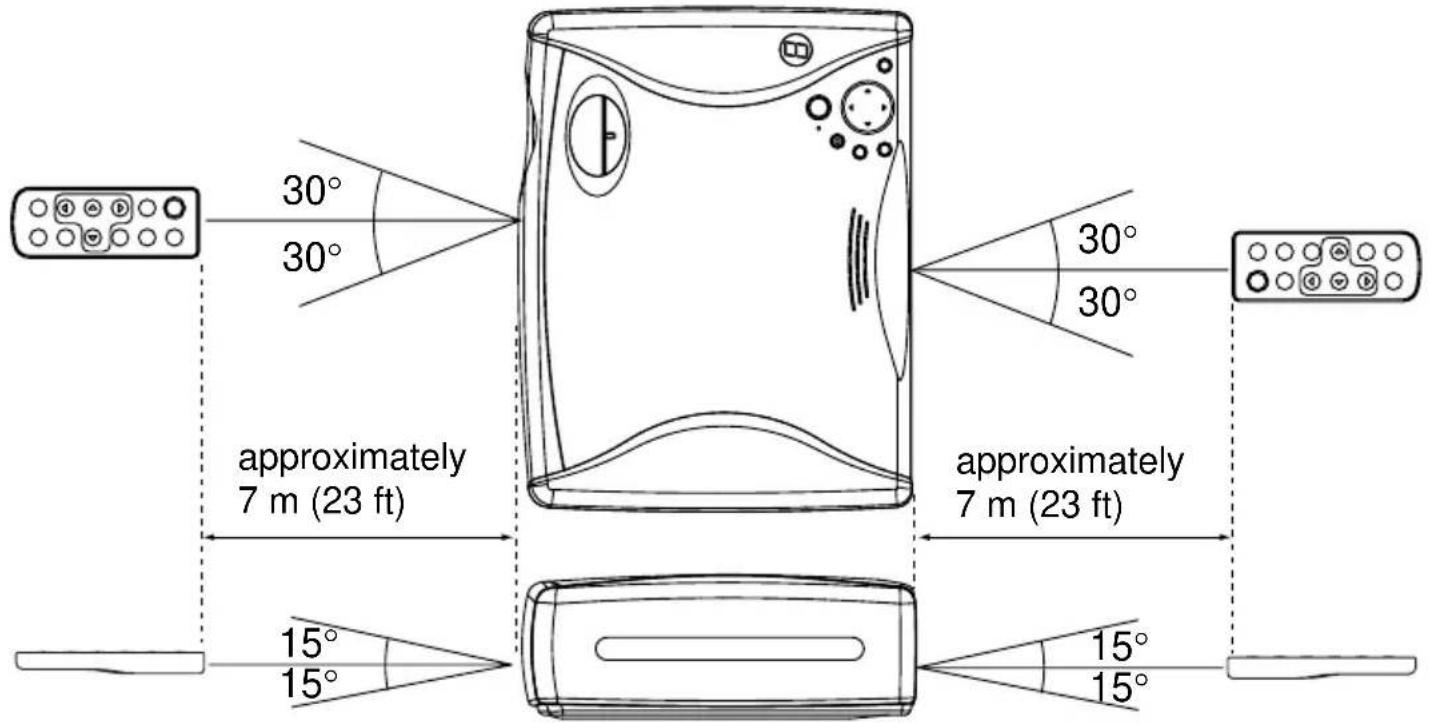
If the remote control unit is held so that it is facing directly in front of the front or rear remote control signal receptors, the operating range is within approximately 7 m (23 ft) from the surfaces of the receptors. Furthermore, the remote control unit can be operated from an angle of ±30^ to the left or right and ±15^ above or below the receptors. (In this case, the operating range is shortened.)
Note
- If there are any obstacles in between the remote control unit and the receptors, the remote control unit may not operate correctly.
- If strong light is allowed to shine onto the remote control signal receptor, or if there are any obstacles between the remote control signal receptor and the remote control unit, correct remote control operation may not be possible.
- If facing the remote control unit toward the screen to operate the projector, the operating range of the remote control unit will be limited by the amount of light reflection loss caused by the characteristics of the screen used.
Attaching and Removing the Swivel Stand
A swivel stand can be attached to or removed from the LCD Projector. When attached, you can fine-adjust the projection angle. To attach or remove the swivel stand, follow the steps below.
- Attachment
1 Place the unit upside down. Place the unit on a flat, stable surface covered with a soft cloth, etc.

natural_image
Line drawing of a portable air conditioner unit with ventilation grilles and mounting holes (no text or symbols)2 1) First, insert the swivel base into the front openings of the projector. 2) Then, while pressing the PUSH Button, insert into the rear openings.

-Removal
1 Place the unit upside down. Place the unit on a flat, stable surface covered with a soft cloth, etc.

natural_image
Line drawing of a portable electronic device with a circular button and top panel (no text or symbols)2 While pressing the PUSH Button, remove the Swivel stand.
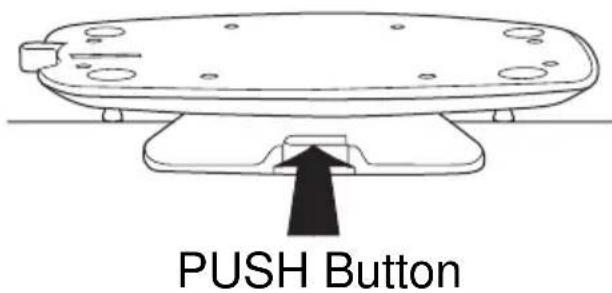
Caution: Never pick the unit up by the swivel stand.
System Configuration Example
■ Example of connection to audio-visual equipment

Note
- Only one audio system circuit is available for the AUDIO IN jack, so if you wish to change the audio input source, you will need to remove and insert the appropriate plugs.
- If the video signal source is connected using a cable with a BNC junction plug, use the BNC-RCA Adaptor (not included) to convert the pin jack.
System Configuration Example
■ Example of connection to a Personal Computer
Personal Computer

Note
- When using the PC Plug & Play feature, first, attach the AC cord to the LCD Projector and turn the projector power on. Then, turn the PC power on.
- When LCD Projector power is turned off, shut down the personal computer as well.
- Refer to the “Signals that can be Input” for types of RGB signals which can be input to the projector by connecting a personal computer.
System Configuration Example
■ Connecting D-sub15-BNC5 (female) Adaptor Cable
The Component signal (YPBPR signal) can be input and projected with this LCD Projector. Please read the operating instructions regarding the output side of the component when connecting.

System Configuration Example
Notes on system configuration
- Turn off the power supply of each system component before connecting any of the components.
- Read the instruction manual for each system component before connecting it.
- If the cables necessary for connecting a component to the system are not included with the component or available as an option, you may need to fashion a cable to suit the component concerned.
- If there is a lot of jitter in the video signal input from the video source, the picture on the screen may flicker. In such cases, it will be necessary to connect a TBC (time base corrector).
- It may not be possible to connect some types of personal computer.
Note
- Because each Y, PB, and PR signal is input independently, the Component signal allows for more faithful color reproduction.
- The Component signal output terminal indication will differ according to the output device (PR, PB, Y/R-Y, B-Y, Y/Cr, Cb, Y, etc.). Please read the operating instructions included with the output device.
- You need to change the input signal setting on this LCD Projector when inputting the Component signal. In this case, please refer to “Setting of the RGB/YPBPR Input Signal Selection”.
- D-sub15-BNC5 (female) Adaptor Cable (sold separately) often have BNC connectors, however a DVD output device usually has RCA jacks. In this case, you will need BNC-RCA adaptors (not included).
Setting-up Positions
There are four ways of installing this projector as shown next page. This section explains the standard case of the desk-mounted front projection.
(The projection method can be set from the MENU screen. Refer to the “Changing the Projection Mode”.)
Caution: When you set up the LCD Projector
- Do not place it in humid or dusty places, or places where the air is sooty or full of cigarette smoke. If the lens, mirror, or other optical components become dirty, the picture will blur or darken, making viewing difficult.
- Do not expose to extreme heat or cold. Operating temperature: 0^ C - 40^ C (32 °F - 104 °F)
Preparation
- Refer to "screen size and required distance".
- Select a room that can be darkened.
Setting-up Positions
DESK/FRONT

natural_image
Silhouette of a person sitting at a desk watching television with a monitor, connected by dashed lines (no text or symbols)Viewing a picture projected on the front of the screen from a floor.
DESK/REAR

natural_image
Silhouette of a person sitting on a chair facing a television, with dashed lines indicating distance from each screen (no text or symbols)Translucent screen
Viewing a picture projected through the back of the screen from a floor installation.
CEILING/REAR

natural_image
Diagram showing a person sitting on a chair facing a camera with dashed lines indicating perspective (no text or symbols)Translucent screen
Viewing a picture projected through the back of the screen from a ceiling installation.
CEILING/FRONT

natural_image
Silhouette of a person sitting on a chair facing a device with a beam, connected to a dashed line indicating perspective (no text or symbols)Viewing a picture projected on the front of the screen from a ceiling installation.
Setting-up Positions
■screen size and required distance
The screen should be positioned so that it is not directly touched by sunlight or room light as this will wash out the colors of the picture making it hard to see. When possible, close all blinds, curtains, etc. and dim the lights. Also, the LCD Projector should be at a 90° angle to the screen for the best picture results. To determine the distance for the desired size, please refer to the “LCD Projector /Screen Relative Position Chart”.
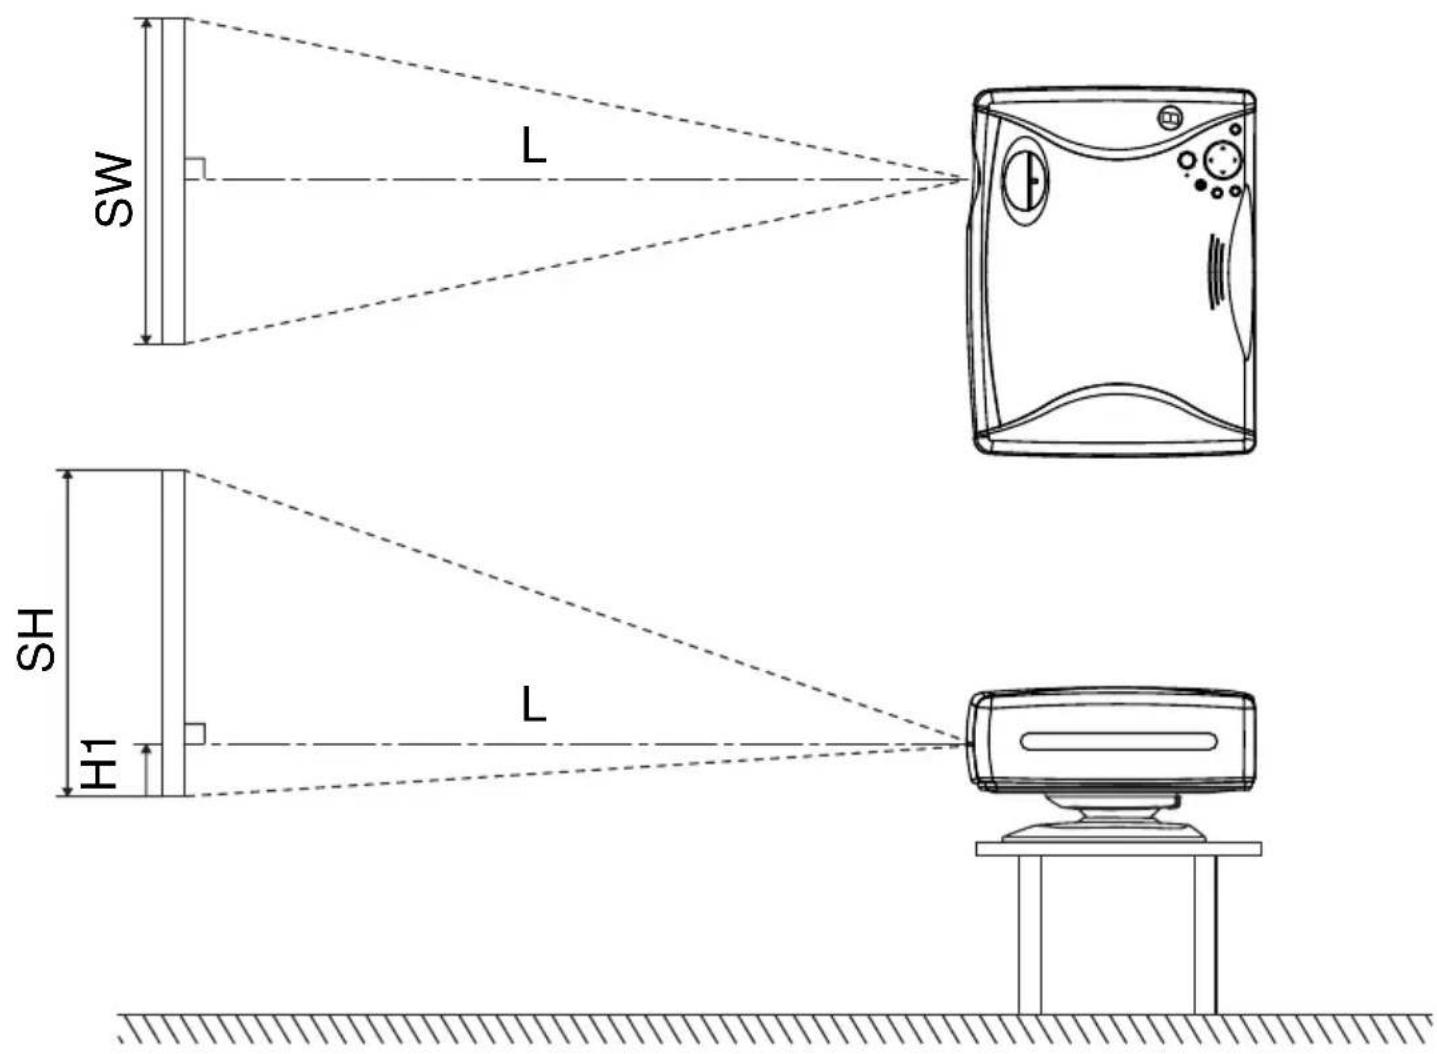
Setting-up Positions
■LCD Projector /Screen Relative Position Chart
The picture can be adjusted to the desired size within the range of the zoom lens. (The values in the table are reference values.)
| Screen type (4:3) | Throw distance (L) | Height position (H1) | |||
| Screen size | Width (SW) | Height (SH) | Wide (LW) | Telephoto (LT) | |
| 30 in | 0.61 m | 0.46 m | 1.6 m | 6.5 cm | |
| 40 in | 0.81 m | 0.61 m | 1.6 m | 2.1 m | 8.7 cm |
| 60 in | 1.22 m | 0.91 m | 2.4 m | 3.1 m | 13.1 cm |
| 80 in | 1.63 m | 1.22 m | 3.2 m | 4.2 m | 17.4 cm |
| 100 in | 2.03 m | 1.52 m | 4.0 m | 5.2 m | 21.8 cm |
| 150 in | 3.05 m | 2.29 m | 6.0 m | 7.8 m | 32.7 cm |
| 200 in | 4.06 m | 3.05 m | 8.1 m | 10.5 m | 43.5 cm |
| 250 in | 5.08 m | 3.81 m | 10.1 m | 13.1 m | 54.4 cm |
| 300 in | 6.10 m | 4.57 m | 12.1 m | 15.7 m | 65.3 cm |
Setting-up dimensions which are not given in the above table can be calculated using the formulas below.
If the screen size is SD, then the following formula is first used to obtain the screen width (SW).
$$ \mathrm{SW} (\mathrm{m}) = \mathrm{SD} \times 0. 0 2 5 4 \div 5 \times 4 $$
The value for SW obtained above can then be used with the following functions to calculate the projection distance.
$$ \mathrm{LW} (\mathrm{m}) = 1. 9 8 \times \mathrm{SW} $$
$$ \mathrm{LT} (\mathrm{m}) = 2. 5 7 \times \mathrm{SW} $$
For 16:9 aspect ratios, the following formula can be used to calculate the screen width (SW) and the projection distance for the wide lens position.
$$ \mathrm{SW} (\mathrm{m}) = \mathrm{SD} \times 0. 0 2 5 4 \div 1 8. 3 6 \times 1 6 $$
Turning the power on and off
If the power cord is removed while the cooling fan is running, or you project immediately after turning on the power, such problems as damaging of the light source lamp or reduced illumination may occur. Be sure to follow the below procedure for turning the power “On” and “Off.”

Note
- Insert Power Cord into LCD Projector AC socket and connect to properly grounded wall outlet.
- When power is turned off, the cooling fan continues to operate in order to cool the projector interior.
- This unit consumes approx. 15 W in OFF condition when plugged into an AC outlet.
Turning the power on and off


Turning on the power
1 Press POWER Button on the LCD Projector or remote control unit.
2 The power indicator will flash, then turn solid green and a picture will be projected onto the screen.
Note
The LCD Projector cannot be turned on for a while after turning it off.
Turning off the power
1 Press POWER Button on the LCD Projector or remote control unit. “Please press POWER button again to power off.” is displayed on the screen, and then press POWER Button again.
2 The power indicator will illuminate flashing red.
3 Wait for the cooling fan to stop.
The power indicator changes to solid red, the cooling fan stops, and the projector goes into Stand-by mode.
Adjusting the Lens
Refer to the “LCD Projector/Screen Relative Position Chart”. After placing the LCD Projector to the throw distance which corresponds with the desired screen size, follow the steps below to adjust the zoom and focus while viewing a projected image.
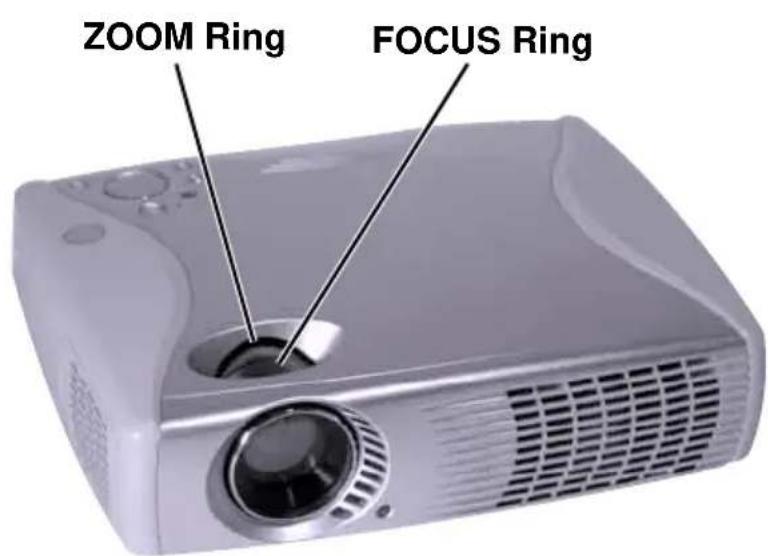
- Adjustment procedure
1 Turn the ZOOM Ring to adjust the size of the picture.
- When facing the rear of the projector, turn the ring to the right for a smaller picture, or to the left for a larger picture.
2 Turn the FOCUS Ring to adjust the focus of the picture.
- Turn the ring to the right or left until the picture is at the optimum focus.
3 Turn the ZOOM Ring again to adjust the size of the picture.
- When you turn the FOCUS Ring, the size of the picture changes.
Menu operations
This section explains how to reach the desired selection or setting screens from the MENU screen.
When an RGB signal is being projected.
(for white balance adjustment of the red component)
1 Press the MENU Button.
The Main MENU screen will be displayed.
Use the ▲, ▼
Buttons to select an item, and then press the ENTER Button.
The Second MENU screen will be displayed.

(Main MENU screen)
2 Press the ▲or ▼
Buttons to select an item, and then press the ◀or ► Buttons to change or adjust the setting.
□ White Balance
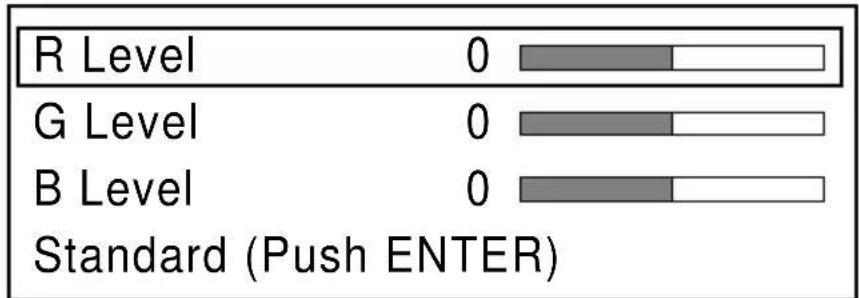
bar_stacked
| Level | Segment 1 | Segment 2 | Segment 3 | | --------- | --------- | --------- | --------- | | R Level | 0 | 0 | 0 | | G Level | 0 | 0 | 0 | | B Level | 0 | 0 | 0 |(Second MENU screen)
Note
- The last adjustment condition is saved and will not be erased even if the power is turned off.
• The value differs with each input signal.
Menu operations
■ Returning to the previous screen
If you press the MENU Button while a menu screen is being displayed, the display will return to the previous screen.
If you press the MENU Button while the Main MENU screen will be cleared.
■ Returning adjustment values to the factory default settings (standard values)
If “Standard” is selected while the “Second MENU” is displayed, the setting can be returned to the factory default setting.
However, the operation of this function varies depending on which screen is being displayed.
Use the ▲, ▼Buttons to select "Standard", and then press the ENTER Button.
□Picture
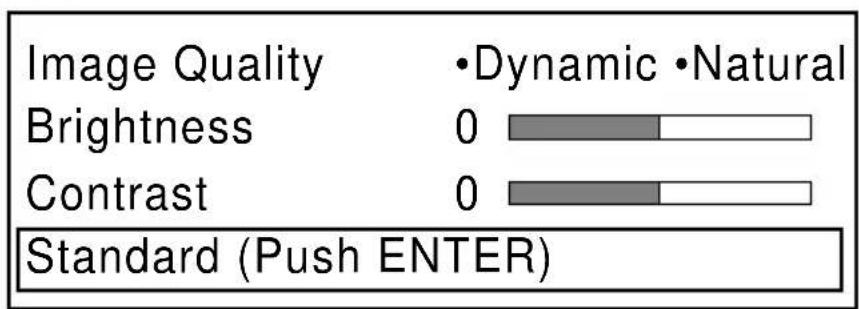
bar
| Category | Value | |---|---| | Image Quality | Dynamic | | Image Quality | Natural | | Brightness | 0 | | Contrast | 0 | Standard (Push ENTER)Changing the Projection Mode
The projection mode used by the Projector can be changed in accordance with the setting-up position. Including ceiling mounting, you may select from four direction types. At the time of shipment from the factory, the Projector is set to the No.1 “DESK/FRONT” projection mode, but this can be changed if required.
The procedure and on-screen display as shown below are based on RGB as the input signal from a personal computer.
- Selecting procedure
1 Press MENU to display the menu.
2 Press ▲ or ▼ to select "Function", and then ENTER to display the screen.
□ Picture
□ White Balance
□ Synchronization
□ Function
□Language
Information
3 Press ▲ or ▼ to select "Projection Mode".
4 Press ◀or ▶to select projecting mode from 1 to 4.
- Select 1 (DESK/FRONT)
- Select 2 (DESK/REAR)
- Select 3 (CEILING/REAR)
- Select 4 (CEILING/FRONT)
□Function
RGB/YPBPR
•RGB •YP BPR
Projection Mode
•1 •2 •3 •4
Expansion
•ON •OFF
On Screen Display
•ON •OFF
Auto Lamp Off
- YES - NO
Standard (Push ENTER)
Setting the Screen Type
This LCD Projector is compatible with wide screen (16:9 ratio). If a wide screen is used and you set the screen type to 16:9 in order to project a wide (16:9) picture to fill the entire screen, pictures are correctly projected within the screen when projecting older (normal) 4:3 ratio pictures. Please follow the instructions below to set the screen type.
The procedure and on-screen display as below are based on S-VIDEO/VIDEO as the input signal.
- Setting procedure
1 Press MENU to display the menu.
2 Press ▲ or ▼ to select “Function”, and then ENTER to display the screen.
□ Picture □ White Balance □ Video System
□ Function □ Language □ Information
3 Press ▲ or ▼ to select "Screen".
4 Press ◀ or ▶ to change the screen type.
• The 4:3 type screen is set at the factory.
| □Function | |
| Projection Mode | •1 •2 •3 •4 |
| Screen | •4:3 •16:9 |
| 16:9 | •ON •OFF |
| On Screen Display | •ON •OFF |
| Auto Lamp Off | •YES •NO |
| Standard (Push ENTER) | |
Changing to 16:9 (wide) screen format
When a S-VIDEO/VIDEO or DTV Format (RGB, YPBPR) signals is input, the image can be displayed in 16:9 (wide) screen by the following procedure. This only applies for S-VIDEO/VIDEO and DTV Format signals. The procedure below describes the on-screen displays when the S-VIDEO signal or the VIDEO signal is being projected.
- Selecting procedure
1 Press MENU to display the menu.
2 Press ▲ or ▼ to select "Function", and then ENTER to display the screen.
□ Picture
□ White Balance
□ Video System
□ Function
Language
Information
3 Press ▲ or ▼ to select "16 : 9".
4 Press◀or ▶to select "ON" or "OFF".
- Select "OFF" to return the normal screen. (This is the factory setting.)
- Select "ON" to display in 16:9 (wide) screen.
Function
| Projection Mode | •1 •2 •3 •4 |
| Screen | •4:3 •16:9 |
| 16:9 | •ON •OFF |
| On Screen Display | •ON •OFF |
| Auto Lamp Off | •YES •NO |
| Standard (Push ENTER) | |
Explanation of Screen Type
| 16:9 (Wide) Function OFF | 16:9 (Wide) Function ON | |
| 4:3 Type Screen |  Projected pictures(4:3) Projected pictures(4:3) |  Projected pictures(16:9) Projected pictures(16:9) |
| 16:9 Type Screen |  Projected pictures(4:3) Projected pictures(4:3) |  Projected pictures(16:9) Projected pictures(16:9) |
Note
Even if the 16:9 (wide) screen feature is set to OFF, when an “S1” signal or DTV Format signal (720 p, 1 080 i) is input, the image is automatically displayed in 16:9 (wide) screen.
Changing the input signal
The input source for picture signals can be changed by pressing the INPUT Buttons on the projector operating panel or on the remote control unit.
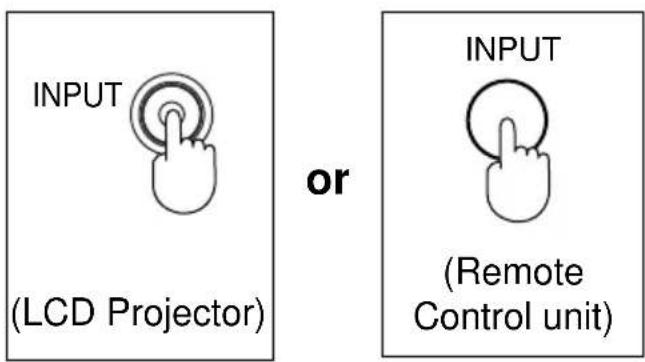
Press the INPUT Button

flowchart
graph TD
    A["RGB"] --> B["YPbPR"]
    B --> C["S-VIDEO"]
    C --> D["VIDEO"]
    D --> E["Output"]
The signal from the source which is connected to the RGB/YPBPR IN connector is projected.
This terminal accepts input of RGB input signals from a personal computer and DTV Format signals (RGB, YPBPR) from a DVD or a digital broadcast. No monitor or projector can automatically decide whether a Component signal is the RGB-type or the YPBPR-type. So, you will have to select either RGB or YPBPR manually.
The signal from the source which is connected to the S-VIDEO IN connector or VIDEO IN connector is projected. If cables are connected to both connectors, the S-VIDEO signal will be selected automatically. (The S-VIDEO signal has priority.) If you would like to project the VIDEO signals being input to the VIDEO IN connector, do not connect any cables to the S-VIDEO IN connector.
Changing the input signal
Note
- To turn off the input signal on-screen display, please see "Turning off the input signal display".
- Only one audio system circuit is available for the AUDIO IN jack, so if you wish to change the audio input source, you will need to remove and insert the appropriate plugs.
- The LCD Projector is shipped from the factory with the system format selection function set to “AUTO”. If the correct picture is not projected when S-VIDEO/VIDEO signal is input and it is necessary to change the input to match the input signal, refer to “S-VIDEO/VIDEO Signal Format Selection”.
- Please refer to the “Setting of the RGB/YPBPR Input Signal Selection” if you change the signal input to the RGB/YPBPR connector.
- When RGB signal is input, please input the registered signals found.
- If a normal image is not obtained using S-VIDEO/VIDEO input, switch to RGB/YPBPR input and then back to S-VIDEO/VIDEO input.
Adjusting the LCD Projector projection angle
Adjusting the LCD Projection angle of the LCD Projector. When the projector is in the horizontal position, keystone correction is unnecessary and a correct image can be viewed.
■ Using the simple stand
While lifting up the front of the projector, pull down the simple stand located underneath the unit.

natural_image
White portable electronic device with ventilation grille and indicator lights (no visible text or symbols)Note
Pressing the trapezoid correction KEYSTONE button will detect the opening and closing of the swinging stand and automatically make a trapezoidal correction, however, a slight distortion may sometimes remain due to the installation condition of the unit.
Caution:
Never pick the unit up by the simple stand.
■ Using the swivel stand
1 Slide the TIGHTEN Knob to the LOOSEN position.
FRONT

natural_image
Simple line drawing of a device with four circular ports and an arrow indicating rotation (no text or symbols)(Top view)
2 Adjust to the desired projection angle. If necessary, you can also tilt to the right or left.

natural_image
Front view of a silver projector with a circular lens and ventilation grille (no visible text or symbols)3 Slide the TIGHTEN Knob to the TIGHTEN position.
FRONT

natural_image
Simple line drawing of a device component with a central square and four circular holes, no text or symbols present.(Top view)
Basic LCD Projector Operation
■ Adjusting the Volume
The volume can be adjusted using the VOLUME -/+ Buttons on the remote control unit.
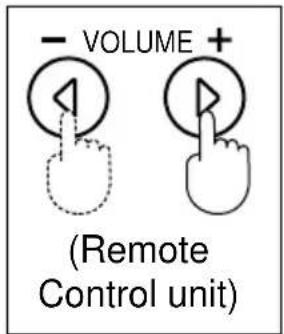
- Press VOLUME - Button to turn down the volume.
- Press VOLUME + Button to turn up the volume.

Note
- The “Volume” will remain displayed on the screen for approximately 5 seconds.
- The volume cannot be adjusted while the digital zoom (D.ZOOM) screen or MENU screen is being displayed.
■ Freezing the picture
Projection can be switched between a frozen (still) picture and a moving picture each time the FREEZE Button on the remote control unit is pressed. Press FREEZE Button again to resume motion.
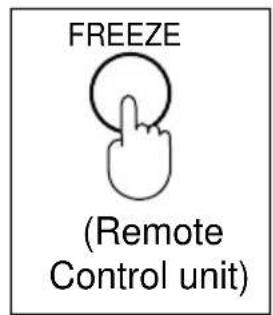
Freeze
Note
Sound is muted while the picture is frozen.
Basic LCD Projector Operation
■ Turning off the Picture and Sound at the same time
When SHUTTER Button is pressed on the remote control the picture and sound turns off and the screen goes black, Press SHUTTER Button again to resume picture and sound.


natural_image
Solid gray rectangular shape with rounded corners (no text or symbols)Black screen
Note
- When the screen goes black, the picture will not be shown on the screen. However, the picture continues to be sent from the personal computer or video source.
- The projector uses less power in shutter mode than it does in normal projection mode.
Using the Auto Setup Feature
When projecting an image other than a video signal, it can simultaneously adjust such elements as the picture vertical position, horizontal position, dot clock and phase. Operate as follows to use this function.
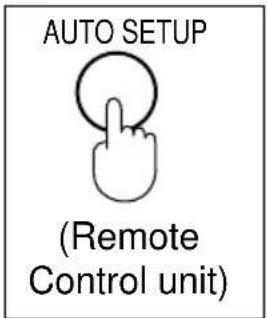
Press the AUTO SETUP Button
on the remote control unit.
The words “Auto Setup” appear on the screen and the automatic adjustment begins.
The adjustment is complete when the “Auto Setup” display disappears.
Auto Setup
Note
- If normal picture can not be attained during RGB signal input or DTV format signal input, please press the AUTO SETUP Button on the remote control.
- The LCD Projector detects whether the simple stand is down or up and automatically corrects keystone distortion.
- Adjusted settings are saved as is even if power is turned off.
- If the edges of the projected picture are indistinct, or if a dark picture is being projected, the automatic set up processing may stop automatically before it is complete. If this happens, project a different picture and then press the AUTO SETUP Button once more. Or, perform the following operations as indicated in the on-screen display.
Refer to the “Adjusting the Image Position, Dot Clock and Phase”.
Refer to the "Keystone correction function".
Adjusting the Image Position, Dot Clock and Phase
Confirm the picture position, Dot Clock, and Phase. If the picture is not correctly positioned within the display area of the screen (the edge of the picture does not appear), adjust the picture position. The items which can be adjusted will vary depending on the type of input signal. The procedure and on-screen display as shown below are based on RGB as the input signal from a personal computer.
- When adjusting the Horizontal Position (H Position)
1 Press MENU to display the menu.
2 Press ▲ or ▼ to select "Synchronization", and then ENTER to display the screen.
□ Picture
□ White Balance
□ Synchronization
□ Function
□ Language
□ Information
3 Press ▲ or ▼ to select "H Position".
- When adjusting the Vertical Position, Dot Clock, and Phase, move the arrow to the item you want to adjust.
4 Press ◀ or ▶ to adjust the H Position setting.
- The current setting will be displayed on the screen by numerals and a bar.
□Synchronization
| H Position | 49 |
| V Position | 27 |
| Dot Clock | 900 |
| Phase | 15 |
| Standard (Push ENTER) | |
Adjusting the Image Position, Dot Clock and Phase
Depending on the adjustment item, the adjust procedure and adjustment will vary. Please refer to the chart below.
| Adjustment item | Button Adjustment Details | Remarks | |
| H Position | Press ►Button. | The image moves to the right. | |
| Press◄Button. | The image moves to the left. | ||
| V Position | Press ►Button. | The image moves up. | |
| Press◄Button. | The image moves down. | ||
| Dot Clock | Adjust the personal computer's dot clock and the projector's dot clock so that no bit interference (vertical stripes) appears on the screen. | RGB,YPBPR only | |
| Phase | Adjust in order to remove any picture interference or contour blurring which may occur in computer images. | RGB only | |
Selecting the Image Quality
This LCD Projector can select Dynamic or Natural as the special characteristic of image quality.
Follow the instructions below to select the image qualities you prefer.
The procedure and on-screen display as shown below are based on RGB as the input signal from a personal computer.
- Setting procedure
1 Press MENU to display the menu.
2 Press ▲ or ▼ to select “Picture”, and then ENTER to display the screen.

3 Press ▲ or ▼ to select "Image Quality".
4 Press ◀ or ▶ to select the Image Quality.
• Dynamic is the factory RGB input signal setting.
- Natural is the factory S-VIDEO/VIDEO, YP _B PR input signal setting.
□Picture

bar
| Category | Image Quality | Dynamic | Natural | | :--- | :--- | :--- | :--- | | Brightness | 0 | 1 | 1 | | Contrast | 0 | 1 | 1 | Standard (Push ENTER)Adjusting the Picture to the Desired Setting
The items which can be adjusted will vary depending on the type of input signal.
The adjustment procedure below describes the on-screen displays when the S-VIDEO signal or the VIDEO signal is being projected.
- Adjustment procedure (when adjusting the Color)
1 Press MENU to display the menu.
2 Press ▲ or ▼ to select “Picture”, and then ENTER to display the screen.
□ Picture
□ White Balance
□ Video System
□ Function
□ Language
□ Information
3 Press ▲ or ▼ to select "Color".
4 Press ◀ or ▶ to adjust the color.
- The current setting will be displayed on the screen by numerals and a bar.
□Picture
| Image Quality | •Dynamic •Natural |
| Color | 0 |
| Tint | 0 |
| Brightness | 0 |
| Contrast | 0 |
| Sharpness | 0 |
| Standard (Push ENTER) | |
Adjusting the Picture to the Desired Setting
Depending on the adjustment item, the adjust procedure and adjustment will vary. Please refer to the chart below.
| Adjustment item | Button Adjustment Details | Remarks | |
| Color | Press ▶ Button. | The color becomes deeper. | YPBPR, S-VIDEO/VIDEO only |
| Press ◀ Button. | The color becomes paler. | ||
| Tint | Press ▶ Button. | Flesh tones become greenish. | NTSC/ NTSC 4.43 (S-VIDEO/VIDEO) only |
| Press ◀ Button. | Flesh tones become reddish. | ||
| Brightness | Press ▶ Button. | The screen becomes brighter. | |
| Press ◀ Button. | The screen becomes darker. | ||
| Contrast | Press ▶ Button. | Only the Highlights of the image become brighter, adding Contrast. | |
| Press ◀ Button. | The Highlights become less bright, diminishing Contrast. | ||
| Sharpness | Press ▶ Button. | The picture quality becomes sharper. | YPBPR, S-VIDEO/VIDEO only |
| Press ◀ Button. | The picture quality becomes softer. | ||
Note
The different adjustment condition cannot be saved for S-VIDEO and VIDEO.
Adjusting the White Balance
The picture may become over-saturated with red or blue color, and the white color may not be at the desired degree of whiteness. In such cases, adjust the white balance by the following procedure.
The procedure and on-screen display as shown below are based on RGB as the input signal from a personal computer.
- Adjustment procedure
(for white balance adjustment of the red component)
1 Press MENU to display the menu.
2 Press ▲ or ▼ to select “White Balance”, and then ENTER to display the screen.
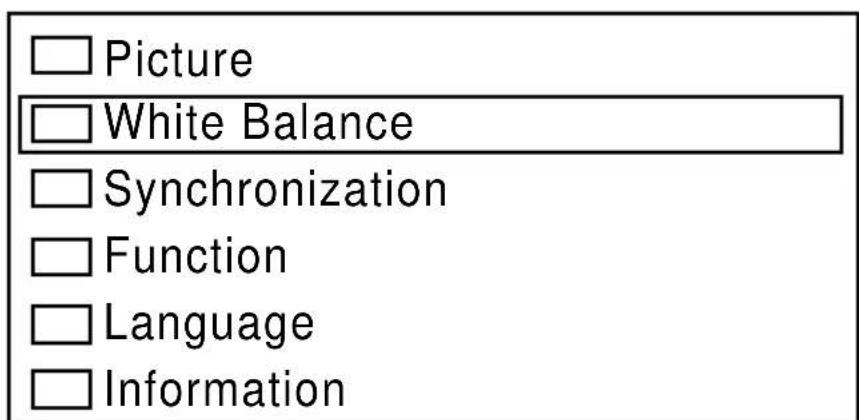
3 Press ▲ or ▼ to select "R Level".
4 Press ◀ or ▶ to adjust the R Level setting.
• The current setting will be displayed on the screen by numerals and a bar.
□ White Balance

bar_stacked
| Level | Segment 1 | Segment 2 | | --------- | --------- | --------- | | R Level | 0 | 0 | | G Level | 0 | 0 | | B Level | 0 | 0 |Adjusting the White Balance
Depending on the adjustment item, the adjust procedure and adjustment will vary. Please refer to the chart below.
| Adjustment item | Button Adjustment Details | |
| R Level | Press ▶Button. | The red component becomes stronger. |
| Press ◀Button. | The red component becomes weaker. | |
| G Level | Press ▶Button. | The green component becomes stronger. |
| Press ◀Button. | The green component becomes weaker. | |
| B Level | Press ▶Button. | The blue component becomes stronger. |
| Press ◀Button. | The blue component becomes weaker. | |
Note
Unless properly adjusted, none of the colors may display normally.
Setting of the RGB/YPBPR Input Signal Selection
DTV Format Signal, such as DVD or digital broadcast, etc. can be input and projected with this Projector. When using this function, please refer to correctly connect to the output device of the DTV Format Signal and perform the following settings correctly.
This LCD Projector allows input of RGB or YPBPR signals (Component input signal) to the RGB/YPBPR input terminal, but you will need to change the setting of the input signal selection manually when changing the signal to be input. If the input signal selection is not set correctly, a normal image will not be projected.
The RGB input signal is set at the factory. Please follow the instructions below to change the input signal.
- Setting procedure
1 Press MENU to display the menu.
2 Press ▲ or ▼ to select "Function", and then ENTER to display the screen.
3 Press ▲ or ▼ to select "RGB/YPBPR".
4 Press ◀ or ▶ to change the input signal.
□ Picture
□ White Balance
□ Synchronization
□ Function
Language
Information
□Function
| RGB/YPBPR | •RGB | •YPBPR |
| Projection Mode | •1 •2 | •3 •4 |
| Expansion | •ON | •OFF |
| On Screen Display | •ON | •OFF |
| Auto Lamp Off | •YES | •NO |
| Standard (Push ENTER) | ||
Turning off the input signal display
The function which displays the currently selected input signal on the screen can be turned off by the following procedure.
Freeze displays will also be turned off.
The procedure and on-screen display as shown below are based on RGB as the input signal from a personal computer.
- Selecting procedure
1 Press MENU to display the menu.
2 Press ▲ or ▼ to select "Function", and then ENTER to display the screen.
| PictureWhite BalanceSynchronizationFunctionLanguageInformation |
3 Press ▲ or ▼ to select "On Screen Display".
4 Press ◀ or ▶ to select "ON" or "OFF".
- Select "OFF" to turn off the input signal display function.
- Select “ON” to turn the input signal display function. The input signal will be displayed each time it is changed. (This is the factory setting.)
| Function | |
| RGB/YPBPR | •RGB •YPBPR |
| Projection Mode | •1 •2 •3 •4 |
| Expansion | •ON •OFF |
| On Screen Display | •ON •OFF |
| Auto Lamp Off | •YES •NO |
| Standard (Push ENTER) | |
Auto Lamp Off
The power save function operates as follows: If the projector continues projecting for 15 minutes or more while there is no input signal to be projected, the light source will shut off automatically to save power. And, the projector will enter standby mode. At the time of shipment from the factory, the Auto Lamp Off function is set YES, so that if you will not use this function, you can turn it off by the following procedure. The procedure and on-screen display as shown below are based on RGB as the input signal from a personal computer.
- Selecting procedure
1 Press MENU to display the menu.
2 Press ▲ or ▼ to select "Function", and then ENTER to display the screen.
□ Picture
□ White Balance
□ Synchronization
□ Function
□ Language
Information
3 Press ▲ or ▼ to select "Auto Lamp Off".
4 Press ◀ or ▶ to select "YES" or "NO".
| Function | |
| RGB/YPBPR | •RGB •YPBPR |
| Projection Mode | •1 •2 •3 •4 |
| Expansion | •ON •OFF |
| On Screen Display | •ON •OFF |
| Auto Lamp Off | •YES •NO |
| Standard (Push ENTER) | |
Canceling enlarging (scanning line conversion) function
When a signal less than 1 024 X 768 dots signals is input, the LCD Projector automatically enlarges the image to 1 024 X 768 dots. This may cause picture quality degradation. For better image, select Expansion: OFF by the following procedure. The procedure and on-screen display as shown below are based on RGB as the input signal from a personal computer.
- Setting procedure
1 Press MENU to display the menu.
2 Press ▲ or ▼ to select “Function”, and then ENTER to display the screen.
□ Picture
□ White Balance
□ Synchronization
□ Function
Language
Information
3 Press ▲ or ▼ to select "Expansion".
4 Press ◀ or ▶ to select "ON" or "OFF".
- Select “OFF” to cancel enlarge (scanning line conversion) function.
- Select “ON” to use enlarge (scanning line conversion) function. (This is the factory setting.)
□ Function
RGB/YPBPR • RGB • YPBPR Projection Mode • 1 • 2 • 3 • 4
Expansion •ON •OFF
On Screen Display • ON • OFF Auto Lamp Off • YES • NO Standard (Push ENTER)
Keystone correction function
When the screen and projector are not level, a keystone (trapezoid) image may occur. This can be corrected by doing the following.
- procedure
1 Project a picture onto the screen.
2 Press the KEYSTONE button on the projector.

3 Press ◀ or ▶ to adjust the Keystone.

Keystone correction function
| Keystone Image Corrected Image | ||
| Keystone (top : wide) |  Projected picturesPress ▶...Top becomes narrow. Projected picturesPress ▶...Top becomes narrow. |  Projected pictures Projected pictures |
| Keystone (under : wide) |  Projected picturesPress ◀..Bottom becomes narrow. Projected picturesPress ◀..Bottom becomes narrow. | 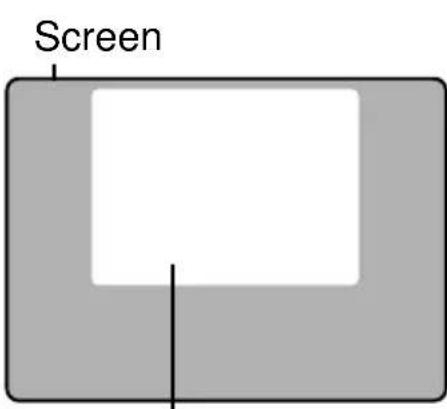 Projected pictures Projected pictures |
Note
- When keystone is corrected, the screen becomes smaller. Furthermore, it may not be possible to obtain the best projected picture if the keystone distortion is adjusted.
- The LCD Projector detects whether the Simple Stand is down or up and automatically corrects keystone distortion when the KEYSTONE Button is pressed.
Selecting the Language for On-Screen Displays
The language of the LCD Projector is set to English as the factory setting. To select one of seven different languages for on-screen display, follow the instructions below. The procedure below describes the on-screen display when the S-VIDEO signal or the VIDEO signal is being projected.
- Selecting procedure
1 Press MENU to display the menu.
2 Press ▲ or ▼ to select “Language”, and then ENTER to display the screen.

3 Press ▲ or ▼ to select language. • You can select English, German, French, Spanish, Italian, Japanese and Chinese.
You can display the input signal type and lamp run time. Display items differ depending on the input signal. The procedure and on-screen display as shown below are based on RGB as the input signal from a personal computer.
- procedure
1 Press MENU to display the menu.
2 Press ▲ or ▼ to select "Information".
| Picture |
| White Balance |
| Synchronization |
| Function |
| Language |
| Information |
3 Press ENTER to display the screen.
Information
| No. of Dots | 1024 x 768 |
| H Frequency | 48.30 kHz |
| V Frequency | 60 Hz |
| Lamp Runtime | 100 h |
Information Functions
| RemarksDes | ||
| No. of Dots | Input signal dot number is displayed. | Personal Computer Signals (RGB) only |
| H Frequency | Horizontal frequency number is displayed. | |
| V Frequency | Vertical frequency number is displayed. | |
| Signal | Name of the input signal type is displayed.When AUTO is selected in the Video System screen, the selected format will be displayed. | YPBPRVIDEO/S-VIDEO only |
| Lamp Runtime | Number of hours the lamp has been used is displayed. |
script
Digital Zoom Functions
You can enlarge and project specific portions of the input picture and select the enlargement ratio for this portion using the D.ZOOM Button on the remote control unit.

flowchart
graph TD
    A["ABC"] --> B["ABC"]
    B --> C["ABC"]
    C --> D["ABC"]
    D --> E["ABC"]
    E --> F["ABC"]
    F --> G["ABC"]
    style A fill:#f9f,stroke:#333
    style G fill:#f9f,stroke:#333

- Press D.ZOOM Button the picture will become bigger.

Note
You can enlarge the centre portion of the image to one of 6 magnifications.
Digital Zoom Functions

flowchart
graph TD
    A["ABC"] --> B["ABC"]
    C["BC"] --> B
    D["AB"] --> B
    E["ABC"] --> B
    F["ABC"] --> B
    B --> G["ABC"]
    B --> H["AB"]
    B --> I["ABC"]

- Use the ▲ and ▼ arrow Buttons to move the position up and down.
- Use the ◀ and ▶ arrow Buttons to move the position to the left and right.
Note
- Position cannot be moved with arrow Buttons on the unit.
- The volume cannot be adjusted while the digital zoom function is being used.
Status Code Display Indications
■ Warning Indicators
This LCD Projector has a STATUS Code Display which calls your attention to problem conditions existing inside the LCD Projector. The LCD Projector displays a status Code Indication each time an internal problem is detected. If any of the following indications appear in the STATUS Code Display, immediately turn off the Power Button, and then see the chart to determine a course of action.
Example: If the total lamp operating time is over 1 900 hours, the status codes “L”, “-”, and “1” will be displayed in sequence.

Note
After taking appropriate action, allow the interior to cool thoroughly before switching on the power. A much longer time may be required if the projector had attained an abnormally high internal temperature.
Status Code Display Indications
| STATUS Code | Symptom | Problem | Possible Solution |
| F-L | Lamp does not light up. | ·Cooling fan malfunction. | ·Take the Projector to your nearest Service Center. |
| C-0 | ·Misinstalled Air Filter Unit or Lamp cover. | ·Properly install Air Filter Unit or Lamp cover. | |
| A-n | ·Ambient temperature is low (less than 0 °C) | ·Place Projector so that surrounding temperature is between 0 °C (32 °F) and 40 °C (104 °F) and the humidity is between 20 % and 80 % (with no condensation.) | |
| A-0 | ·Clogged air filter.·Blocked air intake.·The surrounding temperature of the place of use may be too high. | ·Clean the filter.·Relocate projector to a proper location.·Place Projector so that surrounding temperature is between 0 °C (32 °F) and 40 °C (104 °F) and the humidity is between 20 % and 80 % (with no condensation.) | |
| L-n | ·If the Lamp will not light after turning on the main power 2 or 3 times, the Lamp may be damaged. | ·Take the Projector to your nearest Service Center. | |
| P-2 | ·Lamp Voltage is not correct. | ||
| P-3 | ·Abnormal temperature rise. | ||
| P-4 | ·Other causes. | ||
| L-1 | Lamp operation time is over 1900 hours. | ·It is nearly time to replace the Lamp Unit. | ·Replace the Lamp unit. |
| L-0 | Lamp operation time reaches 2000 hours. | ·The Lamp Unit must be replaced. | |
| C-d | Forced cooling fan operating to expedite lamp replacement. | —— | —— |
Cleaning the Air Filter
Air Filter
The air filter should be cleaned about every 100 hours. Also, clean the air filter if the “A-0” is indicated in the STATUS Code display.
Replace the filter when it is clogged or dirty even after cleaning.

- Cleaning procedure (Tools required: Vacuum Cleaner.)
1 Set the POWER Button to OFF and unplug the power cord.
Note
Wait until the cooling fan stops and the STANDBY(R) ON(G) indicator turns solid red.
2 Remove the Air Filter unit
Hold the indent on the Air Filter unit with your hands and pull the Air Filter unit out of the LCD Projector.
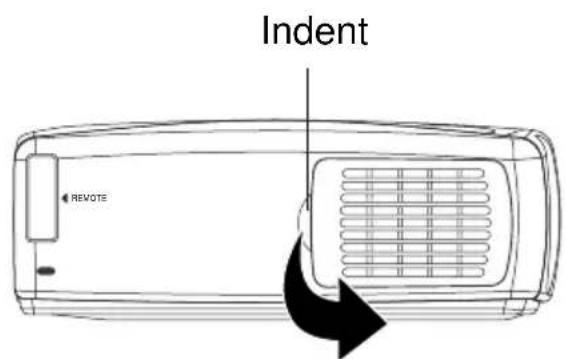
Cleaning the Air Filter
3 Clean the Filter.
Gently remove any accumulated dust from Air Filter unit with your vacuum cleaner.

natural_image
Line drawing of hands using a tool to write on a grid notebook (no text or symbols present)CAUTION: Operating LCD Projector with torn or damaged Filter may cause damage to LCD Projector.
4 Replace the Air Filter unit.
Slide the Air Filter into the LCD Projector so that the indentations of the filter and projector are aligned. Then, press on the arrow mark until you hear it snap into place.

natural_image
Top-down schematic of a device casing with ventilation slots and a black arrow indicating direction (no text or symbols)- The LCD Projector power cannot be turned on unless the Air Filter unit is correctly installed.
- Using with the air filter sponge removed will result in dirt and dust being drawn in and lead to malfunction.
Note
If the dust cannot be removed by cleaning, it is time to replace the air filter.
Lamp Replacement
Warning
If the Lamp does not light and the LAMP STATUS Code is “L-n,” If the Lamp will not light after turning on the main power 2 or 3 times, the Lamp may be damaged. If the Lamp still does not light, the Lamp may be damaged. Because Lamp fragments could cause injury, DO NOT attempt to replace Lamp yourself. Take the LCD Projector to your dealer for repair.
STATUS Code display

natural_image
Exterior view of a silver projector with ventilation grille and control panel (no visible text or symbols)■ Lamp replacement period
The LCD Projector lamp has a limited operating life of approximately 2 000 hours. If lamp operation time exceeds 1 900 hours, “L-1” is displayed as the STATUS Code.
"Lamp replacement is recommended." will be displayed on-screen when operation time reaches 1 900 hours.
Lamp replacement is recommended.
Take the LCD Projector to your dealer for repair. (Order Lamp ET-LAC50.)
- When the lamp operation time has exceeded 1900 hours, a warning will appear for 15 seconds when the LCD Projector power is turned on.
Lamp Replacement
■ In case lamp time reaches 2 000 hours
The LCD Projector will shut itself OFF and the STATUS Code indication becomes “L-0”.
- The on-screen display urging you to replace the lamp unit will be displayed for five minutes after the power has been turned on, the power will then automatically go off and it will enter the standby mode.
Unless you change to a new lamp, POWER will be off 5 minutes later.
Note
The lamp used as the light source eventually wears out. The service life of the light source lamp used on the PT-LC70U is about 2 000 hours, but depending on the individual lamp's properties and the usage conditions the lamp may no longer light after less than 2 000 hours (the lamp is affected by the number of times the lamp is lit and the time span until it is relit, and these may shorten the service life). Because of this, we recommend having a replacement lamp on hand.
Signals that can be Input
The projection mode will be matched automatically to one of the modes which have been pre-set inside the Projector.
If a signal which differs greatly from any of the types listed below is input, the picture image may not be displayed correctly, or a blue background may be displayed.
■ RGB Signals that can be Input
| Display mode name | Signal data | ||||
| No. of dots | Horizontal frequency (kHz) | Vertical frequency (Hz) | Dot clock frequency (MHz) | ||
| Personal Computer Signals | VGA400 (70 Hz) 6 | 40 X 400 31.4 | 70.08 25.1 | 75 | |
| VGA480 (60 Hz) 6 | 40 X 480 31.4 | 59.94 25.1 | 75 | ||
| Macintosh 13" 640 | X 480 35.00 | 66.67 30.241 | |||
| VESA400 (85 Hz) | 640 X 400 37. | 86 85.08 31. | 500 | ||
| VESA480 (72 Hz) | 640 X 480 37. | 86 72.81 31. | 500 | ||
| VESA480 (75 Hz) | 640 X 480 37. | 50 75.00 31. | 500 | ||
| VESA480 (85 Hz) | 640 X 480 43. | 27 85.01 36. | 000 | ||
| SVGA (56 Hz) 800 | X 600 35.16 | 56.25 36.000 | |||
| SVGA (60 Hz) 800 | X 600 37.88 | 60.32 40.000 | |||
| SVGA (72 Hz) 800 | X 600 48.08 | 72.19 50.000 | |||
| SVGA (75 Hz) 800 | X 600 46.88 | 75.00 49.500 | |||
| SVGA (85 Hz) 800 | X 600 53.67 | 85.06 56.250 | |||
| XGA (60 Hz) 1 024 | X 768 48.36 | 60.00 65.000 | |||
| XGA (70 Hz) 1 024 | X 768 56.48 | 70.07 75.000 | |||
| XGA (75 Hz) 1 024 | X 768 60.02 | 75.03 78.750 | |||
| Macintosh 16" 832 | X 624 49.73 | 74.55 57.283 | |||
| Macintosh 19" 1 024 | X 768 60.24 | 74.93 80.000 | |||
| XGA (85Hz) 1 024 | X 768 68.68 | 85.00 94.500 | |||
Signals that can be Input
| Display mode name | Signal data | ||||
| No. of dots | Horizontal frequency (kHz) | Vertical frequency (Hz) | Dot clock frequency (MHz) | ||
| Personal Computer Signals | 1 152 X 864 (70 Hz)*1 | 152 X 864 63.85 | 70.01 94.50 | 0 | |
| 1 152 X 864 (75 Hz)*1 | 152 X 864 67.50 | 75.00 108.00 | 00 | ||
| 1 152 X 864 (85 Hz)*1 | 152 X 864 77.09 | 85.00 121.50 | 00 | ||
| Macintosh 21~*1 152 X | 870 68.68 75.06 | 100.000 | |||
| 1 280 X 960 (60 Hz)*1 | 280 X 960 60.00 | 60.00 108.00 | 00 | ||
| 1 280 X 960 (75 Hz)*1 | 280 X 960 75.00 | 75.00 126.00 | 00 | ||
| 1 280 X 1 024 (60 Hz)* | 1 280 X 1 024 6 | 3.98 60.02 1 | 08.000 | ||
| 1 280 X 1 024 (75 Hz)* | 1 280 X 1 024 7 | 9.98 75.03 1 | 35.000 | ||
| DTV Format Signals | 480 i 664 X 485 15.73 | 29.97 12.650 | |||
| 480 p 720 X 483 31.47 | 59.94 27.000 | ||||
| 720 p*1 280 X 720 45.00 | 00 60.00 74.250 | ||||
| 1 080 i*1 920 X 1 080 | 33.75 30.00 74.250 | ||||
| 625 i 756 X 576 15.63 | 25.00 14.500 | ||||
Note
- *Changing the number of dots to be displayed to within 1 024 X 768 may cause a portion of information to be omitted, or the image quality to be degraded.
- DTV Format Signals are picture signals from a DVD or a digital broadcast.
- The Sync. signal of a DTV format signal (RGB) is only supported if the Horizontal and Vertical frequencies are separate.
Signals that can be Input
■ Component Signals (YPBPR) that can be Input
| Display mode name | Signal data | ||||
| No. of dots | Horizontal frequency (kHz) | Vertical frequency (Hz) | Dot clock frequency (MHz) | ||
| DTV Format Signals | 480 i 664 X | 485 15.73 29.97 | 12.650 | ||
| 480 p 720 X | 483 31.47 59.94 | 27.000 | |||
| 720 p*1 280 | X 720 45.00 60. | 00 74.250 | |||
| 1 080 i*1 92 | 0 X 1 080 33.75 | 30.00 74.250 | |||
| 625 i 756 X | 576 15.63 25.00 | 14.500 | |||
Note
- *Changing the number of dots to be displayed to within 1 024 X 768 may cause a portion of information to be omitted, or the image quality to be degraded.
- DTV Format Signals are picture signals from a DVD or a digital broadcast.
Signals that can be Input
■ S-VIDEO/VIDEO Signal that can be Input
| Signal format name | Horizontal scanning frequency (kHz) | Vertical scanning frequency (Hz) | Colour sub-carrier frequency (MHz) |
| AUTO | Selected automatically. | ||
| NTSC | 15.75 | 60.00 | 3.58 |
| NTSC4.43 | 4.43 | ||
| PAL-M | 3.58 | ||
| PAL | 15.63 | 50.00 | 4.43 |
| PAL-N | 3.58 | ||
| SECAM | 4.25 or 4.41 | ||
Note
- NTSC and PAL-M have the same scanning frequencies and color sub-carrier frequencies, but they have different color modulation methods. Because of this, if the incorrect setting is selected, color pictures may appear in black-and-white.
- The video system screen is not displayed with no S-VIDEO/VIDEO input signal.
S-VIDEO/VIDEO Signal Format Selection
If the correct signal format is not selected and the picture does not appear normal when VIDEO or S-VIDEO signal is being input, select the format by the following procedure. This function is set to “AUTO” at the time of shipment from the factory, so that the projector can normally be used with this setting.
- Setting procedure
1 Press MENU to display the menu.
2 Press ▲ or ▼ to select “Video System”, and then ENTER to display the screen.
| Picture |
| White Balance |
| Video System |
| Function |
| Language |
| Information |
3 Press ▲ or ▼ to switch the setting to "AUTO", "NTSC", "NTSC4.43", "PAL", "PAL-M", "PAL-N" or "SECAM" until a normal picture is obtained.
| □ Video System |
| AUTO |
| NTSC |
| NTSC4.43 |
| PAL |
| PAL-M |
| PAL-N |
| SECAM |
Note
- If using a signal source with poor picture quality, such as a dubbed tape, it may not be possible to get the picture to display properly.
- The display may not always appear correctly if a monochrome signal is input when set to “Auto”. If the correct display is not obtained, input a color signal temporarily and select a setting other than “Auto”.
Blue (Black) Screen with No Input Signal
The LCD Projector is equipped with an internal Blue (Black) Screen function which turns the screen blue black when the video or personal computer equipment connected to the input jack is turned off, or when there is nothing connected to the input jack.
- If the power is turned on when no input signal is input to the LCD Projector, the screen will turn blue. The Focus screen appears only until the video or personal computer equipment is connected to the input jack and turned on.
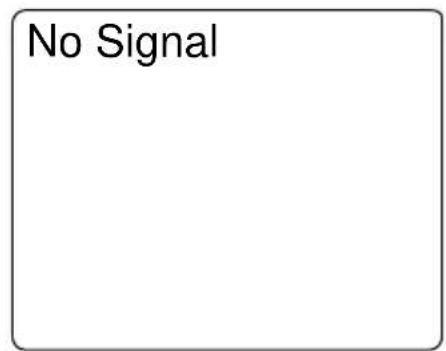
- During operation, if the input signal is terminated, the screen goes black and “No Signal” will be displayed.
- If an unrecognizable signal is input, the screen goes black and "Signal" is displayed.
- When RGB signal is input, please input the registered signals found on "Signals that can be Input".


Optional Accessories
For ordering instructions, see the accessory order form page.
(1) Full Functional Remote Control Unit (ET-RMLC50)
(2) Replacement Lamp (ET-LAC50)
(3) D-sub15-BNC5 Adapter Cable (ET-ADBNC)
(4) Ceiling Mount Bracket (ET-PKC50)
Note
When the full functional remote control unit is used, you can operate the wireless mouse and laser pointer features.
- Operating Instructions
- Model No. PT-LC70U
- Dear Panasonic Customer:
- Things You Should Know
- Caution:
- Declaration of Conformity
- Trade Name: Panasonic
- FCC Warning:
- Warning: (E.U. only)
- Important Safeguards
- LCD Projector Features
- Compact & Lightweight
- Built-in Simple Stand
- Attachable/Removable Swivel Stand
- One-touch Auto Setup
- Compatible with most Personal Computers
- Supports Component Video (YPBPR) Input
- Accommodates all International Broadcast Video Signal Formats
- Digital Zoom and Freeze Feature
- On-board Card Type Wireless Remote Control
- On Screen Display
- Automatic Universal Power Supply
- CD-ROM Manual
- Image Quality Select Feature, R/G/B Level Adjust Feature
- Full Function Remote Control Unit for LCD Projector (optional)
- Frontal Air Vent Design
- Equipped with a variety of convenient functions
- Contents of LCD Projector Box
- Product Information
- LCD Projector
- ■Control panel
- Note
- Remote Control unit
- Before using the Remote Control Unit
- ■Replacing the battery
- WARNING:
- ■Operating range
- Attaching and Removing the Swivel Stand
- - Attachment
- -Removal
- System Configuration Example
- ■ Example of connection to audio-visual equipment
- ■ Example of connection to a Personal Computer
- ■ Connecting D-sub15-BNC5 (female) Adaptor Cable
- Notes on system configuration
- Setting-up Positions
- Caution: When you set up the LCD Projector
- Preparation
- ■screen size and required distance
- ■LCD Projector /Screen Relative Position Chart
- Turning the power on and off
- Turning on the power
- Turning off the power
- Adjusting the Lens
- - Adjustment procedure
- Menu operations
- Press the MENU Button.
- Press the ▲or ▼
- ■ Returning to the previous screen
- ■ Returning adjustment values to the factory default settings (standard values)
- Changing the Projection Mode
- - Selecting procedure
- Setting the Screen Type
- - Setting procedure
- Changing to 16:9 (wide) screen format
- Explanation of Screen Type
- Changing the input signal
- Adjusting the LCD Projector projection angle
- ■ Using the simple stand
- ■ Using the swivel stand
- Basic LCD Projector Operation
- ■ Adjusting the Volume
- ■ Freezing the picture
- ■ Turning off the Picture and Sound at the same time
- Using the Auto Setup Feature
- Press the AUTO SETUP Button
- Adjusting the Image Position, Dot Clock and Phase
- - When adjusting the Horizontal Position (H Position)
- Selecting the Image Quality
- Adjusting the Picture to the Desired Setting
- - Adjustment procedure (when adjusting the Color)
- Adjusting the White Balance
- Setting of the RGB/YPBPR Input Signal Selection
- □Function
- Turning off the input signal display
- Auto Lamp Off
- Canceling enlarging (scanning line conversion) function
- Keystone correction function
- - procedure
- Selecting the Language for On-Screen Displays
- Information Functions
- Digital Zoom Functions
- Status Code Display Indications
- ■ Warning Indicators
- Cleaning the Air Filter
- Air Filter
- Set the POWER Button to OFF and unplug the power cord.
- Remove the Air Filter unit
- Clean the Filter.
- Replace the Air Filter unit.
- Lamp Replacement
- Warning
- STATUS Code display
- ■ Lamp replacement period
- Take the LCD Projector to your dealer for repair. (Order Lamp ET-LAC50.)
- ■ In case lamp time reaches 2 000 hours
- Signals that can be Input
- S-VIDEO/VIDEO Signal Format Selection
- Blue (Black) Screen with No Input Signal
- Optional Accessories
Brand : PANASONIC
Model : PT-LC70U
Category : Video projector