Slim TV 32 - TV Kiano - Free user manual and instructions
Find the device manual for free Slim TV 32 Kiano in PDF.

User questions about Slim TV 32 Kiano
0 question about this device. Answer the ones you know or ask your own.
Ask a new question about this device
Download the instructions for your TV in PDF format for free! Find your manual Slim TV 32 - Kiano and take your electronic device back in hand. On this page are published all the documents necessary for the use of your device. Slim TV 32 by Kiano.
USER MANUAL Slim TV 32 Kiano
natural_image
Front view of a flat-screen TV displaying with blank screen and stand (no text or symbols visible)natural_image
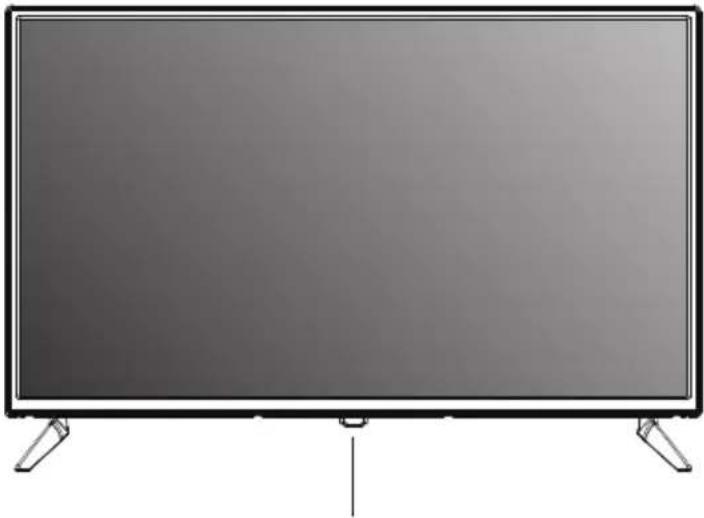
Front view of a blank flat-screen TV with paper clips at the base (no text or symbols visible)

(The back view is for reference only, please refer to the actual product for details)
This equipment is a Class II or double insulated electrical appliance. It has been designed in such a way that it does not require a safety connection to electrical earth.
If at any time in the future you should need to dispose of this product please note that: Waste electrical products should not be disposed of with household waste. Please recycle where facilities exist. Check with your Local Authority or retailer for recycling advice. (Waste Electrical and Electronic Equipment Directive)

You can find the full user manual for the device, also in other languages on website: https://kiano.pl/help/
Original User's Manual
KIANO Slim TV 32"
EN
natural_image
Front view of a flat-screen TV displaying with no visible text, numbers, or symbols on the screen.IMPORTANT: Before installing and using your TV, read the manual carefully. Keep this manual handy in case you need it.
Important Safety Instructions
★ WARNING: To prevent injury, this apparatus must be securely attached to the floor/wall in accordance with the installation instruction.
★ WARNING: To reduce the risk of fire or electric shock, do not expose this apparatus to rain or moisture. The apparatus shall not be exposed to dripping or splashing and that objects filled with liquids, such as vases, shall not be placed on apparatus.
★ WARNING: The mains plug/appliance coupler is used as disconnect device, the disconnect device shall remain readily operable.
★ WARNING: The mains plug is used as disconnect device, the disconnect device shall remain readily operable.
★ WARNING: The mains plug is used as disconnect device, the disconnect device shall remain readily operable.

- This lightning flash with arrowhead symbol within an equilateral triangle is intended to alert the user to the presence of non-insulated "dangerous voltage" within the product's enclosure that may be of sufficient magnitude to constitute a risk of electric shock.
WARNING: To reduce the risk of electric shock, do not remove cover (or back) as there are no user-serviceable parts inside. Refer servicing to qualified personnel.
- The exclamation point within an equilateral triangle is intended to alert the user to the presence of important operating and maintenance instructions in the literature accompanying the appliance.
★ No naked flame sources, such as lighted candles, should be placed on the apparatus.
★ WARNING: The battery (battery or batteries or battery pack) shall not be exposed to excessive heat such as sunshine, fire or the like.
★ WARNING: To prevent the spread of fire, keep candles or other open flames away from this product at all times.
★ Do not install this equipment in a confined or built-in space such as a book case or similar unit, and remain in a well ventilated condition at open site. The ventilation should not be impeded by covering the ventilation openings with items such as newspaper, table-cloths, curtains etc.
★ The instructions for installation or use provided with non-floor standing televisions likely to be used in the home and weighing over 7 kg shall contain the following information or equivalent:
WARNING
Never place a television set in an unstable location. A television set may fall, causing serious personal injury or death. Many injuries, particularly to children, can be avoided by taking simple precautions such as:
- Using cabinets or stands recommended by the manufacturer of the television set.
- Only using furniture that can safely support the television set.
- Ensuring the television set is not overhanging the edge of the supporting furniture.
- Not placing the television set on tall furniture (for example, cupboards or bookcases) without anchoring both the furniture and the television set to a suitable support.
- Not placing the television set on cloth or other materials that may be located between the television set and supporting furniture.
- Educating children about the dangers of climbing on furniture to reach the television set or its controls.
Supplied Accessories
Check the supplied accessories before installation.
In case of missing or damaged, please contact the dealer immediately.
Remote Control x1
AAA Batteries x2
User Manual x1

- The type of power plug provided may be different for some countries.
- Please store the screws that are not used.
natural_image
Front view of a flat-screen television displaying (no visible text or symbols)

Short press to bring up a list of keys, then click left or right to select, long press to send the corresponding selected key, the list will disappear automatically after 10 seconds of no operation.
- POWER(☐)/OK: In the off mode, Short press to turn on the TV. in the on mode, Short press to achieve OK function, long press to achieve POWER function.
POWER (☐): Turns the TV on and off.
After power on, short press to bring up function menu Power, Menu, Source, Channel up/Channel down, Sound +/Sound -. Short press to select in turn.
- MENU: Displays the TV Main Menu.
Long press to enter the menu interface, select the channel up/down key to select the menu entry, move the menu up/down entry to select. Select the +/- of the sound long press to move the menu left and right entries.
- SOURCE: Displays the Source Select List.
Select the Source key to enter the Source menu, press volume +/- to move the menu left and right to select.
-
CH+/-: Channel selection. In the TV menu system, it acts like the right arrow on the remote control, press and hold the Channel up/down key to select programme.
-
VOL+/-: Volume selection, In the TV menu system, it acts like the right arrow on the remote control and long press +/- to adjust the volume level.
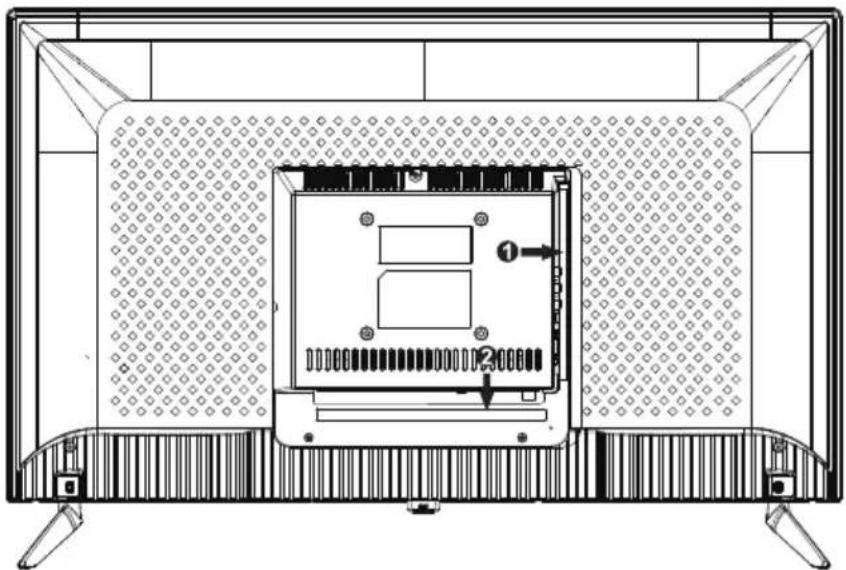
(The back view is for reference only, please refer to the actual product for details)
| Connector | Function | Description |
 | COAX | Connection for Digital Coaxial input for Audio Amplifier. |
 | HDMI | Connect to equipment with HDMI output. |
 | DVB-S2 | DVB-S2 Input Terminal. Connect to LNBF. |
 | DVB-T2 | Antenna Input terminalConnect to equipment with antenna output or wall antenna socket. |
 | AV IN | Video and Audio(L/R)input Terminal |
 | USB | Insert USB. |
 | EARPHONE | Connects audio amplifier or other device with that audio input. |
 | DC 12V(+ -●)- - ) | DC 12V input port. |
 | CI Slot for Common Interface device (Decoder) | |
Remote control

| Button | Description |
| POWER | Turn the TV on and off. |
 | Press this button to cut off the sound of the TV set temporarily, press again to resume. |
| NUMBER BUTTONS | Use to the choose channels (in TV mode). |
 | Press this button before entering a program number greater than 09. |
 | Return to last viewed program/signal source. |
| CH+/CH- | Scroll to next/previous channel. |
VI  'OL- 'OL- | Press to increase or decrease auido volume. |
| EPG | Enter electronic program guide (only for DTV mode). |
 O O | Display and selects audio systems. |
| OOI/II | The button can be used to switch among the option that you want. |
F  RE RE | Select the picture mode. |
| SOUND | Select the sound mode. |
 | Press to adjust picture ratio.ASPECT |
| MENU | Press to display or remove onscreen menus or to quit some operation. |
 CE CE | Press to change signal source. |
| ENTER | Selects or runs a focused menu item. |
 | Directional pad (up / down / left / right). Moves the focus and changes the values seen on the TV's menu. |
| EXIT | Press to exit the current interface. |
 | When pressed while you are watching a programme, detailed programme information appears. |
| COLOR BUTTONS | Red / green / yellow / blue key. Use as a navigation link or program edit menu. |
 | Digital media player control button: Include play / pause, stop, backward, forward, next, previous (in USB mode). |
 REC REC | To start Record Channel. Press to start recording channels stream to your USB flash disk. |
| T-SHIFT | Press the button to pause current DTV program and start record background (Used for models with DTV function only) |
Remote control

| REPEAT | USB Mode: Press to select the repeat play mode. |
| SUBTITLE | Press the button to display available subtitles (in DTV mode). |
| Press to display the favourite programmes selected (in TV mode). | |
| LIST | TV Mode:PRess to call Channel List. |
| TXT Mode:INDEX-Press to call Index main page. | |
| TXT Mode:Press to call teletext. Press button again to turn off teletext. | |
| TXT Mode:HOLD-press button tp freeze teletext page. Press button again to unfreeze page. | |
| TXT Mode:Cancel the teletext but not to exit teletext press again to show teletext. | |
| TXT Mode:Press button to turn on Subpage. Press again button to turn off Subpage. | |
| TXT Mode:Press button to display hidden teletext information. | |
| TXT Mode:Size-Press to change teletext size. |
Menu Operation
Picture
You can adjust picture effect here, such as contrast, brightness, etc.
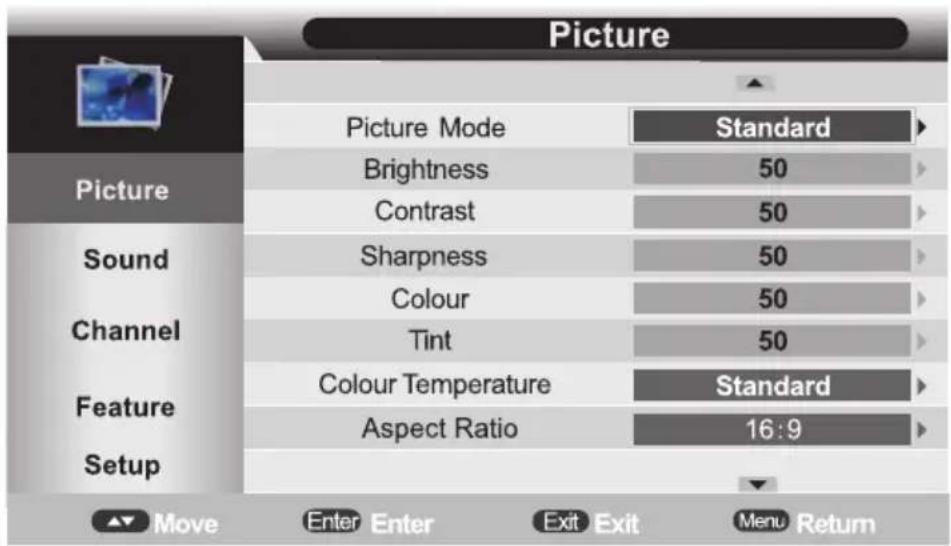
Picture Mode: Press ▲▼ buttons to select. The following option are available:
"Standard, Dynamic, Mild, User."
Brightness: Adjust the brightness.
Contrast: Adjust image Contrast.
Sharpness: Adjust the sharpness level of image.
Colour: Adjust the color saturation.
Tint: Determines the tint of the screen (This is only available with NTSC).
Colour Temperature: Adjust the Color Temperature level of image. The following option are available: "Standard, Warm, Cool".
Aspect Ratio: Press▲▼ buttons to select: 4:3,16:9,full,Zoom1,Zoom2,Cinema(Only in DTV Mode), Panorama,Just Scan".(Just Scan only in HDMI)
Noise Reduction: Press ▲▼ buttons to select : Off, Low, Middle, High.
Sound
You can adjust sound effect here, such as bass, treble, balance, etc.
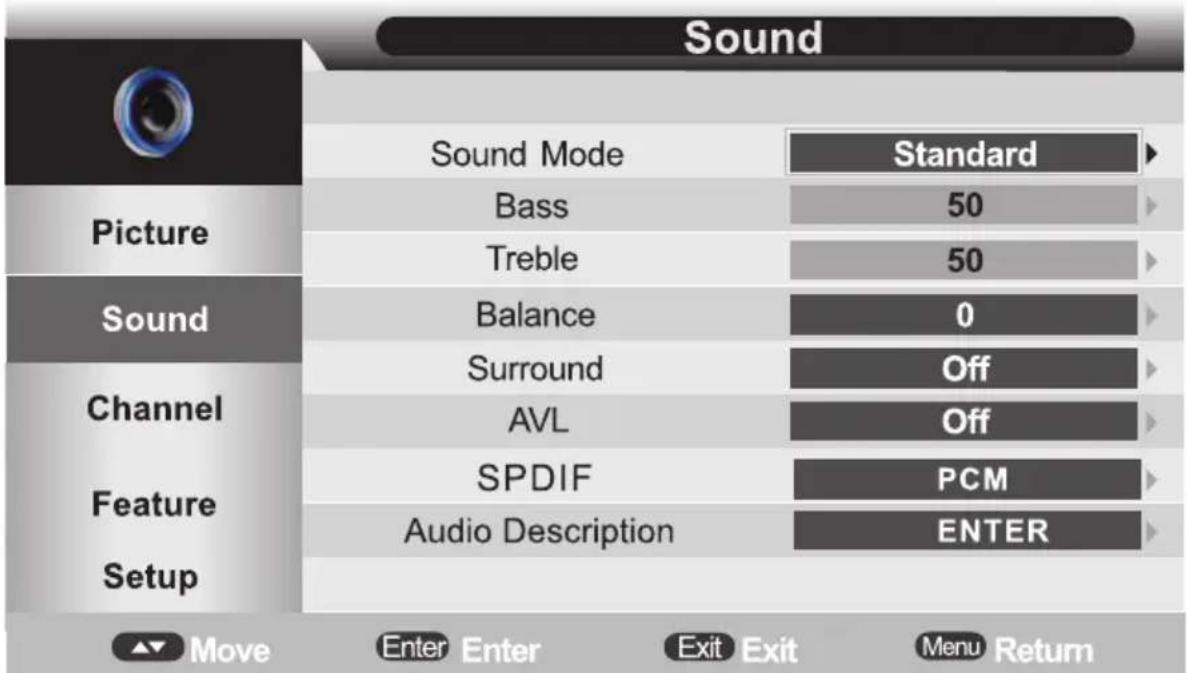
Sound Mode: Press ▲▼ buttons to select. The following option are available: "Standard, Movie, Music, Speech, User."
Bass: Adjust bass effect.
Treble: Adjust treble effect.
Balance: Adjust balance effect.
Surround: Press ▲▼ buttons to select On/Off.
AVL: Press ▲▼ buttons to select On/Off.
SPDIF: Press ▲▼ buttons to select Off, PCM, AUTO.
Audio Description: To select Audio Description mode.
Channel
You can adjust channel effect here, such as auto search, country, etc.
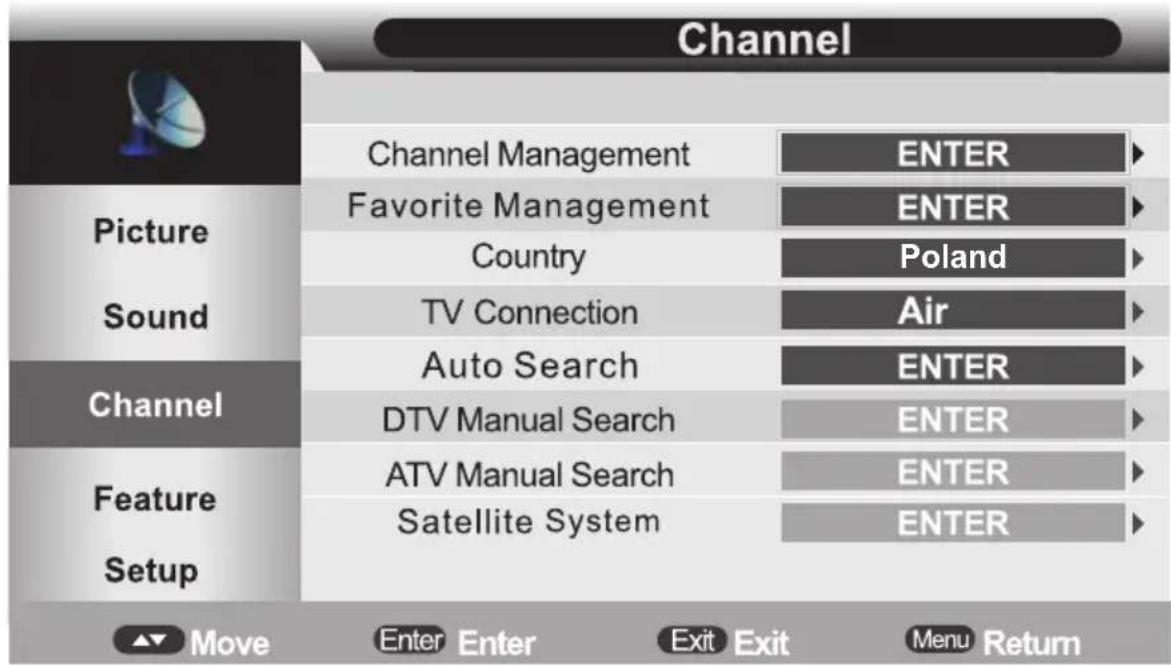
Channel Management : Press "UP(▲)" and "DOWN(▼)" key to select the programs to be deleted and press "RED", "GREEN" or "YELLOW" "BLUE" key to mark them.
Favorite Management: Press "▲▼" or buttons to select the favorite list and "RED", "GREEN", "YELLOW", "BLUE" key to mark them.
Country: Select the Country.
TV Connection: Select the TV Connection.(Air/Cable/Satellite)
Auto Search: To select auto search mode(All/DTV/ATV).
DTV Manual Search: To enter air channel manual search in DTV source and the user operation interface.
ATV Manual Search: To enter analogue manual search in ATV source and the user operation interface Satellite System:
Press "ENTER" or "RIGHT" key on "Satellite System" of "Channel" page in ATV or DTV source. The operation interface shows as follow:
Feature
You can adjust feature effect here, such as lock, language, clock, etc.
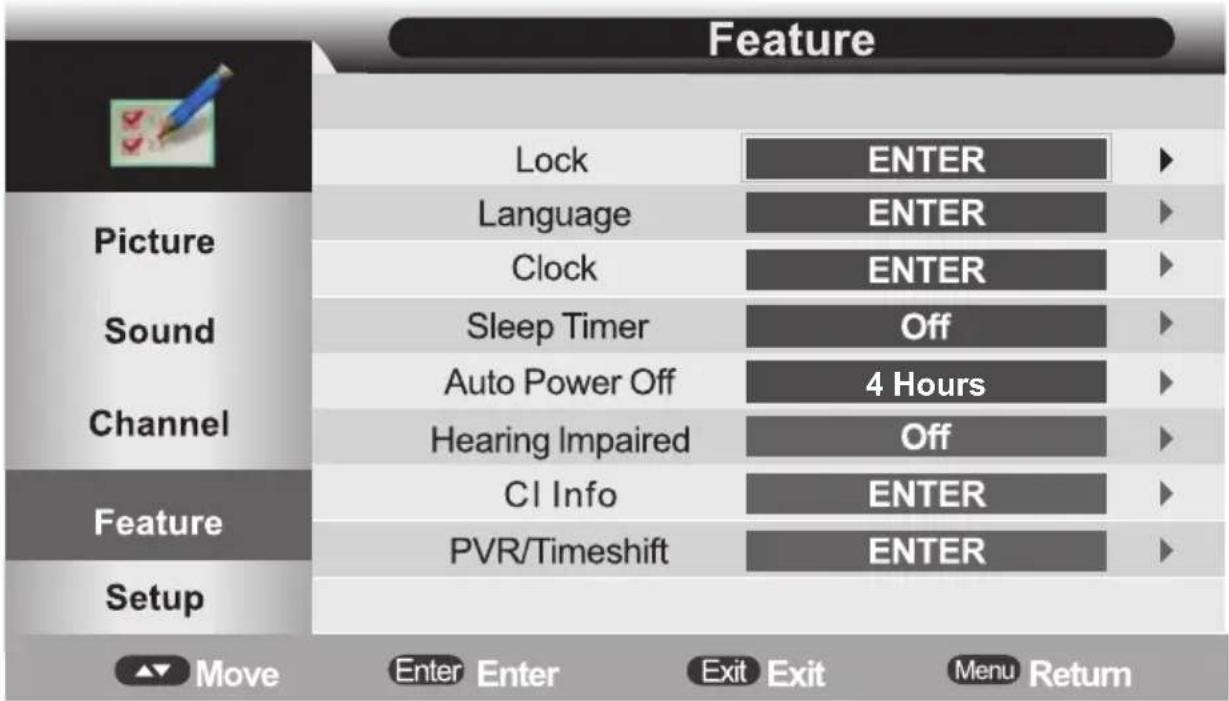
Lock: The default password is "0000". If you forget what you set, please call the service center.
Language: Set the display language.
Clock: Set time.
Sleep Timer: Press ▲▼ buttons to select your desired item(Off, 10Mins, 20Mins, 30Mins, 60Mins, 90Mins, 120Mins, 180Mins, 240Mins.)
Auto Power Off: Press ▲▼ buttons to select the Auto Power Off Time(Off, 1Hours, 2Hours, 4Hours.)
Hearing Impaired: Press ▲▼ buttons to select On/Off.
PVR /Timeshift:Press buttons display PVR/Timeshift menu.
CI card (options)
Setup
You can adjust Setup effect here, such as OSD Timer, PC Setup, etc.
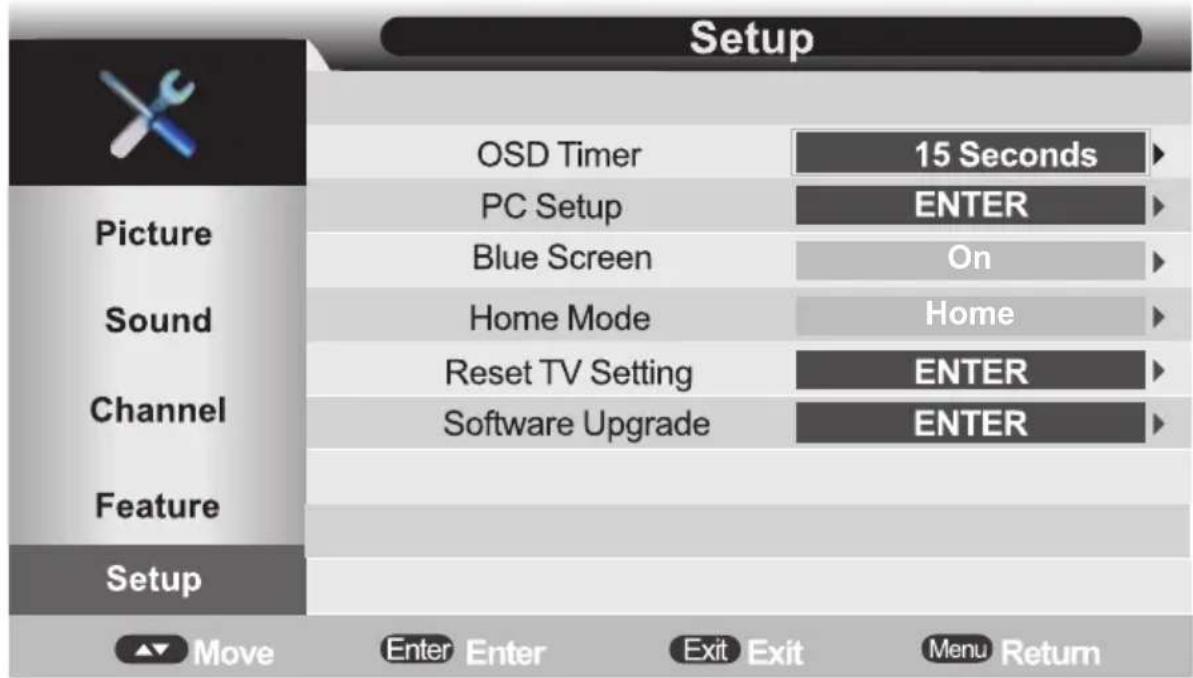
OSD Timer: Set up OSD Timer which means how long the Menus will exist(5 Seconds, 10 Seconds, 15 Seconds, 20 Seconds, 25 Seconds, 30 Seconds, Never).
PC Setup(Only for PC mode): The function only used in PC port to adjust PC position. When input pc source, you can go to PC to setup menu.
Blue Screen: Press ▲▼ buttons to select the On/Off (It is not available in USB, DTV source or when it is not movie mode in multimedia source.)
Home Mode: Press ▲▼ buttons to select Home Mode(Home, Dyamic, Standard, Mild).
Reset TV Setting: If the Lock Channel is On in Feature Menu/Lock, it needs to enter the password to enter the Reset. If will Reset System Setting and Database. When the reset is complete, it will enter the Auto Installation settings page.
Software Upgrade: Software Upgrade by bin code. Put The bin code into the root directory of the media and media plugged into the Tv's USB interface, press ENTER key to upgrade. Don't power off during the upgrading process.
EPG (Electronic program Guide)
If you expect to know the schedule or the information of the current playing program or the program that starts in the near future, you can refer to the EPG menu by pressing the button EPG, date and time on the top right of the menu, the list of the current available channels on the left side of the menu, and the name of each program that starts in a scheduled period of time on the right of the menu. Change the focused list by pressing ◀/▶, or the focused program by pressing ▲/▼. The information of the currently focused program will be displayed on the top of the menu.
There are 3 modes of EPG menu:
Daily mode:
Shows the information of the programs to be broadcasted in daily mode. Display the information of the programs that start in a scheduled period of time in the current channel. It includes name, start time, end time, short content description, current date/time, etc.
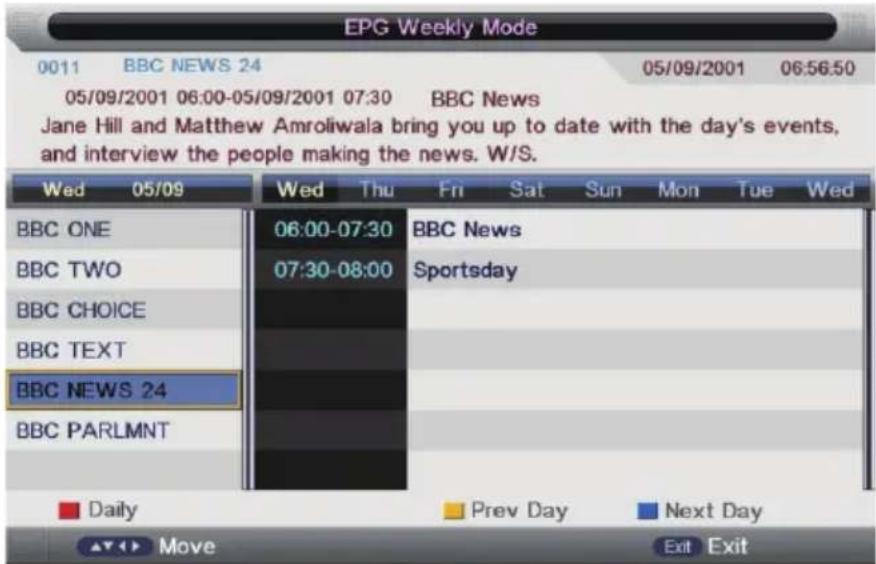
Weekly mode:
Shows the information of the programs to be broadcasted in weekly mode. Display the information of the programs that start in a scheduled period of time in the current channel. It includes name, start time, end time, short content description, current date/time, etc.
Extended mode:
Shows the detailed information of each program. Press INFO button to display Extended Informations. Press EXIT button to return back into Daily EPG mode.
PVR (Personal Video Recorder)
This section is to introduce some contents about PVR, including PVR involved menus, Recording flow, Recorders playback, Recording restrictions.
PVR/TimeShift Menu
PVR/Timeshift menu manages almost all the information that have relationship with PVR.
Enter method: Main menu -> feature -> PVR/Timeshift -> PVR/Timeshift menu
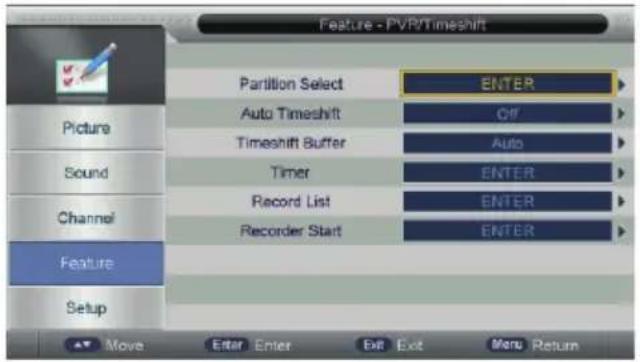
In PVR/TimeShift Menu you can adjust:
Partition Select
Enter into Partition Select Menu. You can Display Partition information, make Format Partition and Set Default partition
Auto TimeShift TimeShift Buffer Timer
Off: Stop Auto TimeShift, Auto: Start Auto Time Shift Set TimeShift Buffer time: Auto - 30mins - 1hr - 2 hr Eneter into Timer menu for adjusting the Recorder Timer.
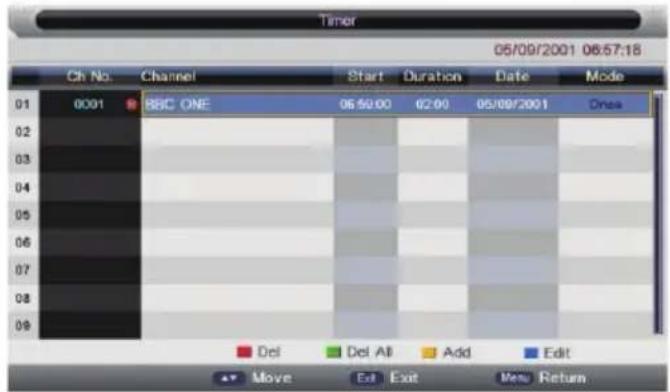
Ch.No: Channel Number
Channel: Channel name
Start: Start: Recording Time
Duration: The total Recording time
Date: The Date of Recording start
Mode: Record Mode: Once, Daily, Weekly, Month
To Add a new Timer, press YELLOW key.
To Edit Timer, press BLUE key.
To Delete Timer, press RED key, to delete all Timers, press GREEN key.
Record List Record Start
Edit Timer
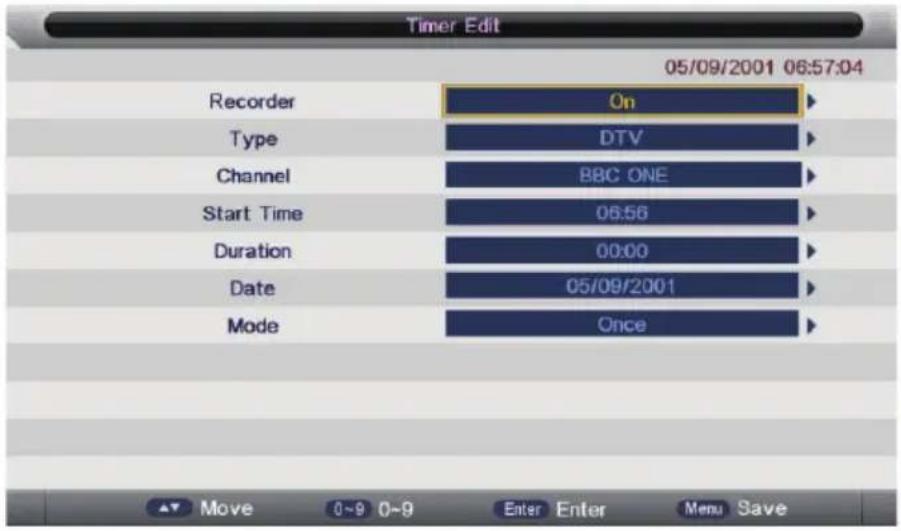
Recorder: Off-Timer is Reminder only, On-means to preengage program for watching and recording.
Type: Type of Program: DTV or DTV Radio
Channel: Name of the Timer program
Start Time: Start Recording Time
Duration: The total recording time. The status of this option is enable only when Recorder is On.
Date: The Date of starting Recorder/Reminder.
Mode: Once, Daily, Weekly, Month.
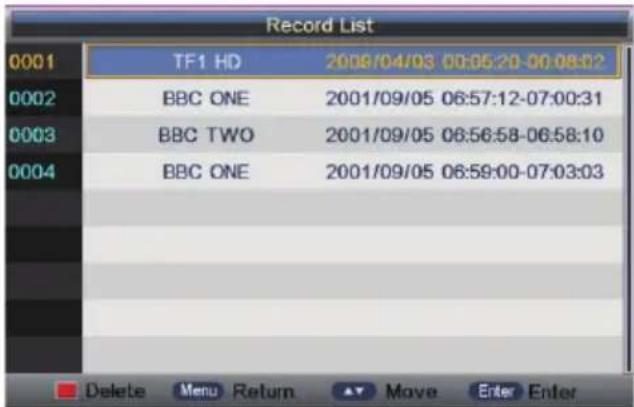
Record List Record List menu manages the Recorded programs. User can playback recorders in this menu.
Recorder Start Enter into menu to Start Recording DTV Channels.
REC (Recording DTV channels)
You can make record DTV programs only. Recorder file do not contain Teletext, EPG and Subtitle information.
Max size of Recording file is up to 3.9GB. If a long-time recorded file takes more than 3.9GB, it cuts and makes a new file named by adding an extra sequence number.
Standard Recording
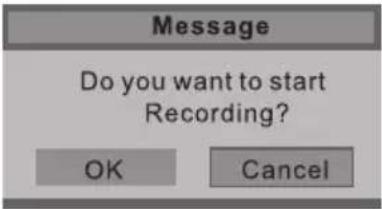
To start Record Channel, please press REC key.
it will pop up a message "Do you want to start Recording?". After confirm, the system will read the speed of the storage device. If the speed is too low for recording, there is a message "Device speed not enough, RECORD anyway?" if user choose Yes, it will record constrainedly. In addition, the speed is high enough, it initializes in the first instance and starts to record later.
As the initialization successfully ends, a REC input info menu appears on the right top corner of the picture and it starts to record while the program is playing in the background.
Message
Initializing Recorder ...
Press INFO key to get the current recording information from the Info Banner, such as current recording time and the recording progress. The recording time depends on how much of the program has been recorded actually.
The recording progress will stop when the USB device has no more free spaces if there is no setting about when to end before. A warning massage pops up, the recording process stops and it will keep on the normal playback process. Otherwise the progress ends naturally when the timer is timeout. Also user could press STOP key to end recording manually.
EPG Recording:
In the EPG Menu you can preengage Programs for watching or Recording.
In EPG menu, Press GREEN key for activate Reminder of highlated program, or press GREEN key Twice to activate TimerRecord function.
Reminder mode: when timeout is reached, unit automatically jumps to the program and only play
TimerRecord mode: when timeout is reached, unit automatically jumps to the program and starts recording. If it is timeout in standby mode, it will power on 2 minutes in advance and starts to record under background, without powering on the panel. To watch the program, user need to press POWER key.
Edit EPG Recording
In Timer menu, you can Increase, Delete or Edit preengage programs.
In the Timer Menu, press YELOW button to Add or BLUE key to Edit Timer. For more details about Add or Edit Timer, see chepter: "PVR (Personal Video Recorder)/Timer"
When the timer recorder is timeout, it jumps to the very channel and starts to record the program automatically (if a manual recording is under process, it will stop the manual recording process and starts the timer recorder automatically). When there is left 10s before recorder, a prompted window will pops up:
Time to start recorder
20s
TimeShift
Timeshift can record program and play the current recording program at the same time. You can paused watching program (for example when telephone ringing) and after finsih your telephone talk, you can continue to watch paused program.
To activate TimeShift, please keep plug in USB storage Device and Set Timeshift Buffer in PVR / TimeShift menu. Timeshift Buffer means how long a recorder can be stored when Timeshift is active. If Buffer is overstepped, the previous recorder stored there will be lie over; There are three modes: Auto, 30Mins, 1h, 2hr. Auto means that Time shift will use all the free spaces on the storage media.
Activate Time Shift
In the normal playback process in DTV source, there are two ways to start timeshift:
-
Manually: Press PAUSE to start Timeshift when there is no menu focused (Stop: Press STOP key.
-
Automatically: Set the Auto Timeshift option as Auto in PVR/TimeShift Menu.
To stop set Auto TimeShift as Off.
Before Manually Timeshift, there is a message "Do you want to start Timeshift". After confirm, it will check whether the speed of the storage device that the user inserted is enough for Timeshift. If the speed is not enough, a warning message will pop up to let the user make decision whether to go on. If timeshift is force to take place, there may be some pause or mosaic. Otherwise the speed is enough for Timeshift, it'll take place under background and users are able to pause or move fast backward.
After a timeshift ends, users are able to pause or move fast backward.
After Automatically Timeshift, it will take some minutes to initialize, then it takes place automatically.
Message
Do you want to stop Timeshift?
OK
Cancal
Media Play
Remote Control for Media
| Button | Description |
| ■ | Stop playback |
| ▶II | Play/Pause |
| ◀◀ ▶▶ | Skip a scene or music. |
| |◀◀ ▶▶| | Go back to the previous or skip to the next. |
| ▲▼ ◀▶ | Press to select item upward/downward. |
| ENTER | Press to confirm an action (For example:cope, paste etc.) |
Media Play
When selecting the USB input mode and input your USB, you can play the USB. There are 4 items in the Preference Page:PHOTO,MUSIC,MOVIE,TEXT.
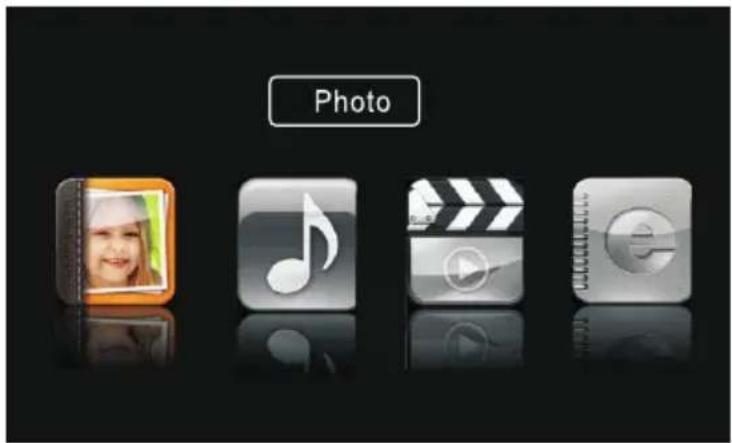
NOTE: Select the picture and press PLAY button to play after exiting music play mode. When Playing a Movie, you can press the "ENTER" button, then the function menu will appear on the screen. You can select you desired item.

The supported file format of media playing:
| File Type | Supported File Format | File Name |
| PHOTO | BMP/JPEG/PNG | .Jpg/.bmp/.png |
| MUSIC | WMA/MP3/M4A | .mp3/.wav/.wma |
| MOVIE | MPEG1/MPEG2/MPEG4 | .mpg/.dat/.Divx/.mp4 |
| TEXT | TXT | .txt |
Note: Not compatible with HDD. The file you played needs license (customer should check this point) or it will not be played.
Troubleshooting
Before calling service personnel, please check the following troubleshooting guide. If any problem still persists, unplug the TV set and call for servicing.
| Symptom | Check List |
| No picture, no sound | Check if the main power of the TV is turned on.Check the connection of the power cord and/or other cables. |
| Normal picture, no sound | Check the volume level.Check if the button has been pressed or not.Check the connection of the external equipment. |
| Poor color or no color, normal sound | Check the value level of “Brightness” and “Contrast” in PICTURE menu. |
| Multiple images, normal sound | Check the antenna connection and direction.Fine tuning the TV.Check the connection of the external equipment.The TV station may have broadcast difficulties. Try another channel. |
| Intermittent interference | Check if the source of interference is shield well.Remove those kinds of electrical devices away from the TV. |
| Remote control does not work | Check if the batteries are installed correctly.The batteries may be exhausted. Replace them with new ones.Remove all obstruction between the remote control and the remote control sensor.Ensure there is no strong light shining on the remote control sensor. |
WARNING
*To prevent the spread of fire, keep candles or other flames away from this product at all times.
*IF PROBLEMS PERSIST, CONTACT AN APPROVED BRUHM SERVICE TECHNICIAN. ALWAYS USE A CERTIFIED TECHNICIAN/ELECTRICIAN.


This equipment is a Class II or double insulated electrical appliance. It has been designed in such a way that it does not require a safety connection to electrical earth.
If at any time in the future you should need to dispose of this product please note that: Waste electrical products should not be disposed of with household waste. Please recycle where facilities exist. Check with your Local Authority or retailer for recycling advice. (Waste Electrical and Electronic Equipment Directive)

You can find the full user manual for the device, also in other languages on website: https://kiano.pl/help/