GO-3 - Grill Ravanson - Free user manual and instructions
Find the device manual for free GO-3 Ravanson in PDF.

User questions about GO-3 Ravanson
0 question about this device. Answer the ones you know or ask your own.
Ask a new question about this device
Download the instructions for your Grill in PDF format for free! Find your manual GO-3 - Ravanson and take your electronic device back in hand. On this page are published all the documents necessary for the use of your device. GO-3 by Ravanson.
USER MANUAL GO-3 Ravanson
EN Original instruction
Gas gril
natural_image
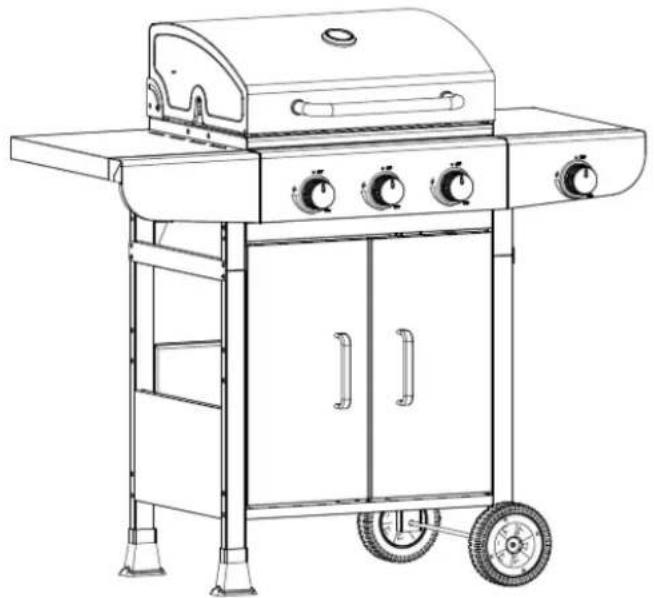
Line drawing of a portable electric grill with four control knobs and wheels (no text or symbols)MODEL: GO-3
PL UWAGA: POSTĘPUJ ZGODNIE ZE WSKAZOWKAMI ZAWARTYMI W TEJ INSTRUKCJI. NIE STOSOWANIE SIĘ DO TEJ INSTRUKCJI MOŻE SKUTKOWAĆ POŻAREM LUB WYBUCHEM, A TO W KONSEKWENCJI DOPROWADZIĆ MOŻE DO USZKODZENIA MIENIA, USZCZERBKU NA ZDROWIU, A NAWET ŚMIERCI.
EN NOTE: FOLLOW THE INSTRUCTIONS IN THIS MANUAL. FAILURE TO FOLLOW THESE INSTRUCTIONS MAY RESULT IN A FIRE OR AN EXPLOSION, AND AS A CONSEQUENCE MAY LEAD TO PROPERTY DAMAGE, HEALTH DAMAGE AND EVEN DEATH.
5 A X 4PCS B X 12PCS
4. Zamontować kółka
6 C X 2PCS
12 G X 4PCS
natural_image
Line drawing of a 31-pointed grill with open doors and wheels (no text or symbols)natural_image
Line drawing of a standard 3D grill with open door, wheels, and a side table (no text or symbols)Before first use, read carefully every warnings and safety instructions.

The failure to comply with the below-mentioned safety warnings and instructions, incorrect installation and use of the device can cause serious injuries or death due to scalds, fire, or carbon oxide poisoning.

Please keep this warnings and safety instructions in order to be able to future use.
DANGER OF EXPLOSION AND FIRE!
Do not store or use gasoline or other flammable vapors and liquids near this device - risk of explosion and fire!
Gas cylinders not connected for use can't be stored near this appliance!
Do not place anything on or near this device!
Clothing or other flammable materials can't be hung on, placed on or near the heater!
GENERAL SAFETY INSTRUCTIONS

The device must be installed in accordance with the applicable law and used only outside.
WARNING! THIS DEVICE IS INTENDED FOR OUTDOOR USE ONLY!
USE OUTDOORS ONLY!
ALWAYS READ THE OPERATING MANUAL BEFORE INSTALLING AND
USING THE DEVICE
- This device must be installed in accordance with the applicable law.
- The manufacturer shall not be held liable for any injuries or damage caused by incorrect installation or use of the device.
- It is not permitted to carry out any changes or modifications which shall render the guarantee invalid.
- The device shall be operated solely by adults. Children must not be allowed to play near the device.
- Warning accessible parts may be very hot. Keep young children away.
- Do not allow children to play with the device.
- ATTENTION! Children and pets should not approach the hot or cooling device.
- The device is designed for cooking. It must not be used for any other purposes!
- The appliance must be repaired by a qualified person using only original spare parts.
- ATTENTION! Incorrect repairs may cause serious hazards.
- ATTENTION! In the device failure, especially when gas escapes, the device must be disconnected from the gas supply and contact the repair service team immediately.
- Do not cover ventilation openings.
- Take special care when replacing gas cylinders.
- Gas cylinder replacement should be performed away from sources of ignition.
- ATTENTION! If the gas escapes, close the gas cylinder and call the Gas Service. Do not light any matches, smoke, switch on or off
any electric (radio, light switch) or mechanical appliances that may cause sparking at that time.
PLEASE NOTE!
Liquefied gas is heavier than air which is why it tends to keep close to the floor. The gas cylinders cannot be located near sources of heat (ovens, fireplaces, stoves etc.) which could increase the temperature inside the cylinder to over 50^ C.
-
Before using, remove all the protections installed for transport.
-
Do not move the appliance during use.
-
Turn off the gas supply at the gas cylinder after use.
-
This appliance must be kept away from flammable materials during use.
-
The regulator and hose must be connected correctly to the appliance. A spanner must be used to tighten the nut onto the connection thread.
-
Do not keep any gas cylinder inside the barbecue trolley when using. It's forbid to insert / put gas cylinder in to the appliance.
-
WARNING! To use protective gloves when handling particularly hot components
-
WARNING! Do not store cleaning agents and flammable materials near the cooker.
-
WARNING! The connection hose should be replaced when and as specified by its manufacturer.
-
WARNING! Check the hose and connection tightness periodically according to the applicable regulations.
-
WARNING! When installing and changing the gas container which shall be carried away from any source of ignition
-
For cleaning use a slightly wet (not wet), soft cloth and mild detergent.
-
Do not use the pressure or steam cleaning devices to clean the cooker.
-
Do not use solvents, petrol, alcohol and other measures that would damage the device. For cleaning do not use harsh detergents.
-
ATTENTION! Do not expose the device to rain and moisture.
-
Transport in the original packaging, protecting against dust, humidity, and mechanical damages.
- Improper installation, adjustment, or modification may result in personal injury or property damage.
- Do not attempt to modify the appliance in any way.
- Do not store chemicals, flammable materials, or aerosols near the appliance – there is a risk of fire.
- Do not use this appliance in areas where flammable vapors or dust are present. It should also not be used in areas where gasoline or other flammable materials are stored.
- The appliance must have a fresh air supply. Otherwise, proper combustion will not occur.
- Under no circumstances should the grill be operated in enclosed spaces.
- Do not use natural gas to power the appliance. The appliance is designed to operate on LPG propane-butane (G30 37mbar I3(B/P)).
- Do not connect the appliance directly to a gas cylinder. The device requires a pressure reducer with an output pressure of 37 mbar.
- Do not store or use gasoline or other flammable gases or liquids near the appliance.
- All leak tests should be performed with a soapy water mixture or using specialized measuring equipment. Never use an open flame to detect possible leaks.
- Do not use the appliance until all connections have been checked for leaks.
- Do not move the appliance while it is in operation.
- Before servicing, cleaning, or maintenance, turn off the appliance and wait for it to cool.
- After turning off the appliance, do not move it until its temperature has cooled down.
- The gas cylinder should be disconnected when the appliance is not in use.
-
Avoid kinking flexible tubes and hoses. The hose must not be placed near sharp edges or sharp-edged objects.
-
Keep pets away from the heater.
- Never leave the heater unattended when it is on!
- Despite using the device as intended and following all safety instructions, certain residual risk factors cannot be completely eliminated.
Despite proper use of the device and following all safety guidelines, some specific residual risks cannot be completely eliminated.
FOR YOUR SAFETY IF YOU SMELL GAS:
- Turn off gas supply at gas cylinder.
- Extinguish all naked flames; do not operate any electrical appliances.
- Ventilate the area.
- Check for leaks as detailed in this manual.
- If odour persists, contact your dealer or gas supplier immediately.
PRECAUTIONS:
- Leak test all connections after each cylinder refill or before each use.
- Never check for leaks with a match or open flame.
- Do not store of use gasoline or other flammable vapours and liquids in the vicinity of this or any other appliance.
- Any LP cylinder not connected for use shall not be stored in the vicinity of this or any other appliance.
ASSEMBLY
When you receive the device:
· Unpack it and check if it is not damaged. DO NOT USE when you detect any damage
- Check if the equipment supplied is complete
- Remove all the packaging components
- Remove all the stickers and plastic protective components
WARNING: Whilst every effort has made in manufacture of your barbecue to remove any sharp edge, you should handle all components with care to avoid accidental injury.
Tools required: Either a Philips crosshead or flat-bladed screwdriver and either a spanner (we have supplied a multifunction spanner) or a pair pliers.
Please read all instructions thoroughly before proceeding. Find a large, clean area in which to assemble your trolley barbecue. Please refer to the parts list and assembly diagram as necessary. Assembly of the barbecue involves many large components, it is advisable to have two people assemble the unit.
NOTICE: Make sure all the plastic protection rip off before assembling!
EXPANDED VIEW
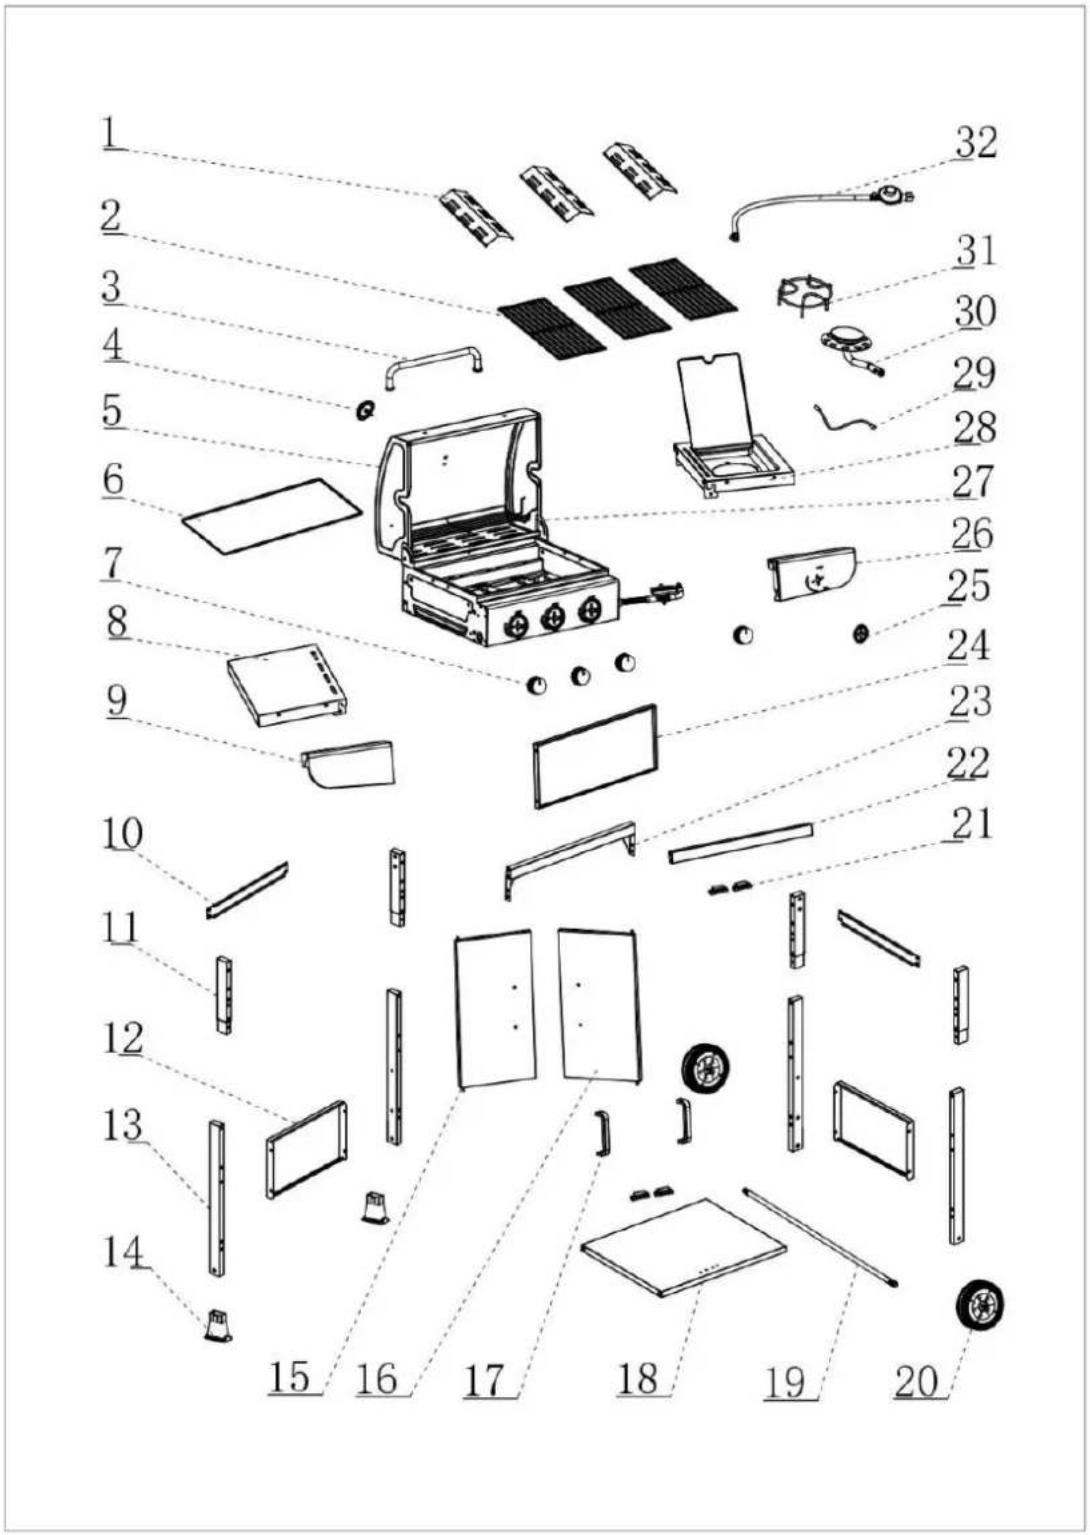
PART LIST:
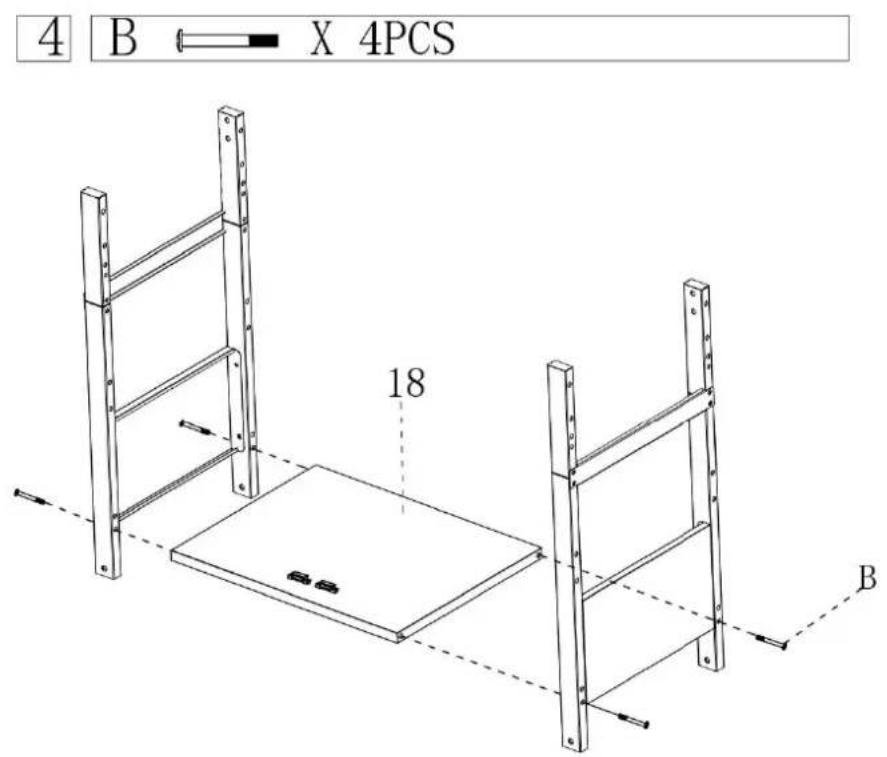
| 1 |  | Flame tamer | 3pcs | 18 | 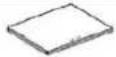 | Bottom plate | 1pc |
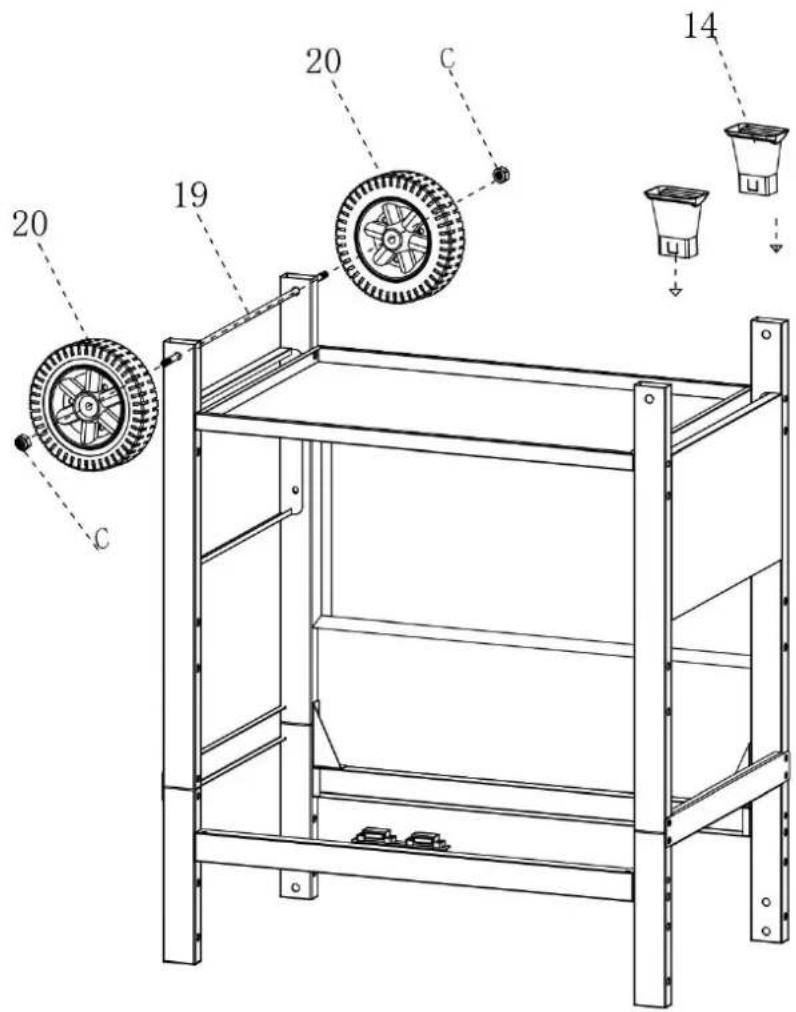
| 2 |  | Cooking grid | 3pcs | 19 |  | Axle | 1pc |
| 3 |  | Lid handle | 1pc | 20 |  | Wheel | 2pcs |
| 4 |  | Thermometer | 1pc | 21 |  | Magnet | 4pcs |
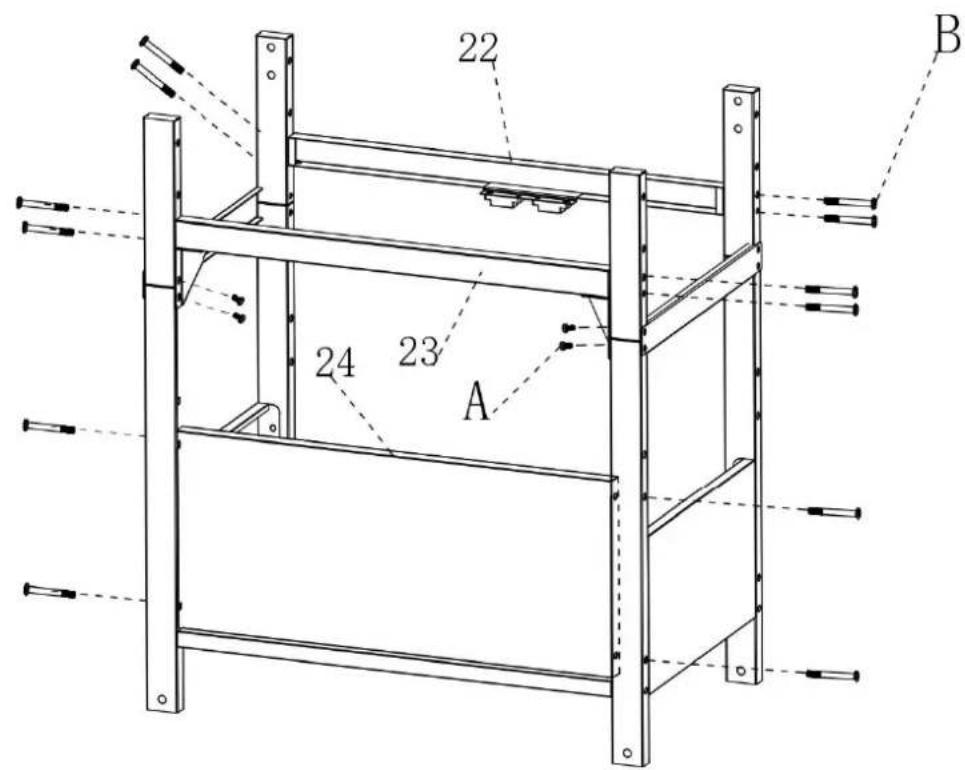
| 5 | 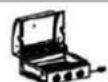 | Body | 1pc | 22 | 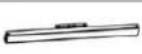 | Door cross beam | 1pc |
| 6 | 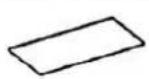 | Grease tray | 1pc | 23 |  | Crossbeam | 1pc |
| 7 |  | Knob | 4pcs | 24 |  | Back panel | 1pc |
| 8 | 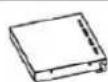 | Side table | 1pc | 25 |  | Knob base | 1pc |
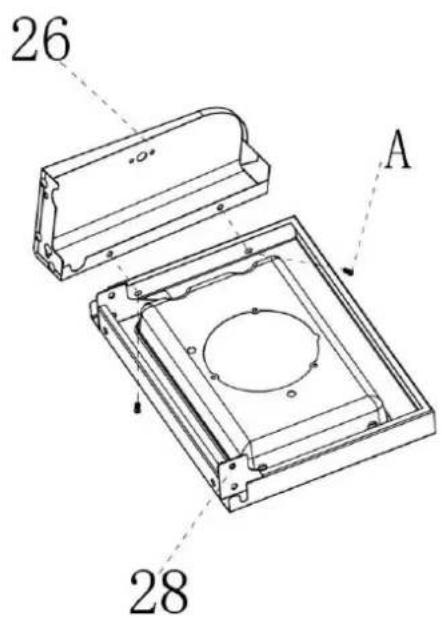
| 9 | 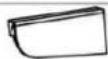 | Side panel | 1pc | 26 |  | Side panel | 1pc |
| 10 |  | Side crossbeam | 2pcs | 27 |  | Warming rack | 1pc |
| 11 |  | Leg | 4pcs | 28 |  | Side | 1pc |
| 12 |  | Back panel | 2pcs | 29 |  | Gas pipe | 1pc |
| 13 |  | Leg | 4pcs | 30 |  | Side burner | 1pc |
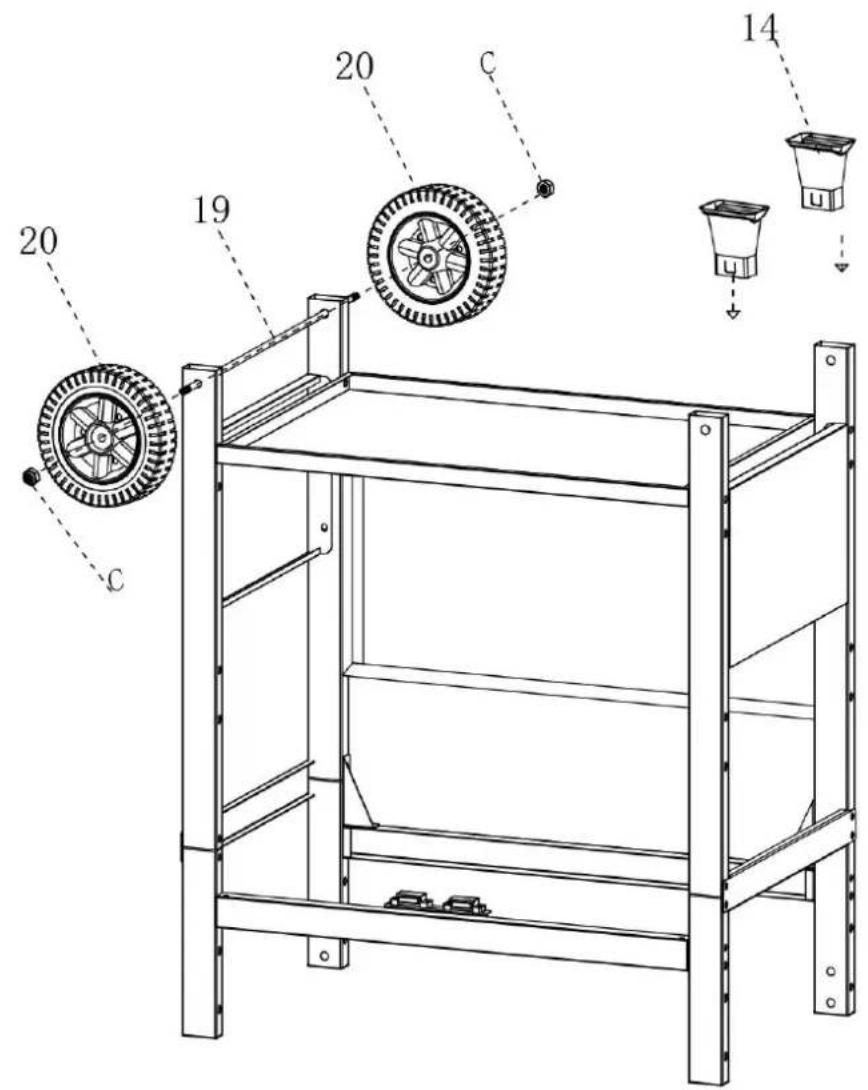
| 14 |  | Foot mat | 2pcs | 31 |  | Rack | 1pc |
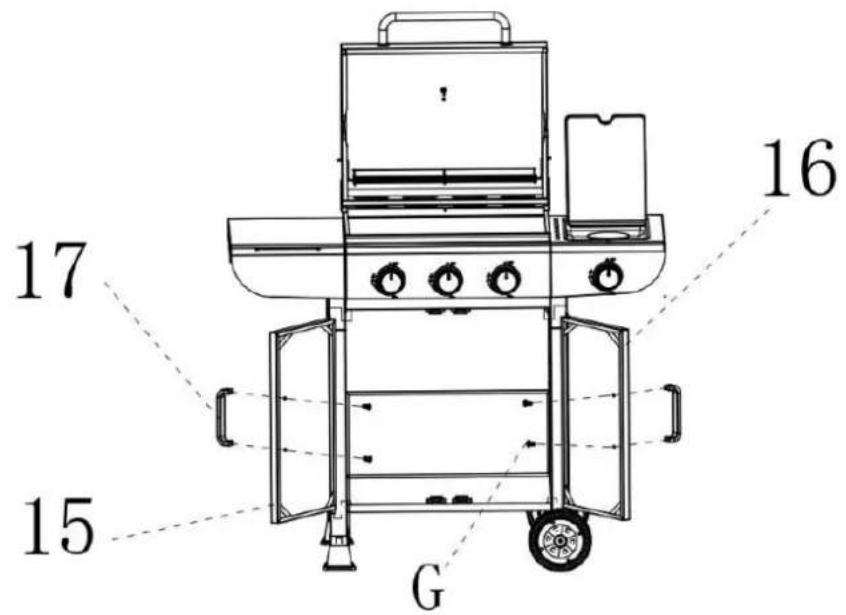
| 15 | 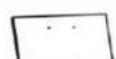 | Door | 1pc | 32 | 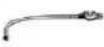 | Hose & Regulator | 1pc |
| 16 |  | Door | 1pc | ||||
| 17 | Door handle | 2pcs |
| A |  M5x10 M5x10 | 28PCS | |
| B | 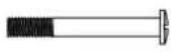 M6x50 M6x50 | 24PCS | |
| C |  M8nut M8nut | 2 PCS | |
| D | 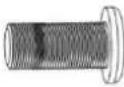 M6x12 M6x12 | 14 PCS | |
| E |  M4x12 M4x12 | 11PCS | |
| F |  M4nut M4nut | 7 PCS | |
| G |  M4x6 M4x6 | 6PCS | |
| H | 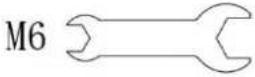 M8 M8 | 1 PC | |
ASSEMBLY:
- Assemble the legs
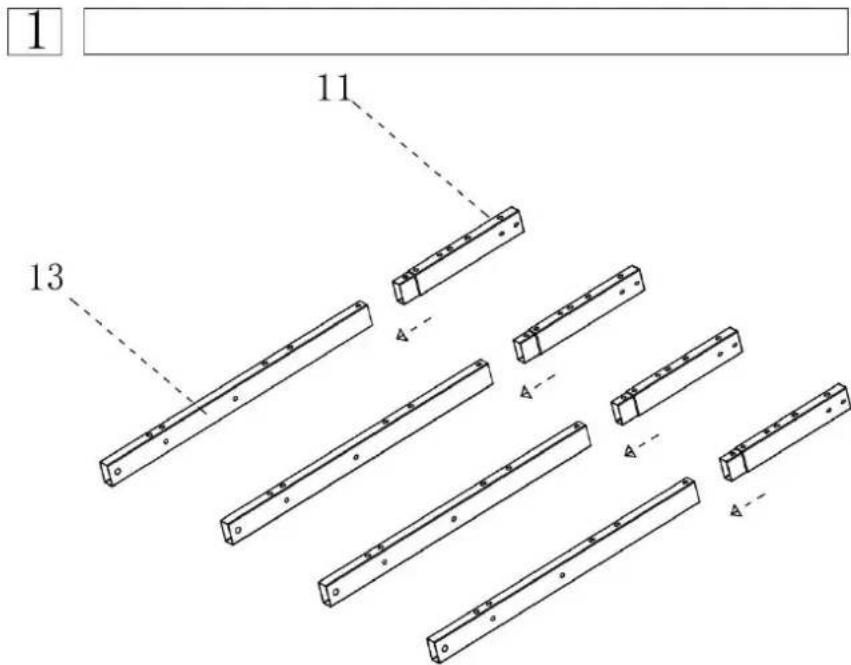
2 A X 16PCS
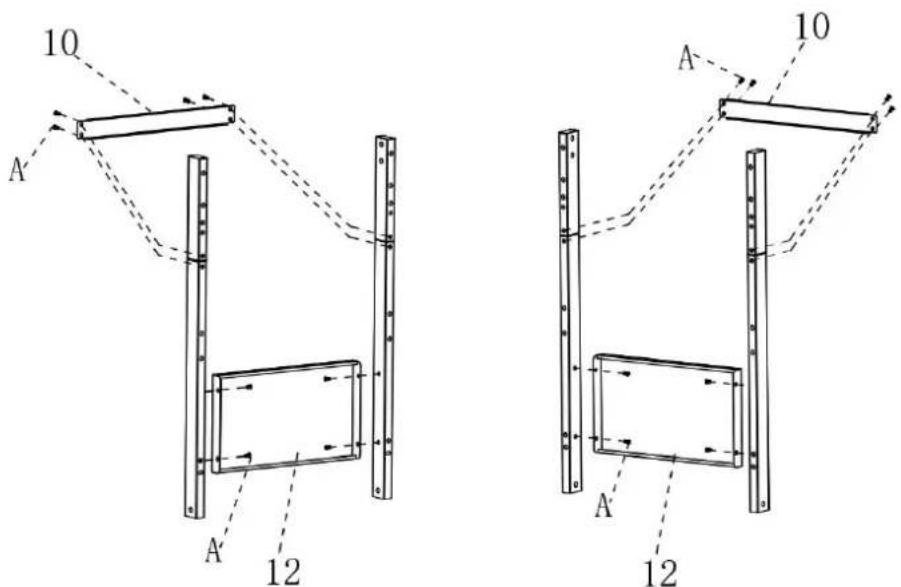
2. Assemble the trolley bottom panel
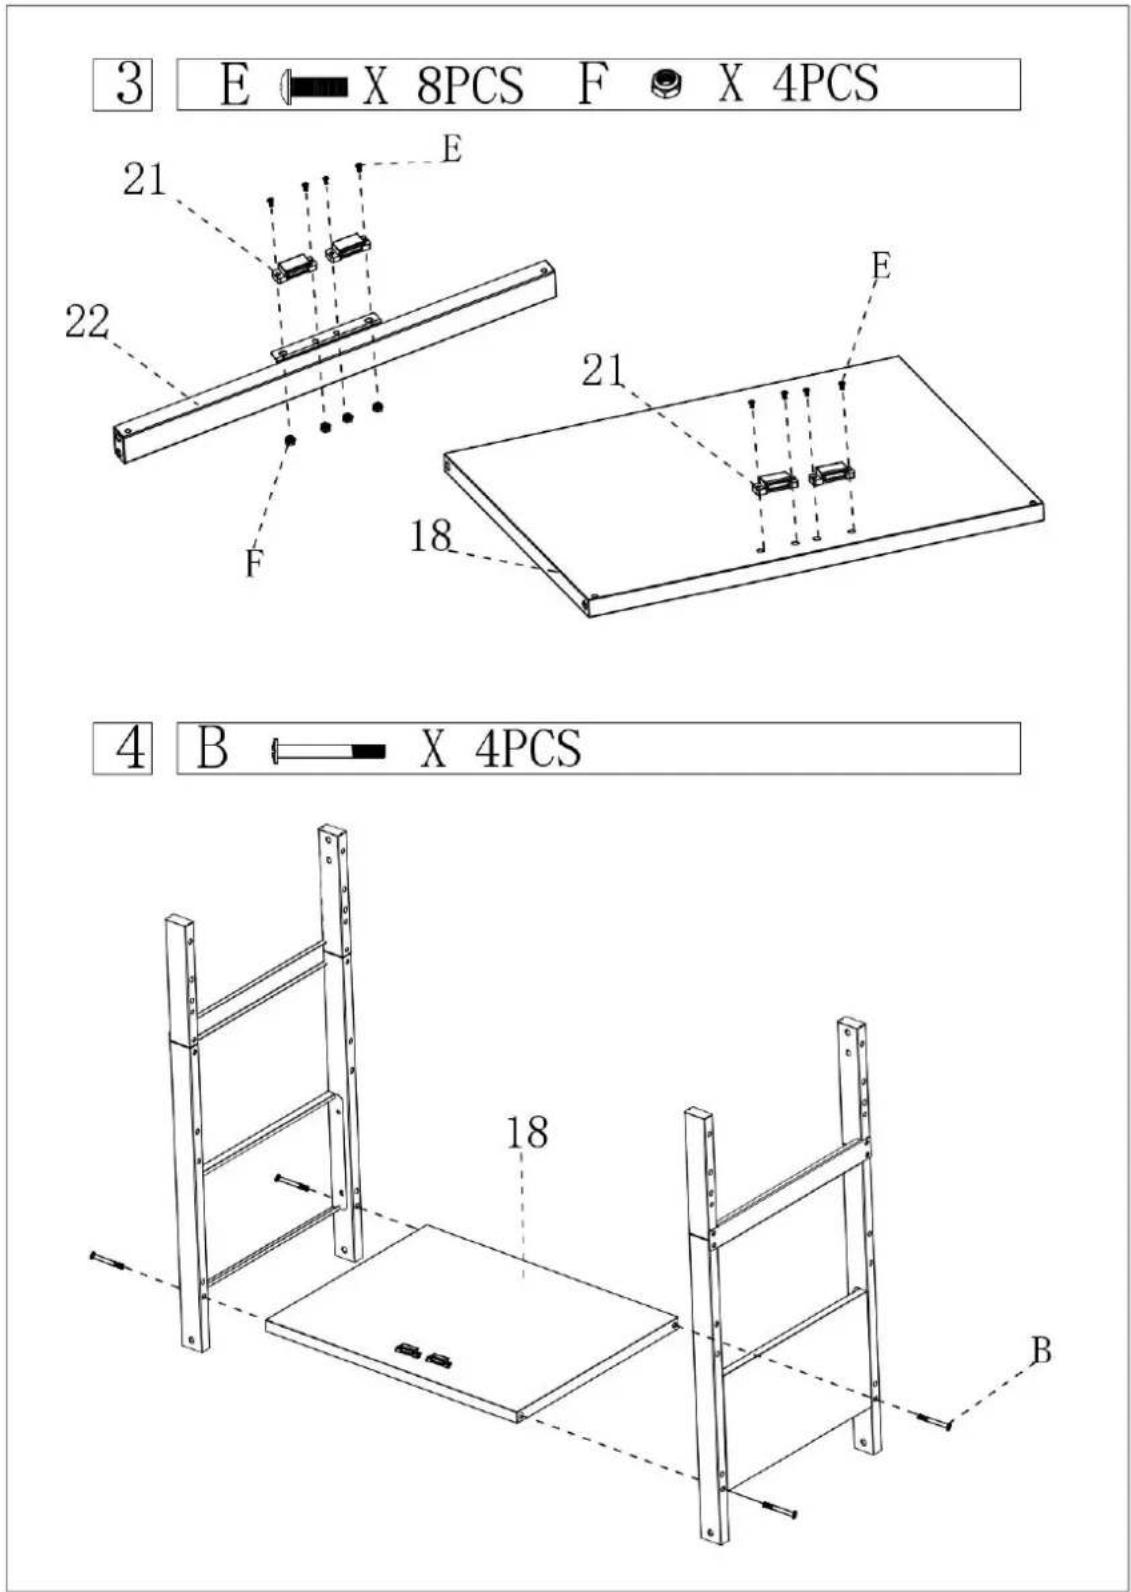
3. Assemble the front panel
4. Assemble the wheels
6 C X 2PCS
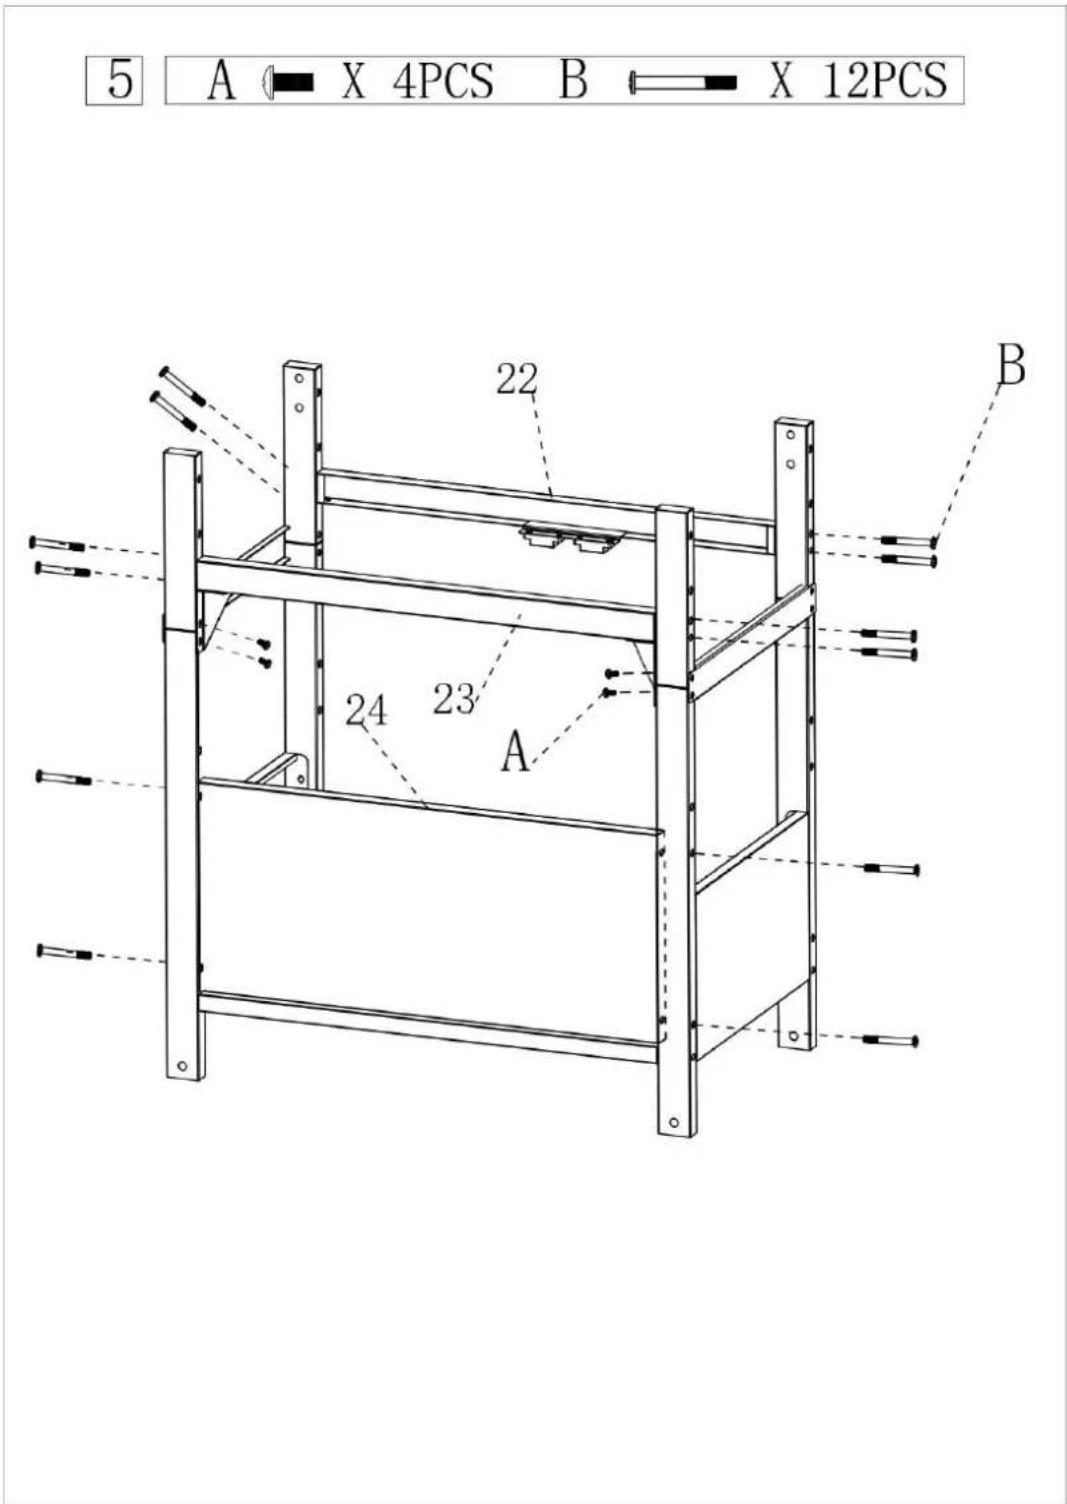
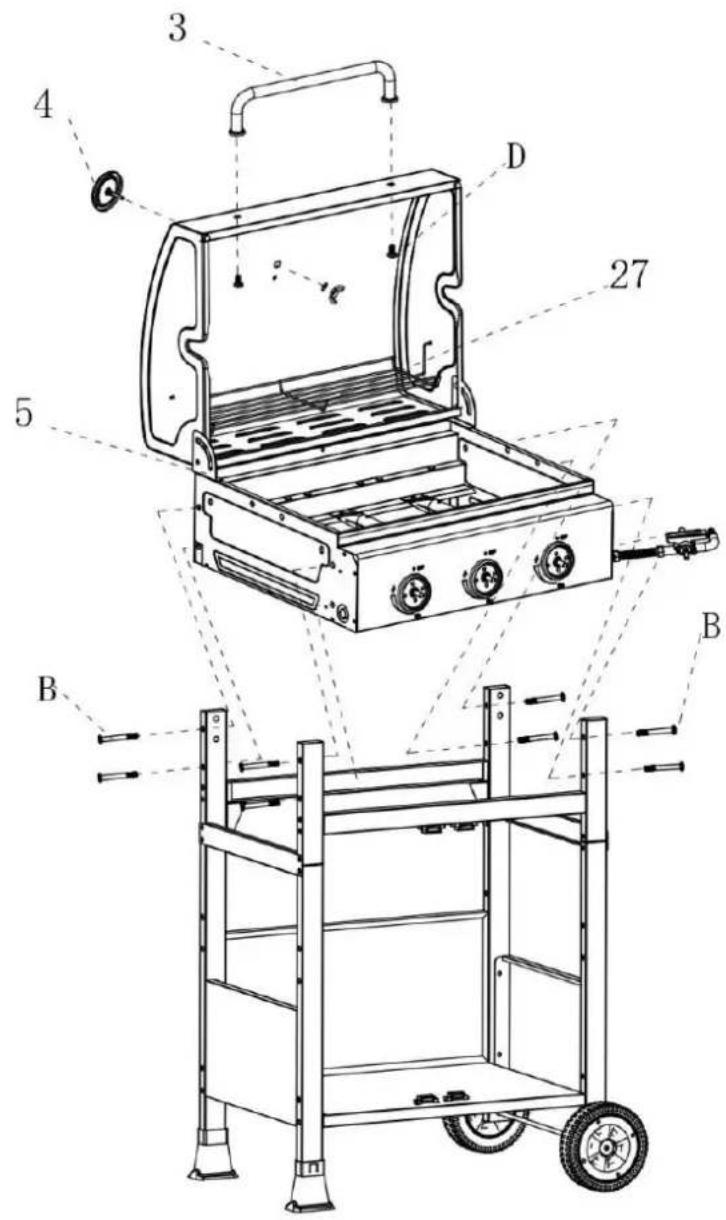
5. Assemble the BBQ body
7 B X 8PCS D X 2PCS
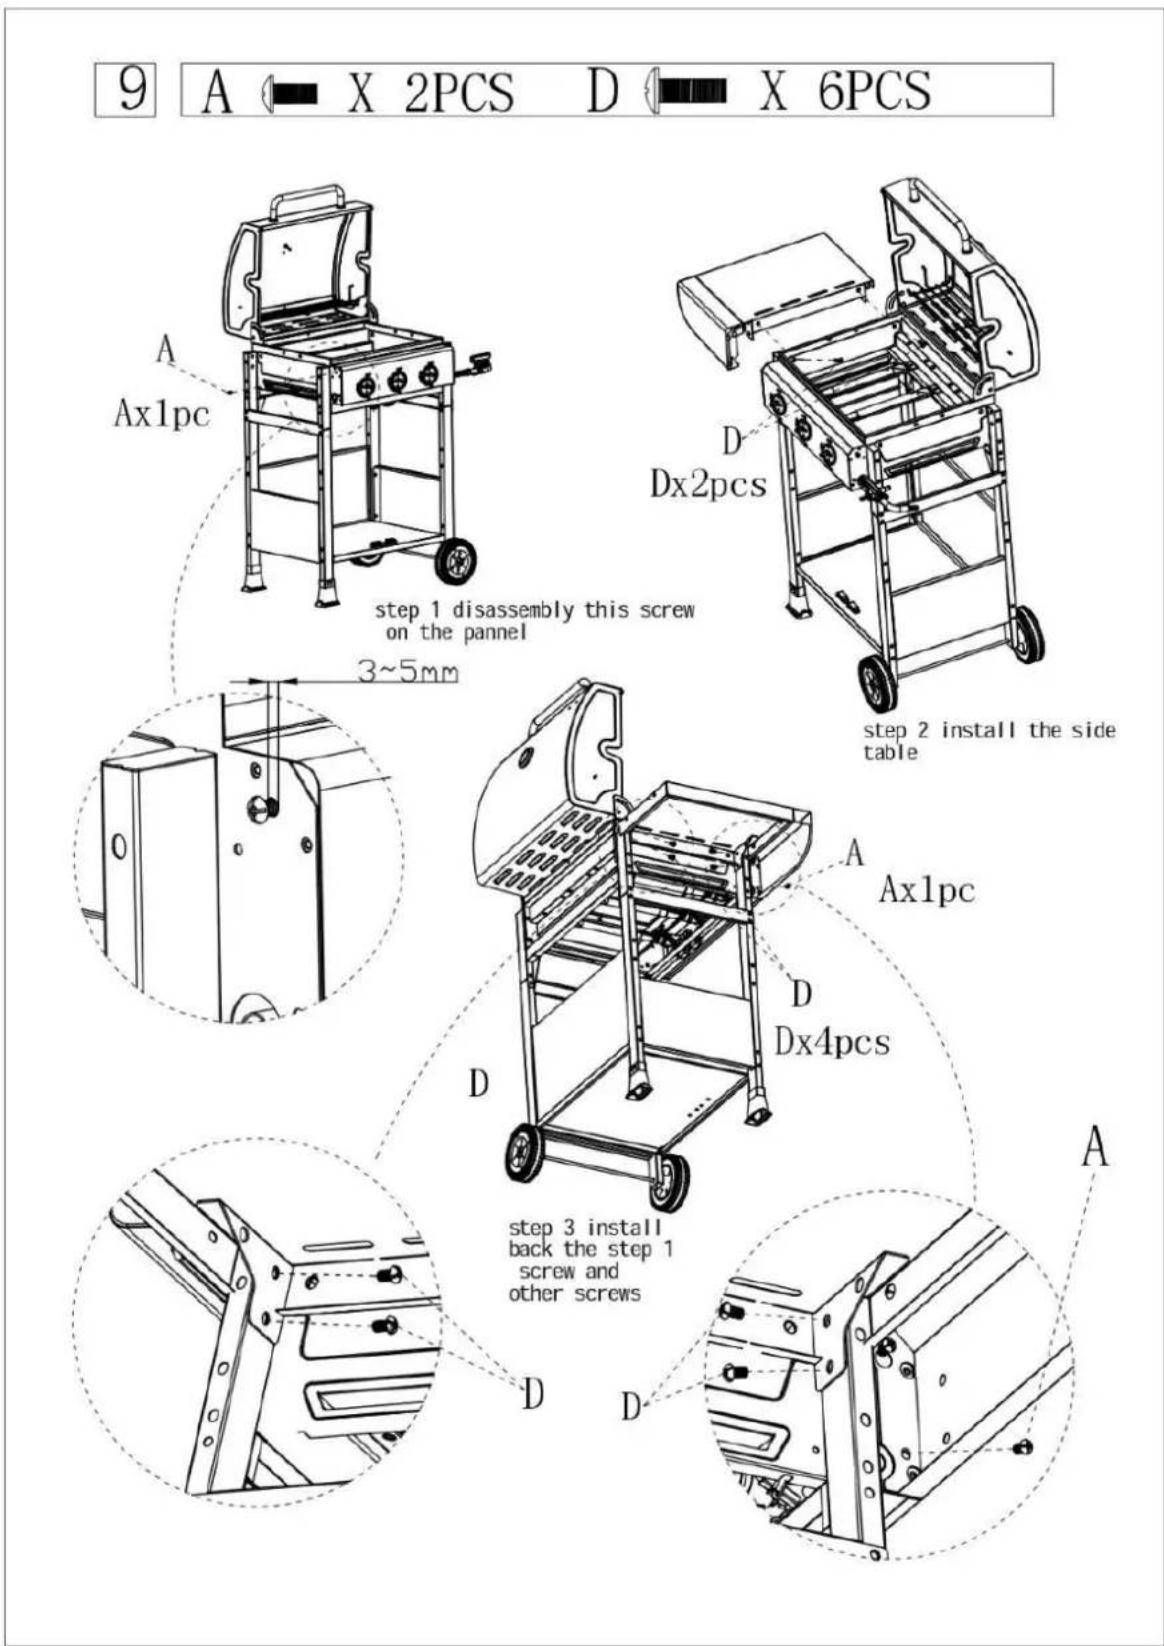
- Assemble the side table
8 A X 4PCS
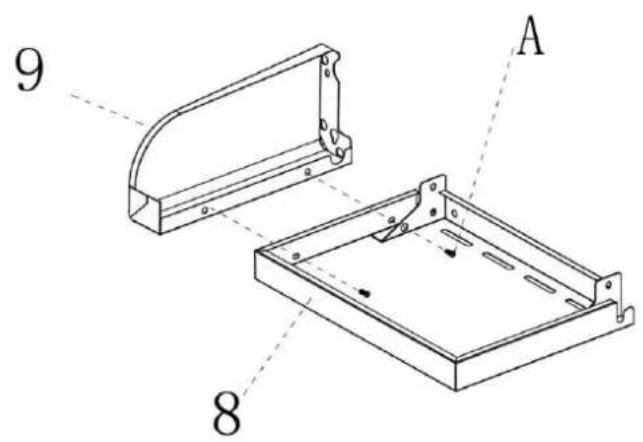
7. Assemble the side table
8. Assemble the side burner
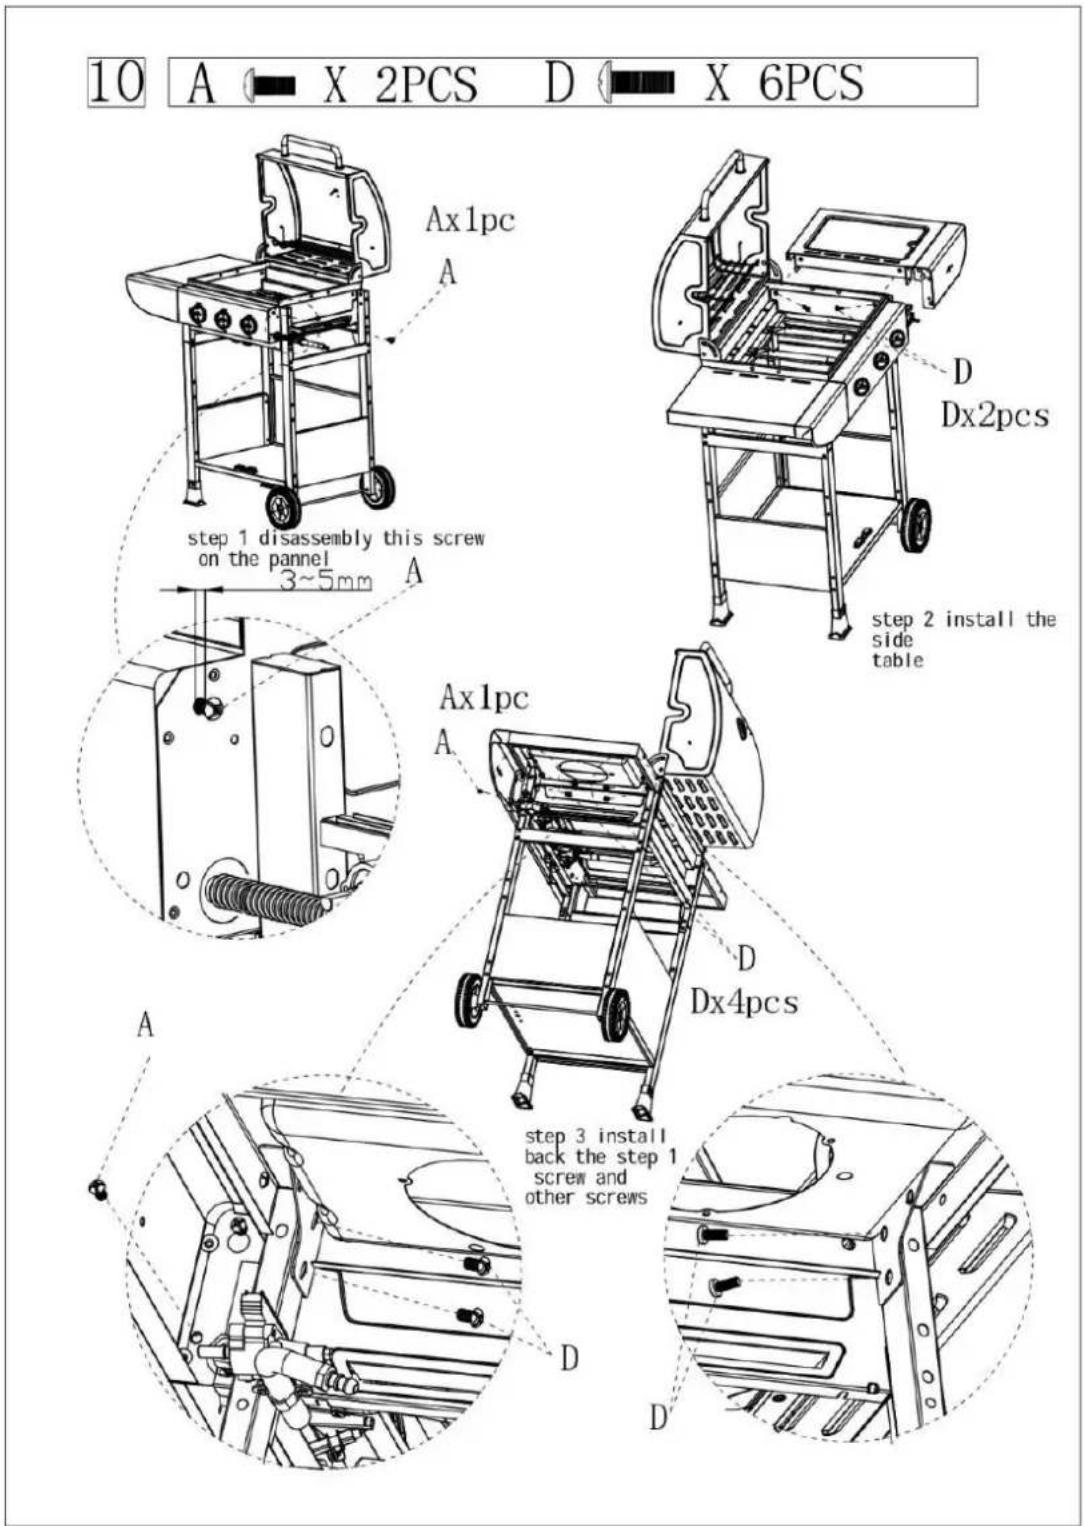
- Assemble the side burner, connect the gas pipe

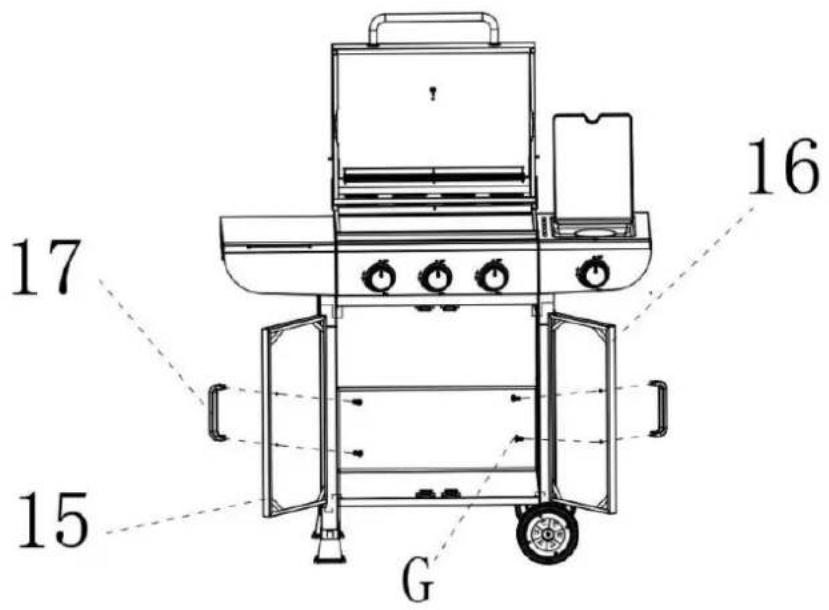
- Assemble the trolley door and side burner rack
12 G X 4PCS
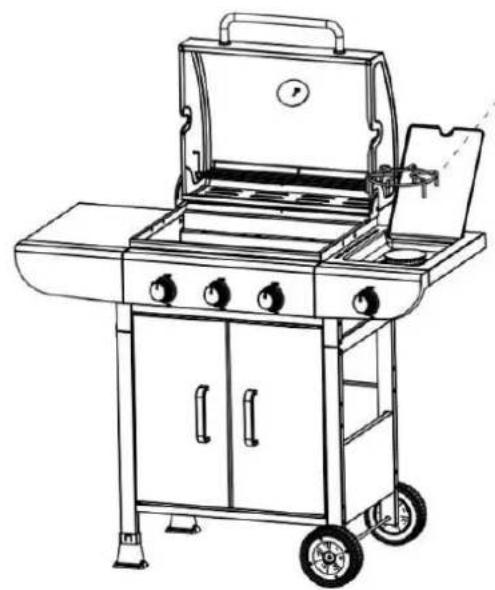
natural_image
Line drawing of a standard 3D grill with open doors, wheels, and a handle (no text or symbols)31
- Assemble the warming rack and cooking grid
13
2
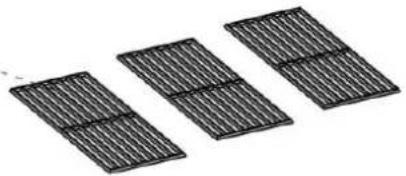
natural_image
Three identical rectangular panels arranged horizontally, each with a vertical line on top (no text or symbols visible)1
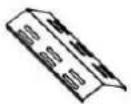
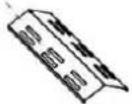
6
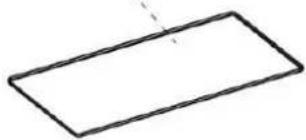
natural_image
Simple geometric diagram of a rectangle with a dashed line indicating a vertical edge (no text or symbols)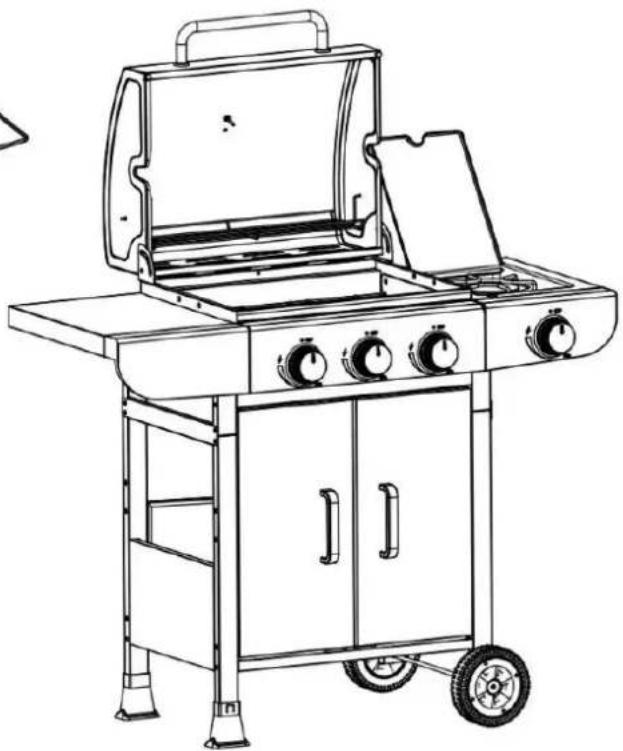
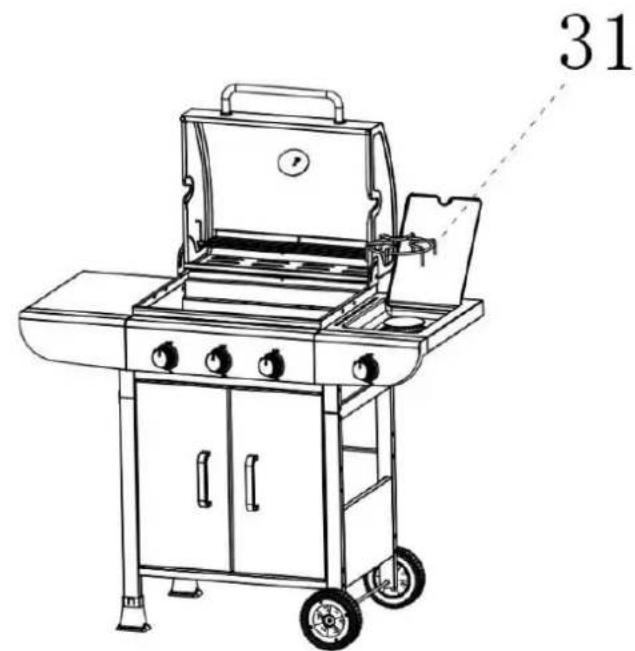
natural_image
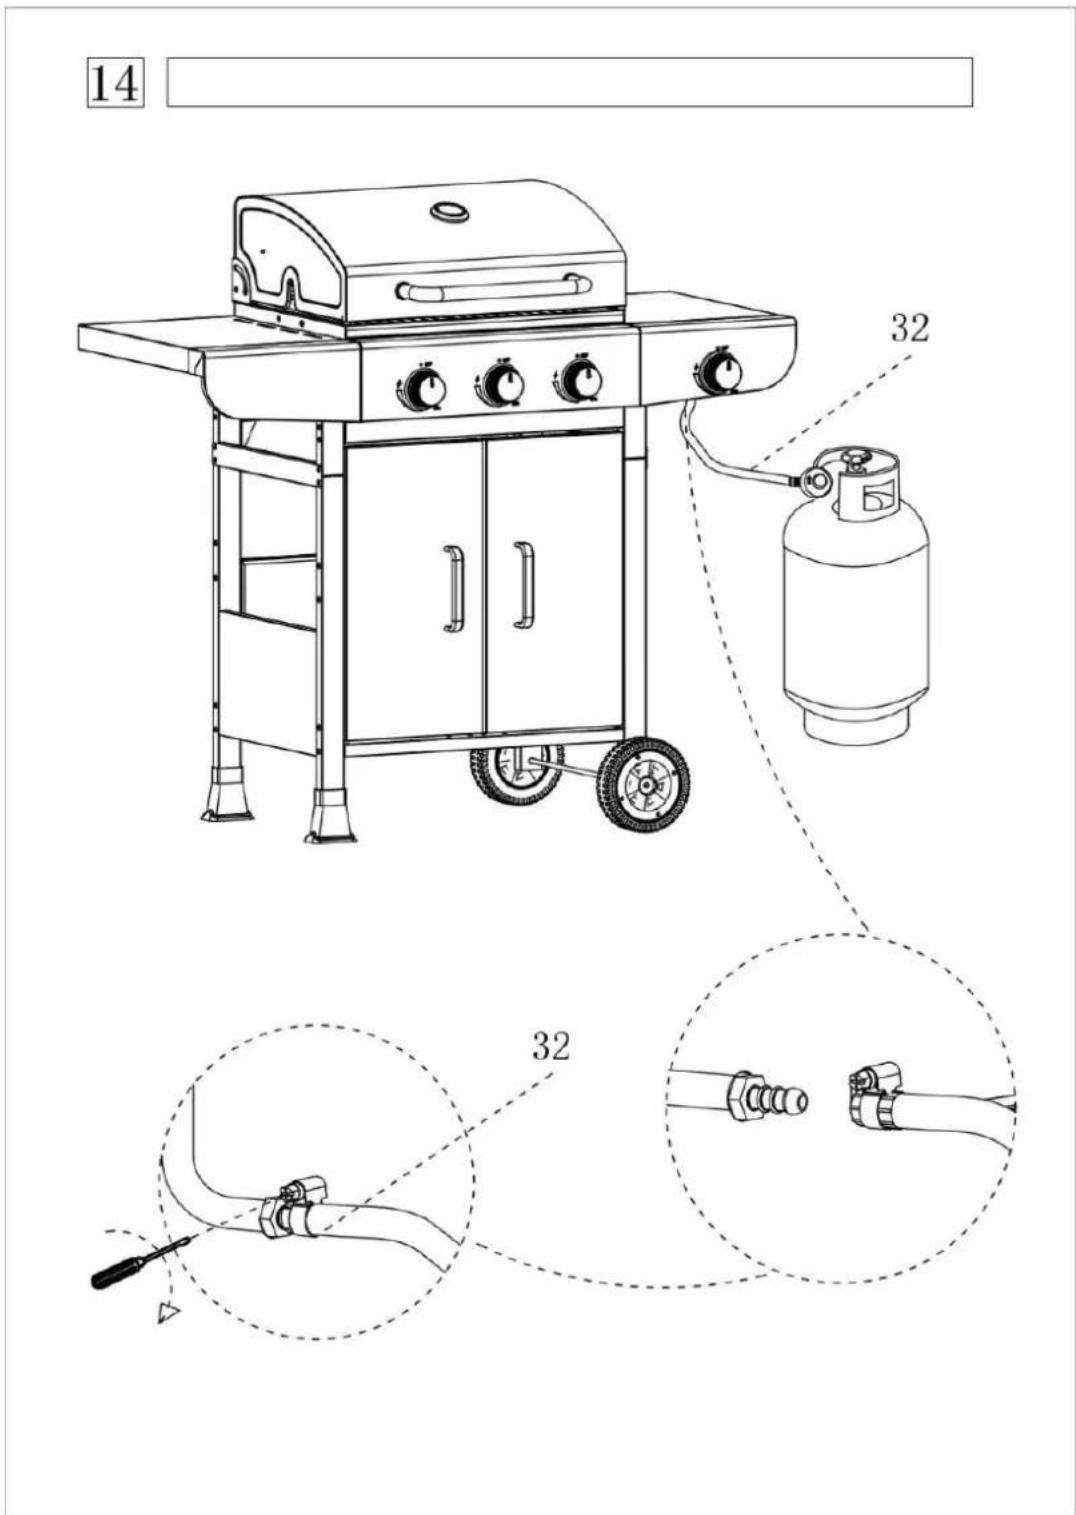
Line drawing of a standard 3D grill with open door, wheels, and open cabin (no text or symbols)- Assemble the hose and regulator, connect the gas cylinder
WARNINGS INFORMATIONS
flowchart
graph LR
    A["Heating System"] --> B["Valve Switch"]
    B --> C["Switch with Valve"]
    C --> D["Heat Dissipation"]
    D --> E["Reactor with Heat Dissipation"]
IMPORTANT:
Read the following instructions carefully and be sure your barbecue is properly installed, assembled and cared for. Failure to follow these instructions may result in serious bodily injury and/or property damage.
If you have any questions concerning assembly or operation, consult your dealer.
Your barbecue can be used with gas cylinders between 11 kg and 15 kg. The maximum size of the gas cylinder should be: Dia. 320mm, Height: 600 mm. Follow the technical information as stated in the instruction manual and Check with your local gas supplier to have a suitable gas cylinder for your barbecue.
Hotplate burner pan: The max. pan Dia. is 195 mm, the min Dia. should be 120 mm.
NOTE FOR CONSUMER: Retain for future Reference
CONNECTING THE GAS CYLINDER TO THE APPLIANCE
The device can be supplied with gas in family 3: 3B/P – propane butane.
To connect the gas, use a pressure reducing valve with the rated gas pressure of 37 mbar and flexible hose.
The hose should be secured to the regulator and the appliance with hose clips. Make sure the flexible hose could not come in contact with hot surface and avoid twisting.
Use a suitable regulator that is certified to EN 16129. To connect the gas, use a pressure reducing valve with the rated gas pressure of 37 mbar.
Please consult your LPG dealer for information regarding a suitable regulator for the gas cylinder.
Regulator and Hose
Use only regulators and hose approved for LP Gas at the above pressures (37 mbar). The life expectancy of the regulator is estimated as 2 years.
The use of the wrong regulator or hose is unsafe; always check that you have the correct items before operating the barbecue.
The hose used must conform to the relevant standard for the country of use. Worn or damaged hose must be replaced. Ensure that the hose is not obstructed, kinked, or in contact with any part of the barbecue other than at its connection.
For Flexible hose:
Avoid twisting the flexible tube when the appliance is in use. The length of flexible hose shall not exceed 1.5m.
The hose should certified according to applicable EN Standard and comply with local code.
STORAGE OF APPLIANCE
Storage of an appliance indoors is only permissible if the cylinder is disconnected and removed from the appliance. When the appliance is not to be used for a period of time it should be stored in its original packaging and stored in a dry dust free environment.
GAS CYLINDER
The gas cylinder should not be dropped or handled roughly! If the appliance is not in use, the cylinder must be disconnected. Replace the protective cap on the cylinder after disconnecting the cylinder from the appliance.
Always connect or replace the cylinder in a well-ventilated area and away from any source of ignition, never in the presence of a flame, spark or heat source.
Cylinders must be stored outdoors in an upright position and out of the reach of children. The cylinder must never be stored where temperatures can reach over 50^ C. Do not store the cylinder near flames, pilot lights or other sources of ignition. DO NOT SMOKE.
This barbecue is designed for use outdoors, away from any flammable materials. It is important that there are no overhead obstructions and that there is a minimum distance of 122cm from the side or rear of the appliance.
It is important that the ventilation openings of the appliance are not obstructed. The barbecue must be used on a level, stable surface. The appliance should be protected from direct draughts and shall be positioned or protected against direct penetration by any trickling water (e.g. rain).
Make sure that the gas cylinder compartment (if any) is not obstructed, keep it ventilated and clean.
Parts sealed by the manufacturer or his agent must not be altered by the user. No modifications should be made to any part of this barbecue. All repairs should only be carried out by an authorized RAVANSON service center.
The current list of service points can be found at: www.ravanson.pl
Service is provided by the Quadra-Net network, please visit: www.quadra-net.pl
Service number: 61 853 44 44
CONNECTION TO APPLIANCE
Before connection, ensure that there is no debris caught in the head of the gas cylinder, regulator, burner and burner ports. Spiders and insects can nest within and clog the burner/venturi tube at the orifice. A clogged burner can lead to a fire beneath the appliance. Clean burner holes with a heavy-duty pipe cleaner.
Disconnect the regulator from the cylinder (according to the directions supplied with the regulator) when the barbecue is not in use.
The Barbecue must be used in a well ventilated area. Do not obstruct the flow of combustion air to the burner when the barbecue is in use. ONLY USE THIS BARBECUE OUTDOORS.
BEFORE USE CHECK FOR LEAKS
Never check for leaks with a naked flame, always use a soapy water solution!
TIGHTNESS
ATTENTION!
After every cooker connection to the gas cylinder check the tightness of the cylinder valve, connection of the pressure-reducing valve with the cylinder and its operation.
NOTE!
- Do not check tightness with open flame (e.g. match or candle). This may cause explosion! Use soapy
water to check tightness. - Check the hose and connection tightness periodically according to the applicable regulations.
TO CHECK FOR LEAKS
Make leak detecting solution by mixing one part washing up liquid with 3 parts water. Ensure the control valve is "OFF".
Connect the regulator to the cylinder and ON/OFF valve to the burner, ensure the connections are secure then turn ON the gas.
Brush the soapy solution onto the hose and all joints. If bubbles appear you have a leak, which must be rectified before use.
Retest after fixing the fault
Turn OFF the gas at the cylinder after testing.
If leakage is detected and cannot be rectified. Do not attempt to cure leakage but consult your gas dealer.
Lighting Instructions for barbecue
- Open the hood of the barbecue before attempting to light the burners.
- Turn all the control knobs clockwise to "OFF" position.
-
Connect the regulator to the gas bottle. Turn the gas supply "ON" at the regulator. Check with the use of soapy water for any gas leakage between the bottle and the regulator.
-
Push down the front left control knob and keep pressing whilst turning anti-clockwise to the "HIGH" position (a clicking sound is heard), this will light the left hand burner. Observe if the burner has lit. If not repeat this process.
- If the burner has not lit after retrying wait 5 minutes and repeat step 4.
- Adjust the heat by turning the knob to the High/Low position.
- If the burner does not light. Light the appliance with a match using the lighting hole in the side of the appliance. Consult your gas dealer to rectify the ignition.
- To light the remaining burners in sequence from left to right, and repeat 4 above. The cross lighting channel between the burners will light the burner adjacent to it.
- To turn the barbecue 'OFF' turn the cylinder valve or regulator switch to the 'OFF' position and then turn the control knob on the appliance clockwise to the 'OFF' position.
WARNING:
If the burner fails to ignite, turn the control knob off (clockwise) and also turn the cylinder valve off.
Wait five minutes before attempting to relight with ignition sequence.
Before cooking for the first time, operate the barbecue for about 15 minutes with the lid closed and the gas turned on LOW. This will “heat clean” the internal parts and dissipate odour from the painted finish.
Clean your barbecue after each USE. DO NOT use abrasive or flammable cleaners, as it will damage the parts of the product and may start a fire. Clean in warm soapy water.
WARNING: Accessible parts may be very hot. Keep young children away from the hot appliance at all times (even while cooling down!).
It is recommended that protective gloves (eg oven gloves) be used when handling particularly hot components.
CLEANING AND CARE
CAUTION: All cleaning and maintenance should be carried out when the barbecue is cool and with the fuel supply turned OFF at the gas cylinder.
CLEANING
"Burning off" the barbecue after every use (for approx 15 minutes) will keep excessive food residue to a minimum.
OUTSIDE SURFACE
Use mild detergent or baking soda and hot water solution. Non-abrasive scouring powder can be used on stubborn stains, then rinse with water.
If the inside surface of the barbecue lid has the appearance of peeling paint, baked on grease build-up has turned to carbon and is flaking off. Clean thoroughly with strong hot soapy water solution. Rinse with water and allow to completely dry. NEVER USE OVEN CLEANER.
INTERIOR OF BARBECUE BOTTOM
Remove residue using brush, scraper and/or cleaning pad then wash with a soapy water solution. Rinse with water and allow to dry.
COOKING GRID
Use a mild soapy water solution. Non-abrasive scouring power can be used on stubborn stains then rinse with water.
CLEANING THE BURNER ASSEMBLY
CAUTION: All cleaning and maintenance should be carried out when the barbecue is cool and with the fuel supply turned OFF at the gas cylinder.
Turn the gas OFF at the control knob and disconnect the cylinder.
Remove cooling grate.
Clean the burner with a soft brush or blow clean with compressed air and wipe with a cloth.
Clean any clogged ports with a pipe cleaner or stiff wire (such as an opened paper clip).
Inspect burner for any damage (cracks or holes). If damage is found, replace with a new burner. Reinstall the burner, check to ensure that the Gas valve orifices are correctly positioned and secured inside the burner inlet (venturi).
SERVICING
If you smell gas: (In the event of gas leakage found).
Turn off the gas supply at the gas container after use If leakage is detected again and cannot be rectified. Do not attempt to cure leakage but consult your gas dealer.
Your gas barbecue should be serviced annually by a competent registered person
TECHNICAL PARAMETERS
| Ravanson® CE | 2531-25 | ||
| GAS GRILL | |||
| Model name: GO-3 | |||
| Gas type: G30 37mbar | |||
| Gas appliance category: I3B/P | |||
| BURNER TYPE | MAIN SIDE | ||
| Burner output [kW] 2,70 2,50 10,60 | |||
| Gas consumption [g/h] 197,00 181,00 | 772,00 | ||
| Burner injector [mm] 0,75 0,72 | |||
| PIN: 2531DQ-0160 | (GB-P310D) | ||
| Country o destination : PL | |||
| Type: A | |||
TROUBLESHOOTING
If, despite proper operation and careful cleaning, malfunctions occur, this section will help you troubleshoot the problem.
| PROBLEM | POSSIBLE CAUSE | SOLUTION |
| The smell of leaking gas | Leak in the gas installation | 1. Immediately close the gas cylinder valve (turn G1 clockwise).2. Avoid flames or sparks (do not turn on electrical appliances).3. Tighten all gas system connections.4. Inspect all gas-conducting parts for damage; replace damaged parts with original spare parts.5. Check for leaks with a leak detector. |
| The burner does not ignite | Empty gas cylinder | Replace the gas cylinder |
| Closed cylinder valve | Turn the gas cylinder valve (G1) counterclockwise. | |
| The nozzles of the adjusting element (under the front panel) are not seated in the burner tubes | Visual inspection, and if necessary, adjust nozzles and connecting tubes. | |
| The gap between the spark plug and the gas outlet holes on the burner (grill unit) (5) is incorrect. | Carry out a visual inspection and/or correct the setting. | |
| Clogged nozzle of the adjusting element (under the control panel) | Remove the front panel and clean the adjusting element nozzle with a needle. | |
| Other parts of the gas system are clogged | Have the gas installation cleaned by a specialist. | |
| Grill temperature too low | Warm-up time too short | Close the lid (grill unit) (1) and set the flame regulator to the Max position. |
| Clogged gas outlet holes on the burner (grill assembly (1) | Restore burner patency | |
| Gas leaking or bubbling | Flashback caused by burner clogging | 1. Immediately close the gas cylinder valve (turn G1 clockwise).2. Wait three minutes and restart the grill.3. If the problem persists, remove the burner and clean it. |