
HPS50E - Loudspeaker HITACHI - Free user manual and instructions
Find the device manual for free HPS50E HITACHI in PDF.


User questions about HPS50E HITACHI
0 question about this device. Answer the ones you know or ask your own.
Ask a new question about this device
Download the instructions for your Loudspeaker in PDF format for free! Find your manual HPS50E - HITACHI and take your electronic device back in hand. On this page are published all the documents necessary for the use of your device. HPS50E by HITACHI.
USER MANUAL HPS50E HITACHI
Tower speaker with Docking for iPad/iPhone/iPod
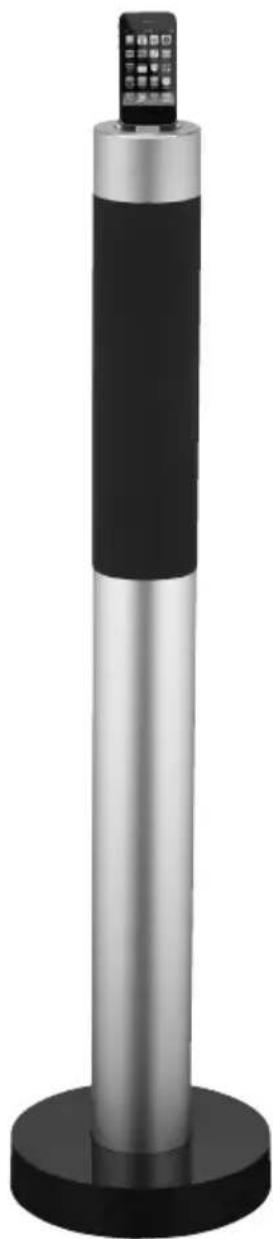
natural_image
Vertical metallic and black cylindrical device with a small screen on top (no visible text or symbols)Contents
Unpacking....7
Product Overview......8
Front View 8
Control Panel 9
Rear Sockets....9
Remote Control....10
Battery Installation for the Remote Control....11
Handling the Battery....11
Handling the Remote Control 12
Remote Control Operation Range....12
Playing music from an Audio Device ....13
Connecting the Aerial ....13
Mains Power....14
First Time Use....15
Clock Setting....15
General Operation....15
Standby/ON....15
Selecting Modes 15
Adjusting the Volume 15
Adjusting the Sound Effect....15
iPod/iPhone Operation 16
Inserting the iPod/iPhone and Selecting DOCK iPod Mode 16
iPod/iPhone Playback....18
Controlling your iPhone/iPod (Navigation Menu) 18
Charging your iPod/iPhone 18
Radio Operation 19
Scanning for Radio Stations 19
Searching for a Station Automatically 19
Searching for a Station Manually....19
For Better Reception 19
Presetting Stations Manually 20
Presetting Stations Automatically....20
Recalling a Preset Station....20
AUX Operation....21
Bluetooth® Operation 21
Maintenance 21
Cleaning the Unit 21
Hints and Tips 22
Specifications....23
SOME DOS AND DON'TS ON THE SAFE USE OF EQUIPMENT
This equipment has been designed and manufactured to meet international safety standards but, like any electrical equipment, care must be taken if you are to obtain the best results and safety is to be assured.
......
DO read the operating instructions before you attempt to use the equipment.
DO ensure that all electrical connections (including the mains plug, extension leads and inter-connections between the pieces of equipment) are properly made and in accordance with the manufacturer's instructions. Switch off and withdraw the mains plug before making or changing connections.
DO consult your dealer if you are ever in doubt about the installation, operation or safety of your equipment.
DO be careful with glass panels or doors on equipment.
DO route the mains lead so that it is not likely to be walked on, crushed, chafed, or subjected to excessive wear and tear or heat.
......
DON'T remove any fixed cover as this may expose dangerous voltages.
DON'T obstruct the ventilation openings of the equipment with items such as newspapers, tablecloths, curtains, etc. Overheating will cause damage and shorten the life of the equipment.
DON'T allow electrical equipment to be exposed to dripping or splashing, or objects filled with liquids, such as vases, to be placed on the equipment.
DON'T place hot objects or naked flame sources such as lighted candles or nightlights on, or close to equipment. High temperatures can melt plastic and lead to fires.
DON'T use makeshift stands and NEVER fix legs with wood screws - to ensure complete safety always fit the manufacturer's approved stand or legs with the fixings provided according to the instructions.
DON'T use equipment such as personal stereos or radios so that you are distracted from the requirements of traffic safety.
DON'T listen to headphones at high volume, as such use can permanently damage your hearing.
DON'T leave equipment switched on when it is unattended unless it is specifically stated that is designed for unattended operation or has a stand-by mode. Switch off using the switch on the equipment and make sure that your family knows how to do this. Special arrangements may need to be made for infirm or handicapped people.
DON'T continue to operate the equipment if you are in any doubt about it working normally, or if it is damaged in any way – switch off, withdraw the mains plug and consult your dealer.
......
ABOVE ALL
- NEVER let anyone especially children push anything into holes, slots or any other opening in the case – this could result in a fatal electric shock;
- NEVER guess or take chances with electrical equipment of any kind;
– it is better to be safe than sorry!
natural_image
Illustration of various electronic components including batteries, capacitors, and batteries (no text or symbols)BATTERY SAFETY GUIDELINES
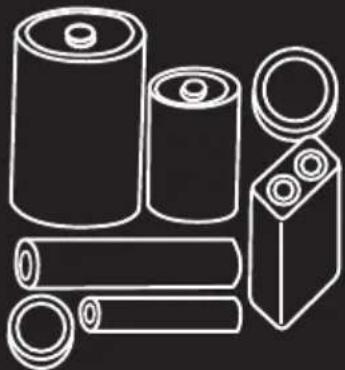
Used correctly, domestic batteries are a safe and dependable source of portable power. Problems can occur if they are misused or abused – resulting in leakage or, in extreme cases, fire or explosion. Here are some simple guidelines to safe battery use designed to eliminate any such problems.
natural_image
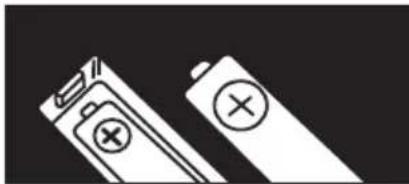
Two battery icons, one with a plus sign and the other with a circle (no text or symbols)Take care to fit your batteries correctly, observing the plus and minus marks on the battery and appliance. Incorrect fitting can cause leakage or, in extreme cases, fire or even an explosion.
natural_image
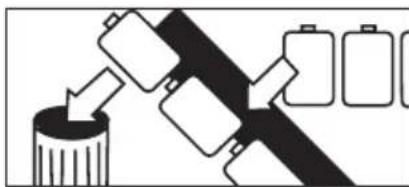
Diagram of battery arrangement with arrows indicating flow direction (no text or symbols)Replace the whole set of batteries at one time, taking care not to mix old and new batteries or batteries of different types, since this can result in leakage or, in extreme cases, fire or even an explosion.
natural_image
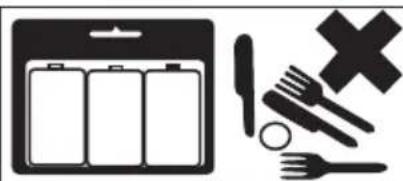
Black-and-white icon showing a battery pack, a crossed-out fork, and a cross symbol (no text or labels)Store unused batteries in their packaging and away from metal objects which may cause a short-circuit resulting in leakage or, in extreme cases, fire or even an explosion.

natural_image
Abstract geometric pattern with three parallel lines and cloud-like shapes on a black background (no text or symbols)Remove dead batteries from equipment and all batteries from equipment you know you are not going to use for a long time. Otherwise the batteries may leak and cause damage.
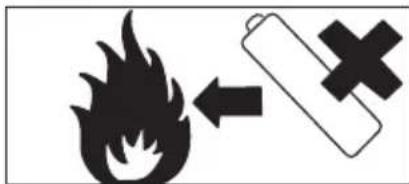
Never dispose of batteries in fire as this can cause them to explode. Please recycle dead batteries; do not put with the normal household waste.
natural_image
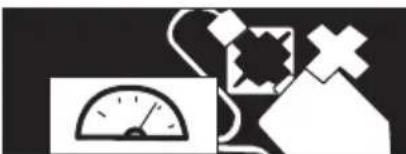
Abstract black-and-white graphic with a gauge, gear, cross, and house shapes (no text or symbols)Never attempt to recharge ordinary batteries, either in a charger or by applying heat to them. They may leak, cause fire or even explode. There are special rechargeable batteries which are clearly marked as such.
natural_image
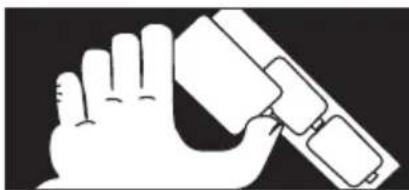
Illustration of a hand holding a device with a rectangular block (no text or symbols)Supervise children if they are replacing batteries themselves in order to ensure these guidelines are followed.

natural_image
Illustration of a human tongue with a pill and a cross mark, no text or symbols presentRemember that small button cell batteries such as used in some hearing aids, toys, games and other appliances, are easily swallowed by young children and this can be dangerous.
natural_image
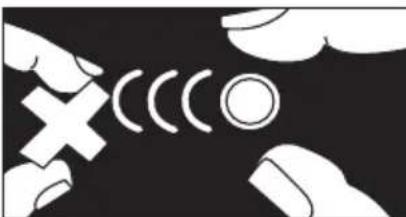
Abstract illustration of white hands interacting with a circular symbol and curved lines on black background (no text or symbols)Keep loose button cells away from young children.
natural_image
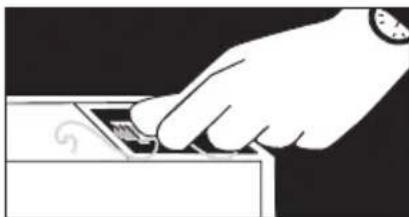
Hand inserting a card into a folder (no text or symbols visible)Make sure battery compartments are secure.
natural_image
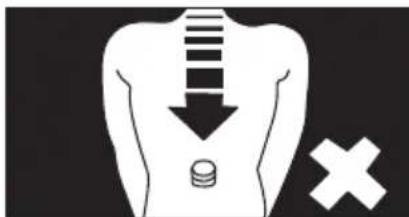
Diagram of a human torso with a downward arrow and a coin on the chest, next to a cross symbol (no text or labels)Seek medical advice if you believe a cell has been swallowed.
Safety Warnings
- Read all the instructions carefully before using the unit and keep them for future reference.
- Retain the manual. If you pass the unit onto a third party make sure to include this manual.
- Check that the voltage marked on the rating label matches your mains voltage.
Damage
- Please inspect the unit for damage after unpacking.
- Do not continue to operate the unit if you are in any doubt about it working normally, or if it is damaged in any way - switch off, withdraw the mains plug and consult your dealer.
Location of Unit
- The unit must be placed on a flat stable surface and should not be subjected to vibrations.
- The unit should be placed in a position such that it will not be easily knocked over.
• Take extra care when positioning or moving the unit to prevent damaging the bass speaker in the base of the unit. - Do not place the unit on sloped or unstable surfaces as the unit may fall off or tip over.
- The mains socket must be located near the unit and should be easily accessible.
- This unit is designed for indoor, domestic use only.
Temperature
- Avoid extreme degrees of temperature, either hot or cold. Place the unit well away from heat sources such as radiators or gas/electric fires.
- Avoid exposure to direct sunlight and other sources of heat.
Naked Flames
- Never place any type of candle or naked flame on the top of or near the unit.
Moisture
- To reduce the risk of fire, electric shock or product damage, do not expose this unit to rain, moisture, dripping or splashing. No objects filled with liquids, such as vases, should be placed on the unit.
- If you spill any liquid into the unit, it can cause serious damage. Switch it off at the mains immediately. Withdraw the mains plug and consult your dealer.
Ventilation
- To prevent the risk of electric shock or fire hazard due to overheating, ensure that curtains and other materials do not obstruct the ventilation vents.
- Do not install or place this unit in a bookcase, built-in cabinet or in another confined space. Ensure the unit is well ventilated.
Safety
- Always disconnect the unit from the mains supply before connecting/ disconnecting other devices or moving the unit.
- Unplug the unit from the mains socket before a lightning storm.
Mains Adapter Cable
- Make sure the unit is not resting on top of the mains adapter cable, as the weight of the unit may damage the cable and create a safety hazard.
Interference
- Do not place the unit on or near appliances which may cause electromagnetic interference. If you do, it may adversely affect the operating performance of the unit, and cause a distorted picture or sound.
Batteries
- Batteries used in the remote control for this unit are easily swallowed by young children and this is dangerous.
- Keep loose batteries away from young children and make sure that the battery holder tray is secure in the remote control. Seek medical advice if you believe a cell has been swallowed.
- Please dispose of batteries correctly by following the guidance in this manual.
Supervision
- Children should be supervised to ensure that they do not play with the unit and the remote control.
- Never let anyone especially children push anything into the holes, slots or any other openings in the case - this could result in a fatal electric shock.
Service
- To reduce the risk of electric shock, do not remove screws. The unit does not contain any user-serviceable parts. Please leave all maintenance work to qualified personnel.
- Do not open any fixed covers as this may expose dangerous voltages.
Maintenance
- Ensure to unplug the unit from the power supply before cleaning.
- Do not use any type of abrasive pad or abrasive cleaning solutions as these may damage the unit's surface.
• Do not use liquids to clean the unit.
Thank you for purchasing your new HITACHI iPod/iPhone Docking Tower.
We recommend that you spend some time reading this instruction manual so that you fully understand all the operational features it offers. You will also find some hints and tips to help you resolve any issues.
Read all the safety instructions carefully before use and keep this instruction manual for future reference.
GB
Unpacking
Remove all items from the packaging. Retain the packaging. If you dispose of it please do so according to local regulations.
The following items are included:
natural_image
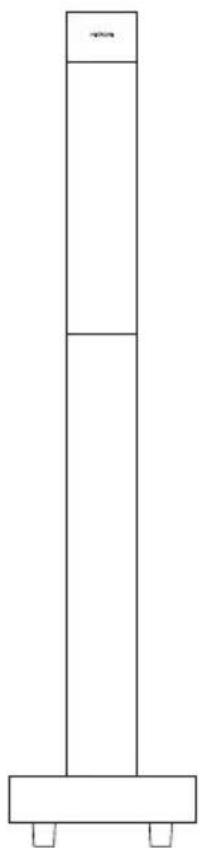
Simple line drawing of a vertical cylindrical structure with four legs and a top panel, no text or symbols present.The Main Unit
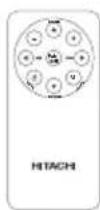
Remote Control
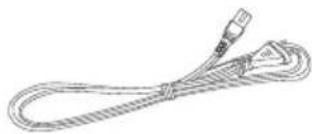
natural_image
Coiled cable with connectors, no text or symbols visibleMains Cable
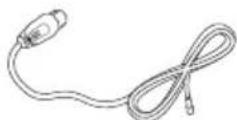
FM Aerial Instruction Manual
Front View
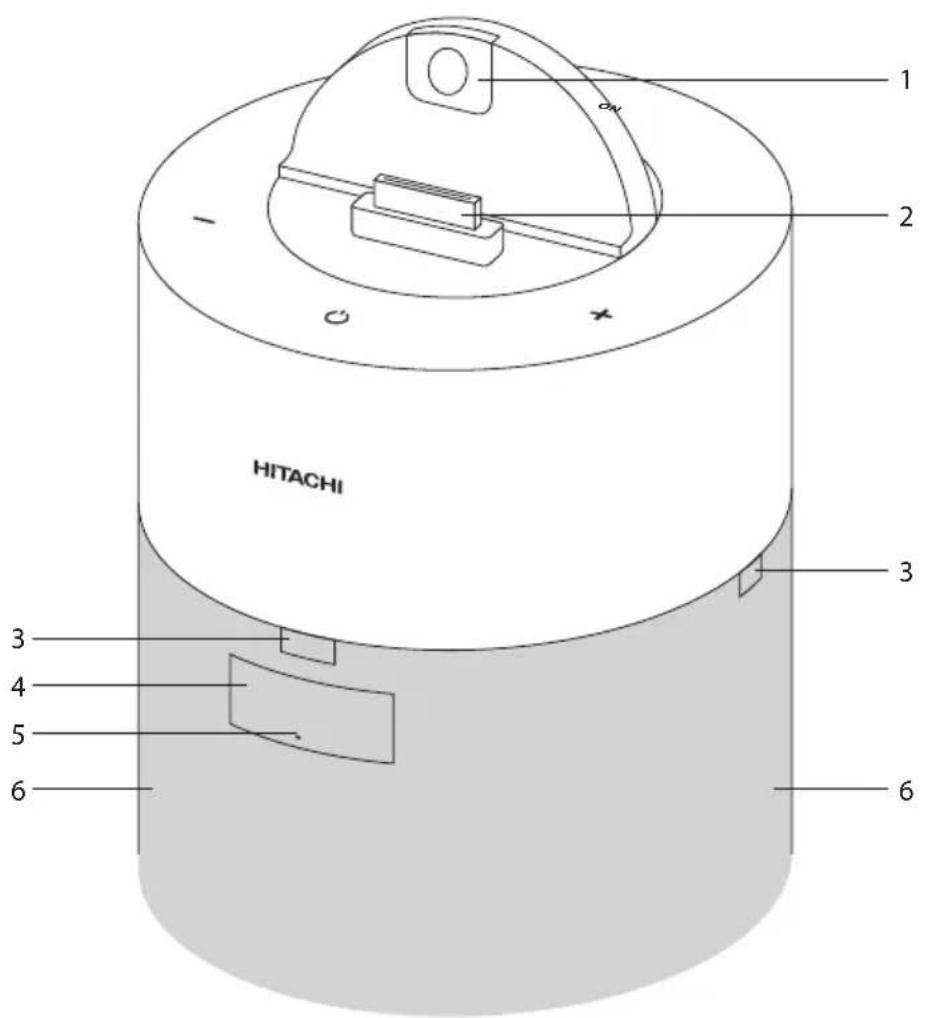
- Lock-release Switch
Unlocks the docking cover and flips it open. - iPod/iPhone Docking
-
Remote Sensors
Receives signals from the remote control. -
LED Display
- Power Indicator
Orange dot will show on the display when the unit is in STANDBY mode. - Speakers
Control Panel
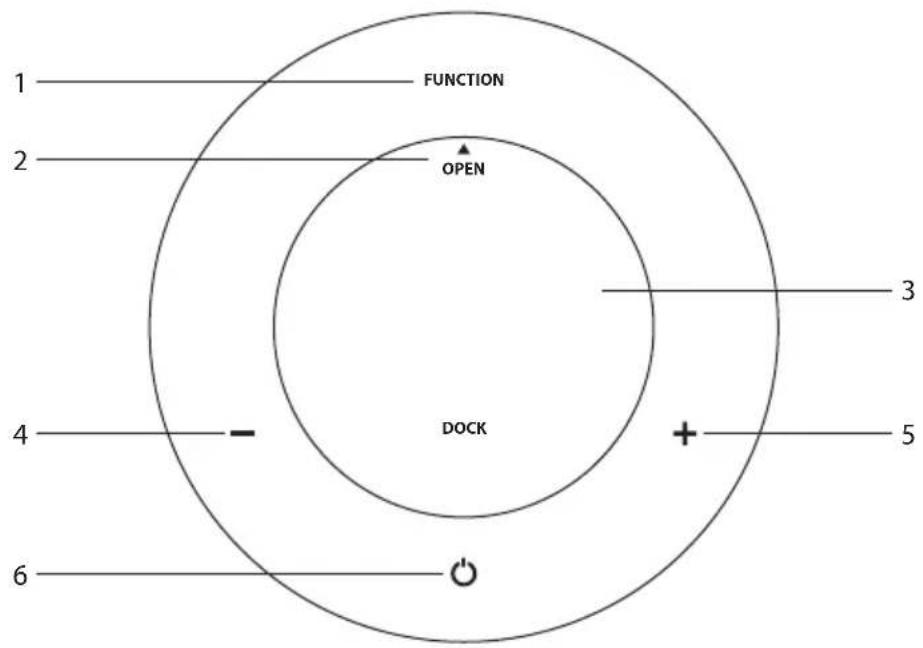
- FUNCTION Button Switches between DOCK iPod / TUNER / BluT / AUX 1 / AUX 2 modes.
- OPEN Button Flips open the docking cover.
-
iPod/iPhone Docking Cover
-
VOLUME – Button Decreases the volume.
- VOLUME + Button Increases the volume.
- STANDBY/ON Button Switches the unit to STANDBY or the ON mode.
Rear Sockets
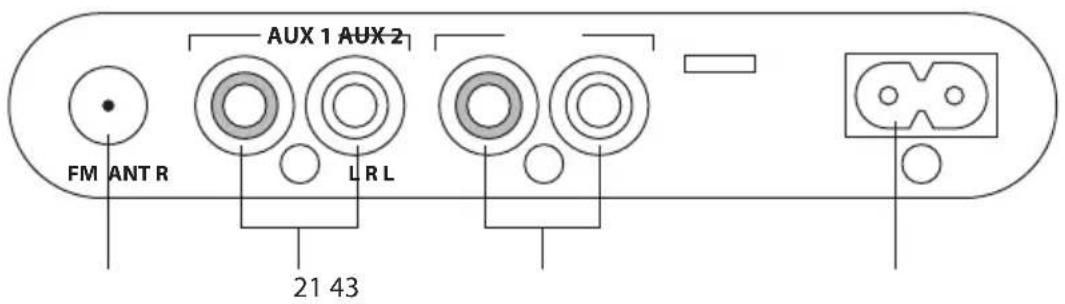
- FM Aerial Socket
- AUX 1 Socket
-
AUX 2 Socket
-
AC IN Socket Connects the mains cable to the mains socket.
GB
1. / SOUND Button
- Navigate up to select an item on a menu screen.
• Switches between preset sound effects (Bass 1 / Bass 2 / Bass 3).
2. VOLUME - Button
Decreases the volume.
3. / Button
- Navigate left to select an item on a menu screen.
• Skips backwards to the beginning of the track or to the previous track. - Allows fast reversing of the current track.
• Searches for a radio station going backwards through accessible radio frequencies.
4. / MUTE Button
• Switches the unit between STANDBY and the ON mode.
• Silences the unit or restores the sound.
5. /SOURCE Button
- Navigate down to select an item on a menu screen.
- Switches between the DOCK iPod, TUNER, BluT, AUX 1 and AUX 2 modes.
6. VOLUME + Button
Increases the volume.
7. Pair / Button
• Pairs with bluetooth device.
• Confirms the selection on a menu screen.
• Plays/pauses/resumes playback.
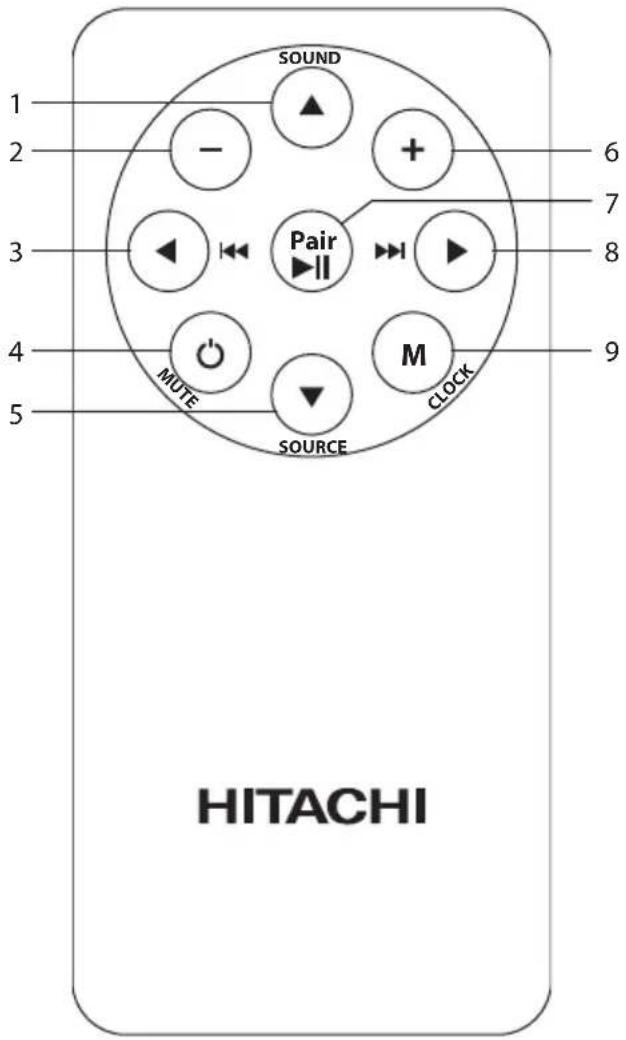
8. /▶Button
- Navigate right to select an item on a menu screen.
• Skips forwards to the next track. - Allows fast forwarding of the current track.
• Searches for a radio station going forwards through accessible radio frequencies.
9. M / CLOCK Button
• Presets a radio station.
- Sets the clock.
• Auto-scans in FM mode.
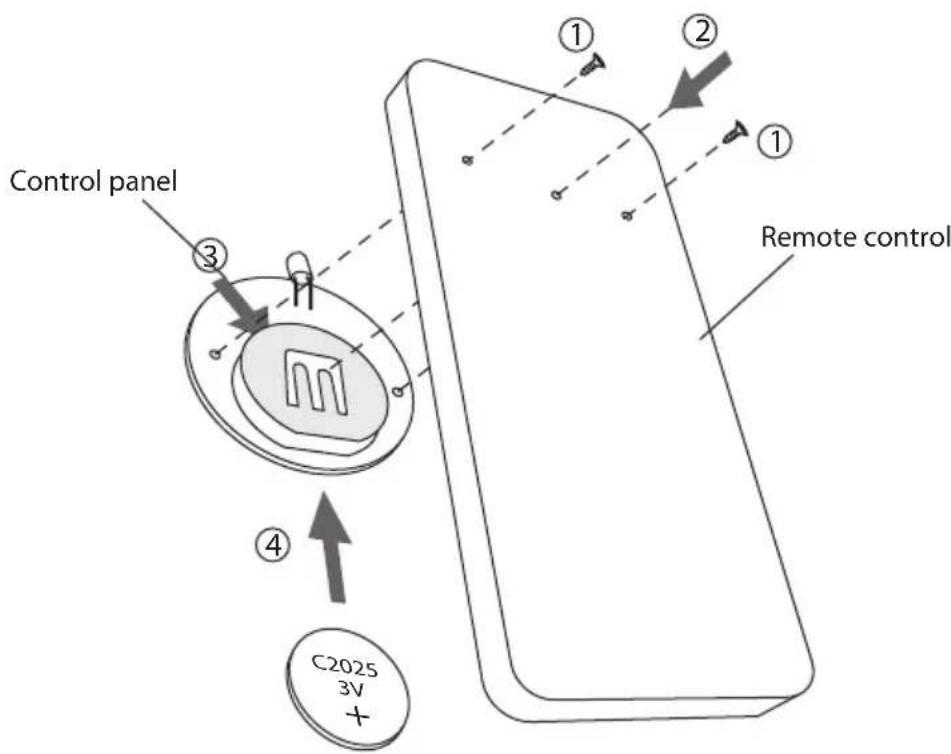
Battery Installation for the Remote Control
- Unscrew the 2 screws.
- Use a wooden toothpick to push the battery compartment forward via the hole at the rear of the remote control. Remove the control panel.
- Remove the old battery by sliding it out or pushing it out (using a wooden toothpick) from the rear of the control panel. Insert a new battery.
- Push the control panel back into place and replace the screws. Ensure they are tightened securely.
Handling the Battery
- Improper or incorrect use of batteries may cause corrosion or battery leakage, which could cause fire, personal injury or damage to property.
- Install the battery correctly by following the polarity (+ and -) indications in the battery compartment.
- When the battery is exhausted, the remote control will not function.
- Only use the battery type indicated in this manual.
- Do not dispose of the used battery as domestic waste. Dispose of it in accordance with local regulations.
- Small button cell batteries such as the one used in the remote control are easily swallowed by young children, this is dangerous. Keep loose button cells away from young children and make sure that the battery holder tray is secure in the remote control. Seek medical advice if you believe a cell has been swallowed.


Handling the Remote Control
- Do not drop the remote control or allow it to suffer any impact.
- Do not spill water or liquid on the remote control.
- Do not place the remote control on a wet object.
- Do not place the remote control under direct sunlight or near sources of excessive heat.
- Remove the battery from the remote control when not in use for a long period of time, as the battery could leak or cause corrosion, which may result in physical injury and/or property damage, including fire.
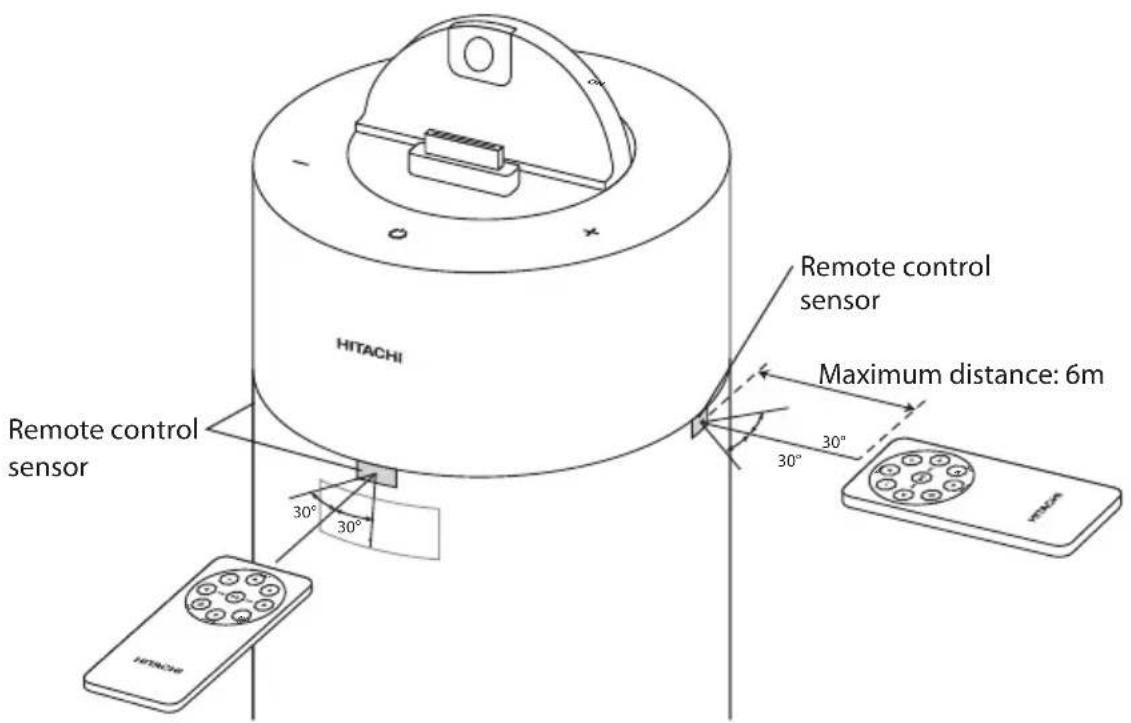
Remote Control Operation Range
Point the remote control at the unit at a maximum of 6 metres from the remote control sensor of the unit and within a 60^ arc of the front of the unit. The operating distance may vary depending on the brightness of the room.
Playing music from an Audio Device
The AUX input is located at the rear of the unit. Use an RCA stereo audio cable (not included) to connect to auxiliary equipment through the AUX 1 / AUX 2 sockets.
Auxiliary Equipment Rear of the unit
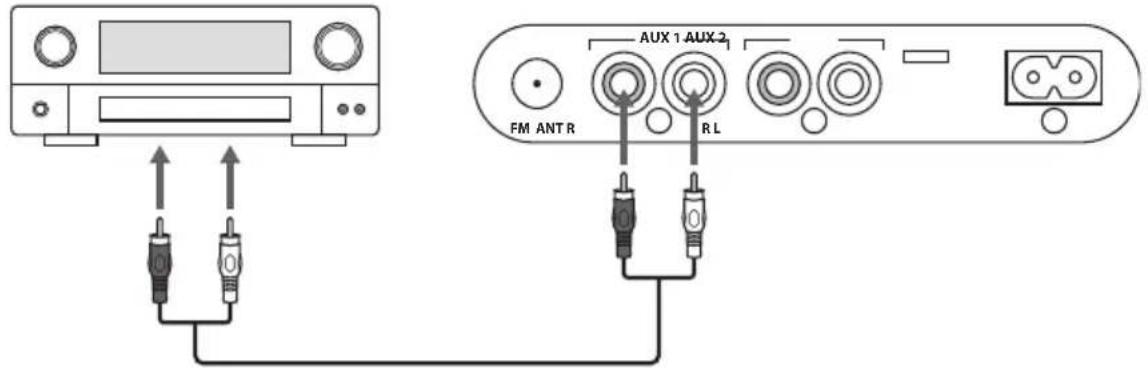
RCA Stereo Audio Cable (not included)
GB
Connecting the Aerial
Connect one end of the aerial cable (included) to the FM socket at the rear of the unit. Extend the FM aerial and place it in the position that offers the best sound reception.
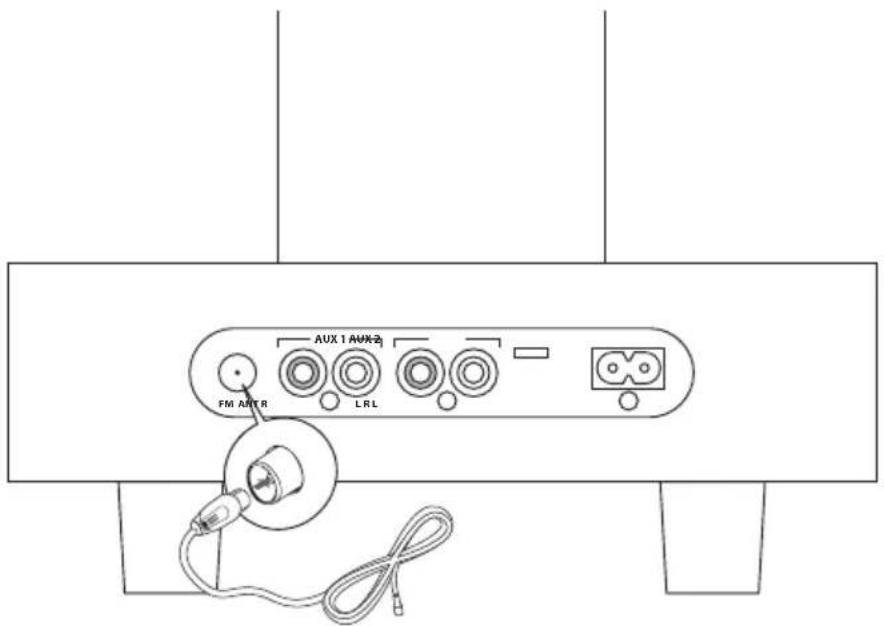
Aerial Cable (included)
Mains Power
- This unit was designed to operate with an AC \~230V 50Hz power supply.
- Unwind the mains cable to its full length. Connect the other end of the mains cable to the AC IN Socket at the rear of the unit then connect the mains plug to the mains socket. Make sure the mains plug is firmly inserted into the mains socket. The unit is now connected and ready to use.
• To switch the unit off completely, remove the mains plug from the mains socket.
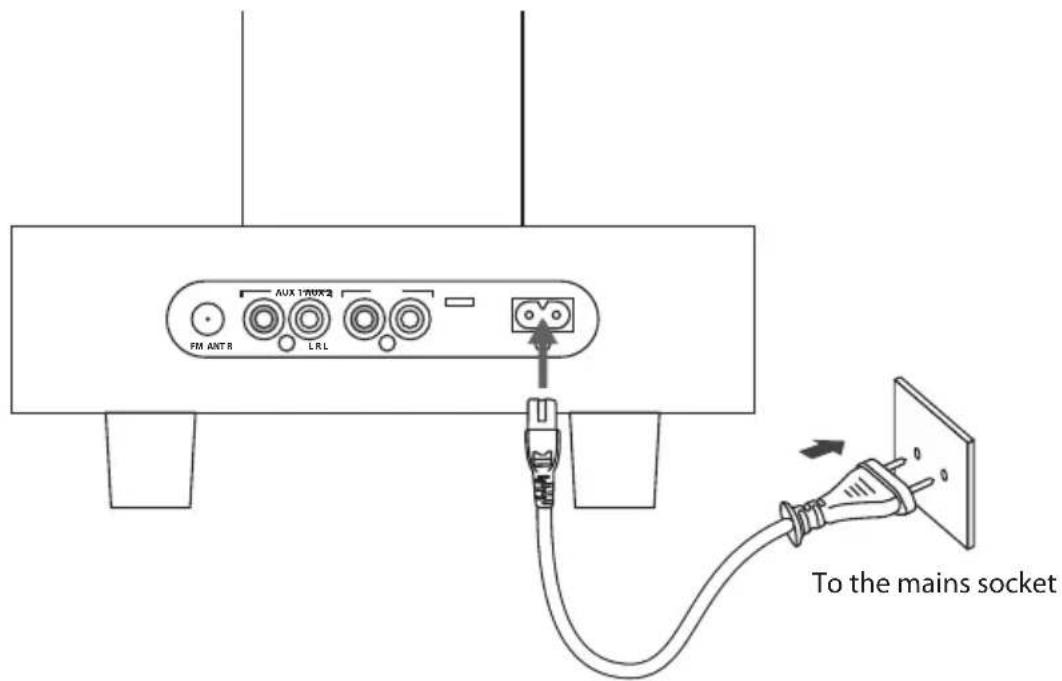

Connecting the unit to any other power source may cause damage to the unit.
First Time Use
On first use, LED display will display a flashing line of dashes. This is the CLOCK mode (see the "Clock Setting" section for more details).
When connecting an Apple™ mobile device, the orange LED display will read "DOCK iPod" for all devices.

Standby/ON
- When you first connect the unit to the mains socket, the unit will be in STANDBY mode.
- Press the ◎ STANDBY/ON button on the unit or press the ◎ /MUTE button to switch the unit to ON mode. The LED display will say "HELLO".
- Press the ○ STANDBY/ON button on the unit or press and hold the ○ /MUTE button for over 3 seconds to switch the unit to STANDBY mode again. The power indicator will illuminate orange.
Selecting Modes
Press the FUNCTION button on the unit or press the ▼ / SOURCE button on the remote control to select between DOCK iPod, TUNER, BluT, AUX 1 and AUX 2 modes.

- If there is no signal under the DOCK, Bluetooth and AUX mode, the unit will automatically switch off within 15 minutes.
- Please turn the unit off completely to save energy when not in use.
Adjusting the Volume
- Press the VOLUME + / - buttons to adjust the volume.
- If you wish to turn the sound off, press the Ⓞ / MUTE button on the remote control.
Press the Ⓞ / MUTE button again or press the VOLUME + / - buttons to resume normal listening.
Adjusting the Sound Effect
Press and hold the ▲/ SOUND button repeatedly on the remote control to adjust the bass level (Bass 1 / Bass 2 / Bass 3).
Clock Setting
Setting the clock can only be done in STANDBY mode.
- In STANDBY mode, press and hold the M / CLOCK button on the remote control until the hour digits is flashing.
- Press the buttons on the remote control to adjust the hour digits while flashing, then press the M / CLOCK button on the remote control to confirm, then the minute digits will flash.
- Press the buttons to adjust the minute digits while flashing, then press the M/CLOCK button on the remote control to confirm.
- Each activated state will be cleared if any buttons are not pressed within 10 seconds.
iPod/iPhone Operation
Using the iPod/iPhone dock you can use the unit to play music files stored on your iPod/iPhone.
This unit can support the following iPod/iPhone models.
| Type Support Model | |
| iPhone • iPhone | iPhone 3G/3GSiPhone 4/4S |
| iPod(with 30-pin dock connectors) | iPod touch 12^nd / 3^rd / 4^th GenerationiPod ClassiciPod nano 1^t/2^nd/3^rd/4^th/5^th/6^th GenerationiPod 45 Generation (with and without colour display)iPod 5^th Generation (video)iPod mini |
| iPad(please only use the Bluetooth function) | iPadiPad 2 |
Inserting the iPod/iPhone and Selecting DOCK iPod Mode
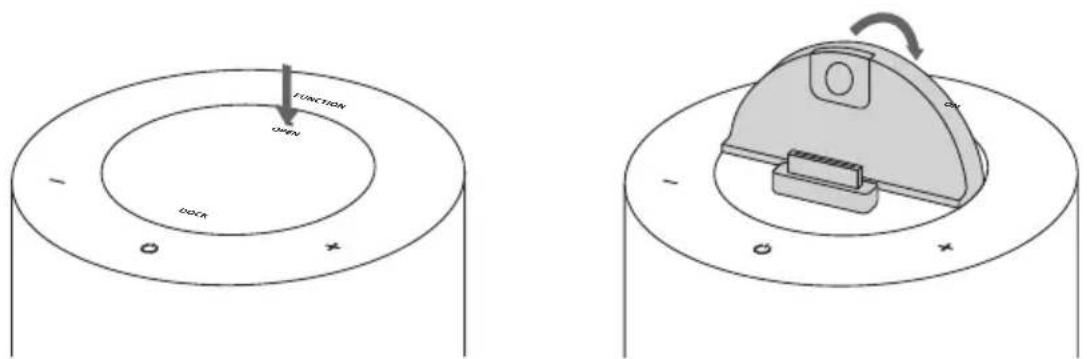
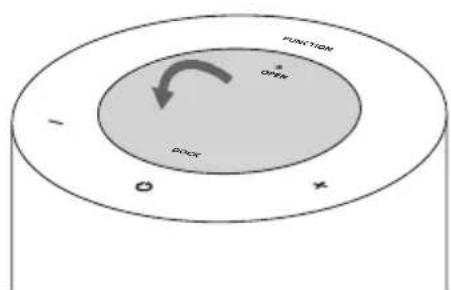
- Press the OPEN button downwards. 2. Flip the docking cover over by
following the arrow direction until it is firmly locked into position.

Keep your fingers away from the docking cover's edge to avoid accidentally hitting the inside edge of the docking tower.
* Using an iPad on the unit is NOT recommended because it will make this unit top-heavy, which means this unit will not be stable.
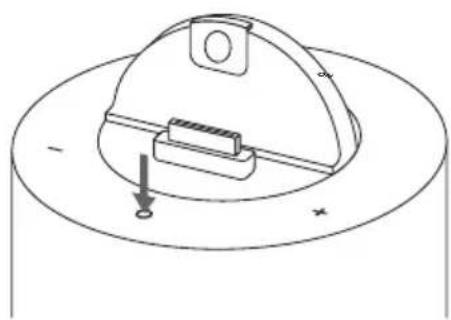
natural_image
Technical line drawing of a mechanical component with a circular base and central housing (no text or symbols)- Press the STANDBY/ON button on the unit or press the ⏻/ MUTE button on the remote control to switch the unit on. The LED display will read "Hello".
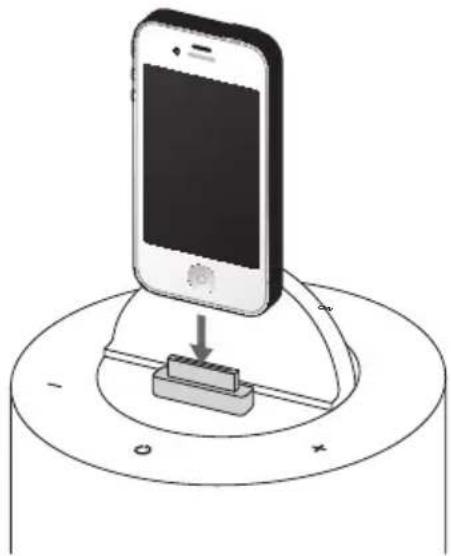
natural_image
Illustration of a smartphone mounted on a base with a small device inserted, no text or symbols present.- Slot the iPod/iPhone onto the dock.
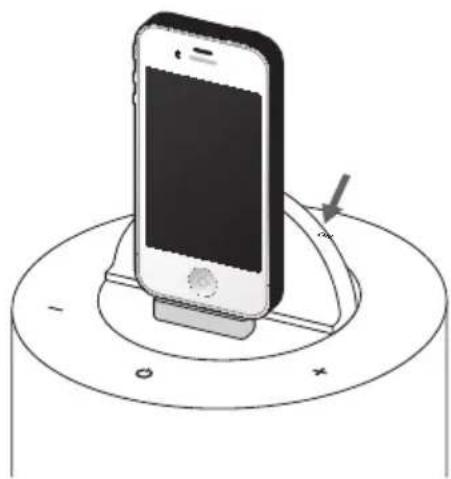
natural_image
Illustration of a smartphone mounted on a stand with a curved arrow indicating motion (no text or symbols)- Press the FUNCTION button on the unit or press the ▼/ SOURCE button on the remote control to select DOCK iPod mode.
natural_image
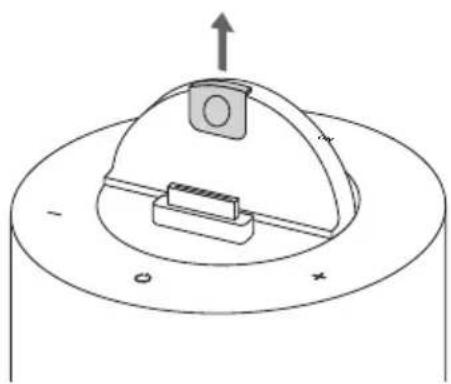
Technical line drawing of a mechanical component with a circular base and central housing, showing no text or symbols.- To unlock the docking cover, pull the lock-release switch upwards.
- Flip the docking cover down, and push gently but firmly down until it locks in place.

- Your iPod/iPhone will automatically start charging once it is docked.
- Switch off your iPod/iPhone while listening to the radio to prevent signal interference.
- While your iPod/iPhone is docked, you can control it from the remote control or from the iPod/iPhone directly.
iPod/iPhone Playback
Press the Pair /▶ button on the remote control to start playing.
To Pause or Resume Playback
Press the Pair /▶II button on the remote control to pause or resume playback. To resume playback, press the Pair /▶Button again.
Skipping to Another Track
Press the / 10/ / buttons on the remote control to skip forward or backward from the current track.
Locating a Particular Point on a Track
Keep either the ◄ / ▶ buttons pressed during playback, and release at the desired point.
Controlling your iPod/iPhone (Navigation Menu)
- While in DOCK iPod mode, press and hold the M / CLOCK button on the remote control to switch between the iPod/iPhone menus.
- Press the buttons on the remote control to navigate up and down in the menu.
- Press the Pair /▶II button on the remote control to confirm selection.

Each activated state will be cleared if any buttons are not pressed within 5 seconds.
Charging your iPod/iPhone
- Your iPod/iPhone has an internal non-removable battery. The battery may need to be charged if it has not been used for a while.
- During STANDBY or ON mode, you can automatically charge the iPod/iPhone through the unit when it is docked.

The iPod/iPhone battery is fully charged in about a few hours. If you charge it while playing music, it may take longer.

- You can control the iPod/iPhone on the remote control or iPod/iPhone itself while the unit is in DOCK iPod mode.
- The unit supports most generations of the iPod. Check your particular model for the iPod generation supported.
Scanning for Radio Stations
The Docking Tower will automatically select a FM radio station with a good signal.
- Select the TUNER mode by pressing the FUNCTION button on the unit or pressing the ▼ / SOURCE button on the remote control until the LED display reads "Tuner".
- To activate automatic scanning, press and hold the Pair /▶II button on the remote control for 3 seconds. The LED display will read "Auto" before scanning.
- The first 20 stations found will be automatically stored.
- To select and listen to a saved radio station, press the /◄ or◄/ buttons on the remote control.
Searching for a Station Automatically
In TUNER mode, press and hold the ◀/ 🔊 / ▶buttons on the remote control for 3 seconds, the tuner will start searching for a station. The tuner will stop searching after tuning into a radio station.

The search may not stop at a station with a very weak signal.
Searching for a Station Manually
In TUNER mode, repeatedly press the ◄/ 🔊 / ▶buttons on the remote control until the desired radio station's frequency is found.

With FM radio it may be necessary to fine tune each station by pressing the ◄ / buttons on the remote control repeatedly. Each press will adjust the frequency by 0.1MHz. If reception is still poor adjust the position of the aerial or try moving the radio to another location.
For Better Reception
Fully unwind the FM aerial. Extend the FM aerial and place it in the position that offers the best sound reception.

Do not connect the FM aerial to an outside aerial.

Presetting Stations Manually
You can store up to 20 of your favourite stations to the memory. This will enable you to access your favourite stations quickly and easily.
- To store a preset station, you must first be listening to the station that you would like to save, press the Pair /▶II button on the remote control. The preset number will show on the display.
- Press the Pair /▶II button again, then press the ◀/|◀ or ▶/▶▶I buttons on the remote control to select your desired preset station number and then press the Pair /▶II button on the remote control to confirm.
- The station will be stored and the screen will then show the preset number.
Presetting Stations Automatically
Please use steps 1-3 in the section "Scanning for Radio Stations" to preset radio stations automatically.
Recalling a Preset Station
Once you have saved a station to one of the preset buttons, you can recall it by pressing the M / CLOCK button on the remote control. It will display the current time. Press the M / CLOCK button again, then press the ◄/ ▶/ ▶buttons on the remote control.

- The stored stations will be saved into the memory and power off will not erase it. Storing a new station in a preset location will erase the previously stored station in that location.
- Ensure a station is selected within 3 seconds, or the display will revert to its previous state.
There are two AUX sockets located at the rear of the unit. Analogue audio sound signals from other sources can be connected to the unit through these sockets.
- Connect to another audio device using the AUX 1 / AUX 2 sockets via a RCA stereo audio cable (not included).
- While in the ON mode, press the FUNCTION button on the unit or press the ▼ / SOURCE button on the remote control repeatedly to select AUX mode.
- Press the VOLUME + / - buttons to adjust the volume to your desired level.
- In AUX mode, operate your audio device directly for playback features.
Bluetooth® Operation
The unit has a bluetooth function that can receive a signal within 8 metres.
Pairing the unit with a bluetooth device to listen to music:
-
During ON mode, press the FUNCTION button on the unit or press the ▼ / SOURCE button on the remote control repeatedly to select BluT (Bluetooth) mode. "NO BT" will show on the display if the Docking Tower is not paired to any bluetooth device.
-
Press and hold the Pair /▶II button on the remote control to be searchable.
-
Activate your bluetooth device and select the search mode.
-
"BLUEPORT" will appear on your bluetooth device list.
-
Select "BLUEPORT" and enter "0000" for the password if necessary. The display will show "BLUT (Bluetooth)".
-
To disconnect the bluetooth function, switch to another function on the unit or disable the function from your bluetooth device.

• If you want to connect your iPad, please only use the Bluetooth function.
- If the signal strength is weak, your bluetooth receiver may disconnect, but it will re-enter pairing mode automatically.
- This unit supports A2DP (Advanced Audio Distribution Profile) and AVRCP (Audio Video remote Control Profile) functions.
Maintenance
Cleaning the Unit

Ensure the unit is fully unplugged from the mains socket before cleaning.
• To clean the unit, wipe the case with a slightly moist, lint-free cloth.
- Do not use any cleaning fluids containing alcohol, ammonia or abrasives.
- Do not spray an aerosol at or near the unit.
If a problem does occur, it may often be due to something very minor. The following table contains various tips.
| Menu Description | |
| No power. • Ensure | the mains plug is connected.• Make sure that you select theONmode. |
| The remote control does not function. | • Use the remote control near the unit.• Point the remote control at the remote sensor on the unit.• Replace the battery in the remote control with a new one.• Remove any obstacles between the remote control and the unit. |
| Loud hum or noise is heard. | • The plugs and sockets are dirty. Wipe them with a cloth slightly moistened with alcohol. |
| I cannot find “BLUEPORT” on my bluetooth device | • Ensure the bluetooth function is activated on your bluetooth device.• Ensure you have paired your unit with the bluetooth device. |
| RADIO | |
| Poor FM reception. • | Make sure the radio aerial is fully extended.• Electrical interference in your home can cause poor reception. Move the unit away from the interference (especially those items with motors and transformers).• Switch off your iPod/iPhone while listening to the radio to prevent signal interference. |
| Desired station not found. | • Weak signal. Use the Manual Tune function. |
| iPod/iPhone | |
| iPod/iPhone does not respond to the speaker system. | • iPod/iPhone may not be docked properly or installed properly. Remove your iPod/iPhone from the dock and check for obstructions on the connectors in the dock and on your iPod/ iPhone.• Make sure that your iPod/iPhone is working properly before docking. Please refer to your iPod/iPhone manual for details. |
| The unit doesn’t play iPod/iPhone files or doesn’t function as expected. | • Make sure the iPod/iPhone is connected properly.•STANDBYmode may be activated; press the○ STANDBY/ONbutton on the unit or press and hold the○/ MUTEbutton on the remote control again.• Make sure the iPod/iPhone is switched on.• Vibrations may have caused the iPod/iPhone to come loose from the dock.• Check theDOCK iPodmode or theAUXmode is selected.• Reinsert the iPod/iPhone. |

If any anomaly is encountered, unplug the mains adapter from the mains socket and reconnect it again.
Specifications
| Model | HPS50E |
| Frequency Range | FM: 87.5 – 108 MHz |
| Power Supply | 230V ~50Hz |
| Power Consumption | 25W (ECO Standby Power Consumption ≤ 0.5W) |
| Output Power | 25W x 2 + 50W (Subwoofer built into base) |
| Net Weight | 7.0 kg |
| Dimension | 288 mm(W) x 288 mm(D) x 1192 mm(H) |
| Rating Label | Rating Label is location at the bottom of the unit.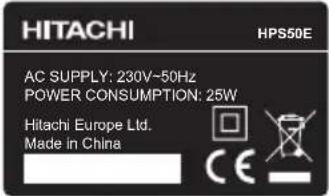 |
Features and specifications are subject to change without prior notice.
Notes for battery disposal
The batteries used with this product contain chemicals that are harmful to the environment. To preserve our environment, dispose of used batteries according to your local laws or regulations. Do not dispose of batteries with normal household waste.
For more information, please contact the local authority or your retailer where you purchased the product.
The Bluetooth® word mark and logos are registered trademarks owned by Bluetooth® SIG, Inc. and any use of such marks by DSG Retail Limited is as an Affiliate under the License held by DSG International Sourcing Ltd. Other trademarks and trade names are those of their respective owners and all rights are acknowledged.
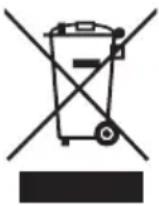
The above mark is in compliance with the Waste Electrical and Electronic Equipment Directive 2002/96/EC (WEEE).
The mark indicates the requirement NOT to dispose the equipment including any spent or discarded batteries as unsorted municipal waste, but use the return and collection systems available. If the batteries or accumulators included with this equipment display the chemical symbol Hg, Cd or Pb, then it means that the battery has a heavy metal content of more than 0.0005% Mercury, or more than 0.002% Cadmium or more than, 0.004% Lead.
Made for

iPod 📋 iPhone 📋 iPad
"Made for iPod", "Made for iPhone" and "Made for iPad" mean that an electronic accessory has been designed to connect specifically to iPod, iPhone and iPod, respectively, and has been certified by the developer to meet Apple performance standards.
Apple is not responsible for the operation of this device or its compliance with safety and regulatory standards.
Please note that the use of this accessory with iPod, iPhone or iPad may affect wireless performance.
iPhone, iPad, iPod, iPod classic, iPod nano, and iPod touch are trademarks of Apple Inc., registered in the U.S. and other countries.
All other trademarks appearing herein are the property of their respective owners.
In the unlikely event of a problem developing, please contact the store where you purchased your equipment.
We continually strive to improve our products; specifications may change without prior notice.
For advice on where to purchase accessories, please contact the store where you purchased your equipment.
All trademarks are the property of their respective owners and all rights are acknowledged.
Manufacturer: Hitachi Europe Ltd., Whitebrook Park, Lower Cookham Road, Maidenhead, Berkshire SL6 8YA U.K.
- Tower speaker with Docking for iPad/iPhone/iPod
- Contents
- Unpacking....7
- Product Overview......8
- Remote Control....10
- Battery Installation for the Remote Control....11
- Remote Control Operation Range....12
- Playing music from an Audio Device ....13
- Connecting the Aerial ....13
- Mains Power....14
- First Time Use....15
- General Operation....15
- iPod/iPhone Operation 16
- Radio Operation 19
- AUX Operation....21
- Bluetooth® Operation 21
- Maintenance 21
- Hints and Tips 22
- Specifications....23
- SOME DOS AND DON'TS ON THE SAFE USE OF EQUIPMENT
- ABOVE ALL
- BATTERY SAFETY GUIDELINES
- Safety Warnings
- Damage
- Location of Unit
- Temperature
- Naked Flames
- Moisture
- Ventilation
- Safety
- Mains Adapter Cable
- Interference
- Batteries
- Supervision
- Service
- Maintenance
- Unpacking
- Front View
- Control Panel
- Rear Sockets
- / SOUND Button
- VOLUME - Button
- / Button
- / MUTE Button
- /SOURCE Button
- VOLUME + Button
- Pair / Button
- /▶Button
- M / CLOCK Button
- Battery Installation for the Remote Control
- Handling the Battery
- Handling the Remote Control
- Remote Control Operation Range
- Playing music from an Audio Device
- Connecting the Aerial
- Mains Power
- First Time Use
- Standby/ON
- Selecting Modes
- Adjusting the Volume
- Adjusting the Sound Effect
- Clock Setting
- iPod/iPhone Operation
- Inserting the iPod/iPhone and Selecting DOCK iPod Mode
- iPod/iPhone Playback
- To Pause or Resume Playback
- Skipping to Another Track
- Locating a Particular Point on a Track
- Controlling your iPod/iPhone (Navigation Menu)
- Charging your iPod/iPhone
- Scanning for Radio Stations
- Searching for a Station Automatically
- Searching for a Station Manually
- For Better Reception
- Presetting Stations Manually
- Presetting Stations Automatically
- Recalling a Preset Station
- Bluetooth® Operation
- Cleaning the Unit
- Specifications
- Notes for battery disposal
Brand : HITACHI
Model : HPS50E
Category : Loudspeaker