304145 - Cooker ROLLER GRILL - Free user manual and instructions
Find the device manual for free 304145 ROLLER GRILL in PDF.

| Product Type | Electric Cooker |
| Brand | Roller Grill |
| Model | 304145 |
| Dimensions (W x D x H) | 600 x 600 x 850 mm |
| Weight | 45 kg |
| Power Supply | 230 V / 50 Hz |
| Power Consumption | 3.5 kW |
| Number of Burners / Plates | 4 cooking zones |
| Oven Type | Conventional electric oven |
| Oven Volume | 55 liters |
| Temperature Range | 50 °C to 250 °C |
| Control Type | Rotary knobs |
| Material | Stainless steel body |
| Cleaning & Maintenance | Removable oven door, smooth surfaces for easy cleaning |
| Safety Features | Overheat protection, child lock, cool-touch handle |
| Spare Parts & Repairability | Heating elements, knobs, and door gaskets available |
| General Information | Suitable for commercial or heavy domestic use |
Frequently Asked Questions - 304145 ROLLER GRILL
User questions about 304145 ROLLER GRILL
0 question about this device. Answer the ones you know or ask your own.
Ask a new question about this device
Download the instructions for your Cooker in PDF format for free! Find your manual 304145 - ROLLER GRILL and take your electronic device back in hand. On this page are published all the documents necessary for the use of your device. 304145 by ROLLER GRILL.
USER MANUAL 304145 ROLLER GRILL
including exploded view & part list
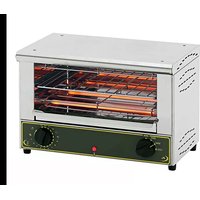
natural_image
Exterior view of a RoRler grater with visible branding and control knob (no text or symbols on body)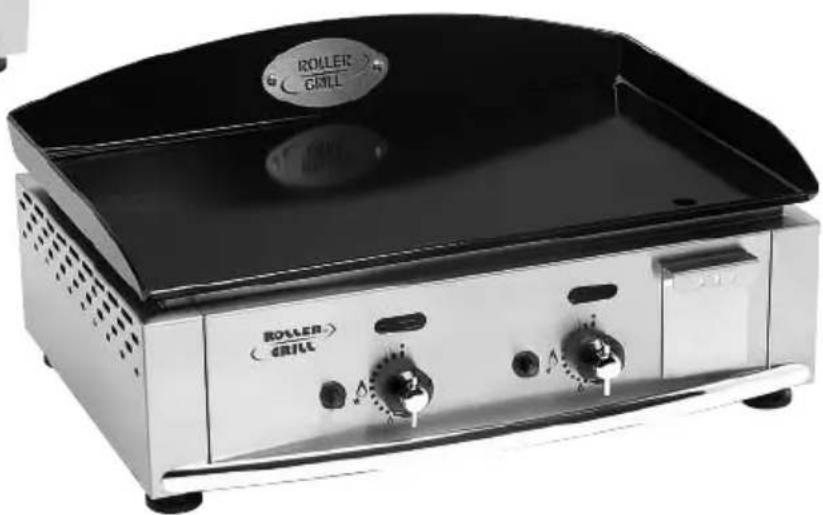
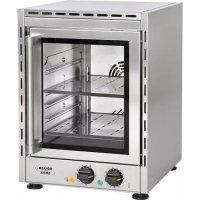
natural_image
Exterior view of a Roeller Grill grater appliance (no text or symbols on main body)FRY-TOPS GAS (*304.145 - *304.165)
You should read these user instructions carefully before using the appliance
CONTENTS
- Safety instructions 3
- Contents of the cardboard box 3
- Conformity of use 4
- Usage instructions 4-5
- Functioning / Handling 5-8
- Cleaning and maintenance 8
- Technical features 9 -10
Annexes: Nomenclatures and exploded views 11-14
Congratulations on your purchase of this top-of-the-line cooking appliance manufactured in France. You have selected an appliance that combines the best technical features with great user-friendliness. We hope that you derive the maximum possible satisfaction.
1 SAFETY INSTRUCTIONS
Please follow these instructions carefully to avoid any risk of fire, burns or other injuries and damage. While using this appliance, there are some basic safety precautions that must always be followed, such as:
- Read the operations manual that is to be systematically kept with the appliance.
- Always install the appliance by following the instructions. A distance of minimum 10 cm from the partition or the wall is required.
- This appliance is meant for outdoor use.
- Protect the appliance from direct sun light, frost and humidity.
- Keep the appliance out of reach of children or disabled persons without supervision.
- Never move the appliance when it is in operation or while the cooking surface is still hot.
- Do not touch the hot surfaces of the appliance. The temperature of the hot surfaces can be very high when the appliance is in operation. Always use the control knobs.
- Do not use the appliance for functions other than the determined use.
- Do not let the pipe or hose (purchased separately from a specialised shop) hang from the side of the trolley or counter top, or let it come in contact with hot surfaces.
- Do not use the appliance near combustible materials.
- Ensure that the ventilation ports of the appliance are not blocked during use.
- The repairs must be entrusted only to a qualified person.
- Use original spare parts only.
- After cooking, do not forget to disconnect the gas inlet before cleaning the appliance.
2. CONTENTS OF THE CARDBOARD BOX
Appliance: A gas plancha
Accessories: - One wooden spatula
-A cookbook
- This manual
text_image
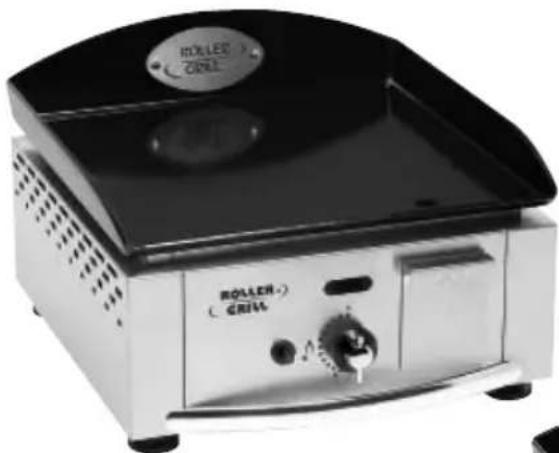
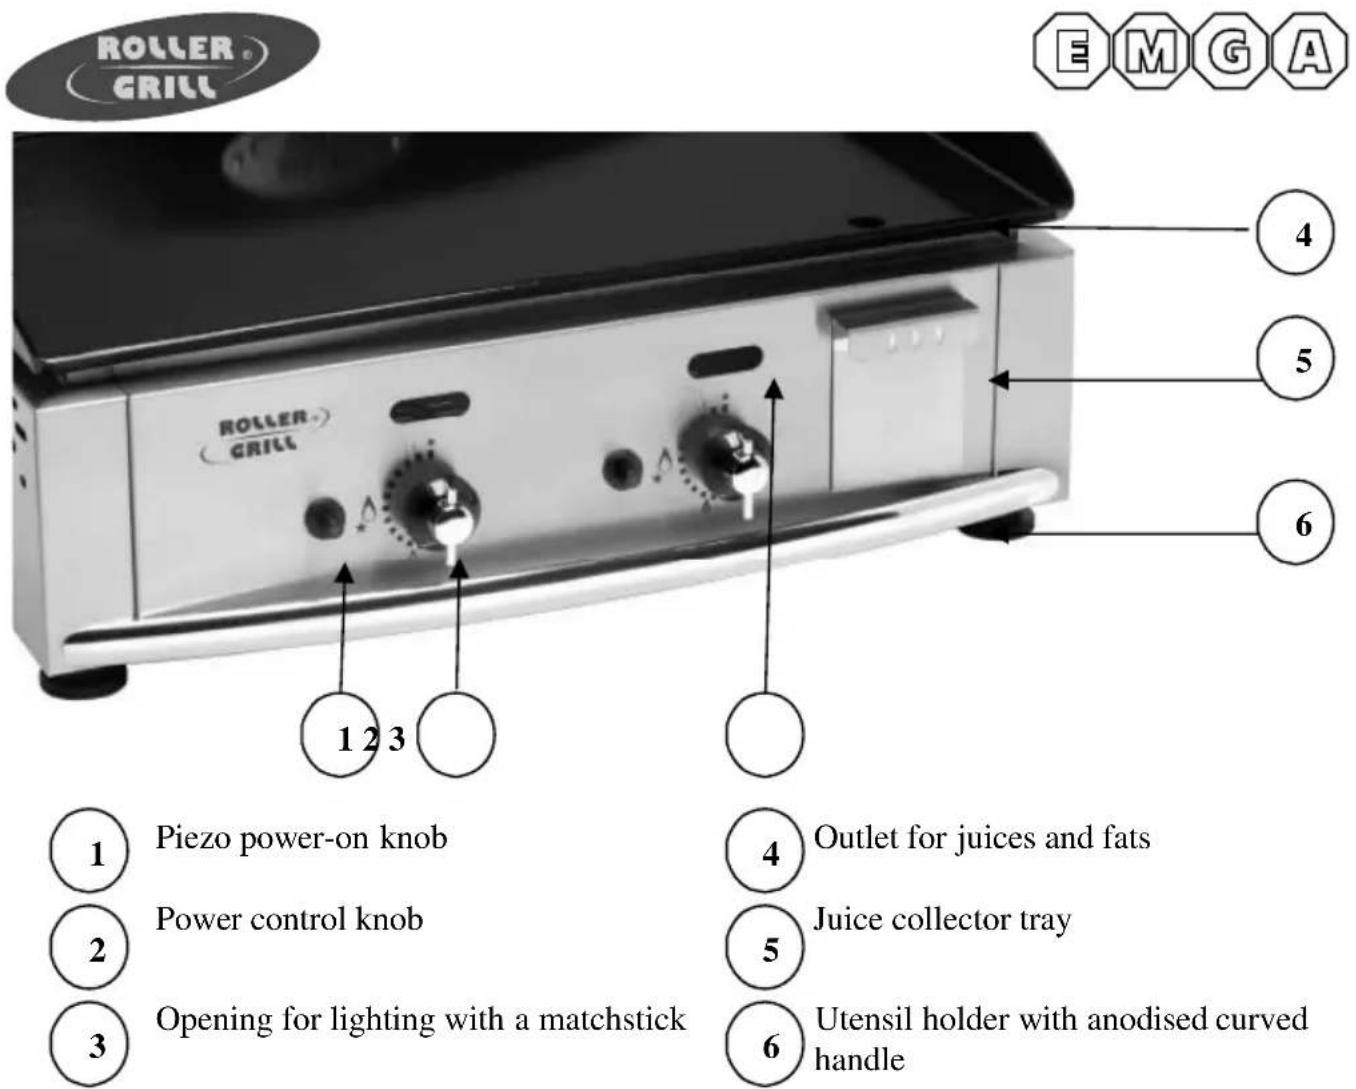
ROLLER GRILL EMG A ROLLER GRILL 1 2 3 4 5 6 ① Piezo power-on knob ② Power control knob ③ Opening for lighting with a matchstick ④ Outlet for juices and fats ⑤ Juice collector tray ⑥ Utensil holder with anodised curved handleRefer to detailed exploded view of PL 400 G and PL 600 G at the end of the document.
3. CONFORMITY OF USE
Use the appliance to grill and quickly sear meat, sausages, fish, shellfish, vegetables, onions as well as for fried eggs or even an omelette.
4. USAGE INSTRUCTIONS
This plancha is an enamelled steel solid cooking plate. The plate's smooth surface provides direct heat transfer to the food being cooked, without heat loss at the centre as in the periphery thanks to star-shaped burners (1 burner for PL 400 G and 2 burners for PL 600 G) that cover the entire cooking surface.
To switch on and heat the plate, just switch on the burner by pressing on the valve lever (No.2 in the photo) opposite the star position for a few seconds and on the piezo (No.1 in the photo) several times if required.
If the piezo (No.1 in the photo) no longer generates the required series of sparks, you can use a gas lighter or a long matchstick by holding it near the oblong hole (No.3 in the photo) and keeping the lever pressed (No.2 in the photo) facing the star position as indicated above.
While cooking, the temperature can be regulated using the control knob (No.2 in the photo) from high flame to low flame in order to avoid over-cooking.
A safety thermocouple cuts the gas supply if the burner is extinguished. The low flame of the appliance is pre-adjusted in the factory, it must not be changed. This extinction can mainly occur when there is a lot of wind. In this particular case, just repeat the switching-on procedures described above.
Your appliance is equipped with a tray (No. 5 in the photo) that is fully removable to drain juice and fats. It must be cleared regularly. It is recommended to pour a little water in the tray when you start cooking to facilitate maintenance and to avoid the solidification and accumulation of fats at the bottom of the tray at the end of the meal.
Never use the appliance without the drip tray (No. 5 in the photo).
5. FUNCTIONING / HANDLING
a) Installation/Assembly:
- Carefully unpack the plancha from the cover and remove from its cardboard box.
- Place the plancha on a flat and heat-resistant surface.
- Never place the appliance near a wall or a partition made of combustible materials even if it is properly insulated.
- A distance of minimum 10 cm with the partition or the wall is required.
- Remove the “Food enamel” label and the red label on the plate as well as the protective film around the appliance without forgetting to remove the film that protects the juice collector tray (No. 5 in the photo). Use a solvent like acetone or other solvents to remove these labels.
b) First use:
When you use this appliance for the first time, heat the plate outside for approx. 30 min to remove any residual oil smoke from the manufacturing of the metal parts. This may emit a slight smell for a few moments.
The appliance does not need to be kept switched on at full capacity: the temperature must be adapted to the products that are to be cooked to limit gas consumption.
Firstcleaning
Clean the appliance before its first use. (Refer to. 6 Cleaning)
Gasconnection
The appliances run on the following gases: Butane G30 and Propane G31. The appliances are originally delivered with a Butane/Propane injector corresponding to the category
13+.
The heat release rate of the appliance is
PL 400 G 2.75 kW
PL 600 G 5.50 kW
Check the supply pressure using a manometer when all the burners are lit. It must be equal to the indications on the rating plate.
The fresh air flow required for combustion air supply is:
- PL400G 5.5m3/h
- PL 600 G 11.0 m3/h
General conditions of installation
The installation and maintenance of the appliance must be carried out in compliance with the statutory texts and good practices in force, mainly:
General specifications
For all appliances:
Article GZ Installation with combustible gases and liquefied hydrocarbons.
Then, according to use:
Article CH Heating, ventilation, refrigeration
Air conditioning and domestic hot water steam generation.
Important: Never change the diameter of the injectors.
Gas category table, according to the country of destination of the appliance.
| Country of destination | Category | Gas | Pressure | Injector diameter |
| France/ Luxembourg I 3+ | I 3B/P | G30/G31 | 28-30/37 | ∅ 85 |
| G30/G31 | 50 | ∅ 85 | ||
| Germany | I 3B/P | G30/G31 | 50 | ∅ 85 |
| Austria | I 3B/P | G30/G31 | 50 | ∅ 85 |
| Belgium | I 3+ | G30/G31 | 28-30/37 | ∅ 85 |
| Sweden/Denmark/Finland | I 3B/P | G30/G31 | 30 | ∅ 85 |
| Spain | I 3+ | G30/G31 | 28-30/37 | ∅ 85 |
| I 3P | G31 | 50 | ∅ 85 | |
| Netherlands | I 3B/P | G30/G31 | 28-30/37 | ∅ 85 |
| I 3P | G31 | 50 | ∅ 85 | |
| Norway | I3B/P | G30/G31 | 30 | ∅ 85 |
| Iceland/Greece/United Kingdom/Italy/Portugal | I 3+ | G30/G31 | 28-30/37 | ∅ 85 |
Air regulation
The injectors have been designed in order to avoid any air regulation, irrespective of the type of gas used.
c) Use of the appliance:
Controlanddisplayelements
| Control/Display Function | Switches on the appliance (simultaneously with the set knob) |
| Piezo(No. 1 in the photo) | |
| Set knob(No. 2 in the photo) | Switches on the appliance (knob pressed simultaneously with piezo)Controls power (low flame = low power, high flame = high power) |
| Opening(No.3 in the photo) | Can replace the piezo and thus helps to switch on the appliance using a large matchstick or a gas lighter (simultaneously with the set knob kept pressed for a few seconds) |
Never use the appliance without its juice collector tray (No. 5 in the photo).
Switching-on
- Press the valve for a few seconds.
- Press on the piezo (No.1 in the photo) to light the burner.
- Keep the valve (No.2 in the photo) pressed for some more seconds.
- The burner then remains lit and it is now possible to increase the power by turning the power lever (No.2 in the photo).
Grease the plate before cooking every time.
Temperaturesetting
After the burner is lit; set the appliance to the desired power by turning the control knob (No.2 in the photo).
Stoppingtheappliance
- Set each control knob (No.2 in the photo) to 0: the appliance is completely switched-off.
- Close the butane or propane cartridge
- Clean the appliance. (Refer to. 6. Cleaning)
d) Breakdown/Repairs:
In case of breakdown or a damaged part, please call your after-sale service and entrust any technical operation to a qualified person.
When you contact the maintenance department of your Distributor or shop, provide full reference of your appliance (commercial description, type and serial number). This information is given on the rating plate that can be seen behind the appliance.
6. CLEANING AND MAINTENANCE
Cut the gas supply.
The plate is still hot:
- Drain most of the fats and cooking juice with the wooden spatula towards the outlet (No.4 in the photo) in front of the plate.
- Let the plate cool down and clean it with warm soapy water and a slightly abrasive pad. Collect the cooking residues in the drip tray (No.5 in the photo).
- Then use some white vinegar to neutralize the cooking smells.
- Finally, wipe the plate before putting it away or using it again.
Do not put ice cubes or other on the plate that is still hot (deglazing), which may lead to a violent thermal shock and permanent damage.
The plate is cold:
- Clean the plate with a wet sponge and some dishwashing liquid.
- Wipe the plate with a soft and clean cloth.
- Remove and empty the tray (No.5 in the photo) filled with fats and cooking juice.
- Clean the tray with a wet sponge and some dishwashing liquid (can also be washed in a machine) and wipe.
- After the tray dries, put it back in the appliance.
- Clean the outer case of the appliance without using any abrasive product.
- Never clean the appliance under a water jet, the seepage may cause irreparable damage to the appliance.
Attention to the capacity of the drip tray (No.5 in the photo): consider emptying it regularly, any overflowing inside the appliance may cause irreparable damage.
Option: large capacity tray for intensive cooking (magrets, etc.)
For more important uses, like cooking magrets that generate more juice, you can obtain specific trays with external draining (automatic drainage tray optional Ref 53157SE).
When the appliance is not in use for a long time, we strongly recommend that the appliance be kept in a dry place.
7. TECHNICAL FEATURES
| Models | PL 400 G | PL 600 G |
| External dimensions | 410x450x280 mm | 610x450x280 mm |
| Cooking surface | 390x380 mm | 590x380 mm |
| Weight | 14.5 Kgs. | 20.5 Kgs. |
| Power | 2,750 W | 5,500 W |
| Number of burners | 1 | 2 |
8. WARRANTY
Conditions of warranty
The warranty that is applicable for the whole appliance is the commercial warranty of the distributor or dealer. Please contact the shop where you purchased your appli-ance for information regarding the specific terms of the same.
The warranty provides no right to damages.
The provisions that follow are not exclusive of the benefit of the legal warranty provided for by articles 1641 et seq. of the Civil Code relating to failures and hidden defects.
Exclusion clauses of the warranty
Incorrect installation and improper maintenance, mainly if the same is not carried out as per the regulations in force or the instructions provided in this user manual. Any violent thermal shock leading to irreparable damage of the plate is not covered by the warranty. (Deglazing = sudden cooling with ice cubes and cold water when the plate is still hot after cooking).
The warranty does not cover repairs required due to incorrect operations, inappropriate use, use for professional purposes, negligence or overloading of the appliance, as well as those resulting from faulty installations.
The damage caused due to shocks and bad weather is not covered by the warranty. The material is transported at the risk of the user; in case of delivery by carrier, the recipient must issue reservations vis-à-vis the carrier before any delivery of the appliance.
The warranty comes to an end in case of intervention, repairs or modification by unqualified persons, or use for inappropriate purposes.
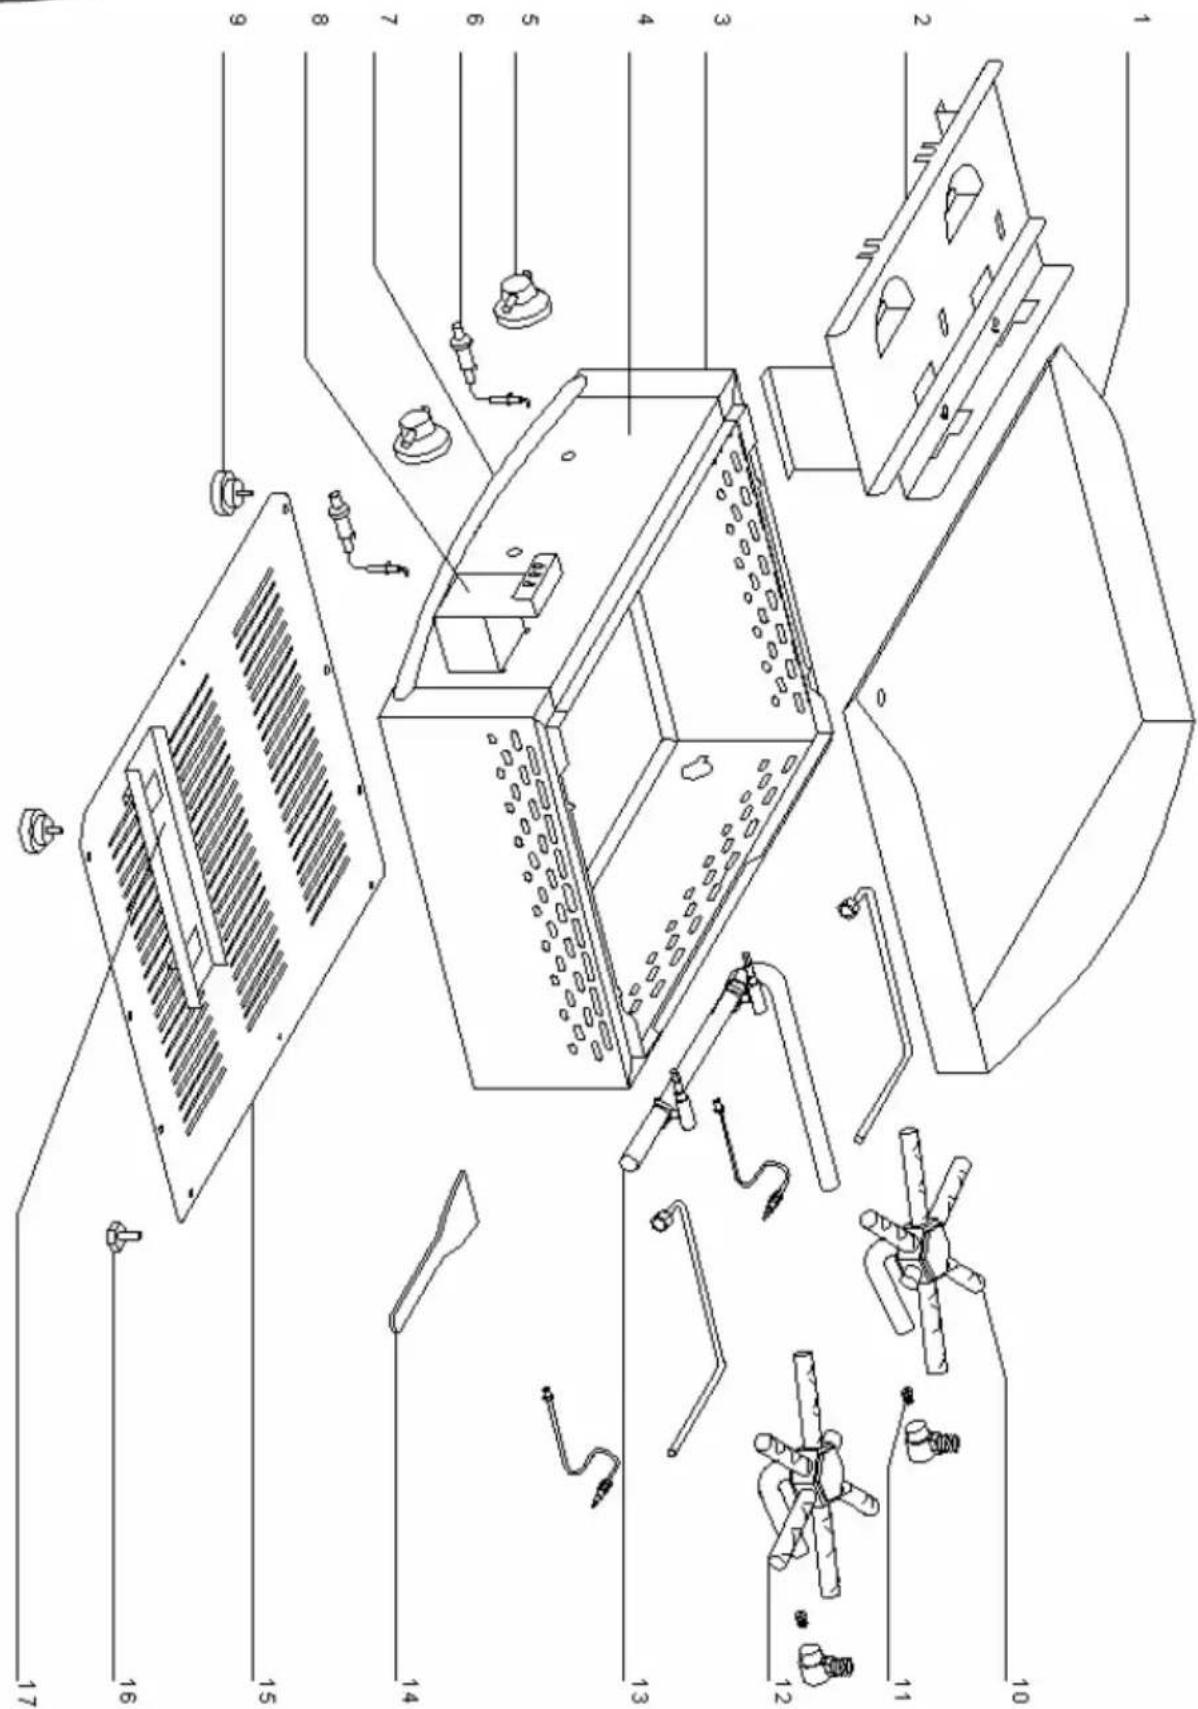
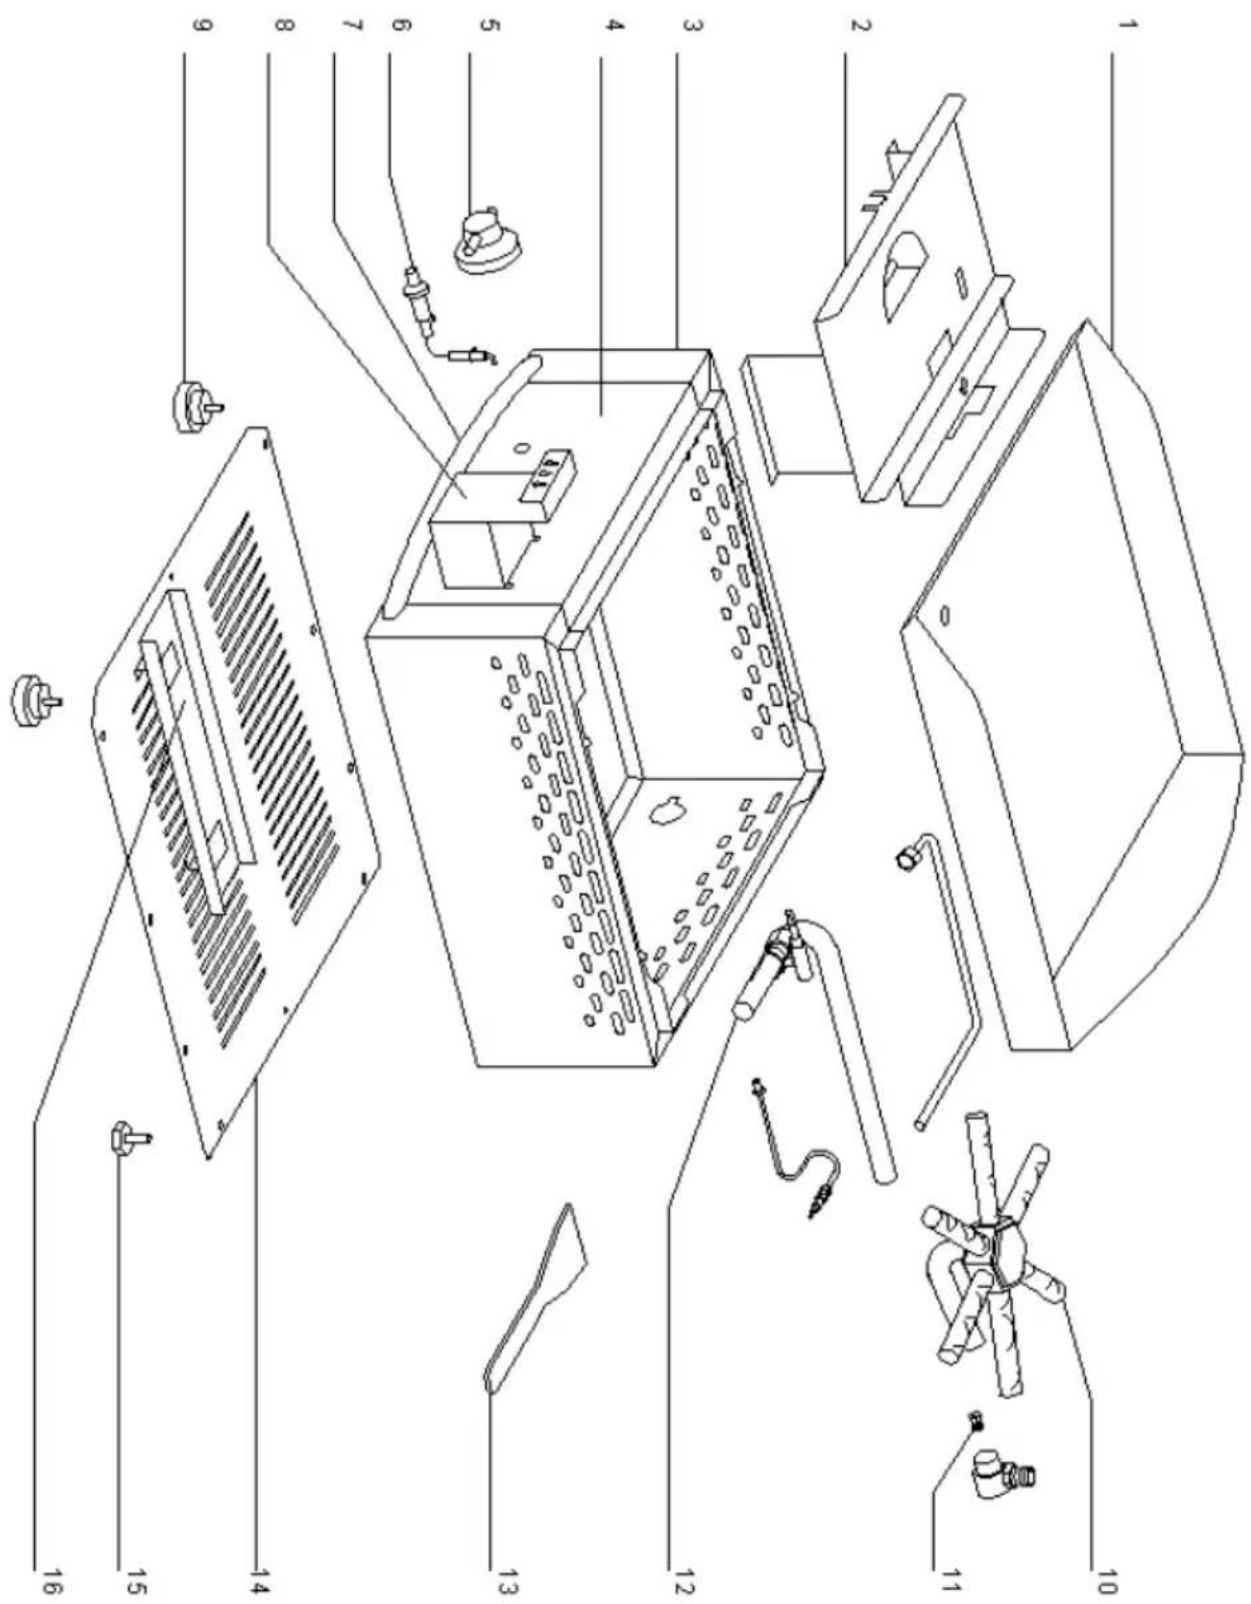
Nomenclature PL 400 G
Spare parts PL 400 G
| S.No. | Code | Qty | Spare part |
| 1 B02057SE1 | 1 | Enamelled steel plate | |
| 2 53143 | 1 | Burner holder | |
| 3 53138SE | 1 | Casing | |
| 4 53142SER | 1 | Front panel | |
| 5 A14112 | 1 | Knob | |
| 6 E02215 | 1 | Piezo | |
| 7 A15058 | 1 | Handle | |
| 8 53135SE | 1 | Drip tray | |
| 9 A13017 | 2 | Foot | |
| 10 E01007 | 1 | Burner | |
| 11 E02075 | 1 | Injector BP 85 | |
| 12 E02214 | 1 | Main supply assembly | |
| 13 F05052 | 1 | Wooden spatula | |
| 14 53140 | 1 | Bottom casing | |
| 15 A13006 | 2 | Adjustable foot | |
| 16 53137 | 1 | Drip tray holder | |
| G03135 | 1 | Recipe book | |
text_image
Technical diagram of a device with numbered parts, likely an electrical or mechanical assembly, showing internal components and connections.Nomenclature PL 600 G
Spare parts PL 600 G
| S.No. | Code Qty. | Square part | |
| 1 | B02058SE1 1 | Enamelled steel plate | |
| 2 | 53150 1 | Burner holder | |
| 3 | 53146SE 1 | Casing | |
| 4 | 53149SER 1 | Front panel | |
| 5 | A14112 2 | Knob | |
| 6 | E02215 2 | Piezo | |
| 7 | A15059 1 | Handle | |
| 8 | 53135SE 1 | Drip tray | |
| 9 | A13017 2 | Foot | |
| 10 | E01009 1 | Left burner | |
| 11 | E02075 2 | Injector BP 85 | |
| 12 | E01010 1 | Right burner | |
| 13 | E02213 1 | Main supply assembly | |
| 14 | F05052 1 | Wooden spatula | |
| 15 | 53148 1 | Bottom casing | |
| 16 | A13006 2 | Adjustable foot | |
| 17 | 53137 1 | Drip tray holder | |
| G03135 1 | Recipe book |