
DD-55-DD-55C - Electronic drum YAMAHA - Free user manual and instructions
Find the device manual for free DD-55-DD-55C YAMAHA in PDF.

| Product type | Digital electronic drum set |
| Brand | Yamaha |
| Model | DD-55 / DD-55C |
| Dimensions (L x W x H) | 500 x 350 x 150 mm |
| Weight | 2.5 kg |
| Power supply | DC 12 V AC adapter (included) or 6 AA batteries |
| Number of pads | 6 pads (kick, snare, toms, hi-hat, crash, ride) |
| Pedals | 2 pedals (kick and hi-hat) |
| Built-in sounds | 180 voices + 9 drum kits |
| Effects | Reverb, chorus |
| Polyphony | 28 notes |
| Sequencer | 100 styles + 100 patterns |
| Metronome | Built-in |
| Inputs/Outputs | Headphone jack, AUX IN, MIDI OUT |
| Display | LCD screen |
| Care and cleaning | Clean with a soft, dry cloth; avoid solvents |
| Safety | Do not expose to moisture; do not open the device |
| Spare parts | AC adapter, pedals, cables available from Yamaha |
| Repairability | Entrust to an authorized technician |
Frequently Asked Questions - DD-55-DD-55C YAMAHA
User questions about DD-55-DD-55C YAMAHA
0 question about this device. Answer the ones you know or ask your own.
Ask a new question about this device
Download the instructions for your Electronic drum in PDF format for free! Find your manual DD-55-DD-55C - YAMAHA and take your electronic device back in hand. On this page are published all the documents necessary for the use of your device. DD-55-DD-55C by YAMAHA.
USER MANUAL DD-55-DD-55C YAMAHA
DD-55 DD-55c Digital Percussion Digital Percussion
Owner's Manual
SPECIALMESSAGESECTION
This product utilizes batteries or an external power supply (adapter). DO NOT connect this product to any power supply or adapter other than one described in the manual, on the name plate, or specifically recommended by Yamaha.
This product should be used only with the components supplied or; a cart, rack, or stand that is recommended by Yamaha. If a cart, etc., is used, please observe all safety markings and instructions that accompany the accessory product.
SPECIFICATIONS SUBJECT TO CHANGE:
The information contained in this manual is believed to be correct at the time of printing. However, Yamaha reserves the right to change or modify any of the specifications without notice or obligation to update existing units.
This product, either alone or in combination with an amplifier and headphones or speaker/s, may be capable of producing sound levels that could cause permanent hearing loss. DO NOT operate for long periods of time at a high volume level or at a level that is uncomfortable. If you experience any hearing loss or ringing in the ears, you should consult an audiologist.
IMPORTANT: The louder the sound, the shorter the time period before damage occurs.
NOTICE:
Service charges incurred due to a lack of knowledge relating to how a function or effect works (when the unit is operating as designed) are not covered by the manufacturer's warranty, and are therefore the owners responsibility. Please study this manual carefully and consult your dealer before requesting service.
ENVIRONMENTAL ISSUES:
Yamaha strives to produce products that are both user safe and environmentally friendly. We sincerely believe that our products and the production methods used to produce them, meet these goals. In keeping with both the letter and the spirit of the law, we want you to be aware of the following:
Battery Notice:
This product MAY contain a small non-rechargeable battery which (if applicable) is soldered in place. The average life span of this type of battery is approximately five years. When replacement becomes necessary, contact a qualified service representative to perform the replacement.
This product may also use "household" type batteries. Some of these may be rechargeable. Make sure that the battery being charged is a rechargeable type and that the charger is intended for the battery being charged.
When installing batteries, do not mix batteries with new, or with batteries of a different type. Batteries MUST be installed correctly. Mismatches or incorrect installation may result in overheating and battery case rupture.
Warning:
Do not attempt to disassemble, or incinerate any battery. Keep all batteries away from children. Dispose of used batteries promptly and as regulated by the laws in your area. Note: Check with any retailer of household type batteries in your area for battery disposal information.
Disposal Notice:
Should this product become damaged beyond repair, or for some reason its useful life is considered to be at an end, please observe all local, state, and federal regulations that relate to the disposal of products that contain lead, batteries, plastics, etc. If your dealer is unable to assist you, please contact Yamaha directly.
NAME PLATE LOCATION:
The name plate is located on the bottom of the product. The model number, serial number, power requirements, etc., are located on this plate. You should record the model number, serial number, and the date of purchase in the spaces provided below and retain this manual as a permanent record of your purchase.
Model
Serial No.
Purchase Date
92-BP (bottom)
PLEASE KEEP THIS MANUAL
FCC INFORMATION (U.S.A.)
1. IMPORTANT NOTICE: DO NOT MODIFY THIS UNIT!
This product, when installed as indicated in the instructions contained in this manual, meets FCC requirements. Modifications not expressly approved by Yamaha may void your authority, granted by the FCC, to use the product.
- IMPORTANT: When connecting this product to accessories and/or another product use only high quality shielded cables. Cable/s supplied with this product MUST be used. Follow all installation instructions. Failure to follow instructions could void your FCC authorization to use this product in the USA.
- NOTE: This product has been tested and found to comply with the requirements listed in FCC Regulations, Part 15 for Class "B" digital devices. Compliance with these requirements provides a reasonable level of assurance that your use of this product in a residential environment will not result in harmful interference with other electronic devices. This equipment generates/uses radio frequencies and, if not installed and used according to the instructions found in the users manual, may cause interference harmful to the operation of other electronic devices. Compliance
with FCC regulations does not guarantee that interference will not occur in all installations. If this product is found to be the source of interference, which can be determined by turning the unit "OFF" and "ON", please try to eliminate the problem by using one of the following measures:
Relocate either this product or the device that is being affected by the interference.
Utilize power outlets that are on different branch (circuit breaker or fuse) circuits or install AC line filter/s.
In the case of radio or TV interference, relocate/reorient the antenna. If the antenna lead-in is 300 ohm ribbon lead, change the lead-in to co-axial type cable.
If these corrective measures do not produce satisfactory results, please contact the local retailer authorized to distribute this type of product. If you can not locate the appropriate retailer, please contact Yamaha Corporation of America, Electronic Service Division, 6600 Orangethorpe Ave, Buena Park, CA90620
The above statements apply ONLY to those products distributed by Yamaha Corporation of America or its subsidiaries.
- This applies only to products distributed by YAMAHA CORPORATION OF AMERICA.
(class B)
OBSERVERA!
- Please keep these precautions in a safe place for future reference.

WARNING
Always follow the basic precautions listed below to avoid the possibility of serious injury or even death from electrical shock, short-circuiting, damages, fire or other hazards. These precautions include, but are not limited to, the following:
- Do not open the instrument or attempt to disassemble the internal parts or modify them in any way. The instrument contains no user-serviceable parts. If it should appear to be malfunctioning, discontinue use immediately and have it inspected by qualified Yamaha service personnel.
- Do not expose the instrument to rain, use it near water or in damp or wet conditions, or place containers on it containing liquids which might spill into any openings.
- If the AC adaptor cord or plug becomes frayed or damaged, or if there is a sudden loss of sound during use of the instrument, or if any unusual smells or smoke should appear to be caused by it, immediately turn off the power switch, disconnect the adaptor plug from the outlet, and have the
instrument inspected by qualified Yamaha service personnel.
- Use the specified adaptor (PA-5D, PA-5C or an equivalent recommended by Yamaha) only. Using the wrong adaptor can result in damage to the instrument or overheating.
- Before cleaning the instrument, always remove the electric plug from the outlet. Never insert or remove an electric plug with wet hands.
- Check the electric plug periodically and remove any dirt or dust which may have accumulated on it.
- Do not put burning items, such as candles, on the unit.
A burning item may fall over and cause a fire.

CAUTION
Always follow the basic precautions listed below to avoid the possibility of physical injury to you or others, or damage to the instrument or other property. These precautions include, but are not limited to, the following:
- Do not place the AC adaptor cord near heat sources such as heaters or radiators, and do not excessively bend or otherwise damage the cord, place heavy objects on it, or place it in a position where anyone could walk on, trip over, or roll anything over it.
- When removing the electric plug from the instrument or an outlet, always hold the plug itself and not the cord.
- Do not connect the instrument to an electrical outlet using a multiple-connector. Doing so can result in lower sound quality, or possibly cause overheating in the outlet.
- Unplug the AC power adaptor when not using the instrument, or during electrical storms.
- Always make sure all batteries are inserted in conformity with the +/- polarity markings. Failure to do so might result in overheating, fire, or battery fluid leakage.
- Always replace all batteries at the same time. Do not use new batteries together with old ones. Also, do not mix battery types, such as alkaline batteries with manganese batteries, or batteries from different makers, or different types of batteries from the same maker, since this can cause overheating, fire, or battery fluid leakage.
- Do not dispose of batteries in fire.
- Do not attempt to recharge batteries that are not intended to be charged.
- When the batteries run out, or if the instrument is not to be used for a long time, remove the batteries from the instrument to prevent possible leakage of the battery fluid.
- Keep batteries away from children.
- If the batteries do leak, avoid contact with the leaked fluid. If the battery fluid should come in contact with your eyes, mouth, or skin, wash immediately with water and consult a doctor. Battery fluid is corrosive and may possibly cause loss of sight or chemical burns.
- Before connecting the instrument to other electronic components, turn off the power for all components. Before turning the power on or off for all components, set all volume levels to minimum. Also, be sure to set the volumes of all components at their minimum levels and gradually raise the volume controls while playing the instrument to set the desired listening level.
-
Do not expose the instrument to excessive dust or vibrations, or extreme cold or heat (such as in direct sunlight, near a heater, or in a car during the day) to prevent the possibility of panel disfiguration or damage to the internal components.
-
Do not use the instrument near other electrical products such as televisions, radios, or speakers, since this might cause interference which can affect proper operation of the other products.
- Do not place the instrument in an unstable position where it might accidentally fall over.
- Before moving the instrument, remove all connected adaptor and other cables.
- When cleaning the instrument, use a soft, dry cloth. Do not use paint thinners, solvents, cleaning fluids, or chemical-impregnated wiping cloths. Also, do not place vinyl, plastic or rubber objects on the instrument, since this might discolor the panel or keyboard.
- Do not rest your weight on, or place heavy objects on the instrument, and do not use excessive force on the buttons, switches or connectors.
- Do not operate the instrument for a long period of time at a high or uncomfortable volume level, since this can cause permanent hearing loss. If you experience any hearing loss or ringing in the ears, consult a physician.
DATA BACK-UP AND STORAGE
- Yamaha recommends that you regularly save data using an external device such as the floppy disk-based Yamaha MIDI data filer MDF3, and storing the floppy disks in a safe, cool, dry place. YAMAHA CANNOT BE HELD RESPONSIBLE FOR THE ACCIDENTAL LOSS OF IMPORTANT MUSIC DATA! Regarding the data you have created, as long as fresh batteries are inserted in (or an AC power adaptor is connected to) the instrument, the data will be retained, even when the power is turned off. It will also be retained long enough to exchange an old set of batteries for a new set. If you have important data in the instrument which you don't want to lose, please take care to keep fresh batteries inserted in (or keep an AC power adaptor connected to) the instrument, and to regularly save data.
Yamaha cannot be held responsible for damage caused by improper use or modifications to the instrument, or data that is lost or destroyed.
Always turn the power off when the instrument is not in use.
Make sure to discard used batteries according to local regulations.
- The illustrations and LED displays as shown in this owner's manual are for instructional purposes only, and may be different from the ones on your instrument.
- Any mention or reference to the DD-55 in this manual also applies to the model DD-55C.
Congratulations!
Thank you for purchasing the Yamaha DD-55. The DD-55 has been developed to respond and play like a drum set - but with greater ease, flexibility and sophisticated functions. Before you use the instrument, we recommend that you carefully read through this manual.
Contents
Setting Up 5
Power Requirements 5
Panel Controls 6
Playing the Demo Song 8
Play the Pads/Pedals 9
Pad Names 9
Hand Percussion ON/OFF 10
Assigning a Drum Kit to the Pads and Pedals ....10
Assigning a Voice to Individual Pads and Pedals ("L" Custom Kit) 11
Reverb ON/OFF 12
Setting the Pad Sensitivity 13
Adjusting the Pad Volume. 14
Click ON/OFF 14
Playing a Song 15
Select the Song and Play. 15
Tap Start 16
Auto Kit Select ON/OFF Setting. 16
Adjusting the Tempo 17
Play along with a Song 18
Track ON/OFF 18
Break. 18
A-B Repeat 19
Recording a Song 20
Recording 20
Playback 20
MIDI Functions 21
What's MIDI? 21
What You Can Do With MIDI 23
Connecting to a Computer 24
Enter/Exit the MIDI/Utility Mode 25
Setting the Clock 25
Local ON/OFF 26
Setting the MIDI Transmit Channel 27
Setting the MIDI Note Number 28
Saving and Loading Song Data 29
Appendix 31
Initialize 31
Troubleshooting 32
Drum Voice List. 33
Song List 35
Drum Kit List. 36
Drum Map 38
GM Voice List. 40
MIDI Implementation Chart 41
Specifications 44
Trademarks
- Apple and Macintosh are trademarks of Apple Computer, Inc., registered in the U.S. and other countries.
- Windows is the registered trademark of Microsoft® Corporation.
All other trademarks are the property of their respective holders.
Supplied Accesories
- Drum Stick (x2)
- Foot Pedal 1 & 2
- Owner's Manual
This section contains information about setting up your DD-55 for playing. Make sure to read this section carefully before using the instrument.
Power Requirements
Although the DD-55 will run either from an optional AC adaptor or batteries, Yamaha recommends use of an AC adaptor whenever possible. An AC adaptor is more environmentally friendly than batteries and does not deplete resources.
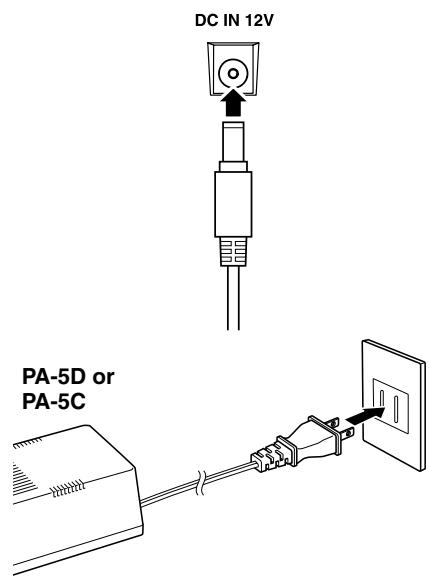
Using an AC Power Adaptor
① Make sure that the [STANDBY/ON] switch of the DD-55 is set to STANDBY.
② Connect the AC adaptor (PA-5D, PA-5C or other adaptor specifically recommended by Yamaha) to the power supply jack.
③ Plug the AC adaptor into an AC outlet.
CAUTION
- Never interrupt the power supply (e.g. remove the batteries or unplug the AC adaptor) during any DD-55 record operation! Doing so can result in a loss of data.
WARNING
- Use ONLY a Yamaha PA-5D or PA-5C AC Power Adaptor (or other adaptor specifically recommended by Yamaha) to power your instrument from the AC mains. The use of other adaptors may result in irreparable damage to both the adaptor and the DD-55.
- Unplug the AC Power Adaptor when not using the DD-55, or during electrical storms.
Using Batteries
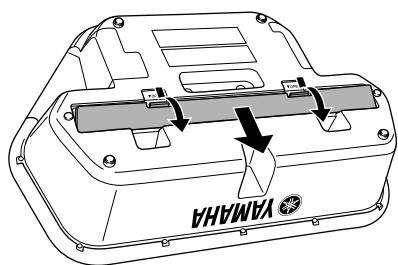
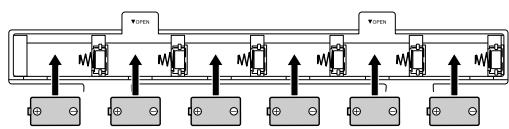
For battery operation the DD-55 requires six 1.5V "C" size, R14P (LR14) or equivalent batteries. (Alkaline batteries are recommended.) When the batteries need to be replaced, the volume may be reduced, the sound may be distorted, and other problems may occur. When this happens, turn the power off and replace the batteries, as described below.
① Open the battery compartment cover located on the instrument's bottom panel.
② Insert the six new batteries, being careful to follow the polarity markings on the inside of the compartment.
③ Replace the compartment cover, making sure that it locks firmly in place.
CAUTION
- When the batteries run down, replace them with a complete set of six new batteries. NEVER mix old and new batteries.
- Do not use different kinds of batteries (e.g. alkaline and manganese) at the same time.
- If the instrument is not to be in use for a long time, remove the batteries from it, in order to prevent possible fluid leakage from the battery.
- Plugging or unplugging the AC power adaptor while the batteries are installed will reset the DD-55 to the defaults.
Front Panel

Front Panel
1 DEMO button 8,25
2 Click button 14
③ DISPLAY 10
VOLUME [▲], [▼] buttons 8
⑤ HAND PERC button. 10
DRUM 1-3 buttons 18
BACKING button 18
PAD button 11, 14, 27
KIT button 10,28
10 SONG button 8, 15, 16, 17
TEMPO button 17
12 START/STOP button 8, 15, 25
13 A-B REPEAT button 19
14 BREAK/TAP button 16, 18
15 REC button 20
16 STANDBY/ON Switch 8,31
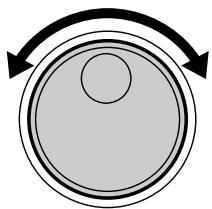
DIAL 10
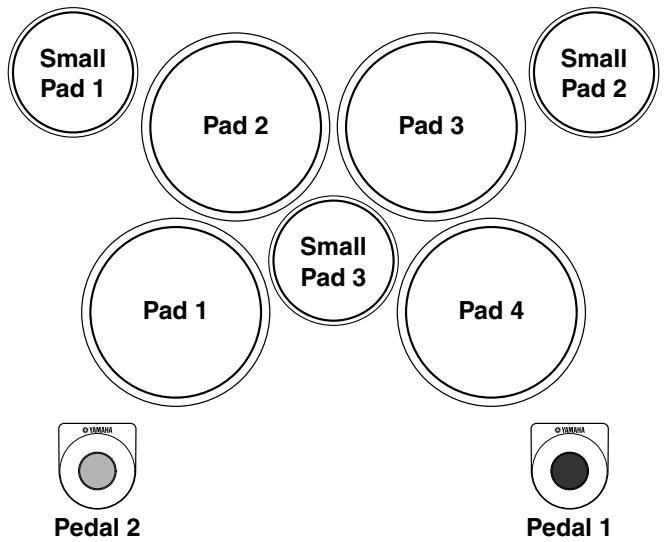
13 Drum Pads (x7) 9
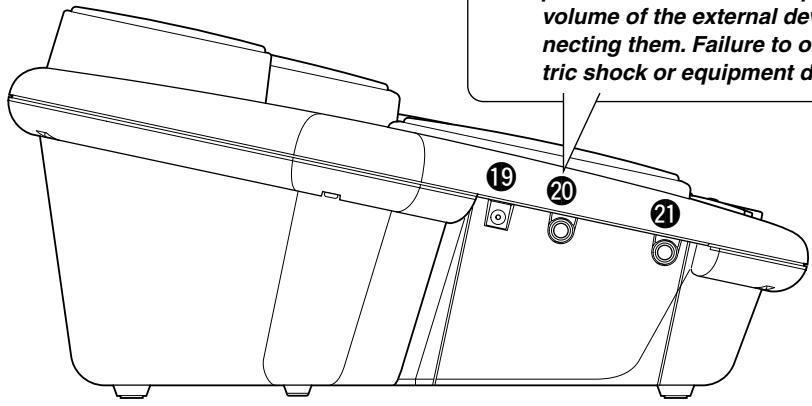
Side Panel (Left)
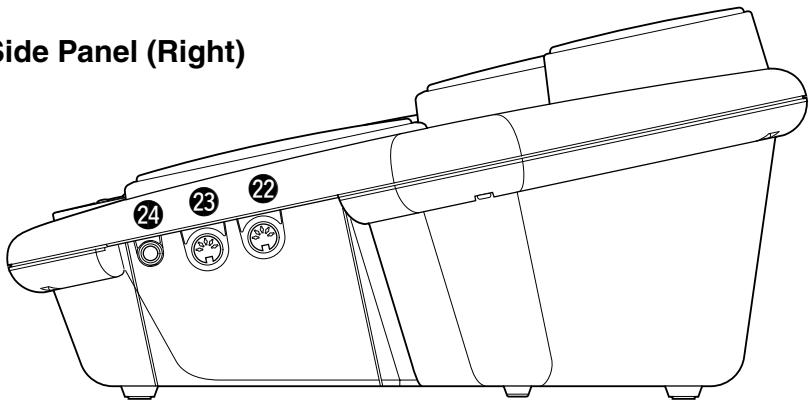
Side Panel (Right)
Side Panel (Left)
DC IN 12V (AC Adaptor) Jack. 5
20 PHONES/OUTPUT Jack 7
PEDAL 2 Jack 7
Side Panel (Right)
22 MIDI IN Terminal 22
23 MIDI OUT Terminal 22
24 PEDAL 1 Jack .7
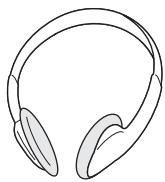
Using a pair of headphones
A standard pair of stereo headphones can be plugged in here for private practice or late-night playing. The internal stereo speaker system is automatically shut off when a pair of head phones is plugged into the PHONES/OUTPUT jack.
Do not listen with the headphones at high volume for long periods of time. Doing so may cause hearing loss.
CAUTION
- Connect the DD-55 to external equipment only after turning off power for all devices. To prevent damage to the speakers, set the volume of the external devices at the minimum setting before connecting them. Failure to observe these cautions may result in electric shock or equipment damage.
CAUTION
- Since speakers are built into the DD-55, you should be careful to never leave any video tapes, cassette tapes, floppy disks or any kind of magnetic storage media on the panel — doing so may result in data loss or damage to the items. Also avoid using the DD-55 near a television or computer monitor, since interference may result.
- Use the sticks with caution. Do not use them for anything other than playing the instrument. Also, to avoid damage or injury, refrain from waving them recklessly or throwing them.
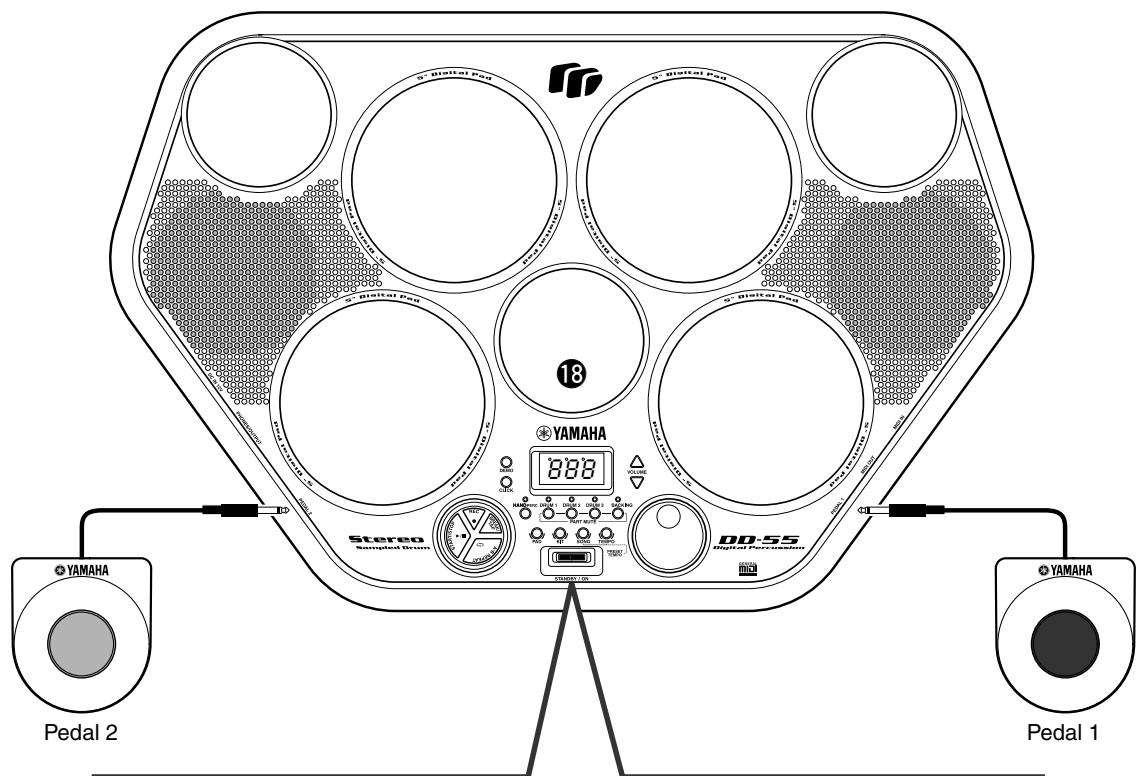
Using the Foot Pedals (1/2)
When connected, these pedals can be used simultaneously play the drum set's hi-hat pedal or bass drum voices — or they can also be assigned to play other voices as well. Connect the supplied Pedal 1 to the PEDAL 1 jack ② and Pedal 2 to the PEDAL 2 jack 2
CAUTION
- Make sure that the pedal plugs are properly connected to the PEDAL jacks before turning on the power.
- Do not press Pedal 2 while turning the power on. Doing this changes the recognized polarity of the pedal, resulting in reversed pedal operation.
- Avoid using the pedals directly on a soft floor, since they may scratch the surface of the floor.
- Avoid getting caught in or tripping over the pedal cords; this may cause the instrument to fall and result in damage or injury.
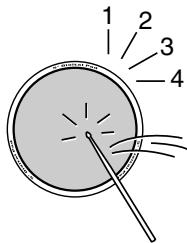
The DD-55 features a demonstration song, specially created to show you the dynamic possibilities of the instrument.
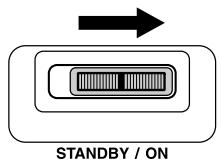

1 Turn on the power.
Turn the [STANDBY/ON] switch ON.
CAUTION
- Even when the switch is in the "STANDBY" position, electricity is still flowing to the instrument at the minimum level. When you are not using the DD-55 for a long time, make sure you unplug the AC power adaptor from the wall AC outlet, and/or remove the batteries from the instrument.
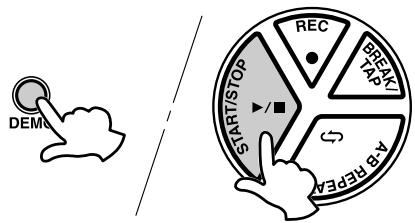
2 Start the Demo Song.
Press the [DEMO] button and the demo song starts playing.
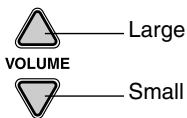
- MASTER VOLUME
The overall volume level of the DD-55 is controlled by two VOLUME [▲], [▼] buttons (10 volume levels L0 - L9).
Press the VOLUME [▲] button to increase the overall volume by one level. Press the VOLUME [▼] button to decrease the overall volume by one level. Holding down either of the buttons increases or decreases the volume level rapidly.
| L0 | ← L5 → | L9 |
| Small | ← Volume Level → | Large |
- When the VOLUME is set to L0, no sound is produced.
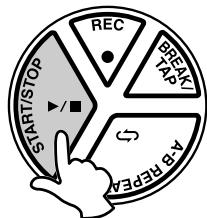
3 Stop the Demo Song.
To stop playback, press the [DEMO] button again or press the [START/STOP] button.


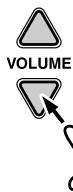
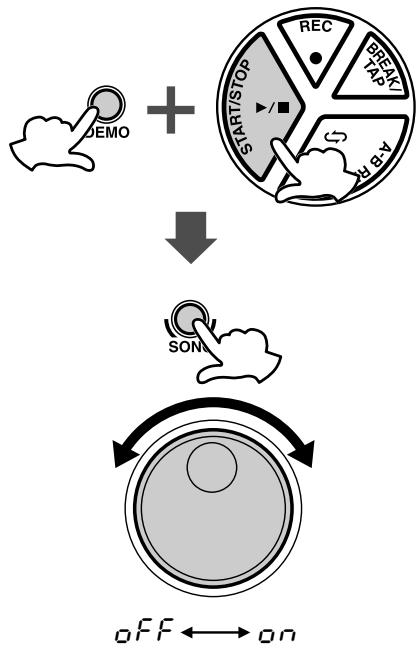
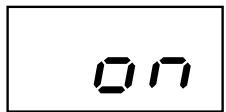
SONG VOLUME
To control the volume level of the song, press the [SONG] button and the song starts playing, simultaneously hold down the [SONG] button and use the VOLUME [▲], [▼] buttons (levels L0 - L9).
(For more information on songs, see page 15.)
The SONG VOLUME can be used to adjust the balance between the song accompaniment and your own performance on the pads.
Simultaneously hold down the [SONG] button and press the VOLUME [▲] button to increase the song volume by one level. Hold down the [SONG] button and press the VOLUME [▼] button to decrease the song volume by one level. Holding either of the buttons (while holding down the [SONG] button) increases or decreases the song volume level rapidly.
| L0 | ← L5 → | L9 |
| Small | ← Volume Level → | Large |
- When the VOLUME is set to L0, no sound is produced by the song.
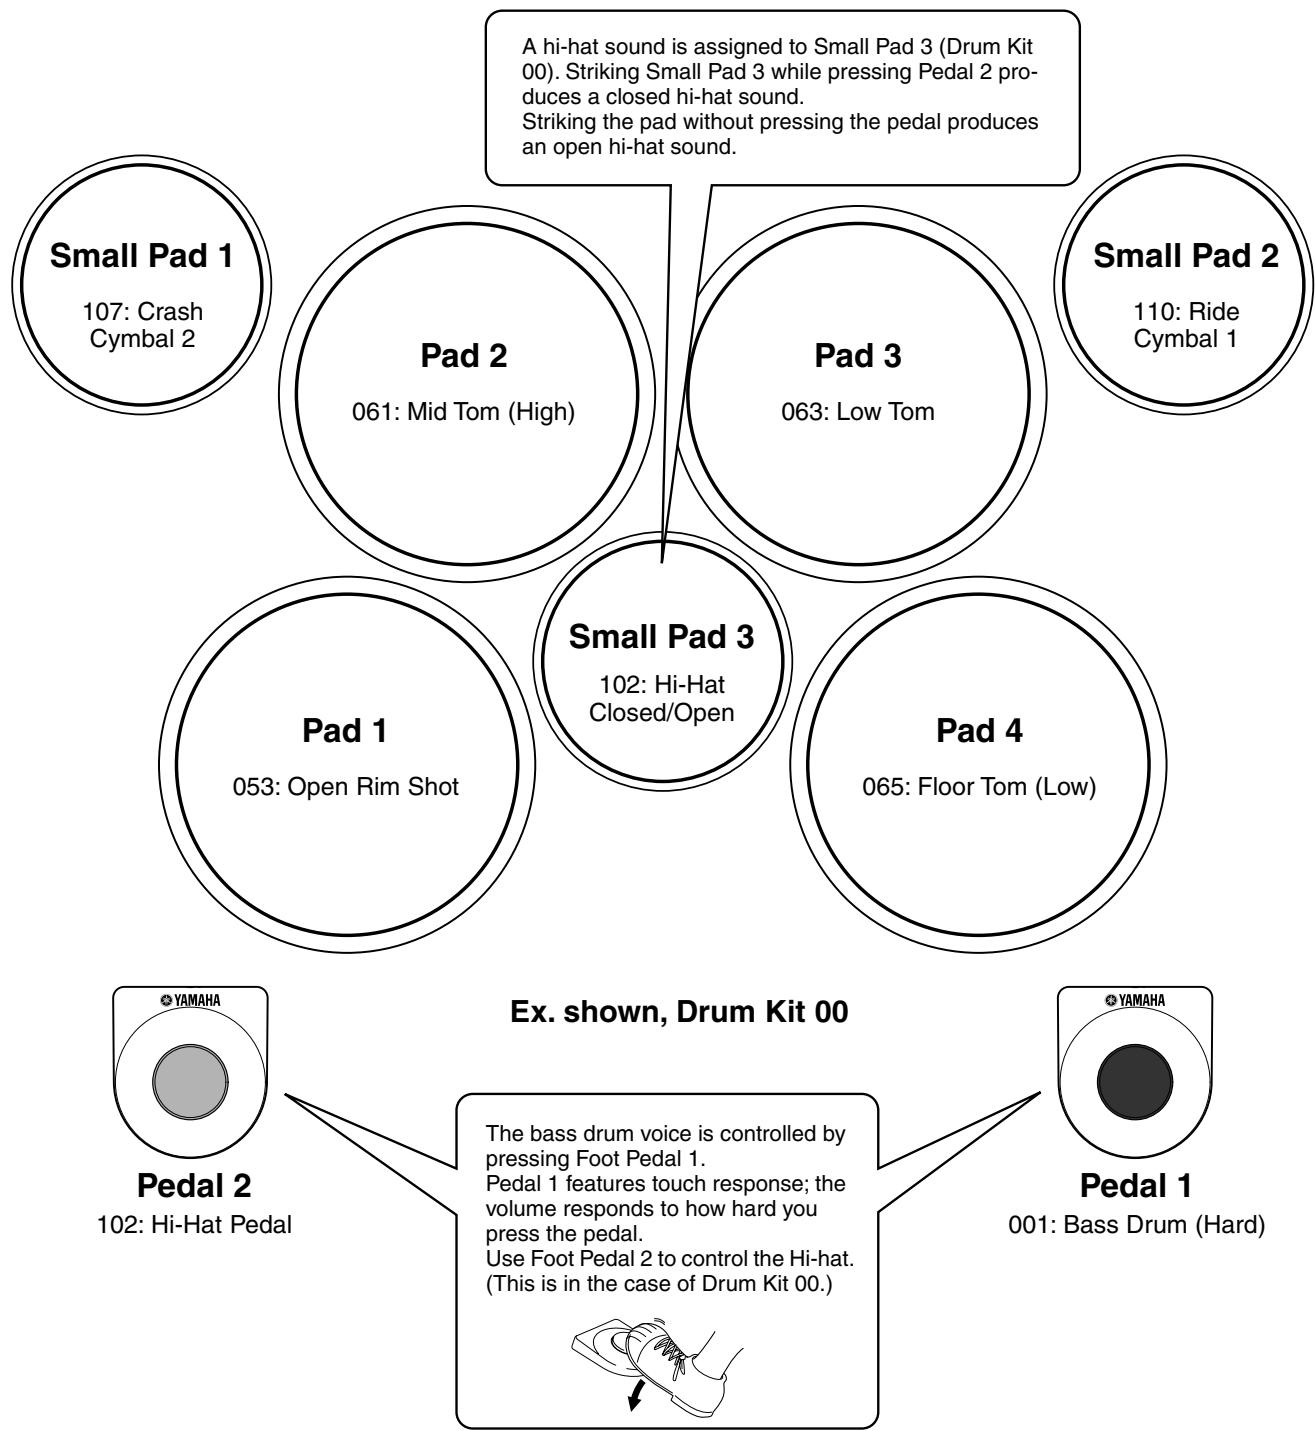
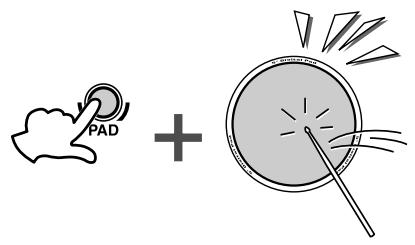
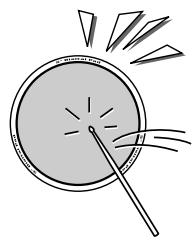
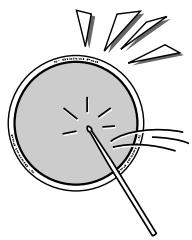
Strike the pad with the supplied drum sticks or your hands to play the drum voices. When playing the pads with your hands, turn the Hand Percussion feature on by pressing the [HAND PERC] button (the lamp lights).
The volume of the pads' sounds responds to your playing; when you play soft the volume is soft, and when you play strongly the volume is loud.
The actual loudness of the sound may vary according to which part of the pad is struck.
Pad Names
Hand Percussion ON/OFF
You can play the pads of the DD-55 either with the supplied sticks or with your hands.
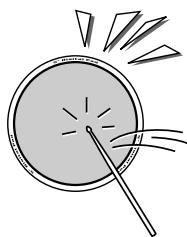
1 Press the [HAND PERC] button.
When you press the [HAND PERC] button, the button's lamp lights, and the pad sensitivity is automatically adjusted for optimum playing by hand.
![YAMAHA DD-55-DD-55C - Press the [HAND PERC] button. - 1](/content/2025/01/114713/images/4b469f90d9149b5bab6e7762fa8cb0c936a6dde3a765ab2b6f89acadbed3cc71.jpg)
- When HAND PERCUSSION is on, the DD-55 automatically selects an appropriate song (#94) and kit (#29), ideal for playing by hand and using with the Hand Percussion feature.
CAUTION
- When Hand Percussion is on, do not strike the pads with drumsticks or anything other than your hands.
Assigning a Drum Kit to the Pads and Pedals
The DD-55 allows you to choose from 45 different Drum Kits (00 - 44 : see the “Drum Kit List” page 36) quickly and easily. 45 of the kits have preset voice combinations that will be set to the pads and pedals when the kit is selected.
Select some different kits and try playing them.
The DD-55 also has one Custom Drum Kit allowing you to assign the desired voices to the seven pads or two pedals (see “Assigning a Voice to Individual Pads and Pedals” page 11).
For some drum kits (35 - 44), the sound changes each time you strike the pad.

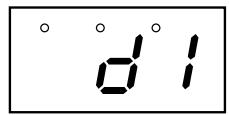
1 Press the [KIT] button.
When you press the [KIT] button, the currently selected Drum Kit number appears on the display.
![YAMAHA DD-55-DD-55C - Press the [KIT] button. - 1](/content/2025/01/114713/images/53b8484a6dce079ae91b5eb84aeb1cf1408d0f217bcddd434f9befd71280df41.jpg)
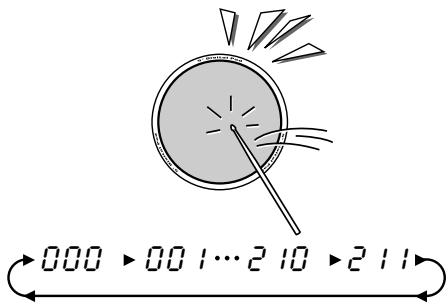
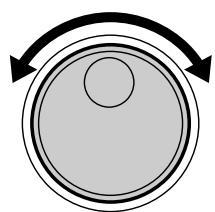
Select a Drum Kit Number.
Turn the DIAL to select a Drum Kit number. Drum Kit numbers will increase as the DIAL is turned to the right (clockwise), and decrease as the DIAL is turned to the left (counter-clockwise).

- Drum Kit number 00 is normally selected when the power is turned on. However, if Auto Kit Select is set to OFF, the last Drum Kit selected before turning the power OFF, is automatically selected when the power is turned on. (See "Auto Kit Select ON/OFF Setting" on page 16.)
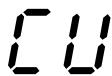
- The "C U" Drum Kit is the Custom Kit. Changes made to any one of the preset drum kits will be saved here. (See "Assigning a Voice to Individual Pads and Pedals" page 11.)
Assigning a Voice to Individual Pads and Pedals ("U" Custom Kit)
The DD-55 contains a total of 212 high quality drum sounds (see the "Drum Voice List" page 33) — and you can assign these freely to each of the 7 drum pads and 2 foot pedals. Try assigning some different voices and create your own "L U" Custom Drum Kit.

- Any changes made to one of the preset drum kits will automatically be saved in the "C U" Custom Drum Kit.
- Both the Custom and "00" drum kit contents are the same until modified (see the "Drum Kit List" page 36).

When you press the [PAD] button, Pad 1's currently assigned voice number is shown in the display.
2 Select the pad or pedal to be assigned.
Strike any pad one time (or press a pedal), and the currently assigned voice number for that pad/pedal is shown in the display.
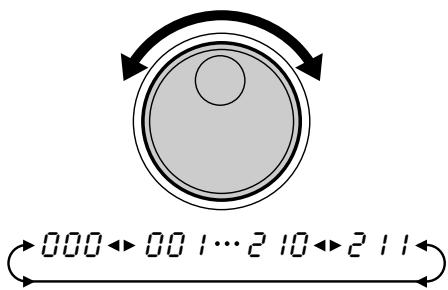
3 Select a Voice Number.
You can select the voice by repeatedly striking the pad or repeatedly pressing the pedal (while listening to the voice), or by turning the DIAL.
- Striking the pad or pressing the pedal to select a voice. Every time the pad is struck or a pedal is pressed, voice numbers will increase by a value of one (1).
Using the DIAL to select a voice.
Turn the DIAL to the right (clockwise), and voice numbers will increase. Turn the DIAL to the left (counter-clockwise), and voice numbers will decrease.
Repeat the previous steps 2 and 3 for any or all of the DD-55's pads and pedals.

4 Play the Pads and Pedals.
After assigning a voice to the desired pad/pedal, press the [KIT] button. You can now play the voice you have assigned to the pad/pedal. After you've assigned the voice, the DD-55 will automatically be set to the custom kit.
Reverb ON/OFF
Different depths of the DD-55's reverb effect can be added to the DD-55's overall sound.
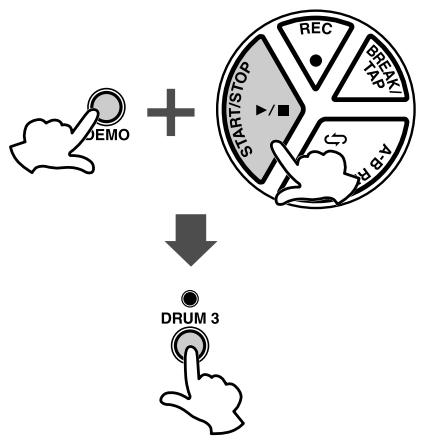
1 Display the Reverb On/Off Setting.
Simultaneously press the [DEMO] and [START/STOP] button to enter the MIDI/Utility mode, then press the [DRUM3] button. The current Reverb setting appears in the display.

Reverb on
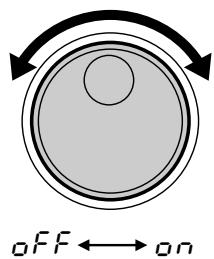
2 Set the Reverb On/Off.
To set to “ ” (Reverb ON), turn the DIAL to the right (clockwise), to set to “ F F ” (Reverb OFF), turn the DIAL to the left (counter-clockwise).
3 Exit the Reverb On/Off Setting.
After setting the Reverb ON/OFF, simultaneously press the [DEMO] and [START/STOP] button to exit the MIDI/Utility mode.
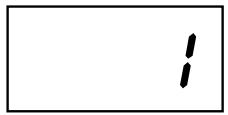
Setting the Pad Sensitivity
The DD-55 allows you to custom-set the sensitivity of the pads (range 0 - 2).
When set to a value of 2, the pad sensitivity is the highest, providing the most dynamic range for your playing (softest to loudest volume).

1 Display the current pad sensitivity setting.
Simultaneously press the [DEMO] and [START/STOP] button to enter the MIDI/Utility mode, then press the [HAND PERC] button. The current pad sensitivity setting appears in the display.
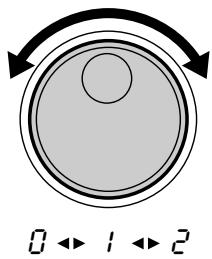
2 Set the sensitivity value.
To raise the value, turn the DIAL to the right (clockwise), and to lower it, turn the DIAL to the left (counter-clockwise).

- Default setting is "I."
3 Exit the sensitivity setting.
After setting the sensitivity, simultaneously press the [DEMO] and [START/STOP] button to exit the MIDI/Utility mode.
DD-55 Sound Triggering
The DD-55 is fitted with sensors underneath each pad. When struck, each pad/sensor produces velocity data. However, striking one pad very strongly may inadvertently trigger the sounds of other pads, because the sensors of those pads pick up the vibrations of the struck pad. To prevent this from happening, the DD-55 is set to ignore hits of low velocity. (It assumes the low velocity is "noise.") However, some noise may get through and trigger the sensors.
Here is another related problem: When you strike two pads simultaneously and hit one with less force than the other, the pad struck weakly may not sound because the DD-55 assumes the hit to be noise.
These problems may be solved by changing the DD-55 settings or altering your playing technique (as described below).
- Striking two pads simultaneously results in one of the pads not sounding.
Set the pad sensitivity level to 2. This may solve the problem if you strike one of the pads weakly. Better yet, try striking both pads with the same force.
- Striking one pad results in other pads also sounding, even though they were not struck.
Set the pad sensitivity level to 0. With this setting, any pads that are not struck may not respond to the vibrations of your playing.
Adjusting the Pad Volume
The DD-55 lets you adjust the volume of each pad (range: L0 - L9), allowing you to set the overall balance of the kit.
1 Press and hold the [PAD] button and strike the pad whose volume you want to adjust.
The corresponding pad is selected for changing volume.
![YAMAHA DD-55-DD-55C - Press and hold the [PAD] button and strike the pad whose volume you want to adjust. - 1](/content/2025/01/114713/images/5cb1c255b02d28edbddd41614a55eb663bf63897feb1b7cc8622927ae3b313a3.jpg)
![YAMAHA DD-55-DD-55C - Press and hold the [PAD] button and strike the pad whose volume you want to adjust. - 2](/content/2025/01/114713/images/2b0c8fc9aa97431ca950045ec36afb4c11b46200c241b4f81048833061e2066b.jpg)
Pad Volume
Press and hold down the [PAD] button and simultaneously press VOLUME [▲] or [▼] to adjust the designated pad's volume.
![YAMAHA DD-55-DD-55C - Press and hold down the [PAD] button and simultaneously press VOLUME [▲] or [▼] to adjust the designated pad's volume. - 1](/content/2025/01/114713/images/048b3db3a29bb0de0ad4561558fa521d655b1e49ec87a53350415e2c97b263d3.jpg)
The default Pad volume is "L 9."
Click ON/OFF

Press the [CLICK] button.
The click sounds in rhythm at the current tempo. (See "Adjusting the
Tempo" on page 17.)
To turn the click off, press the button once again.
The DD-55 features 100 different songs that can be used to provide accompaniment.
(See the "Song List" on page 35.)
Select one of the songs and have listen.
Select the Song and Play
1 Press the [SONG] button.
![YAMAHA DD-55-DD-55C - Press the [SONG] button. - 1](/content/2025/01/114713/images/9e18b82787f8fca16f8e124bd107752b14a881313b8ed5de2cbc9b11b6b79953.jpg)
![YAMAHA DD-55-DD-55C - Press the [SONG] button. - 2](/content/2025/01/114713/images/3a783c174f4a97ccd4cc64f5dfcc969ffd784f40b795ab3b2680623e8865fd68.jpg)
When you press the [SONG] button, the current song number appears in the display.
![YAMAHA DD-55-DD-55C - Press the [SONG] button. - 3](/content/2025/01/114713/images/1299476658b93cf221f7d5622e7e3bf2a8d52e0ae2d69cca88ebabf77c17deb9.jpg)
2 Select a Song Number.
Use the DIAL to select a song number. Song numbers will increase as the DIAL is turned to the right (clockwise), and decrease as the DIAL is turned to the left (counter-clockwise). (See the “Song List” on page 35.)

- Song number “00” is automatically selected whenever the power is turned ON.
- With the Auto Kit Select feature turned on, selecting a song will also automatically select the best suited Drum Kit for that song. (See "Auto Kit Select ON/OFF Setting" on page 16.)
- Song numbers are arranged in each category according to their complexity. Smaller numbers are easier to play than larger numbers.
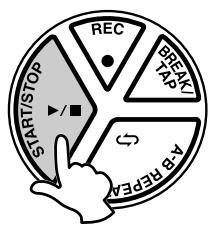
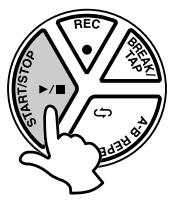
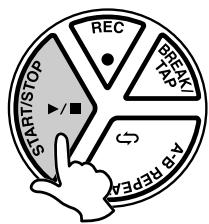
3 Press the [START/STOP] button.
When you press the [START/STOP] button, a one- or two-measure count-in plays, and the song starts playing.
As the song is playing, the Song's current measure will be shown in the display. Try playing the pads and pedals along with the song.
To stop playback of the song, press the [START/STOP] button once again.
![YAMAHA DD-55-DD-55C - Press the [START/STOP] button. - 1](/content/2025/01/114713/images/f9cedf3d955f2742af30f47bd332f79bf0c7e592780a5e2cd318b77b55abbe13.jpg)
- You can also use the TAP START function to start songs (see page 16).
Tap Start
The Tap Start function allows you to set the song's overall tempo as well as start the accompaniment — simply by tapping out the rhythm.
The accompaniment will playback at the tempo with which the pads are struck or the pedals are pressed.
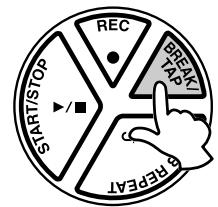
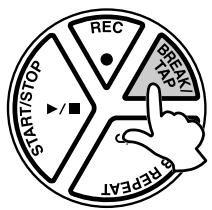
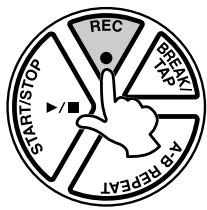
1 Press the [BREAK/TAP] button.
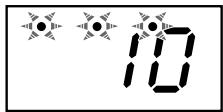
While song playback is stopped, press the [BREAK/TAP] button. All three of the beat lamps flash, indicating the DD-55 is set to Tap Start standby.
To cancel the Tap Start mode, simply press the [BREAK/TAP] button once again (the beat lamps will turn off).
2 Play the Tap Start.
In the case of a song in 4/4 , strike any pad or press any pedal four times, and the accompaniment will start at the desired tempo.

- The number of times needed to strike the pad will change according to the following time signatures: 5/4, 5 times; 4/4, 4 times; 3/4, 3 times; 6/8, 2 times.
3 Stop the Song Playback.
Press the [START/STOP] button and the song accompaniment will stop.
Auto Kit Select ON/OFF Setting
The Auto Kit Select function automatically selects the best matching drum kit for the selected song. You can deactivate this feature by setting the Auto Kit Select to OFF.
1 Setting the Auto Kit Select to ON/OFF.
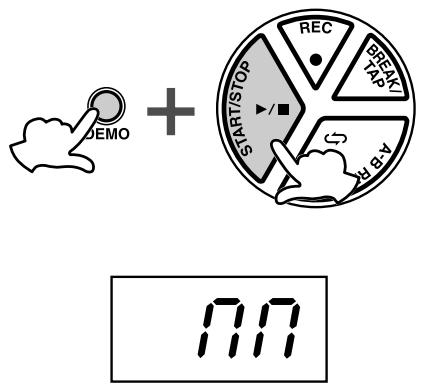
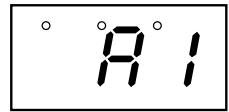
Simultaneously press the [DEMO] and [START/STOP] button to enter the MIDI/Utility mode. An “ ” appears in the display indicating the MIDI/Utility mode.
Next, press the [SONG] button. The current ON/OFF setting appears in the display.
Auto Kit Select is turned on.
2 Select ON/OFF.
Turn the DIAL to the right (clockwise) to activate the Auto Kit Select ( n) . Turn to the left (counter-clockwise) to deactivate the Auto Kit Select ( FF) .
3 Exit the Auto Kit Select.
Press the [DEMO] and [START/STOP] buttons simultaneously once again to exit the MIDI/Utility mode.

- The Auto Kit Select is automatically set to “FF” when the MIDI Transmit Channel setting is changed (see “Setting the MIDI Note Number” on page 28).
Adjusting the Tempo
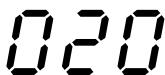
The song tempo can be set anywhere from 32 to 280 beats per minute. The higher the tempo value, the faster the tempo.

120
032→033…279→280
1 Press the [TEMPO] button.
When you press the [TEMPO] button, the current tempo value (32 - 280) appears in the display.
2 Set the Tempo.
Use the DIAL to select the TEMPO. Turn the DIAL to the right (clockwise) to increase the Tempo value, and turn it to the left (counter-clockwise) to decrease the value. (The Tempo range is 32 - 280.) Press the [SONG] button to exit from the Tempo setting mode.

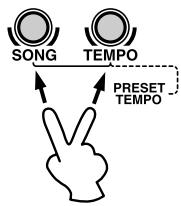
- When both the [SONG] and [TEMPO] buttons are pressed simultaneously, the preset tempo of the currently selected song is automatically applied.
- About the Beat Indicator
During song playback, the three beat lamps in the display will flash in a specific pattern to help you in keeping the beat.
For a song in 4/4 time at a tempo of 120 bpm:
| 1st beat | 2nd beat | 3rd beat | 4th beat |
| °120 | °120 | °120 | °120 |
Use the pads and pedals to play along with the song accompaniment.

- The DD-55 can play a total of 32 notes simultaneously. That includes notes produced by song accompaniment, pads, foot pedals, and note data received through the MIDI IN jack.
Track ON/OFF
The DD-55's song accompaniment consists of 4 tracks: Drum tracks 1, 2, and 3, and the Backing track.
| DRUM 1 | Bass Drum |
| DRUM 2 | Snare Drum |
| DRUM 3 | Cymbal |
| BACKING | Backing |
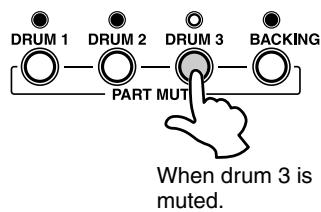
Pressing a Track button ([DRUM 1], [DRUM 2], [DRUM 3], [BACKING]) will mute (turn off the sound) the corresponding track and its indicator lamp will turn off.
Muting DRUM 1, DRUM 2 and DRUM 3 tracks allows you to play along with the song and practice the missing part.
Break
With the Break function, you can liven up songs by adding your own solos or fills, whenever you want.
Striking a pad while in the Break mode, the song's accompaniment will be muted until the end of the measure you have finished your fill or solo in.

1 During song playback, press the [BREAK/TAP] button.
During song playback, press the [BREAK/TAP] button. The three beat lamps in the display flash, indicating the DD-55 is in Break standby mode.
To cancel the Break mode, simply press the [BREAK/TAP] button once again. (The beat lamps flash in tempo.)
2 Play the Break.
Strike any pad or pedal, and the accompaniment will mute until the end of the measure you played in. You can play a drum fill or drum solo during this break.
The DD-55 returns to the Break standby mode when the Break measure is completed.
3 Exit the Break mode.
To exit the Break mode, press the [BREAK/TAP] button.
The Break mode is also exited when the song is stopped.
A-B Repeat
If you want to practice a particular section of a song, you can specify that section's "A" (start repeat) and "B" (end repeat) points. The accompaniment will continuously repeat between points "A" and "B" allowing you to practice between those points for as long as you like.
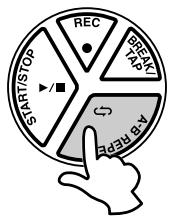
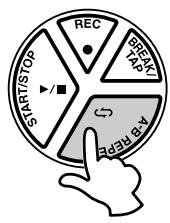
1 Set the "A" (start repeat) point.
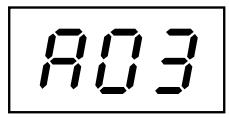
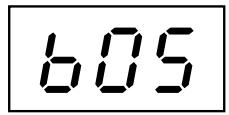
When the song playback has reached the start of the section you want to practice, press the [A-B REPEAT] button and the "A" repeat point is set. An "R" will appear in the display.
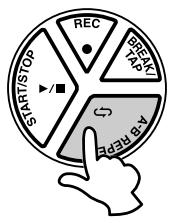
2 Set the "B" (end repeat) point.
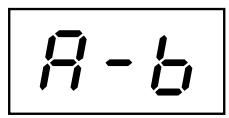
When the song playback has reached the end point of the section you want to practice, press the [A-B REPEAT] button once again to set the "B" point ("b" appears in the display). A one-measure count-in plays ("R-b" appears in the display), then the specified section plays back repeatedly. The current measure number will appear in the display during repeat playback.

- The A-B Repeat start and end points can only be set in measure steps.
3 Stop the A-B REPEAT.
Press the [START/STOP] button and the song accompaniment will stop.
“ - ” will appear in the display indicating the A-B REPEAT mode is still engaged.
Press the [START/STOP] button once again and the accompaniment will again repeat between the set points.

- Repeat is canceled when a different song is selected.
- Exit the Repeat
To exit the A-B Repeat function, press the [A-B REPEAT] button during playback (“R-b” is indicated), and the A-B Repeat mode will be canceled (the A-B Repeat points will also be canceled) and normal playback of the accompaniment will continue.
The DD-55's Custom Song feature (song number “L”) allows you to record and playback one original song (20000 notes approximately).
Data that can be recorded in the Custom Song Mode
- Drum pad and pedal data
- Song data (the number cannot be changed while in the RECORD Mode)
- Track ON/OFF settings
- Tempo setting (The tempo cannot be changed while in the RECORD mode)
- Song Volume setting
Recording
1 Prepare to Record.
Select the desired song, drum kit, tempo and track on/off setting.

- Any song from 00 - 99 can be selected. After recording, the data is automatically saved to the "C U" song. (Recording cannot be done if the "C U" song is selected.)
2 Start Recording.
Press the [REC] button to start recording. A count-in sound plays, guiding you into the start of the recording.
The following indication appears (for a time signature of 4/4):


- Press the [CLICK] button to turn the click sound on or off during recording.
3 Stop Recording.
To stop recording, press the [START/STOP] button.

-
Any previously recorded data will be replaced with new data.
-
If the memory becomes full while recording is in progress, "FL" will appear in the display and recording will automatically stop.
Playback
The recorded Custom Song (CU) can be played back in the same manner as any song (song numbers 00 - 99).
[4]
Song number “L” follows Song number “99” (or prior to “00”).

- The A-B Repeat function (see page 19) cannot be used in the Custom Song Mode.
The MIDI IN and MIDI OUT terminals, located on the DD-55's right side panel, offer broadened musical possibilities through use of MIDI. What is MIDI? What can you do with MIDI? And how can you use MIDI with the DD-55? Here are some answers to those questions...
What's MIDI?
No doubt you have heard the terms "acoustic instrument" and "digital instrument." In the world today, these are the two main categories of instruments.
Let's consider an acoustic piano and a classical guitar as representative acoustic instruments. With the piano, you strike a key, and a hammer inside hits some strings and plays a note. With the guitar, you directly pluck a string and the note sounds.
But how does a digital instrument go about playing a note?
- Acoustic guitar note production
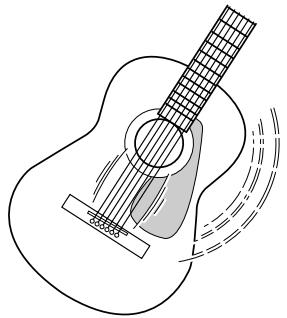
Pluck a string and the body resonates the sound.
Digital instrument note production

Based on playing information from the pads and pedals, a sampling note stored in the tone generator is played through the speakers.
As shown in the illustration above, in an electronic instrument the sampling note (previously recorded note) stored in the tone generator section (electronic circuit) is played based on information received from the pads and pedals. So then what is the information from the pads and pedals that becomes the basis for note production?
For example, let's say you play a "C" quarter note using the grand piano sound on the keyboard. Unlike an acoustic instrument that puts out a resonated note, the electronic instrument puts out information from the keyboard such as with what voice, with which key, about how strong, when was it pressed and when was it released. Then each piece of information is changed into a number value and sent to the tone generator. Using these numbers as a basis, the tone generator plays the stored sampling note.
- Example of Keyboard Information
| Voice number (with what voice) | 01 (grand piano) |
| Note number (with which key) | 60 (C3) |
| Note on (when was it pressed) and note off (when was it released) | Timing expressed numerically (quarter note) |
| Velocity (about how strong) | 120 (strong) |
MIDI is an acronym that stands for Musical Instrument Digital Interface, which allows electronic musical instruments to communicate with each other, by sending and receiving compatible Note, Control Change, Program Change and various other types of MIDI data, or messages.
The DD-55 can control a MIDI device by transmitting note related data and various types of controller data.
The DD-55 can be controlled by the incoming MIDI messages which automatically determine tone generator mode, select MIDI channels, voices and effects, change parameter values and of course play the voices specified for the various parts.
MIDI messages can be divided into two groups: Channel messages and System messages.
Channel Messages
The DD-55 is an electronic instrument that can handle 16 channels. This is usually expressed as "it can play 16 instruments at the same time." Channel messages transmit information such as Note ON/OFF, Program Change, for each of the 16 channels.
| Message Name | DD-55 Operation/Panel Setting |
| Note ON/OFF | Messages which are generated when the pad or pedal is played. Each message includes a specific note number which corresponds to the pad which is struck, plus a velocity value based on how hard the pad is struck. |
| Program Change | Voice setting (control change bank select MSB/LSB setting; only receive is available) |
| Control Change | Voice setting (volume, pan pot, etc.; only receive is available) |
System Messages
This is data that is used in common by the entire MIDI system. System messages include messages like Exclusive Messages that transmit data unique to each instrument manufacturer and Realtime Messages that control the MIDI device.
| Message Name | DD-55 Operation/Panel Setting |
| Exclusive Message | Reverb/Chorus/DSP settings, etc. |
| Realtime Messages | Clock setting Start/stop operation |
The messages transmitted/received by the DD-55 are shown in the MIDI Implementation Chart on page 41.
About MIDI terminals
In order to exchange MIDI data between multiple devices, each device must be connected by a MIDI cable.
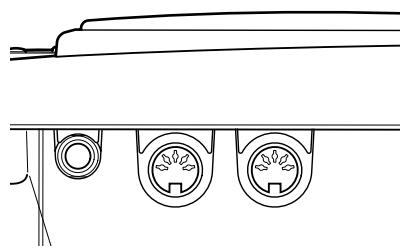
The DD-55 is equipped with two types of MIDI terminals, both of which are located on the right side panel.
MIDI IN Data transmitted from other MIDI instruments via MIDI, is received at this terminal.
MIDI OUT ......Data produced by the DD-55, is transmitted to other MIDI instruments via MIDI from this terminal.
NOTE
- Never use MIDI cables longer than about 15 meters. Cables longer than this can pick up noise which can cause data errors.
What You Can Do With MIDI
The DD-55 also features side panel MIDI terminals (MIDI IN and MIDI OUT) as well as a comprehensive set of MIDI functions, that let you use the instrument in a variety of recording and performance applications.
In all cases, make sure to properly set the MIDI Transmit Channels on the DD-55. Also make appropriate settings on the connected instruments. (Refer to the relevant owner's manuals for details.)
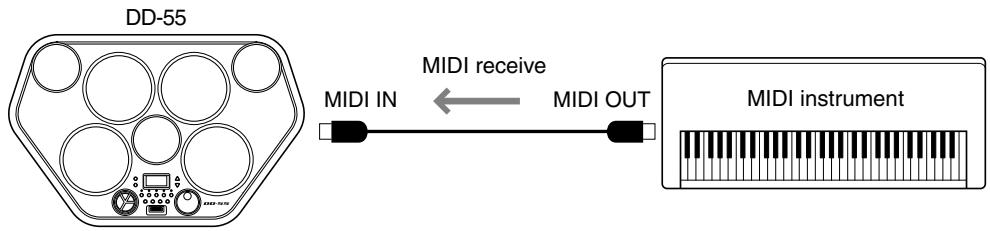
- You can play the voices and sounds of the DD-55 from another MIDI instrument
This setup allows you to control the DD-55 from a MIDI keyboard controller — especially one not having a tone generator. Connect the MIDI IN terminal on the DD-55 to the MIDI OUT terminal on the other instrument.
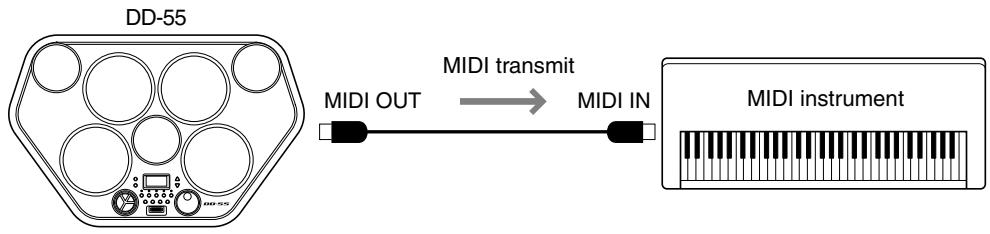
- You can play the voices and sounds of another MIDI instrument from the DD-55
In this setup, you can play another MIDI instrument or tone generator from the DD-55. For example, this lets you mix two different sounds together when you play a pad on the DD-55. Connect the MIDI OUT terminal on the DD-55 to the MIDI IN terminal on the other instrument.
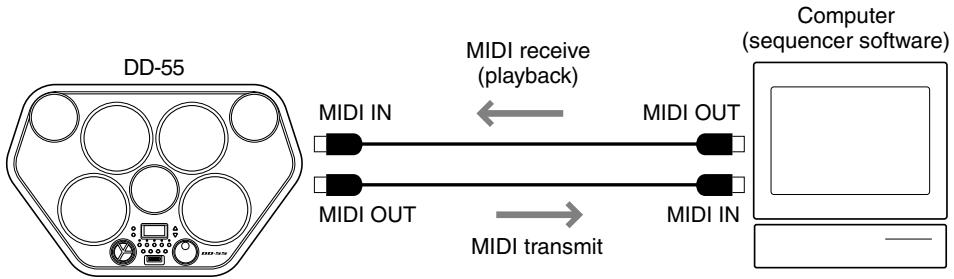
- You can record your performance on the DD-55 to a connected sequencer or computer
Here, you can record all your playing, along with the DD-55's auto accompaniment, to a connected computer or sequencer. Naturally, you can use the sophisticated functions of the computer or sequencer to edit your data, and play it back using the sounds of the DD-55. The DD-55 also lets you play back up to 16 different channels — letting you create complex recordings and compositions.
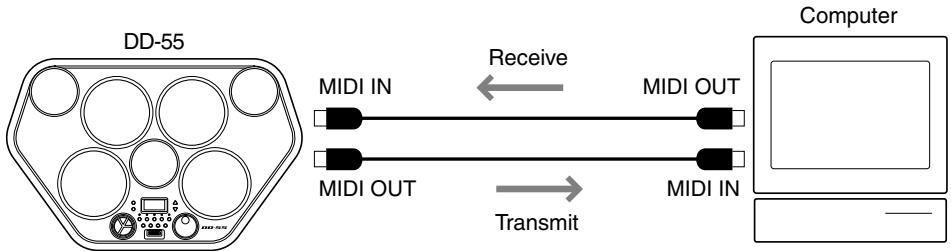
To set up, connect the MIDI OUT terminal on the DD-55 to the MIDI IN terminal on the sequencer or computer (allowing you to record). Also, connect the MIDI IN terminal on the DD-55 to the MIDI OUT terminal on the sequencer or computer (allowing playback). You may need to set Local On/Off (page 26) to off, for best results.
Connecting to a Computer
You can enjoy using personal computer music software when you connect your DD-55's MIDI terminals to a personal computer. Make sure to use only special MIDI cables.
- Connect the MIDI terminals of the DD-55 to the MIDI terminals of the MIDI interface installed to your computer.
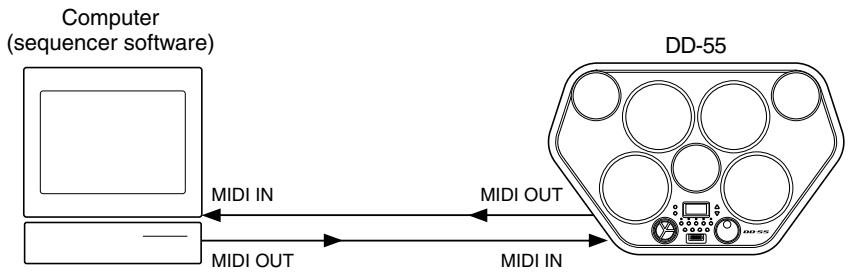
- When using a MIDI interface with a Macintosh series computer, connect the RS-422 terminal of the computer (modem or printer terminal) to the MIDI interface, as shown in the diagram below.
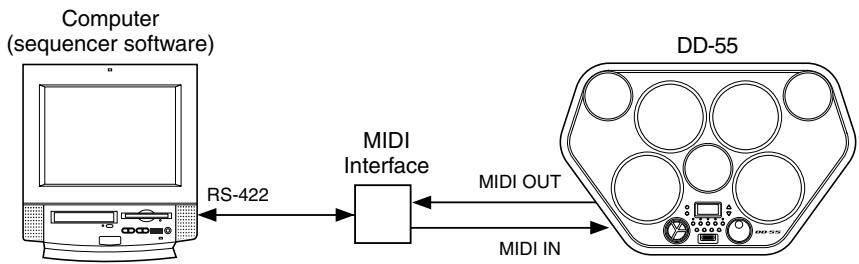
- When connecting to a computer with a USB interface, use the Yamaha UX16 USB/MIDI Interface. Connect the UX16 and the computer with a standard USB cable, then make the proper MIDI connections between the DD-55 and the UX16.

NOTE
- If you use the Yamaha UX16, be sure to install the supplied driver on your computer.
Enter/Exit the MIDI/Utility Mode
Simultaneously press the [DEMO] and [START/STOP] button to enter the MIDI/Utility mode. An "m" appears in the display indicating the MIDI/Utility mode.
NOTE Pads and pedals do not sound while in the MIDI/Utility mode.
To exit the MIDI mode, once again simultaneously press the [DEMO] and [START/STOP] buttons. The DD-55 exits from the MIDI mode and returns to the normal play mode.
Setting the Clock
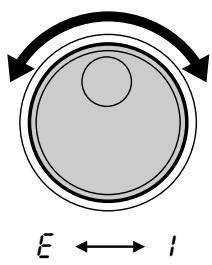
When the DD-55 is connected via MIDI to another MIDI device — such as a sequencer or rhythm machine — you can have the two devices play back in perfect synchronization. To do this properly, you have to make sure that the time based functions (song playback, etc.) on each device are properly set, as to whether they are controlled by internal clock or external clock. When the internal clock ( i ) is enabled on the DD-55, timing will be controlled by the DD-55's internal clock. When external clock ( ) selected, the DD-55 will synchronize to the external sequencer's or computer's clock.
(Internal) The DD-55's clock is used as the timing clock.
E (External) The external clock is used as the timing clock (If the clock is set to external without being connected to another MIDI device, the DD-55's Song Play or Demo functions will not operate.)
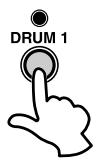
1 Display the clock setting.
After entering the MIDI/Utility mode, press the [DRUM 1] button to see the current setting for the MIDI clock.
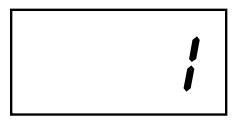
2 Set the Clock to External/Internal.
To set the clock to “ l ” (external), turn the DIAL to the right (clockwise). To set the clock to “ ” (internal), turn the DIAL to the left (counter-clockwise).
3 Exit the MIDI/Utility mode.
After the clock is set, exit the MIDI/Utility mode.
The default MIDI clock setting is "i" (internal).
Local ON/OFF
The Local ON/OFF setting determines whether or not the internal voices respond to the notes you play on the DD-55's pads. Setting this to OFF disconnects the DD-55's pads from the voices. However, data produced by the DD-55 is transmitted via the MIDI OUT terminal.
(Local ON) .........The internal voices will be played and controlled by the DD-55 and its pads. Data received via MIDI will also be played by the DD-55.
口 F F (Local OFF).....Striking the pads will not produce any sound from the voices. However, the data will be transmitted through the MIDI OUT. However, data received via MIDI will be played by the DD-55.

- Normally, this should be set to "0" — since you'll want to hear the sound of the DD-55 as you play it. However, for external sequencer applications, you may need to set this to "0FF" to avoid getting "double" notes, in which the sounds of the DD-55 are played twice — once from the pads and once again by the pad data routed through the sequencer.
1 Display the Local On/Off Setting.
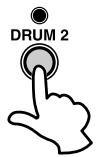
After entering the MIDI/Utility mode, press the [DRUM 2] button and the current Local ON /OFF setting will appear in the display.
2 Set the Local On/Off.
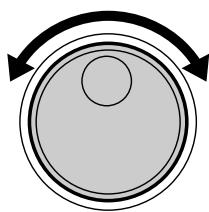
To set to “ n ” (Local ON), turn the DIAL to the right (clockwise), to set to “ F F ” (Local OFF), turn the DIAL to the left (counter-clockwise).
3 Exit the MIDI/Utility mode.
After setting the Local ON/OFF, exit the MIDI/Utility mode.

- Regardless of the Local ON/OFF setting, the DD-55's performance data (including demo song data) is always sent to the MIDI OUT terminals for transmission to external MIDI devices.
- The default Local ON/OFF setting is ON (Local ON).
Setting the MIDI Transmit Channel
Each of the pads/pedals (a total of 9) can be assigned to transmit on any of the 16 MIDI channels, or turned off (indicated as “ F F ” in the display). Also, song transmit channels are as shown below:
| Transmit Channel | Default | ||
| Pad/Pedal | 1 - 16 | 10 | |
| Drum (Song) | 10 | (Fixed) | 10 |
| Backing (Song) | 11 - 16 | (Fixed) | 11 - 16 |
| Pad/Pedal (Custom ) | 10 | (Fixed) | 10 |


1 Display the MIDI Transmit Channel Number.
After entering the MIDI/Utility mode, press the [PAD] button and the current Pad 1 transmit channel will be displayed.
2 Select a pad to be assigned a MIDI Transmit Number.
To select the pad you want to assign a MIDI transmit channel, strike the appropriate pad. That pad's currently selected MIDI transmit channel will appear in the display.
3 Set the MIDI Transmit Channel Number.
Turn the DIAL to the right (clockwise) to increase the MIDI transmit channel value, or turn it to the left (counter-clockwise) to decrease the value.

- You can also select the MIDI transmit channel by striking the pad repeatedly. Every time the pad is struck the MIDI transmit channel number will increase by 1.
4 Exit the MIDI/Utility mode.
After you've assigned each pad to a MIDI transmit channel as desired, exit the MIDI/Utility mode.

- For further information on what type of data is transmitted via MIDI, see the "MIDI Implementation Chart" (page 41).
Setting the MIDI Note Number
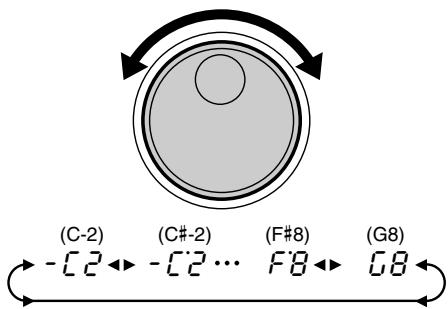
Each pad and pedal (9 total) can be assigned a specific MIDI note number anywhere from C-2 to G8.

1 Display the MIDI Note Number.
After entering the MIDI/Utility mode, press the [KIT] button, the MIDI note number currently assigned to Pad 1 will appear in the display.
2 Select the pad to be assigned a MIDI Note Number.
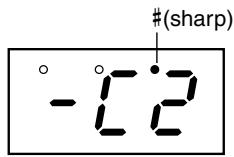
Strike any pad to see the currently assigned MIDI note number for the pad in the display.
Sharp notes are indicated by a beat lamp on the right side of the display.
3 Assign a MIDI Note Number.
To select the desired MIDI note number, turn the DIAL to the right (clockwise) and the MIDI note numbers will increase. Turn the DIAL to the left (counter-clockwise) and MIDI note numbers will decrease.

- You can also select the MIDI note number by striking the pad repeatedly. Every time the pad is struck, the value will increase by semitone steps.
4 Exit the MIDI/Utility mode.
After you've assigned each pad to a MIDI note number as desired, exit the MIDI/Utility mode.

- For information on transmit notes and voices, refer to the DD-55 "Drum Map" on page 38.
- When the Pad Assign or Kit Assign is set, the MIDI Note Number will be applied to the preset value. If the Auto Kit Select is set to ON and another Song is selected, the MIDI Note Number will be applied to the preset value.
- Auto Kit Select is automatically turned off when a MIDI Note Number is changed.
Saving and Loading Song Data
The DD-55 lets you save and load song data to/from a connected computer. Once the song is loaded, you can play or practice them in the same way as with the preset songs.
To transfer song data between the DD-55 and the connected computer, you must first install the special Song Filer software to the computer.
DD-55 song data that can be loaded and saved:
- Number of songs: 1 song (song number "CU")
Available memory: 100 Kbytes
Data format: SMF Format 0
■ Installing Song Filer
You can download the Song Filer software from the following Yamaha PK CLUB website. Make sure that your computer has an Internet connection.
Yamaha PK CLUB (Portable Keyboard Home Page)
http://www.yamahaPKclub.com/
System requirements for Song Filer
[Windows]
OS: Windows 95/98/Me/2000/XP
CPU: Pentium/100MHz or faster
Available Memory: 8MB or more
Free space in Hard Disk: 2MB or more
Display: 800 x 600, 256 colors or more
[Macintosh]
OS: Mac OS 7.5 - 9.2.2 (OS X is not supported)
CPU: Power PC or higher
Available Memory: 8MB or more
Free space in Hard Disk: 2MB or more
Display: 800 x 600, 256 colors or more
![YAMAHA DD-55-DD-55C - [Macintosh] - 1](/content/2025/01/114713/images/e587334d918c4b3d0f0d43e670f4f0ed69464c1c46c3781896329465e18e35c3.jpg)
- Visit the Yamaha PK CLUB website for more information on the latest version of Song Filer and how to install it.
■ Song Filer Functions
After you install Song Filer on the computer and connect the DD-55 to the computer, you can use the two functions described below.
Refer to page 24 for information on connecting the DD-55 to a computer.
For more information on using Song Filer, refer to the PDF manual included with the Song Filer application download.
- Managing Data on DD-55
The DD-55's custom song data can be deleted by using your computer. You should delete this custom song data before sending data from the computer to the DD-55.
Transmitting and Receiving Files
You can transfer a song file between the DD-55 and your computer.
Initialize
The DD-55's Custom Song, Custom Kit, and Panel Setting data are backed up so long as power is supplied to the DD-55 by means of batteries or an AC adaptor. Initialize is the term which refers to this data being restored to its original factory settings. To initialize the DD-55, follow the procedure below.
CAUTION
- Keep in mind that initializing the data erases any and all of the original data you saved to the instrument.
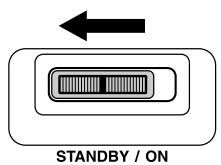
① Turn the power off. (Move the [STANDBY/ON] switch to the STANDBY position.)
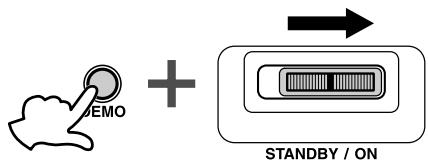
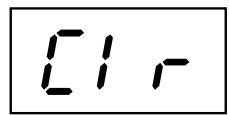
(2) While holding down the [DEMO] button, turn the power on again. (Move the [STANDBY/ON] switch to the ON position.) The DD-55 will be initialized to its factory settings. “ r ” will appear in the display when the initialization process is complete.
The following data will remain in memory, as long as batteries are installed or an AC adaptor is connected, even if the power is turned off.
- Custom Song
- Custom Kit
- Auto Kit Selection
- MIDI Transmit Channel for the PAD
- MIDI Transmit Note for the PAD
- Pad Sensitivity
Troubleshooting
In many cases, problems or malfunctions that occur during use can be remedied easily. Please check the following list before deciding that your DD-55 is damaged.
If the suggested remedy is ineffective, take the DD-55 to an authorized Yamaha dealer for proper diagnosis and repair. Do not attempt to repair this digital instrument by yourself as serious damage may occur.
| Problem | Cause/Solution |
| A buzz or click occurs momentarily when the DD-55 is turned ON or OFF | This is a normal power surge noise that occurs when the POWER switch is operated. |
| The LED display is completely dark. When the pads are struck, the display is dark and returns to “000”. | The batteries are low and should be replaced with a complete set of six new batteries immediately. Ideally, an optional AC adaptor PA-5D or PA-5C should be used to power the DD-55 (see page 5). |
| The custom pad voice assignments have disappeared or defaulted. | |
| No sound comes from the speakers. | ·The volume is set too low. Adjust the volume (see page 8). ·A plug is inserted into the PHONES/OUTPUT jack and should be taken out (see page 7). ·The LOCAL ON/OFF is set to OFF. Set the LOCAL ON/OFF to ON (see page 26). ·You are in the MIDI/Utility mode. Exit the MIDI/Utility mode (see page 25). |
| Striking two pads simultaneously results in one of the pads not sounding. | Refer to “DD-55 Sound Triggering” to resolve the problem (see page 13). |
| Striking a pad results in other pads also sounding, though they were not struck. | |
| The selected voice does not sound when the pad is struck. | The desired voice has not been assigned to the pad. Use the PAD ASSIGN function to program the desired voice to the appropriate pad (see page 11). |
| The song or Demo does not start playback. | The MIDI clock has been set to “E” (external). Change the MIDI clock setting to “I” (internal) (see page 25). |
| “Ctrl” appears in the display when the POWER switch is turned ON, and backed up data has been erased. | Backed up data is initialized if batteries are not installed or AC adaptor is disconnected while the power is turned off (see page 31). |
Drum Voice List
Panel Voice List
| Voice No. | Voice Name |
| 000 | Bass Drum Soft |
| 001 | Bass Drum Hard |
| 002 | Bass Drum |
| 003 | Bass Drum Soft |
| 004 | Bass Drum Hard |
| 005 | Bass Drum |
| 006 | Bass Drum 2 |
| 007 | Room Bass Drum |
| 008 | Rock Bass Drum Soft |
| 009 | Rock Bass Drum Hard |
| 010 | Rock Bass Drum |
| 011 | Elec. Bass Drum Hard |
| 012 | Elec. Bass Drum |
| 013 | Dance Bass Drum Soft |
| 014 | Dance Bass Drum Hard |
| 015 | Dance Bass Drum |
| 016 | Jazz Bass Drum Soft |
| 017 | Jazz Bass Drum Hard |
| 018 | Jazz Bass Drum |
| 019 | Snare H Soft |
| 020 | Snare M |
| 021 | Snare H Hard |
| 022 | Snare H Soft |
| 023 | Snare M |
| 024 | Snare H Hard |
| 025 | Snare H Soft 2 |
| 026 | Snare M 2 |
| 027 | Snare H Hard 2 |
| 028 | Room Snare H Soft |
| 029 | Room Snare M |
| 030 | Room Snare H Hard |
| 031 | Rock Snare H Soft |
| 032 | Rock Snare M |
| 033 | Rock Snare H Hard |
| 034 | Snare L |
| 035 | Elec. Snare M |
| 036 | Elec. Snare H |
| 037 | Dance Snare Snappy |
| Voice No. | Voice Name |
| 038 | Dance Snare M |
| 039 | Dance Snare H Hard |
| 040 | Jazz Snare H Soft |
| 041 | Jazz Snare M |
| 042 | Jazz Snare H Hard |
| 043 | Brush Tap |
| 044 | Brush Slap |
| 045 | Brush Tap |
| 046 | Brush Slap |
| 047 | Side Sticks |
| 048 | Side Sticks |
| 049 | Side Sticks 2 |
| 050 | Room Side Sticks |
| 051 | Dance Side Sticks |
| 052 | Jazz Side Sticks |
| 053 | Open Rim Shot |
| 054 | Open Rim Shot |
| 055 | Open Rim Shot 2 |
| 056 | Room Open Rim Shot |
| 057 | Dance Open Rim Shot |
| 058 | Jazz Open Rim Shot |
| 059 | Sticks |
| 060 | High Tom |
| 061 | Mid Tom H |
| 062 | Mid Tom L |
| 063 | Low Tom |
| 064 | Floor Tom H |
| 065 | Floor Tom L |
| 066 | High Tom |
| 067 | Mid Tom H |
| 068 | Mid Tom L |
| 069 | Low Tom |
| 070 | Floor Tom H |
| 071 | Floor Tom L |
| 072 | Room High Tom |
| 073 | Room Mid Tom H |
| 074 | Room Mid Tom L |
| 075 | Room Low Tom |
| Voice No. | Voice Name |
| 076 | Room Floor Tom H |
| 077 | Room Floor Tom L |
| 078 | Rock High Tom |
| 079 | Rock Mid Tom H |
| 080 | Rock Mid Tom L |
| 081 | Rock Low Tom |
| 082 | Rock Floor Tom H |
| 083 | Rock Floor Tom L |
| 084 | Elec. High Tom |
| 085 | Elec. Mid Tom H |
| 086 | Elec. Mid Tom L |
| 087 | Elec. Low Tom |
| 088 | Elec. Floor Tom H |
| 089 | Elec. Floor Tom L |
| 090 | Dance High Tom |
| 091 | Dance Mid Tom H |
| 092 | Dance Mid Tom L |
| 093 | Dance Low Tom |
| 094 | Dance Floor Tom H |
| 095 | Dance Floor Tom L |
| 096 | Jazz High Tom |
| 097 | Jazz Mid Tom H |
| 098 | Jazz Mid Tom L |
| 099 | Jazz Low Tom |
| 100 | Jazz Floor Tom H |
| 101 | Jazz Floor Tom L |
| 102 | Hi-Hat Closed/Open * |
| 103 | Hi-Hat Open |
| 104 | Hi-Hat Closed/Open * |
| 105 | Hi-Hat Open |
| 106 | Crash Cymbal 1 |
| 107 | Crash Cymbal 2 |
| 108 | Crash Cymbal 1 |
| 109 | Crash Cymbal 2 |
| 110 | Dance Cymbal |
| 111 | Ride Cymbal 1 |
| 112 | Ride Cymbal 2 |
| 113 | Ride Cymbal 1 |
-
By assigning Closed and Open Hi-Hat voices to both the Pad and Pedal, those voices can be controlled with the foot pedal as follows:
-
Strike the pad while pressing the Foot Pedal, the "Closed" Hi-Hat voice will sound.
- Strike the pad without pressing the Foot Pedal, the "Open" Hi-Hat voice will sound.
- Press the Foot Pedal without striking the pad, the Hi-Hat "Pedal" voice will sound.
- If these voices have been assigned to more than one pad, only the left-most pad can be used with the Pedal function (Closed/Open).
| Voice No. | Voice Name |
| 114 | Ride Cymbal 2 |
| 115 | Ride Cymbal Cup |
| 116 | Ride Cymbal Cup |
| 117 | Chinese Cymbal |
| 118 | Chinese Cymbal |
| 119 | Splash Cymbal |
| 120 | Splash Cymbal |
| 121 | Hand Clap |
| 122 | Finger Snap |
| 123 | Tambourine |
| 124 | Tambourine |
| 125 | Cowbell |
| 126 | Cowbell |
| 127 | Dance Cowbell |
| 128 | Jazz Cowbell |
| 129 | Conga H Close |
| 130 | Conga H Open |
| 131 | Conga L |
| 132 | Conga H Close |
| 133 | Conga H Open |
| 134 | Conga L |
| 135 | Dance Conga H Mute |
| 136 | Dance Conga H Open |
| 137 | Dance Conga L |
| 138 | Jazz Conga H Close |
| 139 | Jazz Conga H Open |
| 140 | Jazz Conga L |
| 141 | Bongo H |
| 142 | Bongo L |
| 143 | Bongo H |
| 144 | Bongo L |
| 145 | Timbale H |
| 146 | Timbale L |
| 147 | Timbale H |
| 148 | Timbale L |
| 149 | Agogo H |
| 150 | Agogo L |
| 151 | Cabasa |
| 152 | Cabasa |
| Voice No. | Voice Name |
| 153 | Maracas |
| 154 | Maracas |
| 155 | Shaker |
| 156 | Shaker |
| 157 | Claves |
| 158 | Triangle Mute |
| 159 | Triangle Open |
| 160 | Guiro Short |
| 161 | Guiro Short |
| 162 | Guiro Long |
| 163 | Cuica Mute |
| 164 | Cuica Open |
| 165 | Castanet |
| 166 | Jazz Castanet |
| 167 | Vibraslap |
| 168 | Wood Block H |
| 169 | Wood Block L |
| 170 | Jingle Bell |
| 171 | Bell Tree |
| 172 | Pandiero Keto |
| 173 | Pandiero Solto |
| 174 | Pandiero Ponta |
| 175 | Pandiero Calcanhar |
| 176 | Tamborim Solto |
| 177 | Tamborim Ponta |
| 178 | Tamborim Nylon Volta |
| 179 | Conga Muff |
| 180 | Surdo Mute |
| 181 | Surdo Open |
| 182 | Hi Q |
| 183 | Hi Q Low |
| 184 | Whip Slap |
| 185 | Scratch Push |
| 186 | Scratch Pull |
| 187 | Click Noise |
| 188 | Metronome Click |
| 189 | Metronome Bell |
| 190 | Seq Click L |
| 191 | Seq Click H |
| Voice Number | Phrase Name |
| 192 | Simple Rock |
| 193 | Pop Rock |
| 194 | Rock'n' Roll |
| 195 | Groove Rock |
| 196 | Hard Rock |
| 197 | Contemporary R&B |
| 198 | Hard Suffle |
| 199 | Blues Shuffle |
| 200 | A.O.R |
| 201 | Soul |
| 202 | Club Mix |
| 203 | House |
| 204 | Jazz Funk |
| 205 | Ballad |
| 206 | R & B |
| 207 | Motor Town |
| 208 | Swing Jazz |
| 209 | Urban Funk |
| 210 | Fusion |
| 211 | Fusion Samba |
NOTE:
- Phrase data cannot be transmitted.
- The pan data for each voice is fixed and cannot be changed, regardless of the pad assignments. For example, if a voice containing a "left" pan setting is assigned to a right pad, the actual sound will come from the left.
Song List
| Song No. | Song Name | Diffi-culty |
| Demo | ||
| 00 | Technical Funk | — |
| 01 | Heavy Metal | |
| 02 | Hyper Dance Mix | |
| 03 | Latin Fusion | |
| 04 | Straight Ahead | |
| Pattern | ||
| 05 | Simple Rock | Easy |
| 06 | Pop Rock | |
| 07 | R&R 1 | |
| 08 | R&R 2 | |
| 09 | Groove Rock | Nomal |
| 10 | Hard Rock 1 | Easy |
| 11 | Hard Rock 2 | Nomal |
| 12 | Contemporary R&B | |
| 13 | Hard Shuffle | |
| 14 | Blues Shuffle | |
| 15 | A.O.R 1 | |
| 16 | A.O.R 2 | |
| 17 | Soul 1 | |
| 18 | Soul 2 | |
| 19 | Club Mix | |
| 20 | House | |
| 21 | Jazz Funk 1 | Difficult |
| 22 | Jazz Funk 2 | |
| 23 | Ballad | Easy |
| 24 | R&B | Nomal |
| 25 | Motor Town | |
| 26 | Urban Funk | Difficult |
| 27 | Fusion 1 | |
| 28 | Fusion 2 | |
| 29 | Fusion Samba | |
| 30 | Swing Jazz 1 | Nomal |
| 31 | Swing Jazz 2 | |
| Fill in | ||
| 32 | Simple Rock | Easy |
| Song No. | Song Name | Diffi-culty |
| 33 | Pop Rock 1 | Easy |
| 34 | Pop Rock 2 | |
| 35 | R&R 1 | |
| 36 | R&R 2 | |
| 37 | Groove Rock 1 | Nomal |
| 38 | Groove Rock 2 | |
| 39 | Hard Rock 1 | Easy |
| 40 | Hard Rock 2 | Nomal |
| 41 | Contemporary R&B | |
| 42 | Hard Shuffle 1 | |
| 43 | Hard Shuffle 2 | |
| 44 | Blues Shuffle 1 | |
| 45 | Blues Shuffle 2 | |
| 46 | A.O.R 1 | |
| 47 | A.O.R 2 | |
| 48 | Soul 1 | |
| 49 | Soul 2 | |
| 50 | Club Mix 2 | |
| 51 | Club Mix 2 | |
| 52 | House 1 | |
| 53 | House 2 | |
| 54 | Jazz Funk 1 | Difficult |
| 55 | Jazz Funk 2 | |
| 56 | Ballad 1 | Easy |
| 57 | Ballad 2 | |
| 58 | R&B 1 | Difficult |
| 59 | R&B 2 | Nomal |
| 60 | Motor Town 1 | |
| 61 | Motor Town 2 | |
| 62 | Urban Funk 1 | Difficult |
| 63 | Urban Funk 2 | |
| 64 | Fusion 1 | |
| 65 | Fusion 2 | |
| 66 | Fusion Samba 1 | |
| 67 | Fusion Samba 2 | |
| 68 | Swing Jazz 1 | Nomal |
| Song No. | Song Name | Diffi-culty |
| 69 | Swing Jazz 2 | Nomal |
| Song | ||
| 70 | Simple Rock | Easy |
| 71 | Pop Rock | |
| 72 | R&R | |
| 73 | Groove Rock | Nomal |
| 74 | Hard Rock | |
| 75 | Contemporary R&B | Difficult |
| 76 | Hard Shuffle | Nomal |
| 77 | Blues Shuffle | |
| 78 | A.O.R | Difficult |
| 79 | Soul | Nomal |
| 80 | Club Mix | |
| 81 | House | |
| 82 | Jazz Funk | Difficult |
| 83 | Ballad | Easy |
| 84 | R&B | Difficult |
| 85 | Motor Town | Nomal |
| 86 | Urban Funk | Difficult |
| 87 | Fusion | |
| 88 | Fusion Samba | |
| 89 | Swing Jazz | Nomal |
| Latin | ||
| 90 | Mambo | Difficult |
| 91 | Rhumba Guaguanco | |
| 92 | Bossa-Nova | |
| 93 | Samba Batucada | Nomal |
| 94 | Cha-Cha | |
| 95 | Compatsa | Difficult |
| 96 | Songo | |
| 97 | Mozanbique | |
| 98 | Reggae | Nomal |
| 99 | Bemde(African 6/8) | Difficult |
Demo: These songs demonstrate the drum sounds and rhythms.
Pattern: These are special loop-repeating patterns for drum practice. A variety of basic patterns are included in this type.
Fill in: These are special fill patterns appropriate for use with many rhythms.
Song: These include drum and fill-in patterns, and are ideal for general practice purposes.
Latin: These are special loop-repeating Latin rhythm patterns.
Drum Kit List
| Categ- gory | Kit No. | Kit Name | Pad 1 | Pad 2 | Pad 3 | Pad 4 | ||||
| Demo | 00 | Stereo Kit 1 | 053 | Open Rim Shot | 061 | Mid Tom H | 063 | Low Tom | 065 | Floor Tom L |
| 01 | Heavy Metal Kit | 032 | Rock Snare M | 080 | Rock Mid Tom L | 081 | Rock Low Tom | 083 | Rock Floor Tom L | |
| 02 | Dance Kit | 057 | Dance Open Rim Shot | 147 | Timbale H | 148 | Timbale L | 015 | Dance Bass Drum | |
| 03 | Latin Kit | 130 | Conga H Open | 145 | Timbale H | 146 | Timbale L | 134 | Conga L | |
| 04 | Stereo Kit 2 | 053 | Open Rim Shot | 060 | High Tom | 062 | Mid Tom L | 064 | Floor Tom H | |
| Song | 05 | Standard Kit 1 | 024 | Snare H Hard | 067 | Mid Tom H | 068 | Mid Tom L | 070 | Floor Tom H |
| 06 | Rock Kit 1 | 033 | Rock Snare H Hard | 078 | Rock High Tom | 080 | Rock Mid Tom L | 081 | Rock Low Tom | |
| 07 | R & R Kit | 023 | Snare M | 067 | Mid Tom H | 069 | Low Tom | 071 | Floor Tom L | |
| 08 | Rock Kit 2 | 032 | Rock Snare M | 080 | Rock Mid Tom L | 081 | Rock Low Tom | 083 | Rock Floor Tom L | |
| 09 | Hard Rock Kit | 024 | Snare H Hard | 067 | Mid Tom H | 068 | Mid Tom L | 070 | Floor Tom H | |
| 10 | R & B Kit 1 | 032 | Rock Snare M | 048 | Side Sticks | 081 | Rock Low Tom | 083 | Rock Floor Tom L | |
| 11 | Shuffle Kit | 053 | Open Rim Shot | 061 | Mid Tom H | 063 | Low Tom | 065 | Floor Tom L | |
| 12 | Blues Kit | 053 | Open Rim Shot | 060 | High Tom | 062 | Mid Tom L | 064 | Floor Tom H | |
| 13 | A.O.R. Kit | 053 | Open Rim Shot | 061 | Mid Tom H | 063 | Low Tom | 064 | Floor Tom H | |
| 14 | Soul Kit | 033 | Rock Snare H Hard | 079 | Rock Mid Tom H | 081 | Rock Low Tom | 083 | Rock Floor Tom L | |
| 15 | Club Kit | 030 | Room Snare H Hard | 074 | Room Mid Tom L | 075 | Room Low Tom | 077 | Floor Floor Tom L | |
| 16 | House Kit | 057 | Dance Open Rim Shot | 092 | Dance Mid Tom L | 093 | Dance Low Tom | 094 | Dance Floor Tom H | |
| 17 | Jazz Funk Kit | 024 | Snare H Hard | 067 | Mid Tom H | 069 | Low Tom | 070 | Floor Tom H | |
| 18 | Ballad Kit | 030 | Room Snare H Hard | 072 | Room High Tom | 074 | Room Mid Tom L | 076 | Floor Floor Tom H | |
| 19 | R & B Kit 2 | 023 | Snare M | 068 | Mid Tom L | 069 | Low Tom | 070 | Floor Tom H | |
| 20 | R & B Kit 3 | 024 | Snare H Hard | 067 | Mid Tom H | 069 | Low Tom | 071 | Floor Tom L | |
| 21 | Funk Kit | 054 | Open Rim Shot | 081 | Rock Low Tom | 120 | Splash Cymbal | 083 | Rock Floor Tom L | |
| 22 | Fusion Kit 1 | 053 | Open Rim Shot | 061 | Mid Tom H | 063 | Low Tom | 064 | Floor Tom H | |
| 23 | Fusion Kit 2 | 024 | Snare H Hard | 066 | High Tom | 068 | Mid Tom L | 069 | Low Tom | |
| 24 | Jazz Kit | 055 | Open Rim Shot 2 | 096 | Jazz High Tom | 098 | Jazz Mid Tom L | 100 | Jazz Floor Tom H | |
| Latin | 25 | Mambo Kit | 048 | Side Sticks | 066 | High Tom | 068 | Mid Tom L | 069 | Low Tom |
| 26 | Rumba Kit | 048 | Side Sticks | 066 | High Tom | 069 | Low Tom | 070 | Floor Tom H | |
| 27 | Bossa Nova Kit | 048 | Side Sticks | 066 | High Tom | 068 | Mid Tom L | 069 | Low Tom | |
| 28 | Samba Kit | 176 | Tamborim Solto | 164 | Cuica Open | 163 | Cuica Mute | 178 | Tamborim Nylon Volta | |
| 29 | Cha Cha Cha Kit | 130 | Conga H Open | 141 | Bongo H | 142 | Bongo L | 131 | Conga L | |
| 30 | Comparaša Kit | 054 | Open Rim Shot | 066 | High Tom | 068 | Mid Tom L | 069 | Low Tom | |
| 31 | Songo Kit | 054 | Open Rim Shot | 066 | High Tom | 069 | Low Tom | 070 | Floor Tom H | |
| 32 | Conga Kit | 130 | Conga H Open | 141 | Bongo H | 142 | Bongo L | 131 | Conga L | |
| 33 | Reggae Kit | 048 | Side Sticks | 024 | Snare H Hard | 067 | Mid Tom H | 069 | Low Tom | |
| 34 | Bembe Kit | 024 | Snare H Hard | 067 | Mid Tom H | 069 | Low Tom | 070 | Floor Tom H | |
| Sequen-tial Kit | 35 | Sequence Kit 1 | ||||||||
| 36 | Sequence Kit 2 | |||||||||
| 37 | Sequence Kit 3 | |||||||||
| 38 | Sequence Kit 4 | |||||||||
| 39 | Sequence Kit 5 | |||||||||
| 40 | Sequence Kit 6 | |||||||||
| 41 | Sequence Kit 7 | |||||||||
| 42 | Sequence Kit 8 | |||||||||
| 43 | Sequence Kit 9 | |||||||||
| 44 | Sequence Kit 10 | |||||||||
| Small Pad 1 | Small Pad 2 | Small Pad 3 | Pedal 1 | Pedal 2 | ||||||
| 106 | Crash Cymbal 1 | 111 | Ride Cymbal 1 | 102 | Hi-Hat Closed/Open * | 001 | Bass Drum Hard | 102 | Hi-Hat Closed/Open * | |
| 108 | Crash Cymbal 1 | 116 | Ride Cymbal Cup | 105 | Hi-Hat Open | 010 | Rock Bass Drum | 010 | Rock Bass Drum | |
| 120 | Splash Cymbal | 182 | Hi Q | 104 | Hi-Hat Closed/Open * | 014 | Dance Bass Drum Hard | 104 | Hi-Hat Closed/Open * | |
| 106 | Crash Cymbal 1 | 125 | Cowbell | 129 | Conga H Close | 000 | Bass Drum Soft | 157 | Claves | |
| 106 | Crash Cymbal 1 | 111 | Ride Cymbal 1 | 102 | Hi-Hat Closed/Open * | 001 | Bass Drum Hard | 102 | Hi-Hat Closed/Open * | |
| 108 | Crash Cymbal 1 | 113 | Ride Cymbal 1 | 104 | Hi-Hat Closed/Open * | 003 | Bass Drum Soft | 104 | Hi-Hat Closed/Open * | |
| 108 | Crash Cymbal 1 | 113 | Ride Cymbal 1 | 104 | Hi-Hat Closed/Open * | 008 | Rock Bass Drum Soft | 104 | Hi-Hat Closed/Open * | |
| 108 | Crash Cymbal 1 | 113 | Ride Cymbal 1 | 104 | Hi-Hat Closed/Open * | 003 | Bass Drum Soft | 104 | Hi-Hat Closed/Open * | |
| 108 | Crash Cymbal 1 | 116 | Ride Cymbal Cup | 104 | Hi-Hat Closed/Open * | 010 | Rock Bass Drum | 104 | Hi-Hat Closed/Open * | |
| 108 | Crash Cymbal 1 | 116 | Ride Cymbal Cup | 104 | Hi-Hat Closed/Open * | 005 | Bass Drum | 104 | Hi-Hat Closed/Open * | |
| 108 | Crash Cymbal 1 | 113 | Ride Cymbal 1 | 104 | Hi-Hat Closed/Open * | 009 | Rock Bass Drum Hard | 104 | Hi-Hat Closed/Open * | |
| 106 | Crash Cymbal 1 | 115 | Ride Cymbal Cup | 102 | Hi-Hat Closed/Open * | 001 | Bass Drum Hard | 102 | Hi-Hat Closed/Open * | |
| 106 | Crash Cymbal 1 | 111 | Ride Cymbal 1 | 102 | Hi-Hat Closed/Open * | 001 | Bass Drum Hard | 102 | Hi-Hat Closed/Open * | |
| 106 | Crash Cymbal 1 | 111 | Ride Cymbal 1 | 102 | Hi-Hat Closed/Open * | 002 | Bass Drum | 102 | Hi-Hat Closed/Open * | |
| 108 | Crash Cymbal 1 | 121 | Hand Clap | 104 | Hi-Hat Closed/Open * | 008 | Rock Bass Drum Soft | 104 | Hi-Hat Closed/Open * | |
| 108 | Crash Cymbal 1 | 120 | Splash Cymbal | 104 | Hi-Hat Closed/Open * | 007 | Room Bass Drum | 104 | Hi-Hat Closed/Open * | |
| 013 | Dance Bass Drum Soft | 109 | Crash Cymbal 2 | 121 | Hand Clap | 015 | Dance Bass Drum | 104 | Hi-Hat Closed/Open * | |
| 108 | Crash Cymbal 1 | 116 | Ride Cymbal Cup | 104 | Hi-Hat Closed/Open * | 005 | Bass Drum | 104 | Hi-Hat Closed/Open * | |
| 108 | Crash Cymbal 1 | 113 | Ride Cymbal 1 | 104 | HI-Hat Closed/Open * | 003 | Bass Drum Soft | 104 | Hi-Hat Closed/Open * | |
| 108 | Crash Cymbal 1 | 114 | Ride Cymbal 2 | 104 | Hi-Hat Closed/Open * | 005 | Bass Drum | 104 | Hi-Hat Closed/Open * | |
| 108 | Crash Cymbal 1 | 113 | Ride Cymbal 1 | 104 | Hi-Hat Closed/Open * | 003 | Bass Drum Soft | 104 | Hi-Hat Closed/Open * | |
| 108 | Crash Cymbal 1 | 116 | Ride Cymbal Cup | 104 | Hi-hat Closed/Open * | 003 | Bass Drum Soft | 104 | Hi-Hat Closed/Open * | |
| 106 | Crash Cymbal 1 | 111 | Ride Cymbal 1 | 102 | Hi-Hat Closed/Open * | 002 | Bass Drum | 102 | Hi-Hat Closed/Open * | |
| 108 | Crash Cymbal 1 | 114 | Ride Cymbal 2 | 104 | Hi-Hat Closed/Open * | 003 | Bass Drum Soft | 104 | Hi-Hat Closed/Open * | |
| 108 | Crash Cymbal 1 | 114 | Ride Cymbal 2 | 052 | Jazz Side Sticks | 016 | Jazz Bass Drum Soft | 104 | Hi-Hat Closed/Open * | |
| 108 | Crash Cymbal 1 | 116 | Ride Cymbal Cup | 126 | Cowbell | 003 | Bass Drum Soft | 104 | Hi-Hat Closed/Open * | |
| 108 | Crash Cymbal 1 | 104 | Hi-Hat Closed/Open * | 157 | Claves | 003 | Bass Drum Soft | 104 | Hi-Hat Closed/Open * | |
| 120 | Splash Cymbal | 114 | Ride Cymbal 2 | 104 | Hi-Hat Closed/Open * | 003 | Bass Drum Soft | 104 | Hi-Hat Closed/Open * | |
| 149 | Agogo H | 150 | Agogo L | 177 | Tamborim Ponta | 180 | Surdo Mute | 181 | Surdo Open | |
| 162 | Guiro Long | 161 | Guiro Short | 129 | Conga H Close | 157 | Claves | 153 | Maracas | |
| 157 | Claves | 114 | Ride Cymbal 2 | 126 | Cowbell | 004 | Bass Drum Hard | 104 | Hi-Hat Closed/Open * | |
| 108 | Crash Cymbal 1 | 116 | Ride Cymbal Cup | 120 | Splash Cymbal | 005 | Bass Drum | 104 | Hi-Hat Closed/Open * | |
| 157 | Claves | 125 | Cowbell | 129 | Conga H Close | 161 | Guiro Short | 162 | Guiro Long | |
| 108 | Crash Cymbal 1 | 114 | Ride Cymbal 2 | 104 | Hi-Hat Closed/Open * | 004 | Bass Drum Hard | 104 | Hi-Hat Closed/Open * | |
| 108 | Crash Cymbal 1 | 116 | Ride Cymbal Cup | 048 | Side Sticks | 005 | Bass Drum | 104 | Hi-Hat Closed/Open * | |
Drum Map
- “<——” indicates that in the column on the immediate left.
Each percussion voice uses one note. - The MIDI Note # and Note are actually one octave lower than listed. For example, in "GM Standard 1", the "Seq Click H" (Note# 36/Note C1) corresponds to (Note# 24/Note C0).
(MSB = 127, LSB = 000)
| Program Change No. | 000 | 001 | 008 | 016 | 024 | 027 | 032 | 119 | ||
| Keyboard | MIDI | GM Standard 1 | Standard 2 | Room | Rock | Electronic Kit | Dance | Jazz | Stereo & Latin | |
| 25 | C# | 0 | 13 | C#-1 | Surdo Mute | <---- | <---- | <---- | <---- | <---- |
| 26 | D | 0 | 14 | D-1 | Surdo Open | <---- | <---- | <---- | <---- | <---- |
| 27 | D# | 0 | 15 | D#-1 | Hi Q | <---- | <---- | <---- | <---- | <---- |
| 28 | E | 0 | 16 | E-1 | Whip Slap | <---- | <---- | <---- | <---- | <---- |
| 29 | F | 0 | 17 | F-1 | Scratch Push | <---- | <---- | <---- | <---- | <---- |
| 30 | F# | 0 | 18 | F#-1 | Scratch Pull | <---- | <---- | <---- | <---- | <---- |
| 31 | G | 0 | 19 | G-1 | Finger Snap | <---- | <---- | <---- | <---- | <---- |
| 32 | G# | 0 | 20 | G#-1 | Click Noise | <---- | <---- | <---- | <---- | <---- |
| 33 | A | 0 | 21 | A-1 | Metronome Click | <---- | <---- | <---- | <---- | <---- |
| 34 | A# | 0 | 22 | A#-1 | Metronome Bell | <---- | <---- | <---- | <---- | <---- |
| 35 | B | 0 | 23 | B-1 | Seq Click L | <---- | <---- | <---- | <---- | <---- |
| 36 | C | 1 | 24 | C-0 | Seq Click H | <---- | <---- | <---- | <---- | <---- |
| 37 | C# | 1 | 25 | C#-0 | Brush Tap | <---- | <---- | <---- | <---- | Brush Tap |
| 38 | D | 1 | 26 | D-0 | Brush Swirl | <---- | <---- | <---- | <---- | Brush Swirl |
| 39 | D# | 1 | 27 | D#-0 | Brush Slap | <---- | <---- | <---- | <---- | Brush Slap |
| 40 | E | 1 | 28 | E-0 | Brush Tap Swirl | <---- | <---- | Reverse Cymbal | <---- | Brush Tap Swirl |
| 41 | F | 1 | 29 | F-0 | Snare Roll | <---- | <---- | <---- | <---- | Snare Roll |
| 42 | F# | 1 | 30 | F#-0 | Castanet | <---- | <---- | Hi Q Low | <---- | Jazz Castanet |
| 43 | G | 1 | 31 | G-0 | Snare H Soft | Snare H Soft 2 | Snare H Soft | Snare L | AnSD Snappy | Jazz Snare H Soft |
| 44 | G# | 1 | 32 | G#-0 | Sticks | <---- | <---- | <---- | <---- | <---- |
| 45 | A | 1 | 33 | A-0 | Bass Drum Soft | <---- | <---- | Rock Bass Drum Soft | <---- | Jazz Bass Drum Soft |
| 46 | A# | 1 | 34 | A#-0 | Open Rim Shot | Open Rim Shot 2 | Open Rim Shot | <---- | Dance Open Rim Shot | Jazz Open Rim Shot 2 |
| 47 | B | 1 | 35 | B-0 | Bass Drum Hard | <---- | <---- | Rock Bass Drum Hard | <---- | Hi-Hat Closed |
| 48 | C | 2 | 36 | C-1 | Bass Drum | Room Bass Drum | Room Bass Drum | Elec. Bass Drum Hard | Dance Bass Drum Hard | Jazz Bass Drum Hard |
| 49 | C# | 2 | 37 | C#-1 | Side Sticks | Side Sticks 2 | Side Sticks | <---- | Dance Side Sticks | Jazz Bass Drum Hard |
| 50 | D | 2 | 38 | D-1 | Snare M2 | Room Snare M | Rock Snare M | Elec. Snare Drum M | Dance Snare M | Jazz Snare M |
| 51 | D# | 2 | 39 | D#-1 | Hand Clap | <---- | <---- | <---- | <---- | <---- |
| 52 | E | 2 | 40 | E-1 | Snare H Hard | Snare H Hard 2 | Room Snare H Hard | Rock Snare H Hard | Dance Snare H Hard | Jazz Snare H Hard |
| 53 | F | 2 | 41 | F-1 | Floor Tom L | Room Floor Tom L | Rock Floor Tom L | Elec. Floor Tom L | Dance Floor Tom L | Floor Tom L |
| 54 | F# | 2 | 42 | F#-1 | Hi-Hat Closed | <---- | <---- | <---- | <---- | <---- |
| 55 | G | 2 | 43 | G-1 | Floor Tom H | <---- | Room Floor Tom H | Rock Floor Tom H | Dance Floor Tom H | Jazz Floor Tom H |
| 56 | G# | 2 | 44 | G#-1 | Hi-Hat Pedal | <---- | <---- | <---- | <---- | Hi-Hat Pedal |
| 57 | A | 2 | 45 | A-1 | Low Tom | <---- | Room Low Tom | Rock Low Tom | Dance Low Tom | Low Tom |
| 58 | A# | 2 | 46 | A#-1 | Hi-Hat Open | <---- | <---- | <---- | <---- | Hi-Hat Open |
| 59 | B | 2 | 47 | B-1 | Mid Tom L | <---- | Room Mid Tom L | Rock Mid Tom L | Dance Mid Tom L | Mid Tom L |
| 60 | C | 3 | 48 | C-2 | Mid Tom H | <---- | Room Mid Tom H | Rock Mid Tom H | Dance Mid Tom H | Mid Tom H |
| 61 | C# | 3 | 49 | C#-2 | Crash Cymbal 1 | <---- | <---- | <---- | Dance Cymbal | Crash Cymbal 1 |
| 62 | D | 3 | 50 | D-2 | High Tom | <---- | Room High Tom | Rock High Tom | Dance High Tom | High Tom |
| 63 | D# | 3 | 51 | D#-2 | Ride Cymbal 1 | <---- | <---- | <---- | <---- | Ride Cymbal 1 |
| 64 | E | 3 | 52 | E-2 | Chinese Cymbal | <---- | <---- | <---- | <---- | Chinese Cymbal |
| 65 | F | 3 | 53 | F-2 | Ride Cymbal Cup | <---- | <---- | <---- | <---- | Ride Cymbal Cup |
| 66 | F# | 3 | 54 | F#-2 | Tambourine | <---- | <---- | <---- | <---- | Tambourine |
| 67 | G | 3 | 55 | G-2 | Splash Cymbal | <---- | <---- | <---- | <---- | Splash Cymbal |
| 68 | G# | 3 | 56 | G#-2 | Cowbell | <---- | <---- | <---- | Dance Cowbell | Jazz Cowbell |
| 69 | A | 3 | 57 | A-2 | Crash Cymbal 2 | <---- | <---- | <---- | <---- | Crash Cymbal 2 |
| 70 | A# | 3 | 58 | A#-2 | Vibraslap | <---- | <---- | <---- | <---- | <---- |
| 71 | B | 3 | 59 | B-2 | Ride Cymbal 2 | <---- | <---- | <---- | <---- | Ride Cymbal 2 |
| 72 | C | 4 | 60 | C-3 | Bongo H | <---- | <---- | <---- | <---- | Bongo H |
| 73 | C# | 4 | 61 | C#-3 | Bongo L | <---- | <---- | <---- | <---- | Bongo L |
| 74 | D | 4 | 62 | D-3 | Conga H Mute | <---- | <---- | <---- | Dance Conga H Mute | Jazz Conga H Close |
| 75 | D# | 4 | 63 | D#-3 | Conga H Open | <---- | <---- | <---- | Dance Conga H Open | Jazz Conga H Open |
| 76 | E | 4 | 64 | E-3 | Conga L | <---- | <---- | <---- | Dance Conga L | Conga L |
| 77 | F | 4 | 65 | F-3 | Timbale H | <---- | <---- | <---- | <---- | Timbale H |
| 78 | F# | 4 | 66 | F#-3 | Timbale L | <---- | <---- | <---- | <---- | Timbale L |
| 79 | G | 4 | 67 | G-3 | Agogo H | <---- | <---- | <---- | <---- | <---- |
| 80 | G# | 4 | 68 | G#-3 | Agogo L | <---- | <---- | <---- | <---- | <---- |
| 81 | A | 4 | 69 | A-3 | Cabasa | <---- | <---- | <---- | <---- | Cabasa |
| 82 | A# | 4 | 70 | A#-3 | Maracas | <---- | <---- | <---- | <---- | Maracas |
| 83 | B | 4 | 71 | B-3 | Samba Whistle H | <---- | <---- | <---- | <---- | Samba Whistle H |
| 84 | C | 5 | 72 | C-4 | Samba Whistle L | <---- | <---- | <---- | <---- | Samba Whistle L |
| 85 | C# | 5 | 73 | C#-4 | Guiro Short | <---- | <---- | <---- | <---- | Guiro Short |
| 86 | D | 5 | 74 | D-4 | Guiro Long | <---- | <---- | <---- | <---- | <---- |
| 87 | D# | 5 | 75 | D#-4 | Claves | <---- | <---- | <---- | <---- | <---- |
| 88 | E | 5 | 76 | E-4 | Wood Block H | <---- | <---- | <---- | <---- | <---- |
| 89 | F | 5 | 77 | F-4 | Wood Block L | <---- | <---- | <---- | <---- | <---- |
| 90 | F# | 5 | 78 | F#-4 | Cuica Mute | <---- | <---- | <---- | <---- | <---- |
| 91 | G | 5 | 79 | G-4 | Cuica Open | <---- | <---- | <---- | <---- | <---- |
| 92 | G# | 5 | 80 | G#-4 | Triangle Mute | <---- | <---- | <---- | <---- | <---- |
| 93 | A | 5 | 81 | A-4 | Triangle Open | <---- | <---- | <---- | <---- | <---- |
| 94 | A# | 5 | 82 | A#-4 | Shaker | <---- | <---- | <---- | <---- | Shaker |
| 95 | B | 5 | 83 | B-4 | Jingle Bell | <---- | <---- | <---- | <---- | <---- |
| 96 | C | 6 | 84 | C-5 | Bell Tree | <---- | <---- | <---- | <---- | <---- |
| 97 | C# | 6 | 85 | C#-5 | Pandiero Koto | |||||
| 98 | D | 6 | 86 | D-5 | Pandiero Sotto | |||||
| 99 | D# | 6 | 87 | D#-5 | Pandiero Ponta | |||||
| 100 | E | 6 | 88 | E-5 | Pandiero Calcanhar | |||||
| 101 | F | 6 | 89 | F-5 | Tamborim Sotto | |||||
| 102 | F# | 6 | 90 | F#-5 | Tamborim Ponta | |||||
| 103 | G | 6 | 91 | G-5 | Tamborim Nylon Volta | |||||
| 104 | G# | 6 | 92 | G#-5 | Conga Muff | |||||
| Program Change No. | 120 | 121 | 122 | 123 | 124 | 125 | 126 | 127 | ||
| Keyboard | MIDI | Pad Standard 1 | Pad Standard 2 | Pad Room | Pad Rock | Pad Electronic | Pad Dance | Pad Jazz | Pad Stereo & Latin | |
| 25 | C# | 0 | 13 | C# -1 | <---- | <---- | <---- | <---- | <---- | <---- |
| 26 | D | 0 | 14 | D -1 | <---- | <---- | <---- | <---- | <---- | <---- |
| 27 | D# | 0 | 15 | D# -1 | <---- | <---- | <---- | <---- | <---- | <---- |
| 28 | E | 0 | 16 | E -1 | <---- | <---- | <---- | <---- | <---- | <---- |
| 29 | F | 0 | 17 | F -1 | <---- | <---- | <---- | <---- | <---- | <---- |
| 30 | F# | 0 | 18 | F# -1 | <---- | <---- | <---- | <---- | <---- | <---- |
| 31 | G | 0 | 19 | G -1 | <---- | <---- | <---- | <---- | <---- | <---- |
| 32 | G# | 0 | 20 | G# -1 | <---- | <---- | <---- | <---- | <---- | <---- |
| 33 | A | 0 | 21 | A -1 | <---- | <---- | <---- | <---- | <---- | <---- |
| 34 | A# | 0 | 22 | A# -1 | <---- | <---- | <---- | <---- | <---- | <---- |
| 35 | B | 0 | 23 | B -1 | <---- | <---- | <---- | <---- | <---- | <---- |
| 36 | C | 1 | 24 | C 0 | <---- | <---- | <---- | <---- | <---- | <---- |
| 37 | C# | 1 | 25 | C# 0 | Brush Tap | <---- | <---- | <---- | <---- | Brush Tap |
| 38 | D | 1 | 26 | D 0 | (Brush Swirl) | <---- | <---- | <---- | (Brush Swirl) | (Brush Swirl) |
| 39 | D# | 1 | 27 | D# 0 | Brush Slap | <---- | <---- | <---- | Brush Slap | Brush Slap |
| 40 | E | 1 | 28 | E 0 | (Brush Tap Swirl) | <---- | <---- | (Reverse Cymbal) | (Brush Tap Swirl) | (Brush Tap Swirl) |
| 41 | F | 1 | 29 | F 0 | (Snare Roll) | <---- | <---- | <---- | (Snare Roll) | (Snare Roll) |
| 42 | F# | 1 | 30 | F# 0 | <---- | <---- | <---- | Hi Q Low | Jazz Castanet | <---- |
| 43 | G | 1 | 31 | G 0 | Snare H Soft | Snare H Soft 2 | Room Snare H Soft | Rock Snare H | Jazz Snare H Soft | Snare H Soft |
| 44 | G# | 1 | 32 | G# 0 | <---- | <---- | <---- | <---- | <---- | <---- |
| 45 | A | 1 | 33 | A 0 | Bass Drum Soft | <---- | <---- | Rock Bass Drum Soft | Jazz Bass Drum Soft | Bass Drum Soft |
| 46 | A# | 1 | 34 | A# 0 | Open Rim Shot | Open Rim Shot 2 | Room Open Rim Shot | <---- | Open Rim Shot 2 | Open Rim Shot |
| 47 | B | 1 | 35 | B 0 | Bass Drum Hard | <---- | <---- | Rock Bass Drum Hard | Jazz Bass Drum Hard | Bass Drum Hard |
| 48 | C | 2 | 36 | C 1 | Bass Drum | Bass Drum 2 | Room Bass Drum | Rock Bass Drum | Jazz Bass Drum | Bass Drum |
| 49 | C# | 2 | 37 | C# 1 | Side Sticks | Side Sticks 2 | Room Side Sticks | <---- | Side Sticks | Side Sticks |
| 50 | D | 2 | 38 | D 1 | Snare M | Snare M 2 | Room Snare M | Rock Snare M | Jazz Snare M | Snare M |
| 51 | D# | 2 | 39 | D# 1 | <---- | <---- | <---- | <---- | <---- | <---- |
| 52 | E | 2 | 40 | E 1 | Snare H Hard | Snare H Hard 2 | Room Snare H Hard | Rock Snare H Hard | Jazz Snare H Hard | Snare H Hard |
| 53 | F | 2 | 41 | F 1 | Floor Tom L | <---- | Floor Tom L | Rock Floor Tom L | Jazz Floor Tom L | Floor Tom L |
| 54 | F# | 2 | 42 | F# 1 | Hi-Hat Closed | <---- | <---- | <---- | Hi-Hat Closed | Hi-Hat Closed |
| 55 | G | 2 | 43 | G 1 | Floor Tom H | <---- | Floor Tom H | Rock Floor Tom H | Jazz Floor Tom H | Floor Tom H |
| 56 | G# | 2 | 44 | G# 1 | Hi-Hat Pedal | <---- | <---- | <---- | Hi-Hat Pedal | Hi-Hat Pedal |
| 57 | A | 2 | 45 | A 1 | Low Tom | <---- | Room Low Tom | Rock Low Tom | Jazz Low Tom | Low Tom |
| 58 | A# | 2 | 46 | A# 1 | Hi-Hat Open | <---- | <---- | <---- | Hi-Hat Open | Hi-Hat Open |
| 59 | B | 2 | 47 | B 1 | Mid Tom L | <---- | Room Mid Tom L | Rock Mid Tom L | Jazz Mid Tom L | Mid Tom L |
| 60 | C | 3 | 48 | C 2 | Mid Tom H | <---- | Room Mid Tom H | Rock Mid Tom H | Jazz Mid Tom H | Mid Tom H |
| 61 | C# | 3 | 49 | C# 2 | Crash Cymbal 1 | <---- | <---- | <---- | Crash Cymbal 1 | Crash Cymbal 1 |
| 62 | D | 3 | 50 | D 2 | High Tom | <---- | Room High Tom | Rock High Tom | Jazz High Tom | High Tom |
| 63 | D# | 3 | 51 | D# 2 | Ride Cymbal 1 | <---- | <---- | <---- | <---- | Ride Cymbal 1 |
| 64 | E | 3 | 52 | E 2 | Chinese Cymbal | <---- | <---- | <---- | <---- | Chinese Cymbal |
| 65 | F | 3 | 53 | F 2 | Ride Cymbal Cup | <---- | <---- | <---- | <---- | Ride Cymbal Cup |
| 66 | F# | 3 | 54 | F# 2 | Tambourine | <---- | <---- | <---- | <---- | Tambourine |
| 67 | G | 3 | 55 | G 2 | Splash Cymbal | <---- | <---- | <---- | <---- | Splash Cymbal |
| 68 | G# | 3 | 56 | G# 2 | Cowbell | <---- | <---- | <---- | Jazz Cowbell | Cowbell |
| 69 | A | 3 | 57 | A 2 | Crash Cymbal 2 | <---- | <---- | <---- | <---- | Crash Cymbal 2 |
| 70 | A# | 3 | 58 | A# 2 | <---- | <---- | <---- | <---- | <---- | <---- |
| 71 | B | 3 | 59 | B 2 | Ride Cymbal 2 | <---- | <---- | <---- | <---- | Ride Cymbal 2 |
| 72 | C | 4 | 60 | C 3 | Bongo H | <---- | <---- | <---- | <---- | Bongo H |
| 73 | C# | 4 | 61 | C# 3 | Bongo L | <---- | <---- | <---- | <---- | Bongo L |
| 74 | D | 4 | 62 | D 3 | Conga H Close | <---- | <---- | <---- | Jazz Conga H Mute | Conga H Close |
| 75 | D# | 4 | 63 | D# 3 | Conga H Open | <---- | <---- | <---- | Jazz Conga H Open | Conga H Open |
| 76 | E | 4 | 64 | E 3 | Conga L | <---- | <---- | <---- | Jazz Conga L | Conga L |
| 77 | F | 4 | 65 | F 3 | Timbale H | <---- | <---- | <---- | <---- | Timbale H |
| 78 | F# | 4 | 66 | F# 3 | Timbale L | <---- | <---- | <---- | <---- | Timbale L |
| 79 | G | 4 | 67 | G 3 | <---- | <---- | <---- | <---- | <---- | <---- |
| 80 | G# | 4 | 68 | G# 3 | <---- | <---- | <---- | <---- | <---- | <---- |
| 81 | A | 4 | 69 | A 3 | Cabasa | <---- | <---- | <---- | <---- | Cabasa |
| 82 | A# | 4 | 70 | A# 3 | Maracas | <---- | <---- | <---- | <---- | Maracas |
| 83 | B | 4 | 71 | B 3 | (Samba Whistle H) | <---- | <---- | <---- | <---- | <---- |
| 84 | C | 5 | 72 | C 4 | (Samba Whistle L) | <---- | <---- | <---- | <---- | <---- |
| 85 | C# | 5 | 73 | C# 4 | Guiro Short | <---- | <---- | <---- | <---- | Guiro Short |
| 86 | D | 5 | 74 | D 4 | <---- | <---- | <---- | <---- | <---- | <---- |
| 87 | D# | 5 | 75 | D# 4 | <---- | <---- | <---- | <---- | <---- | <---- |
| 88 | E | 5 | 76 | E 4 | <---- | <---- | <---- | <---- | <---- | <---- |
| 89 | F | 5 | 77 | F 4 | <---- | <---- | <---- | <---- | <---- | <---- |
| 90 | F# | 5 | 78 | F# 4 | <---- | <---- | <---- | <---- | <---- | <---- |
| 91 | G | 5 | 79 | G 4 | <---- | <---- | <---- | <---- | <---- | <---- |
| 92 | G# | 5 | 80 | G# 4 | <---- | <---- | <---- | <---- | <---- | <---- |
| 93 | A | 5 | 81 | A 4 | <---- | <---- | <---- | <---- | <---- | <---- |
| 94 | A# | 5 | 82 | A# 4 | Shaker | <---- | <---- | <---- | <---- | Shaker |
| 95 | B | 5 | 83 | B 4 | <---- | <---- | <---- | <---- | <---- | <---- |
| 96 | C | 6 | 84 | C 5 | <---- | <---- | <---- | <---- | <---- | <---- |
| 97 | C# | 6 | 85 | C# 5 | Pandiero Koto | |||||
| 98 | D | 6 | 86 | D 5 | Pandiero Soltto | |||||
| 99 | D# | 6 | 87 | D# 5 | Pandiero Ponta | |||||
| 100 | E | 6 | 88 | E 5 | Pandiero Calcanhar | |||||
| 101 | F | 6 | 89 | F 5 | Tamborim Soltto | |||||
| 102 | F# | 6 | 90 | F# 5 | Tamborim Ponta | |||||
| 103 | G | 6 | 91 | G 5 | Tamborim Nylon Volta | |||||
| 104 | G# | 6 | 92 | G# 5 | Conga Muff | |||||
GM Voice List
(MSB=000, LSB=000)
| Program Change No. | Voice Name |
| 000 | Grand Piano |
| 001 | Bright Piano |
| 002 | ElecGrandPno |
| 003 | Honkytonk |
| 004 | El.Piano 1 |
| 005 | El.Piano 2 |
| 006 | Harpsichord |
| 007 | Clavi. |
| 008 | Celesta |
| 009 | Glockenspiel |
| 010 | Music Box |
| 011 | Vibraphone |
| 012 | Marimba |
| 013 | Xylophone |
| 014 | TubularBells |
| 015 | Dulcimer |
| 016 | DrawbarOrgan |
| 017 | Perc.Organ |
| 018 | Rock Organ |
| 019 | Church Organ |
| 020 | Reed Organ |
| 021 | Accordion |
| 022 | Harmonica |
| 023 | Tango Accord |
| 024 | Nylon Guitar |
| 025 | Steel Guitar |
| 026 | Jazz Guitar |
| 027 | Clean Guitar |
| 028 | Muted Guitar |
| 029 | Overdriven |
| 030 | Distortion |
| 031 | GtrHarmonics |
| 032 | AcousticBass |
| 033 | Finger Bass |
| 034 | Pick Bass |
| 035 | FretlessBass |
| 036 | Slap Bass 1 |
| 037 | Slap Bass 2 |
| 038 | Synth Bass 1 |
| 039 | Synth Bass 2 |
| 040 | Violin |
| 041 | Viola |
| 042 | Cello |
| 043 | Contrabass |
| 044 | Trem Strings |
| 045 | PizzicatoStr |
| 046 | Orch.Harp |
| 047 | Timpani |
| Program Change No. | Voice Name |
| 048 | Strings 1 |
| 049 | Strings 2 |
| 050 | SynStrings1 |
| 051 | SynStrings2 |
| 052 | Choir Aahs |
| 053 | Voice Oohs |
| 054 | Synth Voice |
| 055 | OrchestraHit |
| 056 | Trumpet |
| 057 | Trombone |
| 058 | Tuba |
| 059 | MutedTrumpet |
| 060 | French Horn |
| 061 | BrassSection |
| 062 | SynthBrass1 |
| 063 | SynthBrass2 |
| 064 | Soprano Sax |
| 065 | Alto Sax |
| 066 | Tenor Sax |
| 067 | Baritone Sax |
| 068 | Oboe |
| 069 | English Horn |
| 070 | Bassoon |
| 071 | Clarinet |
| 072 | Piccolo |
| 073 | Flute |
| 074 | Recorder |
| 075 | Pan Flute |
| 076 | Blown Bottle |
| 077 | Shakuhachi |
| 078 | Whistle |
| 079 | Ocarina |
| 080 | Square Lead |
| 081 | SawtoothLead |
| 082 | CalliopeLead |
| 083 | Chiff Lead |
| 084 | Charang Lead |
| 085 | Voice Lead |
| 086 | Fifths Lead |
| 087 | Bass & Lead |
| 088 | New Age Pad |
| 089 | Warm Pad |
| 090 | PolySynthPad |
| 091 | Choir Pad |
| 092 | Bowed Pad |
| 093 | Metallic Pad |
| 094 | Halo Pad |
| 095 | Sweep Pad |
| Program Change No. | Voice Name |
| 096 | Rain |
| 097 | Sound Track |
| 098 | Crystal |
| 099 | Atmosphere |
| 100 | Brightness |
| 101 | Goblins |
| 102 | Echoes |
| 103 | Sci-Fi |
| 104 | Sitar |
| 105 | Banjo |
| 106 | Shamisen |
| 107 | Koto |
| 108 | Kalimba |
| 109 | Bagpipe |
| 110 | Fiddle |
| 111 | Shanai |
| 112 | Tinkle Bell |
| 113 | Agogo |
| 114 | Steel Drums |
| 115 | Woodblock |
| 116 | Taiko Drum |
| 117 | Melodic Tom |
| 118 | Synth Drum |
| 119 | Rev.Cymbal |
| 120 | GtrFretNoise |
| 121 | Breath Noise |
| 122 | Seashore |
| 123 | Bird Tweet |
| 124 | TelephonRing |
| 125 | Helicopter |
| 126 | Applause |
| 127 | Gunshot |
YAMAHA [ DIGITAL PERCUSSION ]
Date:07-FEB-2001
Model DD-55 MIDI Implementation Chart
Version : 1.0
| Function... | Transmitted | Recognized | Remarks | |
| Basic Channel | Default | 10 - 16 | 1 - 16 | |
| Changed | 1 - 16 | 1 - 16 | ||
| Mode | Default | 3 | 3 | |
| Messages | x | x | ||
| Altered | ********** | x | ||
| Note Number : True voice | 0 - 127 | 13 - 96 | ||
| ********** | 13 - 96 | |||
| Velocity Note ON Note OFF | o 9nH, v=1-127 | o 9nH, v=1-127 | ||
| o 9nH, v=0 | o 9nH, v=0 | |||
| After Key's Touch Ch's | x | x | ||
| x | x | |||
| Pitch Bend | o *3 | o | ||
| Control Change | 0,32 | o | o | Bank Select Modulation Data Entry Volume Pan Expression Sustain Harmonic Content Release Time Brightness Portament Cntrl Reverb Depth Chorus Depth Variation Depth Data Inc,Dec RPN LSB,MSB |
| 1 | o *3 | o | ||
| 6,38 | o *3 | o | ||
| 7 | o | o | ||
| 10 | o *1 | o | ||
| 11 | o | o | ||
| 64 | o *3 | o | ||
| 71 | o *3 | o | ||
| 72 | o *3 | o | ||
| 73 | o *3 | o | ||
| 84 | o *3 | o | ||
| 91 | o | o | ||
| 93 | o *3 | o | ||
| 94 | o *3 | o | ||
| 96,97 | o *3 | o | ||
| 100,101 | o *3 | o | ||
| Prog Change : True # | o | o 0 - 127 | ||
| ********** | ||||
| System Exclusive | o *4 | o *4 | ||
| Common : Song Sel. : Tune | x | x | ||
| x | x | |||
| x | x | |||
| System : Clock Real Time: Commands | o | o | ||
| o | o *2 | |||
| Aux :All Sound OFF :Reset All Cntrls :Local ON/OFF :All Notes OFF Mes- :Active Sense sages:Reset | x | o(120) o(121) | ||
| x | x | |||
| x | x | |||
| x | o | |||
| x | x | |||
NOTE:
1 Value of Pan for each drum pad and foot pedal is not transmitted via MIDI.
2 The DD-55 can accept Start/Stop signals, received via MIDI, by setting the MIDI clock to "External".
3 This data is transmitted only when it is contained in the song data.
4 Exclusive
- This message automatically restores all default settings for the instrument, with the exception of MIDI Master Tuning.
- This message allows the volume of all channels to be changed simultaneously (Universal System Exclusive).
- The values of "mm" is used for MIDI Master Tuning. (Values for "ill" are ignored.)
- mm:Reverb Type MSB
II:Reverb Type LSB
Refer to the Effect Map (page 43) for details.
Refer to the Effect Map (page 43) for details.
- mm : DSP Type MSB
- II:DSP Type LSB
Refer to the Effect Map (page 43) for details.
- II: Dry Level
- 0m : Channel Number
*5 Recording to an external sequencer from the DD-55 and playing back the data may result in selection of a different Reverb effect or a different kit.
Sending MIDI data from the DD-55 to an external tone generator may result in an unexpected voice, particularly if the tone generator doesn't have the same kind of voice as the DD-55.
■ Effect map
- If the received value does not contain an effect type in the TYPE LSB, the LSB will be directed to TYPE 0.
- The numbers in parentheses in front of the Effect Type names correspond to the number indicated in the display.
- By using an external sequencer, which is capable of editing and transmitting the system exclusive messages and parameter changes, you can select the Reverb, Chorus and DSP effect types which are not accessible from the DD-55 panel itself.
REVERB
| TYPEMSB | TYPE LSB | ||||||||
| 00 | 01 | 02 | 08 | 16 | 17 | 18 | 19 | 20 | |
| 000 | No Effect | ||||||||
| 001 | (1)Hall1 | (2)Hall2 | |||||||
| 002 | Room | (3)Room1 | (4)Room2 | ||||||
| 003 | Stage | (5)Stage1 | (6)Stage2 | ||||||
| 004 | Plate | (7)Plate1 | (8)Plate2 | ||||||
| 005...127 | No Effect | ||||||||
CHORUS
| TYPE MSB | TYPE LSB | ||||||||
| 00 | 01 | 02 | 08 | 16 | 17 | 18 | 19 | 20 | |
| 000...064 | No Effect | ||||||||
| 065 | Chorus | Chorus2 | |||||||
| 066 | Celeste | Chorus1 | |||||||
| 067 | Flanger | Flanger1 | Flanger2 | ||||||
| 068...127 | No Effect | ||||||||
DSP
| TYPE MSB | TYPE LSB | ||||||||
| 00 | 01 | 02 | 08 | 16 | 17 | 18 | 19 | 20 | |
| 000 | No Effect | ||||||||
| 001 | (1)Hall1 | (2)Hall2 | |||||||
| 002 | Room | (3)Room1 | (4)Room2 | ||||||
| 003 | Stage | (5)Stage1 | (6)Stage2 | ||||||
| 004 | Plate | (7)Plate1 | (8)Plate2 | ||||||
| 005 | Delay L,C,R | (26)Delay L,C,R | |||||||
| 006 | (27)Delay L,R | ||||||||
| 007 | (28)Echo | ||||||||
| 008 | (29)Cross Delay | ||||||||
| 009 | (9)Early Reflection1 | (10)Early Reflection2 | |||||||
| 010 | (11)Gate Reverb | ||||||||
| 011 | (12)Reverse Gate | ||||||||
| 012...019 | No Effect | ||||||||
| 020 | (30)Karaoke | ||||||||
| 021...064 | No Effect | ||||||||
| 065 | Chorus | (14)Chorus2 | |||||||
| 066 | Celeste | (13)Chorus1 | |||||||
| 067 | Flanger | (15)Flanger1 | (16)Flanger2 | ||||||
| 068 | Symphonic | (17)Symphonic | |||||||
| 069 | Rotary Speaker | (19)Rotary Speaker1 | |||||||
| 070 | Tremolo | (21)Tremolo1 | |||||||
| 071 | Auto Pan | (24)Auto Pan | (20)Rotary Speaker2 | (22)Tremolo2 | (23)Guitar Tremolo | ||||
| 072 | (18)Phaser | ||||||||
| 073 | Distortion | ||||||||
| 074 | (33)Overdrive | ||||||||
| 075 | (34)Amp Simulation | (31)Distortion Hard | (32)Distortion Soft | ||||||
| 076 | (36)3Band EQ | (35)EQ Telephone | |||||||
| 077 | (37)2Band EQ | ||||||||
| 078 | Auto Wah | (25)Auto Wah | |||||||
| 079...127 | No Effect | ||||||||
Specifications
Drum Pads
7 pads (125mm x 4, 88mm x 3), Touch Sensitive
Maximum Polyphony
32
Drum Kits
45 Preset +1 Custom
Songs
100
Tracks
4 (DRUM 1/DRUM 2/DRUM 3/BACKING)
Custom Song
1 Song (approximately 20,000 notes)
Voices
Drum Voices 192 + GM Voices 128 + Drum Kits 8
Functions
Track ON/OFF, TAP START, BREAK, A-B REPEAT, DEMO
Panel Controls
[STANDBY/ON] switch, [PAD] button, [KIT] button, [SONG] button, [TEMPO] button, VOLUME [▲], [▼] buttons, [HAND PERC] button, TRACK (DRUM 1/DRUM 2/ DRUM 3/BACKING) button, [DEMO] button, [CLICK] button, [START/STOP] button, [A-B REPEAT] button, [BREAK/TAP] button, [REC] button, DIAL
LED Display
Song/Drum Kit/Tempo etc.
Auxiliary jacks
DC IN12 V, PHONES/OUTPUT, MIDI IN/OUT, PEDAL 1/2
Main Amplifier
5W + 5W
Speaker
8cmx2
Power Consumption
16 W
Power Supply
Adaptor : DC12V (Yamaha PA-5D or PA-5C sold separately)
Batteries: Six "C" size, R14P (LR14), or equivalent batteries (sold separately)
Dimensions (WxDxH)
558 x 355 x 174 mm (22" x 14" x 6" 7/8)
Weight
3.9kg (8 lbs. 10 oz)
Supplied Accessories
Drum Stick x 2, Foot Pedal 1 & 2, Owner's Manual
Optional Accessories
Headphones HPE-150
USB-MIDI Interface UX16
Limited Warranty
90 DAYS LABOR
1 YEAR PARTS
Yamaha Corporation of America, hereafter referred to as Yamaha, warrants to the original consumer of a product included in the categories listed below, that the product will be free of defects in materials and/or workmanship for the periods indicated. This warranty is applicable to all models included in the following series of products:
DD SERIES OF DIGITAL PERCUSSION
If during the first 90 days that immediately follows the purchase date, your new Yamaha product covered by this warranty is found to have a defect in material and/or workmanship, Yamaha and/or its authorized representative will repair such defect without charge for parts or labor.
If parts should be required after this 90 day period but within the one year period that immediately follows the purchase date, Yamaha will, subject to the terms of this warranty, supply these parts without charge. However, charges for labor, and/or any miscellaneous expenses incurred are the consumers responsibility. Yamaha reserves the right to utilize reconditioned parts in repairing these products and/or to use reconditioned units as warranty replacements.
THIS WARRANTY IS THE ONLY EXPRESS WARRANTY WHICH YAMAHA MAKES IN CONNECTION WITH THESE PRODUCTS. ANY IMPLIED WARRANTY APPLICABLE TO THE PRODUCT, INCLUDING THE WARRANTY OF MERCHANT ABILITIES LIMITED TO THE DURATION OF THE EXPRESS WARRANTY. YAMAHA EXCUSES AND SHALL NOT BE LIABLE IN ANY EVENT FOR INCIDENTAL OR CONSEQUENTIAL DAMAGES.
Some states do not allow limitations that relate to implied warranties and/or the exclusion of incidental or consequential damages. Therefore, these limitations and exclusions may not apply to you.
This warranty gives you specific legal rights. You may also have other rights which vary from state to state.
CONSUMERS RESPONSIBILITIES
If warranty service should be required, it is necessary that the consumer assume certain responsibilities:
- Contact the Customer Service Department of the retailer selling the product, or any retail outlet authorized by Yamaha to sell the product for assistance. You may also contact Yamaha directly at the address provided below.
- Deliver the unit to be serviced under warranty to: the retailer selling the product, an authorized service center, or to Yamaha with an explanation of the problem. Please be prepared to provide proof purchase date (sales receipt, credit card copy, etc.) when requesting service and/or parts under warranty.
- Shipping and/or insurance costs are the consumers responsibility.* Units shipped for service should be packed securely.
*Repaired units will be returned PREPAID if warranty service is required within the first 90 days.
IMPORTANT: Do NOT ship anything to ANY location without prior authorization. A Return Authorization (RA) will be issued that has a tracking number assigned that will expedite the servicing of your unit and provide a tracking system if needed.
- Your owners manual contains important safety and operating instructions. It is your responsibility to be aware of the contents of this manual and to follow all safety precautions.
EXCLUSIONS
This warranty does not apply to units whose trade name, trademark, and/or ID numbers have been altered, defaced, exchanged removed, or to failures and/or damages that may occur as a result of:
- Neglect, abuse, abnormal strain, modification or exposure to extremes in temperature or humidity.
- Improper repair or maintenance by any person who is not a service representative of a retail outlet authorized by Yamaha to sell the product, an authorized service center, or an authorized service representative of Yamaha.
- This warranty is applicable only to units sold by retailers authorized by Yamaha to sell these products in the U.S.A., the District of Columbia, and Puerto Rico. This warranty is not applicable in other possessions or territories of the U.S.A. or in any other country.
Please record the model and serial number of the product you have purchased in the spaces provided below.
Model Serial # Sales Slip #
Purchased from Date
(Retailer)
YAMAHA CORPORATION OF AMERICA
Electronic Service Division
6600 Orangethorpe Avenue
Buena Park, CA 90620
KEEP THIS DOCUMENT FOR YOUR RECORDS. DO NOT MAIL!
For details of products, please contact your nearest Yamaha representative or the authorized distributor listed below.
Yamaha Canada Music Ltd.
135 Milner Avenue, Scarborough, Ontario,
M1S 3R1, Canada
Tel: 416-298-1311
U.S.A.
Yamaha Corporation of America
6600 Orangethorpe Ave., Buena Park, Calif. 90620,
U.S.A.
Tel: 714-522-9011
CENTRAL & SOUTH AMERICA
MEXICO
Yamaha de Mexico S.A. de C.V.
Calz. Javier Rojo Gomez #1149,
Col. Guadalupe del Moral
C.P.09300, Mexico,D.F.,Mexico
Tel: 55-5804-0600
BRAZIL
PANAMA AND OTHER LATIN
AMERICAN COUNTRIES/
CARIBBEAN COUNTRIES
Yamaha Music Latin America, S.A.
Torre Banco General, Piso 7, Urbanizacion Marbella,
Sherbourne Drive, Tilbrook, Milton Keynes,
MK7 8BL, England
Tel: 01908-366700
IRELAND
Danfay Ltd.
61D, Sallynoggin Road, Dun Laoghaire, Co. Dublin
Tel: 01-2859177
GERMANY
Yamaha Music Central Europe GmbH
Siemensstraße 22-34, 25462 Rellingen, Germany
Tel: 04101-3030
147 Skiathou Street, 112-55 Athens, Greece
Tel: 01-228 2160
SWEDEN
Yamaha Scandinavia AB
J. A. Wettergrens Gata 1
Box 30053
S-400 43 Göteborg, Sweden
Tel: 031 89 34 00
DENMARK
YS Copenhagen Liaison Office
Generatorvej 8B
DK-2730 Herlev, Denmark
Tel: 44 92 49 00
FINLAND
F-Musiikki Oy
Kluuvikatu 6, P.O. Box 260,
SF-00101 Helsinki, Finland
Tel: 09 618511
NORWAY
N-1345 Østerås, Norway
Tel: 67 16 77 70
ICELAND
Skifan HF
Skeifan 17 P.O. Box 8120
IS-128 Reykjavik, Iceland
Tel: 525 5000
OTHER EUROPEAN COUNTRIES
Yamaha Music Central Europe GmbH
Siemensstraße 22-34, 25462 Rellingen, Germany
Tel: +49-4101-3030
AFRICA
Yamaha Corporation,
Asia-Pacific Music Marketing Group
Nakazawa-cho 10-1, Hamamatsu, Japan 430-8650
Tel: +81-53-460-2312
MIDDLE EAST
TURKEY/CYPRUS
Yamaha Music Central Europe GmbH
Siemensstraße 22-34, 25462 Rellingen, Germany
Tel: 04101-3030
OTHER COUNTRIES
Yamaha Music Gulf FZE
LB21-128 Jebel Ali Freezone
P.O.Box 17328, Dubai, U.A.E.
Tel: +971-4-881-5868
ASIA
THE PEOPLE'S REPUBLIC OF CHINA
Yamaha Music & Electronics (China) Co., Ltd.
25/F., United Plaza, 1468 Nanjing Road (West),
Jingan, Shanghai, China
Tel: 021-6247-2211
HONG KONG
Tom Lee Music Co., Ltd.
11/F., Silvercord Tower 1, 30 Canton Road,
Tsimshatsui, Kowloon, Hong Kong
Tel: 2737-7688
INDONESIA
PT. Yamaha Music Indonesia (Distributor)
PT. Nusantik
Gedung Yamaha Music Center, Jalan Jend. Gatot
SubROTO Kav. 4, Jakarta 12930, Indonesia
Tel: 21-520-2577
KOREA
Yamaha Music Korea Ltd.
Tong-Yang Securities Bldg. 16F 23-8 Yoido-dong,
Youngdungpo-ku, Seoul, Korea
Tel: 02-3770-0660
MALAYSIA
Yamaha Music Malaysia, Sdn., Bhd.
Lot 8, Jalan Perbandaran, 47301 Kelana Jaya,
Petaling Jaya, Selangor, Malaysia
Tel: 3-78030900
PHILIPPINES
Yupangco Music Corporation
339 Gil J. Puyat Avenue, P.O. Box 885 MCPO,
Makati, Metro Manila, Philippines
Tel: 819-7551
SINGAPORE
Yamaha Music Asia Pte., Ltd.
03-11 A-Z Building
140 Paya Lebor Road, Singapore 409015
Tel: 747-4374
TAIWAN
Yamaha KHS Music Co., Ltd.
3F, #6, Sec.2, Nan Jing E. Rd. Taipei.
Taiwan 104, R.O.C.
Tel:02-2511-8688
THAILAND
Siam Music Yamaha Co., Ltd.
891/1 Siam Motors Building, 15-16 floor
Rama 1 road, Wangmai, Pathumwan
Bangkok 10330, Thailand
Tel: 02-215-2626
OTHER ASIAN COUNTRIES
Yamaha Corporation,
Asia-Pacific Music Marketing Group
Nakazawa-cho 10-1, Hamamatsu, Japan 430-8650
Tel: +81-53-460-2317
OCEANIA
AUSTRALIA
Yamaha Music Australia Pty. Ltd.
Level 1, 99 Queensbridge Street, Southbank,
Victoria 3006, Australia
Tel: 3-9693-5111
NEW ZEALAND
Music Houses of N.Z. Ltd.
146/148 Captain Springs Road, Te Papapa,
Auckland, New Zealand
Tel: 9-634-0099
COUNTRIES AND TRUST
TERRITORIES IN PACIFIC OCEAN
Yamaha Corporation,
Asia-Pacific Music Marketing Group
Nakazawa-cho 10-1, Hamamatsu, Japan 430-8650
Tel: +81-53-460-2312

YAMAHA
Yamaha PK CLUB (Portable Keyboard Home Page, English only)
http://www.yamahaPKclub.com/
Yamaha Manual Library
http://www2.yamaha.co.jp/manual/english/
U.R.G., Pro Audio & Digital Musical Instrument Division, Yamaha Corporation
© 2004 Yamaha Corporation
- DD-55 DD-55c Digital Percussion Digital Percussion
- SPECIALMESSAGESECTION
- SPECIFICATIONS SUBJECT TO CHANGE:
- NOTICE:
- ENVIRONMENTAL ISSUES:
- Battery Notice:
- Warning:
- Disposal Notice:
- NAME PLATE LOCATION:
- Model
- Serial No.
- Purchase Date
- PLEASE KEEP THIS MANUAL
- FCC INFORMATION (U.S.A.)
- IMPORTANT NOTICE: DO NOT MODIFY THIS UNIT!
- OBSERVERA!
- WARNING
- Always follow the basic precautions listed below to avoid the possibility of serious injury or even death from electrical shock, short-circuiting, damages, fire or other hazards. These precautions include, but are not limited to, the following:
- CAUTION
- Always follow the basic precautions listed below to avoid the possibility of physical injury to you or others, or damage to the instrument or other property. These precautions include, but are not limited to, the following:
- DATA BACK-UP AND STORAGE
- Congratulations!
- Contents
- Setting Up 5
- Panel Controls 6
- Playing the Demo Song 8
- Play the Pads/Pedals 9
- Playing a Song 15
- Play along with a Song 18
- Recording a Song 20
- MIDI Functions 21
- Appendix 31
- Trademarks
- Supplied Accesories
- Power Requirements
- Using an AC Power Adaptor
- Using Batteries
- Front Panel
- Side Panel (Left)
- Side Panel (Right)
- Using a pair of headphones
- Using the Foot Pedals (1/2)
- Turn on the power.
- Start the Demo Song.
- - MASTER VOLUME
- Stop the Demo Song.
- SONG VOLUME
- Pad Names
- Hand Percussion ON/OFF
- Press the [HAND PERC] button.
- Assigning a Drum Kit to the Pads and Pedals
- Press the [KIT] button.
- Select a Drum Kit Number.
- Assigning a Voice to Individual Pads and Pedals ("U" Custom Kit)
- Select the pad or pedal to be assigned.
- Select a Voice Number.
- Play the Pads and Pedals.
- Reverb ON/OFF
- Display the Reverb On/Off Setting.
- Set the Reverb On/Off.
- Exit the Reverb On/Off Setting.
- Setting the Pad Sensitivity
- Display the current pad sensitivity setting.
- Set the sensitivity value.
- Exit the sensitivity setting.
- DD-55 Sound Triggering
- Adjusting the Pad Volume
- Press and hold the [PAD] button and strike the pad whose volume you want to adjust.
- Press and hold down the [PAD] button and simultaneously press VOLUME [▲] or [▼] to adjust the designated pad's volume.
- Click ON/OFF
- Select the Song and Play
- Press the [SONG] button.
- Select a Song Number.
- Press the [START/STOP] button.
- Tap Start
- Press the [BREAK/TAP] button.
- Play the Tap Start.
- Stop the Song Playback.
- Auto Kit Select ON/OFF Setting
- Setting the Auto Kit Select to ON/OFF.
- Select ON/OFF.
- Exit the Auto Kit Select.
- Adjusting the Tempo
- Press the [TEMPO] button.
- Set the Tempo.
- - About the Beat Indicator
- Track ON/OFF
- Break
- During song playback, press the [BREAK/TAP] button.
- Play the Break.
- Exit the Break mode.
- A-B Repeat
- Set the "A" (start repeat) point.
- Set the "B" (end repeat) point.
- Stop the A-B REPEAT.
- - Exit the Repeat
- Recording
- Prepare to Record.
- Start Recording.
- Stop Recording.
- Playback
- What's MIDI?
- - Acoustic guitar note production
- Digital instrument note production
- Channel Messages
- System Messages
- About MIDI terminals
- What You Can Do With MIDI
- Connecting to a Computer
- Enter/Exit the MIDI/Utility Mode
- Setting the Clock
- Display the clock setting.
- Set the Clock to External/Internal.
- Exit the MIDI/Utility mode.
- Local ON/OFF
- Display the Local On/Off Setting.
- Set the Local On/Off.
- Setting the MIDI Transmit Channel
- Display the MIDI Transmit Channel Number.
- Select a pad to be assigned a MIDI Transmit Number.
- Set the MIDI Transmit Channel Number.
- Exit the MIDI/Utility mode.
- Setting the MIDI Note Number
- Display the MIDI Note Number.
- Select the pad to be assigned a MIDI Note Number.
- Assign a MIDI Note Number.
- Saving and Loading Song Data
- ■ Installing Song Filer
- [Windows]
- [Macintosh]
- ■ Song Filer Functions
- - Managing Data on DD-55
- Transmitting and Receiving Files
- Initialize
- Troubleshooting
- Drum Voice List
- Panel Voice List
- NOTE:
- Drum Kit List
- Drum Map
- GM Voice List
- ■ Effect map
- Specifications
- Drum Pads
- Maximum Polyphony
- Drum Kits
- Songs
- Tracks
- Custom Song
- Voices
- Functions
- Panel Controls
- LED Display
- Auxiliary jacks
- Main Amplifier
- Speaker
- Power Consumption
- Power Supply
- Dimensions (WxDxH)
- Weight
- Supplied Accessories
- Optional Accessories
- Limited Warranty
- DD SERIES OF DIGITAL PERCUSSION
- CONSUMERS RESPONSIBILITIES
- EXCLUSIONS
- U.S.A.
- CENTRAL & SOUTH AMERICA
- MEXICO
- BRAZIL
- PANAMA AND OTHER LATIN
- AMERICAN COUNTRIES/
- CARIBBEAN COUNTRIES
- IRELAND
- GERMANY
- SWEDEN
- DENMARK
- FINLAND
- NORWAY
- ICELAND
- OTHER EUROPEAN COUNTRIES
- AFRICA
- MIDDLE EAST
- TURKEY/CYPRUS
- OTHER COUNTRIES
- ASIA
- THE PEOPLE'S REPUBLIC OF CHINA
- HONG KONG
- INDONESIA
- KOREA
- MALAYSIA
- PHILIPPINES
- SINGAPORE
- TAIWAN
- THAILAND
- OTHER ASIAN COUNTRIES
- OCEANIA
- AUSTRALIA
- NEW ZEALAND
- COUNTRIES AND TRUST
- TERRITORIES IN PACIFIC OCEAN
- YAMAHA
Brand : YAMAHA
Model : DD-55-DD-55C
Category : Electronic drum