
IDLED3201 - Television BUSH - Free user manual and instructions
Find the device manual for free IDLED3201 BUSH in PDF.


| Product Type | LED TV |
| Brand | Bush |
| Model | IDLED3201 |
| Screen Size | 31.5 inches |
| Resolution | 1920 x 1080 (Full HD) |
| Aspect Ratio | 16:9 |
| Display Colors | 16.7 million |
| Brightness | 450 cd/m² |
| Contrast Ratio | 1000:1 |
| Response Time | 8 ms |
| Viewing Angle | 176° (H) / 176° (V) |
| TV System | Digital DVB-T, Analog PAL/SECAM |
| Power Consumption | 90W |
| Audio Output Power | 2 x 8W (THD ≤ 7%) |
| Input Terminals | 2 x HDMI, 1 x VGA, 1 x PC Audio, 1 x AV (shared audio), 1 x USB, 1 x YPbPr (shared audio), 1 x RF |
| Output Terminals | 1 x AV Output |
| Remote Control | Included, 2 x AAA batteries |
| Wall Mountable | Yes, VESA standard (4 screws) |
| Safety Compliance | Class II double insulated (no earth connection required) |
| Accessories Included | Remote control, 2 x AAA batteries, user manual, base stand assembly kit |
| Warranty | 12 months (Australia 1800 509 394, New Zealand 0800 450 259) |
Frequently Asked Questions - IDLED3201 BUSH
User questions about IDLED3201 BUSH
0 question about this device. Answer the ones you know or ask your own.
Ask a new question about this device
Download the instructions for your Television in PDF format for free! Find your manual IDLED3201 - BUSH and take your electronic device back in hand. On this page are published all the documents necessary for the use of your device. IDLED3201 by BUSH.
USER MANUAL IDLED3201 BUSH
natural_image
Black-and-white photo of a modern computer monitor displaying a spherical object with floating spheres, no visible text or symbols on the device itself.IDLED2601
IDLED3201
The Gold Technical Support Line: 1902 215 259
Personal Product Support
(Charges will apply at \$2.95 per minute)
Thank you for buying this Bush product, which is designed to give you many years of trouble-free service.
You may already be familiar with using a similar unit, but please take time to read these instructions. They are designed to familiarise you with the unit's m any features and to ensure you get the very best from your purchase.
Safety is important
Your safety and the safety of others is important. Therefore, please ensure you read the Safety Instructions before you operate this unit.
Warranty
In the unlikely event that your product fails to work normally, please call the below Bush warranty number to discuss the problem with one of our qualified service engineers.
Australia
Bush Warranty: 1800 509 394
New Zealand
Bush Warranty: 0800 450 259
Contents
INTRODUCTION....1
SAFETY INSTRUCTIONS....3-4
BASE STAND INSTALLATION 5
WALL MOUNTING INSTALLATION....6
INSTALLATION....7-10
REMOTE CONTROL....11-12
OPERATION....13-18
TROUBLESHOOTING....19
TECHNICAL SPECIFICATIONS....20-21
WARRANTY....22
- Do not use this TV near dripping or splashing water. Do not use any liquids near this TV.
- Clean with a dry cloth only.
- Do not block any ventilation openings and install in accordance with the manufacturers instructions.
- Do place this TV near any heat radiating sources, such as; heaters, stoves, or other devices (including amplifiers) that produce heat.
- Please ensure that the power cord is protected from damage (i.e. being walked on, cut or split) especially at the inputs.
- Only use attachments/accessories specified in this manual.
- Unplug the TV during lightning storms or when the unit will be unused for long periods of time.
- Refer all servicing to a qualified service personnel. Servicing is required when the TV has been damaged in any way, such as; if the power-supply cord or plug is damaged, if liquid has been spilled or objects have fallen into the TV, if the TV has been exposed to rain or moisture, if does not operate as per this manual, or if it has been dropped.
- The TV should not be exposed to dripping or splashing and no objects filled with liquids, Such as vases, should be placed on the apparatus.
- If the television is to be built into a cabinet or similar enclosure, a small amount of distance should be maintained to ensure ventilation. Heat build-up will reduce the service life of your television, and can also be dangerous.
ADDITIONAL SAFETY NOTES
Never tamper with any components inside the TV, or any other adjustment controls not mentioned in this manual.
All LED LCD-TVs are high voltage instruments. When you clean the unit or cabinet turn off the power and use a dry soft cloth.
During thunder and lighting, unplug the power cord and antenna cord to prevent damage to your TV.
All repairs to this TV should only be performed by qualified TV service personnel.
Important Safety Instructions
Warning: To reduce the risk of electric shock, do not remove the cover or back as there are no user-serviceable parts inside. Refer all servicing to a qualified technician.
Warning: To prevent fire or electric shock hazard, do not expose the unit to any liquids or moisture.
Do not expose the TV and power adaptor to water (dripping or splashing) and no objects filled with any liquids, such as vases, should be placed on or near the unit.
Please ensure that this product is kept away from direct sunlight and heat sources.
Do not block the any of the ventilation openings. Slots and openings on the unit are provided for ventilation. The openings should never be blocked.
Do not place the product on any unstable surfaces as this may cause the unit to fall and may cause possible damage or injury.
Never place heavy or sharp objects on the panel or frame.
Only use the AC adapter included with product. Using any other adaptor will void your warranty.

This symbol indicates that this unit is a Class II double insulated appliance and therefore an earth connection is not required.

This marking indicates that this product should not be disposed with other household wastes. To prevent possible harm to the environment or human health from uncontrolled waste disposal, recycle it responsibly to promote the sustainable reuse of material resources. To dispose of your LED LCD TV contact your retailer where the product was purchased for tips on safe disposal when the time comes.
ACCESSORIES
Remote Control x 1
User's Manual x1
Battery(AAA) x 2
Base Stand Assembly Instruction
-
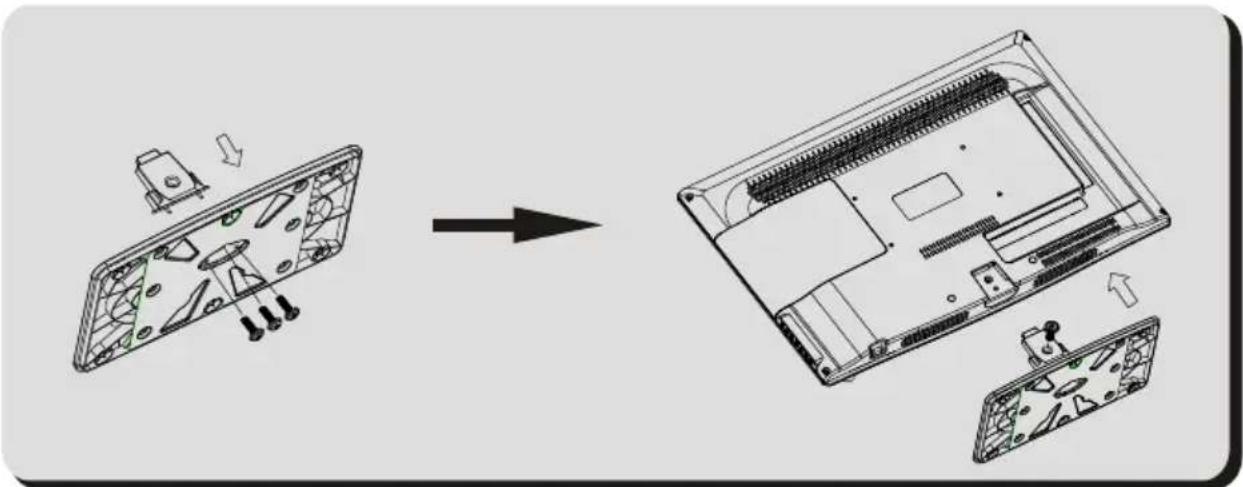
Insert the stand support pillar into the stand as the arrow indicates below. Make sure the three screws are secured firmly as shown below.
-
Then insert the stand into the back cabinet as shown in the image below with the screw provided. Ensure it is connected firmly.
natural_image
Diagram showing a device's internal structure before and after assembly, with no visible text or symbols.INSTALLATION NOTES
This TV can be connected to an AC 100-240 Volts, 50/60 Hz power supply. Never connect straight to a DC power supply.
Locate the TV in a room where light does not strike the screen directly. Total darkness or a reflection on the screen can cause eyestrain. Soft and indirect lighting is recommended for comfortable viewing.
Allow enough space between the TV and the wall to permit ventilation.
Avoid excessively warm locations to prevent possible damage to the cabinet or premature component failure.
WALL MOUNTING INSTALLATION GUIDELINES
This television can be wall mounted as follows:
-
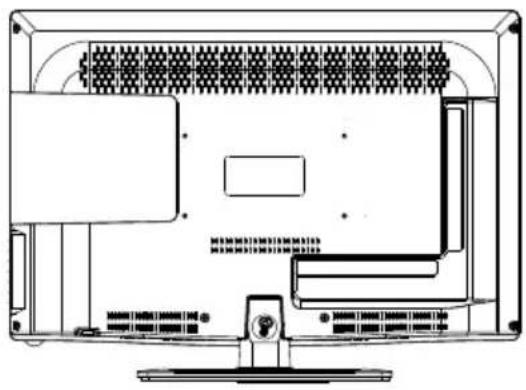
Remove the screw at the back of the stand connecting the stand to the TV as shown below.
-
Remove the stand as directed.
natural_image
Technical line drawing of a computer monitor rear panel with ventilation slots and drive bays (no text or labels)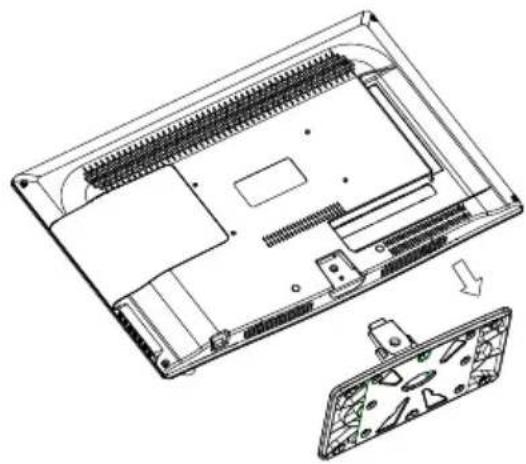
natural_image
Technical line drawing of an electronic device showing internal components and a separate housing (no text or symbols)- Use the four screws provided to fix the TV onto a wall mounting bracket (not included) via the four VESA standard holes on the back of the television.

Front panel
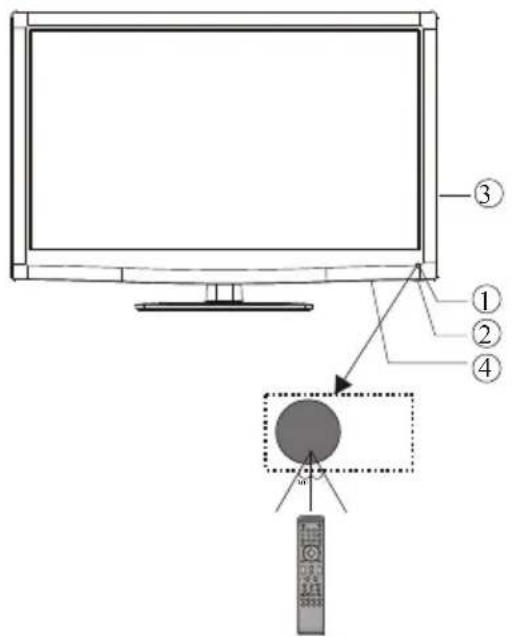
1: Remote Control Sensor.
2: Indicator LCD LED:
BLUE ● POWER ON.
RED ● STANDBY.
3: Side buttons (refer to image below)
4: Main power switch
Side Buttons
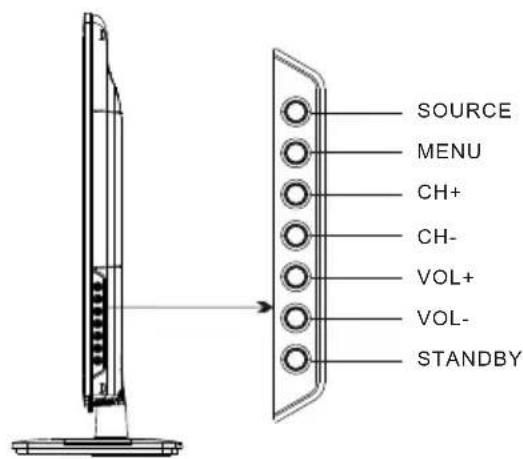
1.SOURCE :
Press the SOURCE Button to display the Input Source list.
- MENU :
Press the MENU Button to display the Main Menu.
- CH+/CH-
Press the CH+/CH- Buttons to change the channel.
In the SOURCE Menu, press the CH+/CH- Buttons scroll through the Input Source List.
In the MAIN MENU, press the CH+/CH- Buttons to scroll through the Menu options.
- VOL+/VOL-
Press the Vol+/Vol- Buttons to adjust the Volume level.
Press the Vol+/Vol- Buttons to confirm your selection in the Input Source Menu.
- STANDBY
Press this button to turn the unit ON from STANDBY mode.
Press it again to turn the set back to STANDBY.
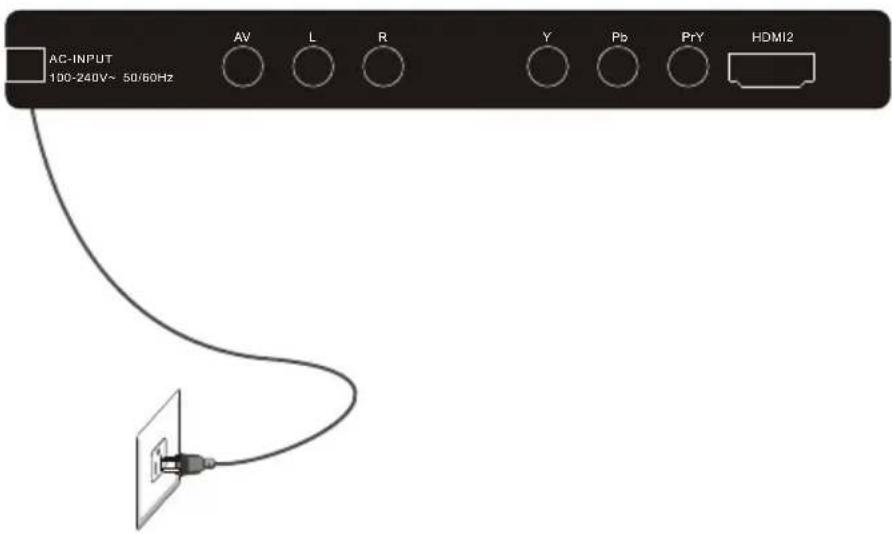
Rear Sockets

Outlined below is the Rear Sockets provided -
AV Input, R/L Audio Input, YPbPr Input and HDMI2 Input. AC POWER INP
Note: 1. The AV Input and YPbPr Input share one audio channel.
- When the HDMI2 Input receives a DVI signal, the audio signal is received from the R/L audio input.
Side Sockets

Outlined below is the Side Sockets provided -
HDMI1 Input, USB Input, PC Audio Input, AV Output, VGA Input and RF Input.
Note: When the VGA Input receives a DVI signal, the audio signal is received from the PC Audio Channel.
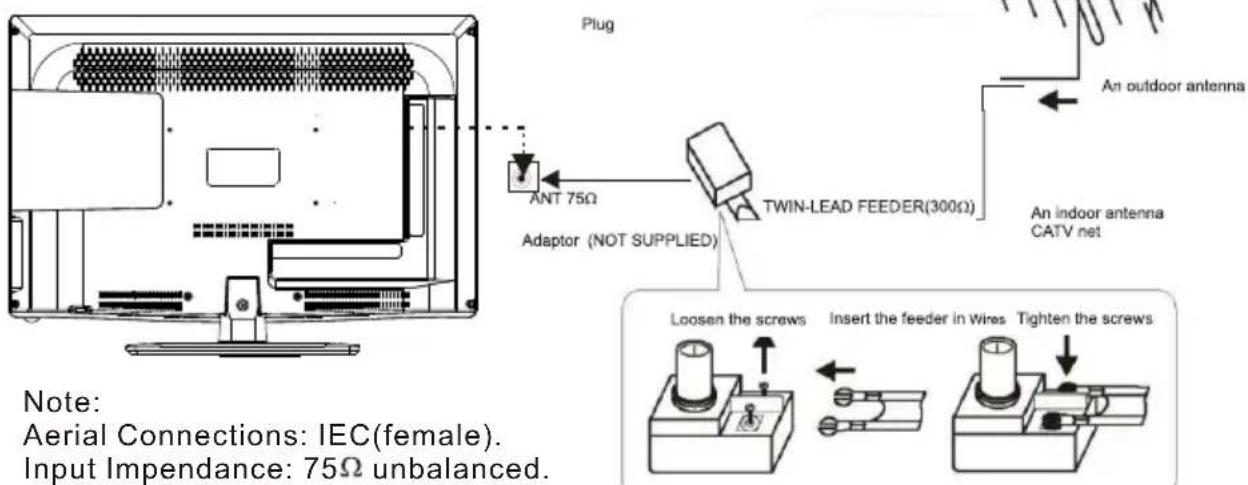
ANTENNA
PC
STEPS:
Ensure the TV and your computer are both set to power off before your connect.
- Connect the VGA Input & PC Audio Input as above.
- Connect power supply again to your TV set.
- Turn on the TV and then press the SOURCE Buttons to select PC mode.
- Then turn the PC power on.

PC
PRESET MODE
| RESOLUTION | V.Freq.(Hz) H.Freq.(KHz) | ||
| 1 | 720*400 | 70 | 31.47 |
| 2 | 640*480 | 60 | 31.47 |
| 3 | 800*600 | 56 | 35.156 |
| 4 | 800*600 | 60 | 37.88 |
| 5 | 800*600 | 72 | 48.08 |
| 6 | 1024*768 | 60 | 48.36 |
| 7 | 1024*768 | 70 | 56.48 |
AV EQUIPMENT
Please follow one of the below instructions when connecting your TV to other devices.
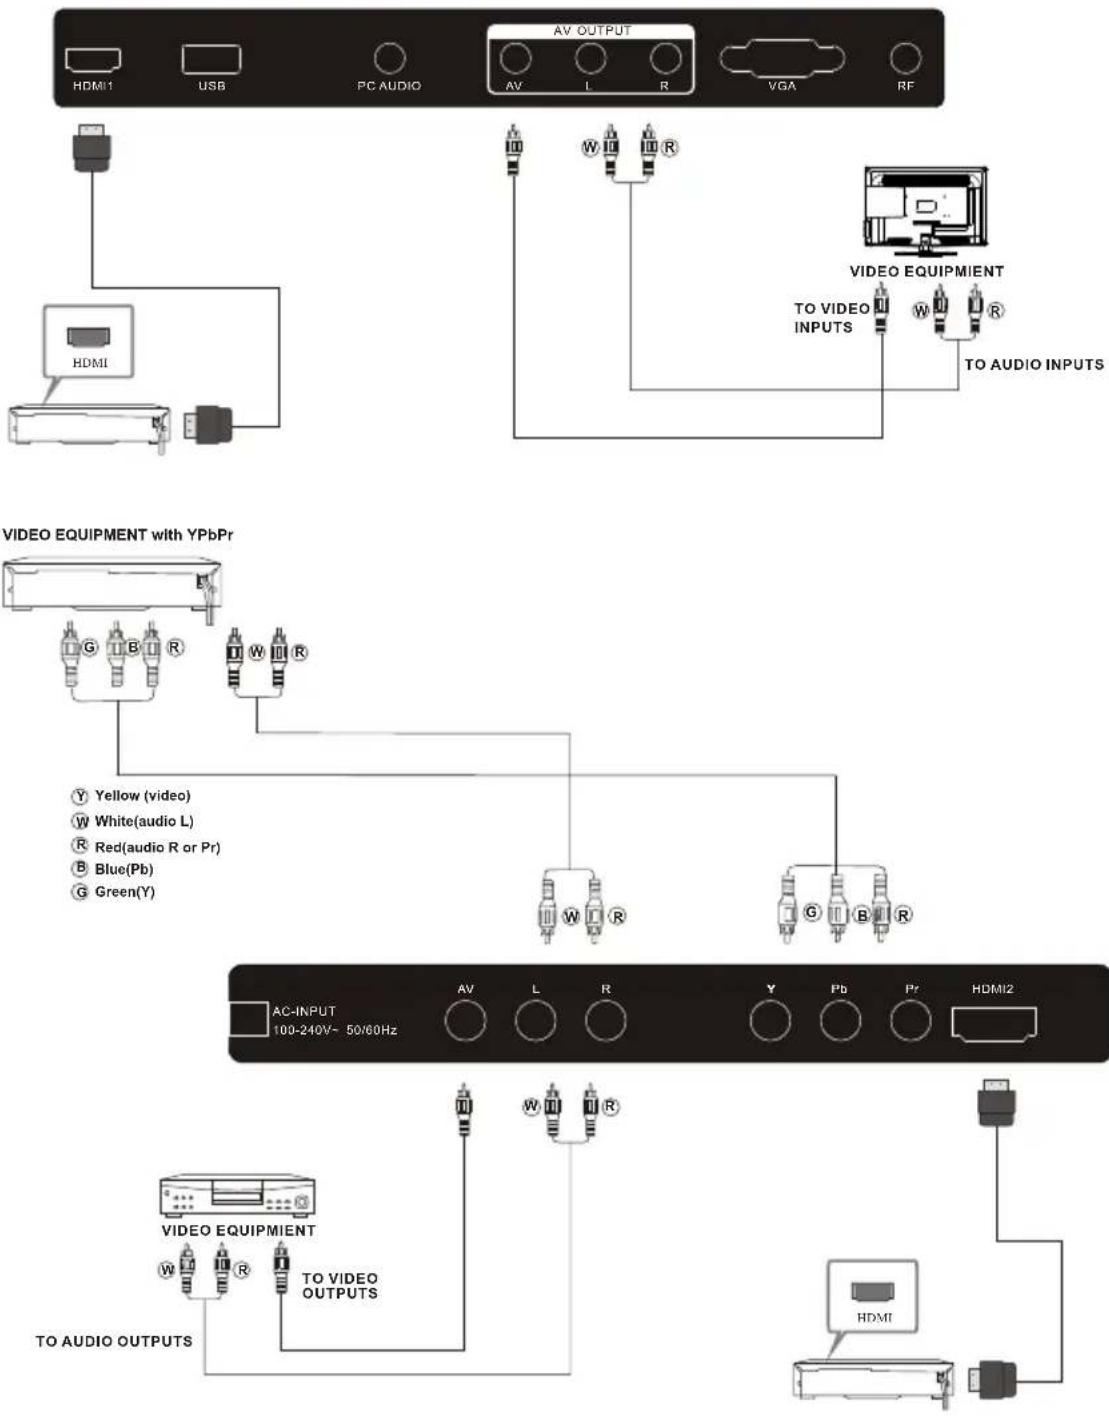
YPbPr Connection can support these video formats: 480i, 576i, 480p, 576p, 720p, 1080i and 1080P.
REMOTE CONTROL
Insert Batteries Into the Remote Control

natural_image
Three-panel mechanical assembly diagram showing a component being cut, with no visible text or symbols- Remove the battery cover.
- Inserting the 2 AAA 1.5V batteries making sure the polarity (+ or -) of the batteries matches the polarity marks inside the unit.
- Mount the battery cover. Replace with new batteries when the TV set begins to show the following symptoms: Operation is unsteady or erratic. Sometimes the TV set does not function with Remote Control Unit.
Remark:
1) Alkaline Battery Recommended.
2) Remove batteries when they are exhausted or if the remote control is not to be used for Long time.
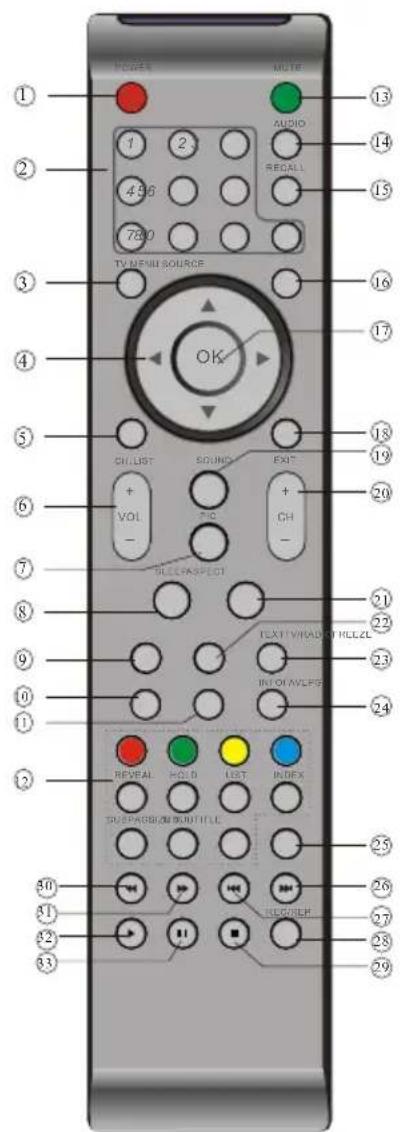
1: POWER: Press to turn the unit on or off.
2: NUMERIC KEY: Press for direct access to channels.
3:TV MENU:Press to display TV Main Menu.
4: CURSOR: Press to scroll through the Menu.
5:CH.LIST:Press to display the channel list.
6:VOL+/- :Press to adjust the sound level.
7: PIC: Press to switch between picture modes.
8:SLEEP:Press to set Sleep Timer.
9:FREEZE :Press to freeze the picture you are watching.
10: EPG: Press to display the 7 Day Electronic Program Guide for information on the show you are watching.
11: FAV: Press to access your favourite channels list in TV or DTV mode
12:TELETEXT KEYS:Refer to page 12.
13: MUTE: Press to disable or enable the sound output.
14: AUDIO: Press to change the available audio /language for the program you are watching.
15: RECALL: Press to return to the previously viewed channel.
16: SOURCE: Press to display the Input SourceList.
17: OK: Press to confirm Menu selections.
18: EXIT: To exit the main menu, press the Exit Button or to cancel setting selections.
19: SOUND:Press to switch between the sound modes.
20: CH+/CH-:Press to scroll through your ChannelList.
21: ASPECT: Press to change the picture aspect ratio.
22:TV/RADIO:Press to switch between TV and Radio modes.
23: TEXT: Press to enter or exit TELETEXT mode.
24: INFO: To display the program information of the show you are watching, press the Info Button.
25: SUBTITLE: To turn on Subtitles press the Subtitle Button in DTV mode.
26: SKIP FORWARD: Press to skip the next file or track in USB Mode.
27: SKIP BACKWARD: Press to skip the previous file or Track in USB Mode
28: REC/REP: Press to record the TV program you are watching in DTV Mode or press to repeat play in USB Mode.
29: STOP: Press to Stop play in USB Mode.
30: REWIND: Press to rewind play in USB Mode and Timeshift Mode.
31: FAST FORWARD: Press to FastForward play in USB mode or Timeshift Mode.
32:PLAY:Press the Play Button in USB Mode or Time Shift Mode to begin or continue Playback.
33: PAUSE: Press the Pause Button to pause play in Time Shift or USB Mode or pause recording in Record Mode.
TELETEXT
Teletext is an information system broadcasted by certain channels which will provide detailed program information. It also offers access to subtitles for viewers with hearing problems or who are not familiar with the transmission language(cable networks, satellite channels, etc.)
| Press: | You will obtain : |
| TEXT | This is used to access and/or exit the Teletext mode.A summary will appear with a list of items that can be accessed. Each item has a 3 digit page number. If the channel selected does not broadcast teletext, 100 will be displayed and the screen will remain blank (in this case, exit teletext and select another channel). |
| SELECTING A PAGE | To view a specific page enter the page number required by using the Numeric Buttons. The number will be displayed on the top left. The page counter will turn until the page is displayed. Repeat this operation to view another page. If the counter continues to search, this means that the page is not transmitted. |
| DIRECT ACCESS TO THE ITEMS | The coloured buttons correspond to the colour options at the bottom of the screen. The four coloured keys are used to access the items or corresponding pages. The coloured areas flash when the item or the page is not yet available. |
| INDEX | This button will open/return you to the contents page. |
| SUB PAGE | Certain pages contain sub-pages which are automatically displayed. This key is used to stop or resume sub-page acquisitionThe indication appears top left. |
| HOLD | To freeze the page. |
| REVEAL | To display or hide the concealed information. |
| LIST | The user can set four favourite pages to be directly linked to the four color keys. While list mode is activated, it is not possibility to use TOP or FLOF navigation with the colour keys. The favourite page numbers should be stored and restored to/from nonvolatile memory for each channel by the system software. |
Installation Guide

This will appear during the first time installation and when you reset the TV. You can choose any of the above languages or countries.
The TV will then automatically scan for all available stations and store the in the station list.
1.CHANNEL MENU
Press the TV MENU Button to display the Channel Menu.
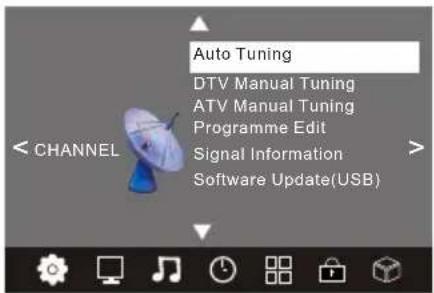
1) Auto Tuning:
An Auto Scan will search for all available ATV and DTV Stations and store them in the station list.
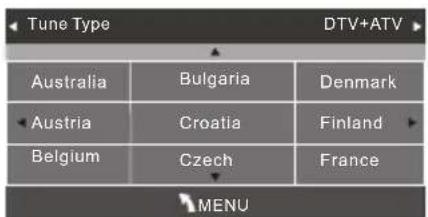
To conduct an Auto Scan, press the arrow buttons to select the Auto Scan Setting and press OK to confirm. To stop scanning at anytime, press the Menu or Exit Button.

2) DTV Manual Tuning - Select the DTV Manual Tune option in the Channel Menu, to conduct a Manual scan. Use the ◀▶ Buttons manually scan through the DTV Manual Tune channels, then press OK to search.
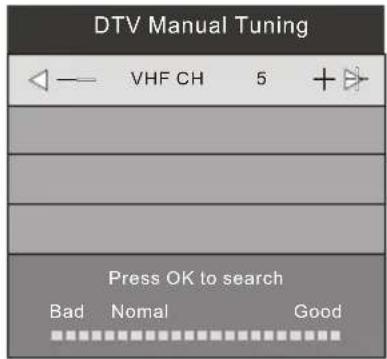
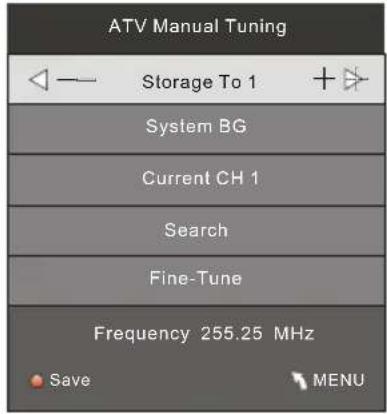
3) ATV Manual Tuning - Select the ATV Manual Tune option in the Channel Menu and follow the above steps.
NOTE:
Press the Red Teletext Button to save and store the channel you have manual scanned.
4). Program Edit:


Delete
Press the Red Teletext Button to delete a program or channel in the channel list.

Rename:
This feature is only available for ATV programs. Use the ▶ to the select the channel/ program you wish to rename. Then press the Green Teletext Button to Rename. Use the ▶ Buttons to select the character to rename and then press OK to confirm. Press the MENU Button or EXIT Button to exit this option.
Note: ATV programs can only be 5 characters.

Move
Use the Arrow Buttons to select the channel you wish to move. Then press the Yellow Button to select Move function. Once active use the Arrow Buttons to move and then press OK to confirm.

Skip
Use the ▼▲ Buttons to highlight the channel/program you wish to set to Skip. Then press the Blue Teletext Button and the Skip icon will be displayed next to the program and it will be skipped in the program list. Press the Blue Button again to cancel the skip setting.

Favourite
Use the ▼▲ Buttons to select the program you wish to set to your favourites list and press the FAV Button to set. The favourite Icon will then be displayed next to the program. Press the FAV Button again to cancel setting.
2. PICTURE MENU
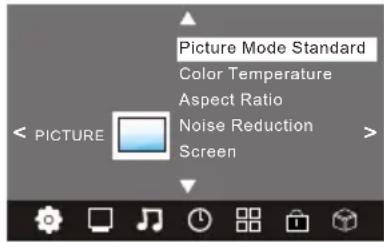
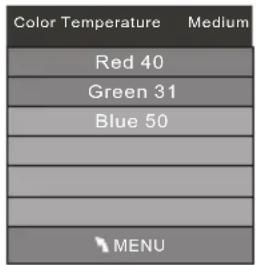
To enter the Picture mode, press the MENU button and then press ▶ o▶ buttons to select the Picture Menu. Once in the Picture mode, press the ▼ or▲ buttons to select the picture settings you wish to adjust. To return to the Main Menu, press the MENU Button.

NOTE:
1) You can change the screen position in PC Mode only. You can adjust to horizontal, vertical, size and phase.
3.SOUND MENU
To enter the Sound Menu, press MENU button and then press or buttons to select the SOUND Menu. Once in the Sound Mode, press or buttons to select the settings you wish to adjust. Press MENU button to return to the Main Menu.

Note:
Auto Volume is only available when the input signal volume is too large or distorted.
4.TIME MENU
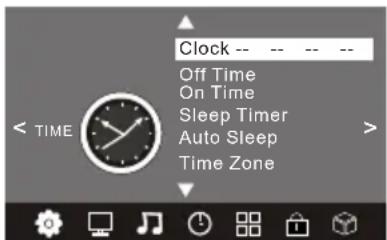
To enter the Time Menu, press MENU button & then press ◀ or ▶ buttons to select the Time Menu.
NOTE:
When you set the Auto Sleep option to ON, your TV will automatically enter into Standby Mode, when there has been no signal for 15 minutes.
5. OPTION MENU
To enter the Option Menu, press MENU button and the press ▶ or ▶ buttons to select the Option Menu. Once in Option Menu, press▼ or▲ buttons to select the settings you wish to adjust. Press MENU button to return to the Main Menu.
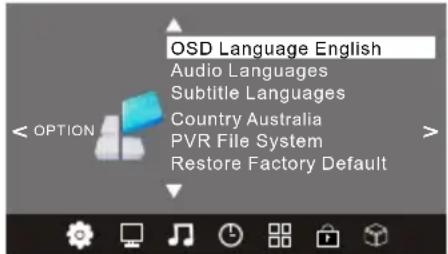
In PVR File System Menu you will be asked to format your USB Disk or Hard Disc for PVR Operation.
| Select Disk C: |
| Check PVR File System Start |
| USB Disk |
| Format |
| Time Shift Size |
| Speed |
| Free Record Limit 6 Hr. |
Select Disc
To view and select the USB file or the allocated space on your Hard Disc that you would like to record to, press OK button to enter the Select Disc Sub-Menu and then press or buttons on your remote control to select the particular partition/file for recording.
Press the Menu Button to return to the Main Menu.
Check PVR File System
Press the OK Button to start checking the file system of your USB storage or Hard Disk. Once Success is shown after checking, you will then be able to begin recording or or use Time Shift function. If FAIL is shown after checking, you then need to format your USB or Hard Disc and to be able to record or use Time Shift.
Format
When you format your USB or Hard Disc partition any saved data will be lost. Please ensure that you start with a blank partition on your Hard Disc to ensure you don't lose any data.
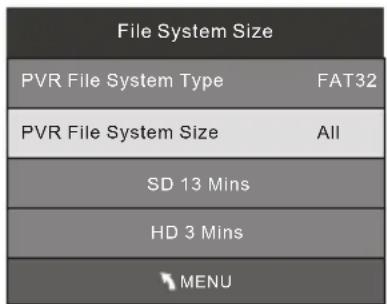
PVR File System Type
There are two types of formats: FAT32 and Hi Speed Format. You can press or buttons to choose the type of formatting. If FAT32 is selected, you will have to format whole size of your USB or the allocated partition for recording. If Hi Speed Format is selected, you will then be able to press or buttons to select the size you wish to use (for example 1G, 10G, 20G... or All). Once a particular size is booked for recording, you will be able to use the remaining space of your USB or Hard Disc for other data storage.
Please note no matter which size is booked for recording, all the data in the allocated partition of the Hard Disc will be lost after formatting.
Speed
This will show the supported speed of recording.
Record Limit
This will show the approximate time you will be able to record on to your USB or Hard Disc.
FACTORY RESET NOTE:
If you wish to reset your TV, please select the Restore Factory Default option, this will clear all settings.
6. LOCK MENU
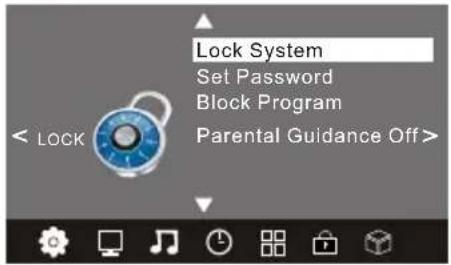
To enter the LOCK Menu, press MENU button and then press ▶ buttons to select the LOCK Menu. The default password is 6666.
Please set a new password to so it is easy to remember. Follow the on screen steps to set.
7. APPLICATIONS MENU
To enter the Applications Menu, press MENU button and then press ▶ or ▶ buttons to select the Applications Menu. This is where you will be able to view and play your USB files.
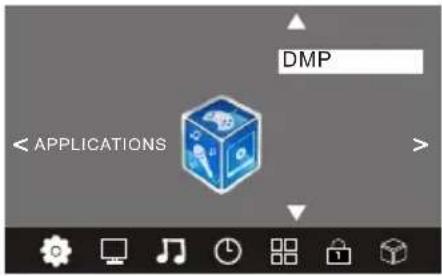
Press the OK button to enter the DMP Menu.

The supported formats are as below:
Photo: JPEG, BMP, PNG
Music: MP3
Movie: AVI, MP4, MKV
Text: TXT
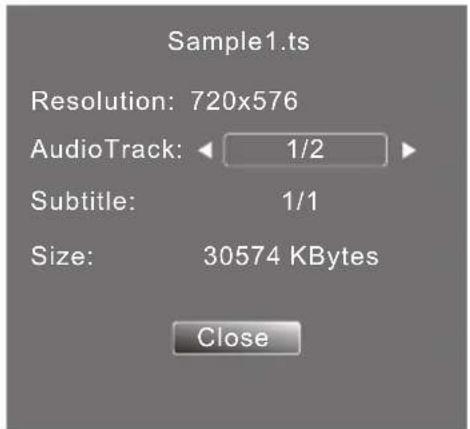
8.EPG Menu(Electronic Program Guide).
The EPG Menu is used to look at what is being broadcasted in DTV or Radio modes. Press the EPG Button to access the EPG Menu. You will receive detailed program information of the channel you are currently watching as well as the 7 Day Program guide.

1. INFO
Use to select a program and then press the Green Button or INFO key to display the highlighted program's information.
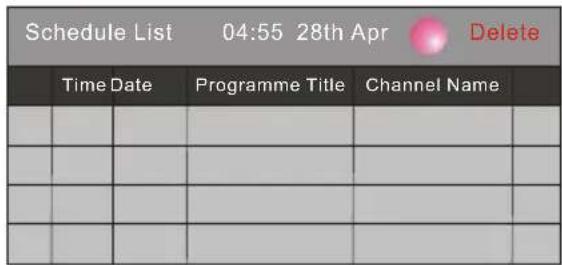
2. Schedule
Press the Yellow Button to view the scheduled programs you have booked for watching or recording. You can also press the Red button to delete the program from your scheduled programs list.
3. Record
By pressing the Red Button you can book the program you would like to record. Please ensure a supported USB or Hard Disc is connected with TV to ensure program will be recorded successfully.
4. Remind
Press the Blue Button to book a program for future viewing and add to the schedule list.

| Potential Issues | Inspection Check | ||
| Picture Audio | |||
 | Snow Noise |  | Check the Antenna Position and that it is connected |
 | Ghost |  Normal audio Normal audio | Check Antenna Position and that it is connected correctly |
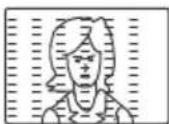 | Interference | 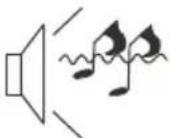 Noise Noise | Check for electrical interference |
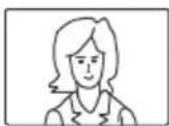 | Normal Picture | 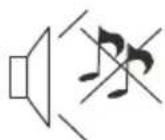 Mute Mute | Check if mute function is on. Check AV cables are connected. |
 | No picture | M1  | Check is connected and on Check Cable connections Adjust Contrast, Brightness and Volume Settings |
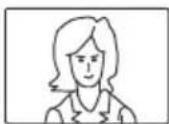 | No colour | 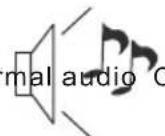 Check TV Colour Check TV Colour | Settings |
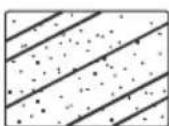 | Picture Breaking Up | 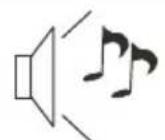 Normal Audio or Weak Normal Audio or Weak | Conduct a Channel Rescan |
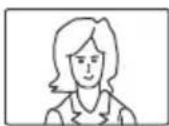 | No Colour | 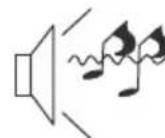 Irregular Irregular | Check AV/Video settings |
 | Mosaic |  Irregular Irregular | Check Antenna connection |
 | No Display |  Normal audio Normal audio | Check Video Cables connected firmly. |
Model: IDLED2601
| LCD: | |
| Screen size | 26 inch |
| Resolution | 1920x1080 |
| Aspect Ratio | 16:9 |
| Display colours | 16.7M |
| Brightness | 250 CD/M2 |
| Contrast ratio | 800:1 |
| Response time | 8 ms |
| View angle | 160°(H)/150°(V) |
| TV: | |
| TV system | Digital TV: DVB-TAnalog TV: PAL/SECAM |
| DVB-T decode | Audio: MPEG2 Audio Layer I&IVideo: MPEG2 Transport MP@HL |
| DVB-T de-modulation | Demodulator : COFDMOFDM Mod.: 2K, 8K FFT, SFN and MFNPacked Carries: 2K/8KGuard Interval: 1/4, 1/8, 1/16, 1/32 |
| Terminals: | |
| HDMI Input | x2 |
| VGA Input | x1 |
| PC audio input | x1 |
| AV input | x1 |
| USB Input | x1 |
| YPbPr input | x1 |
| AV Output | x1 |
| Others: | |
| Input Power Voltage | 100V-240V~ 50/60Hz |
| Power consumption | 55W |
| Audio Output Power (THD≤ 7%) | 2x3W |
Model: IDLED3201
| LCD: | |
| Screen size | 31.5 inch |
| Resolution | 1920x1080 |
| Aspect Ratio | 16:9 |
| Display colours | 16.7M |
| Brightness | 450 CD/M2 |
| Contrast ratio | 1000:1 |
| Response time | 8 ms |
| View angle | 176(H)/176(V) |
| TV: | |
| TV system | Digital TV: DVB-TAnalog TV: PAL/SECAM |
| DVB-T decode | Audio: MPEG2 Audio Layer I&IVideo: MPEG2 Transport MP@HL |
| DVB-T de-modulation | Demodulator : COFDMOFDM Mod.: 2K, 8K FFT, SFN and MFNPacked Carries: 2K/8KGuard Interval: 1/4, 1/8, 1/16, 1/32 |
| Terminals: | |
| HDMI Input | x2 |
| VGA Input | x1 |
| PC audio input | x1 |
| AV input | x1 |
| USB Input | x1 |
| YPbPr input | x1 |
| AV Output | x1 |
| Others: | |
| Input Power Voltage | 100V-240V~ 50/60Hz |
| Power consumption | 90W |
| Audio Output Power (THD≤ 7%) | 2x8W |
Please keep your receipt as proof of purchase. This product is warranted for any defect in materials or workmanship. This product is warranted for any defects in the materials or workmanship for a period of 12 months after the original date of purchase. After the original date of purchase. This product is for normal domestic and office use only. This warranty does not cover damage from misuse or neglect, accidental damage, vermin infestation, excessive voltages such as lightning or power surges or any alternation that affects the performance or reliability of the product.
In the unlikely event that your product fails to work normally, please contact the Bush Warranty on 1800 509 394 (Australia) or 0800 450 259 (New Zealand) and have your receipt of purchase on hand.
This warranty is subject to the following provisions:
- It is only valid within boundaries of the country of purchase;
- The product must be correctly assembled and operated in accordance with the instructions contained in the manual;
- This product must be used solely for domestic purposes;
● The warranty does not cover accidental damage; - The warranty will be rendered invalid if the product is resold or has been damaged by inexpert repair;
● The manufacturer disclaims any liability for incidental or consequential damaged.
This warranty is in addition to, and does not diminish, your statutory or legal rights.
PO BOX 6287
Silverwater NSW 1811
www.bushaustralia.com.au
Bush Warranty: 1800 509 394 Australia
Bush Warranty: 0800 450 259 New Zealand
- Safety is important
- Warranty
- Australia
- Contents
- ADDITIONAL SAFETY NOTES
- Important Safety Instructions
- ACCESSORIES
- Base Stand Assembly Instruction
- INSTALLATION NOTES
- WALL MOUNTING INSTALLATION GUIDELINES
- Front panel
- Side Buttons
- Rear Sockets
- Side Sockets
- ANTENNA
- PC
- STEPS:
- AV EQUIPMENT
- REMOTE CONTROL
- Remark:
- TELETEXT
- Installation Guide
- 1.CHANNEL MENU
- 1) Auto Tuning:
- NOTE:
- Delete
- Rename:
- Move
- Skip
- Favourite
- PICTURE MENU
- 3.SOUND MENU
- 4.TIME MENU
- OPTION MENU
- Select Disc
- Check PVR File System
- Format
- PVR File System Type
- Speed
- Record Limit
- FACTORY RESET NOTE:
- LOCK MENU
- APPLICATIONS MENU
- 8.EPG Menu(Electronic Program Guide).
- INFO
- Schedule
- Record
- Remind
Brand : BUSH
Model : IDLED3201
Category : Television