IMK601RVS - Faucet INVENTUM - Free user manual and instructions
Find the device manual for free IMK601RVS INVENTUM in PDF.

User questions about IMK601RVS INVENTUM
0 question about this device. Answer the ones you know or ask your own.
Ask a new question about this device
Download the instructions for your Faucet in PDF format for free! Find your manual IMK601RVS - INVENTUM and take your electronic device back in hand. On this page are published all the documents necessary for the use of your device. IMK601RVS by INVENTUM.
USER MANUAL IMK601RVS INVENTUM
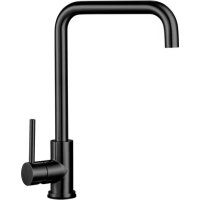
natural_image
Modern stainless steel kitchen faucet with curved handle and side knob (no text or symbols visible)- Safety instructions page 8
- Before using for the first time page 9
- Installation of the mixer tap page 10
- Using the mixer tap page 11
- Cleaning & maintenance page 11
Deutsch
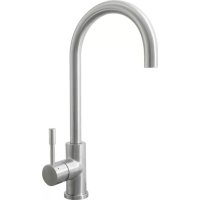
natural_image
Line drawing of a kitchen faucet with a handle and base mount (no text or symbols)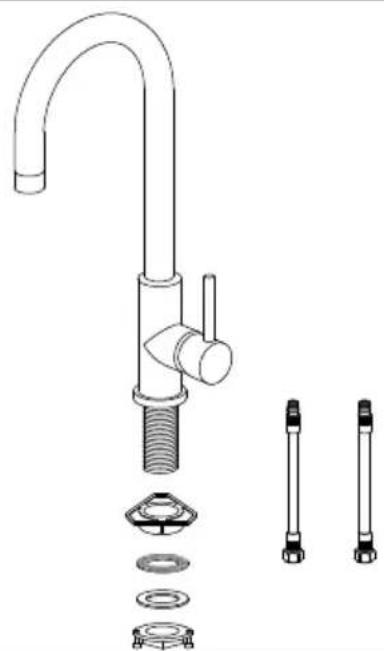
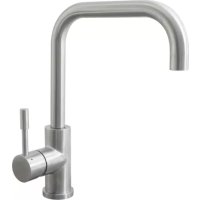
natural_image
Technical line drawing of a kitchen faucet with exploded view showing components like screw, washer, and fittings (no text or labels)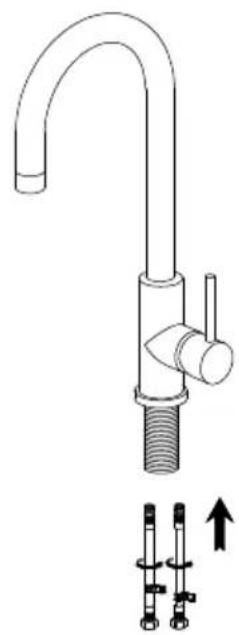
natural_image
Line drawing of a kitchen faucet with a threaded handle and two supporting fixtures (no text or symbols)4.5.6.

natural_image
Line drawing of a laboratory apparatus with a curved tube and tubing (no text or symbols)
natural_image
Line drawing of a laboratory apparatus with a curved tube, tubing, and a valve (no text or symbols)natural_image
Pure diagram of a curved pipe or tube with three small rectangular components below (no text or symbols)6 • Nederlands
1 safety instructions
- Carefully and fully read the user manual prior to using the appliance and carefully store the manual for future reference.
- Only use this appliance for the purposes described in the user manual.
• Installation should take place in accordance with locally applicable regulations for construction and water. Consult an installer in case of doubt. - Defective parts may only be replaced by original parts. Only for those parts will the manufacturer be able to guarantee that they meet the safety requirements.
- Damage as a result of incorrect connection, incorrect fitting or incorrect use does not fall under the warranty.
2 before using for the first time
Observe these instructions when using the appliance for the first time: carefully unpack the mixer tap and remove all packaging material. Keep the packaging (plastic bags and cardboard) out of the reach of children. After unpacking the mixer tap, check it for external damage that may have occurred during transport. Check that all components described below are included in the delivery.
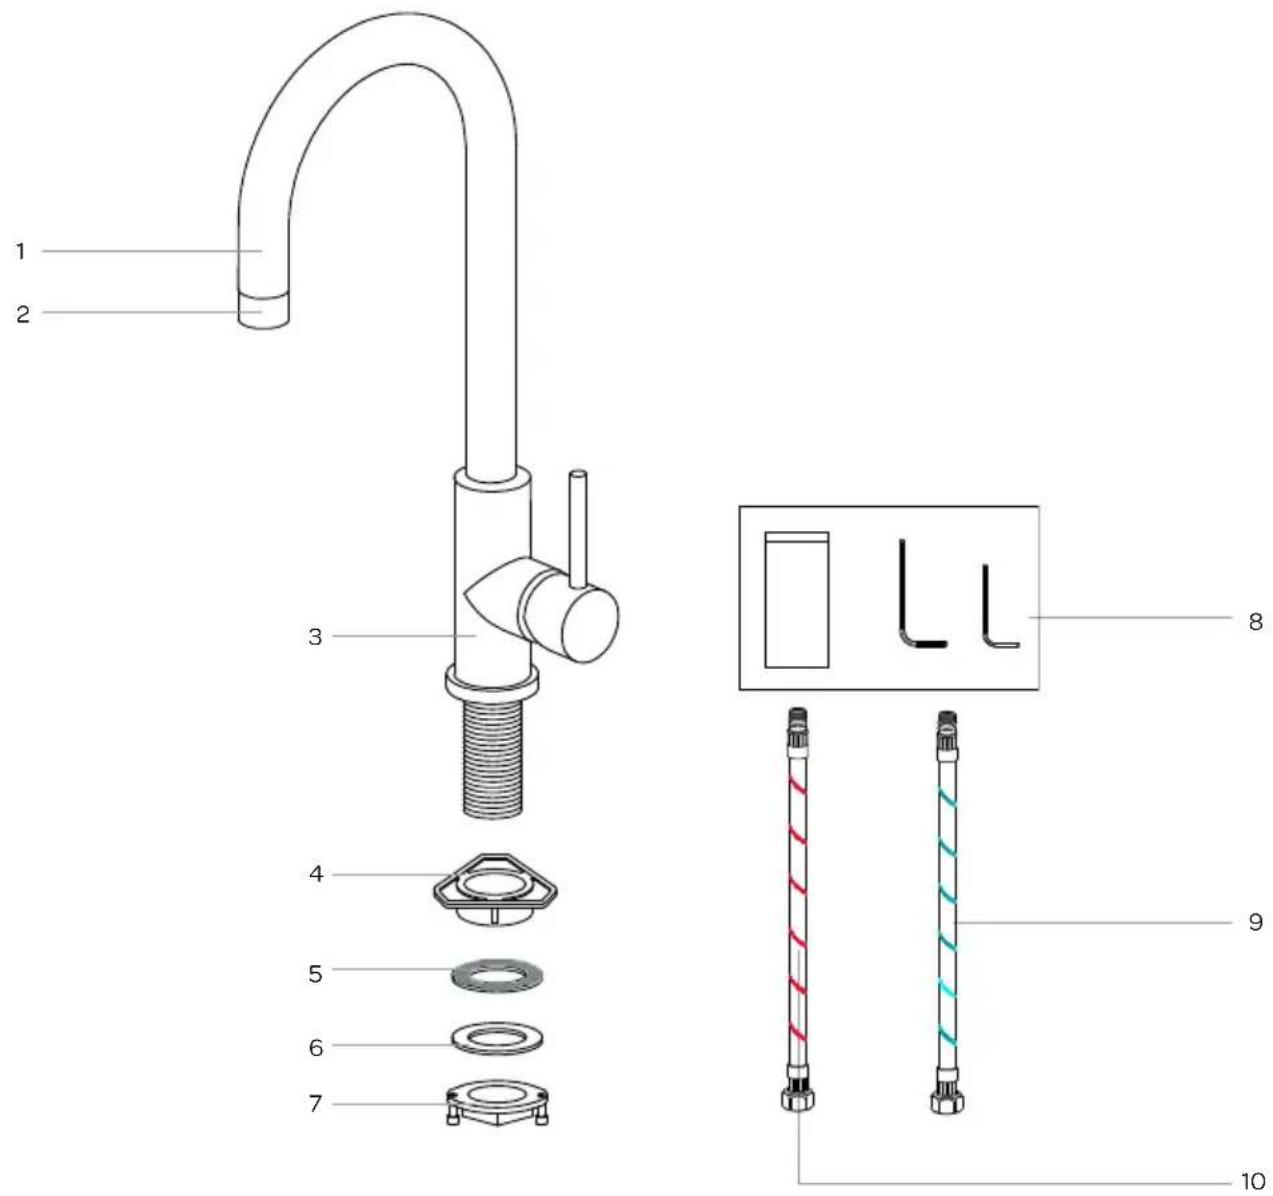
- Tap spout
- Perlator
- Tap
- Plastic flange
- Rubber washer
- Metal washer
- Fastening ring and screws
- Bag with socket head wrenches
- Connection hose - cold water
- Connection hose - hot water
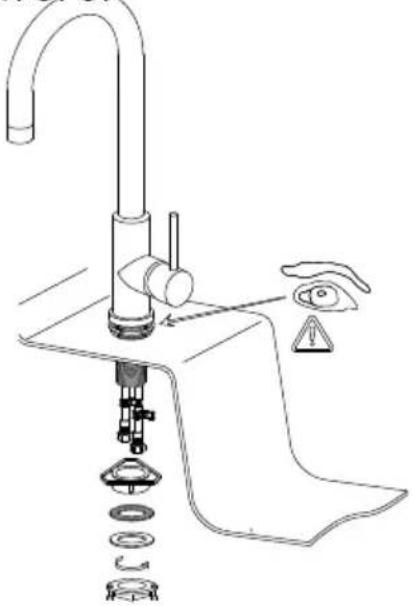
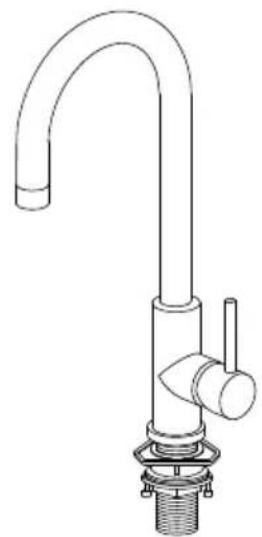
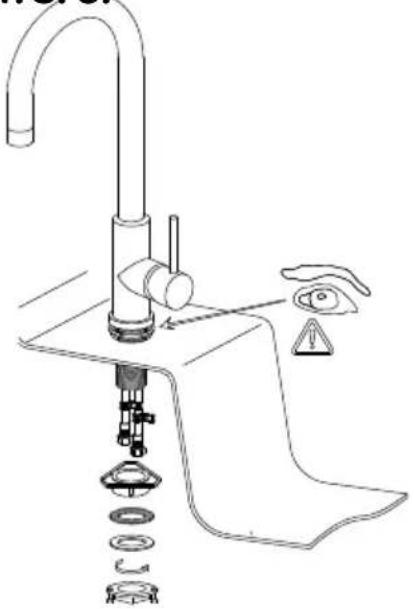
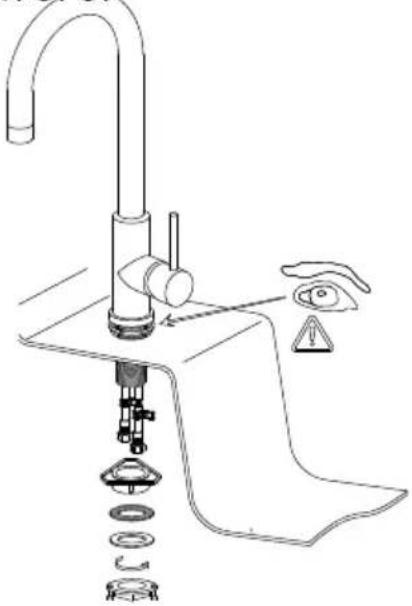
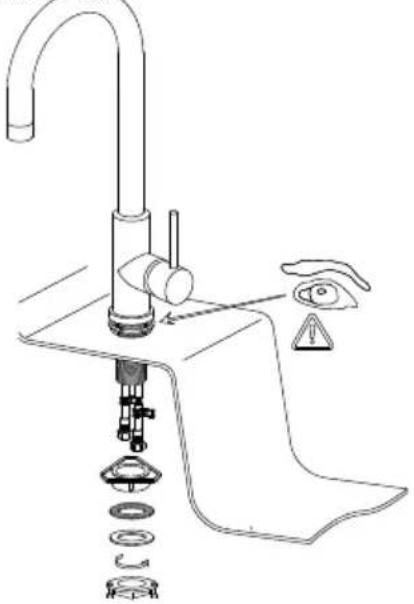
3 installation of the mixer tap
- Safety during use is only guaranteed if the assembly has taken place in a technically correct way and in accordance with these installation instructions. The installer is liable for damage caused by incorrect assembly.
- In case of incorrect installation or connection, the warranty becomes invalid.
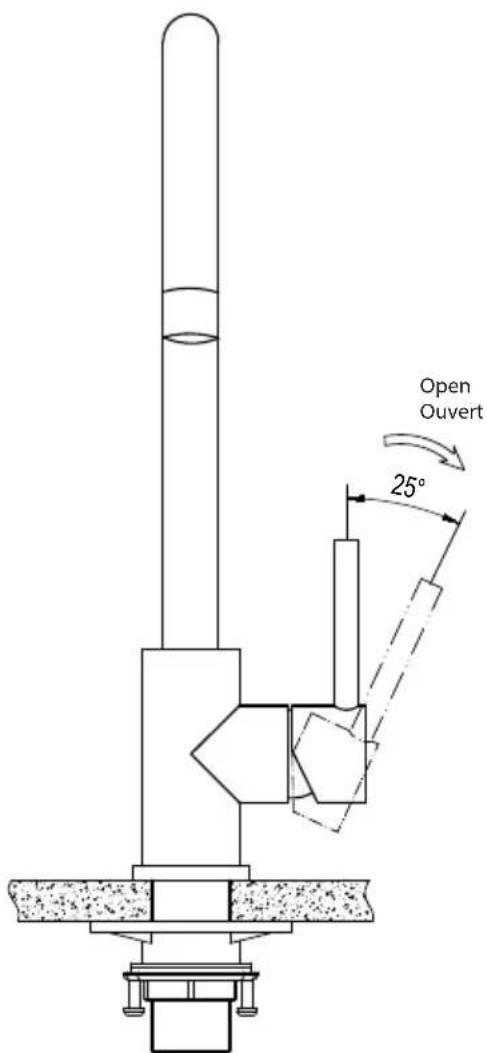
- The nominal pressure of the mixer tap is 0.3MPa and the tap is able to function with a water pressure of 0.05-0.5MPa (including hot and cold water pressure).
- The mixer tap is suitable for indoor use with an average temperature of 4-70°C.
- During assembly, make sure the hot and cold water connections are correct.
- Tools to be used: screwdriver, water level, teflon tape and a drill, if there is no tap hole in the worktop yet.
1.2.3.
natural_image
Line drawing of a kitchen faucet with a handle and valve (no text or symbols)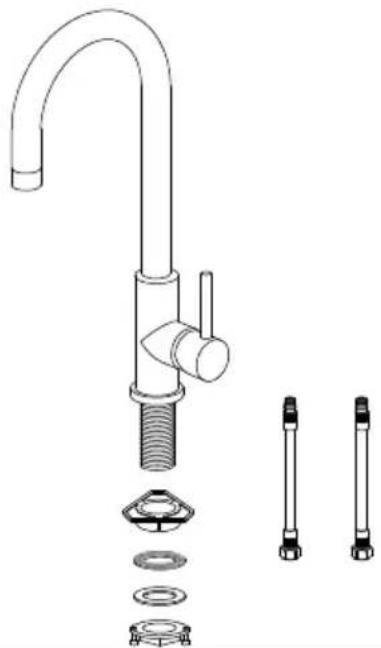
natural_image
Technical line drawing of a kitchen faucet with exploded view showing components like screw, washer, and fittings (no text or labels)
natural_image
Line drawing of a kitchen faucet with a threaded handle and two separate screwdrivers (no text or symbols)4.5.6.

natural_image
Line drawing of a laboratory apparatus with a curved tube and tubing (no text or symbols)
natural_image
Line drawing of a laboratory apparatus with a curved tube, tubing, and a valve (no text or symbols)Rinse the mixer tap clean before using it.
Unscrew the perlator and turn on the mixer tap for a number of minutes.
Turn off the mixer tap and screw back the perlator.
The mixer tap is ready for use.

natural_image
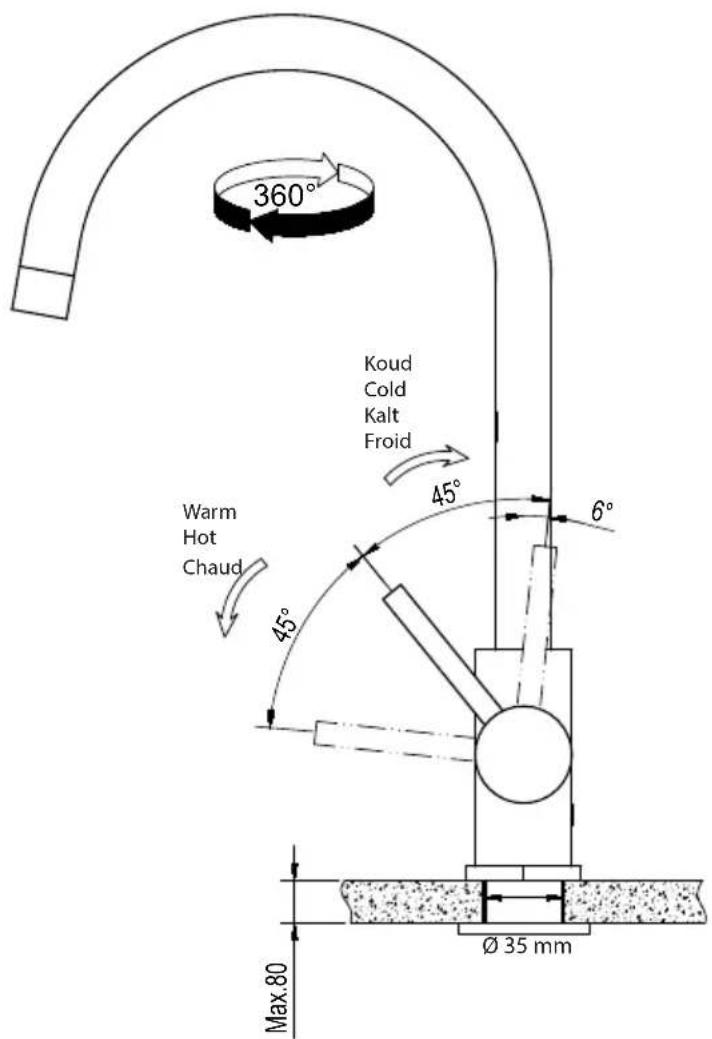
Pure diagram of a curved pipe or tube with three small rectangular components below (no text or symbols)4 using the mixer tap

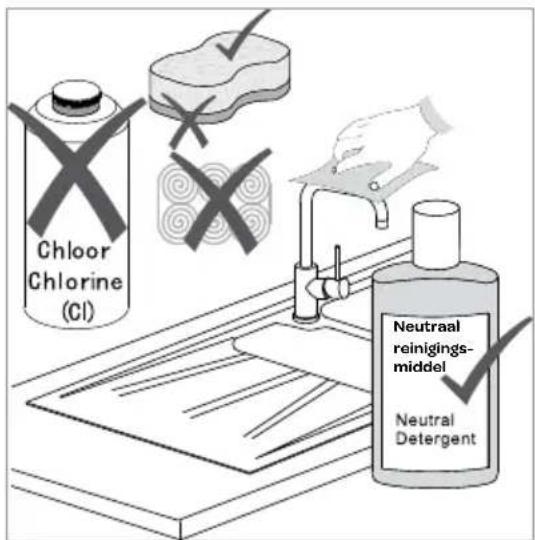
5 cleaning and maintenance
- When cleaning the mixer tap, do not use aggressive, abrasive cleaning agents such as chlorine or steel wool, or detergents that have limescale dissolving or acidic properties.
- Daily clean the mixer tap only with a soft, damp cloth and a mild detergents such as a washing-up liquid. Rinse thoroughly after cleaning and dry with a clean, dry cloth.
- Regularly clean the perlator in order to remove any accumulated scale. If necessary, you can use diluted household vinegar. Rinse thoroughly with water.
natural_image
Line drawing of a kitchen faucet with a handle and valve (no text or symbols)
natural_image
Technical line drawing of a kitchen faucet with exploded view showing internal components (no text or labels)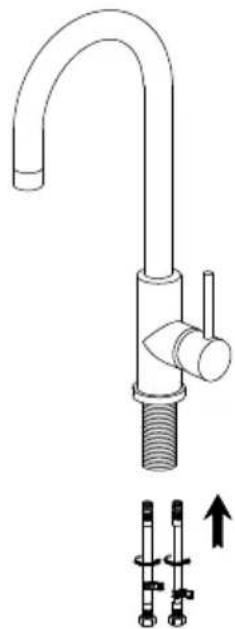
natural_image
Line drawing of a kitchen sink with a threaded handle and two separate mechanical components below (no text or symbols)4.5.6.
natural_image
Line drawing of a kitchen sink with water spray and cleaning components (no text or symbols)
natural_image
Line drawing of a laboratory apparatus with a curved tube and tubing (no text or symbols)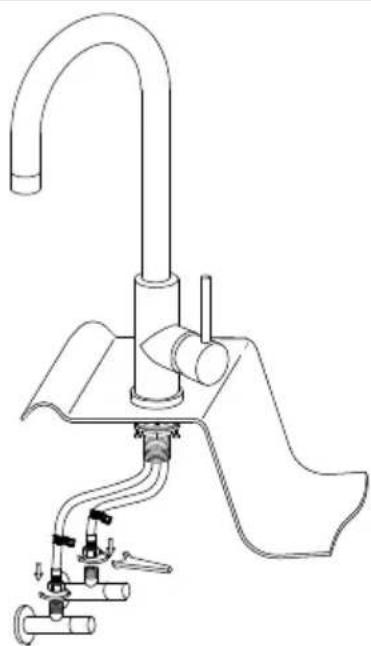
natural_image
Line drawing of a laboratory apparatus with a curved tube, tubing, and a base (no text or symbols)natural_image
Simple line drawing of a curved pipe or tube with three small rectangular components below (no text or symbols)4
natural_image
Line drawing of a kitchen faucet with a handle and base mount (no text or symbols)
natural_image
Technical line drawing of a kitchen faucet with exploded view showing components like screw, washer, and fittings (no text or labels)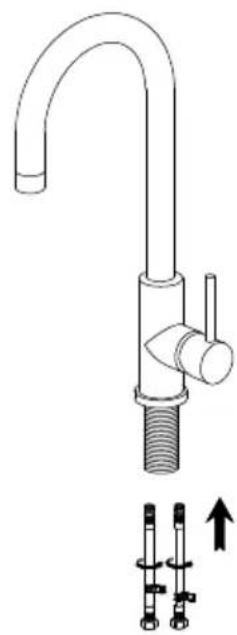
natural_image
Line drawing of a kitchen faucet with a threaded handle and two separate mechanical components below (no text or symbols)4.5.6.
natural_image
Line drawing of a kitchen sink with components and a warning symbol (no text or labels)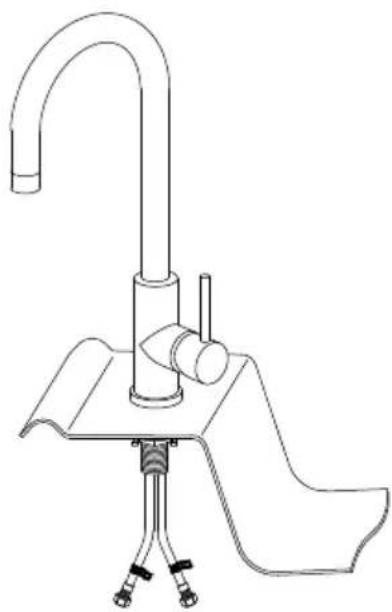
natural_image
Line drawing of a laboratory apparatus with a curved tube and tubing (no text or symbols)
natural_image
Line drawing of a laboratory apparatus with a curved tube, tubing, and a valve (no text or symbols)natural_image
Pure diagram of a curved pipe or tube with three small rectangular components below (no text or symbols)4 usage du mitigeur

facebook.com/inventum1908
youtube.com/inventum1908


For general terms and conditions of service and warranty check the website.