
SID-122305 - Iron Emerio - Free user manual and instructions
Find the device manual for free SID-122305 Emerio in PDF.


| Product Type | Steam Iron |
| Brand | Emerio |
| Model | SID-122305 |
| Power Consumption | 2400 W |
| Soleplate Material | Ceramic |
| Water Tank Capacity | 250 ml |
| Steam Output Continuous | 30 g/min |
| Steam Boost | 100 g/min |
| Anti-Drip System | Yes |
| Auto Shut-Off | Yes (8 minutes vertical, 30 seconds horizontal) |
| Self-Cleaning | Yes |
| Anti-Calc | Yes |
| Cord Length | 2.0 m |
| Dimensions (L x W x H) | 280 x 130 x 160 mm |
| Weight | 1.2 kg |
| Voltage | 220-240 V, 50/60 Hz |
| Spray Function | Yes |
| Vertical Steaming | Yes |
| Heating Indicator Light | Yes |
| Water Fill Opening | Large opening for easy filling |
Frequently Asked Questions - SID-122305 Emerio
User questions about SID-122305 Emerio
0 question about this device. Answer the ones you know or ask your own.
Ask a new question about this device
Download the instructions for your Iron in PDF format for free! Find your manual SID-122305 - Emerio and take your electronic device back in hand. On this page are published all the documents necessary for the use of your device. SID-122305 by Emerio.
USER MANUAL SID-122305 Emerio
Shirt Ironer (EN)
Skjortpressase (SE)
Skjortestryker (NOR)
Before use make sure to read all of the below instructions in order to avoid injury or damage, and to get the best results from the appliance. Make sure to keep this manual in a safe place. If you give or transfer this appliance to someone else make sure to also include this manual.
In case of damage caused by user failing to follow the instructions in this manual the warranty will be void. The manufacturer/importer accepts no liability for damages caused by failure to follow the manual, a negligent use or use not in accordance with the requirements of this manual.
- Read and save these instructions. Attention: pictures in the IM are for reference only.
- This appliance can be used by children aged from 8 years and above and persons with reduced physical, sensory or mental capabilities or lack of experience and knowledge if they have been given supervision or instruction concerning use of the appliance in a safe way and understand the hazards involved.
- Children shall not play with the appliance.
- Cleaning and user maintenance shall not be made by children without supervision.
- If the supply cord is damaged, it must be replaced by the manufacturer, its service agent or similarly qualified persons in order to avoid a hazard.
- Keep the appliance and its cord out of reach of children less than 8 years.
- WARNING: This appliance is intended only for drying textiles washed in water.
- This appliance is intended to be used in household and similar applications.
- Before inserting the plug into the mains socket, please check that the voltage and frequency comply with the
specifications on the rating label.
-
The appliance must always be switched off and disconnected from the mains power when it is not being used and before assembling, disassembling or cleaning.
-
The appliance must not be moved during use.
-
Do not use any extension cables.
-
Ensure that the mains cable is not hung over sharp edges and keep it away from hot objects and open flames.
-
Do not immerse the appliance or the mains plug in water or other liquids. There is danger to life due to electric shock!
-
To remove the plug from the plug socket, pull the plug. Do not pull the power cord.
-
Do not touch the appliance if it falls into water. Remove the plug from its socket, turn off the appliance and send it to an authorized service center for repair.
-
Do not plug or unplug the appliance from the electrical outlet with a wet hand.
-
Never attempt to open the housing of the appliance, or to repair the appliance yourself. This could cause electric shock.
-
Never leave the appliance unattended during use.
-
This appliance is not designed for commercial use.
-
Do not use the appliance for other than intended use.
-
Do not wind the cord around the appliance and do not bend it.
-
Exit of warm air must not be blocked.
-
Caution: do not use the appliance in the immediate vicinity of bath tubes, showers, wash basins or swimming pools.
-
The appliance is for indoor use only.
-
Do not insert or allow foreign objects to enter any ventilation or exhaust opening, as this may cause an electric shock or fire, or damage the appliance.
-
Be sure that no other appliances are plugged into the same circuit with your appliance, as circuit overload could occur.
-
Protect the appliance from heat, naked flame, extreme temperatures, persistent moisture, wet conditions and collisions.
- Always place the appliance with clear space above it and on all sides on a dry, flat, solid and heat-resistant surface.
- Do not place the appliance under other electronic devices.

- Means "DO NOT COVER".
- The machine should not be operated by means of an external timer-switch or by means of a separate system with remote control.
- WARNING!!

Please do not touch surface while in use. The temperature of accessible surfaces may be high when the appliance is operating.
PARTS DESCRIPTION
- Hanger
- Telescopic rod
- Main rod
- Air outlet
- Motor unit
- Ventilation slots
- ON/OFF switch with timer (30-180 minutes)
- Mounting flange
- Fastener
- Water fender
- Collar section
- Nylon balloon

ASSEMBLY
-
Remove all packaging materials.
-
Install the water fender onto the main rod in the range of 5cm from the black line sticked at the main rod. (It will affect the use or even damage the appliance to install the water fender too high or too low.) Tighten the screw to fix the water fender there. Make sure the hollowed side of the water fender face downwards.
-
Plug the main rod into the recess on the top of the motor unit.
-
Assemble the hanger as below drawing shows. Insert the two halves onto the collar section. Note the left and right side by connecting the logo "L" at one side and logo "R" at the other side. Insert the two halves firmly until a click sound is sent out. Tighten the provided screws (a) into the small holes at two sides to fix the assembly of the hanger.

-
Place the hanger onto the telescopic rod by the middle socket. Make sure the slight bend of hanger faces forwards (the same side of "ON/OFF switch and timer").
-
Attach the nylon balloon:
1) Hang the nylon balloon onto the hanger and collar section.
2) Make the main rod and telescopic rod stand in the nylon balloon.
3) There is elastic cord the bottom of the nylon balloon. Press the elastic cord below the mounting flange to fix the nylon balloon.
USE
- Place the appliance on a stable, flat, moisture-resistant and heat-resistant surface.
- Loosen the fastener to adjust the height of the telescopic rod to your desired level. Tighten the fastener after the adjustment.
- Attach the nylon balloon by following the instructions in "Assembly".
-
Put on the clothes outside the nylon balloon and button up if there are buttons. Make the collar fit the collar collection. Do not twist or scrunch up the two sleeves.
-
Put the plug into an appropriate power outlet.
-
Turn on the appliance by rotating the ON/OFF switch with timer to position "ON", or turn the timer

clockwise to select the length of time you want. When the appliance is running, the indicator light besides position "ON" turns on.
- If you use the timer and the select time elapses, the appliance will switches off automatically. The drying/pressing can be interrupted at any time by turning the ON/OFF switch with timer to the position "OFF".
- Remove the dried/pressed clothes from the nylon balloon.
- Take out the mains plug from power outlet and allow the appliance to cool down completely.
Notes:
- This appliance is intended to be used for drying and pressing textiles, for example blouses and shirts. Delicate textiles such as wool or similar fabrics must not be dried/pressed on the appliance. Always follow the care labels for the textiles!
- This appliance is intended primarily for machine-spun laundry. If hand-washed or non-machine-spun laundry is to be pressed, dry it until there is no water dropping when the laundry is hanging.
- The drying/pressing process takes around 10 minutes for a spin-dried shirt. However, the length of time varies depending on the material and thickness. We recommend that you start with a shorter time and extend it if necessary.
- The nylon balloon can be enlarged or reduced in size by opening or closing the zip fasteners at two sides.
REFERENCE TABLE
This table is tested on the spin-dried clothes and only for your reference.
The actual time for drying/pressing clothes depend on the material and thickness of clothes, as well as how dry the clothes originally are.
| Clothes type | T-shirt | Shirt/blouse in short sleeves | Shirt/blouse in long sleeves | Suit |
| Drying/pressing time (minutes) | 10 | 9 | 15 | 17 |
CLEANING AND MAINTENANCE
- Remove the mains plug from power outlet and allow the appliance to cool down completely before any cleaning or storage.
- Clean the outside of the appliance with a slightly damp cloth and a little mild detergent if needed, then dry it completely with a soft dry cloth.
- Clean the hanger, rod, water fender and nylon balloon with a damp cloth, or wash them in warm soapy water and then rinse them fully. Dry all these parts completely before use.
- Never immerse the appliance, its mains cable or mains plug in water or any other liquids.
- Do not use any corrosive or abrasive cleaning agents or cleaning pads to clean the appliance.
TROUBLE SHOOTING
| Problem | Possible cause | Solution |
| The appliance does not work. The indicator light does not light up. | The mains plug is not inserted into the plug socket correctly. | Connect the mains plug correctly. |
| The plug socket is defective. | Try another plug socket. | |
| The appliance is not switched on. | Switch on the appliance and set the timer. | |
| Unusual noises | The ventilation slots are covered up or blocked | Free up the ventilation slots. |
| The appliance switches off suddenly. | The ventilation slots are covered up or blocked. | Free up the ventilation slots. |
| The appliance has an automatic safety switch-off function. It switches off automatically when it overheats. | Allow the appliance to cool down and switch it on again. | |
| The appliance has fallen over. The appliance has a protective switch that is activated if the appliance falls over. | Set the appliance up again and switch it back on. | |
| The set time has elapsed. | Set the time as you want again. | |
| Odour produced | You may notice a slight odour caused by production residues the first time you use the appliance. | This is harmless and will cease as you use the appliance. |
TECHNICAL DATA
Operating voltage: 220-240V \~ 50/60Hz
Power consumption: 1200W
IPX2
GUARANTEE AND CUSTOMER SERVICE
Before delivery our devices are subjected to rigorous quality control. If, despite all care, damage has occurred during production or transportation, please return the device to your dealer. In addition to statutory legal rights, the purchaser has an option to claim under the terms of the following guarantee:
For the purchased device we provide 2 years guarantee, commencing from the day of sale. If you have a defective product, you can directly go back to the point of purchase.
Defects which arise due to improper handling of the device and malfunctions due to interventions and repairs by third parties or the fitting of non-original parts are not covered by this guarantee. Always keep your receipt, without the receipt you can't claim any form of warranty. Damage caused by not following the instruction manual, will lead to a void of warranty, if this results in consequential damages then we will not be liable. Neither can we hold responsible for material damage or personal injury caused by improper use or if the instruction manual are not properly executed. Damage to accessories does not mean free replacement of the whole appliance. In such case please contact our service department. Broken glass or breakage of plastic parts is always subject to a charge. Defects to consumables or parts subjected to wearing, as well as cleaning, maintenance or the replacement of said parts are not covered by the warranty and are to be paid.
ENVIRONMENT FRIENDLY DISPOSAL
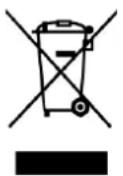
Recycling – European Directive 2012/19/EU
This marking indicates that this product should not be disposed with other household wastes. To prevent possible harm to the environment or human health from uncontrolled waste disposal, recycle it responsibly to promote the sustainable reuse of material resources. To return your used device, please use the return and collection systems or contact the retailer where the product was
purchased. They can take this product for environmental safe recycling.
SÄKERHETSANVISNINGAR

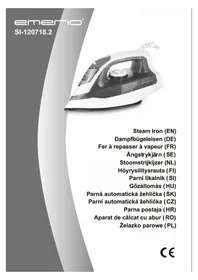
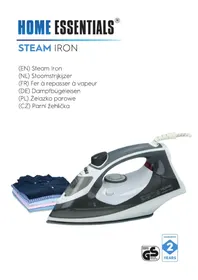
Brand : Emerio
Model : SID-122305
Category : Iron