604-169 - Vacuum Cleaner Hamron - Free user manual and instructions
Find the device manual for free 604-169 Hamron in PDF.


| Product Type | Wet/Dry Vacuum Cleaner |
| Brand | Hamron |
| Model | 604-169 |
| Power Source | 12 VDC Rechargeable Lead Acid Battery |
| Input Voltage (Charger) | 230 VAC, 50 Hz |
| Charger Output | 15 VDC, 350 mA |
| Charging Time | 10-12 hours (first charge 16-20 hours) |
| Container Volume | 3.8 L |
| Dimensions (L x W x D) | 320 x 270 x 198 mm |
| Weight | 2.1 kg |
| Functions | Dry and wet vacuuming |
| Filter Type | Reusable, washable |
| Included Accessories | Hose, brush nozzle, radiator nozzle, nozzle (crevice), carrying strap, mains adapter, 12 VDC adapter |
| Battery | Rechargeable lead acid, replaceable |
| Storage Temperature | Max 38°C |
| Charging Temperature | 0 to 40°C |
| Operation Type | Handheld, cordless |
| Container Material | Plastic |
| Safety Features | Do not use in explosive environments, keep away from children, use only recommended accessories |
Frequently Asked Questions - 604-169 Hamron
User questions about 604-169 Hamron
0 question about this device. Answer the ones you know or ask your own.
Ask a new question about this device
Download the instructions for your Vacuum Cleaner in PDF format for free! Find your manual 604-169 - Hamron and take your electronic device back in hand. On this page are published all the documents necessary for the use of your device. 604-169 by Hamron.
USER MANUAL 604-169 Hamron
natural_image
Black and purple portable vacuum cleaner with coiled hose, no visible text or symbols on device bodySE Bruksanvisning för dammsugare våt/torr 12V
NO Bruksanvisning for støvsuger våt/tørr 12 V
PL Instrukcja obsługi odkurzacza na sucho/mokro 12 V
EN Operating Instructions for Vacuum Cleaner Wet/Dry 12V
SE - Bruksanvisning i original
NO - Bruksanvisning i original
EN - Operating instructions in original
Date of production: 2013-12-20
© Jula AB
SVENSKA....5
SÄKERHETSANVISNINGAR....5
TEKNISKA DATA 6
BESKRIVNING 7
DELAR 7
MONTERING 8
UPPACKNING OCH INSTALLATION 8
HANDHAVANDE 9
TORRDAMMSUGNING....10
VÄTDAMMSUGNING 10
TÖMNING AV BEHÅLLARE 11
FÖRVARING....11
BATTERI....11
BATTERIBYTE 11
NORSK 13
SIKKERHETSANVISNINGER 13
TEKNISKE DATA 14
BESKRIVELSE....15
DELER 15
MONTERING 16
OPPAKKING OG INSTALLASJON 16
BRUK....17
T∅RRST∅VSUGING 18
VÄTST∅VSUGING....18
T∅MMING AV BEHOLDER 19
OPPBEVARING....19
BATTERI....19
SKIFTE BATTERI 19
POLSKI 21
ZASADY BEZPIECZEŃSTWA 21
DANE TECHNICZNE 22
OPIS 23
CZEŚCI....23
MONTAŻ....24
ROZPAKOWYWANIE I INSTALACJA 24
OBSŁUGA 25
ODKURZANIE NA SUCHO 26
ODKURZANIE NA MOKRO 26
OPRÓŻNIANIE ZBIORNIKA....27
PRZECHOWYWANIE 27
AKUMULATOR 27
WYMIANA AKUMULATORÓW 27
ENGLISH 29
SAFETY INSTRUCTIONS 29
TECHNICAL DATA 30
DESCRIPTION 31
PARTS 31
ASSEMBLY....32
UNPACKING AND INSTALLATION 32
OPERATION....33
DRY VACUUM CLEANING....34
WET VACUUM CLEANING 34
EMPTYING THE CONTAINER 35
STORAGE 35
BATTERY 35
BATTERY REPLACEMENT 35
natural_image
3D rendered mechanical component with a small block and arrow indicating direction (no text or symbols)natural_image
Close-up of a white electronic device with a black arrow pointing to a small dot on its surface (no visible text or symbols)natural_image
Black and white photo of a portable electric vacuum cleaner with attached power cord (no visible text or symbols)natural_image
Top-down view of a white industrial machine with black base and side ports, showing directional arrows (no text or symbols)FÖRVARING
natural_image
Close-up of a vacuum cleaner with coiled hose and black base (no visible text or symbols)BATTERI
natural_image
Close-up of a printer's internal components, including a paper holder and clasp (no visible text or symbols)Batterihållare

natural_image
Close-up of a black rectangular electronic device with a cable attached, showing no visible text or symbols.natural_image
3D model of a vehicle chassis with a block and arrow indicating a component (no text or symbols)natural_image
Close-up of a white car hood with a black arrow pointing to a small dot on the surface (no text or symbols visible)natural_image
Black and white photo of a portable vacuum cleaner with attached cable (no visible text or symbols)Ladetid: 16–20 timer.
T∅RRST∅VSUGING
natural_image
Top-down view of a white industrial machine head with directional arrows indicating motion (no text or symbols)OPPBEVARING
natural_image
Black and white photo of a vacuum cleaner with coiled hose and handle (no visible text or symbols)BATTERI
Apparatet har et oppladbart blysyrebatteri som sitter på baksiden av motorenheten.
SKIFTE BATTERI
natural_image
Close-up of a printer's internal components, including a paper feeding device and a separate clip (no visible text or symbols)Batteriholder

natural_image
Close-up of a black rectangular electronic device with a cable and labeled ports (no readable text or symbols)natural_image
3D model of a vehicle chassis with a block and arrow indicating a component (no text or symbols)natural_image
Close-up of a white electronic device with a black arrow pointing to a small dot on its surface (no visible text or symbols)natural_image
Exterior view of a portable electric vacuum cleaner with attached cable (no text or symbols visible)natural_image
Top-down view of a white industrial machine with black base and side ports, showing directional arrows (no text or symbols)PRZECHOWYWANIE
natural_image
Black and white photo of a vacuum cleaner with coiled tubing (no text or symbols visible)AKUMULATOR
natural_image
Close-up of a printer's internal components, showing paper feeding and clamping mechanism (no text or symbols visible)Komora akumulatora
natural_image
Close-up of a black rectangular electronic device with visible ports and wiring (no readable text or symbols)Read the Operating Instructions carefully before use!
Save these instructions for future reference.
The appliance is not intended to be used by persons (children or adults) with any form of functional disorders, or by persons who do not have sufficient experience or knowledge on how to use it, unless they have received instructions concerning the use of the appliance from someone who is responsible for their safety. Keep children away from the appliance. Keep children under supervision to make sure they do not play with the appliance.
WARNING! Avoid the risk of electric shock.
- Read all the instructions, safety instructions and all the warning labels on the appliance before using it. The appliance must only be used as it is intended to be used and in accordance with these instructions.
- Do not use the appliance in explosive environments, for example, in the vicinity of flammable liquids, gases or dust. Never try to clean up such substances.
- Do not use the appliance to clean up burning or glowing objects such as cigarettes or hot ash.
- Do not use the appliance to clean up substances harmful to health.
- Store the appliance indoors. Maximum storage temperature: 38^ C. Do not expose the charger, power cord and/or plug to heat. Do not use the appliance if it is damaged or not working properly, or if the power cord, plug or charger are damaged. Take the appliance to an authorised service centre to be checked, repaired or adjusted.
- Never insert any objects or body parts in the appliance's openings. Keep the ventilation openings clean. Keep your hair, clothing, hands, jewellery and other foreign objects away from moving parts.
- Do not use the appliance unless all the filters are in place.
- Be careful when cleaning stairs.
- Do not attempt to charge the battery with any other charger than the one supplied.
- Do not use any accessories other than those recommended by the manufacturer – risk of personal injury.
- Do not handle the appliance, power cord plug or charger with wet hands.
- Keep your head, face and ears away from the nozzle when the appliance is running. Charging temperature: 10 to 40°C.
IMPORTANT! The battery is supplied with a slight charge and has to be charged before first use.
TECHNICAL DATA
Battery 12 VDC
Input voltage: 230 VAC, 50 Hz
Output voltage/current: 15 VDC, 350 mA
Charging time: 10-12 hours
Volume 3.8 l
Dimensions L320xW270xD198 mm
Weight 2.1 kg
DESCRIPTION
PARTS

- Handle
- Power switch
- Charging indicator
- Lock button
- Container
- Nozzle
- Brush nozzle
- Radiator nozzle
- Hose
- Carrying strap
- Charger connection
- Battery cover
- Catch
- Mains adapter
- Adapter for 12 VDC outlet
ASSEMBLY
UNPACKING AND INSTALLATION
- Push the hose into the inlet connection until it locks into place. Release the hose by pressing the lock button and removing the hose.

Connection end (short) Inlet connection Lock button
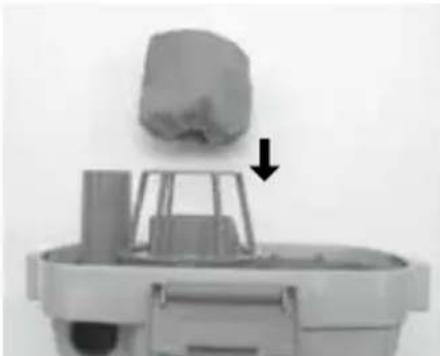
- Make sure that an appropriate filter is installed correctly.
natural_image
3D rendered model of a vehicle or vehicle component with a small block and a downward arrow indicator (no text or symbols)- Fit the required nozzle on the hose. Turn a little to lock the nozzle.

- Attach the carrying strap by pushing the ends into the fasteners on the appliance and lock in place with the supplied Phillips screws.

- When the battery is fully charged the appliance is ready to use.
OPERATION
The appliance is supplied fully assembled. Familiarise yourself with the controls on the appliance and how to use them.
NOTE! The battery is supplied with a slight charge and has to be charged for 16-20 hours before the first use. Charging temperature: 0 to 40^ . The battery charger gets hot during the charging. This is quite normal.
IMPORTANT! Do not allow the battery to become completely discharged.
The speed of the motor drops when the battery charge is low.
Immediately stop using the battery and charge it as soon as possible.
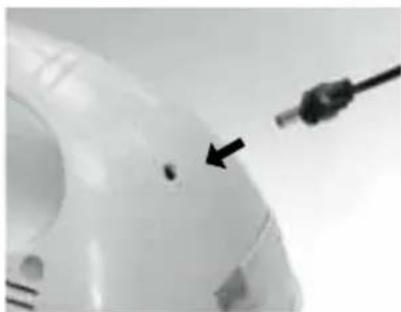
- Connect an appropriate charger to the charging connection on the appliance.
natural_image
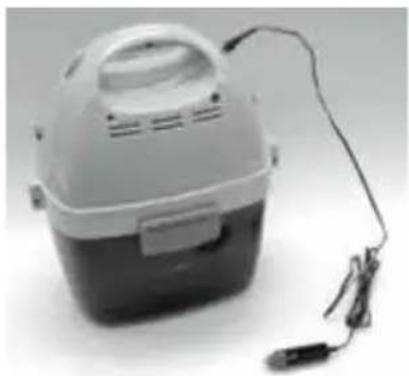
Close-up of a white electronic device with a black arrow pointing to a small dot on its surface, next to a black cable (no visible text or symbols)- Insert the adapter into the wall outlet or into a 12 VDC socket on a vehicle or other power source. The indicator light will be lit during charging and goes out when the battery is fully charged.
natural_image
Exterior view of a portable electric vacuum cleaner with attached cable (no text or symbols visible)Charging time: 16–20 hours.
DRY VACUUM CLEANING
- Disconnect the charger from the appliance.
- Set the power switch to the on position.
- Vacuum in any direction until the area is clean. For stubborn dirt, it is best to move the nozzle back and forth in a sweeping motion. Use the brush nozzle on carpets and the like. Use the radiator nozzle in areas that are hard to reach, such as under objects, between cushions and the like.
- Keep the filter clean.
- The performance of appliance will drop if the filter is blocked. Clean the reusable filter by unscrewing it from the cover and shake to remove dust and contaminants. The filter can also be washed in water. Let the filter dry until it is completely dry before reinstalling. Do not appliance wash. Do not tumble-dry.
WET VACUUM CLEANING
NOTE! Empty the container before liquid or wet waste is cleaned up.
- Vacuum in any direction until the area is clean.
- Stop vacuuming when the level in the container reaches the FILL LINE, otherwise there is a risk of spillage. Handle the appliance carefully when there is liquid in the container. If the appliance should fall over it can be damaged by the liquid.
- Clean the accessories for wet vacuuming regularly with warm water and a mild detergent, especially after vacuuming sticky substances such as kitchen spillage.
EMPTYING THE CONTAINER
Pull out the catches on the side of the appliance. Open the cover and pour out the liquid into an appropriate drain. Replace the container. The appliance is now ready to use.

natural_image
Top-down view of a white industrial machine with black base and side ports, showing directional arrows (no text or symbols)STORAGE
Empty and clean the container before storing the equipment. Wrap the hose around the appliance. Accessories can be stored under the container. Store the appliance indoors.

natural_image
Black and white photo of a vacuum cleaner with coiled tubing (no text or symbols visible)BATTERY
The appliance has a rechargeable lead acid battery, which sits at the back of the motor unit.
BATTERY REPLACEMENT
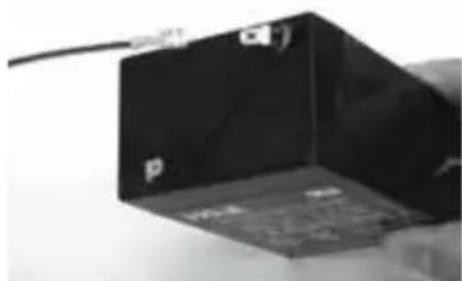
- Open the battery cover.
- Open the battery holder and carefully remove the battery.
- Disconnect the red (positive) and black (negative) battery leads from the battery terminals.
- Connect the red (positive) and black (negative) battery leads to the terminals on the new battery.
- Put the battery in the battery compartment. Refit the battery holder.
- Refit the battery cover.
- Fully charge the new battery in accordance with the instructions.
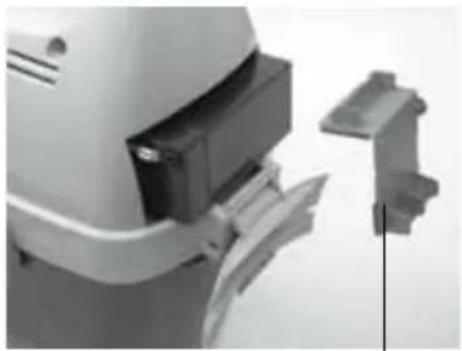
natural_image
Close-up of a printer's internal components, showing paper feeding and clamping mechanism (no text or symbols visible)Battery holder
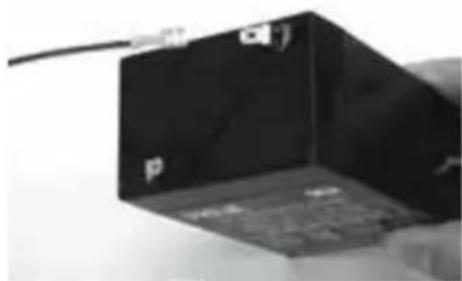
natural_image
Close-up of a black rectangular electronic device with a cable attached, showing no visible text or symbols.IMPORTANT! Disconnect the charger before replacing the battery.
Jula reserves the right to make changes. In the event of problems, please contact our service department. www.jula.com


Care for the environment!
Must not be discarded with household waste!
This product contains electrical or electronic
components that should be recycled.
Leave the product for recycling at the designated
station e.g. the clocal authority's recycling station.
- SVENSKA....5
- SÄKERHETSANVISNINGAR....5
- TEKNISKA DATA 6
- BESKRIVNING 7
- DELAR 7
- MONTERING 8
- UPPACKNING OCH INSTALLATION 8
- HANDHAVANDE 9
- TORRDAMMSUGNING....10
- VÄTDAMMSUGNING 10
- TÖMNING AV BEHÅLLARE 11
- FÖRVARING....11
- BATTERI....11
- BATTERIBYTE 11
- NORSK 13
- SIKKERHETSANVISNINGER 13
- TEKNISKE DATA 14
- BESKRIVELSE....15
- DELER 15
- MONTERING 16
- OPPAKKING OG INSTALLASJON 16
- BRUK....17
- T∅RRST∅VSUGING 18
- VÄTST∅VSUGING....18
- T∅MMING AV BEHOLDER 19
- OPPBEVARING....19
- BATTERI....19
- SKIFTE BATTERI 19
- POLSKI 21
- ZASADY BEZPIECZEŃSTWA 21
- DANE TECHNICZNE 22
- OPIS 23
- CZEŚCI....23
- MONTAŻ....24
- ROZPAKOWYWANIE I INSTALACJA 24
- OBSŁUGA 25
- ENGLISH 29
- FÖRVARING
- BATTERI
- T∅RRST∅VSUGING
- OPPBEVARING
- SKIFTE BATTERI
- PRZECHOWYWANIE
- AKUMULATOR
- Read the Operating Instructions carefully before use!
- WARNING! Avoid the risk of electric shock.
- TECHNICAL DATA
- DESCRIPTION
- PARTS
- ASSEMBLY
- UNPACKING AND INSTALLATION
- OPERATION
- DRY VACUUM CLEANING
- WET VACUUM CLEANING
- EMPTYING THE CONTAINER
- STORAGE
- BATTERY
- BATTERY REPLACEMENT
- Care for the environment!
Brand : Hamron
Model : 604-169
Category : Vacuum Cleaner