
NL4 - Baby monitor Evolveo - Free user manual and instructions
Find the device manual for free NL4 Evolveo in PDF.


| Product Type | Baby Monitor |
| Brand | Evolveo |
| Model | NL4 |
| Transmission Type | Digital (DECT 6.0) |
| Range (Indoor) | Approximately 50 meters |
| Range (Outdoor) | Approximately 300 meters |
| Parent Unit Display | 2.4-inch color LCD |
| Camera Resolution | 640 x 480 pixels |
| Night Vision | Yes, infrared LEDs |
| Two-Way Talk | Yes, built-in microphone and speaker |
| Temperature Sensor | Yes, in baby unit |
| Sound Activation (VOX) | Yes, adjustable sensitivity |
| Lullabies | 2 pre-installed melodies |
| Power Supply | Parent unit: rechargeable Li-ion battery (3.7V, 800mAh); Baby unit: AC adapter (5V DC, 1A) |
| Battery Life (Parent Unit) | Up to 8 hours (continuous use) |
| Dimensions (Baby Unit) | 6.5 x 6.0 x 4.0 cm |
| Dimensions (Parent Unit) | 12.0 x 6.0 x 2.5 cm |
| Weight (Baby Unit) | 90 g |
| Weight (Parent Unit) | 130 g |
| Cleaning and Maintenance | Wipe with a dry cloth; do not use liquids or solvents |
| Safety Features | Out of range warning, low battery indication, secure DECT encryption |
| Spare Parts Availability | Contact Evolveo customer service or authorized dealers |
| Certifications | CE, RoHS |
Frequently Asked Questions - NL4 Evolveo
User questions about NL4 Evolveo
0 question about this device. Answer the ones you know or ask your own.
Ask a new question about this device
Download the instructions for your Baby monitor in PDF format for free! Find your manual NL4 - Evolveo and take your electronic device back in hand. On this page are published all the documents necessary for the use of your device. NL4 by Evolveo.
USER MANUAL NL4 Evolveo
CZ
SK
EN
HU
RO
Obsah / Content / Tartalom / Cuprins
Česky 3
Slovensky 25
English......47
Magyar 69
Română....91
Obsah
VAROVÁNÍ 4
OBSAH BALENÍ 4
KAMERA 5
MONITOR 6
KAMERA 9
ZAČÍNÁME....9
NASTAVENÍ KAMERY 11
-
PŘIDÁNÍ KAMER 11
-
ODSTRANĚNÍ KAMERY....12
DETEKCE ZVUKU 13
TEPLOTNÍ ALARM 14
UKOLÉBAVKY 15
REŽIM SPÁNKU 16
KRMENÍ 17
DATUM / ČAS 18
NASTAVENÍ 19
VYSVĚTLENÍ IKON 21
ČASTO KLADENÉ DOTAZY 22
VAROVÁNÍ

Krok 3:
Krok 4:
- Stisk kamery.
![graph LR A["User Interface"] --> B["Target Icon"] B --> C["Monitor Icon"] C --> D["Arrow to Server"]](/content/2026/05/1106198/images/f9955e72bf6eb758203b08cf4b05aa69f8e3dc5823bf14dbe589400a2a95458f.jpg)
DETEKCE ZVUKU
Vysvětlení:


Poznámka:
VYSVĚTLENÍ IKON
No. 5, 17/F, Strand 50, 50 Bonham Strand, Sheung Wan, Hongkong
Vyrobeno v Číně
Copyright © Abacus Electric, s.r.o.
www.evolveo.com
www.facebook.com/EvolveoCZ
Krok 2:
- Vyberte a stlačte
Krok 3:
Krok 4:
Krok 2:
DETEKCIA ZVUKU
Vysvetlenie:
ALARM TEPLA
Vysvetlenie:


Poznámka:


Poznámka:
VYSVETLENIE IKON
No. 5, 17/F, Strand 50, 50 Bonham Strand, Sheung Wan, Hongkong
Vyrobené v Číne
Copyright © Abacus Electric, s.r.o.
www.evolveo.com
www.facebook.com/EvolveoCZ
Improper use of the product can lead to safety hazards. We therefore strongly recommend that you read the following instructions before using the product.
- Keep the cord(s) out of the reach of children (at least 1 metre away).
- In the event of a MISTAKE, please contact the nearest service centre.
- Use ONLY original adapters. Using non-original cables and adapters can damage the device.
- If you are not using the adapter(s), unplug it(them).
- Check your child's activities regularly as this product is not intended for supervision, but to assist in supervision.
PACKAGING CONTENT
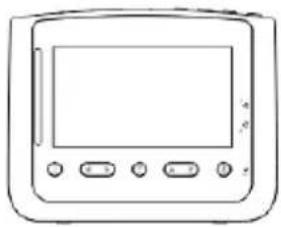 |  | 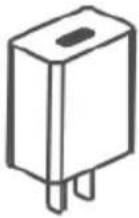 | |
| Monitor | Camera | Power adapter x2 | |
 | 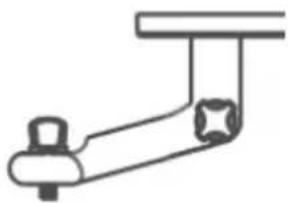 |  |  |
| Mounting kit | Camera holder | Power cable x2 | Manual |
CAMERA

MONITOR

1) VOX: eavesdropping mode, the camera is switched on for the set standby time and it is possible to monitor the events in front of the camera.
2) Camera switch: Camera switching, if 2 or more cameras are connected, you can switch between cameras by repeatedly pressing.
3) Volume/Brightness: Press to adjust the monitor volume or brightness using the left/right and up/down arrows.
4) Power/Sleep button: Long press to turn the monitor on/off; short press to turn the screen on/off.
5) LED panel volume level: the level displays the volume and intensity of the sound detected by the camera. Blue > low, orange > medium, red > high.

6) Menu/Back: Press the button to enter the menu page or press the Back button.
7) Left: Press the button to move the camera to the left or change the selection to the left.
8) Right: Press the button to move the camera to the right or change the selection to the right.
9) Zoom/OK: Press the button to zoom in/out or to confirm the selection.
10) Up: Press the button to tilt the camera up or change the selection upwards.
11) Down: Press the button to tilt the camera downwards or change the selection downwards.
12) Mluvte: Press the button to talk to the child.
13) Charging indicator: lights yellow while the monitor is charging.
14) Performance indicator: The green light will come on when it is connected to electricity.
15) Mikrofon

- If you perform a RESET using the pin, the monitor will be forcibly turned off.
- Only replace the battery with an original or identical battery with identical specifications.
Camera
Press the LED button(11) to switch on the lamp, press it repeatedly to change the colours. Hold to start the cycle mode. Press the +/- (12/13) button to change the intensity of the LED lighting. Press the lullaby button (14) to start one of the melodies, press again to change the melody. Hold to switch off the melody. Press the +/- (12/13) button to change the melody volume.
GETTING STARTED
Step 1:

-
Connect the camera to the adapter.
-
Plug the mains adapter into a socket.
Remark: Place the camera away from the child (at least 1m).
Step 2:
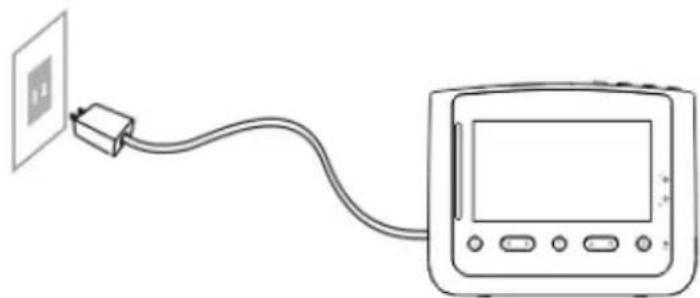
- Connect the monitor to the adapter.
- Plug the mains adapter into a socket.
- Long press the power button to turn on the monitor, and then the monitoring interface is displayed.
Remark: The monitor takes about 4 hours to fully charge and the battery life is up to 5 hours.
CAMERA SETTINGS
Warning: The camera and monitor have already been paired. This function is used to add new cameras to the monitor or to reset the monitor.
1. Adding cameras
Step 1:
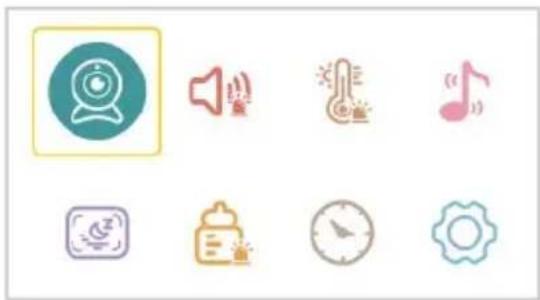
- Press the ≡ button to enter the menu page.
- Select and press the button OK
Step 2:
- Select and press .

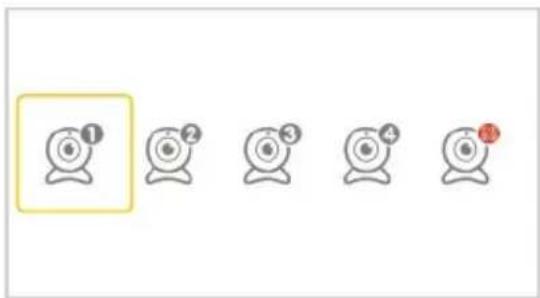
Step 3:
- Select and press the button twice. See Camera NOT paired.
- Press to start pairing.
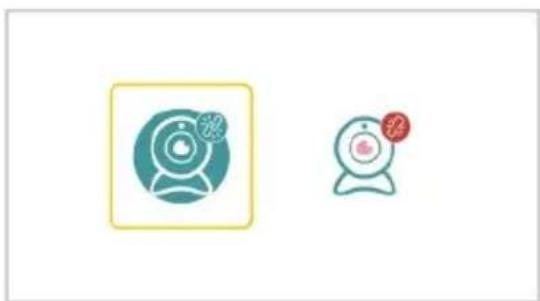
Step 4:
- Press PAIR on the back of the camera.
- The Paired prompt will then appear.
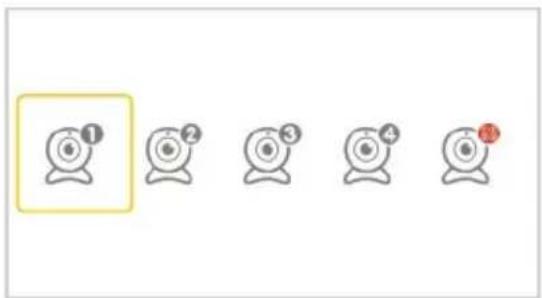
Remark: A maximum of four cameras can be connected to one monitor.
2. Removing cameras
Step 1:
- Print ≡ to access the offer page. Select 🔒 and press OK
- Select the camera that needs to be deleted. Printed from
![graph LR A["User Interface Icon"] --> B["User Interface Icon with Voice, Radio, Headphones, Music Note"] B --> C["User Interface Icon with Calendar, Tablet, Clock, Gear Icon"] D["Sequence 1"] --> E["Sequence 2: Camera Icon"] E --> F["Sequence 3: Headphones Icon"] F --> G["Sequence 4: Clock Icon"] G…](/content/2026/05/1106198/images/2de9506322a938d6e11911078e8701cc89b9dd8557dd340de24bf908072dc2aa.jpg)
Step 2:
- Select the correct camera icon. Press the
- See Removed. Your camera is deleted.

button twice.

![graph LR A["User Input"] --> B["Target Icon"] B --> C["Connection to Monitor"]](/content/2026/05/1106198/images/58ecd3b2330bfc91e39fd89a13e4d1fb464659861b62a43c800b28c8887075db.jpg)
SOUND DETECTION
Explanation:
There are four levels of sound detection: I (78 dB), II (65 dB) III (60 dB) and OFF. I means that sound can be detected when it reaches 78 dB, and so on for II and III.
Step 1:
- Press ≡ to enter the menu page. Select 🔥 and press OK
- Select the desired option. Press OK

HEAT ALARM
Explanation:

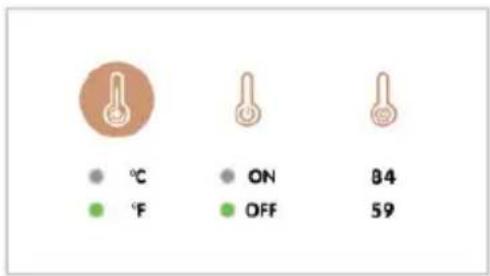
indicates that the temperature value for high and low temperature alarms can be set.
Step 1:
- Press ≡ to access the menu page. Select 🔍 and press OK
- Select the desired option. Press . OK

Remark:
The sound/temperature alarm can be temporarily disabled by pressing any button on the monitor.
LULLABIES
Explanation:
This function is used to calm the child when needed.
Step 1:
- Print ≡ to access the offer page. Select 🔴 and press OK
- Select the desired lullaby. Select ALL(ALL) to play the lullabies in a loop.
![graph LR A["Video"] --> B["Audio"] C["Music"] --> D["Sound"] E["Radio"] --> F["Weather"] G["Clock"] --> H["Clock"] I["Gear"] --> J["Gear"] K["→"] --> L["Audio + 1"] M["Audio + 2"] --> N["Music 1"] O["Audio + 3"] --> P["Music 2"] Q["Audio + 4"] --> R["Music 3"] S["Audio + 5"] --> T["Music 4"] U["Audi…](/content/2026/05/1106198/images/0f4cca5676cb43aaecbf242b4bcae2fb14f65a2e4025c2be61657fed5560ab26.jpg)
SLEEP MODE
Explanation:
This function is used to extend the monitor's operating time by turning off the screen.
Step 1:
- Print ≡ to access the offer page. Select 📄 and press OK
- Select the desired time.
![graph LR A["Camera"] --> B["Music Icon"] C["Radio Icon"] --> D["Timer Icon"] E["Desk Icon"] --> F["Clock Icon"] G["Gear Icon"] --> H["Clock Icon"] I["1 mins"] --> J["5 mins"] --> K["10 mins"] --> L["OFF"]](/content/2026/05/1106198/images/5fe46c97f40170a9c10a7c79aeb3a12204e5b9e9ca833a478fe1155e37f52650.jpg)
Remark:
The screen will automatically light up if an audible or temperature alarm occurs.
FEEDING
Explanation:
This feature reminds you to feed your baby. OFF means you turn the function off; 2.5 hours means it will remind you every 2.5 hours, and so on for the other options.
Step 1:
- Print ⚪ to access the offer page. Select 🔒 and press OK
- Select the desired time. Select OFF to turn off the reminder.
![graph LR A["Weather icon"] --> B["Weather icon with clock"] C["Weather icon"] --> D["Weather icon with clock"] E["Weather icon"] --> F["Weather icon with clock"] G["Weather icon"] --> H["Weather icon with clock"] I["Weather icon"] --> J["Weather icon with clock"] K["Weather icon"] --> L["Weather ico…](/content/2026/05/1106198/images/49b1f9cfce984c1d1413c5ef42e3eca982ad45a0673da9f6f9648917301b39c2.jpg)
Remark: Select + to set the alarm for the specified time.
DATE / TIME
Explanation: This function is used to set the date/time, turn on/off.
Step 1:
-
Print ≡ to access the offer page. Select 🔒 and press OK
-
Press the 🔒 button to start/stop the setup. ▼ means start the setup.
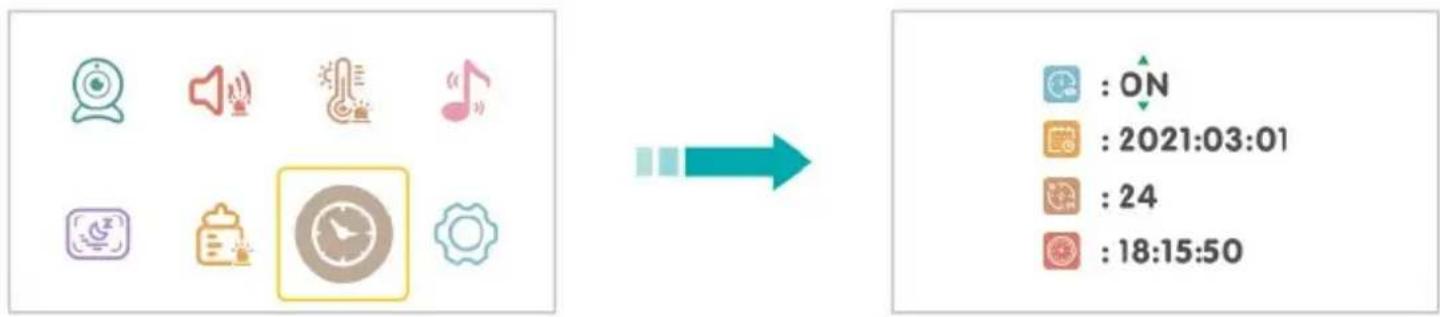
- means the setup is complete.

Remark:
* Press the Up / Down / Left / Right buttons to select and press the Ok button to confirm.
* If is enabled, the date and time will be displayed in the status bar of the monitor; otherwise it will not be displayed.
SETTINGS
Explanation:
Restore factory settings and provide service support information.
Step 1:
- Press ≡ to access the menu page. Select 🔍 and press OK.
- Select and customize ↗. To access the interface, press the OK button.
![graph LR A["Video"] --> B["Audio"] C["Music"] --> D["Music"] E["Calendar Icon"] --> F["Clock Icon"] G["Download Icon"] --> H["Upload Icon"] I["Download Icon"] --> J["Upload Icon"]](/content/2026/05/1106198/images/d01a4553bae9582cd6fde28907366fa6a5e97e6a9aaf1bc131aa482625a2ae40.jpg)
- YES for reset. Print ≡ or customize NO to exit.

- Select i. To access the interface, press the OK button.

EXPLANATION OF ICONS
- Status bar icons
 | No signal connection |  | Sound detection on |
 | Signal strength |  | Temperature alarm enabled |
 | Live Video Loop |  | Feeding reminders allowed |
 | Lullabies allowed |  | 2x magnification |
 | Sleep mode enabled |  | 4x magnification |
| 27°C | Current room temperature |  | Night mode |
 | Battery charge level |  | VOX mode is on |
2. Notification of Icons
 | No camera connected |  | Temperature alarm |
| Audible alarm | Notification of feeding |
Explanation: You can open the Live-Video-Loop function by briefly pressing the buttons on 📷 until 📋 appears in the status bar. When Live-Video-Loop is enabled, the connected cameras automatically switch every 10 seconds. And if an audible/temperature alarm occurs, the camera switch function is temporarily suspended.
FREQUENTLY ASKED QUESTIONS
Q1. Why couldn't I connect the camera to the monitor?
* Make sure the power adapter is firmly connected to the camera and the power outlet.
* Make sure the camera and monitor are at an effective distance.
Q2. Why is the live video so blurry?
* Make sure there is no obstruction on the camera lens.
Q3. Why was the monitor making noise?
* Camera and monitor may be too close. Place them at a greater distance.
Q4. Can I hear my baby if I turn off the screen?
* Yes. You should enable the Sound Detection feature, which wakes up the screen and triggers an audible alarm if a loud sound is detected.
Q5. Why is the picture black and white?
* Night vision mode is activated when the camera is operating in a dark
environment (brightness < 5 lux).
The warranty does NOT cover:
- using the device for purposes other than those for which it is intended,
- installing firmware other than that installed on the device.
- electrical or mechanical damage caused by improper use.
- damage caused by natural influences such as water, fire, static electricity, power fluctuations, etc.
- damage caused by repairs carried out by an unqualified person.
- illegible serial number
- battery capacity will decrease after 6 months of use (6 month battery life guarantee)
Disposal
The crossed-out container symbol on the product, in the accompanying documentation or on the packaging means that all electrical and electronic equipment, batteries and accumulators in the European Union must be disposed of as separated waste at the end of their life. These products must not be disposed of as unsorted municipal waste.

DECLARATION OF CONFORMITY
Abacus Electric, s.r.o. hereby declares that the EVOLVEO Baby Monitor NL4 meets the requirements of the standards and regulations applicable to this type of equipment.
The full text of the Declaration of Conformity can be found at
http://ftp.evolveo.com/ce/.
Importer
Abacus Electric, s.r.o.
Planá 2, 370 01, Czech Republic
Producer
Naxya Limited
No. 5, 17/F, Strand 50, 50 Bonham Strand, Sheung Wan, Hongkong
Made in China
Copyright © Abacus Electric, s.r.o.
www.evolveo.com
www.facebook.com/EvolveoCZ
All rights reserved. Product appearance and technical specifications are subject to change without notice.
Tartalom
FIGYELMEZTETÉS 70
A CSOMAGOLÁS TARTALMA....70
CAMERA....71
MONITOR 72
KAMERA 75
KEZDETBEN....75
KAMERA BEÁLLÍTÁSAI....77


![graph LR A[" webcam"] --> B["屏幕"] style A fill:#f9f,stroke:#333 style B fill:#bbf,stroke:#333](/content/2026/05/1106198/images/aca1595f05471f5860cf00414614ec252d19a6af03196ad4237945904f42c6f0.jpg)
2. lépés:
HANGÉRZÉKELÉS
Magyarázat:


HŐSZÍNHÁZ-ÉRZÉKELŐ
Magyarázat:


Megjegyzés:


AZ IKONOK MAGYARÁZATA
- Állapotsori ikonok
Copyright © Abacus Electric, s.r.o.
www.evolveo.com
www.facebook.com/EvolveoCZ


Pasul 4:
DETECTAREA SUNETULUI
Explicatie:


Observatie:
EXPLICATIA PICTOGRAMELOR
No. 5, 17/F, Strand 50, 50 Bonham Strand, Sheung Wan, Hongkong
Fabricat în China
Copyright © Abacus Electric, s.r.o.
www.evolveo.com
www.facebook.com/EvolveoCZ
| Manufacturer's name or trade mark, commercial registration number and address | Shenzhen Flypower Technology Co., Ltd | - |
| Model identifier | PS10UA050K2000EU | - |
| Input voltage | 100-240 | V |
| Input AC frequency | 50/60 | Hz |
| Output voltage | 5 | V |
| Output current | 2 | A |
| Output power | 10 | W |
| Average active efficiency | 78,7 | % |
| Efficiency at low load (10 %) | X,X | % |
| No-load power consumption | 0,1 | W |
- OBSAH / CONTENT / TARTALOM / CUPRINS
- OBSAH
- VAROVÁNÍ
- KROK 3
- KROK 4
- DETEKCE ZVUKU
- VYSVĚTLENÍ
- POZNÁMKA
- VYSVĚTLENÍ IKON
- KROK 2
- DETEKCIA ZVUKU
- VYSVETLENIE
- ALARM TEPLA
- VYSVETLENIE IKON
- CAMERA
- MONITOR
- GETTING STARTED
- STEP 1
- STEP 2
- CAMERA SETTINGS
- ADDING CAMERAS
- STEP 3
- STEP 4
- REMOVING CAMERAS
- SOUND DETECTION
- EXPLANATION
- HEAT ALARM
- REMARK
- LULLABIES
- SLEEP MODE
- FEEDING
- DATE / TIME
- SETTINGS
- EXPLANATION OF ICONS
- NOTIFICATION OF ICONS
- FREQUENTLY ASKED QUESTIONS
- THE WARRANTY DOES NOT COVER
- DISPOSAL
- DECLARATION OF CONFORMITY
- TARTALOM
- LÉPÉS
- HANGÉRZÉKELÉS
- MAGYARÁZAT
- HŐSZÍNHÁZ-ÉRZÉKELŐ
- MEGJEGYZÉS
- AZ IKONOK MAGYARÁZATA
- PASUL 4
- DETECTAREA SUNETULUI
- EXPLICATIE
- OBSERVATIE
- EXPLICATIA PICTOGRAMELOR
Brand : Evolveo
Model : NL4
Category : Baby monitor