
CTR6001IX - Oven VOX - Free user manual and instructions
Find the device manual for free CTR6001IX VOX in PDF.


| Product Type | Freestanding Electric Cooker with Ceramic Hob and Oven |
| Model | CTR6001IX |
| Dimensions (W x D x H) | 60 x 60 x 85 cm |
| Net Weight | 39 kg (+/-2) |
| Power Supply | 220-240 V~, 50/60 Hz |
| Energy Class | A |
| Oven Volume | 65 L |
| Oven Functions | Static, Turbo, Fan, Grill, Grill+Fan, Defrost, Lower+Fan |
| Hob Type | Ceramic (Vitroceramic) with 4 Cooking Zones |
| Hob Controls | 6-Position Rotary Knobs per Zone, Residual Heat Indicators |
| Oven Controls | Function Selector Knob, Thermostat Knob, Mechanical Timer |
| Cleaning Type | Catalytic Liners (Rear Panel), Self-Cleaning by Absorbing Fats |
| Oven Light | Replaceable Lamp: 230 V, 15-25 W, E14, 300°C Resistant |
| Accessories Included | Deep Tray, Shallow Tray, Wire Grid, Anti-Tilting Kit |
| Safety Features | Anti-Tilting Bracket, Child Safety (8+ years), Residual Heat Warning, Overheat Protection |
| Installation Requirements | Minimum 2 cm Clearance for Air Circulation, Heat-Resistant Surroundings (100°C+) |
Frequently Asked Questions - CTR6001IX VOX
User questions about CTR6001IX VOX
0 question about this device. Answer the ones you know or ask your own.
Ask a new question about this device
Download the instructions for your Oven in PDF format for free! Find your manual CTR6001IX - VOX and take your electronic device back in hand. On this page are published all the documents necessary for the use of your device. CTR6001IX by VOX.
USER MANUAL CTR6001IX VOX
GBR
SRB
MKD
SVN
HRV
GRC
PRT
OPERATING INSTRUCTIONS FREE STANDING COOKER CRT6001/CRT6001IX
УПУТСТВО ЗА УПОТРЕБУ САМОСТОЈЕЋИ ШПОРЕТ CRT6001/CRT6001IX
EN Free Standing Ceramic Cooker / User Manual
Models CRT6001/CRT6001IX

natural_image
Line drawing of a simple kitchen oven with four circular ovens (no text or symbols)Thank you for choosing this product.
This User Manual contains important information on safety and instructions intended to assist you in the operation and maintenance of your appliance.
Please take the time to read this User Manual before using your appliance and keep this book for future reference.

CE Declaration of conformity
We declare that our products meet the applicable European Directives, Decisions and Regulations and the requirements listed in the standards referenced.
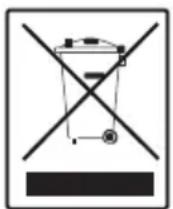
Disposal of your old machine
The symbol on the product or on its packaging indicates that this product may not be treated as household waste. Instead it shall be handed over to the applicable collection point for the recycling of electrical and electronic equipment. By ensuring this product is disposed of correctly, you will help prevent potential negative consequences for the environment and human health, which could otherwise be caused by inappropriate waste handling of this product. For more detailed information about recycling of this product, please contact your local city office, your household waste disposal service or the shop where you purchased the product.
| Icon | Type | Meaning |
| WARNING | Serious injury or death risk | |
| RISK OF ELECTRIC SHOCK | Dangerous voltage risk | |
| CAUTION | Injury or property damage risk | |
| IMPORTANT | Operating the system correctly |
CONTENTS
3
1.SAFETY INSTRUCTIONS 4
1.1. General Safety Wamings....4
1.2. Installation Wamings....6
1.3. During Usage 7
1.4. During Cleaning and Maintenance 8
2. INSTALLATION AND PREPARATIONS FOR USE 10
2.1. Instructions for the Installer 10
2.2. Installation of the Cooker 10
2.3. Electrical Connection and Safety 11
2.4. Anti-tilting kit 12
2.5. Adjusting the feet 12
3.PRODUCT FEATURES....13
- USE OF PRODUCT 14
4.1. Control of Hob 14
4.2. Control of Oven 15
4.3. Use of Mechanical Minute Minder 16
5. CLEANING AND MAINTENANCE 16
5.1. Cleaning.... 16
5.2. Maintenance 19
6. TROUBLESHOOTING&TRANSPORT 20
6.1. Troubleshooting 20
6.2. Transport. 20
1. SAFETY INSTRUCTIONS
- Read these instructions carefully and completely before using your appliance and keep them in a convenient place for reference when necessary.
- This manual is prepared for two models. Your appliance may not have some of the features described in this manual. Pay particular attention to any figures while you are reading the operating manual.
1.1. General Safety Warnings
- This appliance can be used by children aged from 8 years and above and persons with reduced physical, sensory or mental capabilities or lack of experience and knowledge if they have been given supervision or instruction concerning use of the appliance in a safe way and understand the hazards involved. Children shall not play with the appliance. Cleaning and user maintenance shall not be made by children without supervision.
- WARNING: The appliance and its accessible parts become hot during use. Care should be taken to avoid touching heating elements. Keep children less than 8 years of age away unless they are continuously supervised.
- WARNING: Unattended cooking on a hob with fat or oil can be dangerous and may result in fire. NEVER try to extinguish a fire with water, but switch off the appliance and then cover flame e.g. with a lid or a fire blanket.
- ⚠ WARNING: Danger of fire: do not store items on the cooking surfaces.
- ⚠️⚠ WARNING: If the surface is cracked, switch off the appliance to avoid the possibility of electric
shock.
- Do not operate the appliance by means of an external timer or separate remote-control system.
- WARNING: To prevent the appliance tipping, the stabilizing brackets must be installed. (For detailed information refer to the anti-tilting kit set guide.)

natural_image
Warning symbol depicting a person pulling a large block inside a triangle (no text or numbers)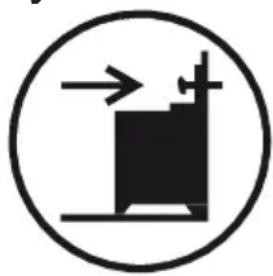
natural_image
Simple black-and-white icon of a machine inside a circle, with no text or symbols present.- During use the appliance will get hot. Care should be taken to avoid touching heating elements inside the oven.
- During use handles held for short periods in normal use may get hot.
- Do not use harsh abrasive cleaners or sharp metal scrapers to clean the oven door glass and other surface. They can scratch the surface which may result in shattering of the glass or damage to the surface.
- Do not use steam cleaners for cleaning the appliance.
- ⚠ WARNING: To avoid the possibility of electric shocks, make sure that the appliance is switched off before replacing the lamp.
- CAUTION: Accessible parts may be hot when cooking or grilling. Keep young children away from the appliance when it is in use.
- Your appliance is produced in accordance with all applicable local and international standards and regulations.
- Maintenance and repair work must only be carried
out by authorised service technicians. Installation and repair work that is carried out by unauthorised technicians may be dangerous. Do not alter or modify the specifications of the appliance in any way. Inappropriate hob guards can cause accidents.
- Before connecting your appliance, make sure that the local distribution conditions (nature of the gas and gas pressure or electricity voltage and frequency) and the specifications of the appliance are compatible. The specifications for this appliance are stated on the label.
- CAUTION: This appliance is designed only for cooking food and is intended for indoor domestic household use only. It should not be used for any other purpose or in any other application, such as for non-domestic use or in a commercial environment or room heating.
- Do not use the oven door handles to lift or move the appliance.
• A possible measures have been taken to ensure your safety. Since the glass may break, care should be taken while cleaning to avoid scratching. Avoid hitting or knocking the glass with accessories. - Make sure that the supply cord is not trapped or damaged during installation. If the supply cord is damaged, it must be replaced by the manufacturer, its service agent or similarly qualified persons in order to prevent a hazard.
- Do not let children climb on the oven door or sit on it while it is open.
1.2. Installation Warnings
- Do not operate the appliance before it is fully installed.
- The appliance must be installed by an authorised technician. The manufacturer is not responsible for any damage that might be caused by defective placement and installation by unauthorised people.
- When the appliance is unpacked, make sure that it has not been damaged during transportation. In case of any defect do not use the appliance and contact a qualified service agent immediately. The materials used for packaging (nylon, staplers, styrofoam, etc.) may be harmful to children and they should be collected and removed immediately.
- Protect your appliance against atmospheric effects. Do not expose it to effects such as sun, rain, snow, excessive humidity etc.
- The material around the appliance (cabinet) must be able to withstand a minimum temperature of 100°C.
1.3. During Usage
- When you first use your Oven you may notice a slight smell. This is perfectly normal and is caused by the insulation materials on the heater elements. We suggest that before using your Oven for the first time you leave it empty, and set at maximum temperature for 45 minutes. Make sure that the environment in which the product is installed is well ventilated.
• Take care when opening the oven door during or after cooking. The hot steam from the oven may cause burns. - Do not put flammable or combustible materials in or near the appliance when it is operating.
• Always use oven gloves to remove and replace food in the oven.
• Do not leave the cooker unattended while cooking
with solid or liquid oils. They may catch fire under extreme heating conditions. Never pour water on to flames that are caused by oil, instead switch the cooker off and cover the pan with its lid or a fire blanket.
- Always position pans over the centre of the cooking zone, and turn the handles to a safe position so they cannot be knocked or grabbed.
- The product will not be used for a long period of time, turn the main control switch off.
- Make sure the appliance control knobs are always in the “0” (stop) position when it is not used.
- The trays incline when pulled out. Take care not to spill or drop hot food when removing it from the ovens.
- Do not place anything on the oven door when it is open. This could disrupt the balance of the oven or damage the door.
- Do not place heavy items or flammable or ignitable items (e.g. nylon, plastic bag, paper, cloth, etc.) into the drawer. This includes cookware with plastic accessories (e.g. handles).
- CAUTION: The inside surface of the storage compartment may get hot when the appliance is in use. Avoid touching the inside surface.
- Do not hang towels, dishcloths or clothes from the appliance or its handles.
1.4. During Cleaning and Maintenance
• Always turn the appliance off before operations such as cleaning or maintenance. You can do it after plugging the appliance off or turning the main switches off.
- Do not remove the control knobs to clean the control panel.
- To maintain the efficiency and safety of your appliance, we recommend you always use original spare parts and to call our authorised service agents in case of need.
2. INSTALLATION AND PREPARATIONS FOR USE

WARNING: This appliance must be installed by an authorised service person or qualified technician,
according to the instructions in this guide and in compliance with the current local regulations.
- Incorrect installation may cause harm and damage, for which the manufacturer accepts no responsibility and the warranty will not be valid.
- Prior to installation, ensure that the local distribution conditions (electricity voltage and frequency and/or nature of the gas and gas pressure) and the adjustments of the appliance are compatible. The adjustment conditions for this appliance are stated on the label.
- The laws, ordinances, directives and standards in force in the country of use are to be followed (safety regulations, proper recycling in accordance with the regulations, etc.).
2.1. Instructions for the Installer General instructions
• After removing the packaging material from the appliance and its accessories, ensure that the appliance is not damaged. If you suspect any damage, do not use it and contact an authorised service person or qualified technician immediately.
- Make sure that there are no flammable or combustible materials in the close vicinity, such as curtains, oil, cloth etc. which may catch fire.
- The worktop and furniture surrounding the appliance must be made of materials resistant to temperatures above 100°C.
- The appliance should not be installed directly above a dishwasher, fridge, freezer, washing machine or clothes dryer.
- The appliance can be placed close to other furniture on condition that in the area where the appliance is set up, the furniture's height does not exceed the height of the cooktop.
2.2. Installation of the Cooker
- If the kitchen furniture is higher than the cooktop, the kitchen furniture must be at least 10 cm away from the sides of appliance for air circulation.
- There should be a minimum 2cm blank space around the appliance for air circulation.
- If a cooker hood or any cupboard is to be installed above the appliance, the safety distance between cooktop and any cupboard/cooker hood should be as shown below.
| A (mm) | 420 |
| B (mm) Cooker Hood/Cupboard | 650/700 |
| C (mm) | 20 |
| D (mm) | Product Width |
| E (mm) | 50 |

2.3. Electrical Connection and Safety

WARNING: The electrical connection of this appliance should be carried out by an authorised service person or qualified electrician, according to the instructions in this guide and in compliance with the current local regulations.

WARNING: THE APPLIANCE MUST BE EARTHED.
Before carrying out the connection to the power supply, the voltage rating of the appliance (stamped on the appliance identification plate) must be checked for correspondence to the available mains supply voltage, and the mains electric wiring should be capable of handling the appliance's power rating (also indicated on the identification plate).
- During installation, please ensure that isolated cables are used. An incorrect connection might damage your appliance. If the mains cable is damaged and needs to be replaced this should be done by a qualified personnel.
- Do not use adaptors, multiple sockets and/or extension leads.
- The supply cord should be kept away from hot parts of appliance and must not be bent or compressed. Otherwise the cord may be damaged, causing a short circuit.
- If the appliance is not connected to the mains with a plug, a multi-pole isolator switch (with at least 3 mm contact spacing) must be used in order to meet the safety regulations.
- The appliance is designed for a power supply of 220-240 V\~. If your supply is different, contact the authorized service personnel or qualified electrician.
- The power cable (H05VV-F) must be long enough to be connected to the appliance.
- The fused switch must be easily accessible once the appliance has been installed.
- Ensure all connections are adequately tightened.
• Fix the supply cable in the cable clamp and then close the cover. - The terminal box connection is placed on the terminal box.

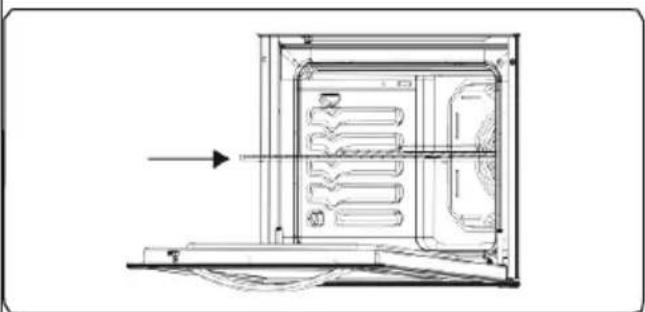
2.4. Anti-tilting kit

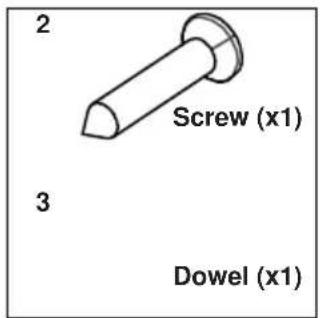
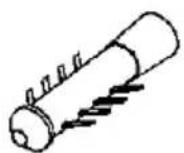
The document bag contains an anti-tilting kit. Loosely attach the anti-tilting bracket (1) to the wall using the screw (2) and dowel (3), following the measurements shown in the figure and table below. Adjust the height of the anti-tilting bracket so that it lines up with the slot on the cooker and tighten the screw. Push the appliance towards the wall making sure that the anti-tilting bracket is inserted into the slot on the appliance.

| Product Dimensions(Width X Depth X Height) (Cm) | A (mm) | B (mm) |
| 60x60x85 | 309.5 | 64 |
2.5. Adjusting the feet
Your product stands on four adjustable feet. For safe operation, it is important that your appliance is safe and balanced. Make sure the appliance is level prior to cooking. To increase the height of the appliance, turn the feet anti-clockwise. To decrease the height of the appliance, turn the feet clockwise.
It is possible to raise the height of the appliance 30 mm by adjusting the feet. The appliance is heavy and we recommend that a minimum of 2 people lift it. Never drag the appliance.

natural_image
Diagram of a mechanical assembly with a spring and rotating arrow (no text or symbols)3. PRODUCT FEATURES

Important: Specifications for the product vary and the appearance of your appliance may differ from that shown in the figures below.
List of Components
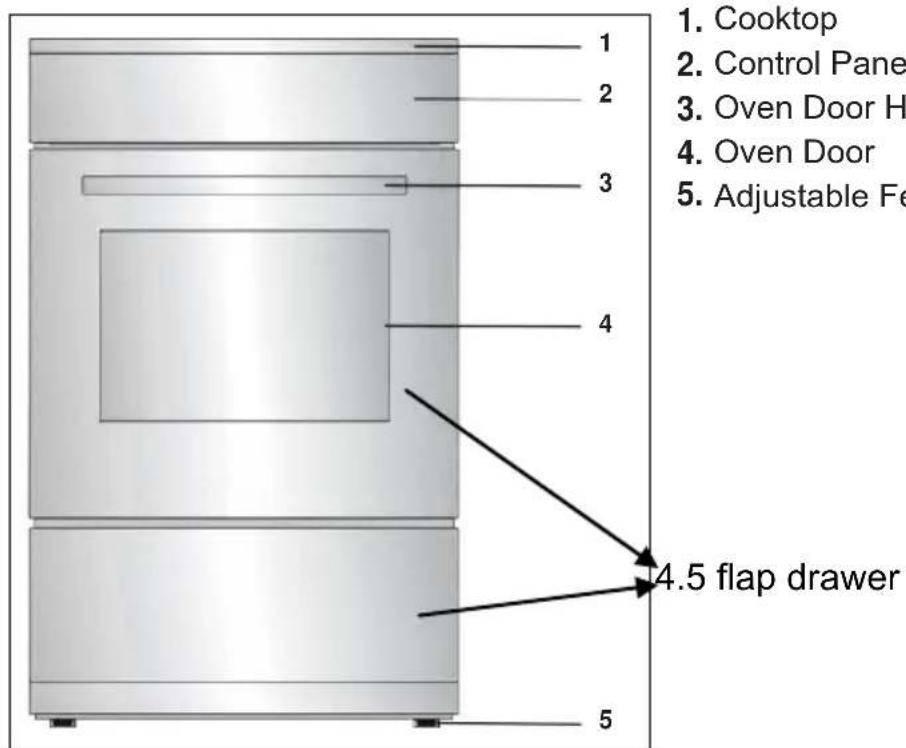
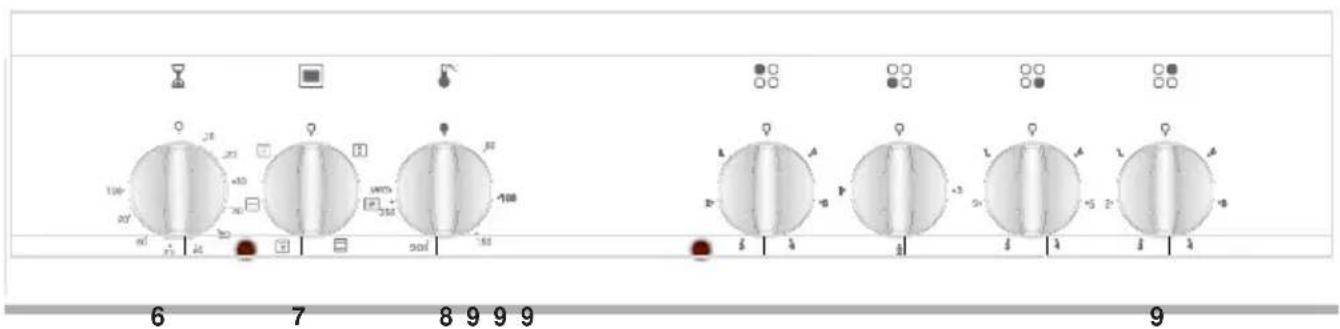
Control Panel
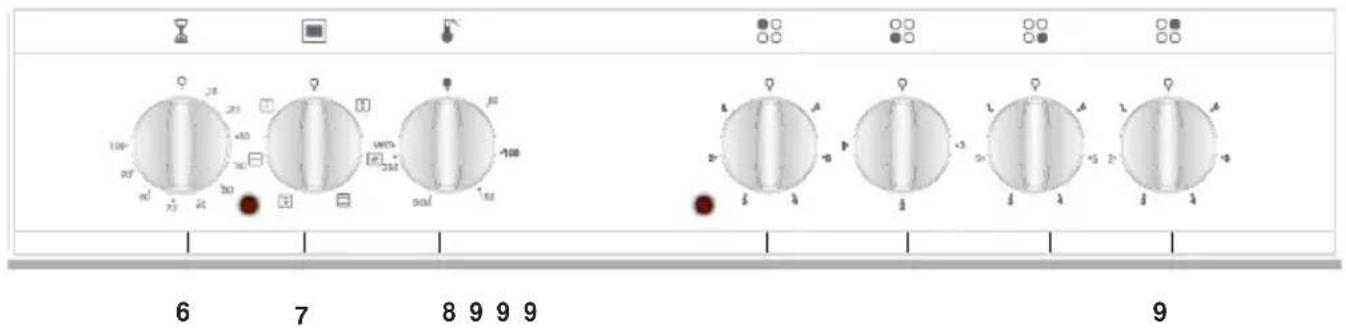
- Timer
- Oven Function Control Knob
- Thermostat Control Knob
- Hob Control Knob
4. USE OF PRODUCT
4.1. Control of Hob
Control of the ceramic heater
The ceramic heater is controlled by a 6 position knob.
The ceramic heater is operated by turning the control knob to the required setting. Near each control knob is a symbol which indicates the heater that is controlled by the knob. The on/off light on the control panel shows if any of the ceramic heaters are in use.
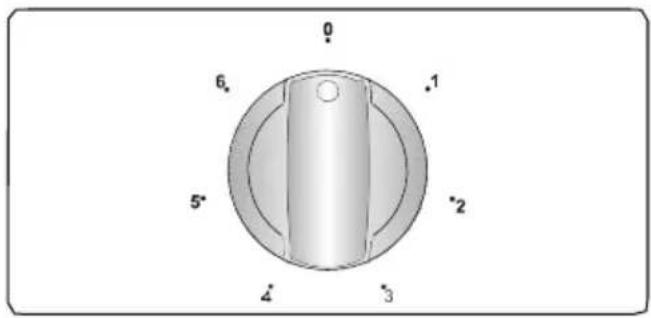
| Knob Position | Function |
| 0 | Off position |
| 1 | Keep warm position |
| 2-3 | Heating position at low heat |
| 4-5-6 | Cooking, roasting and boiling position |

Important: The knob rotation direction may differ according to the product specification.
Residual heat indicator(If available)
After using the hob there will be heat which is called residual heat stored in the vitroceramic glass. If the residual heat level is greater than 60^ C, the residual heat indicator will be active for the cooking zone which is above this temperature.
If the power supply to the hob is disconnected while residual heat indicator is on, the warning light will flash when the power is reconnected. The display will flash until the residual heat has decreased or one
of the cooking zones is activated.
Hints and Tips

Important: When ceramic heaters are operated in higher heat settings, the heated areas may be seen switching
on and off. This is due to a safety device, which prevents the glass from overheating. Some switching on and off when cooking at high temperatures is quite normal, causes no damage to the hob and little delay in cooking times.

WARNING:
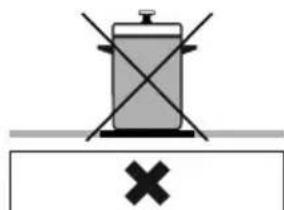
- Never operate the hob without pans on the cooking zone.
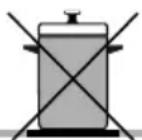
- Use only flat saucepans and with a sufficiently thick base.
• Make sure the bottom of the pan is dry before placing it on the hob. - While the cooking zone is in operation, it is important to ensure that the pan is centred correctly above the zone.
- In order to conserve energy, never use a pan with a different diameter to hotplate being used.

natural_image
Simple line drawing of a cooking pot on a surface with a checkmark below (no text or symbols)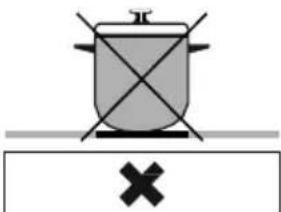
natural_image
Simple line drawing of a cooking pot with crossed lines and a cross symbol below (no text or labels)Circular Saucepan Base
natural_image
Simple line drawing of a cooking pot with crossed lines and a cross symbol below (no text or labels)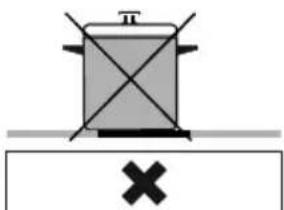
natural_image
Simple diagram of a cooking pot with crossed handles and a cross symbol below (no text or labels)Small Saucepan Saucepan base that Diameter has not settled
- Do not use pans with rough bottoms since these can scratch the glass ceramic surface.
- If possible, always place lids on the pans.
- The temperature of accessible parts maybe high when the appliance is operating. Keep children and animals well away from the hob during operation
and until it has fully cooled after operation.
- If you notice a crack on the cook top it must be switched off immediately and replaced by authorised service personnel.
4.2. Control of Oven
Oven function control knob
Turn the knob to the corresponding symbol of the desired cooking function. For the details of different functions see 'Oven functions'.
Oven thermostat knob
After selecting a cooking function, turn this knob to set the desired temperature. The oven thermostat light will light whenever the thermostat is in operation to heat up the oven or maintain the temperature.
Oven Functions
* The functions of your oven may be different due to the model of your product.

natural_image
Abstract diagram with circular arrow pattern and concentric rings, no text or symbols presentDefrost Function: The oven's warning lights will be turned on and the fan starts operating. To use the defrost function, take your frozen food and
place it in the oven on a shelf in the third slot from the bottom. It is recommended that you place an oven tray under the defrosting food, to catch the water accumulated due to melting ice. This function will not cook or bake your food, it will only help to defrost it.

natural_image
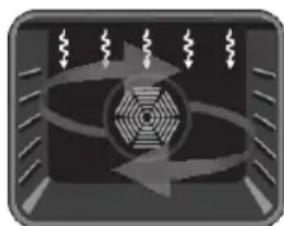
Abstract circular emblem with radial lines, no text or symbols presentTurbo Function: The oven's thermostat and warning lights will be turned on and the ring heating element and fan will start operating. The turbo function
evenly disperses the heat in the oven. All food on all racks will be cooked evenly. It is recommended that you pre-heat the oven for about 10 minutes.

natural_image
Simple rectangular icon with a black horizontal bar and four diagonal lines, no text or symbols present.Static Cooking
Function: The oven's thermostat and warning lights will be turned on and the lower and upper heating elements will start operating. The
static cooking function emits heat, ensuring even cooking of the food. This is ideal for making pastries, cakes, baked pasta, lasagne and pizza. Prehating the oven for 10 minutes is recommended and it is best to cook on only one shelf at a time in this function.

natural_image
Abstract geometric pattern with concentric circles and curved lines inside a rectangular frame (no text or symbols)Fan Function: The
Oven's thermostat and warning lights will turn on, the upper and lower heating elements and fan will start operating. This function
is very good when baking pastry. Cooking is carried out by the lower and upper heating elements within the oven and by the fan, which provides air circulation, giving a slightly grilled effect to the food. It is recommended that you pre-heat the oven for about 10 minutes. The fan and lower heating function is ideal for baking food such as pizza, evenly in a short period of time. While the fan evenly disperses the heat of the oven, the lower heating element bakes the food.

natural_image
Pure electrical circuit lines without any symbolsGrilling Function: The oven's thermostat and warning lights will be turned on, the grill heating element will start operating. This function is used for
grilling and toasting foods. Use the upper shelves of the oven. Lightly brush the wire grid with oil to stop food sticking and place food in the centre of the grid. Always place a tray beneath the food to catch any drips of oil or fat. It is recommended that you pre-heat the oven for about 10 minutes.

Warning: When grilling, the oven door must be closed and the oven temperature should be adjusted to C.
natural_image
Abstract diagram with circular pattern and directional arrows, no readable text or symbolsGrill and Fan
Function: The oven's thermostat and warning lights will be turned on. The grill heating element and fan will start operating. This function is ideal
for grilling thicker food. Use the upper shelves of oven. Lightly brush the wire grid with oil to stop food sticking and place food in the centre of the grid. Always place a tray beneath the food to catch any drips of oil or fat.
Warning: When grilling, the oven door must be closed and the oven temperature should be adjusted to 190°C.
4.3. Use of Mechanical Minute Minder
| Function Description | |
| 0......100 | Operating by adjusting the timer |
Set the desired cooking time by turning the timer knob clockwise. When the timer reaches zero, an audible warning will sound, but the oven will continue working. To turn the oven off switch off the oven control.
Deep Tray
The deep tray is used when cooking stews. To locate the tray correctly in the cavity, put it to any rack and push it up to the end.

natural_image
Technical line drawing of a square frame with mounting holes (no text or symbols)Flap Drawer
Your appliance has a drawer to store accessories like trays, shelves, grids, small pots and pans.

WARNING: The inside surface of drawer may become hot during use.
Do not store any food, plastic or inflammable materials in the drawer.

natural_image
Technical line drawing of a mechanical component with a curved arrow indicating rotation (no text or symbols)Shallow Tray
The shallow tray is used when baking pastry, such as flans, etc.
To locate the tray correctly in the cavity, put it to any rack and push it up to the end.

natural_image
Line drawing of a square frame with rounded corners and internal cutouts (no text or symbols)Wire Grid
The wire grid is used when grilling or processing food in other containers.

natural_image
Pure 3D wireframe diagram of a curved grid structure with directional arrows, no text or symbols present
WARNING: The wire grid is used when grilling or processing food in other containers.

natural_image
Technical line drawing of a door or enclosure with internal compartments and a directional arrow indicating flow or movement (no text or symbols present)5. CLEANING AND MAINTENANCE
5.1. Cleaning

WARNING: Switch off the appliance and allow it to cool down before cleaning your appliance.
General Instructions
- Check whether the cleaning materials are appropriate and recommended by the manufacturer before using on your appliance.
- Use cream cleaners or liquid cleaners which do not contain particles. Do not use caustic (corrosive) creams, abrasive
cleaning powders, rough wire wool or hard tools as they may damage the cooker surfaces.
- Do not use cleaners that contain particles, as they might scratch the glass, enameled and/or painted parts of your appliance.
- Should any liquids overflow, clean them up immediately to avoid parts becoming damaged.
- Do not use steam cleaners for cleaning any part of the appliance.
Cleaning the inside of the Oven
• The inside of enamelled ovens are best cleaned when the oven is warm.
- Wipe the oven with a soft cloth soaked in soapy water after each use. Then wipe the oven over again with a wet cloth and then dry it.
- You may need to use a liquid cleaning material occasionally to completely clean the oven.

natural_image
Line drawing of a hand cleaning a wall with plastic components (no text or symbols)Catalytic Cleaning
Catalytic liners installed within the oven cavity. These are the matte finished, panel at the rear of the oven. They work by collecting the grease and oil residues that occur during cooking. Catalytic liners are designed for a working life of about 300 hours.
The liner self-cleans by absorbing fats and oils and burning them to ash which is then easily removed from the floor of the oven with a damp cloth. The lining must be porous to be effective. The liner may discolour with age.
If a large amount of fat is spilled on to the liner it may reduce its efficiency. To overcome this problem set the oven to maximum temperature for about 10 - 20 minutes. When the oven is cool wipe out the floor of the oven.
Manual cleaning of the catalytic liners is not recommended. Damage will occur if soap impregnated steel wool pad or any other abrasives are used.
In addition, we do not recommend the use of aerosol cleaners on the liners. If the walls of a catalytic liner are no longer effective you can remove the surplus grease with a soft cloth or sponge soaked in hot water then go through the cleaning cycle as described above.

natural_image
Technical line drawing of a rectangular electronic device with a circular vent and internal structure (no text or symbols)Cleaning the Ceramic Glass
Ceramic glass can hold heavy utensils but may be broken if it is hit with a sharp object.
WARNING : Ceramic Cooktops - if the surface is cracked, to avoid any possibility of electric shock switch off the appliance and call for service.
- Use cream or liquid cleaner to clean vitroceramic glass, then rinse and dry them thoroughly with a dry cloth.
- Do not use cleaning materials meant for steel as they may damage the glass.
- Spilt sugary or sweet foods must be cleaned immediately after the glass has cooled down.
- Dust on the surface must be cleaned with a wet cloth.
- Any changes in colour to the ceramic glass does not affect the structure or durability of the ceramic and is not due to a change in the material.
Colour changes to the ceramic glass may be for a number of reasons:
- Spilt food has not been cleaned off the surface.
- Using incorrect dishes on the hob which erodes the surface.
- Using the wrong cleaning materials.
Cleaning the Glass Parts
- Clean the glass parts of your appliance on a regular basis.
- Use a glass cleaner to clean inside and outside of the glass parts, then rinse and dry them thoroughly with a dry cloth.
Cleaning the Enamelled Parts
- Clean the enamelled parts of your appliance on a regular basis.
- Wipe the enamelled parts with a soft cloth soaked in soapy water. Then wipe
them over again with a wet cloth and then dry them.
- Do not wash the enamelled parts when they are still hot from cooking.
- Do not leave vinegar, coffee, milk, salt, water, lemon or tomato juice on the enamel for a long time.
Cleaning the Stainless Steel Parts (If avaliable)
- Clean the stainless steel parts of your appliance on a regular basis.
- Wipe the stainless steel parts with a soft cloth soaked in only water. Then dry them thoroughly with a dry cloth.
- Do not wash the stainless steel parts when they are still hot from cooking.
- Don't leave vinegar, coffee, milk, salt, water, lemon or tomato juice on the stainless steel for a long time.
Removal of Oven Door
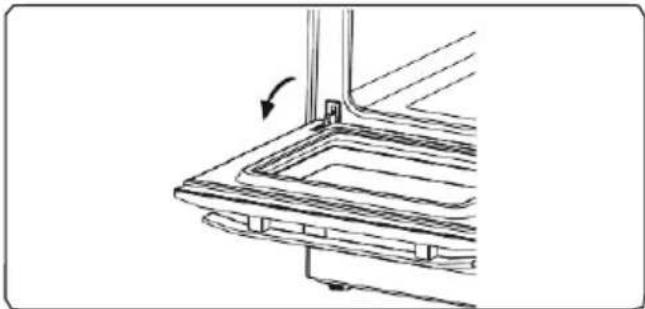
Before cleaning the oven door glass, you must remove the oven door as shown:
- Open the oven door.
natural_image
Technical line drawing of a mechanical component with an arrow indicating direction (no text or symbols)- Open the saddle bracket (a)(with the aid of a screwdriver) up to the end position.

- Close the door until it almost reaches the fully closed position and remove the door by pulling it towards you.

natural_image
Diagram of a door with internal spring mechanism and upward arrow (no text or symbols)5.2. Maintenance

WARNING: The maintenance of this appliance should be carried out by an authorised service person or qualified physician.
Change of Oven Lamp

WARNING: Switch off the appliance and allow it to cool down before cleaning your appliance.
- Remove the glass lense and then remove the bulb.
- Insert the new bulb (resistant to 300°C) to replace the bulb that you removed (230 V, 15-25 Watt, Type E14).
- Replace the glass lens, then your oven is ready for use.

The lamp design is designed specifically for use in household cooking appliances. It is not suitable for household room illumination.
6. TROUBLESHOOTING&TRANSPORT
6.1. Troubleshooting

After checking these basic trouble shooting, if you have still problem with your appliance, please contact with an authorised service person or qualified technician.
| Problem | Possible Cause | Solution |
| The hob or cooking zones cannot be switched on. | There is no power supply. | Check the household fuse for the appliance.Check whether there is a power cut by trying other electronic appliances. |
| Oven does not turn on. | Power is turned off. | Check whether there is power supplied.Also check that other kitchen appliances are working. |
| No heat or oven does not warm up. | Oven temperature control is incorrectly set.Oven door has been left open. | Check the oven temperature control knob is set correctly. |
| Cooking is uneven within the oven. | Oven shelves are incorrectly positioned. | Check that the recommended temperatures and shelf positions are being used.Do not frequently open the door unless you are cooking things that need to be turned. If you open the door often, the interior temperature will be lower and this may affect the results of your cooking. |
| Oven light (if avaliable) does not operate. | Lamp has failed.Electrical supply is disconnected or switched off. | Replace lamp according to the instructions.Make sure the electrical supply is turned on at wall socket outlet. |
| The oven fan (if avaliable) is noisy. | Oven shelves are vibrating. | Check that the oven is level.Check that the shelves and bakeware are not vibrating in contact with the oven back panel. |
6.2. Transport
If you need to transport the product, use the original product packaging and carry it using its original case. Follow the transport signs on the packaging. Tape all independent parts to the product to prevent damaging the product during transport.
If you do not have the original packaging; prepare a carriage box so that the appliance, especially the external surfaces of the product, are protected against external threats.
natural_image
Line drawing of a simple oven with four circular tops and a front panel (no text or symbols)Hvala Vam što ste izabrali ovaj proizvod.
natural_image
Warning symbol depicting a person pulling a large block inside a triangle (no text or numbers)
natural_image
Simple black-and-white icon of a building inside a circle, with arrows pointing to the roof (no text or symbols)strane nekvalifikovanog lica može biti opasno.
natural_image
Technical line drawing of a bolt fastening assembly (no text or symbols)3. KARAKTERISTIKE PROIZVODA

Važno: Specifikacije proizvoda i izgled vašeg uređaja mogu se neznatno razlikovati u odnosu na sliku prikazanu ispod.
Lista delova
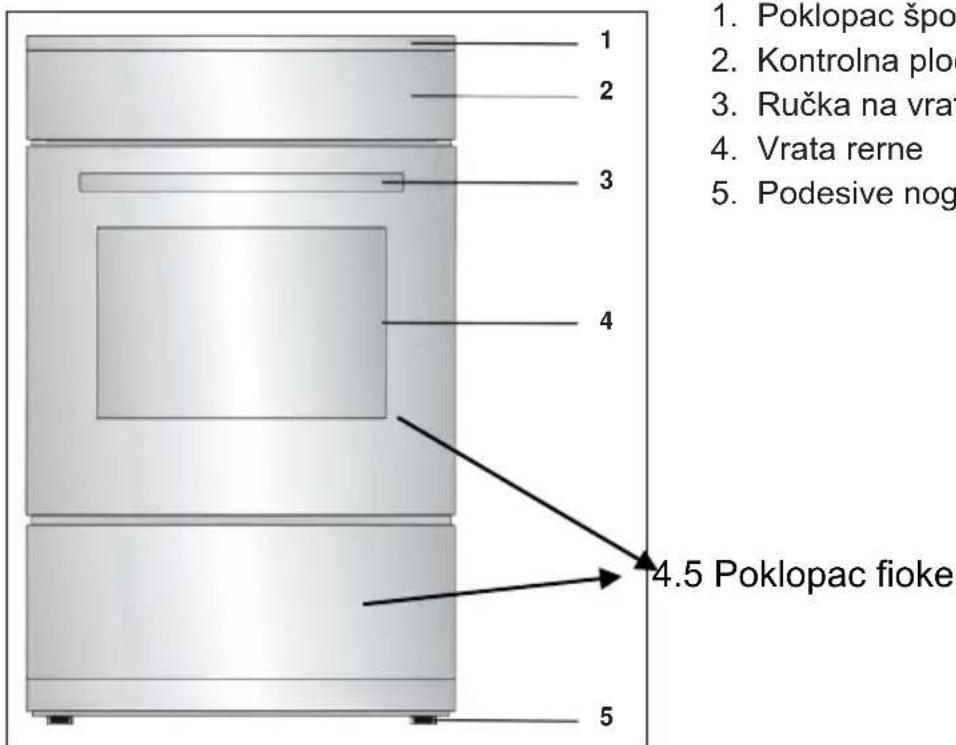
Kontrolna ploča

- Tajmer
- Regulator za kontrolu rerne
- Regulator za kontrolu termostata
- Regulator za kontrolu ploče
4. UPOTREBA PROIZVODA
4.1.Kontrola ploče
Kontrola keramičkih ringli
Keramičke ringle se kontrolišu sa regulatorom sa 6 pozicija.
Keramičkom inglom se može rukovati prebacivanjem regulatora na jednu od ovih pozicija. U blizini svake ringle nalazi se mali simbol koji pokazuje koja je ringla se kontroliše tim regulatorom. Svetlo on/off (uključeno/isključeno) na kontrolnoj ploči pokazuje koje su ringle u upotrebi.

| Pozicija regulatora | Funkcija |
| 0 | Off pozicija (isključeno) |
| 1 | Održava toplo |
| 2-3 | Grejanje pri nižoj jačini |
| 4-5-6 | Pečenje, prženje i kuvanje |

UPOZORENJE: Smer regulatora se može razlikovati u zavisnosti od specifikacija proizvoda.
Indikator preostale toplote (ukoliko je dostupan)
Nakon upotrebe ringle toplota će biti i dalje što predstavlja preostalu toplotu na staklokeramičkoj ploči. Ukoliko je temperatura preostale toplote viša od 60°C, indikator za preostalu toplotu će biti aktivan za ringlu koja je iznad ove temperature.
natural_image
Abstract diagram with circular arrow pattern and concentric rings, no text or symbols presentFunkcija otapanja:
natural_image
Abstract graphic with a circular emblem and ribbon-like elements, no text or symbols present.Turbo Funkcija:
natural_image
Simple icon of a rectangular device with a black horizontal bar and side stripes (no text or symbols)natural_image
Abstract geometric pattern with concentric circles and radial lines (no text or symbols)Funkcija ventilatora:
natural_image
Black rectangular object with five white downward arrows on a dark surface, no text or symbols present.natural_image
Abstract diagram with circular arrow and zigzag lines, no readable text or symbolsRoštilj i ventilator
natural_image
Pure geometric diagram of a square frame with no text, numbers, or symbolsDodatna fioka
natural_image
Technical line drawing of a mechanical component with a curved arrow indicating rotation (no text or symbols)Plitki pleh
natural_image
Technical line drawing of a square frame with internal cutouts and mounting holes (no text or symbols)Žičana rešetka
Žičana rešetka se koristi kod pečenja ili obrade hrane u drugim posudama.

natural_image
Pure 3D wireframe diagram of a curved grid structure with directional arrows, no text or symbols present
UPOZORENJE: Žičana rešetka se koristi kod pečenja ili obrade hrane u drugim posudama.
natural_image
Technical line drawing of a door frame with internal compartments and an arrow indicating direction (no text or symbols)5. ČIŠĆENJE I ODRŽAVANJE
5.1. Čišćenje

UPOZORENJE: Isključite uređaj i sačekajte da se ohladi pre čišćenja.
Opšta uputstva
natural_image
Line drawing of a hand cleaning teeth with a circular object on the right side (no text or symbols)Katalitičko čišćenje
Katalitičke obloge su postavljene unutar okvira rerne. To su mat obrađeni paneli na zadnjem delu šporeta. One skupljaju masti i ostatke ulja tokom kuvanja.
natural_image
Technical line drawing of a rectangular appliance with internal compartments and ventilation slots (no text or symbols)natural_image
Technical line drawing of a mechanical component with an arrow indicating direction (no text or symbols)natural_image
Diagram of a door with internal spring mechanism and upward arrow (no text or symbols)5.2. Održavanje

UPOZORENJE: Održavanje ovog Uređaja mora se poveriti ovlašćenom serviseru ili kvalifikovanom tehničaru.
Zamena sijalice u rerni

UPOZORENJE: Isključite uređaj i sačekajte da se ohladi pre čišćenja.
- Uklonite stakleno sočivo a zatim uklonite sijalicu.
- Stavite novu sijalicu (otpornu na 300°C) da biste zamenili sijalicu koju ste uklonili (230 V, 15-25 Watt, Tip E14).
- Ponovo postavite stakleno sočivo, posle čega je Vaša rena spremna za upotrebu.

Lampa je specijalno dizajnirana za kućne uređaje za kuvanje. Nije prikladna za sobno osvetljenje u domaćinstvu.
6. REŠAVANJE PROBLEMA I TRANSPORT

6.1. Rešavanje problema
Ukoliko još uvek imate problema sa Vašim uređajem nakon provere ovih osnovnih koraka za rešavanje problema, molimo kontaktirajte ovlašćenog servisera ili kvalifikovanog tehničara.
| Problem | Moguči uzrok | Rešenje |
| Ploča ili grejne zone ne mogu da se uključe. | Nema napajanja. | Proverite osigurač uređaja.Proverite da li je prekinuto napajanje pokušavajući da priključite druge električne uređaje. |
| Rerna se ne uključuje. | Struja je isključena. | Proverite ima li napajanja.Proverite takođe da li rade ostali kuhinjski uređaji. |
| Nema zagrevanja ili se rerna ne zagreva. | Kontrolor temperature rerne je nepravilno postavljen.Vrata rerne su ostavljena otvorena. | Proverite da li je regulator temperature rerne pravilno postavljen. |
| Pečenje u rerni je neravnomerno. | Police u rerni su nepravilno postavljene. | Proverite da li se koriste preporučene temperature i položaji polica.Nemojte često otvarati vrata osim ako pečete hranu koja se mora okrenuti.Ukoliko često otvarate vrata, unutrašnja temperatura će biti niža a to može da se odrazi na rezultat vašeg pečenja. |
| Svetlo u rerni (ukoliko je dostupno) ne radi. | Lampica je pokvarena.Napajanje je prekinuto ili isključeno. | Zamenite lampicu prema instrukcijama.Uverite se da je utikač uključen u zidnu utičnicu. |
| Ventilator rerne (ukoliko je dostupan) je bučan. | Police rerne vibriraju. | Proverite da li je rerna nivelisana.Proverite da police i pleh ne vibriraju zbog dodirivanja sa zadnjim panelom rerne. |
6.2. Transport
Ukoliko je potrebno da prevezete uređaj, koristite originalno pakovanje proizvoda i nosite ga koristeći originalnu kutiju. Pratite oznake za transport koje se nalaze na pakovanju. Zalepite sve nezavisne delove za proizvod kako biste sprečili da se ošteti proizvod prilikom transporta.
Ukoliko nemate originalno pakovanje; pripremite kutiju za transport tako da uređaj, naročito spoljašnje strane proizvoda, budu zaštićene od spoljašnjih pretnji.
| Marka |   ELECTRONICS ELECTRONICS | |
| Model | CTR6001IX | |
| Tip rerne ELEKTRIČNA | ||
| Težina kg 39(+/-2) | ||
| Indeks energetske efikasnosti - standardna 119,1 | ||
| Indeks energetske efikasnosti - sa ventilatorom 105,7 | ||
| Energetska klasa A | ||
| Potrošnja energije (struje) - standardna kWh/ciklus 0,98 | ||
| Potrošnja energije (struje) - sa ventilatorom kWh/ciklus 0,87 | ||
| Broj otvora 1 | ||
| Izvor toplote ELEKTRIČNA | ||
| Zapremina I 65 | ||
| Ova rerna je u skladu sa EN 60350-1 | ||
Saveti za uštedu energije
Rerna
natural_image
Line drawing of a simple kitchen oven with four circular ovens (no text or symbols)Thank you for choosing this product.
1.1. General Safety Warnings
natural_image
Warning sign depicting a person pushing a large object inside a triangle (no text or symbols)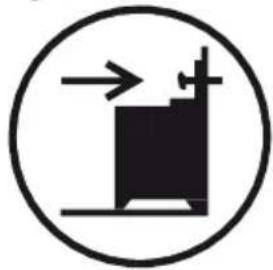
natural_image
Simple black-and-white icon of a building with arrows indicating direction, enclosed in a circle (no text or symbols)- Do not use steam cleaners for cleaning the appliance.


natural_image
Technical line drawing of a bolt securing a nut, showing mechanical assembly (no text or symbols)СОВЕТИ of the cooking zones is activated.
Hints and Tips
natural_image
Abstract diagram with circular arrow pattern and concentric rings, no text or symbols presentnatural_image
Abstract circular emblem with radial lines and concentric rings, no text or symbols presentnatural_image
Simple rectangular icon with a black horizontal bar and gray border, no text or symbols present.natural_image
Abstract geometric pattern with concentric circles and radial lines, no text or symbols presentnatural_image
Black rectangular object with five white downward arrows on a dark surface, surrounded by slatted edges (no text or symbols)natural_image
Abstract diagram with curved arrows and a central circular pattern, no text or symbols presentnatural_image
Line drawing of a square frame with rounded corners and a central hole (no text or symbols)Додатна фиока
natural_image
Technical line drawing of a mechanical assembly with a curved arrow indicating rotation (no text or symbols)Плиток плеж
natural_image
Line drawing of a square frame with rounded corners and mounting holes (no text or symbols)Жичана решетка
natural_image
Pure 3D wireframe diagram of a curved surface with directional arrows, no text or symbols present
ПРЕДУПРЕДУВАЊЕ: Мрежната WARNING: The wire grid is used
natural_image
Technical line drawing of a mechanical or electronic device interior with internal components and directional arrows (no text or symbols)5. ЧИСТЕНАЕГИАОДРЖУВАНЬЕ MAINTENANCE
5.1. Чистенье
5.1. Cleaning
natural_image
Line drawing of a hand cleaning a car window with a circular object on the wall (no text or symbols)Kaatalytiočke anisteњe
Cleaning the Ceramic Glass
Ceramic glass can hold heavy utensils but may be broken if it is hit with a sharp object.

WARNING : Ceramic Cooktops - if the surface is cracked, to avoid any possibility of electric shock switch off appliance and call for service.
- Use cream or liquid cleaner to clean vitroceramic glass, then rinse and dry them thoroughly with a dry cloth.
natural_image
Technical line drawing of a mechanical component with an arrow indicating rotation (no text or symbols)natural_image
Diagram of a door mechanism with spring and directional arrow (no text or symbols)5.2. Одржување
5.2. Maintenance

natural_image
Line drawing of a kitchen oven with four circular ovens (no text or symbols)natural_image
Warning symbol depicting a person pulling a large object inside a triangle (no text or numbers)
natural_image
Simple black-and-white icon of a building inside a circle, with arrows indicating direction (no text or symbols)natural_image
Technical line drawing of a bolt securing a nut, showing rotational motion (no text or symbols)3. LASTNOSTI IZDELKA

| Položaj | Funkcija |
| 0 | Izklop |
| 1 | Ohranjanje toplote |
| 2-3 | Gretje z manjšo intenziteto |
| 4-5-6 | Položaji za kuhanje in pečenje |

natural_image
Abstract diagram with circular arrow pattern and directional arrows, no text or symbols presentnatural_image
Abstract graphic with a circular emblem and curved bands, no text or symbols present.Turbo način: Prižgale se bodo opozorilne lučke in ventilacija ter krožni grelni element pečice bodo pričeli delovati. Turbo način
natural_image
Simple icon of a rectangular device with a black horizontal bar and four side stripes (no text or symbols)natural_image
Abstract geometric pattern with concentric circles and curved lines, no text or symbols presentnatural_image
Black rectangular object with white zigzag markings on a dark surface, no text or symbols visible.natural_image
Abstract diagram with circular arrow pattern and zigzag arrows, no readable text or symbolsŽar z ventilacijo:
natural_image
Line drawing of a square frame with rounded corners and a central hole (no text or symbols)Predal pečice
natural_image
Technical line drawing of a mechanical component with a curved arrow indicating rotation (no text or symbols)Plitki pladenj
natural_image
Line drawing of a square frame with rounded corners and internal cutouts (no text or symbols)Rešetka
natural_image
Isometric line drawing of a corrugated metal sheet with internal ridges (no text or symbols)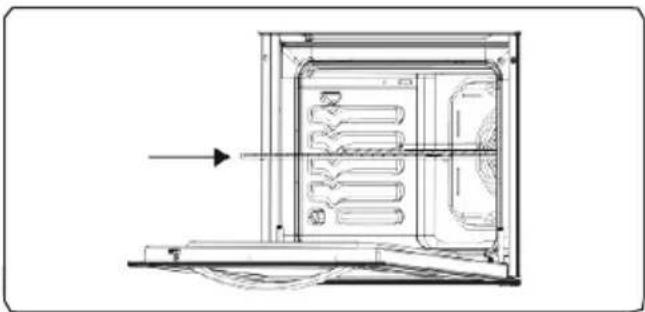
natural_image
Technical line drawing of a door frame with internal compartments and ventilation duct (no text or symbols)5. ČIŠČENJE IN VZDRŽEVANJE
5.1. Čiščenje

OPOZORILO: Pred čiščenjem izklopite aparat in ga pustite, da se popolnoma ohladi.
Splošna navodila
natural_image
Line drawing of a hand cleaning a car window with a circular object on the right side (no text or symbols)Katalitsko čiščenje
natural_image
Technical line drawing of a rectangular device with internal circular vent and ventilation slots (no text or symbols)natural_image
Technical line drawing of a mechanical component with an arrow indicating rotation (no text or symbols)natural_image
Technical line drawing of a door with internal spring mechanism and upward arrow (no text or symbols)5.2. Vzdrževanje

OPOZORILO: Vzdrđevanje aparata sme opravljati le pooblaščeni serviser ali ustrezno usposobljena oseba.
Menjava žarnce v pečici

OPOZORILO: Izklopite aparat in počakajte, da se ohladi, preden začnete čistiti aparat.
- Odstranite stekleno lečo in nato odstranite žarnico.
- Namestite novo žarnico (odporno na temperaturo do 300°C) s katero boste zamenjali staro (230 V, 15-25 W, Tip E14).
- Ponovno namestite stekleno lečo in pečica je pripravljena za uporabo.

natural_image
Line drawing of a simple kitchen oven with four circular windows (no text or symbols)Hvala Vam što ste izabrali ovaj proizvod.
Ove korisničke upute sadrže važne informacije o bezbjednosti i upute koje treba da vam pomognu u korištenju i održavanju uređaja.
natural_image
Warning sign depicting a person pulling a large block inside a triangle (no text or symbols)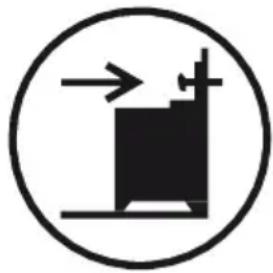
natural_image
Simple black-and-white icon of a machine with directional arrows, enclosed in a circle (no text or symbols)ovlaštenom servisu. Postavljanje i popravka od strane nekvalificiranog lica može biti opasno. Nemojte mijenjati ili modifikovati specifikacije uređaja na bilo koji način. Neodgovarajuća briga o ploči može prouzrokovati nesreću.
natural_image
Technical line drawing of a bolt securing a nut, showing rotational motion (no text or symbols)3 KARAKTERISTIKE PROIZVODA

Važno: Specifikacije proizvoda i izgled vašeg uređaja mogu se neznatno razlikovati u odnosu na sliku prikazanu ispod.
Lista dijelova

Kontrolna ploča
- Tajmer
- Regulator za kontrolu pećnice
- Regulator za kontrolu termostata
- Regulator za kontrolu ploče
4 UPORABA PROIZVODA
4.1. Kontrola ploče
natural_image
Simple line drawing of a cooking pot on a surface with a checkmark below (no text or symbols)
natural_image
Simple line drawing of a cooking pot with crossed panes and a cross mark below (no text or symbols)Osnova okrugle šerpe

šerpa malog prečnika postavljeno
- Nemojte koristiti tave s grubim dnom jer će to izgrebati staklokeramičku površinu.
- Ukoliko je moguće, uvijek stavite poklopac na tavu.
- Temperatura dostupnih dijelova može se povećati tjekom rada uređaja. Neophodno je da djecu i životinje držite dalje od ploče tokom upotrebe i da sačekate da se potpuno ohladi nakon uporabe.
Regulator termostata pećnice
natural_image
Abstract diagram with circular arrow pattern and concentric rings, no text or symbols presentFunkcija otapanja:
Svjetla upozorenja će biti uključena i ventilator će početi s radom. Da biste koristili funkciju otapanja, uzmite vašu zamrznutu
natural_image
Abstract circular graphic with a central hexagonal pattern and radiating bands, no text or symbols present.Turbo Funkcija:
Termostat pećnice i svjetla za upozorenje će se upaliti i grijni prsten i ventilator će početi s radom.
Turbo funkcija ravnomerno širi toplotu u pećnici. Sva hrana na svim policama će se ravnomjerno ispeći. Preporučuje se da prethodno zagrijete pećnicu na oko 10 minuta.

natural_image
Simple rectangular icon with a black horizontal bar and corner lines, no text or symbols present.Funkcija statičkog
natural_image
Abstract geometric pattern with concentric circles and radial lines (no text or symbols)Funkcija ventilatora:
natural_image
Pure electrical circuit lines without any symbolsnatural_image
Abstract diagram with circular arrow and wave patterns, no readable text or symbolsRoštilj i ventilator
natural_image
Line drawing of a square frame with rounded corners and a central hole (no text or symbols)Dodatna ladica
natural_image
Technical line drawing of a mechanical assembly with a curved arrow indicating rotation (no text or symbols)Plitki pleh
natural_image
Line drawing of a square frame with internal grid lines (no text or symbols)Žičana rešetka
Žičana rešetka se koristi kod pečenja ili obrade hrane u drugim posudama.

natural_image
Diagram of a corrugated metal sheet with directional arrows indicating flow or force (no text or symbols)
UPOZORENJE:Žičana rešetka se koristi kod pečenja ili obrade hrane u drugim posudama.

natural_image
Technical line drawing of a mechanical or electrical component with internal channels and a directional arrow (no text or symbols)5 ČIŠĆENJE I ODRŽAVANJE
5.1. Čišćenje

natural_image
Line drawing of a hand cleaning a car trunk with gear and wheel (no text or symbols)Katalitičko čišćenje
Katalitičke obloge su postavljene unutar okvira pećnice. To su mat obrađeni paneli na zadnjem dijelu štednjaka. One skupljaju masti i ostatke ulja tjekom kuhanja. Katalitičke obloge su izrađene za oko 300 sati rada.
natural_image
Technical line drawing of a rectangular electronic device with a circular vent and internal structure (no text or symbols)natural_image
Technical line drawing of a mechanical component with an arrow indicating direction (no text or symbols)natural_image
Diagram of a door with internal spring mechanism and upward arrow (no text or symbols)5.2. Održavanje

natural_image
Line drawing of a simple kitchen oven with four circular ovens (no text or symbols)2.4. To make to avoid risks, you are
4.2 Xenquo's quyou....15
6.1. Troubleshooting....20
6.2. Transport 20
1. ΘΑΓΕΤΕΣΜΣΦΑΛΕΓΑΣΝΣ
by children without supervision.
natural_image
Warning symbol depicting a person pulling a large block inside a triangle (no text or numbers)
natural_image
Simple black-and-white icon of a machine with directional arrows, enclosed in a circle (no text or symbols)- Do not use steam cleaners for cleaning the appliance.
1.2 Do not operate the appliances before it is fully

natural_image
Technical line drawing of a bolt securing a nut, showing mechanical assembly (no text or symbols)3. XAPAKTHPISTIKA NPOIONTOΣ 3. PRODUCT FEATURES

4. XPHSH THS SYSEKEYHS 4. USE OF PRODUCT
natural_image
Abstract diagram with circular arrow pattern and concentric rings, no text or symbols presentnatural_image
Abstract circular emblem with radial lines and concentric rings, no text or symbols present.natural_image
Abstract geometric pattern with concentric circles and radial lines, no text or symbols presentnatural_image
Black rectangular object with five white downward-pointing arrows on a dark background, no text or symbols visible.natural_image
Abstract diagram with curved arrows and a central circular pattern, no text or symbols presentnatural_image
Line drawing of a square frame with rounded corners and a small circular hole at the center (no text or symbols)Συρτάρι
natural_image
Technical line drawing of a mechanical component with a curved arrow indicating rotation (no text or symbols)Pnхó ταψί Shallow
natural_image
Line drawing of a square frame with rounded corners and mounting holes (no text or symbols)Το σύρμα
natural_image
Pure 3D wireframe diagram of a curved surface with directional arrows, no text or symbols present
natural_image
Technical line drawing of a refrigerator interior with ventilation ducts and airflow direction arrow (no text or symbols)5. ΚΑΘΑΡΙΣΜΟΣ ΚΑΙΔΙΑΤΗΡΗΣΗ 5. CLEANING AND
- Do not use cleaners that contain ευαγίε καίνη βαύμενο εξαρτήματα particles, as they might scratch the glass, enameled and/or painted
natural_image
Line drawing of a hand cleaning a car window with a circular object on the wall (no text or symbols)Ceramic glass can hold heavy utensils but may be broken if it is hit with a sharp object.

WARNING : Ceramic Cooktops - if the surface is cracked, to avoid any possibility of electric shock switch off appliance and call for service.
• Use cream or liquid cleaner to clean vitroceramic glass, then rinse and dry them thoroughly with a dry cloth. Καθαρισμος του κεραμίκού γυαλίου
natural_image
Technical line drawing of a mechanical component with an arrow indicating rotation (no text or symbols)natural_image
Technical line drawing of a door mechanism with spring and handle (no text or symbols)5.2.Διατήρηση
5.2. Maintenance

natural_image
Line drawing of a simple kitchen oven with four circular ovens (no text or symbols)natural_image
Simple black-and-white icon of a building with arrows indicating direction, enclosed in a circle (no text or symbols)natural_image
Simple line drawing of a cooking pot on a surface with a checkmark below (no text or symbols)
natural_image
Simple line drawing of a cooking pot with crossed lines and a cross symbol below (no text or labels)natural_image
Simple diagram of a tank with cross symbols above and below, no text or labels present.
natural_image
Simple diagram of a cooking pot with crossed panes and a cross symbol below (no text or labels)natural_image
Abstract graphic with circular arrow and spiral pattern inside a rectangular frame (no text or symbols)Função descongelar:
natural_image
Abstract circular emblem with radial lines, no text or symbols presentFunção Turbo: O
natural_image
Simple rectangular icon with a black horizontal bar and gray border, no text or symbols present.natural_image
Abstract geometric pattern with concentric circles and curved lines inside a rectangular frame (no text or symbols)natural_image
Pure electrical circuit lines without any symbolsnatural_image
Abstract diagram with circular arrow and grid pattern, no readable text or symbolsnatural_image
Line drawing of a square frame with a small circular hole at the top center (no text or symbols)A gaveta
natural_image
Technical line drawing of a mechanical component with a curved arrow indicating rotation (no text or symbols)Tabuleiro
natural_image
Line drawing of a square frame with rounded corners and a central hole (no text or symbols)Grelha
natural_image
Pure 3D wireframe diagram of a curved grid structure with directional arrows, no text or symbols present
natural_image
Technical line drawing of a door or enclosure with internal components and airflow direction arrow (no text or symbols)natural_image
Line drawing of a hand cleaning a wall with plastic components (no text or symbols)Limpeza Catalítica
natural_image
Technical line drawing of a rectangular device with a circular vent and internal structure (no text or symbols)natural_image
Technical line drawing of a mechanical component with an arrow indicating rotation (no text or symbols)natural_image
Diagram of a door mechanism with spring and directional arrow (no text or symbols)5.2
Manutenção


- Thank you for choosing this product.
- CE Declaration of conformity
- Disposal of your old machine
- CONTENTS
- 1.SAFETY INSTRUCTIONS 4
- INSTALLATION AND PREPARATIONS FOR USE 10
- 3.PRODUCT FEATURES....13
- CLEANING AND MAINTENANCE 16
- TROUBLESHOOTING&TRANSPORT 20
- SAFETY INSTRUCTIONS
- General Safety Warnings
- Installation Warnings
- During Usage
- During Cleaning and Maintenance
- INSTALLATION AND PREPARATIONS FOR USE
- Instructions for the Installer General instructions
- Installation of the Cooker
- Electrical Connection and Safety
- WARNING: THE APPLIANCE MUST BE EARTHED.
- Anti-tilting kit
- Adjusting the feet
- PRODUCT FEATURES
- USE OF PRODUCT
- Control of Hob
- Control of the ceramic heater
- Residual heat indicator(If available)
- Hints and Tips
- WARNING:
- Control of Oven
- Oven function control knob
- Oven thermostat knob
- Oven Functions
- Static Cooking
- Fan Function: The
- Grill and Fan
- Use of Mechanical Minute Minder
- Deep Tray
- Flap Drawer
- Shallow Tray
- Wire Grid
- CLEANING AND MAINTENANCE
- Cleaning
- General Instructions
- Cleaning the inside of the Oven
- Catalytic Cleaning
- Cleaning the Ceramic Glass
- Cleaning the Glass Parts
- Cleaning the Enamelled Parts
- Cleaning the Stainless Steel Parts (If avaliable)
- Removal of Oven Door
- Maintenance
- Change of Oven Lamp
- TROUBLESHOOTING&TRANSPORT
- Troubleshooting
- Transport
- Hvala Vam što ste izabrali ovaj proizvod.
- KARAKTERISTIKE PROIZVODA
- UPOTREBA PROIZVODA
- 4.1.Kontrola ploče
- Kontrola keramičkih ringli
- Indikator preostale toplote (ukoliko je dostupan)
- Funkcija otapanja:
- Turbo Funkcija:
- Funkcija ventilatora:
- Roštilj i ventilator
- Dodatna fioka
- Plitki pleh
- Žičana rešetka
- ČIŠĆENJE I ODRŽAVANJE
- Čišćenje
- Opšta uputstva
- Katalitičko čišćenje
- Održavanje
- Zamena sijalice u rerni
- REŠAVANJE PROBLEMA I TRANSPORT
- Rešavanje problema
- Saveti za uštedu energije
- Rerna
- Додатна фиока
- Плиток плеж
- Жичана решетка
- ЧИСТЕНАЕГИАОДРЖУВАНЬЕ MAINTENANCE
- Чистенье
- Kaatalytiočke anisteњe
- Одржување
- LASTNOSTI IZDELKA
- Žar z ventilacijo:
- Predal pečice
- Plitki pladenj
- Rešetka
- ČIŠČENJE IN VZDRŽEVANJE
- Čiščenje
- Splošna navodila
- Katalitsko čiščenje
- Vzdrževanje
- Menjava žarnce v pečici
- KARAKTERISTIKE PROIZVODA
- UPORABA PROIZVODA
- Kontrola ploče
- Regulator termostata pećnice
- Funkcija statičkog
- Dodatna ladica
- ČIŠĆENJE I ODRŽAVANJE
- ΘΑΓΕΤΕΣΜΣΦΑΛΕΓΑΣΝΣ
- Do not operate the appliances before it is fully
- XAPAKTHPISTIKA NPOIONTOΣ 3. PRODUCT FEATURES
- XPHSH THS SYSEKEYHS 4. USE OF PRODUCT
- Συρτάρι
- Pnхó ταψί Shallow
- Το σύρμα
- ΚΑΘΑΡΙΣΜΟΣ ΚΑΙΔΙΑΤΗΡΗΣΗ 5. CLEANING AND
- 5.2.Διατήρηση
- Função descongelar:
- Função Turbo: O
- A gaveta
- Tabuleiro
- Grelha
- Limpeza Catalítica
- Manutenção
Brand : VOX
Model : CTR6001IX
Category : Oven