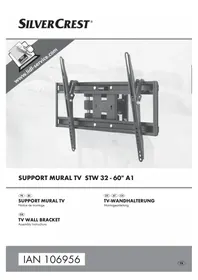
STW 32-60 A1 - Wall mount SILVERCREST - Free user manual and instructions
Find the device manual for free STW 32-60 A1 SILVERCREST in PDF.


| Product Type | Wall Mount |
| Brand | SilverCrest |
| Model | STW 32-60 A1 |
| Compatible Screen Size | 32 to 60 inches |
| Compatible VESA Standard | 100x100 to 400x400 mm |
| Maximum Supported Weight | 35 kg |
| Material | Steel |
| Color | Black |
| Dimensions (W x H x D) | 700 x 400 x 50 mm |
| Net Weight | 3 kg |
| Mounting Type | Wall Mount |
| Tilt | No, fixed |
| Swivel | No |
| Distance from Wall | 50 mm |
| Included Accessories | Dowels, screws, manual |
| Care and Cleaning | Clean with a soft, dry cloth |
| Safety | Do not exceed maximum load |
| Spare Parts and Repairability | Not available |
| General Information | Wall mount for flat screen |
Frequently Asked Questions - STW 32-60 A1 SILVERCREST
User questions about STW 32-60 A1 SILVERCREST
0 question about this device. Answer the ones you know or ask your own.
Ask a new question about this device
Download the instructions for your Wall mount in PDF format for free! Find your manual STW 32-60 A1 - SILVERCREST and take your electronic device back in hand. On this page are published all the documents necessary for the use of your device. STW 32-60 A1 by SILVERCREST.
USER MANUAL STW 32-60 A1 SILVERCREST
Assembly Instructions
IAN 106956
FR/BE Notice de montage Page 1
Montage
Préparer le montage
REMARQUE
REMARQUE
Entretien
KOMPERNASS HANDELS GMBH
BURGSTRASSE 21
44867 BOCHUM
GERMANY
www.kompernass.com
Inhaltsverzeichnis
Einführung 14
HINWEIS
Wartung
KOMPERNASS HANDELS GMBH
BURGSTRASSE 21
44867 BOCHUM
GERMANY
www.kompernass.com
Contents
Introduction 26
Information about these assembly instructions 26
Intended use 26
Warnings used....26
Safety....27
Basic safety guidelines....27
Package contents 28
Mounting kit 28
Installation 28
Preparing for assembly 28
Required tools 29
Assembly steps 30
Maintenance 34
Cleaning 34
Disposal 34
Appendix 34
Technical data 34
Warranty 35
Service....35
Importer 35
Introduction
Information about these assembly instructions
Congratulations!
You have purchased a high-quality product. Familiarise yourself with the product before assembly and before using it for the first time. Please read the following assembly instructions and safety notices carefully. Use the product only as described and for the range of applications specified. Retain these instructions for future reference. Please also pass all associated documents on to any future owner(s).
Intended use
This wall bracket is designed exclusively for wall mounting fl at-panel displays with a screen diagonal of approx. 81 cm-152 cm (32"-60") in private, non-commercial households. The wall bracket is only intended for use inside buildings.
No liability will be assumed for damage caused by misuse or improper handling, the use of force or unauthorised modification. The risk shall be borne solely by the user.
Warnings used
In these assembly instructions, the following warnings are used:
WARNING
A warning at this hazard level indicates a potentially hazardous situation.
If the hazardous situation is not avoided, there is a risk of injury or property damage.
▶ Follow the instructions in this warning to avoid injuries or property damage.
NOTE
▶ A note provides additional information that will assist you in using the device.
Safety
In this section, you will find important safety instructions for using the device. Improper use may result in personal injury and property damage.
Basic safety guidelines
To ensure safe operation of the device, follow the safety guidelines set out below:
■ Do not install the product in places under which people might stand.
■ After mounting the product, check its stability and operational reliability as well as that of the mounted load. This check should be repeated at regular intervals (at least quarterly).
■ Ensure that you do not exceed the maximum permissible load capacity of the product and no load is applied that exceeds the maximum allowable dimensions.
- Maintain a safe distance around the mounted load (depending on the model).
In the case of damage, remove the mounted load and stop using the product.
■ Bearing in mind the wide variety of TV sets and wall mountings available on the market, the supplied mounting kit may not cover all the possibilities.
In rare cases, it is possible that the screws for attaching the TV set may be too long. If this is the case, use the supplied spacers.
■ Ensure that the supplied wall plugs are only suitable for concrete and brick walls.
Before mounting, read the operating instructions for your TV set. This will generally provide information about the type and dimensions of the suitable mounting materials.
If the mounting material necessary for your TV set is not provided in the supplied mounting kit, please purchase the items you require from a specialist shop.
If your wall is made of different types of materials and construction than that intended for the installation, purchase suitable materials from a specialist shop.
■ Never use violence or excessive force for assembly. This could damage your TV set or wall bracket.
If in doubt, contact a suitable specialist for information on mounting this product and do not try to mount the product yourself.
Package contents
- 1 x wall bracket
- 2 x mounting rails
- 1 x Velcro strip
- Mounting materials
• These assembly instructions
GB
NOTE
▶ Check the package for completeness and for signs of visible damage.
Mounting kit
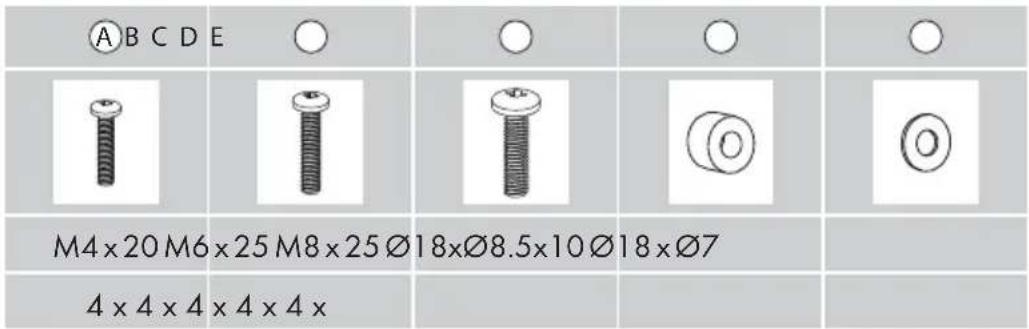
| F | G | HIJ | O | O |
| Ø22×Ø8S10×50 mm M8×65 mm 5×5 | ||||
| 4×4×4×1×1× | ||||
Installation
Preparing for assembly
NOTE
▶ Allow plenty of time for the assembly of the wall bracket.
▶ Remove the individual parts from the packaging and place them within easy reach.
NOTE
▶ Do not install the wall bracket on your own!
▶ Different TV sets have different connectivity options for wiring and other devices. Before installation, check that the required connections will still be accessible after assembly.
▶ Depending on your TV set and the type of mounting, you may not need the complete mounting kit. It is therefore possible that there may be some small parts left over even if the assembly has been carried out correctly.
Store these carefully together with these assembly instructions for later use (sale of the wall bracket, new TV set, etc.).
WARNING
Before installation, check the suitability of the proposed wall for supporting the weight that is to be mounted and ensure that there are no electrical cables, water or gas pipes or other lines in the wall at the mounting location.
▶ Ensure that the supplied wall plugs are only suitable for concrete and brick walls. If you are unsure about the suitability of your wall, please consult an expert.
Required tools
Pencil
Drill

Drill bit ∅ 10 mm
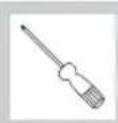
Phillips head screwdriver
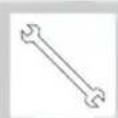
Open-ended spanner SW 13 mm
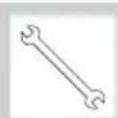
Open-ended spanner SW 10 mm
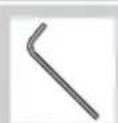
Allen key 5 x 5 (supplied)
Assembly steps
Step 1: Attaching the mounting rails
Check whether the supplied screws (A, B or C) fit in the prepared holes on the back of your TV set. If this is not the case, please use other suitable screws and washers.
- Attach the mounting rail so that the screw heads for adjusting the tilt angle face outwards and the hooks are facing downward. Screw the mounting rail tight using the suitable screws (A, B or C) and washers E so that they run parallel and are aligned at the same height.
For TV sets with a fl at back, no spacersD are usually required. Fasten the mounting rails with the appropriate screws and washers directly onto the rear panel of the device.
For TV sets with a curved rear panel, it may be necessary to use the supplied spacers ⑭ between the TV set and the mounting rail.
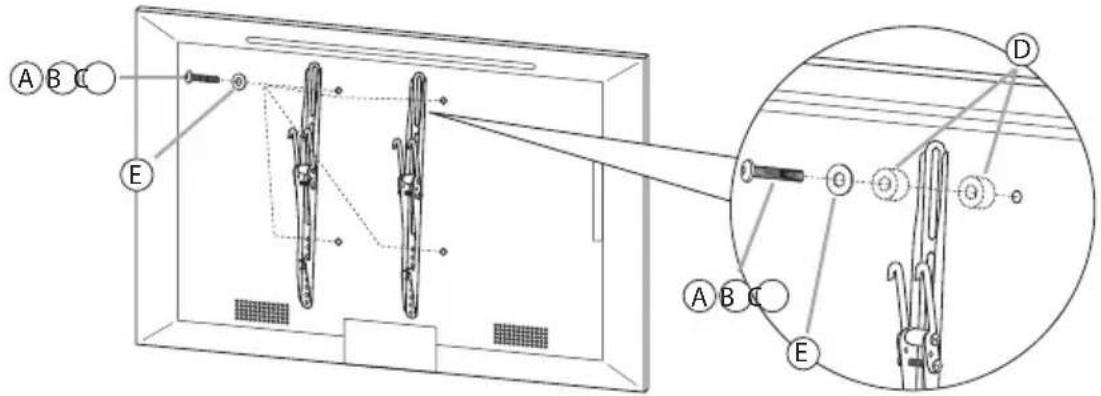
Step 2: Attaching the wall bracket to the wall
- Start by selecting a suitable mounting height. The ideal height for a TV set is parallel to the eye-level of a seated person.
Hold the wall bracket up to the to the desired position on the wall to use as a template and align it with the aid of a spirit level. Mark the 4 holes with a pencil.

Drill holes at the marked positions with a diameter of 10 mm and a depth of at least 60 mm.
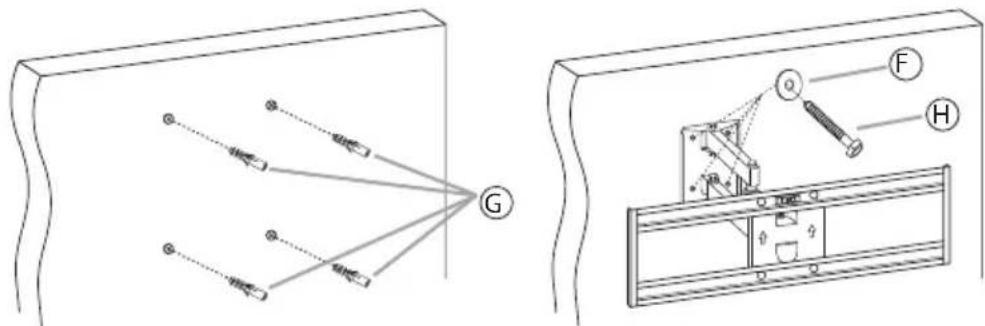
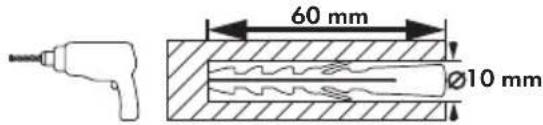
Insert the wall plugs G into the holes. Screw the wall bracket to the wall using the supplied screws H and the washers F.
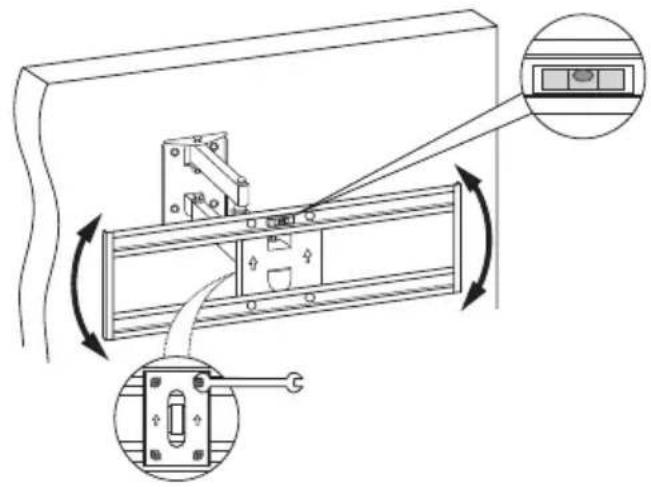
If the wall bracket is not absolutely straight after mounting on the wall, you can correct the tilt to a certain extent.
- Undo the four screws of the mounting plate a little bit using an open-ended spanner (SW 13).
♦ Align the cross member with the aid of the spirit level and then retighten the four screws of the mounting plate.
Step 3: Hanging the TV set on the wall bracket
Now hang your TV set centred on the wall bracket as shown in the illustration.
◆ Hang the TV set at the top first and then at the bottom. Let go of your TV set slowly and carefully.

If the TV set is correctly mounted on the bracket, fi x it in place with the two retaining screws.
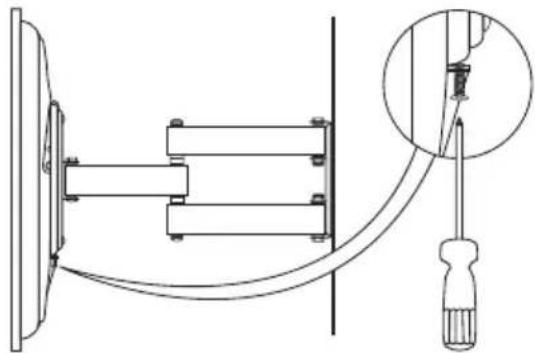
NOTE
Using the supplied Velcro strip Ⓙ, you can route the cables of your TV set safely and tidily.
▶ Always allow enough room for the cables and make sure they cannot get caught when you move the wall bracket.
Step 4: Setting the optimum position
The wall bracket has various setting options with which the TV set can be aligned to the best position.
WARNING
▶ Always carry out all movements carefully so that the cables are not damaged.
Vertical tilt angle
The vertical tilt angle can be set between 0° and 12° (depending on the TV set).
♦ Align the TV set as per your requirements and then tighten the screws on the joint of the mounting rails using a Phillips screwdriver.
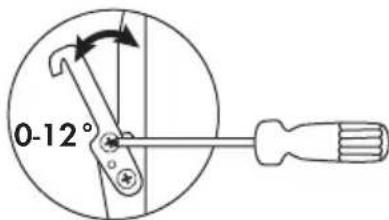
Left/right pan and rotation
You can pan and rotate your TV set on the wall bracket ± 90° to the left or right.
- Set the required position and tighten the screws on the mounting arm using an Allen key ①.
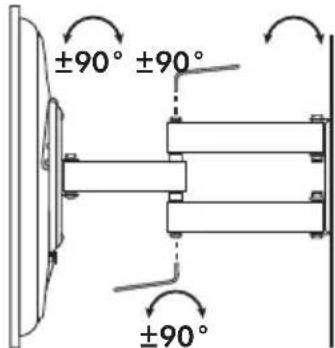
Maintenance
Check the stability and operational reliability of the wall bracket and the attached load at regular intervals (at least quarterly).
If necessary, tighten all of the wall bracket's screw connections.
GB
Cleaning
WARNING
▶ Do not use any aggressive or abrasive cleaning agents, as these may damage the surface of the wall bracket.
- Clean the wall bracket using a moistened cloth and a standard commercial household cleaning fluid.
Disposal
Dispose of the wall bracket via an approved disposal centre or your community waste facility. Observe the currently applicable regulations. Please contact your waste disposal facility if you are in any doubt.

Dispose of all packaging materials in an environmentally friendly manner.
Appendix
Technical data
| Maximal load capacity 35 kg (77 lbs) | |
| Screen size (diagonal) | 32"-60"(approx. 81 cm to approx. 152 cm) |
| Attachment as per VESA standard 100 x 100 to 600 x 400 | |
| Tilt angle 0° - 12° | |
| Pan and rotation ± 90° | |
| Wall clearance to the back of the TV set | approx. 7 cm to approx. 42 cm |
| Weight approx. 4.5 kg | |
Warranty
The warranty for this appliance is for 3 years from the date of purchase.
The appliance has been manufactured with care and meticulously examined before delivery.
Please retain your receipt as proof of purchase. In the case of a warranty claim, please make contact by telephone with our Customer Service Department.
Only in this way can a post-free despatch for your goods be assured.
NOTICE
The warranty covers only claims for material and manufacturing defects, but not for transport damage, wearing parts or for damage to fragile components, e.g. buttons or batteries.
This product is for domestic use only and is not intended for commercial use.
The warranty is void in the case of abusive and improper handling, use of force and internal tampering not carried out by our authorised service branch.
Your statutory rights are not restricted in any way by this warranty. The warranty period is not extended by repairs made under the warranty. This applies also to replaced and repaired parts.
Damages and defects extant at the time of purchase must be reported immediately after unpacking, resp. no later than two days after the date of purchase.
Repairs made after the lapse of the warranty period are subject to charge.
Service
GB Service Great Britain
Tel.: 0871 5000 720 (£ 0.10/Min.)
E-Mail: kompernass@lidl.co.uk
IAN 106956
Hotline availability: Monday to Friday 08:00 - 20:00 (CET)
Importer
KOMPERNASS HANDELS GMBH
BURGSTRASSE 21
44867 BOCHUM
GERMANY
www.kompernass.com
KOMPERNASS HANDELS GMBH
BURGSTRASSE 21
44867 BOCHUM
DEUTSCHLAND / GERMANY
www.kompernass.com

- MONTAGE
- PRÉPARER LE MONTAGE
- REMARQUE
- ENTRETIEN
- INHALTSVERZEICHNIS
- EINFÜHRUNG 14
- HINWEIS
- WARTUNG
- CONTENTS
- INTRODUCTION 26
- SAFETY....27
- PACKAGE CONTENTS 28
- MOUNTING KIT 28
- INSTALLATION 28
- MAINTENANCE 34
- CLEANING 34
- DISPOSAL 34
- APPENDIX 34
- INTRODUCTION
- INFORMATION ABOUT THESE ASSEMBLY INSTRUCTIONS
- INTENDED USE
- WARNINGS USED
- WARNING
- A WARNING AT THIS HAZARD LEVEL INDICATES A POTENTIALLY HAZARDOUS SITUATION
- NOTE
- SAFETY
- BASIC SAFETY GUIDELINES
- PACKAGE CONTENTS
- MOUNTING KIT
- INSTALLATION
- PREPARING FOR ASSEMBLY
- REQUIRED TOOLS
- ASSEMBLY STEPS
- STEP 1: ATTACHING THE MOUNTING RAILS
- STEP 2: ATTACHING THE WALL BRACKET TO THE WALL
- STEP 3: HANGING THE TV SET ON THE WALL BRACKET
- STEP 4: SETTING THE OPTIMUM POSITION
- VERTICAL TILT ANGLE
- LEFT/RIGHT PAN AND ROTATION
- MAINTENANCE
- CLEANING
- DISPOSAL
- APPENDIX
- WARRANTY
- NOTICE
- SERVICE
- IMPORTER
Brand : SILVERCREST
Model : STW 32-60 A1
Category : Wall mount