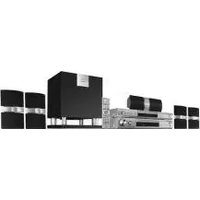
DCS-240 - Home Theater PIONEER - Free user manual and instructions
Find the device manual for free DCS-240 PIONEER in PDF.


| Product Type | Home Theater System |
| Brand | Pioneer |
| Model | DCS-240 |
| Amplifier Power (Front, Center, Surround) | 60 W per channel (1 kHz, 10% THD, 4 Ω) |
| Amplifier Power (Subwoofer) | 60 W (100 Hz, 10% THD, 4 Ω) |
| Disc Playback Compatibility | DVD, Video CD, Super VCD, CD, MP3, WMA, DivX, JPEG |
| FM Tuner Frequency Range | 87.5 MHz – 108 MHz |
| AM Tuner Frequency Range | 531 kHz – 1,602 kHz (9 kHz step) / 530 kHz – 1,700 kHz (10 kHz step) |
| Power Consumption | 45 W (Standby: 0.4 W) |
| Dimensions (Main Unit) | 420 (W) x 60 (H) x 331.5 (D) mm |
| Weight (Main Unit) | 3.1 kg |
| Speaker Configuration | 5.1 channel (Front L/R, Center, Surround L/R, Subwoofer) |
| Video Outputs | Composite Video, S-Video, Component Video, SCART (U.K. model) |
| Audio Outputs | Stereo Line Out (RCA), Headphone Jack (3.5 mm) |
| Surround Sound Decoding | Dolby Digital, DTS, Dolby Pro Logic II, Front Surround, SFC Modes |
| Special Features | Sleep Timer, Parental Lock, DivX VOD, JPEG Slideshow, Disc Navigator |
| Safety | Class 1 Laser Product; ventilation clearance of 10 cm on top, rear, and sides |
| Included Accessories | Remote Control, AA Batteries (2), Video Cable, AM/FM Antennas, Power Cord, Setup Guide, Warranty Card |
| Maintenance | Clean with soft, dry cloth; avoid moisture and direct sunlight |
| Warranty | Refer to included warranty card for terms |
Frequently Asked Questions - DCS-240 PIONEER
User questions about DCS-240 PIONEER
0 question about this device. Answer the ones you know or ask your own.
Ask a new question about this device
Download the instructions for your Home Theater in PDF format for free! Find your manual DCS-240 - PIONEER and take your electronic device back in hand. On this page are published all the documents necessary for the use of your device. DCS-240 by PIONEER.
USER MANUAL DCS-240 PIONEER
Operating Instructions



Location: rear of the unit
IMPORTANT

The lightning flash with arrowhead symbol, within an equilateral triangle, is intended to alert the user to the presence of uninsulated "dangerous voltage" within the product's enclosure that may be of sufficient magnitude to constitute a risk of electric shock to persons.
CAUTION
RISK OF ELECTRIC SHOCK DO NOT OPEN
CAUTION:
TO PREVENT THE RISK OF ELECTRIC SHOCK, DO NOT REMOVE COVER (OR BACK). NO USER-SERVICEABLE PARTS INSIDE. REFER SERVICING TO QUALIFIED SERVICE PERSONNEL.

The exclamation point within an equilateral triangle is intended to alert the user to the presence of important operating and maintenance (servicing) instructions in the literature accompanying the appliance.
D3-4-2-1-1_En-A
Replacement and mounting of an AC plug on the power supply cord of this unit should be performed only by qualified service personnel.
IMPORTANT
FOR USE IN THE UNITED KINGDOM
The wires in this mains lead are coloured in accordance with the following code: Blue : Neutral
Brown : Live If the plug provided is unsuitable for your socket outlets, the plug must be cut off and a suitable plug fitted.
The cut-off plug should be disposed of and must not be inserted into any 13 amp socket as this can result in electric shock. The plug or adaptor or the distribution panel should be provided with b A fuse. As the colours of the wires in the mains lead of this appliance may not correspond with coloured markings identifying the terminals in your plug, proceed as follows: The wire which is coloured blue must be connected to the terminal which is marked with the letter N or coloured black. The wire which is coloured brown must be connected to the terminal which is marked with the letter L or coloured red.
Do not connect either wire to the earth terminal of a three-pin plug.
NOTE
After replacing or changing a fuse, the fuse cover in the plug must be replaced with a fuse cover which corresponds to the colour of the insert in the base of the plug or the word that is embossed on the base of the plug, and the appliance must not be used without a fuse cover. If lost replacement fuse covers can be obtained from your dealer. Only 5 A fuses approved by B.S.I or A.S.T.A to B.S.1362 should be used.
D3-4-2-1-2-2_En
CAUTION : USE OF CONTROLS OR ADJUSTMENTS OR PERFORMANCE OF PROCEDURES OTHER THAN THOSE SPECIFIED HEREIN MAY RESULT IN HAZARDOUS RADIATION EXPOSURE.
CAUTION: THE USE OF OPTICAL INSTRUMENTS WITH THIS PRODUCT WILL INCREASE EYE HAZARD. D6-8-2-1 En
WARNING
This equipment is not waterproof. To prevent a fire or shock hazard, do not place any container filed with liquid near this equipment (such as a vase or flower pot) or expose it to dripping, splashing, rain or moisture. D3-4-2-1-3 A En
WARNING
Before plugging in for the first time, read the following section carefully.
The voltage of the available power supply differs according to country or region. Be sure that the power supply voltage of the area where this unit will be used meets the required voltage (e.g., 230V or 120V) written on the rear panel. D3-4-2-1-4_A_En
WARNING
To prevent a fire hazard, do not place any naked flame sources (such as a lighted candle) on the equipment. D3-4-2-1-7a_A_En
This product is intended for household purposes. Any failure due to use for other than household purposes (such as long-term use for business purposes in a restaurant or use in a car or ship) and which requires repair will be charged for even in the warranty period. KO41 En
VENTILATION CAUTION
When installing this unit, make sure to leave space around the unit for ventilation to improve heat radiation (at least 10 cm at top, 10 cm at rear, and 10 cm at each side).
WARNING
Slots and openings in the cabinet are provided for ventilation to ensure reliable operation of the product, and to protect it from overheating. To prevent fire hazard, the openings should never be blocked or covered with items (such as newspapers, table-cloths, curtains) or by operating the equipment on thick carpet or a bed. D3-4-2-1-7b_A_En
Operating Environment
Operating environment temperature and humidity: +5 °C - +35 °C (+41 °F - +95 °F); less than 85 %RH (cooling vents not blocked)
Do not install this unit in a poorly ventilated area, or in locations exposed to high humidity or direct sunlight (or strong artificial light) D3-4-2-1-7c_A_En
CAUTION
This product is a class 1 laser product, but this product contains a laser diode higher than Class 1. To ensure continued safety, do not remove any covers or attempt to gain access to the inside of the product. Refer all servicing to qualified personnel. The following caution label appears on your unit. Location: top of the unit

CLASS 1 LASER PRODUCT
D3-4-2-1-8 A En
This product complies with the Low Voltage Directive (73/23/EEC, amended by 93/68/EEC), EMC Directives (89/336/EEC, amended by 92/31/EEC and 93/68/EEC). D3-4-2-1-9a En
If the AC plug of this unit does not match the AC outlet you want to use, the plug must be removed and appropriate one fitted. Replacement and mounting of an AC plug on the power supply cord of this unit should be performed only by qualified service personnel. If connected to an AC outlet, the cut-off plug can cause severe electrical shock. Make sure it is properly disposed of after removal. The equipment should be disconnected by removing the mains plug from the wall socket when left unused for a long period of time (for example, when on vacation). D3-4-2-2-1a_A_En
DRM (digital rights management) copy protection is a technology designed to prevent unauthorized copying by restricting playback, etc. of material on devices other than the PC (or other WMA recording equipment) used to record it. For detailed information, please see the instruction manuals or help files that came with your PC and/or software.
For U.S. and Australia Model

C67-7-3 En
CAUTION
These speaker terminals carry HAZARDOUS LIVE voltage. To prevent the risk of electric shock when connecting or disconnecting the speaker cables, disconnect the power cord before touching any uninsulated parts. D3-4-2-2-3_A_En
CAUTION
The STANDBY/ON switch on this unit will not completely shut off all power from the AC outlet. Since the power cord serves as the main disconnect device for the unit, you will need to unplug it from the AC outlet to shut down all power. Therefore, make sure the unit has been installed so that the power cord can be easily unplugged from the AC outlet in case of an accident. To avoid fire hazard, the power cord should also be unplugged from the AC outlet when left unused for a long period of time (for example, when on vacation). D3-4-2-2a_A_En
POWER CORD CAUTION
Handle the power cord by the plug. Do not pull out the plug by tugging the cord and never touch the power cord when your hands are wet as this could cause a short circuit or electric shock. Do not place the unit, a piece of furniture, etc., on the power cord, or pinch the cord. Never make a knot in the cord or tie it with other cords. The power cords should be routed such that they are not likely to be stepped on. A damaged power cord can cause a fire or give you an electrical shock. Check the power cord once in a while. When you find it damaged, ask your nearest PIONEER authorized service center or your dealer for a replacement. S002_En
Thank you for buying this Pioneer product.
Please read through these operating instructions so that you will know how to operate your model properly. After you have finished reading the instructions, put them in a safe place for future reference.
Contents
01 Getting started
Home theater sound setup ....6
Setting the channel levels....6
Using the on-screen displays....7
Playing discs....7
Basic playback controls....7
Resume and Last Memory.....8
DVD-Video disc menus .....8
Video CD/Super VCD PBC menus .....8
Listening to the radio....9
Improving poor FM reception .....9
Memorizing stations .....9
Listening to station presets .....9
Listening to other sources .....9
Setting the sleep timer....10
Dimming the display .....10
02 Listening to your system
About the listening modes....11
Auto listening mode .....11
Listening in surround sound .....11
Using Front Surround .....11
Listening in stereo....12
Listening with headphones .....12
Using the SFC modes .....12
Adjusting the bass and treble .....12
Boosting the bass level .....12
03 Playing discs
Scanning discs .....13
Playing in slow motion....13
Frame advance/frame reverse .....13
Playing a JPEG slideshow .....13
Browsing DVD or Video CD/Super VCD discs with the Disc Navigator .....14
Browsing WMA, MP3, DivX video and JPEG files with the Disc Navigator.....14
Looping a section of a disc .....15
Using repeat play....15
Using random play 16
Creating a program list 16
Other functions available from the program menu 17
Searching a disc 17
Switching subtitles 17
Switching language / audio channels .... 17
Zooming the screen 18
Switching camera angles 18
Displaying disc information....18
04 More tuner features: RDS
An introduction to RDS 19
Displaying RDS information ..... 19
Searching for RDS programs ..... 19
05 Audio Settings and Video Adjust menus
Audio Settings menu....20
Audio DRC 20
Video Adjust menu 20
06 Initial Settings menu
Using the Initial Settings menu ..... 21
Video Output settings 21
Language settings....22
Display settings....22
Options settings 22
Speakers settings 23
Parental Lock 23
About DivX® VOD content 24
Speaker Distance 24
07 Other connections
Connecting auxiliary components ..... 26
Recording mode 27
Connecting external antennas....27
Connecting the S-video output ..... 27
Connecting using the component video output 28
About progressive scan video 28
Using the SCART AV output.... 29
08 Controls and displays
Display.... 30
Front panel.... 31
Remote control 31
09 Additional information
Disc / content format playback compatibility 33
Disc compatibility table 33
About DivX.... 34
DivX video compatibility.... 34
About WMA 35
Using and taking care of discs.... 35
DVD Video regions.... 35
Handling discs.... 35
Storing discs 35
Discs to avoid 35
Installation and maintenance .....36
Hints on installation .....36
Cleaning the pickup lens....36
Problems with condensation....36
Moving the system unit....36
Screen sizes and disc formats .....36
TV system setting....37
Frequency step setting....37
Troubleshooting....38
General 38
DVD/CD/Video CD player....39
Tuner....40
Error Messages....40
Resetting the system .....40
Using the language code list .....40
Language code list .....41
Country/Area code list....41
Specifications 42
Chapter 1 Getting started
Home theater sound setup
Depending on the size and characteristics of your room, you can place your speakers in one of two ways using this system: 1
- Standard surround 5-spot setup – This is a standard multichannel surround sound speaker setup for optimal 5.1 channel home theater sound.

- Front surround 3-spot setup – This setup is ideal when rear surround speaker placement isn't possible or you want to avoid running long speaker cables in your listening area. Use this setup together with the Front Surround modes to take advantage of wall and ceiling reflections for a very realistic surround effect.

After placing your speakers, complete Setting the channel levels below then refer to Speakers settings on page 23 to complete your surround sound setup.
Setting the channel levels
Set the relative channel levels from your main listening position. 2
1 Press SHIFT+TEST TONE.
The test tone is output in the following order (from the speakers active in the current listening mode):
- L – Front left speaker
- C – Center speaker
- R– Front right speaker
- SR – Right surround speaker
- SL – Left surround speaker
- SW – Subwoofer 3
2 Use the VOLUME +/- button to adjust the volume to an appropriate level.
3 Use the ↑/↓ (cursor up/down) buttons to adjust the speaker levels in turn.
You should hear the test tone at the same volume from each speaker when seated in the main listening position. The channel level range is ± 10 dB.
4 When you're done, press ENTER to exit test tone setup.
Note
1 See About the listening modes on page 11 for more on using the different listening modes with each speaker setup.
2 • This is only available when DVD/CD is selected and playback is stopped. Also make sure headphones are unplugged.
- The speaker volume can be adjusted while listening to any sound source you want: Press SHIFT+SYSTEM SETUP, use the ↔/→ (cursor left/right) buttons to select the channel level setting, then press ENTER. Use / (cursor up/down) to adjust the channel levels; ↔/→ (cursor left/right) to move to the next channel. Press ENTER when you're finished.
3 Since the subwoofer produces ultra-low frequencies its sound may seem quieter than it actually is.
Using the on-screen displays
For ease of use, this system makes extensive use of graphical on-screen displays (OSDs).
All the screens are navigated in basically the same way, using the cursor buttons (↑, ↓, ←,
→) to change the highlighted item and
pressing ENTER to select it. 1

Important
- Throughout this manual, 'Select' means use the cursor buttons to highlight an item on-screen, then press ENTER.
Button What it does
| HOME MENU | Displays/exits the on-screen display |
| ←↑↓→ | Changes the highlighted menu item |
| ENTER | Selects the highlighted menu item |
| RETURN | Returns to the main menu without saving changes |

Tip
- The button guide at the bottom of every OSD screen shows you which buttons you'll need to use for that screen.
Playing discs
The basic playback controls for playing DVD, CD, Video CD/Super VCD, DivX video and MP3/WMA discs are covered here. Further functions are detailed in chapter 3.
1 If the player isn't already on, switch it on.
If you're playing a disc with video, also turn on your TV and make sure that it is set to the correct video input.
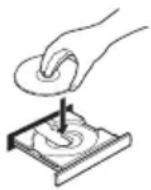
2 Press ▲ OPEN/CLOSE to load a disc.
Load a disc with the label side facing up, using the disc tray guide to align the disc (if you're loading a double-sided DVD disc, load it with the side you want to play face down).
3 Press ▶ (play) to start playback.
If you're playing a DVD or Video CD/Super VCD, a menu may appear. See DVD-Video disc menus and Video CD/Super VCD PBC menus on page 8 to navigate these.
If you're playing a DivX video or WMA/MP3 disc, it may take a few seconds before playing.
If you loaded a CD/CD-R/RW containing JPEGs, a slideshow will start. See Playing a JPEG slideshow on page 13 for more on this.
- If a disc contains a mixture of DivX video and other media file types (MP3, for example), first select whether to play the DivX video files (DivX) or the other media file types (MP3 / WMA / JPEG) from the on-screen display.
4 Adjust the volume.
Use the VOLUME control.
Basic playback controls
The following table shows the basic controls on the remote for playing discs 2 . You can find other playback features in the chapter 3.
Button What it does
▶ Starts/resumes normal playback.
- If the display shows RESUME or
LAST MEM playback starts from the resume or last memory point (see Resume and Last Memory below).
II Pauses/unpauses a disc.
Note
1 The screen saver will appear after five minutes of inactivity.
2 You may find with some DVD discs that some playback controls don't work in certain parts of the disc.
Button What it does
| ■ | Stops playback or cancels the resume function (if the display shows RESUME). |
| ◀◀ | Press to start fast reverse scanning. |
| ▶▶ | Press to start fast forward scanning. |
| I◀◀ | Skips to the start of the current track or chapter, then previous tracks/chapters. |
| ▶▶▶ | Skips to the next track or chapter. |
| Numbers | Use to enter a title/chapter/track number. Press ENTER to select.• If the disc is stopped, playback starts from the selected title (for DVD) or track (for CD/Video CD/Super VCD).• If the disc is playing, playback jumps to the start of the selected title (VR mode DVD-RW), chapter (DVD-Video) or track (CD/Video CD/Super VCD). |
Resume and Last Memory
When you stop playback of a disc, RESUME shows in the display indicating that you can resume playback from that point.
With DVDs and Video CD/Super VCDs, even if ejected, the play position is stored in memory. 1
The next time you load the disc, the display shows LAST MEM and you can resume play-back.
If you want to clear the resume point, press ■ (stop) while RESUME is displayed.
DVD-Video disc menus
Many DVD-Video discs contain menus from which you can select what you want to watch.
Sometimes DVD-Video menus are displayed automatically when you start playback; others only appear when you press DVD MENU or TOP MENU.
Button What it does
| SHIFT+TOP MENU | Displays the ‘top menu’ of a DVD disc—this varies with the disc. |
| DVD MENU | Displays a DVD disc menu—this varies with the disc and may be the same as the ‘top menu’. |
| ←↑↓→ | Moves the cursor around the screen. |
| ENTER | Selects the current menu option. |
| RETURN | Returns to the previously displayed menu screen. |
| Numbers | Highlights a numbered menu option (some discs only). Press ENTER to select. |
Video CD/Super VCD PBC menus
Some Video CD/Super VCDs have menus from which you can choose what you want to watch. These are PBC (Playback control) menus.
You can play a PBC Video CD/Super VCD without having to navigate the PBC menu by starting playback using a number button to select a track, rather than the ▶ (play) button.
| Button | What it does |
| RETURN | Displays the PBC menu. |
| Numbers | Selects numbered menu options. Press ENTER to select. |
| |◀◀ | Displays the previous menu page (if there is one). |
| ▶▶▶ | Displays the next menu page (if there is one). |

Note
1 • The Last Memory function may not work with some discs.
- For DVD-Video discs (except VR mode DVD-RW), the player stores the play position of the last five discs.
Listening to the radio
The tuner can receive both FM and AM broadcasts, and lets you memorize your favorite stations so you don't have to manually tune in every time you want to listen. U.K. model only – See also More tuner features: RDS on page 19.
1 Press TUNER to switch to the tuner, then press repeatedly to select the AM or FM band.
The display shows the band and frequency.
2 Tune to a frequency.
There are three tuning modes—manual, auto, and high-speed:
- Manual tuning: Press TUNE +/- repeatedly to change the displayed frequency.
- Auto tuning: Press and hold TUNE +/- until the frequency display starts to move, then release. The tuner will stop on the next station it finds. Repeat to keep searching.
- High-speed tuning: Press and hold TUNE +/- until the frequency display starts to move rapidly. Keep the button held down until you reach the frequency you want. If necessary, fine tune the frequency using the manual tuning method.
Improving poor FM reception
If you're listening to an FM station in stereo but the reception is weak, you can improve the sound quality by switching to mono.
1 Tune to an FM radio station then press SHIFT+SYSTEM SETUP.
2 Use ←/→ (cursor left/right) to choose FM MODE then press ENTER.
3 Use ↑/↓ (cursor up/down) to select FM MONO then press ENTER.
The mono indicator ( lights when the tuner is in mono reception mode.
Select FM AUTO above to switch back to auto-stereo mode (the stereo indicator (lights when receiving a stereo broadcast).
Memorizing stations
You can save up to 30 station presets so that you always have easy access to your favorite stations without having to tune in manually each time.
1 Tune to an AM or FM radio station.
For the FM band, select mono or auto-stereo reception as necessary. This setting is saved along with the preset.
2 Press SHIFT+SYSTEM SETUP.
3 Use ←/→ (cursor left/right) to choose 'ST.MEM.' then press ENTER.
4 Use ↑/↓ (cursor up/down) to select the station preset you want then press ENTER.
Listening to station presets
1 Make sure the TUNER function is selected.
2 Use the ST +/- buttons to select a station preset.
- You can also use the number buttons to do this.
Listening to other sources
You can connect up to two external sources (TV, satellite receiver, etc.) to this system. See Connecting auxiliary components on page 26.

1 Make sure that the external source (TV, satellite receiver, etc.) is switched on.
2 Press LINE to select the source.
Press repeatedly to switch between LINE1 and LINE2.
3 If necessary, start playback of the source.
Setting the sleep timer
The sleep timer switches off the system after a specified time so you can fall asleep without worrying about it. 1
- Press SLEEP repeatedly to select an option then press ENTER.
Choose between the following options: 2
- SLP AUTO – Switches off automatically after the currently playing CD, Video CD or DivX disc has finished.
- SLP ON – Switches off after about an hour
- SLP OFF – Cancels the sleep timer
After selecting SLP ON, you can press SLEEP again to check how much time is left. Each line indicates approximately 12 minutes (remaining):
SLP ---
Dimming the display
You can choose to dim the display if you find it too bright.
1 Press SHIFT+SYSTEM SETUP.
2 Use ←/→ (cursor left/right) then ENTER to choose the dimmer setting.
This is shown in the front panel display.
3 Use ↑/↓ (cursor up/down) to select LIGHT or DARK then press ENTER.

Note
1 The display dims when the sleep timer is set.
2 Sleep Auto will not work with WMA/MP3 discs, Video CD/Super VCDs during PBC playback, or CDs in repeat play.
Chapter 2
Listening to your system
About the listening modes
As explained in Home theater sound setup on page 6, there are two basic surround speaker setup options available with any of the listening modes:
- Standard surround 5-spot setup – Use any of the surround listening modes with this setup (except Front Surround).
- Front surround 3-spot setup – Make sure the Front Surround mode is switched on before selecting a surround listening mode (see Using Front Surround on page 11).
Auto listening mode
The Auto listening mode is the simplest way to listen to any source as it was mastered: the output from the speakers mirrors the channels in the source material.

- Press SHIFT+SURROUND to select the AUTO listening mode. 1
Listening in surround sound
You can listen to stereo or multichannel sources in surround sound. 2 Surround sound is generated from stereo sources using one of the Dolby Pro Logic decoding modes.

- Press SHIFT+SURROUND repeatedly to select a listening mode. 1
The choices that appear in the display will vary according to the type of source that's playing.
• AUTO – Auto listening mode (see above)
- DOLBY DIGITAL / DTS – Dolby Digital or DTS decoding (depending on the source). 3 For a multichannel source, this will be the same as AUTO.
- PROLOGIC – 4.1 channel surround sound for use with any two-channel source
- MOVIE – Pro Logic II 5.1 channel surround sound, especially suited to movie sources (use with any two-channel source)
- MUSIC – Pro Logic II 5.1 channel surround sound, especially suited to music sources, for use with any two-channel source
• STEREO – See Listening in stereo below
Using Front Surround
The Front Surround mode is effective when you are using the Front surround 3-spot speaker setup as described in Home theater sound setup on page 6. The surround speakers should be placed on top of the front speakers and oriented towards the walls (see the Speaker Setup Guide) and DVD/CD must be selected as the input source. 2
Note
1 If the source is Dolby Digital or DTS, the front panel ☐☐ D or DTS indicator lights.
2 • Note that the input source must be switched to DVD/CD for multichannel playback.
- If you're planning on recording a multichannel source, refer to Recording mode on page 27.
3 When listening in DOLBY DIGITAL /DTS mode, two-channel material will automatically be played in surround sound using Dolby Pro Logic II decoding.
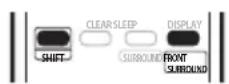
- Press SHIFT+FRONT SURROUND to switch Front Surround on or off.
When set to MODE ON, make sure to follow the guidelines in the Setup Guide for best surround sound.
Listening in stereo
You can listen to any source—stereo or multichannel—in stereo. When playing a multichannel source, all channels are downmixed to the front left/right speakers and the subwoofer.

- Press SHIFT+SURROUND repeatedly until STEREO shows in the display.
Listening with headphones
When headphones are connected, only the STEREO mode is available.
Using the SFC modes
The SFC (Sound Field Control) modes can be used with any multichannel or stereo source for a variety of additional surround sound effects.

1 Press SOUND MODE.
2 Use ←/→ (cursor left/right) to select SFC MODE then press ENTER.
3 Press ↑/↓ (cursor up/down) then ENTER to select an SFC Sound Mode.
Select between OFF, ACTION, DRAMA, ROCK, POP, HALL or LIVE.
Adjusting the bass and treble
Use the bass and treble controls to adjust the overall tone.
1 Press SOUND MODE.
2 Use ←/→ (cursor left/right) to select BASS or TREBLE then press ENTER.
3 Use ↑/↓ (cursor up/down) to adjust the sound then press ENTER to confirm.
Boosting the bass level
There are two bass modes you can use to enhance the bass in a source.
1 Press SOUND MODE.
2 Use ←/→ (cursor left/right) to select BASSMODE then press ENTER.
3 Use ↑/↓ (cursor up/down) to adjust the sound then press ENTER to confirm. Select between OFF, MUSIC or CINEMA.
Chapter 3
Playing discs

Important
- Many of the functions covered in this chapter apply to DVD discs, Video CDs/ Super VCDs, CDs, DivX video and WMA/ MP3/JPEG discs, although the exact operation of some varies slightly with the kind of disc loaded.
- Some DVDs restrict the use of some functions (random or repeat, for example) in some or all parts of the disc. This is not a malfunction.
- When playing Video CD/Super VCDs, some of the functions are not available during PBC playback. If you want to use them, start the disc playing using a number button to select a track.
Scanning discs
You can fast-scan discs forward or backward at various different speeds. 1
- During playback, press ◀◀ or ▶▶ to start scanning.
Press repeatedly to increase the scanning speed (shown on-screen).
• To resume playback, press ▶ (play). 2
Playing in slow motion
You can play DVDs, Video CD/Super VCDs and DivX video at four different forward slow motion speeds. DVD discs can also be played in reverse slow motion.
1 During playback, press II (pause).
2 Press and hold ◀/◄ or ||►/|► until slow motion playback starts.
Press repeatedly to change the slow motion speed (shown on-screen).
• To resume playback, press ▶ (play). 2
Frame advance/frame reverse
You can advance or back up DVD discs frame-by-frame. With Video CD/Super VCDs and DivX video you can only use frame advance.
1 During playback, press II (pause).
2 Press ◀/◄◄ or ||►/|► to reverse or advance a frame at a time.
• To resume playback, press ▶ (play). 2
Playing a JPEG slideshow
After loading a CD/CD-R/RW containing JPEG pictures, press ▶ to start a slideshow from the first folder/picture on the disc. 3 The player displays the pictures in each folder in alphabetical order.
Pictures are automatically adjusted so that they fill as much of the screen as possible.
While the slideshow is running:
| Button | What it does |
| II | Pauses the slideshow; press again to restart. |
Note
1 Only one speed is available for DivX video discs.
2 • Depending on the disc, normal playback may automatically resume when a new chapter is reached on a DVD disc.
- With Video CD/Super VCDs in PBC mode or a WMA/MP3 track, playback automatically resumes at the end or beginning of the track.
3 • The time it takes for the player to load a file increases with large file sizes.
• Discs can contain up to 299 folders and up to 648 folders and files combined.
| Button | What it does |
| |◀◀ | Displays the previous picture. |
| ▶▶| | Displays the next picture. |
| ←/→/↑/↓ | Pauses the slideshow and rotates/flips the displayed picture. (Press ▶ (play) to restart slideshow). |
| ZOOM | Pauses the slideshow and zooms the picture. Press again to toggle between 1x, 2x and 4x zoom. (Press ▶ (play) to restart slideshow). |
| DVD MENU | Displays the Disc Navigator screen (see below). |
Browsing DVD or Video CD/ Super VCD discs with the Disc Navigator
Use the Disc Navigator to browse through the contents of a DVD or Video CD/Super VCD disc to find the part you want to play.
1 During playback, press HOME MENU and select 'Disc Navigator' from the on-screen menu.

Disc Navigator
2 Select a view option.
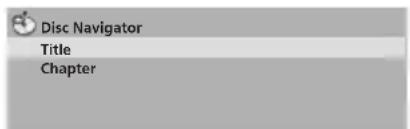
The options available depend on the kind of disc loaded and whether the disc is playing or not, but include:
• Title – Titles from a DVD-Video disc.
- Chapter – Chapters from the current title of a DVD-Video disc.
- Track – Tracks from a Video CD/Super VCD disc.
- Time – Thumbnails from a Video CD/Super VCD disc at 10 minute intervals.
- Original: Title – Original titles from a VR mode DVD-RW disc.
- Playlist: Title – Playlist titles from a VR mode DVD-RW disc.
- Original: Time – Thumbnails from the Original content at 10 minute intervals.
- Playlist: Time – Thumbnails from the Playlist at 10 minute intervals.
The screen shows up to six moving thumbnail images displayed one after another. To display the previous/next six thumbnails, press ◀◀◀/▶◀.
3 Select the thumbnail image for what you want to play.

You can use either the cursor buttons (↑/↓/←/→) and ENTER to select a thumbnail, or the number buttons.
To select using the number buttons, enter a two-digit number then press ENTER.
Browsing WMA, MP3, DivX video and JPEG files with the Disc Navigator
Use the Disc Navigator to find a particular file or folder by filename.
1 Press HOME MENU and select 'Disc Navigator' from the on-screen menu.
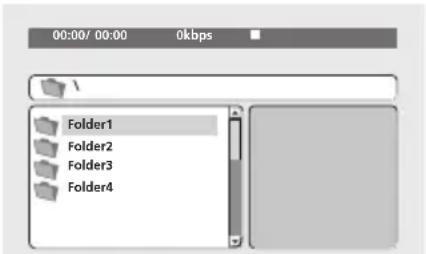
2 Use the cursor buttons ( ↑/↓/←/→) and ENTER to navigate.
Use the cursor up/down buttons (↑/↓) to move up and down the folder/file list.
Use the cursor left button ( ← ) to return to the parent folder. 1
Use ENTER or cursor right (→) to open a highlighted folder.
- When a JPEG file is highlighted, a thumbnail image is displayed on the right.

3 To play the highlighted track or DivX video file or display the highlighted JPEG file, press ENTER.
- When a WMA/MP3 or DivX video file is selected, playback begins from that file, and continues until the end of the folder.
- When a JPEG file is selected, a slideshow begins, starting with that file, and continues to the end of the folder.

Tip
- To play the contents of the whole disc rather than just the current folder, exit the Disc Navigator and start playback using the ▶ (play) button.
Looping a section of a disc
The A-B Repeat function allows you to specify two points (A and B) within a track (CD, Video CD/Super Video CD) or title (DVD) that form a loop which is played over and over.
1 During playback, press HOME MENU and select 'Play Mode'.
2 Select 'A-B Repeat'.
3 Press ENTER on 'A(Start Point)' to set the loop start point.
4 Press ENTER on 'B(End Point)' to set the loop end point.
After pressing ENTER, playback jumps back to the start point and plays the loop.
5 To resume normal playback, select 'Off'.
Using repeat play
In addition to various repeat play options, it's also possible to use repeat play together with program play (see Creating a program list on page 16).
1 During playback, press HOME MENU and select 'Play Mode'.
2 Select 'Repeat' then select a repeat play option. 2
If program play is active, select Program Repeat to repeat the program list, or Repeat Off to cancel.

Note
1 You can also do this by going to the '..' folder at the top, then pressing ENTER.
2 You can't use repeat play with WMA/MP3 discs.
- For DVD discs, select Title Repeat or Chapter Repeat.
- For CDs and Video CD/Super VCDs, select Disc Repeat or Track Repeat.
- For DivX video discs, select Repeat Title (or Repeat Off).
Using random play
Use this function to play titles or chapters (DVD-Video) or tracks (CD and Video CD/Super VCD) in a random order. 1
1 During playback, press HOME MENU and select 'Play Mode'.
2 Select 'Random' then select an option.
- For DVD discs, select Random Title or Random Chapter.
- For CDs and Video CD/Super VCDs, select On or Off to switch random play on or off.

Tip
- Use the following controls during random play:
| Button | What it does |
| ▶▶I | Selects a new track/title/chapter at random. |
| ◀◀ | Returns to the beginning of the current track/title/chapter; further presses select another random track/title/chapter. |
- Random play remains in effect until you select Random Off from the random play menu options.
Creating a program list
This feature lets you program the play order of titles/chapters/tracks on a disc. 2
1 During playback, press HOME MENU and select 'Play Mode'.
2 Select 'Program' then select 'Create/Edit' from the list of program options.
3 Use the cursor buttons and ENTER to select a title, chapter or track for the current step in the program list.
For a DVD disc, you can add a title or a chapter.
- For a CD or Video CD/Super VCD, select a track to add to the program list.
After pressing ENTER to select the title/chapter/track, the step number automatically moves down one.
4 Repeat step 3 to build up a program list.
A program list can contain up to 24 steps.
- You can insert steps by just highlighting the position where you want the new step to appear and entering a title/chapter/track number.
- To delete a step, highlight it and press CLEAR.
5 To play the program list, press ▶ (play).
Program play remains active until you turn off program play (see below), erase the program list (see below), eject the disc or switch off.

Note
1 • You can set the random play option when a disc is playing or stopped. However, you can't use random play together with program play.
- You can't use random play with VR format DVD-RW discs, WMA/MP3 discs, DivX video discs, or while a DVD disc menu is being displayed.
2 • Program lists are saved for the DVD disc loaded. When you load a disc with a saved program list, program play is automatically turned on.
- You can't use Program play with VR format DVD-RW discs, WMA/MP3 discs, DivX video discs, or while a DVD disc menu is being displayed.

Tip
- Use the following controls during program play:
| Button | What it does |
| HOME MENU | Save the program list and exit without starting playback. |
| ▶▶I | Skip to the next step in the program list. |
Other functions available from the program menu
There are a number of other options in the program menu in addition to Create/Edit.
- Playback Start – Starts playback of a saved program list
- Playback Stop – Turns off program play, but does not erase the program list
- Program Delete – Erases the program list and turns off program play
Searching a disc
You can search DVD discs by title or chapter number, or by time; CDs and Video CD/Super VCDs by track number or time; DivX video discs by time.
1 Press HOME MENU and select 'Play Mode'.
2 Select 'Search Mode'.
The search options that appear depend on the kind of disc loaded.
3 Select a search mode.
- The disc must be playing in order to use time search.
4 Use the number buttons to enter a title, chapter or track number, or a time.
- For a time search, enter the number of minutes and seconds into the currently playing title (DVD/ DivX video) or track (CD/ Video CD/Super VCD) you want playback to resume from. For example, press 4, 5, 0, 0 to have playback start from 45 minutes into the disc. For 1 hour, 20 minutes and 30 seconds, press 8, 0, 3, 0.
5 Press ENTER to start playback.
Switching subtitles
Some DVD discs and DivX video discs have subtitles in one or more languages; the disc box will usually tell you which subtitle languages are available. You can switch subtitle language during playback. 1
- Press SHIFT+SUBTITLE repeatedly to select a subtitle option.
- To set subtitle preferences, see Language settings on page 22.
• See Displaying DivX subtitle files on page 34 for more on DivX subtitles.
Switching language / audio channels
When playing discs recorded with dialog in two or more languages, or with dual-mono audio 2 you can switch these during playback. 3
- Press SHIFT+AUDIO repeatedly to select an audio language option.
- To set audio language preferences, see Language settings on page 22.
Note
1 Some discs only allow you to change subtitle language from the disc menu. Press SHIFT+TOP MENU or DVD MENU to access.
2 Some Super VCDs have two soundtracks. With these discs you can switch between the two soundtracks as well as individual channels in each.
3 Some discs only allow you to change audio language from the disc menu. Press SHIFT+TOP MENU or DVD MENU to access.
Zooming the screen
Using the zoom feature you can magnify a part of the screen by a factor of 2 or 4, while watching a DVD, DivX video title or Video CD/ Super VCD or playing a JPEG disc.
1 During playback, use the SHIFT+ZOOM button to select the zoom factor (Normal, 2x or 4x).
2 Use the cursor buttons to change the zoomed area.
You can change the zoom factor and the zoomed area freely during playback. 1
Switching camera angles
Some DVD discs feature scenes shot from two or more angles—check the disc box for details.
When a multi-angle scene is playing, a 📄 icon appears on screen (this can be switched off if you prefer—see Display settings on page 22).
- During playback (or when paused), press SHIFT+ANGLE to switch angle.
Displaying disc information
Various track, chapter and title information can be displayed on-screen during playback.
- To show/switch/hide the information displayed, press DISPLAY repeatedly.
Limited disc information also appears in the front panel display. Press DISPLAY to change the displayed information.

Note
1 • Since DVD, Video CD/Super VCD, DivX video title and JPEG pictures have a fixed resolution, picture quality will deteriorate, especially at 4x zoom. This is not a malfunction.
- If the navigation square at the top of the screen disappears, press SHIFT+ZOOM again to display it.
Chapter 4
More tuner features: RDS
U.K. model only
An introduction to RDS
Radio Data System (RDS) is a system used by most FM radio stations to provide listeners with various kinds of information—the name of the station and the kind of show they're broadcasting, for example.
One feature of RDS is that you can search by type of program. For example, you can search for a station that's broadcasting a show with the program type, JAZZ.
You can search the following program types: 1
NEWS – News
AFFAIRS – Current Affairs
INFO – General Information
SPORT – Sport
EDUCATE – Educational
DRAMA – Radio plays, etc.
CULTURE – National or regional culture, theater, etc.
SCIENCE – Science and technology
VARIED—Usually talk-based material, such as quiz shows or interviews.
POP M – Pop music
ROCK M – Rock music
EASY M – Easy listening
LIGHT M – 'Light' classical music
CLASSICS – 'Serious' classical music
OTHER M – Music not fitting above categories
WEATHER – Weather reports
FINANCE – Stock market reports, commerce, trading, etc.
CHILDREN – Programs for children
SOCIAL – Social affairs
RELIGION – Programs concerning religion
PHONE IN – Public expressing their views by phone
TRAVEL – Holiday-type travel rather than traffic announcements
LEISURE – Leisure interests and hobbies
JAZZ – Jazz
COUNTRY – Country music
NATION M – Popular music in a language other than English
OLDIES – Popular music from the '50s and '60s
FOLK M – Folk music
DOCUMENT – Documentary
Displaying RDS information
Use the DISPLAY button to display the different types of RDS information available. 2
- Press DISPLAY for RDS information.
Each press changes the display as follows:
- Radio Text (RT) – Messages sent by the radio station. For example, a talk radio station may provide a phone number as RT.
- Program Service Name (PS) – The name of the radio station.
- Program Type (PTY) – This indicates the kind of program currently being broadcast.
- SEARCH – PTY search (see below)
- Current tuner frequency
Searching for RDS programs
You can search for a program type listed above.
1 Press the TUNER button for the FM band. 3
2 Press DISPLAY repeatedly until SEARCH appears in the display.
3 Use ←/→ (cursor left/right) to select the program type you want to hear.
4 Press ENTER to start the search.
The system searches the station presets for a match. If it finds one, searching stops for 5 sec.
5 If you want to keep listening to the station, press ENTER within the 5 seconds.
If you don't press ENTER, searching resumes.
Note
1 In addition, there are three other program types, TEST, ALARM, and NONE. ALARM and TEST are used for emergency announcements. You can't search for these, but the tuner will switch automatically to this RDS broadcast signal. NONE appears when a program type cannot be found.
2 • If any noise is picked up while displaying the RT scroll, some characters may be displayed incorrectly.
- If you see NO RADIO TEXT DATA in the RT display, it means no RT data is sent from the broadcast station. The display will automatically switch to the PS data display (if no PS data, the frequency is displayed).
- In the PTY display, NO DATA or NONE may be shown. In this case, the PS display is shown after a few seconds.
3 RDS is only possible in the FM band.
Chapter 5
Audio Settings and Video Adjust menus
Audio Settings menu
The Audio Settings menu offers features for adjusting the way discs sound.
1 Press HOME MENU and select 'Audio Settings' from the on-screen display.

Audio Settings
2 Select and change settings using the ↑/↓/←/→ (cursor) buttons, and ENTER.

Audio DRC
- Settings: High, Medium, Low, Off (default)
When watching Dolby Digital DVDs at low volume, it's easy to lose the quieter sounds completely—including some of the dialog. Switching Audio DRC (Dynamic Range Control) to on can help by bringing up the quieter sounds, while controlling loud peaks. How much of a difference you hear depends on the material you're listening to. If the material doesn't have wide variations in volume, you may not notice much change. 1
Video Adjust menu
From the Video Adjust screen you can adjust settings that affect picture presentation.
1 Press HOME MENU and select 'Video Adjust' from the on-screen display.

Video Adjust
2 Make settings using the ↑/↓/←/→ (cursor) buttons, and ENTER.
| Video Adjust | ||
| Sharpness | ▶ | Standard |
| Brightness | ▶ | 0 |
| Contrast | ▶ | 0 |
| Gamma | ▶ | Off |
| Hue | ▶ | 0 |
| Chroma Level | ▶ | 0 |
You can adjust the following settings:
- Sharpness – Adjusts the sharpness of edges in the picture (Fine, Standard, Soft)
- Brightness – Adjusts the overall brightness (-20 to +20)
- Contrast – Adjusts the contrast between light and dark ( -16 to +16 )
- Gamma – Adjusts the ‘warmth’ of the picture (High, Medium, Low, Off)
- Hue – Adjusts the red/green balance (Green 9 to Red 9)
- Chroma Level – Adjusts how saturated colors appear (-9 to +9)
Adjust the Brightness, Contrast, Hue and Chroma Level settings using the ↔/→ (cursor left/right) buttons.
Brightness min max 0 |||||||......
3 Press ENTER to return to the Video Adjust screen, or HOME MENU to exit.

Note
1 • Audio DRC is only effective with Dolby Digital audio sources.
Chapter 6
Initial Settings menu
Using the Initial Settings menu
The Initial Settings menu provides audio and video output settings, parental lock settings, and display settings, among others.
If an option is grayed out it means that it cannot be changed at the current time. This is usually because a disc is playing. Stop the disc, then change the setting.
1 Press HOME MENU and select 'Initial Settings'.

Initial Settings
2 Use the cursor buttons and ENTER to select the setting and option you want to set.
All the settings and options are explained on the following pages. 1
Video Output settings
| Setting | Option What it means | |
| TV Screen(See also Screen sizes and disc formats on page 36.) | 4:3 (Letter Box) | Set if you have a conventional 4:3 TV. Widescreen movies are shown with black bars top and bottom. |
| 4:3 (Pan & Scan) | Set if you have a conventional 4:3 TV. Widescreen movies are shown with the sides cropped so that the image fills the screen. | |
| 16:9 (Wide) | Set if you have a widescreen TV. | |
| AV Connector OutU.K. model only(See Using the SCART AV output on page 29.) | Video | Standard video, compatible with all TVs. |
| S-Video | Higher quality, but check your TV for compatibility. | |
| RGB | Best quality, but check your TV for compatibility. | |
| Component OutAustralian model only(See also Connecting using the component video output on page 28.) | Interlace | Set if your TV is not compatible with progressive scan video. |
| Progressive | Set if your TV is compatible with progressive scan video (see your TV's instruction manual for details). Press ENTER once more to confirm (or RETURN to cancel).Note that progressive scan video is only output from the component video jacks. | |
| S-Video OutAustralian model only(See also Connecting the S-video output on page 27.) | S2 | Standard setting. |
Note
1 • In the table, the default setting is shown in bold: other settings are shown in italics.
- Some settings, such as TV Screen, Audio Language and Subtitle Language may be overridden by the DVD disc. Often these settings can also be made from the DVD disc menu.
- U.K. model only – The AV Connector Out setting only needs to be set if you have connected this player to your TV using a SCART cable.
Language settings
| Setting Option What it means | ||
| Audio Language English | If there is an English soundtrack on the disc, it is played. | |
| Languages as displayed | ||
| Other Language | ||
| Select to choose a language other than the ones displayed (see Using the language code list on page 40). | ||
| Subtitle Language English | If there are English subtitles on the disc they are displayed. | |
| Languages as displayed | ||
| Other Language | ||
| Select to choose a language other than the ones displayed (see Using the language code list on page 40). | ||
| DVD Menu Language | w/Subtitle Lang. | DVD disc menus are displayed in the same language as your selected subtitle language, if possible. |
| Languages as displayed | DVD menus are displayed in the selected language, if possible. | |
| Other Language | Select to choose a language other than the ones displayed (see Using the language code list on page 40). | |
| Subtitle Display On | Subtitles are displayed in your selected subtitle language. | |
| Off | ||
Display settings
| Setting | Option What it means | |
| OSD Language English | On-screen displays of the player are in English. | |
| Languages as displayed On-screen displays are shown in the language selected. | ||
| Angle Indicator On | A camera icon is displayed on-screen during multi-angle scenes on a DVD disc. | |
| Off No multi-angle indication is shown. | ||
Options settings
| Setting Option What it means | |
| Parental Lock – | See Parental Lock below. |
| DivX VOD Display | See About DivX® VOD content below. |
Speakers settings
| Setting | Option What it means |
| Speaker Distance – | Specify the distance of your speakers from your listening position (see Speaker Distance on page 24). |
Parental Lock
- Default level: Off; Default password: none; Default Country code: us (2119)
To give you some control over what your children watch on your DVD player, some DVD-Video discs feature a Parental Lock level. If your player is set to a lower level than the disc, the disc won't play.
Some discs also support the Country Code feature. The player does not play certain scenes on these discs, depending on the Country Code you set.
Registering a new password
Register a password to change the Parental Lock level or enter a Country code. 1
1 Select 'Password'.

2 Use the number buttons to input a 4-digit password then press ENTER.
Changing your password
To change your password, confirm your existing password then enter a new one.
1 Select 'Password Change'.
2 Input your existing password, then press ENTER.
3 Enter a new password and press ENTER.
Setting/changing the Parental Lock
1 Select 'Level Change'.
2 Use number buttons to enter your password, then press ENTER.
3 Select a new level and press ENTER.
- Press ← (cursor left) repeatedly to lock more levels (more discs will require the password); press → (cursor right) to unlock levels. You can't lock level 1.
Setting/changing the Country code
You can find the Country/Area code list on page 41.
1 Select 'Country Code'.
2 Input your password, then press ENTER.
3 Select a Country code then press ENTER.
There are two ways you can do this:
- Select by code letter: Use ↑/↓ (cursor up/down) to change the Country code.
- Select by code number: Press → (cursor right) then use the number buttons to enter the 4-digit Country code.
The new Country code takes effect after ejecting the disc once.
Note
1 • Not all discs use Parental Lock, and will play without requiring the password first.
- If you forget your password, you'll need to reset the player to register a new password. (see Resetting the system on page 40).
About DivX® VOD content
In order to play DivX VOD (video on demand) content on this player, you first need to register the player with your DivX VOD content provider. You do this by generating a DivX VOD registration code, which you submit to your provider. 1

Important
- DivX VOD content is protected by a DRM (Digital Rights Management) system. This restricts playback of content to specific, registered devices.
- If you load a disc that contains DivX VOD content not authorized for your player, the message Authorization Error is displayed and the content will not play.
Displaying your DivX VOD registration code
1 Press HOME MENU and select 'Initial Settings'.
2 Select 'Options', then 'DivX VOD'.

3 Select 'Display'.
Your 8-digit registration code is displayed.

Make a note of the code as you will need it when you register with a DivX VOD provider.
Playing DivX® VOD content
Some DivX VOD content may only be playable a fixed number of times. When you load a disc containing this type of DivX VOD content, the remaining number of plays is shown on-screen and you then have the option of playing the disc (thereby using up one of the remaining plays), or stopping. If you load a disc that contains expired DivX VOD content (for example, content that has zero remaining plays), the message Rental Expired is displayed.
If your DivX VOD content allows an unlimited number of plays, then you may load the disc into your player and play the content as often as you like, and no message will be displayed.
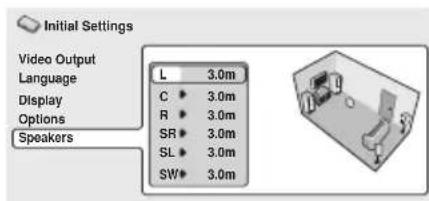
Speaker Distance
- Default setting: 3.0 m
To get the best surround sound from your system, you should set up the speaker distances from your listening position.

1 Use the ↑/↓ (cursor up/down) to select a speaker.
- The L and R speakers are paired; you can't set them differently.

Note
1 Resetting the player (as described in Resetting the system on page 40) will not cause you to lose your registration code.
2 Press → (cursor right) to change the speaker distance for the highlighted speaker.
3 Use the / (cursor up/down) to change the distance.
- When you change the distance settings of the front left (L) or front right (R) speakers, all the other speaker distances change relative to it.
- Front left/right (L/R) speaker distances can be set from 30 cm to 9 m in 30 cm increments.
- The center speaker (C) can be set from -2.1m to 0m relative to the front left/right speakers.
- Surround left/right (SL/SR) speakers can be set from -6.0m to 0m relative to the front left/right speakers. 1
- The subwoofer (SW) can be set from -2.1m to 0m relative to the front left/right speakers.
4 Press ← (cursor left) to go back to the speaker list if you want to modify another speaker, or press ENTER to exit the Speaker Distance screen.
Chapter 7
Other connections
Connecting auxiliary components
U.K. model connections:
Using the stereo analog inputs, you can connect an external component such as a VCR, MD or CD player for playback through this system.
- Connect the LINE 2 (AUDIO IN) jacks to the analog outputs of an external playback component.
Connect using RCA pin-plug stereo cables.
Tape deck, etc.
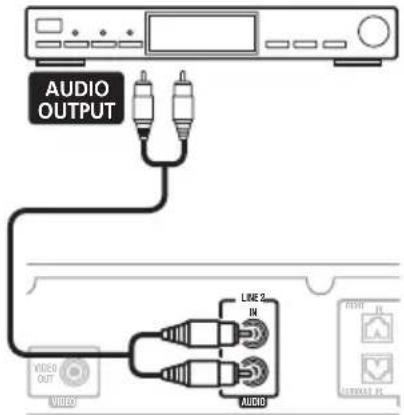
XV-DV232/240
Australian model connections:
This system has both stereo analog inputs and outputs. Use these to connect external components, such as your VCR, MD or CD-R recorder.
1 Connect the LINE (AUDIO IN) jacks to the analog outputs of an external playback component.
Connect using RCA pin-plug stereo cables.
2 Connect the LINE (AUDIO OUT) jacks to the analog inputs of an external recording component.
These include components such as a cassette deck, VCR, MD, or another recorder with analog inputs. Connect using RCA pin-plug stereo cables.

XV-DV131
Recording mode
The Recording mode allows you to make surround-compatible analog recordings from the LINE (AUDIO OUT) jacks. 1 Dolby multichannel sources will be downmixed to stereo for improved playback with systems that can provide matrix-decoding (like Dolby Pro Logic).
1 Press SOUND MODE.
2 Use ←/→ (cursor left/right) to select REC MODE then press ENTER.
3 Use ↑/↓ (cursor up/down) to select MODE ON or MODE OFF then press ENTER to confirm.
- MODE ON – Multichannel sources are downmixed to stereo for recording (the same downmix is heard through the front speakers and the subwoofer).
- MODE OFF – For regular multichannel playback through your speaker system (only the front left and right channels are output from the line output).
Connecting external antennas
For an external AM antenna, use 5–6 meters of vinyl-insulated wire and set up either indoors or outdoors. Leave the loop antenna connected.

For an external FM antenna, Use a PAL connector to hook up an external FM antenna.

Connecting the S-video output
Australian model only
If your TV has an S-video input, you can use this instead of the standard video output for a better quality picture.
- Use an S-video cable to connect the S-VIDEO OUT to an S-video input on your TV.
Line up the small triangle above the jack with the same mark on the plug before plugging in.

XV-DV131
Note
1 • When Recording mode is on, most sound features cannot be used. The display will briefly blink REC MODE if you try and use a prohibited function while Recording mode is on.
- When Recording mode is off, the audio from the LINE (AUDIO OUT) jacks may be interrupted, depending on the operation.
- The Recording mode switches off if you change the input function (DVD/CD, TUNER, etc.) or switch the power off.
Connecting using the component video output
Australian model only
If your TV has component video inputs, you can use these instead of the standard video output to connect this system to your TV. 1 This should give you the best quality picture from the three types of video output available.
- Use a component video cable to connect the COMPONENT VIDEO OUT to a set of component inputs on your TV.

XV-DV131
About progressive scan video
Compared to interlace video, progressive scan video effectively doubles the scanning rate of the picture, resulting in a very stable, flicker-free image. Progressive scan video is available only from the component video output.

Important
- If you connect a TV that is not compatible with a progressive scan signal and switch the system to progressive, you will not be able to see any picture at all. In this case, press ⏻ STANDBY/ON to put the system in standby, then press SHIFT+SYSTEM SETUP, use the ←/→ (cursor left/right) button to select INTER L. Press ENTER to set to interlace and switch the system back on.
Compatibility of this player with progressive-scan and high-definition TVs.
This player is compatible with progressive video Macro Vision System Copy Guard. 2
This system is compatible with the following Pioneer displays and monitors: PDP-504HDE, PDP-434HDE.
Note
1 The component video output is switchable between interlaced and progressive formats. See Video Output settings on page 21. 2 Consumers should note that not all high-definition television sets are fully compatible with this product and may cause artifacts to be displayed in the picture. In case of 525 progressive scan picture problems, it is recommended that the user switch the connection to the 'standard definition' output (Interlace). If there are questions regarding our TV set compatibility with this model, please contact our customer service center.
Using the SCART AV output
U.K. model only
There are two different kinds of video outputs you can use to connect this system to your TV. The SCART output should give you better picture quality than the standard composite video output. The SCART AV connector functions as both a video and audio output. 1
- Use a commercially available SCART cable to connect the AV CONNECTOR to your TV.

XV-DV232/240
SCART pin assignment
The diagram below shows the SCART 21-pin connector assignment. This connector provides the video and audio signals for connection to a compatible color TV/monitor.
2018161412108642

21 19 17 15 13 11 9 7 5 3 1
| Pin No. | Assignment | Pin No. | Assignment |
| 1 Audio R OUT 12 No connection | |||
| 2 Audio R IN 13 GND (video) | |||

Note
1 SCART cables are available in several configurations. Make sure that the one you get will work with this system and your TV/monitor (see SCART pin assignment above).
| Pin No. | Assignment | Pin No. | Assignment |
| 3 Audio L OUT 14 GND (video) | |||
| 4 GND (audio) 15 R or C OUT | |||
| 5 GND (video) 16 BLANK OUT | |||
| 6 Audio L IN 17 GND (video) | |||
| 7 | B | OUT 18 GND (video) | |
| 8 Status 19 Video or Y OUT | |||
| 9 GND (video) 20 No connection | |||
| 10 No connection 21 GND (video) | |||
| 11 G OUT | |||
Chapter 8
Controls and displays
Display

flowchart
graph LR
    A["1"] --> B["PRGSVE SOUND DTS F.SURR."]
    C["2"] --> B
    D["3"] --> E["PL II"]
    F["4"] --> G["15"]
    F --> H["14"]
    F --> I["13"]
    F --> J["12"]
    K["5"] --> L["REC MODE RPT -1 kHz MHz"]
    M["6"] --> N["PGM RDM"]
    O["7"] --> P["Output"]
    Q["8"] --> R["Output"]
    S["9"] --> T["Output"]
    U["10"] --> V["Output"]
    W["11"] --> X["Output"]
1 DTS
Lights during playback of a DTS source (page 11).
2 PRGSVE
Australian model only
Lights when progressive scan video output is selected (page 21).
3 SOUND
Lights when the SFC Modes or the tone controls (treble, bass or bass boost) are active (page 12).
4 F.SURR.
Lights when the Front Surround listening mode is selected (page 11).
5 RPT and RPT-1
RPT lights during repeat play. RPT-1 lights during repeat one-track play (page 15).
6 REC MODE
Lights when Rec Mode is on (page 27).
7 PGM
Lights during program play (page 16).
8 Tuner indicators
YircledR – Lights when a broadcast is being received.
- Lights when a stereo FM broadcast is being received in auto stereo mode.
- Lights when FM mono reception is selected.
- (U.K. model only) Lights when in one of the RDS display or search modes.
9 RDM
Lights during random play (page 16).
10 kHz / MHz
Indicates the frequency unit shown in the character display (kHz for AM, MHz for FM).
11 Character display
12
Lights when sleep timer is active (page 10).
13 ▶
Lights when a disc is playing.
14 ☐☐ PL II
Lights during Dolby Pro Logic II decoding (page 11).
15 D
Lights during playback of a Dolby Digital source (page 11).
Front panel

1 Display
See Display above for detailed information.
2 ▲ OPEN/CLOSE
Opens/closes the disc tray.
3 ▶/II DVD/CD
Selects the DVD/CD function and starts/pauses/resumes playback.
4
Stops playback.
5 FM/AM
Selects the tuner function and toggles between FM/AM bands.
6 VOLUME buttons
Adjusts the volume.
7 ⏻ STANDBY/ON
Switches the system on or into standby.
8 PHONES jack
Headphone jack.
Remote control

1 ⏻ STANDBY/ON
Switches the system on or into standby.
2 Function select buttons
Selects the source you want to listen to (DVD/CD. TUNER, LINE)
3 Number buttons
Select chapters/tracks from a disc directly. Press DVD/CD to access these controls:
SHIFT+AUDIO
Selects audio channel/language (page 17).
SHIFT+SUBTITLE
Displays/changes the subtitles (page 17).
SHIFT+ANGLE
Changes camera angle during DVD multi-angle scene playback (page 18).
SHIFT+ZOOM
Changes the screen zoom level (page 18).
Controls and displays
4 HOME MENU
Displays (or exits) the on-screen menu for Initial Settings, Play Mode functions, etc.
SHIFT+SYSTEM SETUP
Use to make various system and surround sound settings (page 6, 10 and 37).
5 Cursor buttons, ENTER and tuning buttons
Cursor buttons
Use the cursor buttons ( //←/→ ) to navigate on-screen displays and menus.
ENTER
Selects an option or executes a command.
TUNE +/-
Tunes the radio.
ST +/-
Selects station presets when listening to the radio.
6 SOUND MODE
Accesses the sound menu to adjust the SFC Mode, bass and treble, etc. (page 12 and 27)
SHIFT+TEST TONE
Outputs the test tone (for speaker setup) (page 6).
7 Disc playback controls
See Basic playback controls on page 7 and Playing discs on page 13 for an explanation of these controls.
8 SHIFT
Some of the buttons have alternate functions (they are outlined on the remote control). Press and hold SHIFT to access these.
9 CLEAR
Clears an entry.
10 MUTE
Mutes the sound (press again to cancel).
11 VOLUME +/-
Adjusts the volume.
12 DVD MENU
Press to display a DVD disc menu, or the Disc Navigator (page 8).
SHIFT+TOP MENU
Displays the top menu of a DVD disc in the play position—this may be the same as pressing DVD MENU (page 8).
13 RETURN
Returns to a previous menu screen.
14 DISPLAY
Displays/changes disc information shown on-screen (page 18) or to display RDS information (page 19).
Selects a Front Surround listening mode (page 11).
15 SLEEP
Press to set the sleep timer (page 10).
SHIFT+SURROUND
Selects a Surround mode (page 11).
Chapter 9
Additional information
Disc / content format playback compatibility
This player is compatible with a wide range of disc types (media) and formats. Playable discs will generally feature one of the following logos on the disc and/or disc packaging. Note however that some disc types, such as recordable CD and DVD, may be in an unplayable format.
See the Disc compatibility table below for more information.
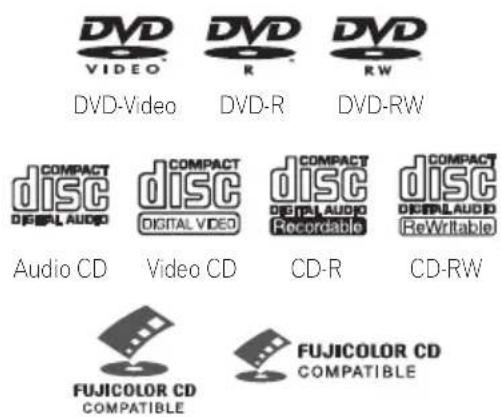
Fujicolor CD
• is a trademark of Fuji Photo Film Co. Ltd.
• DVD is a trademark of DVD Format/Logo Licensing Corporation
• Also compatible with KODAK Picture CD
This player supports the IEC's Super VCD standard for superior picture quality, dual soundtracks, and widescreen support.


Super Video CD (Super VCD)
Disc compatibility table
| Media | Compatible formats |
| CD-R/RW | CD-Audio, Video CD/Super VCD, ISO 9660 CD-ROM**ISO 9660 Level 1 or 2 compliant.CD physical format: Mode1, Mode2 XA Form1. Romeo and Joliet file systems are both compatible.Multi-session playback: NoUnfinalized disc playback: No |
| DVD-R/RW | DVD-Video, Video Recording (VR)*Edit points may not play exactly as edited; screen may go momentarily blank at edited points.Unfinalized playback: NoWMA/MP3/JPEG file playback on DVD-R/RW: No |
| PC-created disc | Discs recorded using a PC may not be playable due to the setting of the software used to create the disc. In these instances, check the DVD-R/RW or CD-R/RW software manual or disc boxes for more on compatibility.Discs recorded in packet write mode (UDF format) are not compatible. |
| Compressed audio | MPEG-1 Audio Layer 3 (MP3), Windows Media Audio (WMA)Sampling rates: 32, 44.1 or 48kHzBit-rates: Any (128Kbps or higher recommended)VBR (variable bit rate) MP3 playback: NoVBR WMA playback: NoWMA lossless encoding: NoDRM (Digital Rights Management) compatible: Yes (DRM-protected audio files will not play in this player).File extensions: .mp3, .wma (these must be used for the player to recognize MP3 and WMA filesFile structure: Up to 299 folders and up to 648 folders and files combined. |
| JPEG file | Baseline JPEG and EXIF 2.2* still image files up to a resolution of 3072 x 2048.*File format for digital still camerasProgressive JPEG compatible: NoFile extensions: .jpg (must be used for the player to recognize JPEG files)File structure: Up to 299 folders; up to 648 folders and files combined |
About DivX
DivX is a compressed digital video format created by the DivX ® video codec from DivXNetworks, Inc. This player can play DivX video files burned on CD-R/RW/ROM discs. Keeping the same terminology as DVD-Video, individual DivX video files are called 'Titles'. When naming files/titles on a CD-R/RW disc prior to burning, keep in mind that by default they will be played in alphabetical order.
DivX video compatibility
• Official DivX® Certified product.
- Plays DivX 5, DivX 4, DivX 3, and DivX VOD video content (in compliance with DivX Certified technical requirements).
- File extensions: .avi and .divx (these must be used for the player to recognize DivX video files). Note that all files with the .avi extension are recognized as MPEG4, but not all of these are necessarily DivX video files and therefore may not be playable on this player.
Displaying DivX subtitle files
The font sets listed below are available for DivX external subtitle files. You can see the proper font set on-screen by setting the Subtitle Language (in Language settings on page 22) to match the subtitle file. 1
ISO 8859-1 (also known as "Latin 1") covers the following West European languages:
Albanian (sq), Basque (eu), Catalan (ca), Danish (da), Dutch (nl), English (en), Faroese (fo), Finnish (fi), French (fr), German (de), Icelandic (is), Irish, (ga) Italian (it), Norwegian (no), Portuguese (pt), Rhaeto-Romanic (rm), Scottish (gd), Spanish (es), and Swedish (sv)
ISO 8859-2 (also known as "Latin 2") covers the following East European languages:
Albanian (sq), Croatian (hr), Czech (cs), Hungarian (hu), Polish (pl), Romanian (ro), Slovak (sk), Slovenian (sl)
ISO 8859-5 (also known as "Latin 5") covers the following Russian languages:
Bulgarian (bg), Byelorussian (be), Macedonian (mk), Russian (ru), Serbian (sr), Ukrainian (uk)
ISO 8859-8 (also known as "Latin 8") covers the following Hebraic languages:
Hebrew (iw), Yiddish (ji)
Note
1 • For external subtitle files the following subtitle format filename extensions are supported (please note that these files are not shown within the disc navigation menu): .srt, .sub, .ssa, .smi
- Some external subtitle files may be displayed incorrectly or not at all.
- The filename of the movie file has to be repeated at the beginning of the filename for the external subtitle file.
- The number of external subtitle files which can be switched for the same movie file is limited to a maximum of 10.
ISO 8859-9 (also known as "Latin 9") covers the following Turkish languages:
Turkish (tr)
DivX, DivX Certified, and associated logos are trademarks of DivXNetworks, Inc. and are used under license.
About WMA

The Windows Media ® logo printed on the box indicates that this player can playback Windows Media Audio content.
WMA is an acronym for Windows Media Audio and refers to an audio compression technology developed by Microsoft Corporation. WMA content can be encoded by using Windows Media® Player version 7, 7.1, Windows Media® Player for Windows® XP, or Windows Media® Player 9 Series.
Microsoft, Windows Media, and the Windows logo are trademarks, or registered trademarks of Microsoft Corporation in the United States and/or other countries.
Using and taking care of discs
DVD Video regions
All DVD Video discs carry a region mark that indicates which region(s) of the world the disc is compatible with. Your DVD system also has a region mark (on the rear panel). Discs from incompatible regions will not play in this player. Discs marked ALL play in any player.
Handling discs
Hold the disc by its edges when handling so as not to leave fingerprints, dirt or scratches on either side of the disc. Damaged or dirty discs can affect playback performance.
If a disc becomes marked with fingerprints, dust, etc., clean using a soft, dry cloth.

Wipe lightly from the center of the disc using straight strokes. Don't wipe the disc surface with circular strokes.
If necessary, use a cloth soaked in alcohol, or a commercially available CD/DVD cleaning kit to clean a disc more thoroughly. Never use benzine, thinner or other cleaning agents such as those designed for cleaning vinyl records.
Storing discs
Avoid leaving discs in excessively cold, humid, or hot environments (including under direct sunlight). Don't glue paper or put stickers onto the disc, or use a pencil, ball-point pen or other sharp-tipped writing instrument. These could all damage the disc.
Discs to avoid
Discs spin at high speed inside the player. If a disc is cracked, chipped, warped, or otherwise damaged, don't risk using it in your player—you could end up damaging the unit.
This unit is designed for use with conventional, fully circular discs only. Pioneer disclaims all liability arising in connection with the use of shaped discs.
Installation and maintenance
Hints on installation
We want you to enjoy using this system for years to come, so please bear in mind the following points when choosing a location:
Do...
√ Use in a well-ventilated room.
√ Place on a solid, flat, level surface, such as a table, shelf or stereo rack.
Don't...
✗ Use in a place exposed to high temperatures or humidity, including near radiators and other heat-generating appliances.
✗ Place on a window sill or other place where the system will be exposed to direct sunlight.
✗ Use in an excessively dusty or damp environment.
✗ Place directly on top of an amplifier, or other component in your stereo system that becomes hot in use.
✗ Use near a television or monitor as you may experience interference—especially if the television uses an indoor antenna.
✗ Use in a kitchen or other room where the system may be exposed to smoke or steam.
✗ Use on a thick rug or carpet, or cover with cloth—this may prevent proper cooling of the system unit.
✗ Place on an unstable surface, or one that is not large enough to support all four of the system unit's feet.
Cleaning the pickup lens
The DVD player's lens should not become dirty in normal use, but if for some reason it should malfunction due to dust or dirt, consult your nearest Pioneer authorized service center. Although lens cleaners are commercially available, we do not recommend using them since some may damage the lens.
Problems with condensation
Condensation may form inside the player if it is brought into a warm room from outside, or if the temperature of the room rises quickly. Although the condensation won't damage the player, it may temporarily impair performance. Leave it to adjust to the warmer temperature for about an hour before switching on.
Moving the system unit
If you need to move the main unit, first remove a disc if there's one in the player, then press ⏻ STANDBY/ON on the front panel to turn the system off. Wait for GOOD BYE to disappear from the display, then unplug the power cord. 1 Never lift or move the unit during playback—discs rotate at high speeds and may damage.
Screen sizes and disc formats
DVD-Video discs come in different screen aspects, ranging from TV programs, which are generally 4:3, to CinemaScope widescreen movies 2 , with an aspect ratio of up to about 7:3. Televisions also come in different aspect ratios; 'standard' 4:3 and widescreen 16:9. 3

Set to 4:3 (Letter Box), widescreen discs are shown with black bars top and bottom.
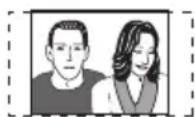
Set to 4:3 (Pan&Scan), widescreen discs are shown with the left and right sides cropped. Although the picture looks larger, you don't actually see the whole picture.

Note
1 Unplugging the unit before GOOD BYE disappears from the display may cause the system to return to the factory settings.
2 Many widescreen discs override the system's settings so that the disc is shown in letterbox format regardless of the setting.
TV system setting
The default setting of this system is AUTO, and unless you notice that the picture is distorted when playing some discs, you should leave it set to AUTO. If you find picture distortion with some discs, set the TV system to match your country or region's system. However, this may restrict the kinds of disc you can watch. See the table for the kinds of discs compatible with each setting (AUTO, PAL and NTSC). 1
1 Switch the unit into standby, then press SHIFT+SYSTEM SETUP.
2 Use ←/→ (cursor left/right) to choose TV SYS then press ENTER.
The TV system changes as follows:
- AUTO → NTSC
- NTSC → PAL
- PAL → AUTO
The system automatically switches on and you'll see the new TV system setting in the display after seeing WELCOME. 2
| Disc Player settingType Format NTSC PAL AUTO | |||
| DVD/Super VCD/Video CD/DivX Video | NTSCPAL | NTSC PAL | NTSCPAL |
| NTSC PAL | |||
| CD/MP3/WMA/JPEG/no disc | — | NTSC PAL | NTSC orPAL |
Frequency step setting
Australian model only
If you find that you can't tune into stations successfully, the frequency step may not be suitable for your country/region.
1 Switch the unit into standby, then press SHIFT+SYSTEM SETUP.
2 Use ←/→ (cursor left/right) to choose AM 9K/10K then press ENTER.
3 Use ↑/↓ (cursor up/down) to select AM 9K or AM 10K then press ENTER.
Note
3 • Using the 16:9 (Wide) setting with a standard 4:3 TV, or one of the 4:3 settings with a widescreen TV, will result in distortion.
- When you watch discs recorded in 4:3 format, you can use the TV controls to select how the picture is presented. Your TV may offer various zoom and stretch options; see the instructions that came with your TV for details.
- Some movie aspect ratios are wider than 16:9, so even with a widescreen TV, these discs will still play in a 'letterbox' style. 1 Most models of the newly developed countdown PAL TV system detect 50Hz (PAL)/60 Hz (NTSC) and automatically switch vertical amplitude, resulting in a display without vertical shrinkage. However, in some cases, the image may appear without color. If your PAL TV does not have a V-Hold control, you may not be able to watch NTSC discs because of picture roll. If the TV has a V-Hold control, adjust it until the picture stops rolling. On some TVs, the picture may shrink vertically, leaving black bands at the top and bottom of the screen.
2 You have to switch the player into standby (press ⏻ STANDBY/ON) before each change.
Troubleshooting
Incorrect operations are often mistaken for trouble and malfunctions. If you think that there is something wrong with this component, check the points below. Sometimes the trouble may lie in another component. Investigate the other components and electrical appliances being used. If the trouble cannot be rectified even after exercising the checks listed below, ask your nearest Pioneer authorized service center or your dealer to carry out repair work.
- If the system does not operate normally due to external effects such as static electricity disconnect the plug from the outlet and insert again to return to normal operating conditions.
General
| Problem | Remedy |
| The power does not turn on, or switches off suddenly (an error message may be displayed at startup). | Leave the unit plugged in, wait for one minute, then switch back on.Make sure there are no loose strands of wire touching the unit. This could cause the system to shut off automatically.Check that the speakers are connected correctly.Make sure the voltage of the mains power source is correct for the model.Try reducing the volume level.If the problem persists, take it to your nearest Pioneer authorized service center or your dealer for servicing. |
| No sound is output when a function is selected. | If you're using the line input, make sure the component is connected correctly (see Connecting auxiliary components on page 26).Press MUTE on the remote control to turn muting off. |
| No image is output when playing discs. | Make sure the TV is connected correctly (refer to the Setup Guide).Australian model only – Reset the video output to interlace (see Video Output settings on page 21). |
| No sound from surround or center speakers. | Refer to Setting the channel levels on page 6 to check the speaker levels.When TUNER or LINE is selected, you can only hear the source in stereo.Switch the input source to DVD/CD for multichannel sound.Check that the Recording mode hasn't been switched on (see Recording mode on page 27).Check that you haven't selected the STEREO mode (see Listening in surround sound on page 11).Connect the speakers properly (refer to the Setup Guide). |
| Can't operate the remote control. | Replace the batteries (refer to the Setup Guide).Operate within 7 m, 30° of the remote sensor (refer to the Setup Guide).Remove any obstacles or operate from another position.Avoid exposing the remote sensor on the front panel to direct light. |
| SND DEMO shows in the display and the unit can't be controlled. | Press and hold ■ (stop) on the front panel for about five seconds. The disc tray ejects automatically to indicate the Sound Demo mode is disabled. |
DVD/CD/Video CD player
| Problem | Remedy |
| The disc is ejected automatically after loading. | Clean the disc and align the disc properly in the disc guide.If the region number on a DVD-video disc does not match the number on the player, the disc cannot be used (seeDVD Video regionson page 35).Allow time for any condensation inside the player to evaporate. Avoid using the player near an air-conditioning unit. |
| Playback not possible. | If the disc is loaded upside down, reload the disc with label side face up. |
| Picture playback stops and buttons cannot be used. | Press ■ (stop), then ▶ (play) to start playback again.Switch the power off once, then on again using the front panel○ STANDBY/ONbutton. |
| Settings are canceled. | When the power is cut, settings will be canceled. |
| No picture/No color. | Check that connections are correct and that plugs are inserted fully.Check the manual of the TV/monitor to make sure the settings are correct. |
| Screen is stretched or aspect doesn't change. | TheTV Screensetting is incorrect. Set the TV Screen option to match the TV/monitor you're using (seeVideo Output settingson page 21). |
| When recorded on a VCR or passed through an AV selector, there is disturbance in the playback picture. | This system uses copy-protection technology which may prevent recording or cause picture problems when connected through a VCR or AV selector. This is not a malfunction. |
| Picture disturbance during playback or dark. | This player is compatible with Macro-Vision System copy guard. Some discs include a copy prevention signal, and when this type of disc is played back, stripes etc., may appear on some sections of the picture depending on the TV. This is not a malfunction.Discs respond differently to particular player functions. This may result in the screen becoming black for a brief instant or shaking slightly when the function is executed. These problems are largely due to differences between discs and disc content and are not malfunctions of this player. |
| Noticeable difference in DVD and CD volume. | DVDs and CDs use different recording methods. This is not a malfunction. |
| CD-ROM disc is not recognized by the system. | Make sure that the CD-ROM was recorded using the ISO 9660 disc format. SeeDisc compatibility tableon page 33 for other disc compatibility information. |
| Files don't show up in the Disc Navigator/ Photo Browser. | The files on the disc must be named with the correct file extension: .mp3 for MP3 files; .wma for WMA files; .jpg for JPEG files (upper or lower-case is OK). SeeDisc compatibility tableon page 33 for more on this. |
| Can't play WMA files. | The files were recorded using DRM (digital rights management). This is not a malfunction. |
Additional information
Tuner
| Problem | Remedy |
| Considerable noise in radio broadcasts. | Connect the AM antenna (refer to the Setup Guide) and adjust the direction and position for best reception. You may also connect an additional internal or external AM antenna (refer to Connecting auxiliary components on page 26).Fully extend the FM wire antenna, position for best reception, and secure to a wall. You may also connect an outdoor FM antenna (see Connecting external antennas on page 27).Turn off other equipment that may be causing the noise or move it further away.Australian model only – The tuning interval is incorrect for your country or region. Try switching the tuning interval (frequency step) (see Frequency step setting on page 37). |
| Auto tuning does not pick up some stations. | The radio signal is weak. Auto tuning will only detect radio stations with a good signal. For more sensitive tuning, connect an outdoor antenna. |
Error Messages
| Message Description | |
| REC MODE | • An operation is prohibited because the Recording Mode is on (page 27). |
| SND DEMO | • The sound demo is on. See General in Troubleshooting on page 38. |
| CANNOT | • An operation is prohibited because headphones are connected, or TEST TONE is pressed during disc playback. |
| STEREO | • An operation is prohibited because the DVD/CD function isn't selected. |
| TRAY LOCK | • The tray lock is on. Contact your Pioneer authorized dealer for instructions. |
| MUTING | • An operation is prohibited because the sound is muted (press MUTE). |
| EEP ERROR | • Contact your Pioneer authorized service center or your dealer for servicing. |
| EXIT | • Appears when a menu is automatically exited after a set period of inactivity. |
Resetting the system
Use this procedure to reset all system settings to the factory default.
1 Switch the system on.
2 Press ⏻ STANDBY/ON while holding down the front panel FM/AM button.
The next time you switch on, all the system settings should be reset.
Using the language code list
Some of the language options (see Language settings on page 22) allow you to set your preferred language from any of the 136 languages listed in the Language code list on page 41.
1 Select 'Other Language'.
2 Use ←/→ (cursor left/right) to select either a code letter or a code number.
3 Use ↑/↓ (cursor up/down) to select a code letter or a code number.
See the Language code list (next page) for a complete list of languages and codes.
Language code list
Language (Language code letter), Language code
Japanese (ja), 1001
English (en), 0514
French (fr), 0618
German (de), 0405
Italian (it), 0920
Spanish (es), 0519
Dutch (nl), 1412
Russian (ru), 1821
Chinese (zh), 2608
Korean (ko), 1115
Greek (el), 0512
Afar (aa), 0101
Abkhazian (ab), 0102
Hungarian (hu), 0821
Armenian (hy), 0825
Interlingua (ia), 0901
Interlingue (ie), 0905
Inupiak (ik). 0911
Indonesian (in), 0914
Icelandic (is), 0919
Hebrew (iw), 0923
Yiddish (ji), 1009
Javanese (jw), 1023
Georgian (ka), 1101
Kazakh (kk), 1111
Greenlandic (kl). 1112
Cambodian (km), 1113
Kannada (kn), 1114
Kashmiri (ks). 1119
Kurdish (ku), 1121
Kirghiz (ky), 1125
Latin (la), 1201
Lingala (In), 1214
Laothian (lo), 1215
Lithuanian (It), 1220
Latvian (lv), 1222
Malagasy (mg), 1307
Maori (mi), 1309
Macedonian (mk), 1311
Malayalam (ml), 1312
Mongolian (mn), 1314
Moldavian (mo), 1315
Marathi (mr), 1318
Malay (ms), 1319
Maltese (mt), 1320
Burmese (my), 1325
Nauru (na), 1401
Nepali (ne), 1405
Norwegian (no), 1415
Occitan (oc), 1503
Oromo (om), 1513
Oriya (or), 1518
Panjabi (pa), 1601
Polish (pl), 1612
Pashto, Pushto (ps), 1619
Portuguese (pt), 1620
Quechua (qu), 1721
Rhaeto-Romance (rm), 1813
Kirundi (rn), 1814
Romanian (ro), 1815
Kinyarwanda (rw), 1823
Sanskrit (sa), 1901
Sindhi (sd), 1904
Sangho (sg), 1907
Serbo-Croatian (sh), 1908
Sinhalese (si), 1909
Slovak (sk), 1911
Slovenian (sl), 1912
Samoan (sm), 1913
Shona (sn), 1914
Somali (so), 1915
Albanian (sq). 1917
Serbian (sr), 1918
Siswati (ss), 1919
Sesotho (st), 1920
Vietnamese (vi), 2209
Volapük (vo), 2215
Wolof (wo), 2315
Xhosa (xh), 2408
Yoruba (yo), 2515
Zulu (zu), 2621
Country/Area code list
Country/Area, Country/Area code, Country/Area code letter
Argentina, 0118, ar
Australia, 0121, au
Austria, 0120, at
Belgium, 0205, be
Brazil, 0218, br
Canada, 0301, ca
Chile, 0312, cl
China, 0314, cn
Denmark, 0411, dk
Finland, 0609, fi
France, 0618, fr
Germany, 0405, de
Hong Kong, 0811, hk
India, 0914, in
Indonesia, 0904, id
Italy, 0920, it
Japan, 1016, jp
Korea, Republic of, 1118, kr
Malaysia, 1325, my
Mexico, 1324, mx
Netherlands, 1412, nl
New Zealand, 1426, nz
Norway, 1415, no
Pakistan, 1611, pk
Philippines, 1608, ph
Portugal, 1620, pt
Russian Federation, 1821, ru
Singapore, 1907, sg
Spain, 0519, es
Switzerland, 0308, ch
Sweden, 1905, se
Taiwan, 2023, tw
Thailand, 2008, th
United Kingdom, 0702, gb
United States of America, 2119, us
Specifications
- Amplifier section
Continuous Power Output (RMS): Front, Center, Surround . . . 60 W per channel (1 kHz, 10 % T.H.D., 4 Ω) 50 W per channel (1 kHz, 10 % T.H.D., 6 Ω) Subwoofer . . .60 W (100 Hz, 10 % T.H.D., 4 Ω) 50 W (100 Hz, 10 % T.H.D., 6 Ω)
- Disc section
Digital audio characteristics ..... DVD fs: 96 kHz, 24-bit Type ..... DVD system, Video CD/Super VCD system and Compact Disc digital audio system Frequency response ....4 Hz to 44 kHz (96kHz sampling) / 4 Hz to 22 kHz (48kHz sampling) Wow and Flutter ..... Limit of measurement (±0.001 % W.PEAK) or less (JEITA)
- FM tuner section
Frequency range ..... 87.5 MHz to 108 MHz Antenna ..... 75 Ω, unbalanced
- AM tuner section
Frequency range: With 9kHz step ..... 531 kHz to 1,602 kHz With 10kHz step (Not applicable to the U.K. model)..... 530 kHz to 1,700 kHz Antenna.....Loop antenna
- Miscellaneous
Power requirements: U.K. model.....AC 220-240 V, 50/60 Hz Australian model.....AC 240 V, 50/60 Hz Power consumption.....45 W Power consumption in standby.....0.4 W Dimensions....420 (W) x 60 (H) x 331.5(D) mm Weight.....3.1 kg
• Accessories (DVD/CD receiver)
Remote control .... 1 AA/R6 dry cell batteries .... 2 Video cable (yellow plugs) .... 1 AM loop antenna .... 1 FM antenna .... 1 Power cord: U.K. model.... 1 Australian model .... 1
Setup Guide .... 1 Warranty card .... 1 These operating instructions .... 1
S-DV232, S-DV131 Speaker system
(Front speakers x2, surround speakers x2, center speaker x1, subwoofer x1)
- Front speakers
Enclosure .....Closed-box bookshelf type (magnetically shielded) System .... 7.7 cm 1-way system Speakers.... 7.7 cm cone type Nominal impedance .... 6 Ω Frequency range .... 90 Hz to 20 kHz Maximum input power .... 60 W Dimensions ... 105 (W) x 115 (H) x 114 (D) mm Weight .... 0.6 kg
- Center speaker
Enclosure .....Closed-box bookshelf type (magnetically shielded) System .... 7.7 cm 1-way system Speakers.... 7.7 cm cone type Nominal impedance .... 6 Ω Frequency range .... 90 Hz to 20 kHz Maximum input power .... 60 W Dimensions ... 115 (W) x 105 (H) x 114 (D) mm Weight .... 0.6 kg
- Surround speakers
Enclosure .....Closed-box bookshelf type (magnetically shielded) System .... 7.7 cm 1-way system Speakers.... 7.7 cm cone type Nominal impedance .... 6 Ω Frequency range .... 100 Hz to 20 kHz Maximum input power .... .60 W Dimensions ... 105 (W) x 118 (H) x 114 (D) mm Weight .... 0.63 kg
- Subwoofer
Enclosure .... Bass-reflex floor type System .... 16 cm 1-way system Speaker.... 16 cm cone type Nominal impedance .... 6 Ω Frequency range .... 30 Hz to 2.0 kHz Maximum Input Power .... 60 W Dimensions ... 190 (W) × 360 (H) × 317 (D) mm Weight .... 4.2 kg
- Accessories
Non-skid pads (small) 12
Non-skid pads (large) 4
S-DV340ST Speaker system
(Front speakers x2, surround speakers x2, center speaker x1)
- Front speakers
Enclosure .....Closed-box floorstanding type (magnetically shielded)
System 7.7 cm 2-way system
Speakers:
Woofer 7.7 cm cone type
Tweeter .....2.0 cm ceramic type
Nominal impedance 6 Ω
Frequency range ..... 85 Hz to 20 kHz
Maximum input power....100 W
Dimensions .. 260 (W) x 983.5 (H) x 260 (D) mm
Weight 3.7 kg
- Center speaker
Enclosure .....Closed-box bookshelf type (magnetically shielded)
System 7.7 cm 1-way system
Speakers.... 7.7 cm cone type
Nominal impedance 6 Ω
Frequency range ..... 75 Hz to 20 kHz
Maximum input power....100 W
Dimensions . . . 270 (W) x 90 (H) x 100 (D) mm
Weight 0.8 kg
- Surround speakers
Enclosure .....Closed-box bookshelf type (magnetically shielded)
System 7.7 cm 1-way system
Speakers.... 7.7 cm cone type
Nominal impedance 6 Ω
Frequency range ..... 100 Hz to 20 kHz
Maximum input power .....100 W
Dimensions . . . 105 (W) x 118 (H) x 114 (D) mm
Weight 0.6 kg
- Accessories
Speaker cables....5
Non-skid pads (small) 4
Non-skid pads (large) 4
Front speaker stand bases ..... 2
Screws (for base)....6
Brackets 2
Screws (for brackets) 4
S-DV240SW Speaker system
(Subwoofer x1)
- Subwoofer
Enclosure .... Bass-reflex floorstanding type System.... 16 cm 1-way system
Speaker....16 cm cone type
Nominal impedance.... 6 Ω
Frequency range ..... 30 Hz to 2.0 kHz
Maximum Input Power....60 W
Dimensions. . . . 190 (W) x 360 (H) x 317 (D) mm
Weight 4.2 kg

Note
- Specifications and design subject to possible modification without notice, due to improvements.
This product includes FontAvenue® fonts licenced by NEC corporation. FontAvenue is a registered trademark of NEC Corporation.
This product incorporates copyright protection technology that is protected by method claims of certain U.S. patents and other intellectual property rights owned by Macrovision Corporation and other rights owners. Use of this copyright protection technology must be authorized by Macrovision Corporation, and is intended for home and other limited uses only unless otherwise authorized by Macrovision Corporation. Reverse engineering or disassembly is prohibited.
Manufactured under license from Dolby Laboratories. "Dolby", "Pro Logic", and the double-D symbol are trademarks of Dolby Laboratories.
“DTS” and “DTS Digital Surround” are registered trademarks of Digital Theater Systems, Inc.
AFTER-SALES SERVICE FOR PIONEER PRODUCTS
Please contact the dealer or distributor from where you purchased the product for its after-sales service (including warranty conditions) or any other information. In case the necessary information is not available, please contact the Pioneer's subsidiaries (regional service headquarters) listed below:
PLEASE DO NOT SHIP YOUR PRODUCT TO THE COMPANIES at the addresses listed below for repair without advance contact, for these companies are not repair locations.
AMERICA
PIONEER ELECTRONICS (USA) INC.
CUSTOMER SUPPORT DIVISION
PO. BOX 1760, LONG BEACH, CA 90801-1760, U.S.A.
CUSTOMER SERVICE HOTLINE : (800) 421-1404
EUROPE
PIONEER EUROPE NV
EUROPEAN SERVICE DIVISION
HAVEN 1087, KEETBERGLAAN 1, B-9120 MELSELE, BELGIUM
ASEAN
PIONEER ELECTRONICS ASIACENTRE PTE. LTD.
SERVICE DEPARTMENT
253, ALEXANDRA ROAD #04-01 SINGAPORE 159936
JAPAN AND OTHERS
PIONEER CORPORATION (HEAD OFFICE)
CUSTOMER SUPPORT CENTER
Published by Pioneer Corporation
Copyright ©2004 Pioneer Corporation
All rights reserved
PIONEER CORPORATION
4-1, Meguro 1-Chome, Meguro-ku, Tokyo 153-8654, Japan
PIONEER ELECTRONICS (USA) INC.
P.O. BOX 1540, Long Beach, California 90810-1540, U.S.A. TEL: (800) 421-1404
PIONEER ELECTRONICS OF CANADA, INC.
300 Allstate Parkway, Markham, Ontario L3R OP2, Canada TEL: 1-877-283-5901
PIONEER EUROPE NV
Haven 1087, Keetberglaan 1, B-9120 Melsele, Belgium TEL: 03/570.05.11
PIONEER ELECTRONICS ASIACENTRE PTE. LTD.
253 Alexandra Road, #04-01, Singapore 159936 TEL: 65-6472-7555
PIONEER ELECTRONICS AUSTRALIA PTY. LTD.
178-184 Boundary Road, Braeside, Victoria 3195, Australia, TEL: (03) 9586-6300
PIONEER ELECTRONICS DE MEXICO S.A. DE C.V.
Blvd.Manuel Avila Camacho 138 10 piso Col.Lomas de Chapultepec, Mexico,D.F. 11000 TEL: 55-9178-4270
<05A000001> Printed in

- Location: rear of the unit
- IMPORTANT
- CAUTION
- RISK OF ELECTRIC SHOCK DO NOT OPEN
- CAUTION:
- FOR USE IN THE UNITED KINGDOM
- NOTE
- WARNING
- VENTILATION CAUTION
- Operating Environment
- CLASS 1 LASER PRODUCT
- POWER CORD CAUTION
- Thank you for buying this Pioneer product.
- Contents
- Getting started
- Listening to your system
- Playing discs
- More tuner features: RDS
- Audio Settings and Video Adjust menus
- Initial Settings menu
- Other connections
- Controls and displays
- Additional information
- Chapter 1 Getting started
- Home theater sound setup
- Setting the channel levels
- Press SHIFT+TEST TONE.
- Use the VOLUME +/- button to adjust the volume to an appropriate level.
- Use the ↑/↓ (cursor up/down) buttons to adjust the speaker levels in turn.
- When you're done, press ENTER to exit test tone setup.
- Using the on-screen displays
- Tip
- Playing discs
- If the player isn't already on, switch it on.
- Press ▲ OPEN/CLOSE to load a disc.
- Press ▶ (play) to start playback.
- Adjust the volume.
- Basic playback controls
- Button What it does
- Resume and Last Memory
- DVD-Video disc menus
- Video CD/Super VCD PBC menus
- Listening to the radio
- Press TUNER to switch to the tuner, then press repeatedly to select the AM or FM band.
- Tune to a frequency.
- Improving poor FM reception
- Tune to an FM radio station then press SHIFT+SYSTEM SETUP.
- Use ↑/↓ (cursor up/down) to select FM MONO then press ENTER.
- Memorizing stations
- Tune to an AM or FM radio station.
- Press SHIFT+SYSTEM SETUP.
- Listening to station presets
- Listening to other sources
- Setting the sleep timer
- Dimming the display
- Chapter 2
- Listening to your system
- About the listening modes
- Auto listening mode
- Listening in surround sound
- Using Front Surround
- Listening in stereo
- Listening with headphones
- Using the SFC modes
- Adjusting the bass and treble
- Boosting the bass level
- Chapter 3
- Scanning discs
- Playing in slow motion
- Frame advance/frame reverse
- Playing a JPEG slideshow
- Browsing DVD or Video CD/ Super VCD discs with the Disc Navigator
- Browsing WMA, MP3, DivX video and JPEG files with the Disc Navigator
- Press HOME MENU and select 'Disc Navigator' from the on-screen menu.
- Use the cursor buttons ( ↑/↓/←/→) and ENTER to navigate.
- To play the highlighted track or DivX video file or display the highlighted JPEG file, press ENTER.
- Looping a section of a disc
- During playback, press HOME MENU and select 'Play Mode'.
- Select 'A-B Repeat'.
- Press ENTER on 'A(Start Point)' to set the loop start point.
- Press ENTER on 'B(End Point)' to set the loop end point.
- To resume normal playback, select 'Off'.
- Using repeat play
- Select 'Repeat' then select a repeat play option. 2
- Using random play
- Select 'Random' then select an option.
- Creating a program list
- Select 'Program' then select 'Create/Edit' from the list of program options.
- Use the cursor buttons and ENTER to select a title, chapter or track for the current step in the program list.
- Repeat step 3 to build up a program list.
- To play the program list, press ▶ (play).
- Other functions available from the program menu
- Searching a disc
- Press HOME MENU and select 'Play Mode'.
- Select 'Search Mode'.
- Select a search mode.
- Use the number buttons to enter a title, chapter or track number, or a time.
- Press ENTER to start playback.
- Switching subtitles
- - Press SHIFT+SUBTITLE repeatedly to select a subtitle option.
- Switching language / audio channels
- - Press SHIFT+AUDIO repeatedly to select an audio language option.
- Zooming the screen
- Switching camera angles
- Displaying disc information
- Chapter 4
- More tuner features: RDS
- An introduction to RDS
- Displaying RDS information
- Searching for RDS programs
- Chapter 5
- Audio Settings and Video Adjust menus
- Audio Settings menu
- Audio DRC
- Video Adjust menu
- Chapter 6
- Initial Settings menu
- Using the Initial Settings menu
- Parental Lock
- Registering a new password
- Select 'Password'.
- Use the number buttons to input a 4-digit password then press ENTER.
- Changing your password
- Setting/changing the Parental Lock
- Setting/changing the Country code
- About DivX® VOD content
- Displaying your DivX VOD registration code
- Playing DivX® VOD content
- Speaker Distance
- Chapter 7
- Other connections
- Connecting auxiliary components
- U.K. model connections:
- Australian model connections:
- Recording mode
- Connecting external antennas
- Connecting the S-video output
- Connecting using the component video output
- About progressive scan video
- Compatibility of this player with progressive-scan and high-definition TVs.
- Using the SCART AV output
- SCART pin assignment
- Chapter 8
- Controls and displays
- Display
- DTS
- PRGSVE
- SOUND
- F.SURR.
- RPT and RPT-1
- REC MODE
- PGM
- Tuner indicators
- RDM
- kHz / MHz
- Character display
- 12
- ▶
- ☐☐ PL II
- D
- Display
- ▲ OPEN/CLOSE
- ▶/II DVD/CD
- 4
- FM/AM
- VOLUME buttons
- ⏻ STANDBY/ON
- PHONES jack
- ⏻ STANDBY/ON
- Function select buttons
- Number buttons
- SHIFT+AUDIO
- SHIFT+SUBTITLE
- SHIFT+ANGLE
- SHIFT+ZOOM
- HOME MENU
- SHIFT+SYSTEM SETUP
- Cursor buttons, ENTER and tuning buttons
- Cursor buttons
- ENTER
- SOUND MODE
- SHIFT+TEST TONE
- Disc playback controls
- SHIFT
- CLEAR
- MUTE
- VOLUME +/-
- DVD MENU
- SHIFT+TOP MENU
- RETURN
- DISPLAY
- SLEEP
- SHIFT+SURROUND
- Chapter 9
- Additional information
- Disc / content format playback compatibility
- About DivX
- DivX video compatibility
- Displaying DivX subtitle files
- About WMA
- Using and taking care of discs
- DVD Video regions
- Handling discs
- Storing discs
- Discs to avoid
- Installation and maintenance
- Hints on installation
- Do...
- Don't...
- Cleaning the pickup lens
- Problems with condensation
- Moving the system unit
- Screen sizes and disc formats
- TV system setting
- Switch the unit into standby, then press SHIFT+SYSTEM SETUP.
- Use ←/→ (cursor left/right) to choose TV SYS then press ENTER.
- Frequency step setting
- Troubleshooting
- Resetting the system
- Switch the system on.
- Press ⏻ STANDBY/ON while holding down the front panel FM/AM button.
- Using the language code list
- Select 'Other Language'.
- Use ←/→ (cursor left/right) to select either a code letter or a code number.
- Use ↑/↓ (cursor up/down) to select a code letter or a code number.
- Language code list
- Country/Area code list
- Specifications
- - Amplifier section
- - Disc section
- - FM tuner section
- - AM tuner section
- - Miscellaneous
- • Accessories (DVD/CD receiver)
- S-DV232, S-DV131 Speaker system
- - Front speakers
- - Center speaker
- - Surround speakers
- - Subwoofer
- - Accessories
- S-DV340ST Speaker system
- S-DV240SW Speaker system
- AFTER-SALES SERVICE FOR PIONEER PRODUCTS
- AMERICA
- EUROPE
- ASEAN
- JAPAN AND OTHERS
- PIONEER CORPORATION
Brand : PIONEER
Model : DCS-240
Category : Home Theater