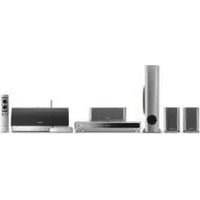
DCS-525 - Home Theater PIONEER - Free user manual and instructions
Find the device manual for free DCS-525 PIONEER in PDF.


| Product Type | Home Theater System |
| Brand | Pioneer |
| Model | DCS-525 |
| Surround Sound Channels | 5.1 |
| Total Output Power | 600 W RMS |
| Disc Playback | DVD, CD, MP3, JPEG |
| Receiver Dimensions (W x H x D) | 430 x 150 x 350 mm |
| Receiver Weight | 4.5 kg |
| Speaker Dimensions (Front) | 250 x 1100 x 250 mm each |
| Speaker Weight (Front) | 3.2 kg each |
| Subwoofer Dimensions | 230 x 450 x 380 mm |
| Subwoofer Weight | 6.5 kg |
| Power Consumption | 150 W |
| Standby Power Consumption | < 0.5 W |
| FM Tuner | Yes |
| Audio Inputs | 2 x RCA, 1 x Optical |
| Video Outputs | Composite, S-Video, Component |
| Remote Control | Yes |
| Maintenance | Clean with dry cloth; avoid liquids |
| Safety | Do not expose to water or heat sources |
| Repairability | Contact authorized service center (score 6/10) |
Frequently Asked Questions - DCS-525 PIONEER
User questions about DCS-525 PIONEER
0 question about this device. Answer the ones you know or ask your own.
Ask a new question about this device
Download the instructions for your Home Theater in PDF format for free! Find your manual DCS-525 - PIONEER and take your electronic device back in hand. On this page are published all the documents necessary for the use of your device. DCS-525 by PIONEER.
USER MANUAL DCS-525 PIONEER
Digital Wireless Speaker System
XW-DV525
XW-DV1WS
Operating Instructions


Location: underside of the unit (XV-DV525) / rear of the unit (XW-DV525/XW-DV1WS)
IMPORTANT

The lightning flash with arrowhead, within an equilateral triangle, is intended to alert the user to the presence of uninsulated "dangerous voltage" within the product's enclosure that may be of sufficient magnitude to constitute a risk of electric shock to persons.
CAUTION
RISK OF ELECTRIC SHOCK DO NOT OPEN
CAUTION:
TO PREVENT THE RISK OF ELECTRIC SHOCK, DO NOT REMOVE COVER (OR BACK). NO USER-SERVICEABLE PARTS INSIDE. REFER SERVICING TO QUALIFIED SERVICE PERSONNEL.

The exclamation point within an equilateral triangle is intended to alert the user to the presence of important operating and maintenance (servicing) instructions in the literature accompanying the appliance.
D3-4-2-1-1_En
Replacement and mounting of an AC plug on the power supply cord of this unit should be performed only by qualified service personnel.
IMPORTANT
FOR USE IN THE UNITED KINGDOM
The wires in this mains lead are coloured in accordance with the following code: Blue : Neutral
Brown : Live
If the plug provided is unsuitable for your socket outlets, the plug must be cut off and a suitable plug fitted.
The cut-off plug should be disposed of and must not be inserted into any 13 amp socket as this can result in electric shock. The plug or adaptor or the distribution panel should be provided with 5 A fuse. As the colours of the wires in the mains lead of this appliance may not correspond with coloured markings identifying the terminals in your plug, proceed as follows: The wire which is coloured blue must be connected to the terminal which is marked with the letter N or coloured black.
The wire which is coloured brown must be connected to the terminal which is marked with the letter L or coloured red.
Do not connect either wire to the earth terminal of a three pin plug.
NOTE
After replacing or changing a fuse, the fuse cover in the plug must be replaced with a fuse cover which corresponds to the colour of the insert in the base of the plug or the word that is embossed on the base of the plug, and the appliance must not be used without a fuse cover. If lost replacement fuse covers can be obtained from your dealer. Only 5 A. fuses approved by B.S.I or A.S.T.A to B.S.1362 should be used.
D3-4-2-1-2-2_En
WARNING: The apparatus is not waterproofs, to prevent fire or shocks hazard, do not expose this apparatus to rain or moisture and do not put any water source near this apparatus, such as vase, flower pot, cosmetics container and medicine bottle etc. D3-4-2-1-3
WARNING:
BEFORE PLUGGING IN THE UNIT FOR THE FIRST TIME, READ THE FOLLOWING SECTION CAREFULLY. The voltage of the available power supply differs according to country or region. Be sure that the power supply voltage of the area where this unit will be used meets the required voltage (e.g., 230V or 120V) written on the rear panel. D3-4-2-1-4_Er
WARNING: No naked flame sources, such as lighted candle, should be placed on the apparatus. If naked flame sources accidentally fall down, fire spread over the apparatus then may cause fire.
D3-4-2-1-7a_En
CAUTION
These speaker terminals can be under HAZARDOUS VOLTAGE. When you connect or disconnect the speaker cables, to prevent the risk of electric shock, do not touch uninsulated parts before disconnecting the power cord. D3-4-2-2-3_E
[XV-DV525 only]
VENTILATION:
European, UK, Australian, New Zealand, Hong Kong and Taiwanese models:
When installing this unit, make sure to leave space around the unit for ventilation to improve heat radiation (at least 10 cm at top, 10 cm at rear, and 10 cm at each side).
All other models:
When installing this unit, make sure to leave space around the unit for ventilation to improve heat radiation (at least 20 cm at top, 15 cm at rear, and 15 cm at each side).
[XW-DV525/XW-DV1WS only]
VENTILATION:
When installing this unit, make sure to leave space around the unit for ventilation to improve heat radiation (at least 10 cm at top, 10 cm at rear, and 10 cm at each side).
WARNING: Slot and openings in the cabinet are provided for ventilation and to ensure reliable operation of the product and to protect it from overheating, to prevent fire hazard, the openings should never be blocked and covered with items, such as newspapers, table-cloths, curtains, etc. Also do not put the apparatus on the thick carpet, bed, sofa, or fabric having a thick pile. D3-4-2-1-7b_En
D3-4-2-1-7b_En
[Excluding XW-DV525/XW-DV1WS]
CAUTION
This product contains a laser diode of higher class than 1. To ensure continued safety, do not remove any covers or attempt to gain access to the inside of the product.
Refer all servicing to qualified personnel. The following caution label appears on your unit.

D3-4-2-1-8_En
CAUTION : USE OF CONTROLS OR ADJUSTMENTS OR PERFORMANCE OF PROCEDURES OTHER THAN THOSE SPECIFIED HEREIN MAY RESULT IN HAZARDOUS RADIATION EXPOSURE.
CAUTION : THE USE OF OPTICAL INSTRUMENTS WITH THIS PRODUCT WILL INCREASE EYE HAZARD. D6-8-2-1_En
The channel, frequency, output power, and other features and functions of the equipment shall not be changed after approval.
The equipment shall safely use only a channel fr equency that is legally approved and shall not cause interference on other channels. If the equipment fails to meet these r equirements, use of the equipment will be pr obhibited until compliance can be attained.
[Excluding XW-DV525/XW-DV1WS]
This product complies with the Low Voltage Directive (73/23/EEC, amended by 93/68/EEC), EMC Directives (89/336/EEC, amended by 92/31/EEC and 93/68/EEC). D3-4-2-1-9a_En
Operating Environment
Operating environment temperature and humidity: +5 °C - +35 °C (+41 °F - +95 °F); less than 85 %RH
(cooling vents not blocked)
Do not install in the following locations
- Location exposed to direct sunlight or strong artificial light
- Location exposed to high humidity, or poorly ventilated location D3-4-2-1-7c_En
[XV-DV525 only]
The STANDBY/ON switch is secondary connected and therefore, does not separate the unit from mains power in STANDBY position. Therefore install the unit suitable places easy to disconnect the MAINS plug in case of the accident. The MAINS plug of unit should be unplugged from the wall socket when left unused for a long period of time. D3-4-2-2-2a_En
[XW-DV525/XW-DV1WS only] CAUTION
The POWER switch does not completely separates the unit from the MAINS in off position. Therefore install the unit suitable places easy to disconnect the MAINS plug in case of the accident. The MAINS plug of unit should be unplugged from the wall socket when left unused for a long period of time.
D3-4-2-2-2b_En
Energy-saving design
This system is designed to use 0.5W of electricity when power is switched to standby.
[For XV-DV525 only]
For U.S. and Australia Model

C67-7-3_En
Declaration of Conformity with regard to the R&TTE Directive 1999/5/EC
Manufacturer:
Pioneer Corporation
4-1, 1-chome, Meguro, Meguro-ku
EU Representative's: Pioneer Europe NV
Haven 1087, Keetberglaan 1,
9120 MELSELE, BELGIUM
| English Hereby, Pioneer, declares that this Digital Wireless Speaker System XW-DV525 is in compliance with the essential requirements and other relevant provisions of Directive 1999/5/EC. | |
| Suomi | Pioneer vakuuttaa täten että Digital Wireless Speaker System XW-DV525 tyyppinen laite on direktiivin 1999/5/EY olecellisten vaatimusten ja sitä koskevien direktiivin muiden chtojen mukainen. |
| Nederlands | Hierbij verklaart Pioneer dat het toestel Digital Wireless Speaker System XW-DV525 in overeenstemming is met de essentiële eisen en de andere relevante bepalingen van richtlijn 1999/5/EG. |
| Français | Par la présente Pioneer déclare que l'appareil Digital Wireless Speaker System XW-DV525 est conforme aux exigences essentielles et aux autres dispositions pertinentes de la directive 1999/5/CE. |
| Svenska Härmed intygar Pioneer att denna Digital Wireless Speaker System XW-DV525 står I överensstämmelse med de väsentliga egenskapskrav och övriga relevanta bestämmelser som framgår av direktiv 1999/5/EG. | |
| Dansk | Undertegnede Pioneer erklærer herved, at fölgende udstyr Digital Wireless Speaker System XW-DV525 overholder de väsentlige krav og øvrige relevante krav i direktiv 1999/5/EF. |
| Deutsch | Hiermit erklärt Pioneer, dass sich dieses Digital Wireless Speaker System XW-DV525 in Übereinstimmung mit den grundlegenden Anforderungen und den anderen relevanten Vorschriften der Richtlinie 1999/5/EG befindet". (BMWi) |
| Ellinika ME | THN ΠΑΡΟΥΣΑ Pioneer ΔΗΛΩΝΕΙ OTI Digital Wireless Speaker System XW-DV525 ΣΥΜΜΟΡΦΩΝΕΤΑΙ ΠΡΟΣ ΤΙΣ ΟΥΣΙΩΔΕΙΣ ΑΠΑΙΤΗΣΕΙΣ ΚΑΙ ΤΙΣ ΛΟΙΠΕΣ ΣΧΕΤΙΚΕΣ ΔΙΑΤΑΞΕΙΣ ΤΗΣ ΟΔΗΓΙΑΣ 1999/5/ΕΚ. |
| Italiano | Con la presente Pioneer dichiara che questo Digital Wireless Speaker System XW-DV525 è conforme ai requisiti essenziali ed alle altre disposizioni pertinenti stabilite dalla direttiva 1999/5/CE. |
| Español | Por medio de la presente Pioneer declara que el Digital Wireless Speaker System XW-DV525 cumple con los requisitos esenciales y cualesquiera otras disposiciones aplicables o exigibles de la Directiva 1999/5/CE. |
| Português | Pioneer declara que este Digital Wireless Speaker System XW-DV525 está conforme com os requisitos essenciais e outras disposições da Directiva 1999/5/CE. |
Thank you for buying this Pioneer product.
Please read through these operating instructions so that you will know how to operate your model properly. After you have finished reading the instructions, put them in a safe place for future reference.
Contents
01 Before you start
Features 8
Disc / content format playback compatibility 8
CD-R/RW compatibility 8
DVD-R/RW compatibility 9
PC-created disc compatibility ..... 9
Compressed audio compatibility ..... 9
About WMA 9
JPEG file compatibility 9
02 Controls and displays
Front panel.... 10
Display.... 11
Remote control 12
Transmitter.... 16
Wireless speaker 16
03 Getting started
Switching on and setting up.... 18
Setting the clock 19
Home theater sound setup.... 20
Using the Room Setup.... 20
Setting up the remote to control your TV . 21
Using the on-screen displays.... 21
Playing discs 22
Basic playback controls.... 22
Resume and Last Memory 23
DVD-Video disc menus 24
Video CD/Super VCD PBC menus ..... 25
Listening to the radio 25
Improving poor FM reception.... 26
Memorizing stations 26
Listening to station presets 27
Listening to other sources 27
Using the wireless speaker system.....27
04 Listening to your system
About the listening modes....29
Auto listening mode .....29
Listening in surround sound .....30
Dolby Pro Logic II Music settings .....30
Using the Advanced Surround effects . . . .31
Using Front Surround ....31
Adjusting the Advanced and Front Surround effect level....32
Listening in stereo 32
Listening with headphones .....32
Enhancing dialogue....33
Listening with a virtual surround back speaker .33
Using Quiet and Midnight listening modes ....33
Adjusting the bass and treble .....34
Boosting the bass level .....34
05 Playing discs
Scanning discs ....35
Playing in slow motion....35
Frame advance/frame reverse .....35
Using the Disc Navigator to browse the contents of a disc .....36
Looping a section of a disc .....37
Using repeat play....37
Using random play .....38
Creating a program list .....39
Using the OSD 39
Other functions available from the program menu 39
Using the front panel display.....40
Clearing the program list. . . . . . . . . . . . . . . . . . . . . . . . . . . . . . . . . . . . . . . . . . . 40
Searching a disc .....40
Switching subtitles .....41
Switching the DVD audio language .....41
Switching the Video CD/Super VCD audio channel ....41
Zooming the screen....42
Switching camera angles .....42
Displaying disc information....42
OSD disc information .....42
Front panel display information.....42
06 Viewing JPEG discs
Playing a JPEG slideshow .....44
Using the JPEG Disc Navigator and
Photo Browser....44
Zooming the screen....45
07 More tuner features: RDS
An introduction to RDS .....46
Displaying RDS information .....47
Searching for RDS programs .....47
08 Using the timer
Setting the wake-up timer .....48
Turning the wake-up timer on/off. . . . . . .48
Setting the sleep timer....49
09 Surround sound and other settings
Using the System Setup menu .....50
Surround and sound setup options .....50
SR+ control options for Pioneer plasma displays....51
Setting the channel levels .....52
10 Video Adjust menu
Video Adjust .....54
Creating your own presets....54
11 Initial Settings menu
Using the Initial Settings menu .....55
Video Output settings .....55
Language settings....56
Display settings .....57
Options .....57
Parental Lock ....57
12 Other connections
Connecting external antennas....59
Connecting auxiliary components.....59
Recording mode....60
Connecting using the S-video output.....61
Connecting using the component video output....61
About progressive scan video....61
Using the SCART AV output 62
Switching the TV audio input from SCART to RCA 63
Using this unit with a Pioneer plasma display....63
Using the SR+ mode with a Pioneer plasma display 64
13 Additional information
Optional system settings 65
System Setup menu options in standby....65
Watching NTSC on a PAL TV (MOD. PAL)....66
Resetting the system....66
Using and taking care of discs ..... 67
Titles, chapters and tracks ..... 67
DVD Video regions 67
Handling discs 67
Storing discs. 68
Discs to avoid 68
Proper installation and maintenance of this system 68
Hints on installation 68
Cleaning the pickup lens 69
Problems with condensation 69
Moving the system unit....69
Power cord caution....69
Wireless speaker system maintenance and precautions 69
Cleaning the exterior. 69
Moving the wireless speaker ..... 70
Radio wave reflections 70
Radio wave caution....70
Scope of operation 71
For safety in operation 71
Static electricity 71
Troubleshooting.... 72
General 72
DVD/CD/Video CD player....73
WMA/MP3/JPEG discs 74
Tuner 74
Wireless speaker system 75
Error Messages 76
Screen sizes and disc formats 77
Widescreen TV users 77
Standard TV users 77
Selecting languages using the language code list 77
Language code list.... 78
Country code list 78
Preset code list 79
Glossary 80
Specifications 81
Chapter 1
Before you start
Features
• 24-bit/96kHz compatible DAC
This system is fully compatible with high sampling-rate discs, capable of delivering exceptional sound quality in terms of dynamic range, low-level resolution and high-frequency detail.
- Surround sound entertainment with Dolby Digital and DTS software
The built-in Dolby Digital and DTS decoders let you enjoy great surround sound with Dolby Digital and DTS discs.
• Pure Cinema progressive scan video
Not applicable to the European model
When connected to a progressive scan-compatible TV or monitor using the component video outputs, you can enjoy extremely stable, flicker free images, with the same frame refresh rate as the original movie.
- Picture zoom
See Zooming the screen on page 42.
• MP3 and WMA compatibility
See Compressed audio compatibility on page 9.
- JPEG compatibility
See JPEG file compatibility on page 9.
• Graphical on-screen displays
Setting up and using your DVD home theater system is made very easy using the graphical on-screen displays.
• Energy saving design
This system is designed to use 0.5 W of power when in standby.
Disc / content format playback compatibility
This player is compatible with a wide range of disc types (media) and formats. Playable discs will generally feature one of the following logos on the disc and/or disc packaging. Note however that some disc types, such as recordable CD and DVD, may be in an unplayable format—see below for further compatibility information.

DVD-Video DVD-R DVD-RW


CD-RW
Audio CD CD\Rdeo CD

FUJICOLOR CD
COMPATIBLE

FUJICOLOR CD
COMPATIBLE
Fujicolor CD
• is a trademark of Fuji Photo Film Co. Ltd.
• Also compatible with KODAK Picture CD
This player supports the IEC's Super VCD standard for superior picture quality, dual soundtracks, and widescreen support.


Super Video CD (Super VCD)
CD-R/RW compatibility
- Compatible formats: CD-Audio, Video CD/
Super VCD, ISO 9660 CD-ROM* containing MP3, WMA or JPEG files
* ISO 9660 Level 1 or 2 compliant. CD physical format: Mode1, Mode2 XA Form1. Romeo and Joliet file systems are both compatible with this player.
- Multi-session playback: No
• Unfinalized disc playback: Yes
DVD-R/RW compatibility
- Compatible formats: DVD-Video, Video Recording (VR)*
* Edit points may not play exactly as edited; screen may go momentarily blank at edited points.
• Unfinalized playback: No - WMA/MP3/JPEG file playback on DVD-R/RW: No
PC-created disc compatibility
Discs recorded using a personal computer may not be playable in this unit due to the setting of the application software used to create the disc. In these particular instances, check with the software publisher for more detailed information.
Discs recorded in packet write mode (UDF format) are not compatible with this player.
Check the DVD-R/RW or CD-R/RW software disc boxes for additional compatibility information.
Compressed audio compatibility
- Compatible formats: MPEG-1 Audio Layer 3 (MP3), Windows Media Audio (WMA)
• Sampling rates: 32, 44.1 or 48kHz - Bit-rates: Any (128Kbps or higher recommended)
• VBR (variable bit rate) MP3 playback: Yes
• VBR WMA playback: No
• WMA lossless encoding compatible: No
- DRM (Digital Rights Management) compatible: Yes (DRM-protected audio files will not play in this player). See also DRM in the Glossary on page 80.
- File extensions: .mp3, .wma (these must be used for the player to recognize MP3 and WMA files – do not use for other file types)
- File structure: Up to 999 files per folder
About WMA

The Windows Media ® logo printed on the box indicates that this player can playback Windows Media Audio content.
WMA is an acronym for Windows Media Audio and refers to an audio compression technology developed by Microsoft Corporation. WMA content can be encoded by using Windows Media® Player version 7, 7.1, Windows Media® Player for Windows® XP, or Windows Media® Player 9 Series.
Microsoft, Windows Media, and the Windows logo are trademarks, or registered trademarks of Microsoft Corporation in the United States and/or other countries.
JPEG file compatibility
- Compatible formats: Baseline JPEG and EXIF 2.1* still image files up to 8 mega-pixels are supported (maximum vertical and horizontal resolution is 5120 pixels). *File format used by digital still cameras
- File extensions: .jpg (must be used for the player to recognize JPEG files – do not use for other file types)
- File structure: Up to 999 files per folder
Chapter 2
Controls and displays
Front panel

1 Operation indicator
2 ▲ OPEN/CLOSE
Press to open/close the disc tray.
3 ▶/II DVD/CD
Press to switch to the DVD/CD function. Also press to start/pause/resume playback.
4
Press to stop playback.
5 FM/AM
Press to switch to the tuner function, then to toggle between the FM and AM bands.
6 VOLUME buttons
Use to adjust the volume.
7 ⏻ STANDBY/ON
Press to switch the system on or into standby.
8 PHONES jack
Headphone jack.
9 Timer indicator
Lights when the wake-up timer is set (page 48).
10 Display
See Display on page 11 for detailed information.
11 Remote sensor
12 Disc tray
Display

1 Tuner indicators

European model only
Lights when in one of the RDS display or search modes.

Lights when a broadcast is being received.

Lights when a stereo FM broadcast is being received in auto stereo mode.

Lights when FM mono reception is selected.
2 ▶
Lights when a disc is playing.
3 MIDNIGHT
Lights when the Midnight mode is selected (page 33).
4 QUIET
Lights when the Quiet mode is selected (page 33).
5 PGM
Lights when a program list has been programmed (page 39).
6 RPT and RPT-1
RPT lights during repeat play. RPT-1 lights during repeat one-track play (page 37).
7 RDM
Lights during random play (page 38).
8 ATT
Lights when the input attenuator is active for the currently selected analog input (page 65).
9 REC MODE
Lights when the Rec Mode is on (page 60).
10 Timer indicators

Lights when the wake-up timer is set (page 48).

Lights when the sleep timer is active (page 49).
11 PRO LOGIC II
Lights during Dolby Pro Logic II decoding (page 30).
12 DIGITAL
Lights during playback of a Dolby Digital source (page 30).
Controls and displays
13 Speaker indicators
These show which speakers are being used to output the current source (they are not placement diagrams). The illustrations below show some example displays.

5.1 channel surround sound

Stereo (2.1 channel) sound

3.1 channel sound with Dialogue enhancement on the center channel

5.1 channel surround sound with Virtual Surround Back mode active
14 PRGSVE
Not applicable to the European model
Lights when progressive scan video output is selected (page 56).
15 ADV.SURR.
Lights when one of the Advanced or Front Surround listening modes is selected (page 31).
16

Lights during playback of a DTS source (page 30).
17 kHz / MHz
Indicates the unit of the frequency shown in the character display (kHz for AM, MHz for FM).
18 Character display
19

Lights during multi-angle scenes on a DVD disc (page 42).
20 WIRELESS
Lights when the W.Surr. mode is selected (see Using the wireless speaker system on page 27).
Remote control


Important
- Functions printed in green on the remote control are accessed by switching the MAIN/SUB switch to SUB.
1 ⏻ STANDBY/ON
Press to switch the system on or into standby.
2 Function select buttons
Press to select the source you want to listen to (DVD (CD). TUNER, TV, LINE)
3 FRONT SURROUND
Use to select a Front Surround listening mode (page 31).
4 Disc playback controls

Press to start or resume playback.

and ◀/ ◀II
Use for reverse slow motion playback, frame reverse and reverse scanning.

and ||►/||►
Use for forward slow motion playback, frame advance and forward scanning.

Press to pause playback; press again to restart.

Press to stop playback.
5
Press to jump to the beginning of the current chapter/track, then to previous chapters/tracks.
6 DVD MENU
Press to display a DVD disc menu, or the Disc Navigator if a VR format DVD-RW, CD, Video CD/Super VCD, MP3, WMA or JPEG disc is loaded.
7 Cursor buttons, ENTER and tuning buttons
Cursor buttons
Use the cursor buttons ( //←/→ ) to navigate on-screen displays and menus.
ENTER
Press to select an option or execute a command.
TUNE +/-
Use to tune the radio.
ST +/-
Use to select station presets when listening to the radio.
8 MUTE
Press to mute all sound from the speakers and headphones (press again to cancel).
9 MASTER VOLUME
Use to adjust the volume.
10 TV CONTROL (page 21)
[Non-Text]
Press to switch the TV on or into standby.
INPUT
Press to switch the TV input.
CH +/-
Use to select channels on the TV.
VOL +/-
Use to adjust the volume on the TV.
11 ▲ OPEN/CLOSE
Press to open/close the disc tray.
12 ▶▶
Press to jump to the next chapter/track.
13 RETURN
Press to return to a previous menu screen.
14 SOUND
Press to access the sound menu, from which you can adjust the DSP effect level, bass and treble, etc.
15 Surround sound mode/sound enhancement buttons
SURROUND
Use to select a Surround mode (page 30).
ADVANCED
Use to select an Advanced Surround mode (page 31).
Controls and displays
VIRTUAL SB
Press to switch the Virtual Surround Back speaker effect on/off (page 33).
BASS MODE
Use to select a Bass Mode (page 34).
DIALOGUE
Use to select a Dialogue mode (page 33).
CH LEVEL
Use to adjust the speaker level (page 52).
16 DVD/CD buttons
AUDIO
Press to select an audio channel or language (page 41).
SUBTITLE
Press to display/change the DVD subtitle display (page 41).
ANGLE
Press to change camera angle during DVD multi-angle scene playback (page 42).
PROGRAM
Use to program/play a program list (page 39–40).
REPEAT
Use to select a repeat play mode (page 37).
RANDOM
Use to select a random play mode (page 38).
17 ZOOM
Press to change the screen zoom level (page 42).
TOP MENU
Use to display the top menu of a DVD disc in the play position (this may be the same as pressing DVD MENU).
HOME MENU
Press to display (or exit) the on-screen menu for Initial Settings, Play Mode functions, etc.
18 SYSTEM SETUP
Use to make various system and surround sound settings (page 50).
TEST TONE
Use to output the test tone (for speaker setup) (page 52).
QUIET/MIDNIGHT
Use to select the Quiet and Midnight modes (page 33).
19 DIMMER
Press to switch between normal and dimmed front panel display.
DISPLAY
Press to display/change disc information shown on-screen (page 42).
TIMER/CLOCK
Press to display the clock and to access the timer menu (page 19 and page 48).
20 SR+
Press to switch the SR+ mode on/off (page 64).
FOLDER -
Press to jump to previous folders.
FOLDER +
Press to jump to the next folder.
CLR
Press to clear an entry.
ENTER
Selects menu options, etc. (works exactly the same as the ENTER button in 7 above).
21 MAIN /SUB
Change from MAIN to SUB to access the functions/commands printed in green on the remote.
ROOM SETUP
Press to start Room Setup (page 20).
WIRELESS
Press to switch between surround modes with the wireless speaker system (see Using the wireless speaker system on page 27).
22 Number buttons
Use the number buttons for selecting chapters/tracks from a disc directly.
Transmitter

Wireless speaker

1 CHANNEL indicators
Light to indicate the selected channel.
2 CHANNEL
In case of poor reception due to interference from other electrical devices, you can improve reception by selecting another channel. Each time you press the button, the channel changes sequentially:
![graph LR A["CH 1"] --> B["CH 2"] B --> C["CH 3"] C --> D["CH 4"]](/content/2026/05/1066180/images/875aeb72012ab8c9ddb11fb72a2ac04f944defac4a81521eb1ba86dc4627067b.jpg)

Note
- Poor reception may cause the audio to be interrupted or disappear completely. This is not a malfunction. Try changing the location or orientation of the transmitter and/or the wireless speaker to improve reception.
- The wireless speaker can be used at distances of up to 10m from the transmitter. This range may change depending on the environment.
3 Transmitter antenna
Transmits signals to the wireless speaker.
4 Wireless speaker antenna
Receives signals from the transmitter.
5 POWER
Press to switch the unit on or off.
6 WIRELESS MODE switch
Slide to select either W.SURROUND or
W.STEREO mode. See Using the wireless speaker system on page 27 for more on these modes.
- W.SURROUND — Sounds going to the surround left and right channels are heard through the wireless speakers.
- W.STEREO — Any source playing through the main system is heard in stereo through the wireless speakers (multichannel sources will be downmixed to stereo).

Note
- The system should be in standby when switching between modes (see Using the wireless speaker system on page 27).
- If the mode of the wireless speaker system and the mode of the DVD receiver do not match, loud noise may be output from the wireless speaker system.
- The STEREO MODE VOLUME control can be used to adjust the volume when W.STEREO is selected.
7 STEREO MODE VOLUME
Turn to adjust the speaker volume when the WIRELESS MODE is set to W.STEREO.
When set to W.SURROUND, the volume control does not operate. The volume changes automatically.
8 POWER indicator
Lights when the wireless speaker is switched on.
9 TUNED indicator
Lights when the signal from the transmitter is properly received.

Note
- For more on using the wireless speaker system Using the wireless speaker system on page 27.
Chapter 3
Getting started
Switching on and setting up
After making sure everything is connected up properly, you're ready to switch on. The first thing to do is to tell the system what kind of TV you're using, standard or widescreen.
After that you can set up the surround sound for your room, and set the clock so that you can use the timer features.

1 Press ⏻ STANDBY/ON (on the remote or the front panel) to switch the system on.
Also make sure that your TV is switched on and that the video input is set to this system (for example, if you connected this system to the VIDEO 1 input on your TV, switch your TV to VIDEO 1).
2 Follow the directions that appear on the on-screen display.
European model:
- Use the ↑/↓ (cursor up/down) buttons to choose a language, then press ENTER.

All other models:
- After you're finished reading the welcome screen, press ENTER to move on.
![Welcome to Pioneer DVD! Thank you for purchasing this Pioneer DVD player. Before using, please take a little time to setup your DVD player Put the batteries into the remote control Next, press the [ENTER] button on the remote control and start the Let's Get Started Menu Next](/content/2026/05/1066180/images/7cb19b584d2b3ffe905ed34b5519294abfd7bdf8571db11c83d5610f29a16c7f.jpg)
3 Use the ↔/→ (cursor left/right) buttons to select either 'Wide screen (16:9)' or 'Standard size screen (4:3)' according to the kind of TV you have, then press ENTER.
See also Screen sizes and disc formats on page 77 if you're not sure which one to choose.
![Let's Got Started Menu What kind of TV do you have? Use the ←→ cursor buttons to choose, then press [ENTER] Wide screen (16:9) Standard size screen (4:3)](/content/2026/05/1066180/images/0813ff5614925fbcc3492f0575127c19204fb175828c3d31734cc52166ceac72.jpg)
4 Press ENTER again to finish setting up.
![Let's Get Started Menu Setup complete If you're finished setting up, choose [Complete], to start again choose [Back] Complete Back](/content/2026/05/1066180/images/613b18f4da71f87edc2d01e0ae2e20cac07a284066bcd833685c696e86cdb930.jpg)
- Use the → (cursor right) button to select Back then press ENTER if you want to go back and change the setting you just made.

Tip
- You can also use the function buttons (DVD/CD, TUNER, etc.) or the ▲ OPEN/CLOSE button to switch the system on from standby.
Setting the clock
Setting the clock allows you to use the timer features.

1 Press TIMER/CLOCK.
- If you are adjusting the clock, rather then setting it for the first time, press TIMER/CLOCK again.
2 If 'Clock ADJ?' isn't already showing in the display, press ⇐ or ⇒ (cursor left or right) until you see it.
3 Press ENTER.
4 Use the ↑/↓ (cursor up/down) buttons to set the hour.
5 Press ENTER.
6 Use the ↑/↓ (cursor up/down) buttons to set the minute.
7 Press ENTER to confirm.
The display flashes to indicate the clock is set.

Tip
- Press TIMER/CLOCK anytime to display the clock.

Note
- If you unplug the system from the wall outlet, or there is a power outage, you will need to set the clock again.
Home theater sound setup
After setting up your front speakers as shown below, refer to the supplied setup guide, or Using the wireless speaker system on page 27 for more wireless speaker placement options.
- Standard surround setup – This is a standard multichannel surround sound speaker setup.

The following speaker placement options are only possible if you have connected a pair of speakers (not supplied) to the surround speaker terminals (refer to the setup guide to do this) and you are using the wireless speaker as a second stereo system (see Using the wireless speaker system on page 27 for more on this).
- Standard surround 5-spot setup – Provides enveloping surround sound by using additional surround speakers.

- Front surround 3-spot setup – SeeUsing Front Surround on page 31 for more on this.

Using the Room Setup
After you have set up your speakers to your liking (see Home theater sound setup above), make sure you calibrate your system for surround sound. This is a quick and easy way to get good surround sound for your room.
For a more detailed surround sound setup, see Using the System Setup menu on page 50.
1 If the system isn't already on, press ⏻ STANDBY/ON to switch it on.
2 Press ROOM SETUP.
- If you have previously set up the room type and seating position, the display will show the current room settings.
3 Press ENTER.
4 Use the ↑/↓ (cursor up/down) buttons to select a room type then press ENTER.
Choose one of the following:
- S – Smaller than average room
- M – Average room
- L – Larger than average room
5 Use the ↑/↓ (cursor up/down) buttons to select a seating position. Press ENTER.
Choose one of the following depending on where your main listening position is:
- Fwd – If you are nearer to the front speakers than the surround speakers
- Mid – If you are equal distance from the front and surround speakers
- Back – If you are nearer to the surround speakers than the front speakers

Note
- The Room Setup automatically sets up both channel level and channel delay. If you have already set the channel levels manually (see Setting the channel levels on page 52), you will see Room Set? in the display when you first press the ROOM SETUP button.
Setting up the remote to control your TV
You can set up the supplied remote to control your TV using the TV CONTROL buttons.
1 Switch on your TV.
2 Find the name of the manufacturer of your TV in the Preset code list on page 79.
Next to each manufacturer is one or more three digit codes. These tell the remote what kind of TV you have.
If the name of the manufacturer of your TV does not appear in the table, you won't be able to set up this remote to control your TV.
3 Point the remote at your TV, hold down the CLR button, then enter the three digit code for your TV.
The remote transmits an on/off signal to the TV. If you've entered the correct code, your TV should switch off.
If your TV doesn't turn off, repeat the procedure using the next code in the list until your TV switches off successfully. Once set, you can use the individual TV controls shown below.

| Button | What it does |
| 💡 | Switches your TV on or into standby. |
| CH +/- | Changes the TV channel. |
| VOL +/- | Adjusts the volume. |
| INPUT | Switches the TV's input between the built in TV tuner and an external video source. |

Note
• The default setting is for a Pioneer TV.
Using the on-screen displays
For ease of use, this system makes extensive use of graphical on-screen displays (OSDs). You should get used to the way these work as you'll need to use them when setting up the system, using some of the playback features, such as program play, and when making more advanced settings for audio and video.
All the screens are navigated in basically the same way, using the cursor buttons (↑, ↓, ←, →) to change the highlighted item and pressing ENTER to select it.

Important
- Throughout this manual, 'Select' means use the cursor buttons to highlight an item on-screen, then press ENTER.

| Button | What it does |
| HOME MENU | Displays/exits the on-screen display |
| ←↑↓→ | Changes the highlighted menu item |
| ENTER | Selects the highlighted menu item (both ENTER buttons work in exactly the same way) |
| RETURN | Returns to the main menu without saving changes |

Tip
- The button guide at the bottom of every OSD screen shows you which buttons you'll need to use for that screen.
Playing discs
The basic playback controls for playing DVD, CD, Video CD/Super VCD and WMA/MP3 discs are covered here. Further functions are detailed in chapter 5.
1 If the player isn't already on, press ⏻ STANDBY/ON to switch it on.
If you're playing a DVD or Video CD/Super VCD, also turn on your TV and make sure that it is set to the correct video input.
2 Press ▲ OPEN/CLOSE to open the disc tray.
3 Load a disc.
Load a disc with the label side facing up, using the disc tray guide to align the disc (if you're loading a double-sided DVD disc, load it with the side you want to play face down).

4 Press ▶ (play) to start playback.
If you're playing a DVD or Video CD/Super VCD, a menu may appear. See DVD-Video disc menus on page 24 and Video CD/Super VCD PBC menus on page 25 for how to navigate these.
If you're playing an WMA/MP3 disc, it may take a few seconds before playback starts, depending on the complexity of the file structure on the disc.
If you loaded a CD/CD-R/RW containing JPEGs, a slideshow will start. See Viewing JPEG discs on page 44 for more on playing these discs.
• See also Options on page 57 if the disc contains both WMA/MP3 audio files and JPEG picture files.
5 Use the MASTER VOLUME - / + button (or the front panel VOLUME buttons) to adjust the volume.
Basic playback controls
The following table shows the basic controls on the remote for playing discs. You can find other playback features in the chapter 5.

| Button | What it does |
| ▶ | Starts playback.DVD and Video CD: If the display showsResumeor Last Mem playback starts from the resume or last memory point (see also Resume and Last Memory below.) |
| II | Pauses a disc that's playing, or restarts a paused disc. |
| ■ | Stops playback.DVD and Video CD: The display showsResume. Press■ again if you want to cancel the resume function. (See also Resume and Last Memory below.) |
| ◀◀ | Press to start fast reverse scanning. Press▶ (play) to resume normal playback. |
| ▶▶ | Press to start fast forward scanning. Press▶ (play) to resume normal playback. |
| I◀◀ | Skips to the start of the current track or chapter, then to previous tracks/chapters. |
| ▶▶I | Skips to the next track or chapter. |
| FOLDER +/- | Skips to the next/previous folder when playing an WMA/MP3 disc. |
| Button | What it does |
| Numbers | • If the disc is stopped, playback starts from the selected title (for DVD) or track number (for CD/Video CD/Super VCD/WMA/MP3) after a few seconds (or after pressing ENTER). • If the disc is playing, playback jumps to the start of the selected chapter or track after a few seconds (or after pressing ENTER). |

Note
- You may find with some DVD discs that some playback controls don't work in certain parts of the disc. This is not a malfunction.
- Track skip and number buttons for track selection do not work with unfinalized CD-R/RW discs.
Using the front panel controls
The ▲ OPEN/CLOSE, ▶/II DVD/CD, FM/AM and ■ (stop) buttons work the same way as the remote control equivalents.
Resume and Last Memory
When you stop playback of a DVD or Video CD disc, Resume shows in the display indicating that you can resume playback from that point. If the disc tray is not opened, the next time you start playback the display shows Resume and playback resumes from the resume point. For DVD discs only: If you take the disc out of the player, the play position is stored in memory. When you load the disc next time, the display shows Last Mem and you can resume playback (this works for up to five discs). If you want to clear the resume/last memory point, press ■ (stop) while Resume or Last Mem is displayed.

Note
- When a Video CD is loaded, the Resume point is lost if the system is switched off, or switched to a function other than DVD (CD).
- For the Last Memory function to work, you must press ■ (stop) to stop playback before opening the disc tray.
- The Last Memory function doesn't work with VR format DVD-RW discs.

FAQ
• After I load a DVD disc, it ejects automatically after a few seconds!
Most likely, the disc is the wrong region for your system. The region number should be printed on the disc; check it against the region number of the system (which you can find on the rear panel). See also DVD Video regions on page 67.
If the region number is OK, it may be that the disc is damaged or dirty. Clean the disc and look for signs of damage. See also Using and taking care of discs on page 67.
• Why won't the disc I loaded play?
First check that you loaded the disc the right way up (label side up), and that it's clean and not damaged. See Using and taking care of discs on page 67 for information on cleaning discs.
If a disc loaded correctly won't play, it's probably an incompatible format or disc type, such as DVD-Audio or DVD-ROM. See Disc / content format playback compatibility on page 8 for more on disc compatibility.
• I have a widescreen TV so why are there black bars at the top and bottom of the screen when I play some discs?
Some movie formats are such that even when played on a widescreen TV, black bars are necessary at the top and bottom of the screen. This is not a malfunction.
• I have a standard (4:3) TV and set the system to show widescreen DVDs in pan & scan format, so why do I still get black bars top and bottom with some discs?
Some discs override the display preferences of the system, so even if you have 4:3 (Pan & Scan) selected, those discs will still be shown in letterbox format. This is not a malfunction.
DVD-Video disc menus
Many DVD-Video discs contain menus from which you can select what you want to watch. They may give access to additional features, such as subtitle and audio language selection, or special features such as slideshows. See the disc packaging for details.
Sometimes DVD-Video menus are displayed automatically when you start playback; others only appear when you press DVD MENU or TOP MENU.

| Button | What it does |
| TOP MENU | Displays the 'top menu' of a DVD disc—this varies with the disc. |
| DVD MENU | Displays a DVD disc menu—this varies with the disc and may be the same as the 'top menu'. |
| ←↑↓→ | Moves the cursor around the screen. |
| ENTER | Selects the current menu option. |
| RETURN | Returns to the previously displayed menu screen. |
| Numbers | Highlights a numbered menu option (some discs only). Press ENTER to select. |
Video CD/Super VCD PBC menus
Some Video CD/Super VCDs have menus from which you can choose what you want to watch. These are called PBC (Playback control) menus.
You can play a PBC Video CD/Super VCD without having to navigate the PBC menu by pressing ■ (stop) then starting playback using a number button to select a track, rather than ▶ (play) (or ▶/■ on the front panel).

| Button | What it does |
| RETURN | Displays the PBC menu. |
| Numbers | Selects a numbered menu option. |
| |◀◀ | Displays the previous menu page (if there is one). |
| ▶▶| | Displays the next menu page (if there is one). |
| ENTER | Press to select highlighted menu option. |
Listening to the radio
The tuner can receive both FM and AM broadcasts, and lets you memorize your favorite stations so you don't have to manually tune in every time you want to listen. For more on using the radio, see More tuner features: RDS on page 46.

1 If the system isn't already on, press ⏻ STANDBY/ON to switch on.
2 Press TUNER to switch to the tuner, then press repeatedly to select the AM or FM band.
The display shows the tuner band and frequency.
- If you're using the front panel controls, the TUNER button switches between FM, AM and station presets (see Memorizing stations below).
3 Tune to a frequency.
There are three tuning modes—manual, auto, and high-speed:
- Auto tuning : Press and hold TUNE +/- until the frequency display starts to move, then release. The tuner will stop on the next station it finds. Repeat to search for other stations.
- Manual tuning: Press TUNE +/- repeatedly to change the displayed frequency.
- High-speed tuning: Press and hold TUNE +/- until the frequency display starts to move rapidly. Keep the button held down until you reach the frequency you want. If necessary, fine tune the frequency using the manual tuning method.
Improving poor FM reception
If you're listening to an FM station in stereo but the reception is weak, you can improve the sound quality by switching to mono.
1 Tune to an FM radio station.
2 Press SYSTEM SETUP.
3 Use the ↔/→ (cursor left/right) buttons to choose 'FM Mode?' then press ENTER.
4 Use the ↑/↓ (cursor up/down) buttons to select 'FM Mono' then press ENTER.
The mono indicator ( ) lights when the tuner is in mono reception mode.
Select Auto above to switch back to auto-stereo mode (the stereo indicator (rights when receiving a stereo broadcast).
Memorizing stations
You can save up to 30 station presets so that you always have easy access to your favorite stations without having to tune in manually each time.

1 Tune to an AM or FM radio station.
For the FM band, select mono or auto-stereo reception as necessary. This setting is saved along with the preset.
2 Press SYSTEM SETUP.
3 Use the ↔/→ (cursor left/right) buttons to choose 'St. Memory?' then press ENTER.
4 Use the ↑/↓ (cursor up/down) buttons to select the station preset you want.
There are 30 preset locations; each can store one station preset.
5 Press ENTER to save the station preset.

Note
- If the system is unplugged from the power supply completely, saved stations will remain for several days, after which you'll have to save them again.
Listening to station presets
1 Make sure the TUNER function is selected.
2 Use the ST +/- buttons to select a station preset.
Listening to other sources
You can connect up to three external sources (TV, satellite receiver, etc.) to this system, including one digital source. See also Connecting auxiliary components on page 59.

1 If the system isn't already on, press ⏻ STANDBY/ON to switch on.
Also make sure that the external source (TV, satellite receiver, etc.) is switched on.
2 Select the source you want to listen to.
- If you're using the remote control, press TV to select the TV IN input, or use the LINE (L1/L2) button to select the LINE 1 or LINE 2 input.
3 If necessary, start playback of the external source.
Using the wireless speaker system
The wireless speaker supplied with your system can be used for multichannel sound with your main setup, or as a second stereo speaker system.


1 Switch the wireless speaker off and the main unit into standby.
2 Press SYSTEM SETUP.
3 If it's not already selected, use ←/→ (cursor left/right) to select 'Wireless?' then press ENTER.
The current setting is shown in the display.
4 Use ↑/↓ (cursor up/down) to select 'W.Surr.' or 'W.Stereo' then press ENTER.
- W.Surr. – Sounds going to the surround left and right channels are heard through the wireless speaker (see below for placement options).
- W.Stereo – Any source playing through the main system is heard in stereo through the wireless speaker (multichannel sources will be downmixed to stereo).

5 Set the WIRELESS MODE switch on the wireless speaker to the same mode you selected above.

Caution
- If the mode of the wireless speaker and the DVD receiver don't match, loud noise may be output from the wireless speaker.
6 Switch the main unit and wireless speaker back on.
If you selected W.Stereo, start playback and adjust the STEREO MODE VOLUME control as necessary.
If you selected W.Surr. continue to the next step.
7 Press WIRELESS repeatedly to select a wireless listening mode.
Choose between the following options:
- Normal – Use for surround sound with the wireless speaker placed behind the listening position.

- Wide (default) – Use to create enveloping surround sound with the wireless speaker placed behind the listening position (see illustration for Normal above).
- Left Side – Use for surround sound with the wireless speaker placed to the left of the listening position.

- Right Side – Use for surround sound with the wireless speaker placed to the right of the listening position.

8 Press ENTER.

Note
- If you selected W.Stereo in step 4, the WIRELESS button has no effect when the system is switched on (W.Stereo flashes in the display).
- The WIRELESS indicator on the front panel display is only shown when W.Surr. is selected.

Important
- Even when not in use, the fan in the wireless speaker will continue to operate. Switching off the wireless speaker when not in use will increase product life.
- Placing the transmitter and the wireless speaker too close together will result in an unstable signal. Make sure they are more than 1m apart for the best reception.
- The radio waves sent from the transmitter to the wireless speaker may reflect off any number of surfaces in your listening area (for example, walls or cabinets). If you are experiencing poor reception due to this phenomenon, try moving the position of the wireless speaker for better reception.
Chapter 4
Listening to your system
About the listening modes
As explained in Home theater sound setup on page 20 and Using the wireless speaker system on page 27, there are several setup options available. However, unless you have connected an extra pair of surround speakers, you should use the Standard (Listening in surround sound on page 30) and Advanced (Using the Advanced Surround effects on page 31) surround listening modes with your setup.
If you have connected an extra pair of surround speakers, the Front Surround modes are available with a 3-spot setup. See Using Front Surround on page 31 for more on this.
Make sure you have completed Using the Room Setup on page 20. For a more detailed surround sound setup, see Using the System Setup menu on page 50.

Note
- Certain features explained in this section may not be possible depending on the source (for example, 88.2/96 kHz sources), or a conflicting system setting. See Error Messages on page 76 for more on this.
Auto listening mode
The Auto listening mode is the simplest way to listen to any source as it was mastered: the output from the speakers mirrors the channels in the source material.

- Press SURROUND to select the 'Auto' listening mode.
If the source is Dolby Digital or DTS, the ☐ DIGITAL or DTS indicator on the front panel lights.

Note
- Any previously active Dolby Pro Logic or Advanced Surround mode is canceled when Auto listening mode is selected.
Listening in surround sound
You can listen to any source—stereo or multichannel, analog or digital—in surround sound. Surround sound is generated from stereo sources using one of the Dolby Pro Logic decoding modes.

- Press SURROUND repeatedly to select a listening mode (or press SURROUND then use the ↑/↓ (cursor up/down) buttons).
The listening mode choices that appear in the display will vary according to the type of source that's playing.
- Auto – Auto listening mode (see above)
- Dolby Digital / DTS – Dolby Digital or DTS decoding (depending on the source). For a multichannel source, this will be the same as Auto.
- Pro Logic – 4.1 channel surround sound for use with any two-channel source
- PL II Movie – Pro Logic II 5.1 channel surround sound, especially suited to movie sources, for use with any two-channel source
- PL II Music – Pro Logic II 5.1 channel surround sound, especially suited to music sources, for use with any two-channel source (see also Dolby Pro Logic II Music settings below)
- Stereo – See Listening in stereo below

Note
- When listening in Dolby Digital / DTS mode, two-channel material will automatically be played in surround sound using Dolby Pro Logic II decoding.
- Dolby Digital / DTS sources that use only the center channel cannot be played back in surround sound.
Dolby Pro Logic II Music settings
When listening in Dolby Pro Logic II Music mode, there are three further parameters you can adjust: Center Width, Dimension, and Panorama.
1 With Dolby Pro Logic II Music mode active, press SOUND.
2 Use the ↔/→ (cursor left/right) buttons to select 'C Width', 'Dimen.' or 'Pnrm.'
- C Width (Center Width): Makes the center channel wider (higher settings) or narrower (lower settings)
- Dimen. (Dimension): Makes the sound more distant (minus settings), or more forward (positive settings)
- Pnrm. (Panorama): Creates more spacious surround sound
3 Use the ↑/↓ (cursor up/down) buttons to adjust the setting.
Center Width is adjustable between 0 and 7; Dimension between -3 and +3. Panorama is On or Off.
4 Press ENTER to confirm.
Using the Advanced Surround effects
The Advanced Surround effects can be used with any multichannel or stereo source for a variety of additional surround sound effects. The Standard surround setup described in Home theater sound setup on page 20 should be used with these effects.
For more options, see Adjusting the Advanced and Front Surround effect level below.

- Press ADVANCED to select an Advanced Surround mode (or press ADVANCED then use the ↑/↓ buttons).
Press repeatedly to select from:
- Adv. Movie – Gives a movie theater-type sound
- Adv. Music – Gives a concert hall-type sound
- Expanded – Creates an extra wide surround field
- TV Surr. – Designed for mono or stereo TV broadcasts and other sources
- Sports – Designed for sports and other programs based on commentary
- Game – Creates surround sound from video game sources
- 5ch Stereo – Designed to give powerful surround sound to stereo music sources
Using Front Surround
The Front Surround feature is only possible if you connect a pair of speakers (not supplied) to the surround speaker terminals.
This setup is ideal when rear surround speaker placement isn't possible or you want to avoid running long speaker cables in your listening area. This setup should be used with the Front Surround modes below to take advantage of wall and ceiling reflections for a very realistic surround effect.

The surround speakers should be placed on either side of the front speakers and oriented either towards the walls, or straight ahead, depending on which mode you are using (see below).
For more options, see Adjusting the Advanced and Front Surround effect level below.

- Press FRONT SURROUND to select an Front Surround mode (or press FRONT SURROUND then use the ↑/↓ buttons).
Press repeatedly to select from:
- Frt. Movie – The Front Surround Movie mode emphasizes directionality, giving you a realistic movie theater-type sound.
- Frt. Music – The Front Surround Music mode provides greater breadth and depth to music sources, enveloping you with a concert hall-type sound.
- ExtraPower – The Extra Power mode gives additional energy and depth to a stereo source by using the surround speakers in addition to the front speakers.
If you have selected Frt. Movie or Frt. Music, you will achieve best results by turning each surround speaker about 60° towards the closest wall. With ExtraPower, orient the surround speakers in the same direction as the front speakers (towards the listening position).

Frt. Movie / Frt. Music Extra Power
Adjusting the Advanced and Front Surround effect level
You can emphasize or reduce the effect of the Advanced and Front Surround modes as you like. You can set the effect level for all modes independently.
1 With one of the Advanced or Front Surround modes active, press SOUND.
2 Use the ↔/→ (cursor left/right) buttons to select 'Effect'.
3 Use the ↑/↓ (cursor up/down) buttons to adjust the effect level.
The effect level can be adjusted from 10 (min) to 90 (max).
4 Press ENTER to confirm.
Listening in stereo
You can listen to any source—stereo or multichannel, analog or digital—in stereo. When playing a multichannel source, stereo sound is created by downmixing all channels to the front left/right speakers and the subwoofer.

- Press SURROUND repeatedly until 'Stereo' shows in the display.
Any active Advanced or Front Surround mode is canceled.
Listening with headphones
When headphones are connected, only the Stereo (default) and Phones Surround (virtual surround sound for headphones) modes are available.
When you disconnect them it reverts to the previous mode.
- With headphones connected, press ADVANCED or FRONT SURROUND to select 'Phones Surround' or SURROUND to select 'Stereo'.
Enhancing dialogue
- Default setting: Dialog Off (European model) / Dialog Mid (All other models)
The Dialogue Enhancement feature is designed to make the dialog stand out from other background sounds in a TV or movie soundtrack.

- Press DIALOGUE to select the amount dialog enhancement.
Press repeatedly to select from:
- Dialog Off – No dialog enhancement
- Dialog Mid – Moderate dialog enhancement
- Dialog Max – Strong dialog enhancement
Listening with a virtual surround back speaker
- Default setting: Vir. SB Off
The Virtual Surround Back feature can be used when listening in surround sound (using the Standard surround 5-spot setup described in Home theater sound setup on page 20) to
simulate an added surround back channel. In a real theater the surround back speaker would be directly behind you, creating more cohesive and realistic surround sound.

- Press VIRTUAL SB repeatedly to switch between 'Vir. SB On' and 'Vir. SB Off'.

Note
- You can't use Virtual Surround Back when using the Stereo listening mode (or Auto with stereo sources).
- If you are using the The Front surround 3-spot setup (see Using Front Surround on page 31), switch the Virtual Surround Back feature off.
- If there is no surround channel, Virtual Surround Back has no effect.
- You can't use Virtual Surround Back when you've selected the W.Surr wireless mode (the current wireless listening mode flashes in the display).
Using Quiet and Midnight listening modes
- Default setting: Off
The Quiet listening feature reduces excessive bass or treble in a sound source. You can use this feature if the music is a little bit harsh and you would like a smoother sound.
The Midnight listening feature allows you to hear effective surround sound of movies at low volume levels. The effect automatically adjusts according to the volume at which you're listening.

- Press QUIET/MIDNIGHT repeatedly to switch between 'Quiet', 'Midnight' and 'Off'.
Adjusting the bass and treble
Use the bass and treble controls to adjust the overall tone. Bass and treble adjustment is not possible when the Quiet or Midnight modes are active.
![graph TD A["ENTER"] --> B["TUNE+"] A --> C["ST-"] A --> D["ST+"] A --> E["MUTE"] A --> F["SOUND"] G["DVD MENU"] --> A H["RETURN"] --> A I["MASTER VOLUME"] --> J["+"]](/content/2026/05/1066180/images/7605789df5100c25a98146637af0f164cb899e7b0eeecf18f94280b78031d4b3.jpg)
1 Press SOUND.
2 Use the ↔/→ (cursor left/right) buttons to select 'Bass' or 'Treble'.
3 Use the ↑/↓ (cursor up/down) buttons to adjust the sound.
The bass and treble can be adjusted from -3 to +3.
4 Press ENTER to confirm.
Boosting the bass level
There are three bass modes you can use to enhance the bass in a source.

- Press BASS MODE repeatedly to choose an option that fits the source you're listening to.
- Music – Can be used with music to give a deeper bass sound
- Cinema – Good for action movies or movies with lots of sound effects
- P. Bass – Can be used with music sources to bring the beat of the music (or soundtrack) to the forefront
- Off – Switch off the bass boost if it causes excessive bass (i.e. it sounds 'boomy) in the source
Chapter 5
Playing discs

Note
- Some DVDs restrict the use of some functions (random or repeat, for example) in some or all parts of the disc. This is not a malfunction.
- When playing Video CD/Super VCDs, some of the functions are not available during PBC playback. If you want to use them, start the disc playing using a number button to select a track.
- Many features are not available when using unfinalized CD-R/RW discs.

Remember
- To access functions printed in green on the remote, move the slider switch from MAIN to SUB.
Scanning discs
You can fast-scan discs forward or backward at various different speeds.
1 During playback, press ◀◀ or ▶▶ to start scanning.
- There is no sound while scanning DVDs and Video CD/Super VCDs, and no subtitles while scanning DVDs.
2 Press repeatedly to increase the scanning speed.
- The scanning speed is shown on-screen.
3 To resume playback, press ▶ (play).
- When scanning a Video CD/Super VCD or a WMA/MP3 track, playback automatically resumes at the end or beginning of the track.
- Depending on the disc, normal playback may automatically resume when a new chapter is reached on a DVD disc.
Playing in slow motion
You can play DVDs and Video CD/Super VCDs at four different forward slow motion speeds. DVD discs can also be played at two reverse speeds.
1 During playback, press Ⅱ (pause).
2 Press and hold ◀/◄◄ or ||►/|► until slow motion playback starts.
- The slow motion speed is shown on-screen.
- There is no sound during slow motion playback.
3 Press repeatedly to change the slow motion speed.
4 To resume normal playback, press ▶ (play).
- Depending on the disc, normal playback may automatically resume when a new chapter is reached.
Frame advance/frame reverse
You can advance or back up DVD discs frame-by-frame. With Video CD/Super VCDs you can only use frame advance.
1 During playback, press II (pause).
2 Press ◀/◄◄ or ||►/|► to reverse or advance a frame at a time.
3 To resume normal playback, press ▶ (play).
- Depending on the disc, normal playback may automatically resume when a new chapter is reached.
Using the Disc Navigator to browse the contents of a disc
Use the Disc Navigator to browse through the contents of a disc to find the part you want to play. You can use the Disc Navigator when a disc is playing or stopped (a disc must be loaded).
1 Press HOME MENU and select 'Disc Navigator' from the on-screen display.

Disc Navigator
- With most discs, you can also press DVD MENU to go directly to the Disc Navigator.
2 Select what you want to play.
Depending on the type of disc you have loaded, the Disc Navigator looks slightly different.
The screen for DVD discs shows the titles on the left and the chapters on the right. Select a title, or a chapter within a title.

For a VR (Video Recording) mode DVD-RW disc select between the Playlist and Original areas of the disc, or a title. Press → (cursor right) to preview the title.
- It's not possible to switch between Original and Playlist during playback.
- Not all VR format DVD-RW discs have a Playlist.

The screen for CDs and Video CD/Super VCDs shows a list of tracks.

The screen for an WMA/MP3 disc shows the folder names on the left and the track names on the right (note that if there are more than 16 folders or names that contain accented or non-roman characters, tracks and folders may show up with generic names – F_033, T_035, etc.).
Select a folder, or a track within a folder.

Playback starts after you press ENTER.

Tip
- Another way to find a particular place on a disc is to use one of the search modes. See Searching a disc on page 40.
Looping a section of a disc
The A-B Repeat function allows you to specify two points (A and B) within a track (CD and Video CD) or title (DVD) that form a loop which is played over and over.
- You can't use A-B Repeat with Super VCD or WMA/MP3 discs.
1 During playback, press HOME MENU and select 'Play Mode'.
2 Select 'A-B Repeat' from the list of functions on the left.

3 Press ENTER on 'A(Start Point)' to set the loop start point.
4 Press ENTER on 'B(End Point)' to set the loop end point.
After pressing ENTER, playback jumps back to the start point and plays the loop.
• The minimum loop time is 2 seconds.
5 To resume normal playback, select 'Off' from the menu.
Using repeat play
There are various repeat play options, depending on the kind of disc loaded. It's also possible to use repeat play together with program play to repeat the tracks/chapters in the program list (see Creating a program list on page 39). However, note that you can't use repeat and random play at the same time.
1 During playback, press HOME MENU and select 'Play Mode'.
2 Select 'Repeat' from the list of functions on the left.

3 Select a repeat play option.
If program play is active, select Program Repeat to repeat the program list, or Repeat Off to cancel.
- For DVD discs, select Title Repeat or Chapter Repeat (or Repeat Off).

- For CDs and Video CD/Super VCDs, select Disc Repeat or Track Repeat (or Repeat Off).
- For WMA/MP3 discs, select Disc Repeat, Folder Repeat or Track Repeat (or Repeat Off).

Tip
- You can also use the REPEAT button on the remote to select a repeat play option. The repeat mode is indicated in the front panel display and on-screen. The repeat modes available are the same as when choosing from the Play Mode menu.
- If you've created a program list, Program Repeat is also available.
- During playback, you can cancel repeat play by pressing CLR.
Using random play
Use this function to play titles or chapters (DVD-Video) or tracks (CD, Video CD/Super VCD and WMA/MP3 discs) in a random order.
You can set the random play option when a disc is playing or stopped. However, you can't use random play together with program or repeat play.
- You can't use random play with VR format DVD-RW discs, or while a DVD disc menu is being displayed.
1 During playback, press HOME MENU and select 'Play Mode'.
2 Select 'Random' from the list of functions on the left.

3 Select a random play option.
- For DVD discs, select Random Title or Random Chapter, (or Random Off).

- For CDs and Video CD/Super VCDs, select On or Off to switch random play on or off.
- For WMA/MP3 discs, select Random All (all folders) or Random Track (current folder only), (or Random Off).

Tip
- Use the following controls during random play:
Button What it does
| ■ | Stop and cancel random play. |
| ▶▶I | Selects another track/chapter at random from those remaining. |
| ◀◀ | Returns to the beginning of the current track/chapter. You can't go back further than this. |
- You can also use the RANDOM button on the remote to select a random play mode. The random mode is indicated in the front panel display and on-screen. The random modes available are the same as when choosing from the Play Mode menu. Press ENTER to start random play.
- To cancel random playback without stopping playback, press CLR. The disc will play to the end, then stop.
Creating a program list
This feature lets you program the play order of titles/chapters/folders/tracks on a disc.
- You can't use Program play with VR format DVD-RW discs, or while a DVD disc menu is being displayed.
Using the OSD
1 During playback, press HOME MENU and select 'Play Mode'.
2 Select 'Program' from the list of functions on the left.

3 Select 'Create/Edit' from the list of program options.
4 Use the cursor buttons and ENTER to select a title, chapter, folder or track for the current step in the program list.
For a DVD disc, you can add a title or a chapter to the program list.

- For a CD or Video CD/Super VCD, select a track to add to the program list.
- For an WMA/MP3 disc, you can add a whole folder, or a track within a folder to the program list.
After pressing ENTER to select the title/chapter/folder/track, the step number automatically moves down one.
5 Repeat step 4 to build up a program list.
A program list can contain up to 24 titles/chapters/folders/tracks.
- You can insert steps into the middle of a program list by just highlighting the position where you want the new step to appear and entering a title/chapter/folder/track number.
- To delete a step, highlight it and press CLR.
6 To play the program list, press ▶ (play).
Program play remains active until you turn off program play (see below), erase the program list (see below), eject the disc or switch off the player.

Tip
- Use the following controls during program play:
| Button | What it does |
| HOME MENU | Save the program list and exit the program edit screen without starting playback. |
| ▶▶I | Skip to the next step in the program list. |
| CLR | Switch off program play. Press while stopped to erase the program list. |
| RETURN | Exit the program edit screen without saving any changes. |
Other functions available from the program menu
There are a number of other options in the program menu in addition to Create/Edit.
- Playback Start – Starts playback of a saved program list
- Playback Stop – Turns off program play, but does not erase the program list
- Program Delete – Erases the program list and turns off program play
- Program Memory (DVD only) – Select On to save the program list for the disc loaded. (Select Off to cancel the program memory for the disc loaded)
Using the front panel display
Even though the OSD is available for CDs and WMA/MP3 discs, the front panel display provides enough information to make a program list easily. If a disc is playing, stop it first.
1 Press PROGRAM.
You're prompted to enter a track or folder for the first step in the program list.
P 0 - 0 0' 0 "0
2 Use ↑/↓ (cursor up/down) to select a track or a folder, then press ENTER.
- For WMA/MP3 discs only: To select an individual track within a folder, use the ↑/↓ (cursor up/down) buttons to select the folder, then press →, then use ↑/↓ (cursor up/down) to select a track. Press ENTER.
P 0 - 1 5' 3 "7
Wait for the display to prompt you after completing each selection. If you make a mistake, press CLR to delete the last (most recently) programmed track.
3 Repeat step 2 to build up a program list.
A program list can contain up to 24 steps.
4 To play the program list, press ▶ (play).
Program play remains active until you press ■ (stop), clear the playlist (see below), eject the disc or switch off the player.
Clearing the program list
You must clear the program list to program a new one.
1 If a disc is playing, press ■ (stop).
2 Press CLR.

Note
- Program lists are saved for the DVD disc loaded. When you load a disc with a saved program list, program play is automatically turned on.
- You can save program lists for up to 24 discs. After that, the oldest one is replaced with the new one saved.
Searching a disc
You can search DVD discs by title or chapter number, or by time. CD/Super VCDs can be searched by track number, and Video CDs by track number or time. WMA/MP3 discs can be searched by folder or track number.
- You can't use search with random, program, or repeat play.
1 Press HOME MENU and select 'Play Mode'.
2 Select 'Search Mode' from the list of functions on the left.
The search options that appear depend on the kind of disc loaded. The screen below shows the DVD search options.

3 Select a search mode.
- The disc must be playing in order to use time search.
4 Use the number buttons to enter a title, chapter, folder or track number, or a time.
![graph TD A["A-B Repeat"] --> B["Title Search"] C["Repeat"] --> D["Chapter Search"] E["Random"] --> F["Time Search"] G["Program"] --> H["Search Mode"] I["Input Chapter"] --> J["0 0 1"]](/content/2026/05/1066180/images/aa7a53bd1fe55d8763072087613462ce8a1da93d8f7f52c0127a90ee32a28916.jpg)
- For a time search, enter the number of minutes and seconds into the currently playing title (DVD) or track (Video CD) you want playback to resume from. For example, press 4, 5, 0, 0 to have playback start from 45 minutes into the disc. For 1 hour, 20 minutes and 30 seconds, press 8, 0, 3, 0.
5 Press ENTER to start playback.
Switching subtitles
Some DVD discs have subtitles in one or more languages; the disc box will usually tell you which subtitle languages are available. You can switch subtitle language during playback.
- Press SUBTITLE repeatedly to select a subtitle option.
Current / Total Subtitle English1/2

Note
- Some discs only allow you to change subtitle language from the disc menu. Press TOP MENU to access.
- To set subtitle preferences, see Language settings on page 56.
Switching the DVD audio language
When playing a DVD disc recorded with dialog in two or more languages, you can switch audio language during playback.
- Press AUDIO repeatedly to select an audio language option.
Current /Total Audio French Dolby Digital 3/2.1CH1/2

Note
- Some discs only allow you to change audio language from the disc menu. Press TOP MENU to access.
- To set audio language preferences, see Language settings on page 56.
Switching the Video CD/Super VCD audio channel
When playing a Video CD/Super VCD, you can switch between stereo, just the left channel or just the right channel.
Some Super VCDs have two soundtracks. With these discs you can switch between the two soundtracks as well as individual channels in each.
- Press AUDIO repeatedly to select an audio channel option.

Zooming the screen
Using the zoom feature you can magnify a part of the screen by a factor of 2 or 4, while watching a DVD or Video CD/Super VCD or playing a JPEG disc.
1 During playback, use the ZOOM button to select the zoom factor (Normal, 2x or 4x).
- Since DVD, Video CD/Super VCD and JPEG pictures have a fixed resolution, picture quality will deteriorate, especially at 4x zoom. This is not a malfunction.
2 Use the cursor buttons to change the zoomed area.
You can change the zoom factor and the zoomed area freely during playback.
- If the navigation square at the top of the screen disappears, press ZOOM again to display it.

Note
- If you are displaying subtitles, these will disappear when the screen is zoomed. They will reappear when you return the screen to normal.
Switching camera angles
Some DVD discs feature scenes shot from two or more angles—check the disc box for details.
When a multi-angle scene is playing, a 📄 icon appears on screen to let you know that other angles are available (this can be switched off if you prefer—see Display settings on page 57).
- During playback (or when paused), press ANGLE to switch angle.
Displaying disc information
OSD disc information
Various track, chapter and title information can be displayed on-screen while a disc is playing.
- To show/switch/hide the information displayed, press DISPLAY repeatedly.
- When a disc is playing, the information appears at the top of the screen.
Front panel display information
Limited disc information also appears in the front panel display. Press DISPLAY to change the displayed information.
• DVD / DVD-RW displays
2 · 2 · ' 8 "
Title no.
Chapter no.
Elapsed title time
1 T T L 1 '0 7"0
Title no.
Remaining title time
2 · 2 · ' 0 "
Title no.
Chapter no.
Remaining chapter time
• CD and Video CD/Super VCD displays
4 · 1'16"
Track no.
Elapsed track time
4 · 3'20"
Track no.
Remaining track time (CD / Video CD only)
Disc5 3 1 5 "
Remaining disc time (CD / Video CD only)
• WMA / MP3 disc displays
2 · 0' 3 5"
Track no.
Elapsed track time
EVERYBOD
Track name
BEST_OF_
Folder name
- JPEG disc displays
TIGER_01
File name
ZOO _ TR IP
Folder name
Chapter 6
Viewing JPEG discs
Playing a JPEG slideshow
After loading a CD/CD-R/RW containing JPEG pictures, press ▶ to start a slideshow from the first folder/picture on the disc. The player displays the pictures in each folder in alphabetical order.
Pictures are automatically adjusted so that they fill as much of the screen as possible (if the aspect ratio of the picture is different to your TV screen you may notice black bars at the sides, or at the top and bottom of the screen).
While the slideshow is running:
| Button | What it does |
| II | Pauses the slideshow; press again to restart. |
| |◀◀ | Displays the previous picture. |
| ▶▶| | Displays the next picture. |
| ANGLE | Pauses the slideshow and rotates the currently displayed picture 90° clockwise. Press ▶ (play) to restart slideshow. |
| ZOOM | Pauses the slideshow and zooms the screen (see below). Press ▶ (play) to restart slideshow. |
| DVD MENU | Displays the Disc Navigator screen (see below). |
| FOLDER +/ FOLDER - | Skips to the next/previous folder when playing a JPEG disc. |

Note
- The II, ANGLE and ZOOM buttons do not work while the display shows LOADING.
- The time it takes for the player to load a file increases with large file sizes.
- Up to 999 files are viewable on a disc. If there are more files than this on a disc, only the first 999 files are viewable.
- If you want to play the WMA/MP3 tracks on a disc that also contains JPEG picture files, you should first set the Photoviewer option to Off. See Options on page 57.
Using the JPEG Disc Navigator and Photo Browser
Use the JPEG Disc Navigator to find a particular folder or picture by filename on the disc in the play position; use the Photo Browser to find a picture within a folder by thumbnail image.
1 Press DVD MENU to display the Disc Navigator screen.

The left column shows the folders on the disc, the right column shows the files in a folder.
2 Use the cursor buttons ( ↑/↓/←/→ ) to navigate.
When a file is highlighted, a thumbnail image is displayed.
- When a folder is highlighted you can press ENTER to open the Photo Browser screen for that folder. See below for more on using the Photo Browser.
3 To resume the slideshow from the highlighted file, press ENTER.
Using the Photo Browser
The Photo Browser displays nine thumbnail images at a time from the current folder.
1 From the Disc Navigator screen, highlight a folder to display then press ENTER.
The Photo Browser screen opens with the first nine pictures displayed as thumbnails.

2 Use the cursor buttons ( ↑/↓/←/→) to highlight a thumbnail picture.
- Use the track skip buttons (◀◀ and ▶▶) to see the previous / next page of thumbnails. Keep the button pressed if you want to skip several pages; release when you reach the page you want.
- To return to the Disc Navigator screen, press RETURN.
3 Press ENTER to display the selected thumbnail full size on screen.
The slideshow resumes from the selected picture.
Zooming the screen
Using the zoom feature you can magnify a part of the screen by a factor of 2 or 4, while viewing pictures from a JPEG disc.
1 During slideshow playback, use the ZOOM button to select the zoom factor.
- Normal
• 2x
• 4x
Normal

Zoom 2x

Zoom 4x

- The slideshow is paused when the screen is zoomed.
- Since JPEG pictures have a fixed resolution, picture quality may deteriorate, especially at 4x zoom. This is not a malfunction.
2 Use the cursor buttons ( ↑/↓/←/→ ) to change the zoomed area.
You can change the zoom factor and the zoomed area freely.
3 To resume the slideshow, press ▶ (play).
Chapter 7:
More tuner features: RDS
European model only
An introduction to RDS
Radio Data System, or RDS as it's usually known, is a system used by FM radio stations to provide listeners with various kinds of information—the name of the station and the kind of show they're broadcasting, for example. This information shows up as text on the display, and you can switch between the kind of information shown. Although you don't get RDS information from all FM radio stations, you do with most.
Probably the best feature of RDS is that you can search automatically by type of program. So, if you felt like listening to jazz, you could search for a station that's broadcasting a show with the program type, Jazz. There are around 30 such program types, including various genres of music, news, sport, talk shows, financial information, and so on.
The receiver lets you display three different kinds of RDS information: Radio Text, Program Service Name, and Program Type.
Radio Text (RT) is messages sent by the radio station. These can be anything the broadcaster chooses—a talk radio station might give out it telephone number as RT, for example.
Program Service Name (PS) is the name of the radio station.
Program Type (PTY) indicates the kind of program currently being broadcast.
The receiver can search for and display the following program types:
News – News
Affairs – Current affairs
Info – General information
Sport - Sport
Educate – Educational material
Drama – Radio plays or serials
Culture – National or regional culture, theater, etc.
Science – Science and technology
Varied – Usually talk-based material, such as quiz shows or interviews.
Pop M – Pop music
Rock M – Rock music
Easy M – Easy listening music
Light M – 'Light' classical music
Classics – 'Serious' classical music
Other M – Other music not fitting any of the above categories
Weather – Weather reports
Finance – Stock market reports, commerce, trading, etc.
Children – Programs for children
Social – Social affairs
Religion – Programs concerning religion
Phone In – Public expressing their views by phone
Travel – Holiday-type travel rather than traffic announcements
Leisure – Leisure interests and hobbies
Jazz – Jazz
Country – Country music
Nation M – Popular music in a language other than English
Oldies – Popular music from the '50s and '60s
Folk M – Folk music
Document – Documentaries
In addition, there are three other program types, TEST, Alarm!, and None. Alarm! and TEST are used for emergency announcements. You can't search for these, but the tuner will switch automatically to this RDS broadcast signal. None appears when a program type cannot be found.
Displaying RDS information
Use the DISPLAY button to display the different types of RDS information available (RT, PS and PTY).
- Press DISPLAY to select the RDS information display.
Each press changes the display as follows:
- RT – Radio Text display
- PS – Program Service display
• PTY – Program Type display - PTY SEARCH – see Searching for RDS programs below
- Current tuner frequency

Note
- If any noise is picked up while displaying the RT scroll, some characters may be displayed incorrectly.
- If you see No Data in the RT display, it means no RT data is transmitted from the broadcast station. The display will automatically switch to the PS data display. If no PS data is transmitted from the station, the frequency will be displayed.
- In the PTY display, there are cases where No Data or None is shown. If this happens, the PS display is shown after a few seconds.
Searching for RDS programs
One of the most useful features of RDS is the ability to search for a particular kind of radio program. You can search for any of the program types listed on the previous page.
1 Press the TUNER button to select the FM band.
RDS is only possible in the FM band.
2 Press DISPLAY repeatedly until PTY SEARCH appears in the display.
3 Use ←/→ (cursor left/right) to select the program type you want to hear.
4 Press ENTER to search for the program type.
The system starts searching through the station presets for a match. When it finds one, the search stops and the station plays for five seconds.
5 If you want to keep listening to the station, press ENTER within the 5 seconds. If you don't press ENTER, searching resumes.
Chapter 8
Using the timer
Setting the wake-up timer
Use the wake-up timer to set the system to switch on at any time and start playing whatever source you want.

Important
- The clock must be set to the correct time for the wake-up timer to work properly (see Setting the clock on page 19).

1 Select the source you want played.
For example, press TUNER (FM/AM on the front panel) to select the radio as your source.
2 Prepare the source.
For example, tune in the radio station you want to wake up to.
3 Set the volume.
4 Press TIMER/CLOCK twice to reach the timer menu.
5 Use the ↔/→ (cursor left/right) buttons to select 'Wake-Up?' then press ENTER.
6 Use the ←/→ (cursor left/right) buttons to select 'TimerEdit' then press ENTER.
7 Set the switch-on time.
Use the ↑/↓ (cursor up/down) buttons to set the hour, then press ENTER. Set the minute in the same way, pressing ENTER when you're done.
8 Set the switch-off time.
Use the ↑/↓ (cursor up/down) buttons to set the hour, then press ENTER. Set the minute in the same way, pressing ENTER when you're done.
After pressing ENTER this last time, the wake-up indicator lights, and the switch-on, switch-off times, the function (DVD/CD, etc.) and volume are confirmed in the display.
9 Switch the system into standby mode.
The wake-up timer will not work if the system is left on!

Tip
- You can check the timer settings in standby by pressing TIMER/CLOCK twice. (Press TIMER/CLOCK once to display the current time.)
Turning the wake-up timer on/off
If the wake-up timer is on, it will switch on the system everyday at the time you have set.
1 Press TIMER/CLOCK twice to reach the timer menu.
2 Use the ↔/→ (cursor left/right) buttons to select 'Wake-Up?' then press ENTER.
3 Use the ↔/→ (cursor left/right) buttons to select 'Timer On?' or 'Timer Off?'.
- You must have the timer set (see above) to select ON. The wake-up timer switches on and off according to your previous settings.
4 Press ENTER.

Note
- The wake-up timer will automatically be canceled if the clock is reset.
Setting the sleep timer
The sleep timer switches off the system after a specified time so you can fall asleep without worrying about it.

Important
- If you set the sleep timer while the wake-up timer is active, the earlier switch off time takes priority.

1 Press TIMER/CLOCK twice to reach the timer menu.
2 Use the ↔/→ (cursor left/right) buttons to select 'Sleep?' then press ENTER.
3 Use the ↑/↓ (cursor up/down) buttons to select a switch-off time then press ENTER.
Choose between the following options:
- Sleep Auto – System switches off automatically after the currently playing CD, Video CD or WMA/MP3 disc has finished.
- Sleep 90 – System switches off after 90 minutes
- Sleep 60 – System switches off after an hour
- Sleep 30 – System switches off after 30 minutes
- Sleep Off – cancels the sleep timer
4 To check how much time is left, repeat steps 1 and 2.
The remaining time is displayed momentarily.
- The front panel display dims when the sleep timer is active.

Note
- Sleep Auto will not work with Video CDs during PBC playback or CDs in repeat play.
Chapter 9
Surround sound and other settings
Using the System Setup menu
All the available settings in the setup menu are listed in Surround and sound setup options and SR+ control options for Pioneer plasma displays below. See the notes in each section for additional information about the settings. Follow the steps below to customize the settings in the System Setup menu.

1 Press SYSTEM SETUP.
2 Use the ↔/→ (cursor left/right) buttons to choose the setting you want to adjust.
The current setting is shown for each option as you cycle through the display. See below for a full list and description of each.
3 Use the ↑/↓ (cursor up/down) buttons to adjust the setting.
4 Repeat steps 2 and 3 to make other settings.
5 When you're done, press ENTER to leave the System Setup menu.

Note
- The System Setup menu is exited automatically after 5 minutes of inactivity.
- You can't change the Surround and sound setup options with the Recording Mode (page 60) switched on.
Surround and sound setup options
The Room Setup feature (page 20) is designed to give you a basic surround sound setup, however you can make more detailed settings that may improve the surround sound in your listening room. Note that the first setting in each section is the default.
Front speakers distance setting
Specifies the distance from your listening position to the front speakers:
- Front 0.3 m \~ Front 9 m – Distance can be set in increments of 0.3 m. The default is 3 m.
Center speaker distance setting
Specifies the distance from your listening position to the center speaker:
- Center 0.3 m \~ Center 9 m – Distance can be set in increments of 0.3 m. The default is 3 m.
Surround speakers distance setting
Specifies the distance from your listening position to the surround speakers:
- Surr. 0.3 m \~ Surr. 9 m – Distance can be set in increments of 0.3 m. The default is 3 m.
Dynamic Range Control
Specifies the amount of dynamic range adjustment to Dolby Digital or DTS soundtracks:
- DRC Off – No dynamic range adjustment (use when listening at higher volume)
- DRC Mid – Mid setting
- DRC High – Dynamic range is reduced (loud sounds are reduced in volume while quieter sounds are increased)

Note
- This setting works only with Dolby Digital and some DTS soundtracks. For other sources, you can create a similar effect using the Midnight mode (see Using Quiet and Midnight listening modes on page 33).
Dual mono setting
Specifies how dual mono encoded Dolby Digital or DTS soundtracks should be played. You can also use this setting to switch the audio channel on DVD-RW discs recorded with two separate soundtracks.
- L-Ch1 R-Ch2 – Both channels are played through the front speakers
- Ch1 Mono – Only channel 1 is played
- Ch2 Mono – Only channel 2 is played

Note
- On the Ch1 Mono and Ch2 Mono settings the sound comes only from the center speaker (or from the front speakers if listening in STEREO mode).
- This setting works only with dual mono encoded Dolby Digital or DTS soundtracks. See the disc packaging for channel information.
LFE attenuator setting
Dolby Digital and DTS audio sources include ultra-low bass tones. Set the LFE attenuator as needed to prevent the ultra-low bass from distorting the sound.
- LFE ATT 0 – The LFE channel is played with no attenuation
- LFE ATT 10 – LFE channel is attenuated by 10dB
- LFE OFF – LFE channel is not played
SR+ control options for Pioneer plasma displays
You only need to make the following settings if you have connected a Pioneer plasma display to this unit using an SR+ cable (not supplied).
Note that in the function settings below, the number of video inputs may change depending on your display. See also Using this unit with a Pioneer plasma display on page 63.
Control mode setting
- SR+ Off – Switches SR+ off (this unit and the plasma display work independently)
- SR+ On – Switches SR+ on (this unit sends control signals to the plasma display)
The following settings are only available if the Control mode setting (above) is switched on.
Volume control setting
- Vol C.Off – This unit does not control the volume of the plasma display
- Vol C.On – When this unit is switched to an input that used the plasma display (DVD, for example), the volume on the plasma display is muted so only sound from this unit is heard.
Function setting for DVD input
- DVD -> OFF/PDP1-5/PDPTV – Matches the DVD function of this unit with a numbered video input on the plasma display. For example, DVD -> PDP2 matches the DVD input with video input 2 on the plasma display.
Function setting for TV input
- TV -> OFF/PDP1-5/PDPTV – Matches the TV function of this unit with a numbered video input on the plasma display. For example, TV -> PDP1 matches the TV input with video input 1 on the plasma display.
Function setting for L1 input
- LINE1 -> OFF/PDP1-5/PDPTV – Matches the LINE (L1) function of this unit with a numbered video input on the plasma display. For example, LINE1 -> PDP3 matches the LINE1 input with video input 3 on the plasma display.
Function setting for L2 input
- LINE2 -> OFF/PDP1-5/PDPTV – Matches the LINE (L2) function of this unit with a numbered video input on the plasma display. For example, LINE2 -> PDP3 matches the LINE2 input with video input 3 on the plasma display.
Setting the channel levels
You can set the relative channel levels from your main listening position for all of the listening modes independently. However, the SURROUND modes are divided into two independent groups: multichannel listening modes and stereo listening modes only.
If you used the Room Setup feature (page 20), the channel levels for each listening mode will already be set. However, you can still fine-tune the levels here if you need to.

1 Select a listening mode.
Press SURROUND, ADVANCED or FRONT
SURROUND repeatedly to select the listening mode you want.
2 Switch the remote control to SUB, then press TEST TONE to hear the test tone.
The test tone is output in the following order (from the speakers active in the current listening mode):
- L – Front left speaker
- C– Center speaker
- R– Front right speaker
- RS – Right surround speaker
- LS – Left surround speaker
- SW – Subwoofer
3 Use the MASTER VOLUME +/- button to adjust the volume to an appropriate level.
Turn down the volume to 40 or less to ensure you have adequate headroom.
4 Use the ↑/↓ (cursor up/down) buttons to adjust the speaker levels in turn.
You should hear the test tone at the same volume from each speaker when seated in the main listening position. The channel level range is ± 10 dB.
5 When you're done, press ENTER to exit test tone setup.

Tip
- The speaker volume can be adjusted while listening to any sound source you want by pressing CH LEVEL and then using the ↑/↓ (cursor up/down) buttons to adjust the channel levels. After you're finished with one channel, use the ←/→ (cursor left/right) buttons to move to the next.

Note
- When the Auto listening mode is selected, using the test tone method will adjust levels for multichannel sources only. Use CH LEVEL and the ↑/↓ (cursor up/down) buttons (see tip above) to set levels for the Auto listening mode with two channel sources.
- Since the subwoofer produces ultra-low frequencies its sound may seem quieter than it actually is.
Chapter 10
Video Adjust menu
Video Adjust
- Default setting: Standard
From the Video Adjust screen you can select the standard video presentation or define presets of your own.
1 Press HOME MENU and select 'Video Adjust' from the on-screen display.

Video Adjust
2 Use the ↔/→ (cursor left/right) buttons to select a preset.

- Standard – Normal
- Memory1–2 – Use for saving your own presets (see below)
3 Press ENTER to make the setting and exit the Video Adjust screen.

Note
- Depending on the disc and the TV/monitor, you may not see the effect clearly.
Creating your own presets
You can create up to three presets of your own.
1 Select one of the Memory presets (see above).
2 Press ↓ (cursor down) to select 'Detailed Settings' then press ENTER.

3 Adjust the picture quality settings.

- Use the ↑/↓ (cursor up/down) buttons to select a setting.
- Use the ↔/→ (cursor left/right) buttons to adjust the current setting.
- Press DISPLAY to switch between full and single view.
- You can change the preset number from the Recall Settings menu item.
You can adjust any or all of the following picture quality settings:
- Contrast – Adjusts the contrast between light and dark.
- Brightness – Adjusts the overall brightness.
- Chroma Level – Adjusts how saturated colors appear.
4 Press ENTER to save the preset and exit the Video Adjust screen.
Chapter 11
Initial Settings menu
Using the Initial Settings menu
The Initial Settings menu provides audio and video output settings, parental lock settings, and display settings, among others.
If an option is grayed out it means that it cannot be changed at the current time. This is usually because a disc is playing. Stop the disc, then change the setting.
1 Press HOME MENU and select 'Initial Settings'.

Initial Settings
2 Use the cursor buttons and ENTER to select the setting and option you want to set.
All the settings and options are explained on the following pages.

Note
- In the table below, the default setting is shown in bold: other settings are shown in italics.
- Some settings, such as TV Screen, Audio Language and Subtitle Language may be overridden by the DVD disc. Often these settings can also be made from the DVD disc menu.
- European model only – The AV Connector Out setting only needs to be set if you have connected this player to your TV using a SCART cable (See Using the SCART AV output on page 62).
Video Output settings
| Setting | Option What it means | |
| TV Screen(See also Screen sizes and disc formats on page 77.) | 4:3 (Letter Box) | Set if you have a conventional 4:3 TV. Widescreen movies are shown with black bars top and bottom. |
| 4:3 (Pan & Scan) | Set if you have a conventional 4:3 TV. Widescreen movies are shown with the sides cropped so that the image fills the screen. | |
| 16:9 (Wide) | Set if you have a widescreen TV. | |
| AV Connector Out European model only(See also Using the SCART AV output on page 62.) | Video | Standard video, compatible with all TVs. |
| S-Video | Higher quality, but check your TV for compatibility. | |
| RGB | Best quality, but check your TV for compatibility. | |
| Component OutNot applicable to the European model(See also Connecting using the component video output on page 61.) | Interlace | Set if your TV is not compatible with progressive scan video. |
| Progressive | Set if your TV is compatible with progressive scan video (see your TV's instruction manual for details). Press ENTER once more to confirm (or RETURN to cancel).Note that progressive scan video is only output from the component video jacks and that there is no output from the composite and S-video jacks when this setting is selected. | |
| S-Video OutNot applicable to the European model(See also Connecting using the S-video output on page 61.) | S2 | Standard setting. |
| S1 | If you find that the picture is stretched or distorted on the default S2 setting, try changing it to this setting. | |
Language settings
| Setting | Option What it means | |
| Audio Language English | If there is an English soundtrack on the disc then it will be played. | |
| Languages as displayed If there is the language selected on the disc, then it will be played. | ||
| Other Language Select to choose a language other than the ones displayed (see Selecting languages using the language code list on page 77). | ||
| Subtitle Language English | If there is are English subtitles on the disc then they will be displayed. | |
| Languages as displayed If there is the subtitle language selected on the disc, then it will be displayed. | ||
| Other Language Select to choose a language other than the ones displayed (see Selecting languages using the language code list on page 77). | ||
| DVD Menu Language | w/Subtitle Lang. | DVD disc menus will be displayed in the same language as your selected subtitle language, if possible. |
| Languages as displayed | DVD disc menus will be displayed in the selected language, if possible. | |
| Other Language | Select to choose a language other than the ones displayed (Selecting languages using the language code list on page 77). | |
| Subtitle Display On | Subtitles are displayed according to your selected subtitle language (see above). | |
| Off Subtitles are always off by default when you play a DVD disc (note that some discs override this setting). | ||
Display settings
| Setting | Option What it means | |
| OSD Language English | On-screen displays of the player are in English. | |
| Languages as displayed | ||
| On Screen Display On | Operation displays (Play, Resume, Scan, and so on) are shown on-screen. | |
| Off | ||
| Angle Indicator On | A camera icon is displayed on-screen during multi-angle scenes on a DVD disc. | |
| Off | ||
Options
| Setting | Option What it means | |
| Parental Lock See below | See Parental Lock below. | |
| Photo Viewer Setting does not take effect until the next disc is loaded (or the current disc is reloaded). | On | Only the JPEG files are shown on discs that contains both WMA/MP3 audio files and JPEG picture files. |
| Off | WMA/MP3 audio file playback is possible. | |
Parental Lock
- Default level: Off; Default password: none; Default Country code: us (2119)
To give you some control over what your children watch on your DVD player, some DVD-Video discs feature a Parental Lock level. If your player is set to a lower level than the disc, the disc won't play.
Some discs also support the Country Code feature. The player does not play certain scenes on these discs, depending on the Country Code you set.

Note
- Not all discs use Parental Lock, and will play without requiring the password first.
- If you forget your password, you'll need to reset the player to register a new password. (see Resetting the system on page 66)
Registering a new password
You must register a password before you can change the Parental Lock level or enter a Country code.
1 Select 'Password'.

2 Use the number buttons to enter a 4-digit password.
The numbers you enter show up as asterisks (*) on-screen.
3 Press ENTER to register the password.
You will return to the Options menu screen.
Changing your password
To change your password, confirm your existing password then enter a new one.
1 Select 'Password Change'.
2 Use the number buttons to enter your existing password, then press ENTER.
3 Enter a new password and press ENTER.
This registers the new password and you will return to the Options menu screen.
Setting/changing the Parental Lock
1 Select 'Level Change'.
2 Use number buttons to enter your password, then press ENTER.
3 Select a new level and press ENTER.
- Press ← (cursor left) repeatedly to lock more levels (more discs will require the password); press → (cursor right) to unlock levels. You can't lock level 1.
This sets the new level and you will return to the Options menu screen.
Setting/changing the Country code
You can find the Country code list on page 78.
1 Select 'Country Code'.
2 Use number buttons to enter your password, then press ENTER.
3 Select a Country code and press ENTER.
There are two ways you can do this:
- Select by code letter: Use ↑/↓ (cursor up/down) to change the Country code.
- Select by code number: Press → (cursor right) then use the number buttons to enter the 4-digit Country code.
The new Country code is set and you will return to the Options menu screen. Note that the new Country code doesn't take effect until the next disc is loaded (or the current disc is reloaded).
Chapter 12
Other connections
Please refer to the supplied setup guide for basic connections and the wireless speaker setup options.
Connecting external antennas
External AM antenna
Use 5–6 meters of vinyl-insulated wire and set up either indoors or outdoors. Leave the AM loop antenna connected.

External FM antenna
Use a PAL connector to hook up an external FM antenna.

Connecting auxiliary components
This system has both stereo analog inputs and outputs, as well as a optical digital input. Use these to connect external components, such as your VCR, MD or CD-R recorder.

- Connect the TV (IN) jacks to the audio outs of your TV (or VCR).
This will enable you to hear the TV (or VCR) through this system. Connect using RCA pin-plug stereo cables.

- Connect the LINE 1 (IN) jacks to the analog outputs of an external playback component.
These include components such as a VCR or cassette deck. Connect using RCA pin-plug stereo cables.
- Connect the LINE 1 (OUT) jacks to the analog inputs of an external recording component.
These include components such as a cassette deck, VCR, MD, or another recorder with analog inputs. Connect using RCA pin-plug stereo cables.
- Connect the LINE 2 (OPTICAL IN) jack on the rear panel to the optical digital output of an external playback component.

These include digital components such as an MD player, digital satellite, or a game system. Connect using a optical digital cable (not supplied).
Tip
- If you're playing a high signal level source which is producing unpleasant distortion from the speakers, you can reduce the signal level of the auxiliary source (connected to the TV or LINE 1 analog inputs) by switching on the attenuator. See Optional system settings on page 65 to do this.
Recording mode
The Recording mode allows you to make surround-compatible analog recordings from the LINE 1 (OUT) jacks. Dolby multichannel sources will be downmixed to stereo for improved playback with systems that can provide matrix-decoding (like Dolby Pro Logic).
1 Press SOUND.
2 Use the ↔/→ (cursor left/right) buttons to select 'Rec Mode?'.
3 Press ENTER.
4 Use the ↑/↓ (cursor up/down) buttons to select 'R.Mode On' or 'R.Mode Off'.
- R.Mode On – A surround-compatible downmix (left-total/right-total, or Lt/Rt) of Dolby multichannel sources is output, (suitable for Dolby Surround Pro Logic or other matrix decoding).
- R.Mode Off – A simple stereo downmix (left-only/right-only, or Lo/Ro) is output (suitable for playback on a two-channel stereo system or on headphones).
Note
- When Recording mode is on, most surround sound-related functions cannot be used. The display will briefly blink RecMode On if you try and use a prohibited function while Recording mode is on.
- When Recording mode is off, the audio from the analog output may be interrupted, depending on the operation.
- The Recording mode automatically switches off if you change the input function (DVD/CD, TUNER, etc.) or switch the power off.
Connecting using the S-video output
Not applicable to the European model
If your TV has an S-video input, you can use this instead of the standard video output for a better quality picture.
- Use an S-video cable (not supplied) to connect the S-VIDEO OUT to an S-video input on your TV.
Line up the small triangle above the jack with the same mark on the plug before plugging in.


Note
- The S-video output is switchable between S1 and S2 formats for compatibility with all TVs. See Video Output settings on page 55 to change this setting.
Connecting using the component video output
Not applicable to the European model
If your TV has component video inputs, you can use these instead of the standard video output to connect this system to your TV. This should give you the best quality picture from the three types of video output available.
- Use a component video cable (not supplied) to connect the COMPONENT VIDEO OUT to a set of component inputs on your TV.


Note
- The component video output is switchable between interlaced and progressive formats. See Video Output settings on page 55 for more on this.
About progressive scan video
Compared to interlace video, progressive scan video effectively doubles the scanning rate of the picture, resulting in a very stable, flicker-free image. Progressive scan video is available only from the component video output.

Important
- If you connect a TV that is not compatible with a progressive scan signal and switch the system to progressive, you will not be able to see any picture at all. In this case, press ⏻ STANDBY/ON to put the system in standby, then press and hold the front panel ■ (stop) button for about 8 seconds until the display shows Mem.Clr.? Press the front panel VOLUME – (DOWN) or + (UP) button so that the display shows Interlace?. Press the front panel ▶/II button to set to interlace and switch the system back on.
When TV format is set to AUTO or NTSC:
- When set to Progressive, PAL and NTSC discs are both output as progressive NTSC video. See also TV format setting on page 66
- When Component Out (above) is set to Progressive, there is no video output from the VIDEO and S-VIDEO jacks. If you want to display video on more than one monitor simultaneously, make sure that it is set to Interlace. See also TV format setting on page 66.
When TV format is set to PAL:
- Progressive cannot be selected. See also TV format setting on page 66.
Compatibility of this player with progressive-scan and high-definition TVs.
This player is compatible with progressive video Macro Vision System Copy Guard.
Consumers should note that not all high-definition television sets are fully compatible with this product and may cause artifacts to be displayed in the picture. In case of 525 progressive scan picture problems, it is recommended that the user switch the
connection to the 'standard definition' output (Interlace). If there are questions regarding our TV set compatibility with this model, please contact our customer service center.
This system is compatible with the following Pioneer displays and monitors: PDP-503HDG, PDP-504HDG, PDP-433HDG, PDP-434HDG.
Using the SCART AV output
European model only
There are two different kinds of video outputs you can use to connect this system to your TV. The SCART output should give you better picture quality than the standard composite video output. The SCART AV connector functions as both a video and audio output.
- Use a commercially available SCART cable to connect the AV CONNECTOR to your TV.

XV-DV525

Note
- SCART cables are available in several configurations. Make sure that the one you get will work with this system and your TV/monitor. You can find the pin assignments below.
Switching the TV audio input from SCART to RCA
You can set the TV audio input to RCA or SCART.
1 Press TV.
2 Press SYSTEM SETUP.
3 Use the ↔/→ (cursor left/right) buttons to select 'TV Audio?'.
4 Press ENTER.
5 Use the ↑/↓ (cursor up/down) buttons to select SCART or RCA.
6 Press ENTER
SCART pin assignment
The diagram below shows the SCART 21-pin connector assignment. This connector provides the video and audio signals for connection to a compatible color TV or monitor.
2018161412108642

21 19 17 15 13 11 9 7 5 3 1
| Pin No. | Assignment | Pin No. | Assignment |
| 1 | Audio R OUT 12 No | connection | |
| 2 | Audio R IN 13 GND (video) | ||
| 3 | Audio L OUT 14 GND (video) | ||
| 4 | GND (audio) 15 R or C OUT | ||
| 5 | GND (video) 16 BLANK OUT | ||
| 6 | Audio L IN 17 GND (video) | ||
| 7 | B | OUT 18 GND (video) |
| Pin No. | Assignment | Pin No. | Assignment |
| 8 Status 19 Video or Y | OUT | ||
| 9 GND (video) 20 No | connection | ||
| 10 No connection | 21 GND (video) | ||
| 11 G OUT | |||
Using this unit with a Pioneer plasma display
If you have a Pioneer plasma display (models PDP-504HDG and PDP-434HDG or (European model only) PDP-504HDE and PDP-434 HDE), you can use an SR+ cable (see note below) to connect it to this unit and take advantage of various convenient features, such as automatic video input switching of the plasma display when the input is changed.

The illustration above shows the European model.
- Use a 3-ringed miniplug SR+ cable to connect the CONTROL IN jack of this unit through a media receiver to the CONTROL OUT jack of your plasma display.
Before you can use the extra SR+ features, you need to make a few settings in the unit. See SR+ control options for Pioneer plasma displays on page 51 for detailed instructions.
Using the SR+ mode with a Pioneer plasma display
When connected using an SR+ cable, a number of features (such as automatic video input switching and volume muting on the plasma display) become available to make using this unit with your Pioneer plasma display even easier.
See also SR+ control options for Pioneer plasma displays on page 51 for information on setting up the unit.
1 Make sure that the plasma display and this unit are switched on and that they are connected with an SR+ cable.
See Using this unit with a Pioneer plasma display above for more on connecting these components.
2 To switch SR+ mode on/off, press SR+.
The front panel display shows the new setting; SR+ ON or SR+ OFF.
- If SR+ Error shows in the display, it means there is a communication problem between the unit and the plasma display. Check all connections and retry.

Note
- The 3-ringed SR+ cable from Pioneer is commercially available under the part number ADE7095. Contact the Pioneer Customer Support division for more information on obtaining an SR+ cable.
- You won't be able to use the remote sensor of this unit with the CONTROL IN jack of this unit connected to the CONTROL OUT jack of your plasma display. You can use the remote sensor of the plasma display (even in standby) as long as the power isn't switched off.
- The automatic volume muting feature is enabled separately; see SR+ control options for Pioneer plasma displays on page 51. (You can also use the System Setup menu to switch the SR+ mode of this unit.)
- If you disconnect the SR+ cable or switch the plasma display off while SR+ is on, the setting automatically reverts to SR+ OFF. This displays an error if you switch the input of the unit with the plasma display switched off. Likewise, if this unit is switched off, the link with the plasma display will be terminated.
Chapter 13
Additional information
Optional system settings
These settings are accessed by using the System Setup menu while in standby.

1 Switch the system into standby.
2 Press SYSTEM SETUP.
3 Use the ↔/→ (cursor left/right) buttons to choose the setting you want to adjust then press ENTER.
The current setting is shown for each option as you cycle through the display. See below for a full list and description of each.
4 Use the ↑/↓ (cursor up/down) buttons to adjust the setting.
5 Repeat steps 2 and 3 to make other settings.
6 Press ENTER to confirm.
System Setup menu options in standby
Below are all the available settings in the setup menu. The first setting in each section is the default. See also the notes in each section for additional information about the settings.
Wireless speaker setting
See Using the wireless speaker system on page 27.
Child lock setting
The Child Lock feature is useful when you've set the wake-up timer and don't want the system switched on before it activates.
- Lock On – Makes the front panel buttons and controls inoperative.
- Lock Off – Restores regular use of the front panel buttons and controls.
Clock format setting
Specifies how the clock is displayed:
- 12-Hour – Sets the clock to show in 12-hour format in the display.
- 24-Hour – Sets the clock to show in 24-hour format in the display.
TV attenuator setting
If the source connected to the TV analog input is producing distortion through the speakers, the attenuator will reduce the signal level.
- ATT 6dB – Reduces the signal level by 6dB.
- ATT 10dB – Reduces the signal level by 10dB.
- ATT Off – No attenuation
Line attenuator setting
If the source connected to the LINE analog input is distorting, the attenuator can reduce the signal level.
- ATT 6dB – Reduces the signal level by 6dB.
- ATT 10dB – Reduces the signal level by 10dB.
- ATT Off – No attenuation
Frequency step setting
Not applicable to the European model
If you find that you can't tune into stations successfully, the frequency step may not be suitable for your country/region.
• F M50. AM9
• FM 1 0 0. AM10
TV format setting
The default setting of this system is AUTO, and unless you notice that the picture is distorted when playing some discs, you should leave it set to AUTO. If you experience picture distortion with some discs, set the TV system to match your country or region's system. Doing this, however, may restrict the kinds of disc you can watch. The table below shows what kinds of disc are compatible with each setting (AUTO, PAL and NTSC).
| Disc Player settingType Format NTSC PAL AUTO | |||
| DVD NTSC/Super VCD PAL | NTSC | MOD.PAL | NTSC |
| NTSC PAL | PAL | ||
| Video CD NTSCPAL | NTSC | MOD.PAL | NTSC |
| NTSC PAL | PAL | ||
| CD/no disc — | NTSC PAL | NTSC orPAL | |
System demo setting
Switches the automatic demo feature on or off (this starts when the system is plugged in for the first time):
- Demo On – Switches the demo feature on.
- Demo Off – Switches the demo feature off.

Note
- After setting the clock, the demo mode switches off automatically. However, if you unplug the system from the wall outlet, the demo mode will revert to Demo On (and the clock will be reset).
Watching NTSC on a PAL TV (MOD. PAL)
Most models of the newly developed count-down PAL TV system detect 50 Hz (PAL)/60 Hz (NTSC) and automatically switch vertical amplitude, resulting in a display without vertical shrinkage. However, in some cases, the image may appear without color.
If your PAL TV does not have a V-Hold control, you may not be able to watch NTSC discs because of picture roll. If the TV has a V-Hold control, adjust it until the picture stops rolling. On some TVs, the picture may shrink vertically, leaving black bands at the top and bottom of the screen. This is not a malfunction; it is caused by the NTSC to PAL conversion.
Resetting the system
Use this procedure to reset all system settings to the factory default.
1 Switch the system into standby.
2 Press and hold the front panel ■ (stop) button for about 8 seconds until the display shows 'Mem.Clr.?'.
3 Press the front panel ▶/II button.
All the system's settings are now reset, and you should see the 'Let's Get Started' screen.
Using and taking care of discs
Titles, chapters and tracks
DVD discs are generally divided into one or more titles. Titles may be further subdivided into chapters.
![graph LR A["Chapter 1 Chapter 2 Chapter 3"] --> B["Chapter 1 Chapter 2"] B --> C["Chapter 3 Chapter 1 Chapter 2"]](/content/2026/05/1066180/images/1509e39a6b68fc1d7ae18a30e284086b31f70cf8e8b7832fad842d5e350dd635.jpg)
CDs and Video CD/Super VCDs are divided into tracks.

CD-ROMs contain folders and files. MP3 and WMA files are referred to as tracks. Folders may contain further folders.
![graph LR A["Folder A"] --> B["Folder B"] B --> C["Folder C"] C --> D["Track 1"] C --> E["Track 2"] C --> F["Track 3"] C --> G["Track 1 File 1"] C --> H["File 2"]](/content/2026/05/1066180/images/f35d070e4c5da3314b58299611ccf9aac44a52b6f780a008c2174930ea77b517.jpg)
DVD Video regions
All DVD Video discs carry a region mark on the case somewhere that indicates which region(s) of the world the disc is compatible with. Your DVD system also has a region mark, which you can find on the rear panel. Discs from incompatible regions will not play in this player. Discs marked ALL will play in any player.
The diagram below shows the various DVD regions of the world.

Handling discs
When holding discs of any type, take care not to leave fingerprints, dirt or scratches on the disc surface. Hold the disc by its edge or by the center hole and edge.
Damaged or dirty discs can affect playback performance. Take care also not to scratch the label side of the disc. Although not as fragile as the recorded side, scratches can still result in a disc becoming unusable.
Should a disc become marked with fingerprints, dust, etc., clean using a soft, dry cloth, wiping the disc lightly from the center to the outside edge as shown in the diagram below.

Wipe lightly from the center of the disc using straight strokes.

Don't wipe the disc surface using circular strokes.
If necessary, use a cloth soaked in alcohol, or a commercially available CD/DVD cleaning kit to clean a disc more thoroughly. Never use benzine, thinner or other cleaning agents, including products designed for cleaning vinyl records.
Storing discs
Although CDs and DVD discs are more durable than vinyl records, you should still take care to handle and store discs correctly. When you're not using a disc, return it to its case and store upright. Avoid leaving discs in excessively cold, humid, or hot environments (including under direct sunlight).
Don't glue paper or put stickers onto the disc, or use a pencil, ball-point pen or other sharp-tipped writing instrument. These could all damage the disc.

For more detailed care information see the instructions that come with discs.
Do not load more than one disc into the player at a time.
Discs to avoid
Discs spin at high speed inside the player. If you can see that a disc is cracked, chipped, warped, or otherwise damaged, don't risk using it in your player—you could end up damaging the unit.

This unit is designed for use with conventional, fully circular discs only. Use of shaped discs is not recommended for this product. Pioneer disclaims all liability arising in connection with the use of shaped discs.
Proper installation and maintenance of this system
Hints on installation
We want you to enjoy using this system for years to come, so please bear in mind the following points when choosing a suitable location for it:
Do...
√ Use in a well-ventilated room.
√ Place on a solid, flat, level surface, such as a table, shelf or stereo rack.
Don't...
✗ Use in a place exposed to high temperatures or humidity, including near radiators and other heat-generating appliances.
✗ Place on a window sill or other place where the system will be exposed to direct sunlight.
✗ Use in an excessively dusty or damp environment.
✗ Place directly on top of an amplifier, or other component in your stereo system that becomes hot in use.
✗ Use near a television or monitor as you may experience interference—especially if the television uses an indoor antenna.
✗ Use in a kitchen or other room where the system may be exposed to smoke or steam.
✗ Use on a thick rug or carpet, or cover with cloth—this may prevent proper cooling of the system.
✗ Place on an unstable surface, or one that is not large enough to support all four of the unit's feet.
Cleaning the pickup lens
The DVD player's lens should not become dirty in normal use, but if for some reason it should malfunction due to dust or dirt, consult your nearest Pioneer authorized service center. Although lens cleaners are commercially available, we do not recommend using them since some may damage the lens.
Problems with condensation
Condensation may form inside the player if it is brought into a warm room from outside, or if the temperature of the room rises quickly. Although the condensation won't damage the player, it may temporarily impair its performance. For this reason you should leave it to adjust to the warmer temperature for about an hour before switching on and using.
Moving the system unit
If you need to move the main unit, first remove a disc if there's one in the player, then press ⏻ STANDBY/ON on the front panel to turn the system off. Wait for Good Bye to disappear from the display, then unplug the power cord. Never lift or move the unit during playback—discs rotate at a high speed and may be damaged.

Note
- Unplugging the unit before Good Bye disappears from the display may cause the system to return to the factory settings.
Power cord caution
Handle the power cord by the plug. Do not pull out the plug by tugging the cord and never touch the power cord when your hands are wet as this could cause a short circuit or an electric shock. Do not place this unit, a piece of furniture, etc., on the power cord, or pinch the cord. Never make a knot in the cord or tie it with other cords. The power cords should be routed such that they are not likely to be stepped on. A damaged power cord can cause a fire or give you an electrical shock.
Check the power cord once in a while. When you find it damaged, ask your nearest Pioneer authorized service center or your dealer for a replacement.
Wireless speaker system maintenance and precautions

Important
- Even when not in use, the fan in the wireless speaker will continue to operate. Switching off the wireless speaker when not in use will increase product life.
Cleaning the exterior
Use a polishing cloth or dry cloth to wipe off dust and dirt. If the surfaces are very dirty, wipe with a soft cloth dipped in some neutral cleanser diluted five or six times with water and wrung out well, then wipe again with a dry cloth.
Do not use furniture wax or cleaners. Never use thinners, benzine or insecticide sprays or other chemicals on or near this unit since they will corrode the surface.
If you use a chemical-impregnated cleaning cloth, read the instructions carefully before use. These cloths may leave smear marks on half-mirror finish surfaces; if this happens, finish with a dry cloth.
Make sure to unplug the unit when cleaning.
AC adapter and power cord caution
- Do not leave the power cord near heating equipment. The coating of the cord may melt, which could lead to fire and/or electrocution.
- Make sure to grasp the body of the AC adaptor when removing it from the power outlet. If you pull the power cord, it may become damaged which could lead to fire and/or electrocution.
- Do not attempt to plug in or remove the AC adaptor with wet hands. This may result in electrocution.
- Insert the prongs of the AC adaptor all the way into the power outlet. If the connection is incomplete, heat may be generated which could lead to fire. Furthermore, contact with the connected prongs of the adaptor may result in electrocution.
- Do not insert the AC adaptor into a power outlet where the connection remains loose despite inserting the prongs all the way into the outlet. Heat may be generated which could lead to fire. Consult with the retailer or an electrician regarding replacement of the power outlet.
Moving the wireless speaker
If you need to move the wireless speaker, first press POWER on the top panel to turn the unit off, then unplug the power cord.
Radio wave reflections
The radio waves received by the receiver include the radio wave coming directly from the transmitter (direct wave) and waves coming from various directions due to reflections by walls, furniture and building (reflected waves). The reflected waves (due to obstacles and reflecting objects) further produce a variety of reflected waves as well as variation in reception condition depending on locations. If the audio cannot be received properly due to this phenomenon, try moving the location of the wireless speaker a little. Also note that audio may be interrupted due to the reflected waves when a person crosses or approaches the space between the transmitter and wireless speaker.
Radio wave caution
This wireless speaker system uses a 2.4GHz radio wave frequency, which is a band used by other wireless systems (see list below). To prevent noise or interrupted communication, do not use this system nearby such devices, or make sure these devices are switched off during use. You can also try switching the channel on the transmitter (see Transmitter on page 16) for better reception.
- Cordless phones
- Wireless broadband routers
- Wireless AV equipment
• Microwave-based health aids - Microwave ovens
- Wireless controllers for game systems
- Bluetooth equipment
- Some baby monitors
Other, less common, equipment that may operate on the same frequency:
- Anti-theft systems
- Warehouse logistic management systems
- Amateur radio stations (HAM)
• Discrimination systems for train or emergency vehicles

Note
- If there is something obstructing the path between the transmitter and the wireless speaker (such as a metal door, concrete wall, or insulation containing tinfoil), you may need to change the location of your system to prevent signal noise and interruptions.
- If the transmitter is used near A/V equipment with an antenna input terminal, such as a TV, VCR, BS tuner or CS tuner, you may experience noise interference on a TV near the transmitter. In such cases, place the transmitter at a larger distance from the antenna input terminal of the A/V equipment.
Scope of operation
Use of this equipment is limited to home use. (Transmission distances may be reduced depending on communication environments.)
In the following locations, poor condition or inability to receive radio waves may cause the audio to be interrupted or stopped:
- In reinforced concrete buildings or homes made of metallic structural members.
• Near large metallic furniture. - In a crowd of people or near a building or obstacle.
- If you live in a heavily populated residential area (apartment, townhouse, etc.) and if your neighbor's microwave is placed near your system, you may experience radio wave interference or no sound from the speaker. If this occurs, move your unit to a different place. When the microwave is not in use, there will be no radio wave interference.
For safety in operation
Do not use the system in the proximity of electronic equipment that requires high-accuracy control or handling of very low-level signals, such as:
- Hearing aids, cardiac pacemakers, other electrical medical equipment, fire alarms, automatic doors, and other automated control equipment.
The system may affect the electronic equipment, causing malfunction or accident.
- If you use a pacemaker or other electrical medical equipment, consult the manufacturer or dealer to check the effects of radio waves on it.
Do not use the system in places where its use is prohibited, for example near aircraft equipment and in hospitals.
The system may affect electronic equipment or electrical medical equipment, causing an accident. Follow the instructions given by the aircraft company or medical institution.

Important
- We do not assume any liability for the damages incurred due to improper use of the product by the user or third party, malfunction during use, other troubles or use of the product, unless indemnity for damages is admitted by the law.
Static electricity
Static electricity or other external influence may cause malfunctioning of this unit. In this case, unplugging the power cord and then re-plugging it in will usually reset the unit for proper operation. If this does not correct the problem, please consult your nearest Pioneer service center.
Troubleshooting
Incorrect operations are often mistaken for trouble and malfunctions. If you think that there is something wrong with this component, check the points below. Sometimes the trouble may lie in another component. Investigate the other components and electrical appliances being used. If the trouble cannot be rectified even after exercising the checks listed below, ask your nearest Pioneer authorized service center or your dealer to carry out repair work.
- If the system does not operate normally due to external effects such as static electricity disconnect the power plug from the outlet and insert again to return to normal operating conditions.
- If you are experiencing problems with the wireless speaker system, make sure to bring both the transmitter and wireless speaker in for repair so that they can be tested properly.
General
| Problem | Remedy |
| The power does not turn on. | Connect the power plug to the wall outlet.Disconnect the power plug from the outlet, and insert again.Make sure there are no loose strands of speaker wire touching the rear panel. This could cause the system to shut off automatically. |
| No sound is output when a function is selected. | If you're using the line input, make sure the component is connected correctly (see Connecting auxiliary components on page 59).Press MUTE on the remote control to turn muting off.Adjust the VOLUME.If you're using the TV input, make sure you've selected the RCA audio input (see Switching the TV audio input from SCART to RCA on page 63). |
| No image is output when playing discs. | Make sure the TV is connected correctly (refer to the Setup Guide).Not applicable to the European model – Reset the video output to interlace (see Video Output settings on page 55). |
| No sound from surround or center speakers. | Refer to Setting the channel levels on page 52 to check the speaker levels.Check that you haven't selected the STEREO sound mode (see Listening in surround sound on page 30).Connect the speakers properly (refer to the Setup Guide). |
| Can't operate the remote control. | Replace the batteries (refer to the Setup Guide).Operate within 7 m, 30° of the remote sensor on the front panel (refer to the Setup Guide).Remove any obstacles or operate from another position.Avoid exposing the remote sensor on the front panel to direct light.You won't be able to use the remote sensor of this unit with the CONTROL IN jack of this unit connected to the CONTROL OUT jack of your plasma display. You can use the remote sensor of the plasma display (even in standby) as long as the power isn't switched off. |
| Sound Demo shows in the display and the unit can't be controlled. | Press and hold ■ (stop) on the front panel for about five seconds. The disc tray ejects automatically to indicate the Sound Demo mode is disabled. |
| Timer indicator is blinking and the system will not switch on. | Unplug the unit, then plug back in. Wait for one minute then switch on.Make sure the fan at the rear of the unit is not being blocked.Check that the speakers are connected correctly.Make sure the voltage of the mains power source is correct for the model.If the problem persists, take it to your nearest Pioneer authorized service center or your dealer for servicing. |
DVD/CD/Video CD player
| Problem Remedy | |
| The disc is ejected automatically after loading. | Clean the disc.Align the disc properly in the disc guide.If the region number on a DVD-video disc does not match the number on the player, the disc cannot be used (seeDVD Video regionson page 67).The system Parental Lock level is set to a level lower than the disc you are trying to play.SeeParental Lockon page 57 to change it.Allow time for any condensation inside the player to evaporate. Avoid using the player near an air-conditioning unit. |
| Playback is not possible. | If the disc is loaded upside down, reload the disc with the label side face up. |
| Picture playback stops and the operation buttons cannot be used. | Press■(stop), then ▶(play) to start playback again.Switch the power off once, then on again using the front panel○STANDBY/ONbutton. |
| Settings are canceled. | When the power is cut due to power failure or by unplugging the power cable, settings will be canceled. |
| No picture/No color. | Check that connections are correct and that plugs are inserted fully.Check the instruction manual of the TV/monitor to make sure the TV/monitor settings are incorrect. |
| Screen is stretched or aspect does not change. | TheTV Screensetting is incorrect. Set the TV Screen option to match the TV/monitor you're using (seeVideo Output settingson page 55). |
| When recorded on a VCR or passed through an AV selector, there is disturbance in the playback picture. | This system uses copy-protection technology which may prevent recording or cause picture problems when connected through a VCR or AV selector.This is not a malfunction. |
Additional information
| Problem | Remedy |
| CD won't play • Set the PhotoViewer menu option in the Initial Settings menu to able to play some copy-protected CDs. See Options on page 57. | Off to be |
| Picture disturbance during playback or dark. | • This player is compatible with Macro-Vision System copy guard. Some discs include a copy prevention signal, and when this type of disc is played back, stripes etc., may appear on some sections of the picture depending on the TV. This is not a malfunction.• Discs respond differently to particular player functions. This may result in the screen becoming black for a brief instant or shaking slightly when the function is executed. These problems are largely due to differences between discs and disc content and are not malfunctions of this player. |
| Noticeable difference in DVD and CD volume. | • DVDs and CDs use different recording methods. This is not a malfunction. |
WMA/MP3/JPEG discs
| Problem Remedy | |
| CD-ROM disc is not recognized by the system. | Make sure that the CD-ROM was recorded using the ISO 9660 disc format. SeeDisc / content format playback compatibility on page 8 for other disc compatibility information. |
| Files don't show up in the Disc Navigator/ Photo Browser. | The files on the disc must be named with the correct file extension: .mp3 for MP3 files; .wma for WMA files; .jpg for JPEG files (upper or lower-case is OK). SeeDisc / content format playback compatibility on page 8 for other disc compatibility information. |
| Can play JPEG files, but not WMA/MP3 files on the same disc (or vice versa). | Set the PhotoViewer menu option in the Initial Settings menu toOffto be able to access the WMA/MP3 files. Set toOnto be able to play the JPEG files. SeeOptionson page 57. |
| Can't play WMA files. | The files were recorded using DRM (digital rights management). This is not a malfunction. SeeDRMin theGlossaryon page 80. |
Tuner
| Problem | Remedy |
| Considerable noise in radio broadcasts. | Connect the antenna (refer to the Setup Guide) and adjust the direction and position for best reception.Fully extend the FM wire antenna, position for best reception, and secure to a wall. |
| Considerable noise in radio broadcasts (continued). | Connect an outdoor FM antenna (see Connecting external antennas on page 59).Connect an additional internal or external AM antenna (refer to the Setup Guide and Connecting external antennas on page 59).Turn off any other equipment that may be causing the noise or move it away from the main unit.Not applicable to the European model – The tuning interval is incorrect for your country or region. Try switching the tuning interval (frequency step) (see Frequency step setting on page 66). |
| Auto tuning does not pick up some stations. | The radio signal is weak. Auto tuning will only detect radio stations with a good signal. For more sensitive tuning, connect an outdoor antenna. |
| Sound is mono only. | Check that the tuner is not set to FM mono (see Improving poor FM reception on page 26). |
Wireless speaker system
| Problem Remedy | |
| Audio cannot be received. | ·The radio wave reception is variable depending on locations due to the effects of obstacles and reflecting objects. Try changing the location of the wireless speaker system a little.·The transmitter and wireless speaker are designed and sold as a pair, and they identify each other in communication. This means that communication is not available between separately purchased transmitter and wireless speaker. |
| Audio is interrupted. | ·This system uses high frequency radio waves that have properties similar to light, such as linearity, reflection, refraction, diffraction, and interference. Therefore, placement of the system can result in weak radio waves and/or interruption.·The distance between the transmitter and wireless speaker may be too large. Use the wireless speaker within the reach of the radio waves (within 10m) from the transmitter.·The system is being used in a location with radio wave interference or electrical noise. If so, the unit may need to be relocated. |
| Audio is suddenly interrupted. | ·There may be radio communication equipment using the same frequency band (2.4 GHz) as this system, such as a Bluetooth device, radio LAN device or microwave oven, operating nearby. |
| No sound from the wireless speaker. | ·If you selected W.Stereo, the volume on the wireless speaker may be turned down too low. |
Additional information
| Problem | Remedy |
| Horizontal stripe noise interference on a TV set near the transmitter. | ·If there a piece of A/V equipment with an antenna near the transmitter, move the transmitter away from the antenna input terminal of the AV equipment. |
| The POWER indicator goes out when the switch is on or the system is in operation. | ·It is likely that the system is malfunctioning. Ask your nearest Pioneer authorized service center or your dealer to carry out repair work. |
Error Messages
| Message Description | |
| Child Lock | This message appears when the front panel buttons are pressed when the child lock feature is active. See Child lock setting on page 65 for more on switching on/off the child lock. |
| Rec Mode On | Blinks rapidly for 2 seconds when an operation is prohibited because the Recording Mode is on (see Recording mode on page 60). |
| Phones In | Blinks rapidly for 2 seconds when an operation is prohibited because headphones are connected. |
| 96k Stereo | Blinks rapidly for 2 seconds when an operation is prohibited because the source is digital 88.2 or 96kHz PCM. |
| No Surr. SP | Blinks rapidly for 2 seconds when an operation is prohibited because there is no surround speaker output. |
| Normal / Wide / Left Side/ Right Side / W. Stereo | Blinks rapidly for 2 seconds when an operation is prohibited due to the wireless speaker setting. |
| Muting | Blinks rapidly for 2 seconds when an operation is prohibited because the sound is muted (press the MUTE button to turn the sound on). |
| Exit | Appears briefly when a menu is automatically exited after a set period of inactivity. |
| SR+ Error | Appears when there is a communication problem between the unit and the plasma display. Check all connections and retry. |
Screen sizes and disc formats
DVD-Video discs come in several different screen aspects, ranging from TV programs, which are generally 4:3, to CinemaScope widescreen movies, with an aspect ratio of up to about 7:3.
Televisions also come in different aspect ratios; 'standard' 4:3 and widescreen 16:9.
Widescreen TV users
If you have a widescreen TV, the TV Screen setting (see Video Output settings on page 55) of this system should be set to 16:9 (Wide).
When you watch discs recorded in 4:3 format, you can use the TV controls to select how the picture is presented. Your TV may offer various zoom and stretch options; see the instructions that came with your TV for details.
Please note that some movie aspect ratios are wider than 16:9, so even though you have a widescreen TV, these discs will still play in a 'letterbox' style with black bars at the top and bottom of the screen.
Standard TV users
If you have a standard TV, the TV Screen setting (see Video Output settings on page 55) of this system should be set to 4:3 (Letter Box) or 4:3 (Pan&Scan), depending on which you prefer.
Set to 4:3 (Letter Box), widescreen discs are shown with black bars top and bottom.

Set to 4:3 (Pan&Scan), widescreen discs are shown with the left and right sides cropped. Although the picture looks larger, you don't actually see the whole picture.

Please note that many widescreen discs override the system's settings so that the disc is shown in letterbox format regardless of the setting.

Tip
- Using the 16:9 (Wide) setting with a standard 4:3 TV, or either of the 4:3 settings with a widescreen TV, will result in a distorted picture.
Selecting languages using the language code list
Some of the language options (see Language settings on page 56) allow you to set your preferred language from any of the 136 languages listed in the Language code list on page 78.
1 Select 'Other Language'.
2 Use the ↔/→ (cursor left/right) buttons to select either a code letter or a code number.
3 Use the ↑/↓ (cursor up/down) buttons to select a code letter or a code number.
See the Language code list (next page) for a complete list of languages and codes.
Language code list
Language (Language code letter), Language code
Japanese (ja), 1001
English (en), 0514
French (fr), 0618
German (de), 0405
Italian (it), 0920
Spanish (es), 0519
Dutch (nl), 1412
Russian (ru). 1821
Chinese (zh), 2608
Korean (ko), 1115
Greek (el), 0512
Afar (aa), 0101
Abkhazian (ab), 0102
Hungarian (hu), 0821
Armenian (hy), 0825
Interlingua (ia), 0901
Interlingue (ie), 0905
Inupiak (ik), 0911
Indonesian (in), 0914
Icelandic (is), 0919
Hebrew (iw), 0923
Yiddish (ji), 1009
Javanese (jw), 1023
Georgian (ka), 1101
Kazakh (kk), 1111
Greenlandic (kl), 1112
Cambodian (km), 1113
Kannada (kn), 1114
Kashmiri (ks), 1119
Kurdish (ku), 1121
Kirghiz (ky), 1125
Latin (la), 1201
Lingala (In), 1214
Laothian (lo), 1215
Lithuanian (lt). 1220
Latvian (lv), 1222
Malagasy (mg), 1307
Maori (mi), 1309
Macedonian (mk), 1311
Malayalam (ml), 1312
Mongolian (mn), 1314
Moldavian (mo), 1315
Marathi (mr), 1318
Malay (ms), 1319
Maltese (mt), 1320
Burmese (my), 1325
Nauru (na), 1401
Nepali (ne), 1405
Norwegian (no), 1415
Occitan (oc), 1503
Oromo (om), 1513
Oriya (or), 1518
Panjabi (pa), 1601
Polish (pl), 1612
Pashto, Pushto (ps), 1619
Portuguese (pt), 1620
Quechua (qu), 1721
Rhaeto-Romance (rm), 1813
Kirundi (rn), 1814
Romanian (ro), 1815
Kinyarwanda (rw), 1823
Sanskrit (sa), 1901
Sindhi (sd), 1904
Sangho (sg), 1907
Serbo-Croatian (sh), 1908
Sinhalese (si), 1909
Slovak (sk), 1911
Slovenian (sl), 1912
Samoan (sm), 1913
Shona (sn), 1914
Somali (so), 1915
Albanian (sq), 1917
Serbian (sr), 1918
Siswati (ss), 1919
Sesotho (st), 1920
Vietnamese (vi), 2209
Volapük (vo), 2215
Wolof (wo), 2315
Xhosa (xh), 2408
Yoruba (yo), 2515
Zulu (zu), 2621
Country code list
Country, Country code, Country code letter
Argentina, 0118, ar
Australia, 0121, au
Austria, 0120, at
Belgium, 0205, be
Brazil, 0218, br
Canada, 0301, ca
Chile, 0312, cl
China. 0314, cn
Denmark, 0411, dk
Finland. 0609, fi
France, 0618, fr
Germany, 0405, de
Hong Kong, 0811, hk
India, 0914, in
Indonesia, 0904, id
Italy, 0920, it
Japan, 1016, jp
Korea, Republic of, 1118, kr
Malaysia, 1325, my
Mexico, 1324, mx
Netherlands, 1412, nl
New Zealand, 1426, nz
Norway, 1415, no
Pakistan, 1611, pk
Philippines, 1608, ph
Portugal, 1620, pt
Russian Federation, 1821, ru
Singapore, 1907, sg
Spain, 0519, es
Switzerland, 0308, ch
Sweden, 1905, se
Taiwan, 2023, tw
Thailand, 2008, th
United Kingdom, 0702, gb
United States of America, 2119, us
Preset code list
Please note that there are cases where only certain functions may be controllable after assigning the proper preset code, or the codes for the manufacturer in the list will not work for the model that you are using.
ACURA 644
ADMIRAL 631
AIWA 660
AKAI 632, 635, 642
AKURA641
ALBA 607, 639, 641, 644
AMSTRAD 642, 644, 647
ANITECH 644
ASA 645
ASUKA 641
AUDIOGONIC 607, 636
BASIC LINE 641, 644
BAUR631, 607, 642
BEKO638
BEON607
BLAUPUNKT 631
BLUESKY 641
BLUESTAR 618
BPL 618
BRANDT 636
BTC641
BUSH607, 641, 642, 644, 647, 656
CASCADE 644
CATHAY 607
CENTURION 607
CGB 642
CIMLINE 644
CLARIVOX 607
CLATRONIC638
CONDOR 638
CONTEC 644
CROSLEY632
CROWN 638, 644
CRYSTAL642
CYBERTRON 641
DAEWOO 607, 644, 656
DAINICHI 641
DANSAI 607
DAYTON 644
DECCA 607, 648
DIXI 607, 644
DUMONT653
ELIN 607
ELITE641
ELTA 644
EMERSON 642
ERRES 607
FERGUSON 607, 636, 651
FINLANDIA 635, 643, 655
FINLUX 632, 607, 645, 648, 653, 654, 655
FIRSTLINE 640, 644
FISHER 632, 635, 638, 645
FORMENTI632, 607, 642
FRONTECH 631, 642, 646
FRONTECH/PROTECH632
FUJITSU 648, 629
FUNAI 640, 646, 658
GBC 632, 642
GE 601, 608, 607, 610, 617, 602, 628, 618
GEC 607, 634, 648
GELOSO 632, 644
GENEXXA 631, 641
GOLDSTAR 610, 623, 621, 602, 607, 650
GOODMANS 607, 639, 647, 648, 656
GORENJE 638
GPM 641
GRAETZ 631, 642
GRANADA 607, 635, 642, 643, 648
GRADIENTE 630, 657
GRANDIN 618
GRUNDIG 631, 653
HANSEATIC 607, 642
HCM 618, 644
HINARI 607, 641, 644
HISAWA 618
HITACHI 631, 633, 634, 636, 642, 643, 654, 606, 610, 624, 625, 618
HUANYU 656
HYPSON 607, 618, 646
ICE 646, 647
IMPERIAL 638, 642
INDIANA 607
INGELEN 631
INTERFUNK 631, 632, 607, 642
INTERVISION 646, 649
ISUKAI 641
ITC 642
ITT 631, 632, 642
JEC 605
JVC 613, 623
KAISUI 618, 641, 644
KAPSCH 631
KENDO 642
KENNEDY 632, 642
KORPEL 607
KOYODA 644
LEYCO 607, 640, 646, 648
LIESENK&TTER 607
LOEWE 607
LUXOR 632, 642, 643
M-ELECTRONIC 631, 644, 645, 654, 655, 656, 607, 636, 651
MAGNADYNE 632, 649
MAGNAFON 649
MAGNAVOX 607, 610, 603, 612, 629
MANESTH 639, 646
MARANTZ 607
MARK 607
MATSUI 607, 639, 640, 642, 644, 647, 648
MEDIATOR 607
MEMOREX 644
METZ 631
MINERVA 631, 653
MITSUBISHI 609, 610, 602, 621, 631
MULTITECH 644, 649
NEC 659
NECKERMANN 631, 607
NEI 607, 642
NIKKAI 605, 607, 641, 646, 648
NOBLIKO 649
NOKIA 632, 642, 652
NORDMENDE 632, 636, 651, 652
OCEANIC 631, 632, 642
ORION 632, 607, 639, 640
OSAKI 641, 646, 648
OSO 641
OSUME 648
OTTO VERSAND 631, 632, 607, 642
PALLADIUM 638
PANAMA 646
PANASONIC 631, 607, 608, 642, 622
PATHO CINEMA 642
PAUSA 644
PHILCO 632, 642
PHILIPS 631, 607, 634, 656
PHOENIX 632
PHONOLA 607
PROFEX 642, 644
PROTECH 607, 642, 644, 646, 649
QUELLE 631, 632, 607, 642, 645, 653
R-LINE 607
RADIOLA 607
RADIOSHACK 610, 623, 621, 602
RBM 653
RCA 601, 610, 615, 616, 617, 618, 661, 662, 609
REDIFFUSION 632, 642
REX 631, 646
ROADSTAR 641, 644, 646
SABA 631, 636, 642, 651
SAISHO 639, 644, 646
SALORA 631, 632, 642, 643
SAMBERS 649
| Analog audio | Direct representation of sound by an electrical signal. See also Digital audio. |
| Aspect ratio | The width of a TV screen relative to its height. Conventional TVs are 4:3; widescreen models are 16:9. |
| Digital audio | Indirect representation of sound using numbers. See also Sampling frequency and Analog audio. |
| Dolby Digital | A multi-channel audio encoding system developed by Dolby Laboratories that enables far more audio to be stored on a disc than PCM encoding. See also PCM (Pulse Code Modulation). |
| DRM copy protection | DRM (digital rights management) copy protection is a technology designed to prevent unauthorized copying by restricting playback, etc. of material on devices other than the PC (or other WMA recording equipment) used to record it. For detailed information, please see the instruction manuals or help files that came with your PC (or other WMA recording equipment) and/or software. |
| DTSDIGITAL | A multi-channel audio encoding system developed by Digital Theater Systems that enables far more audio to be stored on a disc than PCM encoding. See also PCM (Pulse Code Modulation). |
| Dynamic range | The difference between the quietest and loudest sounds possible in an audio signal. |
| EXIF(Exchangeable Image File) | A file format developed by Fuji Photo Film for digital still cameras. Digital cameras from various manufacturers use this compressed file format which carries date, time and thumbnail information, as well as the picture data. |
| File extension | A tag added to the end of a filename to indicate the type of file. For example, ".mp3" indicates an MP3 file. |
| ISO 9660 format | International standard for the volume and file structure of CD-ROM discs. |
| JPEG | A standard file format used for still images. JPEG files are identified by the file extension “.jpg”. |
| MP3 | MP3 (MPEG1 audio layer 3) is a compressed stereo audio file format. Files are recognized by their file extension “.mp3”. |
| MPEG audio | An audio format used on Video CD/ Super VCDs and some DVD discs. |
| MPEG video | A video format used on Video CD/Super VCDs and DVD discs. |
| PBC(Playback Control) | A system of navigating a Video CD/ Super VCD through on-screen menus recorded onto the disc. |
| PCM(Pulse Code Modulation) | Digital audio encoding system found on CDs. Good quality, but requires a lot of data compared to Dolby Digital, DTS and MPEG encoded audio. See also Digital audio. |
| Progressive scan video | All the lines that make up a video picture are updated in one pass (compared to interlace which takes two passes to update the whole picture). |
| Regions | These associate DVD-Video discs and players with particular areas of the world. See DVD Video regions on page 67 for more information. |
| Sampling frequency | The rate at which sound is measured to be turned into digital audio data. The higher the rate, the better the sound quality. CD is 44.1 kHz; DVD can be up to 96 kHz. See also Digital audio. |
| WMA | WMA is short for Windows Media Audio and refers to an audio compression technology developed by Microsoft Corporation. Files are recognized by their file extension “.wma”. |
Manufactured under license from Dolby Laboratories. "Dolby", "Pro Logic" and the double-D symbol are trademarks of Dolby Laboratories. "DTS" and "DTS Digital Surround" are registered trademarks of Digital Theater Systems, Inc.
Specifications
Amplifier section
Continuous Power Output (RMS):
Front, Center, Surround . . . 100 W per channel
(1 kHz, 10 % T.H.D., 6 Ω)
Subwoofer .. 100 W (100 Hz, 10 % T.H.D., 6Ω)
Continuous Power Output:
Front, Center, Surround . . . .75 W per channel
(1 kHz, 1 % T.H.D., 6 Ω)
Subwoofer . . . . 75 W (100 Hz, 1 % T.H.D., 6Ω)
Disc section
Digital audio
characteristics ..... DVD fs: 96 kHz, 24-bit
Type. . . . . . . DVD system, video CD system and compact disc digital audio system
Total harmonic distortion . . . . . . . . . . . . . . . 0.004%
Frequency
response. . . . 4 Hz to 44 kHz (96kHz sampling) / 4 Hz to 22 kHz (48kHz sampling)
Wow and Flutter. . . . . . . Limit of measurement (±0.001 % W.PEAK) or less (JEITA)
FM tuner section
Frequency range .....87.5 - 108 MHz
Antenna . . . . . . . . . . . . . . . . . . . . . . . . . . . . . . . . . . . . . . . . . . . . . . . . . . . . 75 Ω , unbalanced
AM tuner section
Frequency range
With 9kHz step. . . . . . . . 531 kHz to 1,602 kHz
With 10kHz step (Not applicable to
the European model) . . . 530 kHz to 1,700 kHz
Antenna .... Loop antenna
Miscellaneous
Power requirements
European/Singapore/South African
models . . . . . . . . . AC 220-230 V, 50/60 Hz
U.K. model .....AC 230 V, 50/60 Hz
Taiwan model. . . . . . . . . AC 110-120 V, 60 Hz
Australian/New Zealand/
Malaysian models .....AC 240 V, 50/60 Hz
Power consumption 175W
Power consumption in standby ..... 0.5 W
Dimensions ..... 420 (W) x 70 (H) x 396 (D) mm
Weight 7.0 kg
Accessories (DVD/CD receiver)
Remote control 1
AA/R6 dry cell batteries 2
Video cable (yellow plugs) 1
AM loop antenna 1
FM antenna 1
Power cord 1
Setup Guide....1
These operating instructions....1
Warranty Card (European, U.K., Australian and
New Zealand models only)....1
Speaker System
(Front speakers x2, center speaker x1, subwoofer x1)
Front speakers
Enclosure .... Closed-box bookshelf type (magnetically shielded)
System 10x7 cm 1-way system
Speakers 10x7 cm cone type
Nominal impedance....6 Ω
Frequency range ..... 90 Hz to 20 kHz
Maximum Input Power....100 W
Dimensions ..... 105 (W) x 158 (H) x 83 (D) mm
Weight 0.8 kg
Center speaker
Enclosure .... Closed-box bookshelf type (magnetically shielded)
System 10x7 cm 1-way system
Speakers 10x7 cm cone type
Nominal impedance....6 Ω
Frequency range ..... 78 Hz to 20 kHz
Maximum Input Power....100 W
Dimensions ..... 240 (W) x 87 (H) x 79 (D) mm
Weight 0.85 kg
Subwoofer
Enclosure .... Bass-reflex floor type
System 16 cm 1-way system
Speaker 16 cm cone type
Nominal impedance....6 Ω
Frequency range
European model ..... 35 Hz to 2.8 kHz
Other models 25 Hz to 2.5 kHz
Maximum Input Power.....100 W
Dimensions
European
model.....108 (W) × 420 (H) × 390 (D) mm
Other models. .190 (W) x 360 (H) x 327 (D) mm
Weight 5 kg
Accessories (Speaker system)
Speaker cables 6
Speaker setup guide. 1
Non-slip pads (small) 20
European model only: Non-slip pads (large)....9
Subwoofer stands....3
Digital Wireless Speaker System
General
Digital Wireless Speaker System (Transmitter /
Wireless speaker)
Transmitter
AC adaptor:
Power requirements
U.K./Hong Kong
models. AC 220-230 V, 50/60 Hz
Australian/New Zealand
models. AC 240 V, 50/60 Hz
Taiwanese model .....AC 110 V, 60 Hz
Other models ..... AC 220-240 V, 50/60 Hz
Power consumption 9W
Rated output 12V/300mA
Power consumption (without AC adaptor) . . . 2W
Input.... RCA jack
Weight 0.3 kg
Dimensions .....166 (W) x 56 (H) x 112 (D) mm
Wireless speaker
Power requirements
European/U.K./Hong Kong/South
African model ..... AC 220-230 V, 50/60 Hz
Australian/New Zealand
models. AC 240 V, 50/60 Hz
Taiwanese model. . . . . . . . AC 110 V, 60 Hz
Other models ..... AC 220-240 V, 50/60 Hz
Power consumption
Australian/New Zealand models .....55W
Taiwanese model....51W
Other models .....52W
Amplifier characteristics
Maximum power output ..... 25W/ch
RMS(1kHz, THD 10%, 4Ω)
Speaker unit....7 cm cone type x2
Weight 4.0 kg
Dimensions (without
Warranty card (European, U.K., Australian
and New Zealand models only)....1

Note
- Specifications and design subject to possible modification without notice, due to improvements.
This product includes FontAvenue® fonts licenced by NEC corporation. FontAvenue is a registered trademark of NEC Corporation.
This product incorporates copyright protection technology that is protected by method claims of certain U.S. patents and other intellectual property rights owned by Macrovision Corporation and other rights owners. Use of this copyright protection technology must be authorized by Macrovision Corporation, and is intended for home and other limited uses only unless otherwise authorized by Macrovision Corporation. Reverse engineering or disassembly is prohibited.
This product is intended for household purposes. Any failure due to use for other than household purposes (such as long-term use for business purposes in a restaurant or use in a car or ship) and which requires repair will be charged for even in the warranty period. KO41 En
AFTER-SALES SERVICE FOR PIONEER PRODUCTS
Please contact the dealer or distributor from where you purchased the product for its after-sales service (including warranty conditions) or any other information. In case the necessary information is not available, please contact the Pioneer's subsidiaries (regional service headquarters) listed below:
PLEASE DO NOT SHIP YOUR PRODUCT TO THE COMPANIES at the addresses listed below for repair without advance contact, for these companies are not repair locations.
AMERICA
PIONEER ELECTRONICS (USA) INC.
CUSTOMER SUPPORT DIVISION
P.O. BOX 1760, LONG BEACH, CA 90801-1760, U.S.A.
CUSTOMER SERVICE HOTLINE : (800) 421-1404
EUROPE
PIONEER EUROPE NV
EUROPEAN SERVICE DIVISION
HAVEN 1087, KEETBERGLAAN 1, B-9120 MELSELE, BELGIUM
ASEAN
PIONEER ELECTRONICS ASIACENTRE PTE. LTD.
SERVICE DEPARTMENT
253, ALEXANDRA ROAD #04-01 SINGAPORE 159936
JAPAN AND OTHERS
PIONEER CORPORATION (HEAD OFFICE)
CUSTOMER SUPPORT CENTER
Published by Pioneer Corporation
Copyright ©2004 Pioneer Corporation
All rights reserved
PIONEER CORPORATION
4-1, Meguro 1-Chome, Meguro-ku, Tokyo 153-8654, Japan
PIONEER ELECTRONICS (USA) INC.
P.O. BOX 1540, Long Beach, California 90810-1540, U.S.A. TEL: (800) 421-1404
PIONEER ELECTRONICS OF CANADA, INC.
300 Allstate Parkway, Markham, Ontario L3R OP2, Canada TEL: (905) 479-4411
PIONEER EUROPE NV
Haven 1087, Keetberglaan 1, B-9120 Melsele, Belgium TEL: 03/570.05.11
PIONEER ELECTRONICS ASIACENTRE PTE. LTD.
253 Alexandra Road, #04-01, Singapore 159936 TEL: 65-6472-1111
PIONEER ELECTRONICS AUSTRALIA PTY. LTD.
178-184 Boundary Road, Braeside, Victoria 3195, Australia, TEL: (03) 9586-6300
PIONEER ELECTRONICS DE MEXICO S.A. DE C.V.
Blvd.Manuel Avila Camacho 138 10 piso Col.Lomas de Chapultepec, Mexico,D.F. 11000 TEL: 55-9178-4270

- DIGITAL WIRELESS SPEAKER SYSTEM
- XW-DV525
- XW-DV1WS
- LOCATION: UNDERSIDE OF THE UNIT (XV-DV525) / REAR OF THE UNIT (XW-DV525/XW-DV1WS)
- IMPORTANT
- CAUTION
- RISK OF ELECTRIC SHOCK DO NOT OPEN
- FOR USE IN THE UNITED KINGDOM
- NOTE
- WARNING
- [XV-DV525 ONLY]
- VENTILATION
- [XW-DV525/XW-DV1WS ONLY]
- [EXCLUDING XW-DV525/XW-DV1WS]
- OPERATING ENVIRONMENT
- [XW-DV525/XW-DV1WS ONLY] CAUTION
- ENERGY-SAVING DESIGN
- DECLARATION OF CONFORMITY WITH REGARD TO THE R&TTE DIRECTIVE 1999/5/EC
- EU REPRESENTATIVE'S: PIONEER EUROPE NV
- THANK YOU FOR BUYING THIS PIONEER PRODUCT
- CONTENTS
- 01 BEFORE YOU START
- 02 CONTROLS AND DISPLAYS
- 03 GETTING STARTED
- 04 LISTENING TO YOUR SYSTEM
- 05 PLAYING DISCS
- 06 VIEWING JPEG DISCS
- 07 MORE TUNER FEATURES: RDS
- 08 USING THE TIMER
- 09 SURROUND SOUND AND OTHER SETTINGS
- 10 VIDEO ADJUST MENU
- 11 INITIAL SETTINGS MENU
- 12 OTHER CONNECTIONS
- 13 ADDITIONAL INFORMATION
- CHAPTER 1
- BEFORE YOU START
- FEATURES
- 24-BIT/96KHZ COMPATIBLE DAC
- SURROUND SOUND ENTERTAINMENT WITH DOLBY DIGITAL AND DTS SOFTWARE
- PURE CINEMA PROGRESSIVE SCAN VIDEO
- PICTURE ZOOM
- MP3 AND WMA COMPATIBILITY
- JPEG COMPATIBILITY
- GRAPHICAL ON-SCREEN DISPLAYS
- ENERGY SAVING DESIGN
- DISC / CONTENT FORMAT PLAYBACK COMPATIBILITY
- CD-R/RW COMPATIBILITY
- DVD-R/RW COMPATIBILITY
- PC-CREATED DISC COMPATIBILITY
- COMPRESSED AUDIO COMPATIBILITY
- ABOUT WMA
- JPEG FILE COMPATIBILITY
- CHAPTER 2
- CONTROLS AND DISPLAYS
- 1 OPERATION INDICATOR
- 2 ▲ OPEN/CLOSE
- 3 ▶/II DVD/CD
- 4
- 5 FM/AM
- 6 VOLUME BUTTONS
- 7 ⏻ STANDBY/ON
- 8 PHONES JACK
- 9 TIMER INDICATOR
- 10 DISPLAY
- 11 REMOTE SENSOR
- 12 DISC TRAY
- DISPLAY
- 1 TUNER INDICATORS
- 2
- 3 MIDNIGHT
- 4 QUIET
- 5 PGM
- 6 RPT AND RPT-1
- 7 RDM
- 8 ATT
- 9 REC MODE
- 10 TIMER INDICATORS
- 11 PRO LOGIC II
- 12 DIGITAL
- 13 SPEAKER INDICATORS
- 14 PRGSVE
- 15 ADV.SURR
- 17 KHZ / MHZ
- 18 CHARACTER DISPLAY
- 20 WIRELESS
- 1 ⏻ STANDBY/ON
- 2 FUNCTION SELECT BUTTONS
- 3 FRONT SURROUND
- 4 DISC PLAYBACK CONTROLS
- 5
- 6 DVD MENU
- 7 CURSOR BUTTONS, ENTER AND TUNING BUTTONS
- CURSOR BUTTONS
- ENTER
- TUNE
- ST
- 8 MUTE
- 9 MASTER VOLUME
- 10 TV CONTROL (PAGE 21)
- INPUT
- CH
- VOL
- 11 ▲ OPEN/CLOSE
- 12
- 13 RETURN
- 14 SOUND
- 15 SURROUND SOUND MODE/SOUND ENHANCEMENT BUTTONS
- SURROUND
- ADVANCED
- VIRTUAL SB
- BASS MODE
- DIALOGUE
- CH LEVEL
- 16 DVD/CD BUTTONS
- AUDIO
- SUBTITLE
- ANGLE
- PROGRAM
- REPEAT
- RANDOM
- 17 ZOOM
- TOP MENU
- HOME MENU
- 18 SYSTEM SETUP
- TEST TONE
- QUIET/MIDNIGHT
- 19 DIMMER
- TIMER/CLOCK
- 20 SR
- FOLDER
- CLR
- 21 MAIN /SUB
- ROOM SETUP
- WIRELESS
- 22 NUMBER BUTTONS
- TRANSMITTER
- WIRELESS SPEAKER
- 1 CHANNEL INDICATORS
- 2 CHANNEL
- 3 TRANSMITTER ANTENNA
- 4 WIRELESS SPEAKER ANTENNA
- 5 POWER
- 6 WIRELESS MODE SWITCH
- 7 STEREO MODE VOLUME
- 8 POWER INDICATOR
- 9 TUNED INDICATOR
- CHAPTER 3
- GETTING STARTED
- SWITCHING ON AND SETTING UP
- 1 PRESS ⏻ STANDBY/ON (ON THE REMOTE OR THE FRONT PANEL) TO SWITCH THE SYSTEM ON
- 2 FOLLOW THE DIRECTIONS THAT APPEAR ON THE ON-SCREEN DISPLAY
- TIP
- SETTING THE CLOCK
- HOME THEATER SOUND SETUP
- USING THE ROOM SETUP
- 1 IF THE SYSTEM ISN'T ALREADY ON, PRESS ⏻ STANDBY/ON TO SWITCH IT ON
- 2 PRESS ROOM SETUP
- 3 PRESS ENTER
- 4 USE THE ↑/↓ (CURSOR UP/DOWN) BUTTONS TO SELECT A ROOM TYPE THEN PRESS ENTER
- 5 USE THE ↑/↓ (CURSOR UP/DOWN) BUTTONS TO SELECT A SEATING POSITION. PRESS ENTER
- SETTING UP THE REMOTE TO CONTROL YOUR TV
- 1 SWITCH ON YOUR TV
- 2 FIND THE NAME OF THE MANUFACTURER OF YOUR TV IN THE PRESET CODE LIST ON PAGE 79
- 3 POINT THE REMOTE AT YOUR TV, HOLD DOWN THE CLR BUTTON, THEN ENTER THE THREE DIGIT CODE FOR YOUR TV
- USING THE ON-SCREEN DISPLAYS
- PLAYING DISCS
- 1 IF THE PLAYER ISN'T ALREADY ON, PRESS ⏻ STANDBY/ON TO SWITCH IT ON
- 2 PRESS ▲ OPEN/CLOSE TO OPEN THE DISC TRAY
- 3 LOAD A DISC
- 4 PRESS ▶ (PLAY) TO START PLAYBACK
- 5 USE THE MASTER VOLUME - / + BUTTON (OR THE FRONT PANEL VOLUME BUTTONS) TO ADJUST THE VOLUME
- BASIC PLAYBACK CONTROLS
- USING THE FRONT PANEL CONTROLS
- RESUME AND LAST MEMORY
- FAQ
- DVD-VIDEO DISC MENUS
- VIDEO CD/SUPER VCD PBC MENUS
- LISTENING TO THE RADIO
- 2 PRESS TUNER TO SWITCH TO THE TUNER, THEN PRESS REPEATEDLY TO SELECT THE AM OR FM BAND
- 3 TUNE TO A FREQUENCY
- IMPROVING POOR FM RECEPTION
- MEMORIZING STATIONS
- LISTENING TO STATION PRESETS
- LISTENING TO OTHER SOURCES
- USING THE WIRELESS SPEAKER SYSTEM
- 6 SWITCH THE MAIN UNIT AND WIRELESS SPEAKER BACK ON
- 7 PRESS WIRELESS REPEATEDLY TO SELECT A WIRELESS LISTENING MODE
- 8 PRESS ENTER
- CHAPTER 4
- LISTENING TO YOUR SYSTEM
- ABOUT THE LISTENING MODES
- AUTO LISTENING MODE
- LISTENING IN SURROUND SOUND
- DOLBY PRO LOGIC II MUSIC SETTINGS
- USING THE ADVANCED SURROUND EFFECTS
- USING FRONT SURROUND
- ADJUSTING THE ADVANCED AND FRONT SURROUND EFFECT LEVEL
- LISTENING IN STEREO
- LISTENING WITH HEADPHONES
- ENHANCING DIALOGUE
- LISTENING WITH A VIRTUAL SURROUND BACK SPEAKER
- USING QUIET AND MIDNIGHT LISTENING MODES
- ADJUSTING THE BASS AND TREBLE
- BOOSTING THE BASS LEVEL
- CHAPTER 5
- REMEMBER
- SCANNING DISCS
- 1 DURING PLAYBACK, PRESS ◀◀ OR ▶▶ TO START SCANNING
- 2 PRESS REPEATEDLY TO INCREASE THE SCANNING SPEED
- 3 TO RESUME PLAYBACK, PRESS ▶ (PLAY)
- PLAYING IN SLOW MOTION
- 1 DURING PLAYBACK, PRESS Ⅱ (PAUSE)
- 2 PRESS AND HOLD ◀/◄◄ OR ||►/|► UNTIL SLOW MOTION PLAYBACK STARTS
- 3 PRESS REPEATEDLY TO CHANGE THE SLOW MOTION SPEED
- 4 TO RESUME NORMAL PLAYBACK, PRESS ▶ (PLAY)
- FRAME ADVANCE/FRAME REVERSE
- USING THE DISC NAVIGATOR TO BROWSE THE CONTENTS OF A DISC
- 1 PRESS HOME MENU AND SELECT 'DISC NAVIGATOR' FROM THE ON-SCREEN DISPLAY
- 2 SELECT WHAT YOU WANT TO PLAY
- LOOPING A SECTION OF A DISC
- 1 DURING PLAYBACK, PRESS HOME MENU AND SELECT 'PLAY MODE
- 2 SELECT 'A-B REPEAT' FROM THE LIST OF FUNCTIONS ON THE LEFT
- 3 PRESS ENTER ON 'A(START POINT)' TO SET THE LOOP START POINT
- 4 PRESS ENTER ON 'B(END POINT)' TO SET THE LOOP END POINT
- 5 TO RESUME NORMAL PLAYBACK, SELECT 'OFF' FROM THE MENU
- USING REPEAT PLAY
- 2 SELECT 'REPEAT' FROM THE LIST OF FUNCTIONS ON THE LEFT
- 3 SELECT A REPEAT PLAY OPTION
- USING RANDOM PLAY
- 2 SELECT 'RANDOM' FROM THE LIST OF FUNCTIONS ON THE LEFT
- 3 SELECT A RANDOM PLAY OPTION
- CREATING A PROGRAM LIST
- USING THE OSD
- OTHER FUNCTIONS AVAILABLE FROM THE PROGRAM MENU
- USING THE FRONT PANEL DISPLAY
- 1 PRESS PROGRAM
- 2 USE ↑/↓ (CURSOR UP/DOWN) TO SELECT A TRACK OR A FOLDER, THEN PRESS ENTER
- 3 REPEAT STEP 2 TO BUILD UP A PROGRAM LIST
- 4 TO PLAY THE PROGRAM LIST, PRESS ▶ (PLAY)
- CLEARING THE PROGRAM LIST
- SEARCHING A DISC
- 2 SELECT 'SEARCH MODE' FROM THE LIST OF FUNCTIONS ON THE LEFT
- 3 SELECT A SEARCH MODE
- 4 USE THE NUMBER BUTTONS TO ENTER A TITLE, CHAPTER, FOLDER OR TRACK NUMBER, OR A TIME
- 5 PRESS ENTER TO START PLAYBACK
- SWITCHING SUBTITLES
- PRESS SUBTITLE REPEATEDLY TO SELECT A SUBTITLE OPTION
- SWITCHING THE DVD AUDIO LANGUAGE
- PRESS AUDIO REPEATEDLY TO SELECT AN AUDIO LANGUAGE OPTION
- SWITCHING THE VIDEO CD/SUPER VCD AUDIO CHANNEL
- ZOOMING THE SCREEN
- 1 DURING PLAYBACK, USE THE ZOOM BUTTON TO SELECT THE ZOOM FACTOR (NORMAL, 2X OR 4X)
- 2 USE THE CURSOR BUTTONS TO CHANGE THE ZOOMED AREA
- SWITCHING CAMERA ANGLES
- DISPLAYING DISC INFORMATION
- OSD DISC INFORMATION
- TO SHOW/SWITCH/HIDE THE INFORMATION DISPLAYED, PRESS DISPLAY REPEATEDLY
- FRONT PANEL DISPLAY INFORMATION
- CHAPTER 6
- VIEWING JPEG DISCS
- PLAYING A JPEG SLIDESHOW
- USING THE JPEG DISC NAVIGATOR AND PHOTO BROWSER
- 1 PRESS DVD MENU TO DISPLAY THE DISC NAVIGATOR SCREEN
- USING THE PHOTO BROWSER
- 1 FROM THE DISC NAVIGATOR SCREEN, HIGHLIGHT A FOLDER TO DISPLAY THEN PRESS ENTER
- 1 DURING SLIDESHOW PLAYBACK, USE THE ZOOM BUTTON TO SELECT THE ZOOM FACTOR
- CHAPTER 7
- MORE TUNER FEATURES: RDS
- AN INTRODUCTION TO RDS
- DISPLAYING RDS INFORMATION
- PRESS DISPLAY TO SELECT THE RDS INFORMATION DISPLAY
- SEARCHING FOR RDS PROGRAMS
- CHAPTER 8
- USING THE TIMER
- SETTING THE WAKE-UP TIMER
- 1 SELECT THE SOURCE YOU WANT PLAYED
- 2 PREPARE THE SOURCE
- 3 SET THE VOLUME
- 4 PRESS TIMER/CLOCK TWICE TO REACH THE TIMER MENU
- 7 SET THE SWITCH-ON TIME
- 8 SET THE SWITCH-OFF TIME
- 9 SWITCH THE SYSTEM INTO STANDBY MODE
- TURNING THE WAKE-UP TIMER ON/OFF
- SETTING THE SLEEP TIMER
- CHAPTER 9
- SURROUND SOUND AND OTHER SETTINGS
- USING THE SYSTEM SETUP MENU
- 1 PRESS SYSTEM SETUP
- 2 USE THE ↔/→ (CURSOR LEFT/RIGHT) BUTTONS TO CHOOSE THE SETTING YOU WANT TO ADJUST
- 3 USE THE ↑/↓ (CURSOR UP/DOWN) BUTTONS TO ADJUST THE SETTING
- 4 REPEAT STEPS 2 AND 3 TO MAKE OTHER SETTINGS
- 5 WHEN YOU'RE DONE, PRESS ENTER TO LEAVE THE SYSTEM SETUP MENU
- SURROUND AND SOUND SETUP OPTIONS
- FRONT SPEAKERS DISTANCE SETTING
- CENTER SPEAKER DISTANCE SETTING
- SURROUND SPEAKERS DISTANCE SETTING
- DYNAMIC RANGE CONTROL
- DUAL MONO SETTING
- LFE ATTENUATOR SETTING
- SR+ CONTROL OPTIONS FOR PIONEER PLASMA DISPLAYS
- CONTROL MODE SETTING
- VOLUME CONTROL SETTING
- FUNCTION SETTING FOR DVD INPUT
- FUNCTION SETTING FOR TV INPUT
- FUNCTION SETTING FOR L1 INPUT
- FUNCTION SETTING FOR L2 INPUT
- SETTING THE CHANNEL LEVELS
- 1 SELECT A LISTENING MODE
- 2 SWITCH THE REMOTE CONTROL TO SUB, THEN PRESS TEST TONE TO HEAR THE TEST TONE
- 3 USE THE MASTER VOLUME +/- BUTTON TO ADJUST THE VOLUME TO AN APPROPRIATE LEVEL
- 4 USE THE ↑/↓ (CURSOR UP/DOWN) BUTTONS TO ADJUST THE SPEAKER LEVELS IN TURN
- 5 WHEN YOU'RE DONE, PRESS ENTER TO EXIT TEST TONE SETUP
- CHAPTER 10
- VIDEO ADJUST MENU
- VIDEO ADJUST
- 1 PRESS HOME MENU AND SELECT 'VIDEO ADJUST' FROM THE ON-SCREEN DISPLAY
- 2 USE THE ↔/→ (CURSOR LEFT/RIGHT) BUTTONS TO SELECT A PRESET
- 3 PRESS ENTER TO MAKE THE SETTING AND EXIT THE VIDEO ADJUST SCREEN
- CREATING YOUR OWN PRESETS
- 1 SELECT ONE OF THE MEMORY PRESETS (SEE ABOVE)
- 2 PRESS ↓ (CURSOR DOWN) TO SELECT 'DETAILED SETTINGS' THEN PRESS ENTER
- 3 ADJUST THE PICTURE QUALITY SETTINGS
- 4 PRESS ENTER TO SAVE THE PRESET AND EXIT THE VIDEO ADJUST SCREEN
- CHAPTER 11
- INITIAL SETTINGS MENU
- USING THE INITIAL SETTINGS MENU
- 1 PRESS HOME MENU AND SELECT 'INITIAL SETTINGS
- 2 USE THE CURSOR BUTTONS AND ENTER TO SELECT THE SETTING AND OPTION YOU WANT TO SET
- PARENTAL LOCK
- REGISTERING A NEW PASSWORD
- 1 SELECT 'PASSWORD
- CHANGING YOUR PASSWORD
- SETTING/CHANGING THE PARENTAL LOCK
- SETTING/CHANGING THE COUNTRY CODE
- CHAPTER 12
- OTHER CONNECTIONS
- CONNECTING EXTERNAL ANTENNAS
- EXTERNAL AM ANTENNA
- EXTERNAL FM ANTENNA
- CONNECTING AUXILIARY COMPONENTS
- RECORDING MODE
- 1 PRESS SOUND
- CONNECTING USING THE S-VIDEO OUTPUT
- CONNECTING USING THE COMPONENT VIDEO OUTPUT
- ABOUT PROGRESSIVE SCAN VIDEO
- COMPATIBILITY OF THIS PLAYER WITH PROGRESSIVE-SCAN AND HIGH-DEFINITION TVS
- USING THE SCART AV OUTPUT
- SWITCHING THE TV AUDIO INPUT FROM SCART TO RCA
- SCART PIN ASSIGNMENT
- USING THIS UNIT WITH A PIONEER PLASMA DISPLAY
- USING THE SR+ MODE WITH A PIONEER PLASMA DISPLAY
- 1 MAKE SURE THAT THE PLASMA DISPLAY AND THIS UNIT ARE SWITCHED ON AND THAT THEY ARE CONNECTED WITH AN SR+ CABLE
- 2 TO SWITCH SR+ MODE ON/OFF, PRESS SR
- CHAPTER 13
- ADDITIONAL INFORMATION
- OPTIONAL SYSTEM SETTINGS
- SYSTEM SETUP MENU OPTIONS IN STANDBY
- WIRELESS SPEAKER SETTING
- CHILD LOCK SETTING
- CLOCK FORMAT SETTING
- TV ATTENUATOR SETTING
- LINE ATTENUATOR SETTING
- FREQUENCY STEP SETTING
- TV FORMAT SETTING
- SYSTEM DEMO SETTING
- WATCHING NTSC ON A PAL TV (MOD. PAL)
- RESETTING THE SYSTEM
- 1 SWITCH THE SYSTEM INTO STANDBY
- 2 PRESS AND HOLD THE FRONT PANEL ■ (STOP) BUTTON FOR ABOUT 8 SECONDS UNTIL THE DISPLAY SHOWS 'MEM.CLR
- 3 PRESS THE FRONT PANEL ▶/II BUTTON
- USING AND TAKING CARE OF DISCS
- TITLES, CHAPTERS AND TRACKS
- DVD VIDEO REGIONS
- HANDLING DISCS
- STORING DISCS
- DISCS TO AVOID
- PROPER INSTALLATION AND MAINTENANCE OF THIS SYSTEM
- HINTS ON INSTALLATION
- DO
- DON'T
- CLEANING THE PICKUP LENS
- PROBLEMS WITH CONDENSATION
- MOVING THE SYSTEM UNIT
- POWER CORD CAUTION
- WIRELESS SPEAKER SYSTEM MAINTENANCE AND PRECAUTIONS
- CLEANING THE EXTERIOR
- AC ADAPTER AND POWER CORD CAUTION
- MOVING THE WIRELESS SPEAKER
- RADIO WAVE REFLECTIONS
- RADIO WAVE CAUTION
- SCOPE OF OPERATION
- FOR SAFETY IN OPERATION
- STATIC ELECTRICITY
- TROUBLESHOOTING
- SCREEN SIZES AND DISC FORMATS
- WIDESCREEN TV USERS
- STANDARD TV USERS
- SELECTING LANGUAGES USING THE LANGUAGE CODE LIST
- LANGUAGE CODE LIST
- COUNTRY CODE LIST
- PRESET CODE LIST
- SPECIFICATIONS
- AMPLIFIER SECTION
- DISC SECTION
- FM TUNER SECTION
- AM TUNER SECTION
- MISCELLANEOUS
- ACCESSORIES (DVD/CD RECEIVER)
- SPEAKER SYSTEM
- FRONT SPEAKERS
- CENTER SPEAKER
- SUBWOOFER
- ACCESSORIES (SPEAKER SYSTEM)
- GENERAL
- AFTER-SALES SERVICE FOR PIONEER PRODUCTS
- AMERICA
- EUROPE
- ASEAN
- JAPAN AND OTHERS
- PIONEER CORPORATION
- PIONEER ELECTRONICS (USA) INC
- PIONEER ELECTRONICS OF CANADA, INC
- PIONEER EUROPE NV
- PIONEER ELECTRONICS ASIACENTRE PTE. LTD
- PIONEER ELECTRONICS AUSTRALIA PTY. LTD
- PIONEER ELECTRONICS DE MEXICO S.A. DE C.V
Brand : PIONEER
Model : DCS-525
Category : Home Theater