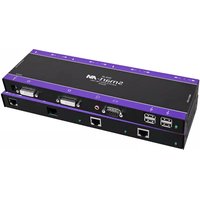
DVX-2PS - AV Extender Smart-AVI - Free user manual and instructions
Find the device manual for free DVX-2PS Smart-AVI in PDF.


| Product Type | AV Extender |
| Brand | Smart-AVI |
| Model | DVX-2PS |
| Video Input | DVI-D (Single Link) |
| Video Output | DVI-D (Single Link) |
| Max Resolution | 1920x1200 @ 60Hz |
| Transmission Distance | Up to 100m (328ft) over Cat5e/6 |
| Audio Support | Stereo analog audio via 3.5mm jacks |
| Power Supply | 5V DC, 1A (included) |
| Dimensions (L x W x H) | 4.5 x 2.5 x 1 in (114 x 63 x 25 mm) |
| Weight | 0.5 lb (225 g) |
| Housing Material | Metal |
| LED Indicators | Power, Link, Signal |
| Required Cable | Cat5e/6 UTP (not included) |
| Mounting | Yes, brackets included |
| Operating Temperature | 0°C to 50°C |
| Storage Temperature | -20°C to 60°C |
| Warranty | 2 years |
| Certifications | FCC, CE |
| Included Accessories | DVI cable, power adapter, mounting brackets |
| Maintenance | Clean with a dry, soft cloth |
| Safety | Use only the provided power adapter |
| Repairability | Non user-serviceable; contact technical support |
| General Information | Plug and play, no driver installation required |
Frequently Asked Questions - DVX-2PS Smart-AVI
User questions about DVX-2PS Smart-AVI
0 question about this device. Answer the ones you know or ask your own.
Ask a new question about this device
Download the instructions for your AV Extender in PDF format for free! Find your manual DVX-2PS - Smart-AVI and take your electronic device back in hand. On this page are published all the documents necessary for the use of your device. DVX-2PS by Smart-AVI.
USER MANUAL DVX-2PS Smart-AVI
| DVI | |
| Video Interface | DVI-D |
| Resolution | 1920 x 1200@60Hz, Resolution up to 1280 x 1024 min. 75Hz |
| Input Interface | DVI-D (Single-Link) |
| Upgradeable | Onboard Flash |
| USB | |
| CAT6 (STP) | Maximum Range 220ft |
| USB Data | Data Rate of 12Mbps Compatible with USB version 1.1 |
| USB Connectors | USB-TX-DVX-2P, Type A USB-TX-DVX-2P, Type B |
| RS232 and Audio | |
| RS232 | (TX-DB9Female) (RX-DB9Male) |
| CAT6 | STP CAT6 |
| Protocol | Full duplex, transparent to all baud rate |
| Audio | Signal Type Stereo Audio Bandwidth 15MHz.0db Impedance 100 Ohm Connector 3.5 mini jack, |
| Power | 110/120V - 5VDC - 4A |
| Dimension (inches) | 10.81" (L) x 3.38" (W) x 1.06" (H) |
| Weight (lbs) | 2lb |
© Copyright 2011 Smart-AVI, All Rights Reserved
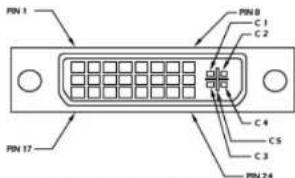
| Pin # | Signal | Pin # | Signal |
| 1 | T.M.D.S Data 2> | 16 | Hot Plug Duct |
| 2 | T.M.D.S Data 2+ | 17 | T.M.D.S Data 0- |
| 3 | T.M.D.S Data 2/4 Shield | 18 | T.M.D.S Data 0+ |
| 4 | T.M.D.S Data 4- | 19 | T.M.D.S Data O/S Shield |
| 5 | T.M.D.S Data 4+ | 20 | T.M.D.S Data 5- |
| 6 | DOC Clock | 21 | T.M.D.S Data 5+ |
| 7 | DOC Data | 22 | T.M.D.S Clock Shield |
| 8 | Analog Vert. Sync | 23 | T.M.D.S Clock+ |
| 9 | T.M.D.S Data 1- | 24 | T.M.D.S Clock - |
| 10 | T.M.D.S Data 1+ | ||
| 11 | T.M.D.S Data 1/3 Shield | C1 | Analog Red |
| 12 | T.M.D.S Data 3> | C2 | Analog Green |
| 13 | T.M.D.S Data 3+ | C3 | Analog Blue |
| 14 | SUDC 1.6A | C4 | Analog Horz Sync |
| 15 | GND | C5 | Analog Ground |
NOTICE
The information contained in this document is subject to change without notice. Smart-AM makes no warranty of any kind with regard to this material, including but not limited to, implied warranties of merchantability and fitness for any particular purpose.
Smart-AVI will not be liable for errors contained herein or for incidental or consequential damages in connection with the furnishing performance or use of this material.
No part of this document may be photocopied, reproduced or translated into another language without prior written consent from Smart-AVL.
For more information, visit www.xsmartavi.com.
Smart-AM
SMART AUDIO VIDEO INNOVATION
SmartAVI, Inc. / Twitter: smartavi
11651 Vanowen St. North Hollywood, CA 91605
Tel:(818)503-6200 Fax:(818)503-6208
http://www.SmartAVI.com
Smart-AM
SMART AUDIO VIDEO INNOVATION
User Manual
DVX-2P

natural_image
Front view of a Smart-AM device with ports and connectors (no visible text or symbols on main body)Extend 2 DVI-D, RS232, Stereo Audio and USB1.1

flowchart
graph TD
    A["Computer monitor"] -->|DVI| B["Receiver"]
    B -->|USB / RS232| C["Printer"]
    B -->|USB| D["Audio"]
    B -->|4 STP.CAT6| E["Transmitter"]
    E --> F["Computer tower"]
    style A fill:#f9f,stroke:#333
    style B fill:#ccf,stroke:#333
    style C fill:#cfc,stroke:#333
    style D fill:#fcc,stroke:#333
    style E fill:#cff,stroke:#333
    style F fill:#ffc,stroke:#333
Applications
• Film and Music Industry: Perfect for recording studios and editing stations that need to be isolated.
Medical: In an environment where display monitors and workstations cannot be in close proximity of various pieces of medical equipment.
Data Centers and Server Rooms: Allows for users to access CPUs from a remote work space.
Connecting the DVI
- Turn off computer and monitor.
- Connect DVI male to male cable between the computer and the transmitter.
- Connect monitor or projector to the DVI port on the receiver.
- Connect the transmitter and receiver with 4 CAT6 STP cables.
Connecting the USB In/Out
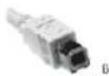
- Connect the transmitter to the host using the A-B USB cable (included with the unit).
- The A side of the connector would go to the computer host and the B side would be connected to the transmitter.
- Connect the receiver to the peripheral.
- Connect the CAT6 STP Cable.
Note: The receiver provides remote power up to 500 mA to the connected peripherals. This power comes from the host computer and is passed by the transmitter to the receiver. In some applications, and external power supply is required. SmartAVI can provide a power supply for such cases with the receiver and transmitter units.

Connecting the Audio and RS232
- Connect an RS232 cable and/or audio cable to the source unit.
- Connect the Audio using 3.5mm cable at the transmitter
- Connect the Speaker/s. at the Receiver.
- Connect the last CAT6 STP Cable.
CAT5/5e/6 CABLE SPECIFICATIONS
| CONNECTOR | PAN | PWS | |
| RJ-45 MALE | RJ-45 FEMALE | 1 | 1 & 2 |
| 2 | 3 & 6 | ||
| 3 | 4 & 5 | ||
| 4 | 7 & 8 | ||
| CAPACITANCE | 14 pF/ft (40.2 pF/m) | ||
| CONDUCTOR GAUGE | 24 AWS | ||
| IMPEDANCE | 100 +/- 15 ohms | ||
Connecting the TX/RX
- Connect DVI, USB (In/Out) and Audio/RS232 as outlined.
- Connect Power Supply (5VDC - 5A).
- Turn on TX and RX.
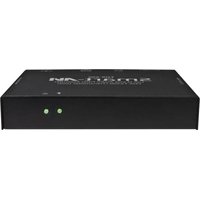
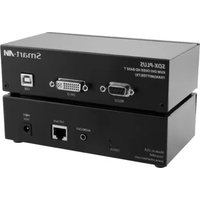
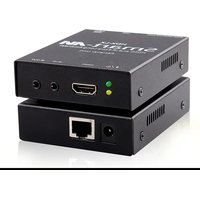
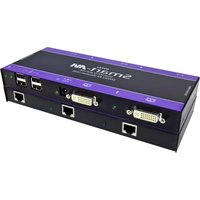
Brand : Smart-AVI
Model : DVX-2PS
Category : AV Extender