
HOH-YD11WH - Frying Pan Heinner - Free user manual and instructions
Find the device manual for free HOH-YD11WH Heinner in PDF.


| Type of Product | Electric Frying Pan |
| Brand | Heinner |
| Model | HOH-YD11WH |
| Dimensions (L x W x H) | 40 x 30 x 15 cm |
| Weight | 2.3 kg |
| Power Supply | 220-240 V ~ 50/60 Hz |
| Power Consumption | 1500 W |
| Cooking Surface | Non-stick coated |
| Temperature Control | Adjustable thermostat with indicator light |
| Main Functions | Frying, grilling, sautéing, warming |
| Safety Features | Automatic shut-off, cool-touch handle, overheat protection |
| Cleaning and Maintenance | Removable pan; hand wash recommended; wipe exterior with damp cloth |
| Spare Parts and Repairability | Only available through authorized service centers |
| General Information | For household use only; not suitable for induction cooktops |
Frequently Asked Questions - HOH-YD11WH Heinner
User questions about HOH-YD11WH Heinner
0 question about this device. Answer the ones you know or ask your own.
Ask a new question about this device
Download the instructions for your Frying Pan in PDF format for free! Find your manual HOH-YD11WH - Heinner and take your electronic device back in hand. On this page are published all the documents necessary for the use of your device. HOH-YD11WH by Heinner.
USER MANUAL HOH-YD11WH Heinner
natural_image
Exterior view of a modern electric solar power heater with cooling wheels and a digital display (no visible text or symbols)natural_image
Three-panel diagram showing a mechanical device with rotating wheels and a separate view of a curved component, labeled 2, 3, and 4 (no text or symbols present)natural_image
Exterior view of a modern electric solar power heater with cooling wheels and a digital display (no visible text or symbols)This product is only suitable for well insulated spaces or occasional use!
- LED Display
- Remote control
- Power: 2500W
1. SAFETY MEASURES
Keep the manual in a safe place for future reference, along with the completed warranty card, purchase receipt and carton. If applicable, pass these instructions on to the next owner of the appliance.
Always follow basic safety precautions and accident prevention measures when using an electrical appliance, including the following:
Electrical safety and cord handling
WARNING: PLEASE READ THIS INSTRUCTION MANUAL CAREFULLY BEFORE USE
When using an electrical appliance, basic safety precautions should always be observed, including the following:
-
This appliance is not intended for use by persons (including children) with reduced physical, sensory or mental capabilities, or lack of experience and knowledge, unless they have been given supervision or instruction concerning use of the appliance by a person responsible for their safety.
-
Children should be supervised to ensure that they do not play with the appliance.
-
Connect the appliance to single phase AC supply of the voltage specified on the rating plate.
-
In order to avoid overheating, do not cover the heater.
-
Never leave the heater unattended while it is in use. Always turn the product to the OFF position and unplug it from the electrical outlet when not in use.
-
Extreme caution is necessary when any heater is used by or near children, reduced physical, sensory or mental capabilities or elderly person and whenever the heater is left operating and unattended.
-
The heater must not be located immediately below an electrical socket-outlet.
-
Do not run cord under carpeting and do not cover cord with throw rugs, runners or the like. Arrange cord away from traffic area and where it will not be tripped over.
-
Do not operate the heater with a damaged cord or plug, or after the heater malfunctions, has been dropped, or damaged in any manner.
-
If the supply cord is damaged, it must be replaced by the manufacturer or its service agent or a similarly qualified person to avoid a hazard.
-
Avoid the use of an extension cord as this may overheat and cause a risk of fire.
-
Use the heater in a well-ventilated area. Do not insert or allow objects to enter any ventilation or exhaust opening. To prevent a possible fire, do not block air intakes or exhaust openings in any manner. Do not use on soft surfaces, like a bed, where openings may become blocked. Use the heater on flat, dry surfaces only.
-
Do not place this heater near flammable materials, surfaces or substances, as there may be a risk of fire. Keep the above flammable materials, surfaces or substances at least 1m from the front of the product and keep them away from the sides and rear.
-
Do not use the heater in any areas where petrol, paint or other flammable liquids are stored e.g. Garages or workshops as a hot, arcing or sparking parts inside the heater.
-
Don't use this heater in the immediate surroundings of a bath, a shower or a swimming pool. Never locate the heater where it may fall into bathtub or other water container.
-
This heater is hot when in use. To avoid burns and personal injury, do not let bare skin touch hot surfaces. If provided, use handles when moving the product.
-
Be sure that no other appliances are in use on the same electrical circuit as your product as an overload can occur.
-
This heater is filled with a precise quantity of special oil.
-
Repair requiring opening of the oil container are only to be made by the manufacturer or its service agent who should be contacted if there is an oil leakage.
-
Regulations concerning the disposal of oil when scrapping the appliance have to be followed.
-
The heater should not be used in a room, of which the floor area is less than 5 M2.
-
The cord shouldn't be placed nearby the hot surface of the appliance.
-
Indoor household use only
-
NOTE: It is normal when the heaters are turned on for the first time or when they are turned on after having not been used for a long period of time the heaters may have noise inside, This will disappear when the heater has been on a short while.
Safety features
- Your heater is equipped with a Tip-Over Safety Switch. When your heater tips over, it will turn off automatically.
- Your heater is equipped with an Overheat Protection System. When the threshold temperature has been reached, your heater will turn off automatically.
- To reset your heater when the overheat Protection System has been activated, perform the following:
- Turn the Power Control Switch to the 'OFF' position and turn the Temperature Control Switch to the lowest setting.
- Disconnect the power cord from the electrical outlet.
- Allow your heater to cool down for approximately ten minutes.
- Connect the power cord to the electrical outlet.
- Turn the Power Control Switch to the 'HIGH' position and turn the Temperature Control Switch to the highest setting.
- If your heater does not operate normally, turn the Power Control Switch to the "OFF" position, disconnect the power cord from the electrical outlet, and consult an authorized repair technician.
2. USING THE PRODUCT

When the device is powered on, the buzzer beeps and the power indicator lights up “💡”, (Standby mode).

Press the button to start the machine and display the ambient temperature. At the same time, the indicator light of the first gear will turn on (one LED light), and press again to shut down.

Every time you press it, the gear shifts from 1st gear, 2nd gear and 3rd gear. After the setting is completed, the corresponding gear indicator light will turn on. The 1st gear indicator lights up (1 LED light), 2nd gear indicator lights up (2 LED lights), 3rd gear indicator lights up (3 LED lights).
Gear 1, one indicator, on the left of display;
Gear 2, two lights, on the right;
Gear 3, three lights, in the middle.
Temperature "+" and "-" button:
Press the "+" "-" key to enter the automatic temperature control mode and set the target temperature, 15-35°C. After the setting is complete, the ambient temperature will be displayed after blinking for 3 seconds (press +- to view the setting temperature, and then press to operate). After entering the temperature control
mode, the temperature control indicator will be on. "
Timer button "

This time is a scheduled shutdown. In the startup state, press "00" for the first time and "01" for the second time, increasing by one hour each time until "00" is displayed again after "24". After the timing operation is complete, the ambient temperature is displayed blinking for 3 seconds (Press the timing button to view the timing time). At this time, the timing screen "h" is on. The timing is up to the shutdown action (when setting the timing, press +- to increase or decrease the timing when the time flashes).
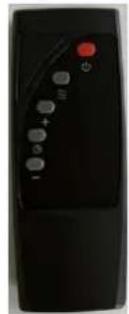
Controls on remote control
POWER: press this button after plug in to power on the
Heater and press the on-off button on the side, and start operation,
or press it repeatedly to stop operation and set the heater into standby mode.
MODE: use this button to set the power level.
TIMER: use this button to set the timer.
[ + ] and [ - ]: use these buttons when setting the
desired temperature, or for setting the timer.
natural_image
Black remote control device with buttons and a red play button (no visible text or symbols)3. PRODUCT DESCRIPTION

| 1. Carry handle |
| 2. Display |
| 3. Control panel |
| 4. Power cord storage |
| 5. Radiant fins |
| 6. Castors |
Assembly instructions
The heater is packaged with the feet unattached. You must attach them before operating the heater.
WARNING: Do not operate without feet attached. Do operate the heater only in upright position (feet on the bottom, controls on the top), any other position could create a hazardous situation

- Place the radiator body upside-down on a scratch-free location, make sure it is stable and will not fall.
- Screw off the wing nuts from the U-shaped bolt provided, attach the U-shaped bolt to the U-facing flange between first and second fins (near the front cover).
- To attach the castor mounting plate to the radiator body, you should insert the threaded ends of the U bolt in the holes on the castor mounting plate.
- Screw the wing nuts back to the U bolt and fasten the wing nut properly.
Note: do not over tighten, which may cause the damage of radiator flange.
-
Screw off spherical nut from the castor, align the shaft to the hole of the castor mounting plate, insert in, and screw on the spherical nut.
-
Repeat 2, 3, 4 and 5 on the rear of radiator for mounting of the rear castors.
Note: the rear castors must be mounted between the end two fins.

4. CLEANING AND MAINTENANCE
- Press Power Button to turn off the heater.
- Disconnect the power cord from the electrical outlet and wait until the unit cool down.
Off-season storage instructions:
- Secure the power cord, and place your heater in its original shipping container, or a similar container.
- Store the container in a cool, dry location.
- Take out the remote batteries (to prevent corrosion) as shown below. Store the remote in a safe place.
Maintenance
- Always remove the plug from the socket-outlet and allow the radiator to cool down before cleaning the heater.
- Wipe the radiator with a soft damp (not wet) cloth.
- To store away the heater, wind the cable round bobbin and store the heater in a clean dry place.
- In case of malfunction or doubt, do not try to repair the radiator yourself, it may result in a fire hazard or electric shock.
WARNING:
Do not immerse the heater in water.
Do not use any cleaning chemicals such as detergents and abrasives.
Do not allow the interior to get wet as this could create a hazard.
CUSTOMER CARE AND SERVICE
Always use original spare parts.
When contacting our Authorised Service Centre, ensure that you have the following data available: Model and Serial Number.
The information can be found on the rating plate. Subject to change without notice.
5. TECHNICAL DATA
11 fins: 1000W/1500W/2500W
Fin size: 120x550mm
Color: white
| Model identifier(s): HOH-YD11WH | |||||
| Item | Symbol | Value | Unit | Item | Unit |
| Heat output | Type of heat input, for electric storage local space heaters only (select one) | ||||
| Nominal heat output | Pnom | 1,0975 | kW | manual heat charge control, with integrated thermostat | NA |
| Minimum heat output (indicative) | Pmin | 0,7654 | kW | manual heat charge control with room and/or outdoor temperature feedback | NA |
| Maximum continuous heat output | Pmax, c | 1,0975 | kW | electronic heat charge control with room and/ or outdoor temperature feedback | NA |
| Auxiliary electricity consumption | fan assisted heat output | NA | |||
| At nominal heat output | elmax | NA | kW | Type of heat output/room temperature control (select one) | |
| At minimum heat output | elmin | NA | kW | single stage heat output and no room temperature control | No |
| In standby mode | eISB | NA | kW | Two or more manual stages, no room temperature control | No |
| with mechanic thermostat room temperature control | Yes | ||||
| with electronic room temperature control | No | ||||
| electronic room temperature control plus day timer | No | ||||
| electronic room temperature control plus week timer | No | ||||
| Other control options (multiple selections possible) | |||||
| room temperature control, with presence detection | No | ||||
| room temperature control, with open window detection | No | ||||
| with distance control option | No | ||||
| with adaptive start control | No | ||||
| with working time limitation | No | ||||
| with black bulb sensor | No | ||||
| Contact details | Importer: Network One Distribution Marcel Iancu Street, 3-5, Bucharest, Romania Tel: +40 21 211 18 56, www.heinner.com, www.nod.ro | ||||
Thank you for purchasing this product. If you need support with your product, visit our website using the links below.
Get User manuals: https://www.heinner.ro
Get Service information: https://www.heinner.ro

Environment friendly disposal
You can help protect the environment!
Please remember to respect the local regulations: hand in the non-working electrical equipment's to an appropriate waste disposal center.

HEINNER is a registered trademark of Network One Distribution SRL. Other brands and product names are trademarks or registered trademarks of their respective holders.
No part of the specifications may be reproduced in any form or by any means or used to make any derivative such as translation, transformation, or adaptation without permission from NETWORK ONE DISTRIBUTION.
Copyright © 2013 Network One Distribution. All rights reserved.
www.heinner.com, http://www.nod.ro

This product is in conformity with norms and standards of European Community.

Importer: Network One Distribution
Marcel Iancu Street, 3-5, Bucharest, Romania
Tel: +40 21 211 18 56, www.heinner.com, www.nod.ro
МАСЛЕН РАДИАТОР
Модел:
HOH-YD11WH

natural_image
Exterior view of a modern electric solar power heater with cooling wheels and a digital display (no visible text or symbols)natural_image
Black remote control device with a red indicator light and control buttons (no visible text or symbols)3. ОПИСАНИЕ НА ПРОДУКТА

natural_image
Exterior view of a modern electric solar power heater with cooling wheels and a digital display (no visible text or symbols)natural_image
Three-panel diagram showing a mechanical device with wheels and a valve, labeled 2, 3, and 4 (no text or symbols present)

- SAFETY MEASURES
- Electrical safety and cord handling
- WARNING: PLEASE READ THIS INSTRUCTION MANUAL CAREFULLY BEFORE USE
- Safety features
- USING THE PRODUCT
- Timer button "
- Controls on remote control
- PRODUCT DESCRIPTION
- Assembly instructions
- CLEANING AND MAINTENANCE
- Off-season storage instructions:
- Maintenance
- WARNING:
- CUSTOMER CARE AND SERVICE
- TECHNICAL DATA
- Environment friendly disposal
- МАСЛЕН РАДИАТОР
- ОПИСАНИЕ НА ПРОДУКТА
Brand : Heinner
Model : HOH-YD11WH
Category : Frying Pan