
10A61-2 - Electronic board Daytronic - Free user manual and instructions
Find the device manual for free 10A61-2 Daytronic in PDF.


| Product Type | Signal Conditioning Module |
| Brand | Daytronic |
| Model | 10A61-2 |
| Dimensions | 8.5 x 2.6 x 12.0 inches (216 x 66 x 305 mm) |
| Weight | 3.5 lbs (1.6 kg) |
| Power Supply | 100-240 VAC, 50/60 Hz, 10 VA |
| Input Voltage Range | ±10 VDC, ±5 VDC, ±1 VDC (selectable) |
| Output Voltage Range | ±10 VDC |
| Number of Channels | 2 |
| Signal Type | DC voltage, current loop (4-20 mA with external resistor) |
| Frequency Response | DC to 10 kHz (-3 dB) |
| Accuracy | ±0.1% of full scale |
| Operating Temperature | 0°C to 50°C (32°F to 122°F) |
| Storage Temperature | -20°C to 70°C (-4°F to 158°F) |
| Connectivity | Screw terminals for input/output, BNC for monitoring |
| Display | None (LED indicators for power and overload) |
| Control | DIP switches for gain, offset, filtering |
| Protection | Overvoltage, reverse polarity, short circuit |
| Maintenance | Periodic calibration recommended; clean with dry cloth |
| Certifications | CE, RoHS |
| Warranty | 1 year limited |
Frequently Asked Questions - 10A61-2 Daytronic
User questions about 10A61-2 Daytronic
0 question about this device. Answer the ones you know or ask your own.
Ask a new question about this device
Download the instructions for your Electronic board in PDF format for free! Find your manual 10A61-2 - Daytronic and take your electronic device back in hand. On this page are published all the documents necessary for the use of your device. 10A61-2 by Daytronic.
USER MANUAL 10A61-2 Daytronic
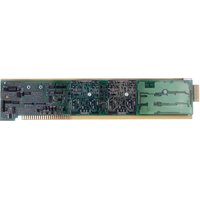
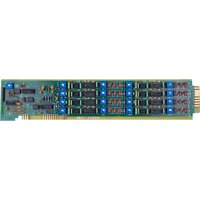
The Model 10A60-4 is a general-purpose conditioner allowing input of up to four external voltage signals. Mixed as desired, these may originate from DC-to-DC LVDT's, potentiometer-type sensors, and other 2-wire analog signal sources that provide their own power supply. Or they may represent the outputs of other instrument systems having various voltage levels and grounding configurations.
Inputs can be either floating (differential) or grounded (single-ended). With differential inputs, generous common-mode range and excellent common-mode rejection eliminate ground-coupling errors and other problems normally associated with off-ground signal sources. Chopper-stabilized DC amplification with active low-pass filtering yields smooth and stable measurement of the true average value of the input variable, even in the face of substantial dynamic content.
ADDITIONAL 10A60-4 SPECIFICATIONS
Transducer Types: 2-wire DC voltage sources, grounded or floating
Input Voltage Ranges: ±0.5, 1.0, 2.0, 5.0, 10, or 20 V-DC; automatically selected—on an individual channel basis—when the channel is configured; for the System 10 channel “type” codes assigned to 10A60-4 data channels, see Table 1, below
Amplifier (per channel):
Normal-Mode Range: ±20 V operating; ±200 V without instrument damage
Common-Mode Range: ±50 V operating; ±300 V without instrument damage
Common-Mode Rejection Ratio: DC: -60 dB; at 60 Hz: -70 dB
Input Impedance: Differential: 2 MΩ; Common-Mode: 0.5 MΩ
Offset: Initial: ±0.5 mV; vs. Temperature: ±0.005 mV/°C; vs. Time: ±0.05 mV/month
Gain Accuracy: ±0.02% of full scale typical, following calibration*
Gain Stability: vs. Temperature: ±50 ppm/°C; vs. Time: ±50 ppm/month
Filter (per channel): 3-pole modified Butterworth; 3 dB down at 10 Hz; 60 dB down at 100 Hz
Step-Response Settling Time (Full-Scale Output):
To 1% of final value: 150 msec
To 0.1% of final value: 200 msec
To 0.02% of final value: 250 msec
Auxiliary Outputs: Filtered outputs available on mainframe wire-wrap pins
Table 1 10A60-4 "Type" Codes
| Full-Scale Channel Range Type Code |
| ±0.5 V-DC 5A |
| ±1.0 V-DC 5B |
| ±2.0 V-DC 5C |
| ±5.0 V-DC 5D |
| ±10.0 V-DC 5E |
| ±20.0 V-DC 5F |
2 TRANSDUCER CONNECTIONS
The Model 10A60-4's I/O CONNECTOR mates with Daytronic CONDITIONER CONNECTOR No. 60322, shown in Fig. 1.5 (in Manual Section 1.E.1). Table 2 gives standard pin assignments for the I/O Connector.
Cabling for floating inputs is given in Fig. 1(a). NOTE: To minimize signal noise, it is recommended that for a floating (ungrounded) input with high common-mode impedance, the COMMON pin be tied to the -SIGNAL line at the connector. Cabling for grounded inputs is shown in Fig. 1(b).
Table 2 Model 10A60-4 Pin Assignments
| I/O Connector Conditioner Conditioner Pin Channel Line Number Number Function | ||
| 1 | 1 | +SIGNAL |
| A | 1 | -SIGNAL |
| 2 | 1 | COMMON |
| B | Not Committed | |
| 3 | 2 | +SIGNAL |
| C | 2 | -SIGNAL |
| 4 | 2 | COMMON |
| D | Not Committed | |
| 5 | 3 | +SIGNAL |
| E | 3 | -SIGNAL |
| 6 | 3 | COMMON |
| F | Not Committed | |
| 7 | 4 | +SIGNAL |
| H | 4 | -SIGNAL |
| 8 | 4 | COMMON |
| J | Not Committed | |
| 9,K,10,L | Not Committed | |
Fig. 1 Model 10A60-4 Transducer Cabling

flowchart
graph TD
    A["Reg. Power Supply (if required)"] --> B["Analog Signal Source"]
    B --> C["+ SIGNAL"]
    B --> D["- SIGNAL"]
    C --> E["CONDITIONER CONNECTOR (No. 60322)"]
    D --> E
    E --> F["SHIELD"]
    F --> G["Ground Lug"]
    style A fill:#f9f,stroke:#333
    style B fill:#ccf,stroke:#333
    style E fill:#cfc,stroke:#333
    style F fill:#fcc,stroke:#333
    style G fill:#ffc,stroke:#333

3 SETUP AND/OR OPERATING CONSIDERATIONS
3.a CONFIGURATION AND CALIBRATION
For initial configuration of ANALOG INPUT CHANNELS dedicated to a specific Model 10A60-4 card when used in System 10, see the general remarks on System 10 "real-channel" configuration in Manual Section 1.G.1 and elsewhere in the System 10 Guidebook. For 10A60-4 channel "type" codes, see Table 1, above.
In System 10, you can use two calibration methods with the Model 10A60-4:
ABSOLUTE CALIBRATION
Described in Manual Section 1.G.3.b, this method is applicable only when the 10A60-4 is being used to measure voltage itself. In this case, the user need only specify an appropriate SCALING FACTOR ("m" coefficient), once the 10A60-4-based input channel has been properly configured.
Thus, to calibrate a 10A60-4-based Channel No. "x," you need only turn ON the system EEPROM SWITCH and then apply the following SCALING FACTOR (EMM) command:
$$ E M M x = (1. 2 5) m [ C R ] $$
where "m" equals the full-scale range corresponding to the channel's present TYPE designation, expressed to the precision desired for the channel's data readings. Channel "type" codes and associated full-scale ranges are given in Table 1, above.
Note that for the Model 10A60-4 (ONLY), the entered "m" value must be 1.25 times the stated full-scale range for the respective channel "type."
If, for example, a voltage-measuring 10A60-4 channel is "typed" as "5D" (corresponding to a full scale of ±5 V-DC) and you want the channel to read hundredths of a volt, you would enter an "m" value of "6.25" (= 1.25 x 5.00).
NOTE: The accuracy of "absolute" calibration of a 10A60-4-based channel is limited to ± 1.5% of full scale.
TWO-POINT (DEADWEIGHT) CALIBRATION
Using the standard ZERO (ZRO) and FORCE (FRC) commands, this conventional "zero and span" method can be applied to a 10A60-4 channel if the received voltage input is an analog of another parameter which has one or more independently and accurately known calibration values. It can also be used to improve the ABSOLUTE calibration of an input that measures voltage itself (beyond the 10A60-4 card's inherent limit of ± 1.5% of full scale). The mainframe's EEPROM Write Protect Switch must be ON for the ZRO and FRC commands to be effective. See Manual Section 1.G.5 for a general discussion of this calibration technique.


- ADDITIONAL 10A60-4 SPECIFICATIONS
- TRANSDUCER CONNECTIONS
- SETUP AND/OR OPERATING CONSIDERATIONS
- 3.a CONFIGURATION AND CALIBRATION
- ABSOLUTE CALIBRATION
- Note that for the Model 10A60-4 (ONLY), the entered "m" value must be 1.25 times the stated full-scale range for the respective channel "type."
- TWO-POINT (DEADWEIGHT) CALIBRATION
Brand : Daytronic
Model : 10A61-2
Category : Electronic board