USER MANUAL BX 112C BEKO
Please read this user manual first!
Dear Customer,
Thank you for preferring a Beko product. We hope that you get the best results from your product which has been manufactured with high quality and state-of-the-art technology. Therefore, please read this entire user manual and all other accompanying documents carefully before using the product and keep it as a reference for future use. If you handover the product to someone else, give the user manual as well. Follow all warnings and information in the user manual.
Meanings of the symbols
Following symbols are used in the various section of this manual:

Important information or useful hints about usage.

Warning for hazardous situations with regard to life and property.

Warning to actions that must never perform.

Warning for electric shock.
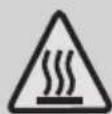
Warning for hot surfaces.
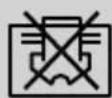
Do not cover it.

This symbol shows that the operation manual should be read carefully.

This symbol shows that a service personnel should be handling this equipment with reference to the installation manual.

This symbol shows that this appliance uses a flammable refrigerant. If the refrigerant is leaked and exposed to an external ignition source, there is a risk of fire.

This product has been produced in environmentally friendly, modern facilities
Contents
1 Precautions 4
3 Usage 9
3.1 Fix batteries 9
3.2 Auto operation mode 9
3.3 Cooling/Heating operation mode 9
3.4 Fan operation mode....10
3.5 Drying operation mode 10
1 Precautions
Before first time use of the remote controller, install the batteries and ensure the "+" and "-" poles are correctly positioned.
- Ensure the remote controller is pointed to the signal receiving window, and that there is no obstruction in between and the distance is 8m at the maximum.
Do not let the remote controller drop or fling it at will.
Do not let any liquid in the remote controller.
Do not expose the remote controller directly to the sunlight or excessive heat.
If the remote controller does not function normally, remove the batteries for 30 second before reinstall them. If that doesn't work, replace the batteries.
When replacing the batteries, do not mix the new batteries with old ones or mix batteries of different types, which could cause failure of the remote controller.
If the remote controller is not to be used for a long period of time, remove the batteries first, lest the leakage from them may damage the remote controller.
•Properly dispose the discarded batteries.
1 Precautions

Note:
- This is a universal remote controller which provide all the function buttons. Please understand that some of the buttons may not function, depending on the specific air conditioner you have purchased. (If a specific function is not available on the air conditioner, pressing the corresponding button will simply have no respond.)
- Heat and ELE.H functions are not available for cool only models, thus these two buttons do not work correspondingly.


Note: The remote controller display all symbols during power-on and only those corresponding to current operation the rest of the time.
-
ON/OFF button
-
Press this button to turn on/off the unit.
• This will clear the existing timer and SLEEP settings.
-
MODE button
- Press this button, you can select the running mode as follows:

flowchart
graph LR
    A["AUTO COOL DRY HEAT FAN"] --> B["→"]
    B --> C["→"]

Note: HEAT mode is not available for cool only units.
-
TIMER button
-
With the unit ON, press this button to set OFF timer or with it OFF to set ON timer.
- Press this button once, a "ON (OFF)" will flash. Press "+" or "-" to set the number of hours in which the unit will be turned ON/OFF, with an interval of 0.5 hour, and a range of 0.5-24 hours.
- Press it again to confirm the setting, the "ON(OFF)" will stop flashing.
- If the timer button is not pressed longer than 10 seconds after the "ON (OFF)" start flashing, the timer setting will be exited.
- If a timer setting is confirmed, pressing this button again will cancel it.
- Press this button to enter HEAT mode.
- Press this button to enter COOL mode.
- Press this button, you can select the fan speed as follows:

flowchart
graph LR
    A["Low (•)"] --> B["Mid (■■)"]
    B --> C["High (■■■)"]
    C --> D["Auto (Auto)"]

Note: Auto air speed is not available in Fan mode.
- Each time the “+” is pressed, the temperature setting will increase by 1°C and each time the “-” is pressed, it will decrease by 1°C.
- The temperature setting ranges from 16^ (60°F) - 32°C (90°F).

Note: The temperature cannot be set in Auto or Fan mode.
- Press °C & °F Button to switch the display of degrees Celsius and degrees Fahrenheit on the screen.
- Press this button to activate up/down swing and press it again to fix the swing position.
- When the unit is on, press sleep mode button, which will activate (deactivate) the function of sleep mode.
- The unit will exit SLEEP mode after 10 hours of continuous operation and restore to the previous status.

Note: The SLEEP function cannot be activated in FAN and AUTO mode. In the sleep mode, the screen of the air-conditioner is off.
11. Child-lock
- Press the "HEAT" and "MODE" buttons at the same time and hold for at least 3 seconds to activate or deactivate the child-lock function.
- When the child-lock function is activated, the remote control will indicate "☐".
3 Usage
3.1 Fix batteries
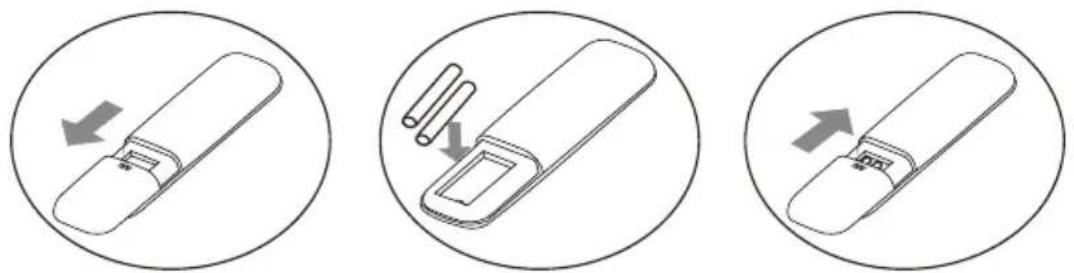
- Slide to open the cover according to the direction indicated by the arrowhead.
- Insert two brand new batteries (7#), and position the batteries to the right electric poles (+&-).
- Put back the cover.
3.2 Auto operation mode
- Press the "MODE" button, select the auto operation mode.
- By pressing the "SPEED" button, you can select the fan speed from Low, Mid, High, Auto.
- Press the "ON/OFF" button, the air-conditioner starts to operate.
- Press the "ON/OFF" button again, the air-conditioner stops.

Note: In the Auto mode, the temperature settings is non-effective.
3.3 Cooling/Heating operation mode
- Press the "MODE" button, select the Cooling or Heating operation mode.
- By pressing the "+" or "-" button, you can set the temperature range from 16°C (60°F) - 32°C (90°F), the display changes as you touch the button.
- By pressing the "SPEED" button, you can select the fan speed from Low, Mid, High, Auto.
- Press the "ON/OFF" button, the air-conditioner starts to operate.
- Press the "ON/OFF" button again, the air-conditioner stops.

Note: The cold wind type has no heating function.
3 Usage
3.4 Fan operation mode
- Press the "MODE" button, select the fan operation mode.
- By pressing the "SPEED" button, you can select the fan speed from Low, Mid, High.
- Press the "ON/OFF" button, the air-conditioner starts to operate.
- Press the "ON/OFF" button again, the air-conditioner stops.

Note: In the fan mode, the temperature settings is non-effective.
3.5 Drying operation mode
- Press the "MODE" button, select the drying operation mode.
- By pressing the "+" or "-" button, you can set the temperature range from 16°C (60°F)-32°C (90°F), the display changes as you touch the button.
- Press the "ON/OFF" button, the air-conditioner starts to operate.
- Press the "ON/OFF" button again, the air-conditioner stops.

Note: In the dry mode, the speed settings is non-effective.
Attention! Surfaces chaudes!
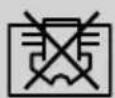
Ne pas couvrir.

4. Touche HEAT (Chauffage)
9. Touche SWING (Oscillation)
10. Knop "SLEEP" (Slaap)
natural_image
Abstract geometric design with blue triangular shapes on white background (no text or symbols)


