Skypad SP725 - Tablet Skytex - Free user manual and instructions
Find the device manual for free Skypad SP725 Skytex in PDF.


| Product Type | Tablet |
| Brand | Skytex |
| Model | Skypad SP725 |
| Display Size | 7 inches |
| Dimensions (W x H x D) | 191 x 112 x 10 mm |
| Weight | 310 g |
| Battery Capacity | 3000 mAh |
| Charging Method | Micro USB cable and power adapter (5V/1A) |
| Operating System | Android 4.2 Jelly Bean |
| Processor | 1.2 GHz dual-core |
| RAM | 512 MB |
| Internal Storage | 4 GB (expandable via microSD card up to 32 GB) |
| Wi-Fi | 802.11 b/g/n |
| Bluetooth | Bluetooth 4.0 |
| Camera (Rear) | 2 MP |
| Camera (Front) | 0.3 MP |
| Audio | Built-in speaker and 3.5 mm headphone jack |
| Connectivity Ports | Micro USB 2.0, microSD card slot |
| Power Adapter Input | 100-240V AC, 50/60 Hz |
| Maintenance & Cleaning | Wipe with a soft, dry cloth. Do not use abrasive cleaners or liquids. |
| Safety | Keep away from water and extreme temperatures. Do not disassemble. Use only approved chargers. |
| Spare Parts & Repairability | Contact Skytex support for replacement parts. Repairs should be done by qualified service centers. |
| General Information | User manual available in PDF format. For free download, visit notice-facile.com. |
Frequently Asked Questions - Skypad SP725 Skytex
User questions about Skypad SP725 Skytex
0 question about this device. Answer the ones you know or ask your own.
Ask a new question about this device
Download the instructions for your Tablet in PDF format for free! Find your manual Skypad SP725 - Skytex and take your electronic device back in hand. On this page are published all the documents necessary for the use of your device. Skypad SP725 by Skytex.
USER MANUAL Skypad SP725 Skytex
SP725
Quick Start Guide
IMPORTANT NOTICES
This package may contain plastic bags or other materials that pose a hazard to children. Be sure to dispose of all packing materials after opening.
To avoid damaging the screen, do not touch it with excessive force or with any object other than your finger. For best response, make sure your hands are clean before using the touch Screen controls.
The battery used in this tablet may present a fire or chemical burn if misused. Don't heat or incinerate the tablet. Don't leave it in a place subject to direct sunlight, or in a car with windows closed. Don't connect to a power source from another manufacturer. This may result in the risk of fire or electric shock.
SKYTEX is not responsible for any loss or damages incurred from your access to third party content, Apps, or services and expressly disclaims all warranties of any kind.
To avoid damage and data corruption, do not remove a memory card while data is being written to or read from the card. As an example, do not remove a card while playing a video or music file stored on the card. The available menu items are dependent on the unit. All illustrations are for reference only.
Customer Use Only:
Enter the model number of your tablet and save for future reference.
Model #: ____
Serial #: ____
Be especially cautious with applications that request access to many functions or to a significant amount of your data. You are responsible for the results of applications installed on your tablet.
The Tablet's "mass storage mode" is compatible with many operating systems including: Windows® 8, XP, Vista, 7 or higher and Mac OS or Linux.
For recycling or disposal information about this product, please contact your local authorities or the Electronics Industries Alliance: www.eiae.org.
Company Trademarks
SKYTEX logo is trademarks of SKYTEX TECHNOLOGY INC.
Android is a trademark of Google Inc. Use of this trademark is subject to Google Permissions.
HDMI, the HDMI logo are trademarks or registered trademarks of HDMI Licensing, LLC.
All other trademarks and logos are property of their respective owners unless indicated otherwise.
FCC Compliance
This tablet complies with Part 15 of the FCC Rules. Operation is subject to the following two conditions:
(1) This tablet may not cause harmful interference, and
(2) This tablet must accept any interference received, including interference that may cause undesired operation.
Note: This tablet has been tested and found to comply with the limits for Class B digital devices, pursuant to Part 15 of the FCC rules.
These limits are designed to provide reasonable protection against harmful interference in a residential installation. This tablet generates, uses and can radiate radio frequency energy and, if not installed and used in accordance with the instructions, may cause harmful interference to radio communications. However, there is no guarantee that interference will not occur in a particular installation. If this tablet does cause harmful interference to radio or television reception, which can be determined by turning the tablet off and on, the user is encouraged to attempt to correct the interference by one of the following measures:
- Reorient or relocate the receiving antenna.
- Increase the separation between the tablet and receiver.
- Connect the equipment into an outlet on a circuit different from that to which the receiver is connected.
- Consult the dealer or an experienced radio / TV technician for help
Use of shielded cable is required to comply with Class B limits in Subpart B of Part 15 of the FCC rules.
Do not make any changes or modifications to the tablet unless otherwise specified in the manual. If such changes or modifications should be made, you could be required to stop using the tablet.
SAFETY NOTICES
- Read: and retain these instructions for future reference.
- Warnings: on the product and User Guide instructions should always be adhered to.
- Cleaning: Do not use liquid cleaners or aerosol cleaners. Use a damp soft cloth for cleaning.
- Adapters: Use UL certified adapters recommended by SKYTEX. Other adapters may be hazardous or void your warranty.
- Moisture & Water: Do not use near water such as near bath tub, kitchen sink, laundry tub, or swimming pool.
- Ventilation: Should there be slots and openings in the tablet, they are provided for ventilation to ensure reliable operation of and protection from overheating. These openings should never be blocked by placing the product on a bed, sofa, rug, or other similar surface.
- Power Sources: This tablet should be operated from the type of power source indicated on the rating label. Consult your product dealer or our website for more information. For products intended to operate from battery power or other sources, refer to the operating instructions.
-
Overloading: Do not overload wall outlets, extension cords, or integral convenience receptacles as this can result in a risk of fire or electric shock.
-
Object and Liquid Entry: Never put objects of any kind on to or into this product through openings as they may touch dangerous voltage points or short out parts that could result in a fire or electric shock. Never spill liquid of any kind on the product.
- Servicing: Do not attempt to service this product yourself as opening or removing covers may expose you to dangerous voltage or other hazards and will void your warranty. Refer all servicing to qualified service personnel.
- Damage Requiring Service: Unplug this product from the wall outlet and refer servicing to qualified service personnel: a) when the power-supply is damaged; b) if liquid has been spilled; c) if the product has been exposed to rain or water; d) if the product does not operate normally; e) if the product has been dropped or damaged in any way (voids warranty); f) when the product exhibits a distinct change in performance.
- Heat: The product should be kept away from heat sources such as a radiator, heat register, stove, or other products that generate heat.
- Replacement Parts: Unauthorized substitutions when service this product may result in fire, electric shock, or other hazards. Make sure your service technician has used parts specified by the manufacturer.
TABLE OF CONTENTS
Important Notices....1
Safety Notices....2
FCC Compliance....3
Table of Contents....4
Introduction....5
Tablet Controls & Descriptions....6-7
Charging Your Tablet....8
Power ON/OFF/STANDBY....9
Connecting To a Wireless Network....10
Install Apps ....11
Browse the Web....12
Settings: Date, Time, Screen Time Out....13
Home Screen Applications....14
Discover Application Shortcuts....15
Notifications Bar / Connecting HDMI to HDTV / Using Micro-USB....16
Transfer Music/Video/Photos....17
Playing Music/Video....18
Video Streaming/ Insert Memory Card....19
Camera & Video Chat....20
Setting Up Your Email....21
Troubleshooting....22
Specifications....23
Warranty & Support....24
INTRODUCTION
Thank you for purchasing your new Skytex 7" tablet with a high resolution 1024x600 multi-touch display. It is designed to keep you entertained and engaged for hours at a time. With its 8GB of internal storage and Micro-SD card slot (for up to an additional 32GB), you can house a large library of games, movies, music, eBooks, photos and document files. View in high definition 1080p through your HDTV when connected to HDMI®. The tablet also features a web cam and 2MP rear camera for life's special moments.
Discover and download many of your favorite Android Apps from the Skytex App Store*. The Apps are optimized specifically for your screen size bringing you the best experience possible in which to view them. The 1Mobile Market offers more than 300,000 Android Apps including gaming, productivity for business, children's education, and more. In addition, 5GB of free cloud storage is provided through the CloudLink®Toolbox which includes many popular business-friendly Apps.
It is recommended that you read this user guide completely before first use. Visit our website at www.skytex.com to register your tablet and review additional information and updated FAQ's.
PACKAGE CONTENTS: SKYPAD™ Tablet, USB Cable, AC Adapter.
* Approximately 1.5GB of internal storage is used for the OS, system files and pre-installed Apps. ** Powered by Good e-Reader.
TABLET CONTROLS & DESCRIPTIONS

- Power On/Off Press and hold momentarily to turn on; when powering off you will be asked to confirm.
- Volume + Press and hold to increase volume.
- Volume - Press and hold to decrease volume.
- Mini-HDMI Connect to an HDTV or HD projector to view images in high definition resolution.
- Micro-USB OTG Connect to a computer to transfer files or for use with a keyboard / mouse.
- Built-in Mic Records audio including your voice while video chatting, etc.
- 3.5mm Jack Audio connection to listen to stereo earphones or powered speakers.
- DC IN Connect the AC power adapter to charge the battery (No more than 3 hours)
TABLET CONTROLS & DESCRIPTIONS

- Reset
- MicroSD Card Slot
- Speaker
- Webcam
- App Tray
- Back Key
- Home Key
- Open Apps Key
Reset the default factory setting
Load external storage memory card (up to an additional 32GB).
Listen through speaker unless earphone jack is connected. Sound will mute.
Front facing camera for video chat.
Tap to access all applications installed on to the tablet.
Tap to go back to the previous page.
Tap to go to the Home Launcher Screen.
Tap to view open applications. Swipe to the left to close and save battery life.
CHARGING YOUR TABLET
The tablet comes with a built-in rechargeable battery that should be charged fully prior to first use. Connect the AC adapter to your Tablet via the DC input on the bottom of the Tablet (illustrated below). Disconnect the Tablet when its fully charged.
A full charge and discharge (15% or below) cycle is recommended to maximize the battery's life and performance.
If the battery is completely drained please allow the Tablet at least 10-15 minutes to recharge prior to turning it on.

Note: When charging the Tablet while powered OFF, the battery indicator appears momentarily. Although the battery indicator disappears, the Tablet will continue to charge.
POWER ON/OFF/STANDBY MODE
ON: Press and hold the Power button until the Tablet's loading screen appears. Once the lock screen appears, unlock the Tablet by swiping your finger from the left 'Unlock' icon to the right 'Unlock' icon (illustrated below). Should the display 'Timeout' (or go black) before you are able to unlock the Tablet, press the Power button for one second to turn the display back on.

NOTE: Leaving the Tablet in Standby Mode when not in use will result in battery drain. Switch the Tablet off completely to conserve power between charges.

SKYTEX
OFF: Press and hold the Power button until the Tablet options appear. The options will prompt you to tap 'OK' to power the Tablet off or 'Cancel' to return back to the Home screen.
STANDBY: To enter Standby Mode, simply tap and release the Power button. To wake from Standby, tap and release the Power button.
CONNECTING TO A WIRELESS NETWORK
NOTE: To connect your Tablet to the Internet you must have an Internet connection and a wireless network.
A.Open the App Tray □□□ > Select 'Settings' > Switch the 'Wi-Fi' option from 'OFF' to 'ON' by tapping the 'OFF' icon.
B.A list of networks will appear to the right of the screen > Select your network and enter the password/network key.
C.Tap 'Connect' to complete the connection

Tip: Check the "Show Password" box to verify password was entered correctly.

REQUIREMENT: To connect you will require a wireless router or an access point through a broadband internet connection. You must know the name of your network password and if your network is secured. Settings of this nature may be found on your wireless router and/or its user guide.
NOTE: If you are connected to network previously used with this tablet, it will automatically connect.
If you don't see your network in the list, tap the SCAN icon located on the top right corner of the screen.
INSTALLING APPS
A. Tap the

or App and browse by Categorypopular apps to download on to yourthe desired App and download it.connected to a wireless network.)
B. NOTE : When your download has completed you, will be prompted to install the App. Tap 'Install' and when completed the App will appear in your App Tray.


Discover and manage pre-populated productivity apps within CloudLink's Toolbox that includes 5GB of free cloud storage; Catch Notes; Office Suite to view docs spreadsheets, PowerPoint; premium Apps available also.

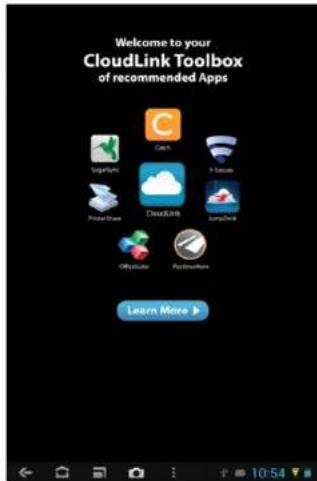

The Skytex App Store is stocked with the most ar free Apps that have been "optimized" ically for the screen size on your Tablet.
Hundreds more are optimized for release weekly.

Find over 300,000 apps at 1Mobile including the shopping apps, streaming video apps, games, media, radio, news, recipes, and more.

Purchase Apps from the Amazon App Store their Free App of the Day Promotion featured
BROWSE THE WEB

Your Tablet is equipped with a full HTML Web Browser that enables you to view web pages.
A. To access the Web Browser select the icon from the App Tray.
B. To enter a URL, tap the URL field at the top of the browser and enter the desired link using the QWERTY keyboard.
C.Tap 'Go' to load the page.
Bookmark a Favorite Page
A. Scroll to the top of the desired web page.
B. Tap the star on the URL field ☆ > Tap 'OK.'

SETTINGS: Date, Time, & Screen Timeout
Manual Time Setting
A.Open the App Tray > Select 'Settings' > Scroll down to and tap 'Date & Time' > Select 'Set Time' > Set the hour and minute by tapping the arrow keys; then tap 'Set.'
Manual Date Setting
A.Open the App Tray > Select 'Settings' > Scroll down to and tap 'Date & Time' > Select 'Set Date' > Set the month, date, and year by tapping the arrow keys; then select 'Set.'

Screen Timeout
A. Open the App Tray □□□> Select 'Settings' > 'Display' > 'Sleep.'
B. A dialogue box will appear with several options to choose from. Tap the length of time (in seconds or minutes) before the Tablet goes black (to conserve battery life).

Auto Date & Time
A. Open the App Tray □□□ > Select 'Settings' > Scroll down to and tap 'Date & Time' > Select 'Automatic Date & Time' to check the box.
Note: The 'Automatic Date & Time' option sets the date and time using the network provided. Should an incorrect time zone appear, tap 'Select Time Zone' and find the appropriate time zone.
HOME LAUNCHER SCREEN APPLICATIONS
Home Launcher Screen
This is your starting point. The Home Launcher screen consists of 5 screens (slide finger left or right across the screen to view). You'll find many features including pre-installed AppLink shortcuts of the most popular Apps used today, that are ready for download once you connect to the internet.

NOTE: Apps that are running in the background will take up valuable memory and drain battery resources. Tap the 📄 icon to view any open Apps, then swipe towards the left to close them.

Add or Remove Favorite Apps from App Tray
A. To open the App Tray tap the 🎯icon located at the upper right hand corner of the Tablet to display all of the applications that have been pre-installed or downloaded to your Tablet.
B. To add to the Home Launcher screen, tap and hold the desired app. Release the icon onto the Home screen.
C. To remove an App from the Home Launcher screen, tap and hold the icon until it enlarges, then slide to remove to Trash.
DISCOVER APP SHORTCUTS
Your Home launcher screens feature pre-installed Apps shortcuts and up to 12 Applinks for your convenience. They are ready for download once you connect to the internet. Several examples are described below.

Music – Access music files installed on your Tablet.

App Tray – Access all Apps that are installed on to your Tablet.

Settings – View and modify settings for Wireless network, display, battery, menu language, etc.

Internet Browser – Access the world wide web when connected to a wireless network.

File Manager – View all your files installed on your Tablet.

Gallery – Access photos and videos you have installed on your Tablet.

Skytex App Store – Thousands of the most popular Android Apps specifically optimized for your tablet!

1Mobile Market – Discover 300,000+ free Android Apps: games, social media, music, education, books, etc.

Get Amazon – One of (up to 12) pre-installed Applinks direct you to download the actual App once connected to a wireless network. When installed the App will be located in your App Tray. It is recommended to delete the "Get" Applink once the actual App is downloaded and installed, to reserve space on your Home screen.

Get Kindle –Download and again access to millions of eBooks, magazines, newspapers, audio books, games, blogs, and more.

Cloudlink – Discover and manage pre-populated productivity suite content from CloudLink's Toolbox including 5GB of free cloud storage.
NOTIFICATIONS BAR / CONNECT HDMI TO TV / USING MICRO-USB
NOTIFICATIONS BAR
The Notifications Bar, located at the bottom of the Home Launcher screen displays new messages, alerts and icons that show you the time, wireless network status, battery charge, progress of downloads, connectivity of micro-USB, alarm setup, and more.

Back

Home

Open Apps

App Tray
Back – Tap to go back to the previous page.
Home – Tap to go to the Home Launcher Screen
Open Apps – Tap to view open applications. Swipe to the left to close and save battery life.
App Tray – Access all applications installed on to the tablet.
HDMI

Your Tablet features an HDMI output to display its content digitally to your HDTV. Enjoy the benefits of high definition video by connecting an optional mini HDMI HD cable (available at the SKYTEX store).
Micro-USB
Your tablet offers true versatility when using the micro-USB port. Select cables are available at the SKYTEX online store.
Keyboard/Mouse – connect an optional keyboard or mouse using an optional micro-USB OTG cable.
Ethernet Adapter – connect your tablet to a wired internet network using an optional Ethernet to USB dongle.
3G Wireless – connect an optional 3G wireless modem dongle. Insert your SIM card into it and use your tablet when Wi-Fi isn't available.
Transfer Files & Additional Storage—connect a flash drive using the cable provided with your tablet.
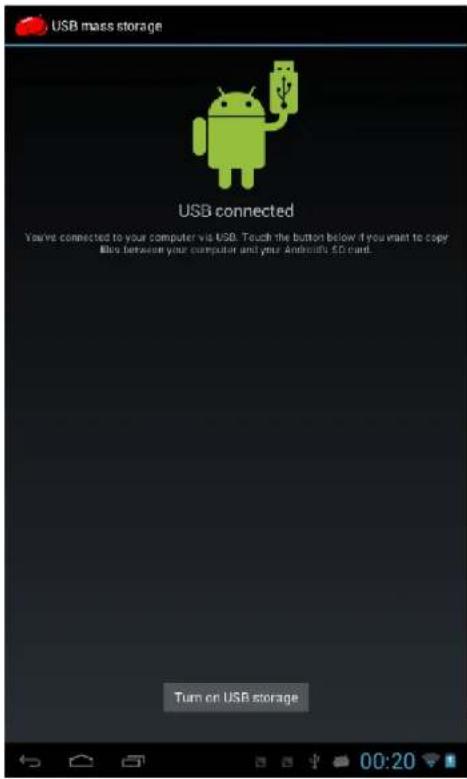
A. Connect your Tablet to your PC via the USB cable.
B. A USB symbol will appear in the Notifications Bar/Bottom Bar
C. Select the symbol that appears > Tap USB Connected > Turn on USB Storage.
D. You are now able to drag-and-drop your music, video, and photo files between your Tablet and PC.
NOTE: Your Tablet will be recognized as an external drive. Once completed, tap 'Turn off USB Storage' and remove Tablet from your PC.
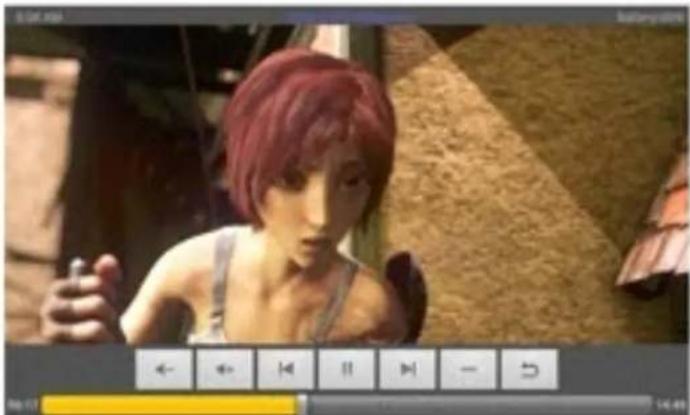
A. Go to the App Tray and select 'Gallery'

B. Select the movie file to view.
C.Once the video begins, you may select playback controls that appear on the display.
View Photos
A. Go to App Tray and select 'Gallery'

B. Tap on photo files you would like to view.
Play Music
A. Go to App Tray then tap the 'Music'

App.
B. Select the desired song and adjust volume settings to your liking.
C. To exit out of the App, tap 'Home or 'Back.'
D. To stop music playback, go back to the Music App and tap 'Pause.'
NOTE: Hearing experts advise against the constant use of headphones played at high volume. Constant exposure to higher volumes may lead to hearing loss. Should you experience ringing in the ears or hearing loss, discontinue use.
Your Tablet is capable of streaming videos directly from the Internet or via 3 ^rd party streaming applications. Popular streaming video applications are available through the Skytex App Store for download on to the Tablet. Prior to streaming movie files, download the application of your choice.
INSERTING A MICRO-SD CARD
Your Tablet will accept a micro-SD memory card to add up to an additional 32GB of storage for videos, music, photos, documents, and more.
Align an optional memory card with the card slot. Make certain the metal contacts are facing downward. Slide the card carefully into the spring-loaded slot until it clicks securely.
To remove safely, enter SETTINGS and STORAGE to view options. Tap UNMOUNT SD card, then push the memory card with your thumbnail further into the slot until it springs outward of the slot. Do not remove card while any app is in use.


NOTE:
Do not attempt to insert objects other than a micro-SD memory card into the card slot. A compatible memory card should fit easily into the card slot; If you encounter resistance, check the alignment of the card. Do not attempt to force the card in. Avoid touching the gold contacts of the memory card.
CAMERA & VIDEO CHAT
natural_image
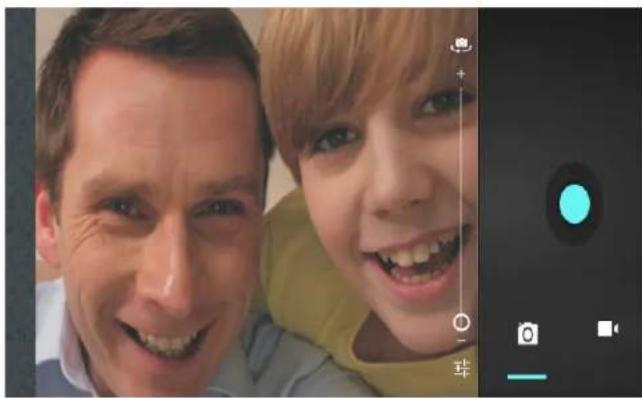
Close-up selfie of a smiling adult and child with camera control panel visible (no text or symbols on main subjects)Web Camera Functions
A. Tap the Trash Can icon to delete.
B. Tap Menu > 'Set Picture As' to set the photo as the Table's background.
Video Chat
A. Download and install your favorite video chat app from the Skytex App Store or 1 Mobile Market.
B. The Webcam is set as the default camera for video chat.
Rear Camera Functions
A.Open the 'Camera' application by tapping the Camera icon

B.Switch between front and rear camera by tapping the icon.
C. Capture images shown on the display by tapping.
D. Tap the thumbnail of an image that appears to view or edit the photo.
E. You may also view your photos with the 'Gallery' app


natural_image
Portrait of a woman wearing a headset, with an inset photo of a person in a red turtleneck (no visible text or symbols)SETTING UP YOUR EMAIL
A. From your App Tray, tap the 'Email' icon to enter the Email client.
B. Enter an Email address and a password.
C. After you have entered your information, press 'Next' to move to the next step.
D. The Email app will test the incoming and outgoing mail servers. Once completed, you will be prompted to enter an account name and your name.
E. The account name is used to identify the name of the account on the Tablet.
F. Your name will be displayed on all outgoing messages sent from the Email app on your Tablet.
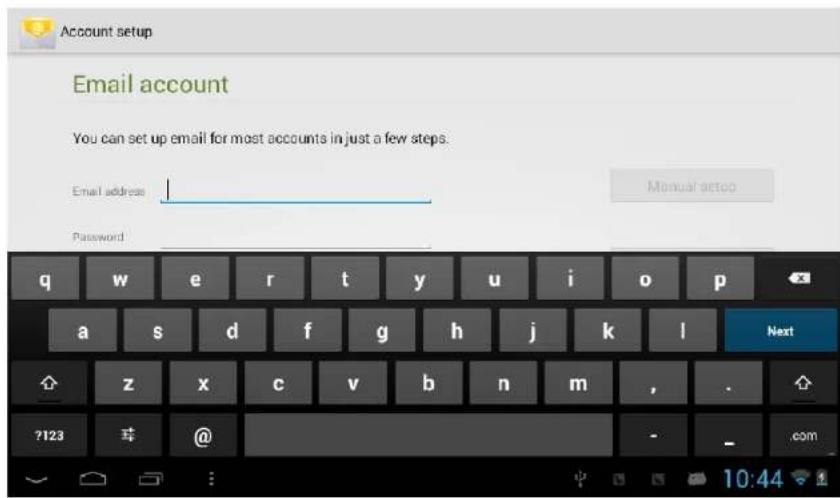
NOTE: Certain Email providers will require you to enter more details about the type of account you are using. You will have three choices: POP3, IMAP, and Exchange. If unsure of your account type, please contact your Email provider for more information.
TROUBLESHOOTING
For more updated FAQs and troubleshooting tips, visit us at www.skytex.com/support
| Symptom | Solution |
| My touchscreen is not responding. How do I reset the tablet?The battery drained completely and now it won’t turn on... | To reset, first make sure the power source is unplugged. Press and hold the Power button for 10 seconds and then plug the power source back in. Press the Power button for another 2-3 seconds.To erase all data on the Tablet go to Settings > Backup & reset > Factory Data Reset. ALL DATA WILL BE LOST. |
| I inserted a MicroSD card. Where are my files located? | After inserting the card, find your files in the “File Manager” application.Go to the App tray; open ‘File Manager’. Select the SD card icon to access files. |
| 1Mobile Market states a ‘Network Error’ message when I attempt a download. | The App requires an update to the most recent version. Visit http://www.1mobile.com on your tablet’s browser and download the updated version. |
| My Wi-Fi says it’s ‘Disconnected’ after I attempt to connect? | The 'Disconnected' status means that the tablet is not connected to any network. Make sure the correct password is entered when connecting to your wireless network. This password could be on the bottom of the router or a password that was created by someone when the Wi-Fi device was originally set up. |
SPECIFICATIONS
HD Display Type:
Processor Type:
Operating System:
Storage Capacity:
Internal Memory:
Memory Card Supported:
Wireless LAN:
HDMI:
Cameras:
Micro USB:
Stereo Headphone Output:
Tablet Dimensions:
Tablet Weight:
Battery Capacity:
Input Voltage, Power Adapter
Limited Warranty:
7" 1024 x 600 Capacitive Touchscreen Display
1.2GHz Processor + Mali 400 GPU
Android 4.1 Jelly Bean
8GB* Internal Storage
1GB RAM
Micro-SD Expansion to 32GB
802.11b/g/n
Yes
VGA Front, 2MP Rear
Yes
3.5mm
7.1"(L) × 5.1"(W) × 0.3"(D)
9 ounces
Up to 6 hours*
100V/240VAC, 50/60Hz, 5V Output (UL Listed)
1 Year Parts & Labor
NOTE:
1- *Available storage capacity will be less due to operating system and pre-installed software applications.
2- Battery life will vary depending on your settings, use and other factors.
WARRANTY & SUPPORT
SKYTEX Technology Inc. warrants against defects in material and workmanship for a period of one year from original purchase date when purchased from an authorized U.S. reseller/retailer by the original purchaser or is a consumer who received the tablet as a gift. You must retain and provide the original bill of sale (or photocopy) as proof of purchase in case the tablet requires service. Retain the original box and inner packaging to ship if necessary.
Your Responsibility
Warranty service shall be provided after a return authorization number (RMA#) is provided to you by our customer support representative. For one year, SKYTEX will provide at no charge, service repairs using new or replacement parts. In certain cases your tablet may be replaced with a refurbished model that meets or exceeds factory specifications. Service provided or refurbished replacement is warranted for the duration of the original warranty period or 45 days, whichever is greater. Warranty extends to defects in materials or workmanship and does not cover cosmetic imperfections, damage incurred during shipment to SKYTEX, misuse, accidental drops that crack the screen, connection to improper equipment, or repairs by an unauthorized party. Write the RMA number on the package; include a copy of the store receipt and description of the issue with the product and serial number.
How to Obtain Warranty Service
If after following the User Guide, should you find it necessary to contact Customer Support, email or call between 9am-5:30pm Mon-Fri (Pacific Time). Have your date of purchase, serial number, and a full understanding of the issue ready for your representative. You are responsible for the transportation costs and protective packaging associated with shipping the product to SKYTEX safely. Ship the tablet using a service that provides tracking information.
Customer Support
Mon-Friday 9:00am-5:30pm
Phone: (888) 759-8399
Email: support@skytex.com
Website: www.skytex.com
SKYPAD
7" Tableta Multimedia
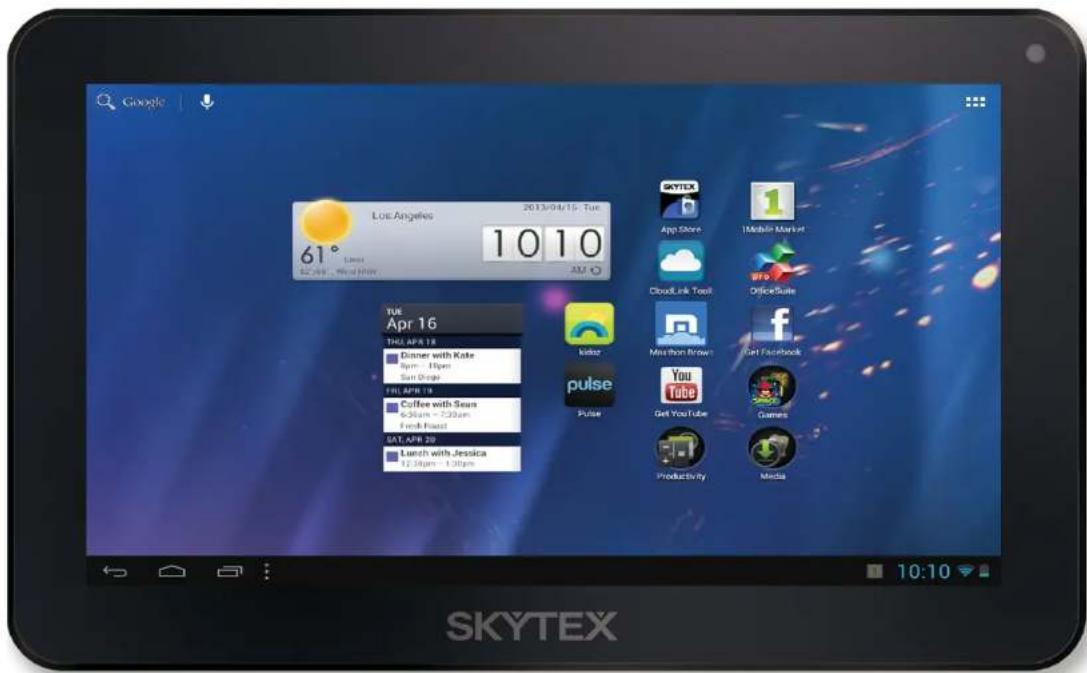
Modelo SP725
CONFORMIDAD CON LA FCC
Camera & Video Chat....20
- Encendido On / Off
2 Volumen+ - Volumen -
- Mini-HDMI
- Micro-USB OTG
- Microfono Incorporado
7.3.5mm conexión Jack
8.DC IN


AJUSTES: FECHA, HORA, TIEMPO DE ESPERA DE PANTALLA
Ajustes de Manual de la Hora
REPRODUCCION DE MUSICA / VIDEOS

Ver Videos
natural_image
Industrial equipment setup with robotic arm and structural beams, captured in a photo frame (no visible text or symbols)NOTA:
natural_image
Close-up photo of a smiling adult and child with camera interface overlay (no readable text or symbols)natural_image
Portrait of a woman wearing a headset, with an inset photo of a person in a red turtleneck (no visible text or symbols)CONFIGURAR EL CORREO ELECTRONICO
Email: support@skytex.com
- IMPORTANT NOTICES
- Customer Use Only:
- Company Trademarks
- FCC Compliance
- SAFETY NOTICES
- TABLE OF CONTENTS
- INTRODUCTION
- CHARGING YOUR TABLET
- POWER ON/OFF/STANDBY MODE
- SKYTEX
- CONNECTING TO A WIRELESS NETWORK
- INSTALLING APPS
- BROWSE THE WEB
- Bookmark a Favorite Page
- SETTINGS: Date, Time, & Screen Timeout
- Manual Time Setting
- Manual Date Setting
- Screen Timeout
- Auto Date & Time
- HOME LAUNCHER SCREEN APPLICATIONS
- Home Launcher Screen
- Add or Remove Favorite Apps from App Tray
- DISCOVER APP SHORTCUTS
- NOTIFICATIONS BAR / CONNECT HDMI TO TV / USING MICRO-USB
- NOTIFICATIONS BAR
- HDMI
- Micro-USB
- View Photos
- Play Music
- INSERTING A MICRO-SD CARD
- NOTE:
- CAMERA & VIDEO CHAT
- Video Chat
- SETTING UP YOUR EMAIL
- TROUBLESHOOTING
- SPECIFICATIONS
- WARRANTY & SUPPORT
- Your Responsibility
- How to Obtain Warranty Service
- SKYPAD
- 7" Tableta Multimedia
- CONFORMIDAD CON LA FCC
- AJUSTES: FECHA, HORA, TIEMPO DE ESPERA DE PANTALLA
- Ajustes de Manual de la Hora
- REPRODUCCION DE MUSICA / VIDEOS
- Ver Videos
- NOTA:
- CONFIGURAR EL CORREO ELECTRONICO
Brand : Skytex
Model : Skypad SP725
Category : Tablet