CV-S960 - Vacuum Cleaner HITACHI - Free user manual and instructions
Find the device manual for free CV-S960 HITACHI in PDF.

| Product Type | Canister Vacuum Cleaner |
| Model | CV-S960 |
| Brand | Hitachi |
| Dimensions (L x W x H) | Approx. 400 x 260 x 300 mm |
| Weight | 5.5 kg |
| Power Consumption | 1200 W |
| Suction Power | Variable, up to 350 AW |
| Dust Capacity | 2.0 L |
| Filtration System | HEPA washable filter |
| Noise Level | ~72 dB(A) |
| Cord Length | 5.0 m |
| Operating Radius | 7.0 m (with hose) |
| Hose Length | 1.5 m |
| Main Functions | Cyclonic separation, carpet/floor switch, crevice tool, dusting brush |
| Variable Speed Control | Yes, electronic slider |
| Dust Bag Indicator | No (bagless) |
| Filter Cleaning | Washable under water |
| Maintenance | Empty dust container after each use; wash filter every 3 months |
| Safety Features | Thermal overload protection, automatic shut-off if blocked |
| Spare Parts Availability | Filters, brush roll, belts, and accessories available through authorized service centers |
| Repairability Index | High: modular design, user-replaceable filters and brush |
| Manual Language | English (provided PDF) |
Frequently Asked Questions - CV-S960 HITACHI
User questions about CV-S960 HITACHI
0 question about this device. Answer the ones you know or ask your own.
Ask a new question about this device
Download the instructions for your Vacuum Cleaner in PDF format for free! Find your manual CV-S960 - HITACHI and take your electronic device back in hand. On this page are published all the documents necessary for the use of your device. CV-S960 by HITACHI.
USER MANUAL CV-S960 HITACHI
natural_image
Line drawing of a vacuum cleaner with lid, wheels, and mounting base (no text or symbols)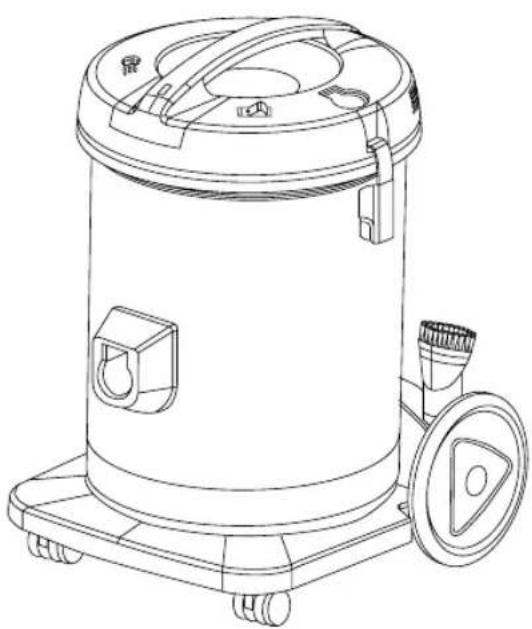
natural_image
Line drawing of a vacuum cleaner with lid, wheels, and mounting bracket (no text or symbols)
text_image
Technical diagram of a vacuum cleaner with labeled parts including pump, hose, and handle mechanismsFig. 1 Hitachi Vacuum Cleaner and its accessories
圖1 日立吸塵器及其附件

ACCESSORIES
- Flexible crush proof hose
- Extension pipes (CV-S950), (CV-T940)
- Telescopic extension pipe (CV-S960)
- Rug and floor tool
- Crevice nozzle
- Dusting brush
- Joint pipe
- Curved joint pipe
附件
The hose and joint pipes are packed individually. Toput them together, insert the curved joint pipe ① and joint pipe ② into each end of the hose ③ until the claws ④ of the stopper ring ⑤ click into the holes ⑥ of the curved joint pipe and joint pipe.
使用說明
安裝吸塵管
Insert the joint pipe ② into suction inlet ⑦ of the cleaner. When you want to remove the hose ③, press the button ⑧ and pull out the joint pipe ②.
將吸塵管與吸塵器主機連接
text_image
Technical diagram showing exploded view of a mechanical connector with numbered parts and directional arrows indicating assembly or assembly.text_image
Technical diagram of a vacuum cleaner with numbered parts labeled ① to ⑧Fig. 3 To attach hose to cleaner 圖3 將吸塵管與吸塵器主機連接
Attach the extension pipes ⑨ together by joining the two ends and twist a little to make it tight.
text_image
Diagram showing a mechanical or electrical component with labeled parts and rotation arrowHold the grip ⑩ in one hand and the curved joint pipe ① in another hand. Extend/Retract the telescopic extension pipe by pulling/pushing the curved joint pipe.
使用望遠鏡型延長管 (CV-S960)
text_image
Diagram showing a hand holding a tool with labeled parts ① and ⑩, indicating a mechanical or electrical component.Motor is switched ON/OFF by changing the power switch ⑪.
開機/關機
通過電源開關⑪,可以啟動或關閉馬達。
natural_image
Technical line drawing of a mechanical component with no visible text or symbolsThe tool is fitted with a brush at the back which can either be used in the "withdrawn" or "projected" position. These positions are operated by the pedal on the tool marked " (Carpet) and""(Floor)Forcleaningrugorcarpet,keepthebrushinits"withdrawn"position, i.e.,withthepedalmarked""presseddownwithyourtoe.
If you feel the tool is heavy to slide on the carpet, pleased to reduce the suction power by adjusting the suction control. (Fig.9)
11A
地毯和地板吸塵頭
RUG AND FLOOR TOOL (Deluxe)
The nozzle is fitted with a brush at the back which can either be in the "withdrawn" or "projected" position.
These positions are operated by the pedal on the tool marked “____” (Carpet) ⑫ and “ ” (Floor)
⑬. For cleaning rugs or carpets keep the brush in its "withdrawn" position, i.e., align the "——" indicator with the "——" symbol.
If you feel the tool is too heavy to slide on the carpet, please reduce the suction power by adjusting the suction control.
地毯和地板吸塵頭(豪華)
When the orange sign ⑭ appears in the large window continuously, the cleaner requires emptying.
Check the dust indicator by lifting suction tool from the floor and removing the crevice nozzle when it is used.
NOTE: If the cleaner is used when the orange sign appears in the large window, air to the motor will be reduced and the motor will eventually burn out.
灰塵指示器
natural_image
Technical diagram showing a cross-sectional view of a mechanical component with labeled part (14), alongside a separate schematic of three parallel plates (no text or symbols present)Suction pressure can be reduced by moving the adjustment ring ⑮ on the curved joint pipe ① to expose a hole. The more hole area exposed, the lower the suction. Low suction pressure is recommended for cleaning curtains, blinds, delicate fabrics etc.
吸力控制
text_image
Technical diagram of a welding torch with numbered parts and directional arrows indicating assembly or motion.Fig. 9 Suction control
圖9 吸力控制
شكل 9 ضابط الشفط
BLOWER
Use your vacuum cleaner as a blower for hard to reach areas.
- Insert the joint pipe ② of the hose into the blower outlet ⑯ until it snaps into place.
- To remove the hose, press the button ⑧ and pull the hose from the cleaner.
吹風機
text_image
Technical diagram of a mechanical device with numbered components and directional arrows indicating assembly or movement.Fig. 10 Blower
圖10 吹風機
شكل 1. Infach
الNVACH
natural_image
Line drawing of a person using a handheld device to clean or wash a machine, with no text or symbols present.Fig. 12 Using the crevice nozzle
圖12 使用縫隙吸塵管
Blockages may be cleared by separating the curved joint pipe ① from the hose. To separate the curved joint pipe, pull the hose and press the two claws ④ that is clicked into the holes ⑥ on both sides of the joint pipe.
When needed, the hose collar ⑰ can be removed from the hose end by turning it (left-handed screw). Likewise, you can disconnect the hose joint on the other end of the hose.
拆開連接彎管
text_image
Technical diagram of a mechanical or electrical component with numbered parts labeled 1, 4, 6, and 17.Fig. 13 Curved joint pipe
圖13 連接彎管
The back of the dolly has a storage for the dusting brush and crevice nozzle. Place the attachments on the storage space for handy retrieval.
工具儲存位
When the dust accumulation is excessive, remove the dust by the following procedure.
- Switch off the power supply and disconnect the power cord.
- Remove the hose, and release the clamp ⑱ by pulling the lower side of it on each side and take off the upper case ⑲.
- Take the filter guide ⑳ and shake the filter for about 20 times to remove the clogging dust from the filter cloth ②1. When fluff remains excessively on the filter cloth, remove it by a brush.
NOTE: Do not shake up and down.
-
Take off the filter and dispose of the dust in the tank ②2.
-
Replace the filter ② to the tank ②2, and set the upper case ⑲ on the tank.
清除灰塵
flowchart
graph TD
    A["Raw Material"] --> B["Step 1: Hand press"]
    B --> C["Step 2: Presser with handle, fan, and cloth"]
    C --> D["Step 3: Presser with filter, brush, and cloth"]
    D --> E["Step 4: Presser with basket, fan, and cloth"]
    E --> F["Step 5: Presser with filter, brush, and cloth"]
    F --> G["Step 6: Presser with cloth, fan, and cloth"]
    G --> H["Step 7: Presser with filter, brush, and cloth"]
    H --> I["Step 8: Presser with cloth, fan, and cloth"]
To store the power cord ②3, wound the power cord and place it on the cord storage hook ②4.
放置電源線
要放置電源線②3,請將電源線捲好,將它放置於電源線掛勾②4。
text_image
Technical diagram of a vacuum cleaner with numbered parts labeled 23 and 24Hose, extension pipes and rug and floor tool can be stored in an assembled condition to the cleaner. This combination allows you a neat and tidy storage.
- Slide the nozzle hook ⑲ of the rug and floor tool into the hook supporter ⑳ at the rear of the dolly.
- Coil the hose around the extension pipe to make it compact and stable and rest the extension pipe on the pipe rest ⑳ as shown in Fig. 17.
放置吸塵器
text_image
Technical diagram of a vacuum cleaner with numbered parts labeled 25, 26, and 27Fig. 17 Storing the vacuum cleaner 圖17 放置吸塵器
Once or twice a year, to ensure good suction power, after disposing of the dust, clean the filter using the following method.
- Take off the filter ring ⑳ from the packing ⑲.
- Wash the filter ③0 in tepid water or a neutral detergent. If detergent is used, rinse it out thoroughly.
- Allow the filter to dry naturally.
NOTE:
• A void washing in boiling water and by the washing machine.
• A void drying over a fire or in hot sun.
- If the filter is used when wet, suction is impaired and the motor may be damaged.
過濾網的保養
text_image
Technical diagram illustrating three steps of a mechanical or industrial process: pressing a granular container, adding a valve, and pouring a motor.- Be sure to replace the Filter after disposing of the dust.
If the cleaner is used without replacing its filter, dust will be sucked directly into the mechanical parts and may damage the motor.
- Do not block the airflow.
Any blockages or obstructions to the suction inlet, rug and floor tool, extension pipe, hose, etc., or the exhaust air outlet can cause loss of power and motor overheating.
- Do not pick up matches, fireplace ashes, or smoking material with the cleaner, as a hazard may result.
- Do not use the cleaner to pick up wet dirt, and do not use the cleaner in a wet and moist place as moisture will damage the motor and other mechanical parts.
- To clean the cleaner body and attachments, wipe them with a soapsuds-soaked cloth, and avoid using spirits.
- A void cleaning the switch part with a wet cloth and splashing water on it as moisture may cause a short circuit.
- T he carbon brushes of the motor are of special composition.
When replacing the defaced carbon brushes, it is necessary to use the Hitachi special carbon brushes for the Hitachi Vacuum Cleaner.
- Y our vacuum cleaner is not a toy. Do not allow children to play with the cleaner. Do not leave cleaner connected to an electrical outlet and leave it unattended.
- A Iways disconnect cord from electrical outlet before servicing the cleaner.
- Warning :
Electrical shock could occur if used outdoors or on wet surfaces.
Before you plug in your Hitachi Vacuum Cleaner, make sure that the voltage indicated on the rating plate located on the back of the vacuum cleaner is the same as your local power supply.
CAUTION :
If the supply cord is damaged, it must be replaced by the manufacturer or its service agent or a similarly qualified person in order to avoid a hazard.
如何有效的進行清潔工作並避免發生事故
- 清除灰塵之後,切記放回過濾網。
15-12, Nishi-Shinbashi 2-chome, Minato-ku, Tokyo, 105-8410 Japan
Tel : Tokyo (03) 3502-2111
3-J1861-5D