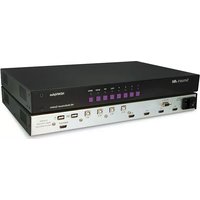
HDMVplus Multiviewer - AV Extender Smart-AVI - Free user manual and instructions
Find the device manual for free HDMVplus Multiviewer Smart-AVI in PDF.


| Product Type | AV Extender / Multiviewer |
| Brand | Smart-AVI |
| Model | HDMVplus Multiviewer |
| Video Inputs | 4x HDMI |
| Video Output | 1x HDMI |
| Max Resolution | 1920 x 1200 @ 60Hz |
| Transmission Distance | Up to 100m via CAT5e/6 |
| Multiview Modes | Quad, PiP, Split, Full Screen |
| Audio Support | Embedded HDMI audio, stereo output |
| Control Interface | Front panel buttons, IR remote, RS-232 |
| Power Supply | 12V DC, 2A |
| Power Consumption | 12W max |
| Dimensions (W x D x H) | 17.0 x 5.5 x 1.75 inches (43.2 x 14.0 x 4.4 cm) |
| Weight | 3.5 lbs (1.6 kg) |
| Mounting | 19-inch rackmount, 1U |
| Operating Temperature | 32°F to 104°F (0°C to 40°C) |
| Humidity | 20% to 90% RH (non-condensing) |
| Included Accessories | Power adapter, IR remote, mounting ears, user manual |
| Certifications | FCC, CE, RoHS |
| Maintenance | Clean with a dry, soft cloth. Avoid solvents. |
| Safety | Use only provided power supply. Do not expose to moisture. |
| Spare Parts & Repairability | Replacement power adapters available. No user-serviceable parts inside. |
Frequently Asked Questions - HDMVplus Multiviewer Smart-AVI
User questions about HDMVplus Multiviewer Smart-AVI
0 question about this device. Answer the ones you know or ask your own.
Ask a new question about this device
Download the instructions for your AV Extender in PDF format for free! Find your manual HDMVplus Multiviewer - Smart-AVI and take your electronic device back in hand. On this page are published all the documents necessary for the use of your device. HDMVplus Multiviewer by Smart-AVI.
USER MANUAL HDMVplus Multiviewer Smart-AVI
4-Port Full HD Multiviewer
View four different HDMI video sources simultaneously on one screen with USB keyboard and mouse support.
Installation Manual
Smart-AM
SMART AUDIO VIDEO INNOVATION
Table of Contents
| TABLE OF CONTENTS AND TECHNICAL SPECIFICATIONS 2-3 | |
| INTRODUCTION AND FEATURES 4 | |
| APPLICATIONS 5 | |
| CONNECTING THE BOX AND USING THE FRONT CONTROL PANEL 6 | |
| USING THE OSD 7-8 | |
| HOTKEY AND CONSOLE COMMANDS 9 | |
| CONSOLE COMMANDS (cont) AND ACCESSORIES | 10 |
| PROGRAMMING THE EDID | 11 |
| UPGRADING THE VIDEO/USB FIRMWARE | 12-13 |
| Q & A | 14 |
| PART NO. QTY DESCRIPTION | ||
| HDMV-Plus 1 | 4-Port | HDMI-Plus, USB 1.1 KVM Switch with PiP/Dual/Quad/Full modes |
| Power Cord 1 | 6ft Power Cable | |
| CBLDB906 1 | 6ft DB9 | Serial RS-232 Cable |

Technical Specifications
| VIDEO | |
| Video Bandwidth Single- | link 340MHz [10.2Gbps] |
| Resolution HDTV 480i,48 | 0p,720i,720p,1080i,1080p |
| PC Resolution 800 x 600 | up to 1920 x 1200 |
| Input Video Signal 1.2 volts | |
| Input DDC Signal 5 volts | |
| Single Link Range 1080p | |
| Format HDMI 1.4 | |
| DVI Compliance Single-link DVI-D 2.0 | |
| Output Cable Length Up to 20 ft. | |
| HDCP Compliance 1.0/2.0 | |
| Video Bandwidth Single-link 340MHz [10.2Gbps] | |
| Input Interface (4) HDMI | |
| Output Interface HDMI | |
| Connector Type A [19-pin female] | |
| USB | |
| Input | USB 2.0, 1.1, and 1.0 |
| Input Interface (4) USB Type B | |
| Keyboard | USB 1.0 (Type A) |
| Mouse | USB 1.0 (Type A) |
| CONTROL | |
| Front Panel Tact Switches | |
| RS-232 | DB9 (female) |
| MECHANICAL | |
| Height | 1.70 in. (1U) |
| Width | 17 in. (431.8 mm.) |
| Depth | 10.2 in. (259 mm.) |
| Weight 4.05 lbs. (1.84 kg) | |
| POWER | |
| Requirements | Internal 100-240 VAC |
| Power Supply Approvals | UL, CE, CSA, CEC, RoHS |
Introduction
The HDMV-Plus Multiviewer Switch allows you to view up to four different high definition video sources simultaneously on one display device. It also supports keyboard and mouse functionality, allowing you to access all four displays with one set of interface controls.
Connections to video sources are managed via HDMI connectors. Advanced viewing options include quad-mode, full-screen mode, and PiP (picture in picture) mode. Use this device to simplify management of multiple sources by controlling them all through a single display and set of controls.
Features
• View up to four computers on a single monitor at the press of a button
• Supports USB keyboard and mouse
• On-screen display (OSD) makes setup and switching easy
• Change views by pressing the tact switches and RS-232
• Display each computer with clean and crisp high-resolution video
• Supports HD resolutions up to 1920x1080p
• Quad-mode splits the screen to show four computers on one screen
• PiP-mode displays one computer in full screen with three thumbnail views
• Control any one computer while monitoring three others

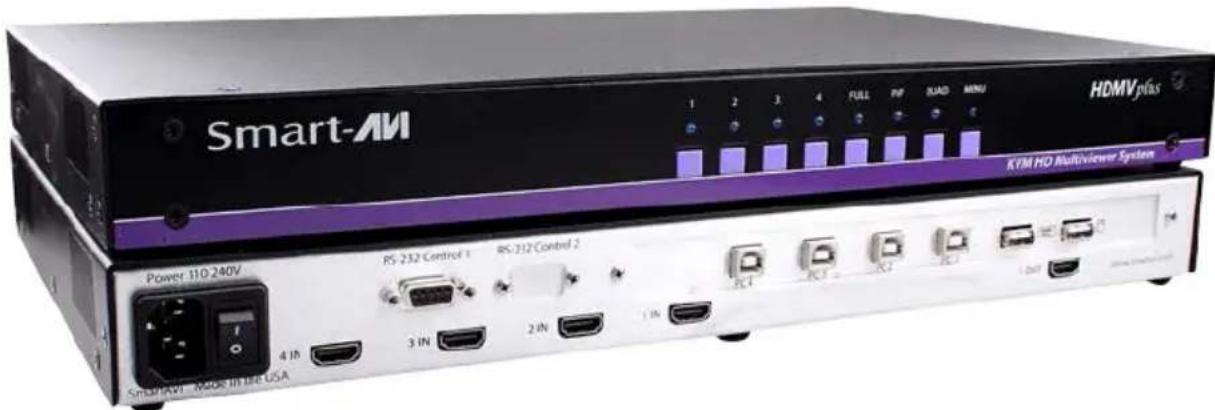
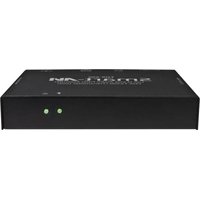
Front control Panel
RS-232 Connection
USB inputs
(from computers)
USB Keyboard and Mouse

Output
RS-232 (DB9) connection
HDMI inputs
Applications
- Lawenforcement
• Security Clearance
• Hospital and Hospice Care Patient Monitoring
• ProfessionalPresentations
• Corporate or Educational Presentations
• Financial (Remote Servers/User Control)
• Call Centers for Technical Support
• Industrial (Long-Range Workstation Isolation)
• Airport Installations (Air Traffic Control/Passenger Information)
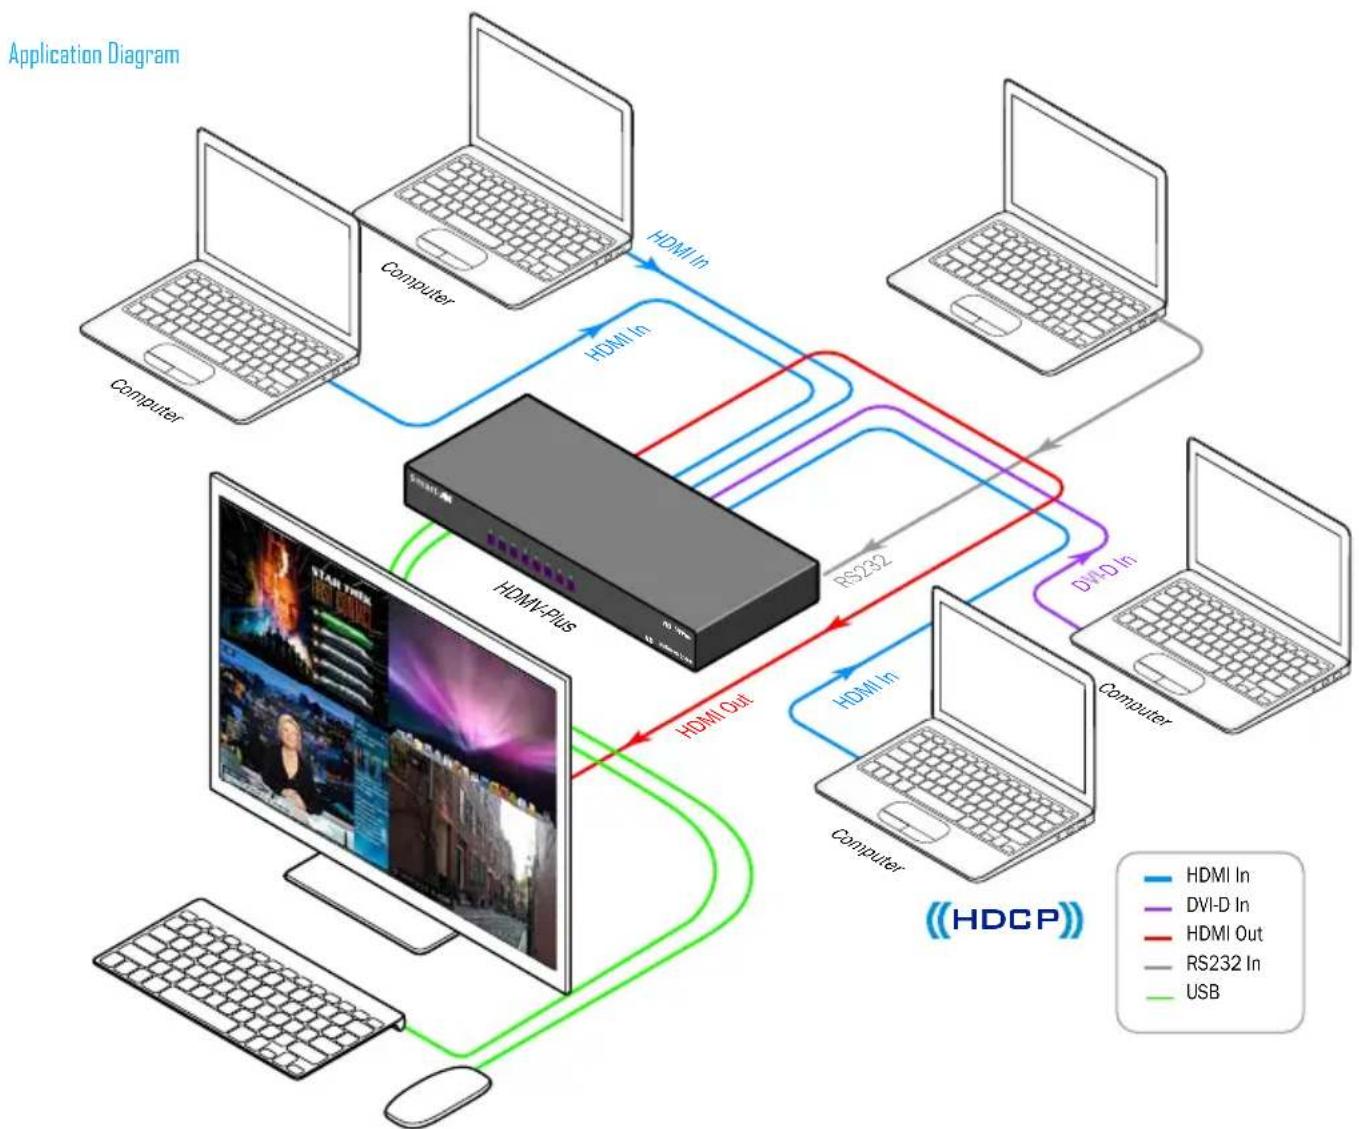
The power connection and switch are located at the back of the unit as well as the RS-232 connection and all HDMI and USB inputs and outputs. Connect all peripheral devices first and turn them on before powering on the HDMV-Plus.
Modes
AVAILABLE CONFIGURATIONS

FullScreen Mode - In the FullScreen mode, one of the four video sources is displayed in full screen size and maximum resolution. Keyboard and mouse operation automatically switch to the corresponding computer.

PiP Mode - In the PiP(picture in picture) mode, the full screen displays of one of the four video sources, and is accompanied by three smaller images (thumbnails) containing the other video sources on the right-hand margin of the screen, allowing simultaneous monitoring.

Quad-Mode - In Quad mode, the screen is split into four fields of equal size with the four video sources or computers being displayed in each of these fields. Keyboard and mouse operation can be assigned to the field of the corresponding computer.
Using the Front Control Panel

To switch to Full Screen Mode press the button "FULL" on the front control panel and then select the desired channel 1, 2, 3, or 4.
To switch to picture in picture mode press "PiP" on the front control panel and then select the desire channel 1, 2, 3, or 4. Note: The keyboard and mouse control will default to the last channel selected.
To switch to Quad-Mode press "QUAD" on the front control panel and then select the desired channel 1, 2, 3, or 4. The keyboard and mouse control will default to the last channel selected.
Using the On Screen Display
The OSD can be accessed by using either the "MENU" button on the front control panel or through hotkey commands "Hotkey + Hotkey + O", for example if your hotkey is left ctrl (by default) press "Ctrl + Ctrl+ O" and the OSD will come up. The OSD allows you to change modes, change the hotkey button, move the OSD position, toggle the hot plugs, and restore the HDMV-Plus to factory defaults.

To change modes with the OSD simply navigate with the attached keyboard and press the up and down arrow keys, press the right key to activate the submenu and the left to deactivate it. To select a new mode scroll down to the input and press the right arrow key on the keyboard. Use the up and down arrow keys again to select Full, Quad, or PiP and press enter to change the mode.

The hotkey button itself can be changed by using the up and down arrow in the OSD and pressing right arrow on "HK:" Next, a submenu will come up with the option to change the hotkey to ctrl, shift, and alt.

To save the settings navigate to the "Save" text and press the Enter key. The next time the HDMV-Plus is started the current screen mode will load by default.

To restore the factory settings click scroll down to "Factory Reset" and press enter. The HDMV-Plus will perform a power reset on itself.

The position of the OSD can be moved around. Select the "OSD Position" text and press enter. Next use the up, down, left, and right arrows from the keyboard to move the position of the OSD. Likewise the 1, 2, 3, 4 buttons on the front control panel will move the OSD as well where 1 is down, 2 is up, 3 is left, and 4 is right.

Using HotKey Commands
The default factory hotkey is the left "ctrl" key. To use a hotkey command simply hit ctrl twice, and then the appropriate command.
| HOTKEY SEQUENCE FUNCTION EXAMPLE | ||
| hotkey + hotkey + Q + # | Change to quad mode Ctrl + ctrl + Q + 2 | (quad mode) |
| Hotkey + hotkey + F + # | Change to full mode of channel | |
| Hotkey + hotkey + P + # | Change to picture in picture mode for that channel (Note, user control will default to the last channel selected.) | Ctrl + ctrl + F + 1(full mode with ch. 1) |
| Hotkey + hotkey + U + # | Change the user control | Ctrl + ctrl + P + 3(picture in picture mode with ch. 3 as the main) |
| Hotkey + hotkey + O Bring up the OSD | - | |
| Hotkey + Hotkey + B Re-Boot the HDMV-Plus - | ||
RS-232 Operation and Console Commands
The HDMV-Plus may also be controlled via RS-232 commands; this feature requires an RS-232 card installed on your computer or a USB to RS-232 adapter. First connect the RS-232 cable between your PC and the HDMV-Plus.


natural_image
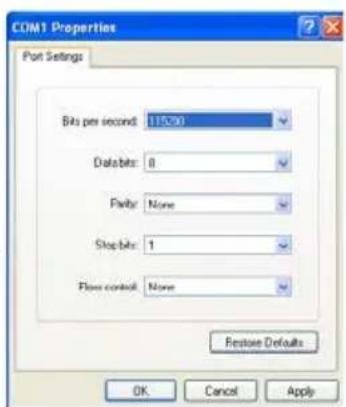
Line drawing of a desktop computer setup with monitor, tower, keyboard, and mouse (no text or symbols)Next connect to the device using HyperTerminal or a similar serial data application and an DB9 for RS-232 connection. The settings for the connection are shown in the picture on the right.
Any serial data application similar to HyperTerminal will be able to connect to the HDMV-Plus provided the Bits per second are 115200, the data bits are set to 8, the Parity is "None," the stop bits are "1," and there is no flow control. HyperTerminal comes standard on windows XP and can be enabled on Windows Vista, Windows 7, and Windows 8. There are many applications available for windows, Linux, and Mac operating systems.
Console Commands Continued
| MODE CONSOLE | DESCRIPTION & EXAMPLE | |
| COMMAND | ||
| Quad Mode | //Q# | 4 inputs on screen, equally displayed. “//Q2” quad mode, channel 2 as user control |
| Full Screen Mode | //F# | 1 input on screen, displaying full screen. “//F4” Full mode, input 4 selected |
| Picture in Picture Mode | //P# | 4 inputs on screen, main selection largest Area. “//P3” Picture in picture mode, input 3 selected |
| Change User Control //U# | Changes USB control to input selected. “//U4” change to user channel 4 (In PiP mode with main input 1, control over input 4) | |
| Reset //reset | Resets the HDMV box | |
| Query Inputs | //Q| | Queries which input is selected as control, returns input number |
| Input Status | //IS | Queries the current display properties of each input, returns a table of resolution values |
| Hot Plug | //H# | Hot plugs devices, useful for some Blu-ray Players and Video Cards. Will wake up sleeping devices. “//H2”, hot plug input 2 |
| Memory Reset | //MR | Clears the video memory for a refresh |
Accessories
This product is backward compatible with DVI-D and VGA with the appropriate adapter.
SmartAVI makes a full line of accessories that can be used to enhance features of this product from giving you remote access via the Internet or extending the range inputs and output over 200 ft, to many others. Visit our website for more information.
Attaching a DVI-D Device
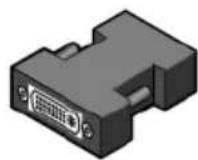
An inexpensive HDMI to DVI-D adapter will enable you to input or output your signals to DVI-D devices
Programming the EDID
The EDID (Extended Display Identification Data) of your monitor or display can be programmed into the HDMV-Plus. This will allow the HDMV-Plus to pass essential display information between the display and the attached sources. Information pertaining to color depth, resolution, and sound must be properly configured in order for the optimum viewing.
To program the EDID first disconnect any inputs to the HDMV-Plus and plug a monitor in to the output. Next power the device on.
Plug an RS-232 cable or USB to RS-232 adapter into the HDMV-Plus and your computer.

Any serial data application similar to HyperTerminal will be able to connect to the HDMV provided the Bits per second are 115200, the data bits are set to 8, the Parity is "None," the stop bits are "1," and there is no flow control. HyperTerminal comes standard on Windows XP and can be enabled on Windows Vista, Windows 7, and Windows 8. There are many applications available for Windows, Linux, and Mac operating systems.
- Connect a monitor to the output port of the HDMV-Plus.
- Connect to the HDMV-Plus using RS-232 (use PuTTY or HyperTerminal).
- Type in "debugcon" followed by
to go to Debug Mode. You will not see any feedback until you press the button. - If this has been done properly, you should see the message "CLI Menu Enabled" on the terminal client.
-
Enter "?" to see the rest of the options.
-
To learn screen, enter the following command: wEDID a 3
-
Wait for all the debug messages to stop.
-
Once done, the EDID is learned and your sources should be able read the EDID of your monitor.
*Note: other debugging options such as enabling and disabling hotplug, changing output mode, and resetting the unit can be accessed through the CLI Menu.
How to Upgrade the Video Firmware
Download the latest firmware upgrade from the SmartAVI website.
Open either Chip45Boot2 or a serial data application such as HyperTerminal. Chip45Boot2 may be downloaded from the Chip45 website. HyperTerminal, Putty, TeraTerm are widely distributed and free to use.
Using Chip45Boot2 GUI


Using HyperTerminal


1) Connect an RS-232 cable or USB to RS-232 adapter from your computer to the HDMV-Plus.
2) Open Chip45Boot2 GUI and select the appropriate com port.
3) Select a baud rate of 115200 (if connection fails select a lower baud rate)
4) Press "Select Flash Hexfile" and locate the firmware upgrade. (Don't forget to download the upgrade first.)
5) With the power to the HDMV off, press "Connect to Bootloader" then turn the power to the HDMV-Plus on.
6) Once connected click on "Program Flash"
7) When finished click "Disconnect from bootloader" and power cycle the HDMV-Plus.
Occasionally Chip45 may give an error "Unable to connect, with a red status flag." Clicking "connect" just after seeing this message will sometimes connect. Also consider lowering the baud rate.
With a Terminal Program:
1) Set PC serial port to 19200 baud, 8N1, XON XOFF (we suggest to start with 19200 baud, even though higher baud rates are possible, depending of target MCU clock.) Set the line endings on your terminal program to 'CR+LF' for outgoing messages, this means to "send line ends with line feeds." Emulation should be set to "VT100."
2) Hold shift-U keys pressed while powering on or resetting your target
3) See the welcome message "c45b2" plus version number plus prompt on the next line now the boot loader is ready to accept the firmware.
4) Type "pf" to load the firmware. An echo of "pf+" will return.
5) Send text file, go to desktop and "show all" and select the hex file. (Send it as a text file although it is a hex file.)
How to Upgrade the USB Firmware
Open a serial data application such as HyperTerminal. HyperTerminal, Putty, Tera Term are widely distributed and free to use.

HyperTerminal


Connect to the RS-232 at 115200 bits per second, 8 data bits, no parity, 1 stop bit, and no flow control.


Set Emulation to VT100 and setup the ASCII with a line delay of 250 milliseconds, send line ends with line feeds. These settings may be found in properties in hyperterminal. The ASCII setup is found by clicking "ASCII Setup" under the settings tab in properties.

In the console type "menuon" and press enter. Next type "bootusb" and hold the shift+u button quickly afterwards. If this has been done correctly then "USBbtldv1.1" will show up in the console along with a prompt. Go to "Send text file" and select the corresponding hex file (select "show all" if you don't see it) and then click open.
Type "pf" at the prompt and the HDMV-Plus will begin loading the firmware for the USB. Reset the HDMV-Plus after the console prompt is shown. The console will display "USB...PASS" if there were no errors when the device is rebooted.
Q: What do I need in order to use the console commands?
A: A standard RS-232 cable, one end is male and the other end is female. Your home computer, laptop, or home entertainment control system must have an RS-232 card or simply use an external USB to RS-232 adapter cable.
Q: How do I update the firmware?
A: If new firmware is available you will be able to download it from the SmartAVI website. Firmware is updated through the RS-232 connection and requires a program called Chip45Boot2 which is freely available. Open up Chip45Boot 2 and load the firmware file by clicking on "select flash file" and select the downloaded firmware update. Next, establish the RS-232 connection with the HDMV-Plus box. Click "Connect to Bootloader" and then power on the HDMV-Plus soon thereafter. The firmware should be uploading. Click "disconnect from Bootloader" when it finishes and restart the device. Updating the USB can by done through hyperterminal.
Q: I see vertical lines on the display. What happened?
A: The video memory needs to be refreshed. Issue a console command “//MR” to refresh or power cycle the HDMV-Plus.
Q: My hotkey stopped working and I seem to be in computer control, what happened?
A: Your hotkey control is interacting with the operating system and not through the keyboard control, this happens if you have another hotkey on your computer that conflicts with the HDMV-Plus. The solution is to change the hotkey of either the HDMV-Plus or your computer. If you are using windows simply press the windows button one time, and then issue another hotkey command to get out; then go back and reconfigure at a more convenient time.
Q: Why do my inputs appear pink, what happened?
A: The HDCP protocol between the outputs of the attached devices and the HDMV-Plus have lost synchronization. Physically unplugging the input and plugging it back in or powering down the peripheral device should resolve the problem. Power cycle the HMDV-Plus.
Notes:
At SmartAVI, we offer a complete line of audio/video solutions for high-quality signal switching and distribution. Our devices support multiple signal types including VGA, DVI, HDMI, USB, RS232, IR and more.
EXTENDERS
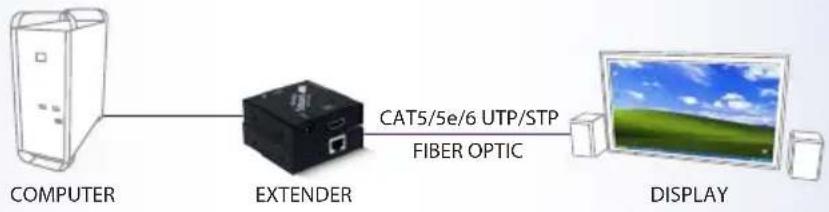
flowchart
graph LR
    A["COMPUTER"] --> B["EXTENDER"]
    B --> C["FIBER OPTIC"]
    C --> D["DISPLAY"]
SPLITTERS

flowchart
graph LR
    A["BLUERAY PLAYER"] --> B["SPLITTER"]
    B --> C["DISPLAYS"]
SWITCHES
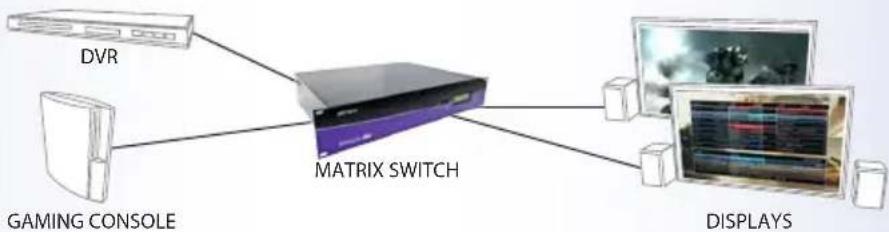
flowchart
graph TD
    A["DVR"] --> B["MATRIX SWITCH"]
    C["GAMING CONSOLE"] --> B
    D["DISPLAY"] --> B
    B --> E["Computer"]
At SmartAVI, we offer high-quality products including digital signage, video walls, signal extenders, splitters and switches and fiber optics. All of our products are manufactured in the United States in our North Hollywood, California facility.

natural_image
Exterior view of a modern office building with 'Smart-AM' signage and purple awnings, surrounded by palm trees and parked cars (no readable text beyond signage)NOTICE
The information contained in this document is subject to change without notice. SmartAVI makes no warranty of any kind with regard to this material, including but not limited to, implied warranties of merchantability and fitness for any particular purpose. SmartAVI will not be liable for errors contained herein or for incidental or consequential damages in connection with the furnishing, performance or use of this material. No part of this document may be photocopied, reproduced or translated into another language without prior written consent from SmartAVI. For more information, visit www.smartavi.com.
© Copyright 2014 SmartAVI, All Rights Reserved
SmartAVI, Inc. / Twitter: smartavi - 11651 Vanowen St. North Hollywood, CA 91605
Tel: (818) 503-6200 Fax: (818) 574-5581 - http://www.SmartAVI.com
Smart-AM
SMART AUDIO VIDEO INNOVATION
- 4-Port Full HD Multiviewer
- Installation Manual
- Introduction
- Features
- Applications
- Modes
- AVAILABLE CONFIGURATIONS
- Using the Front Control Panel
- Using the On Screen Display
- Using HotKey Commands
- RS-232 Operation and Console Commands
- Console Commands Continued
- Accessories
- Programming the EDID
- How to Upgrade the Video Firmware
- With a Terminal Program:
- How to Upgrade the USB Firmware
- Notes:
- EXTENDERS
- SPLITTERS
- SWITCHES
- NOTICE
Brand : Smart-AVI
Model : HDMVplus Multiviewer
Category : AV Extender