K67718US - Anti-theft KENSINGTON - Free user manual and instructions
Find the device manual for free K67718US KENSINGTON in PDF.

User questions about K67718US KENSINGTON
0 question about this device. Answer the ones you know or ask your own.
Ask a new question about this device
Download the instructions for your Anti-theft in PDF format for free! Find your manual K67718US - KENSINGTON and take your electronic device back in hand. On this page are published all the documents necessary for the use of your device. K67718US by KENSINGTON.
USER MANUAL K67718US KENSINGTON
Installation Instructions
USB PORT LOCK & USB PORT SECURITY SYSTEMS
CONTENTS
All USB Packages Contain the following:

a. USB PORT LOCK
b. KEY

c. 3 SPACERS PER LOCK
Your individual package may contain some or all of the following items:

d. SQUARE USB PORT BLOCK

e. RECTANGULAR USB PORT BLOCK
1. SQUARE USB CABLE GUARD
g. RECTANGULAR USB CABLE GUARD
Technical Support
1-800-535-4242 (US and Canada) • (650-572-2700)
www.kensington.com
Patents Pending
Limited Lifetime Warranty
KENSINGTON COMPUTER PRODUCTS GROUP ("KENSINGTON") warrants only to the original purchaser of this product from a Kensington-authorized reseller or distributor that this product will be free from defects in material and workmanship under normal use and service. Kensington reserves the right, before having any obligation under this limited warranty, to inspect the damaged Kensington product, and all costs of shipping the Kensington product to Kensington for inspection shall be borne solely by the purchaser. In order to recover under this limited warranty, Purchaser must make claim to Kensington within 60 days of occurrence, and must present acceptable proof of original ownership (such as original receipt, warranty card registration, on-line registration, or other documentation Kensington deems acceptable) for the product. KENSINGTON, at its option, shall repair or replace the defective unit covered by this warranty. Please retain the dated sales receipt as evidence of the original purchaser's date of purchase. You will need it for any warranty service. In order to keep this limited warranty in effect, the product must have been handled and used as prescribed in the instructions accompanying this warranty. This limited warranty does not cover any damage due to accident, misuse, abuse or negligence. This limited warranty is valid only if the product is used with the equipment specified on the product box. Please check product box for details or call KENSINGTON technical support. This limited warranty is non-transferable and does not apply to any purchaser who bought the product from a reseller or distributor not authorized by Kensington, including but not limited to purchases from internet auction sites. This warranty does not affect any other legal rights you may have by operation of law. Contact KENSINGTON at www.support.kensington.com or at one of the technical support numbers for warranty service procedures.

BRANDS
Kensington Computer Products Group
A Division of ACCO Brands
333 Twin Dolphin Drive
Sixth floor
Redwood Shores, CA 94065
Kensington and the ACCO name and design are registered trademarks of ACCO brands. All other registered and unregistered trademarks are the property of their respective owners.
© 2009 Kensington Computer Products Group, a division of ACCO Brands. Any unauthorized copying, duplicating, or other reproduction of the contents hereof is prohibited without written consent from Kensington Computer Products.
Group. All rights reserved. 3/09
901-2326-00
KL
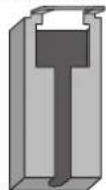
ADDING A SPACER TO THE USB PORT LOCK

text_image
0 0 0 SPACERSNOTE: For the most secure fit, it is recommended to use a spacer on all USB Port Lock installations. Snap on a small spacer, and if the lock does not fit snuggly once installed, switch to a different size. If you have difficulty locking the lock with a spacer installed, it is sufficient to use the lock without any spacers.
LOCKING A USB PORT WITH THE USB PORTLOCK

text_image
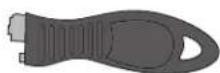
Diagram showing a USB connector with an LED icon above it, indicating the connection point.Hold the plastic housing of the USB Port Lock and firmly slide into the USB port

natural_image
Illustration of a USB flash drive with an icon and arrow indicating direction (no text or symbols)Push in the locking button until it clicks. The USB port is now locked.
UNLOCKING THE USB PORT LOCK
text_image
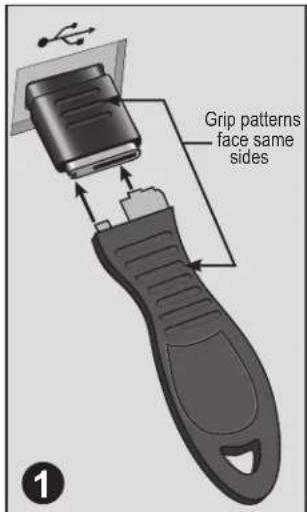
Grip patterns face same sides 1Align the grip patterns on the key and lock, and insert the key into the locking button.
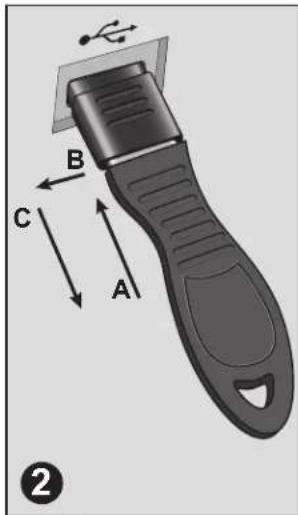
text_image
B C A ②Push the key into the lock in (A) until it is fully depressed. Then slide the key sideways (B) until the locking mechanism is released. Continue holding in position B while allowing the lock button to slide out (C).
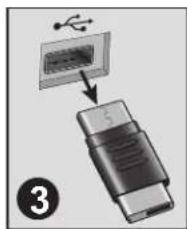
text_image
Diagram showing USB port connection to a USB socket, labeled with number 3The USB Port Lock is now unlocked and can be removed by slowly pulling it out of the USB port
SECURING TWO USB PORTS WITH THE USB PORT LOCK & PORT BLOCK (not included in all packages)

text_image
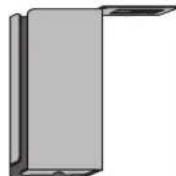
Rectangular Port Block Square Port BlockInsert the USB Port Lock into the rectangular window of the USB Port Block.
text_image
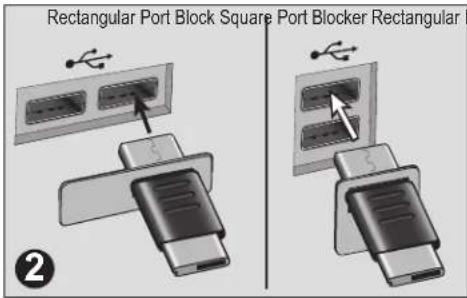
Rectangular Port Block Square Port Blocker Rectangular ②Position the lock and port block so that the lock is aligned with a USB port and the port block is positioned over an additional port. Holding the plastic housing, insert the lock into the USB port.

text_image
Block Square Port Block ③Push in the locking button until it clicks. The USB port is now locked and the additional USB port is blocked.
For the most secure fit, it is recommended to use a spacer. Try the smallest spacer first, and adjust to larger sizes if needed. If the lock will not fit properly with a spacer installed, it is sufficient to use the lock without a spacer. (See NOTE on reverse)
SECURING TWO USB PORTS WITH A PERIPHERAL USING THE USB PORT LOCK & CABLE GUARD
(not included in all packages)
text_image
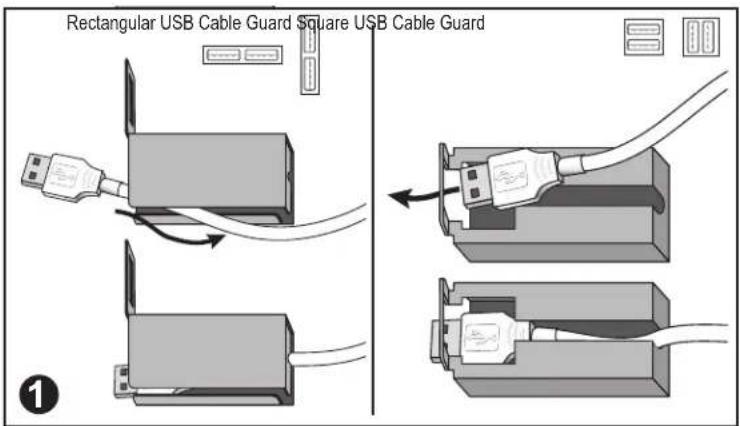
Rectangular USB Cable Guard Square USB Cable GuardThread the USB cable through the slot in the USB Cable Guard's compartment.

text_image
Rectangular USB Cable Guard Square USB Cable GuardConnect the USB device to the desired USB port configuration
text_image
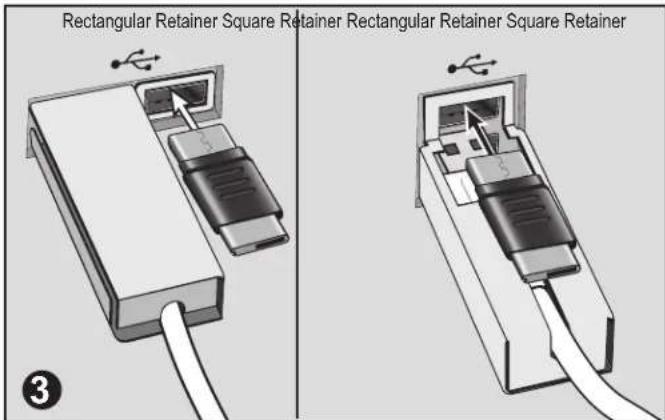
Rectangular Retainer Square Retainer Rectangular Retainer Square Retainer ③Position the cable guard so the window is aligned with the second USB port and, holding the plastic housing of the USB Lock, insert the lock firmly into the USB port.
natural_image
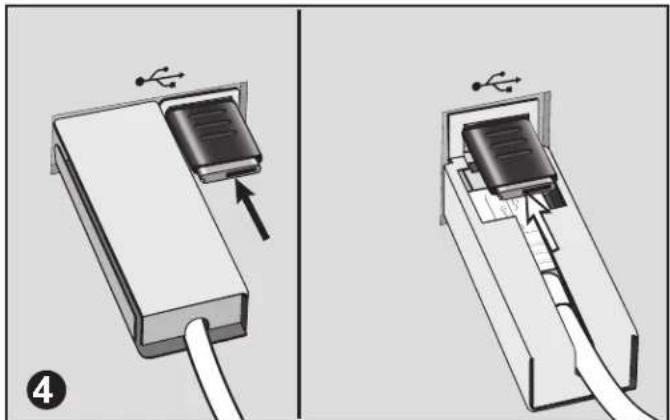
Diagram showing two stages of USB cable installation, one with a USB plug and arrow indicating insertion (no text or symbols present)Push in the locking button until it clicks.
The USB ports are are now secured.
For the most secure fit, it is recommended to use a spacer. Try the smallest spacer first, and adjust to larger sizes if needed. If the lock will not fit properly with a spacer installed, it is sufficient to use the lock without a spacer. (See NOTE on reverse)