
DPF1001 - Digital photo frame Sunstech - Free user manual and instructions
Find the device manual for free DPF1001 Sunstech in PDF.


| Product Type | Digital Photo Frame |
| Brand | Sunstech |
| Model | DPF1001 |
| Display Size | 10.1 inches (diagonal) |
| Resolution | 1024 x 600 pixels |
| Aspect Ratio | 16:9 |
| Supported Image Formats | JPEG, BMP, GIF, PNG |
| Supported Video Formats | AVI, MP4 |
| Supported Audio Formats | MP3 |
| Memory Card Slots | SD/MMC (up to 32GB) |
| USB Port | USB 2.0 Host (for flash drives) |
| Remote Control | Included |
| Power Supply | DC 5V, 1A (AC adapter included) |
| Power Consumption | < 10W |
| Dimensions (with stand) | Approx. 260 x 170 x 20 mm |
| Weight | Approx. 500 g |
| Cleaning Instructions | Use a soft, dry cloth. Avoid liquids. |
| Safety Precautions | Keep away from moisture, do not disassemble, use only supplied adapter. |
| Repairability | Not user serviceable; contact Sunstech support for repairs. |
Frequently Asked Questions - DPF1001 Sunstech
User questions about DPF1001 Sunstech
0 question about this device. Answer the ones you know or ask your own.
Ask a new question about this device
Download the instructions for your Digital photo frame in PDF format for free! Find your manual DPF1001 - Sunstech and take your electronic device back in hand. On this page are published all the documents necessary for the use of your device. DPF1001 by Sunstech.
USER MANUAL DPF1001 Sunstech
natural_image
Black-and-white photo of two puppies facing each other in a grassy field, displayed on a flat-screen TV (no text or symbols visible)DIGITAL PHOTO VIEWER
DPF-1001
Please read this User Manual carefully before using this product and keep this manual for future reference.
Suns Corporation, Tokyo, Japan
Warranty conditions
The warranty of this product is for 2 years since the purchase date.
The warranty will exclude breakdowns caused by bad use of the product, wrong installation or installation in not desirable places for a proper maintenance of the product, rips, updates of the products that are not the supplied by the brand, pieces wore away for its use or for not domestic or inappropriate use. Also are excluded breakdowns caused for manipulations of the products by people or companies alien to our company.
For any request regarding the warranty terms, the purchase receipt must be attached.

You can help protect the environment!
Please remember to respect the local regulations: hand in the non-working electrical equipments to an appropriate waste disposal center.
Contents
User Notice
This product has met electronic emissions standards required. It can be used safely at home.


Before Operation
| Package Contents | 2 |
| Photo Frame Overview | 3 |
Basic Operation
| Remote Control | 4 |
| Power Connection | 6 |
| Insert a memory card | 7 |
| Photo | 8 |
| Music | 10 |
| Photo + Music | 11 |
| Movie | 12 |
| E-Book | 13 |
Advanced Operation
| Edit | 14 |
| Clock | 16 |
| Alarm | 17 |
| Setup | 18 |
| Favorite | 19 |
Customer Management
Warranty Conditions 20
Before Operations
Package Contents
For the improvement of product performance and/or quality, the basic components may be modified without prior notice. The components may differ slightly in appearance with the provided images.

natural_image
Digital photo frame with a framed picture of two dogs (no text or symbols on the image itself)

natural_image
Simple line drawing of a power adapter with a bulb and plug (no text or symbols)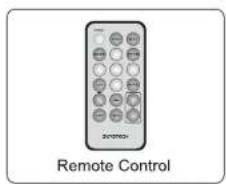
Advanced Operations
Favorite
In the main menu, use the navigation buttons to select the Favorite menu, and press ENTER button to slide show the pictures in your internal memory.
Note: It can only be stored at most 15pcs pictures in the internal memory as it is norflash.

Exit
Press Exit button to enter to the file list, in this file, you can delete pictures as same as in the Edit files.
2
19
Advanced Operations
Setup
In the main menu, use the navigation buttons to select the Setup menu, press ENTER button to enter into the Setup Menu mode.


Photo Setting
Use the navigation buttons to select the Photo Setting icon, and set the interval time, the transition effect, show type and browse mode.
Auto-play
Use the navigation buttons to select the Auto-play icon, you can set Photo/Music/Movie auto-play on or off.
Display Setup
Use the navigation buttons to select the Display Setup icon, you adjust the Brightness the Contrast, the TFT Brightness, the TFT Contrast, and the TFT Saturation.
Custom Setup
Use the navigation buttons to select the Custom Setup icon, you can select the OSD Language, the Repeat Mode, set date and time, and default mode in the menu.
Exit
Use the navigation buttons to select the Exit icon, and press ENTER button to return to the main menu.
Before Operations
Photo Frame Overview
The package contents may differ slightly in appearance with the provided images

Back View
- ← :Press the button to move cursor right or next picture/music/movie.
- →: Press the button to move cursor left or previous picture/music/movie.
- ENTER :Press the button to enter or confirm or pause.
- EXIT : Press the button to exit from the present interface.
- POWER :Press the button to turn on or off the player.
- Wall mountable hole.
- Stand: Using the stand provided you can position the photo frame with horizontal or vertical view.
- Speaker : Bulit in stereo speakers.
Right View
- USB HOST :Connect to a USB probable flash with a USB cable.
- SD/MMC/MS : Insert SD/MMC/MS card.
- Ω : Audio output.
- DC IN : Insert the DC power adaptor to the DPF player.
Basic Operations
Remote Control

Power
Press POWER to turn the player on and off.
16:9/4:3
Press this button to switch the picture ratio between original and optimal.
Music:
Press MUSIC to play songs.
Slide Show:
Press SLIDE SHOW to continually cycle through all of the pictures in the device.
Step Show
Press STEP SHOW to display a single picture; each press will advance one picture at a time.
Note: Remove Insulating Tab to activate battery.
Advanced Operations
Alarm
In the main menu, use the navigation buttons to select the Alarm menu, press ENTER button to enter into the alarm setting mode.


Enable
Select on/off to control the state of the alarm.
Set time
Select Set time icon, press Enter and use the Navigation button to set up time, then select ok/cancel to confirm.
Attn:The alarm function works only when the digital photo frame is powered on.

Exit
Select the Exit icon and press Enter button to return to the main menu.
Advanced Operations
Clock
In the main menu, use the navigation buttons to select the clock menu, press ENTER button to enter into the clock display options interface.


Press navigation buttons to select the option you want and then press ETNER to display related clock effect.


Press EXIT icon on remote control to exit to the main menu.
Basic Operations
Remote Control
Navigation Buttons:
Press the arrow keys to move the cursor to the desired icon.
Enter
Press ENTER to enter/confirm.
EXIT
Press EXIT to pause or return to the previous menu.
ROTATER
Press ROTATE to rotate the picture. This operation is available when a picture is playing normally.
ZOOM:
Press ZOOM repeatedly to zoom out /in the picture.
OSD:
Press OSD to display the state of the playing file.
VIEW
Press VIEW to view the photos in thumbnail mode. Use the up /down/left/right buttons to select the picture and press enter to confirm
MENU:
Press MENU to return to the main menu.
VOL+/−
Press the VOLUME button to adjust the player's volume.
Basic Operations
Power Connection

natural_image
Simple line drawing of a cable being connected to a rectangular device, with two labeled points (1 and 2) indicating connection details.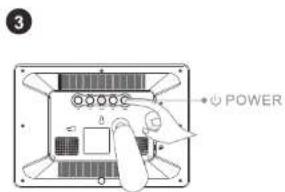
- Connect the power adaptor to the DC IN jack on the left side of the frame.
- Plug in the power cord.
- The frame will automatically power on.
Advanced Operations
Edit
Delete files
Use the navigation buttons to select the Delete icon, press ENTER button, then select the picture what you want, press ENTER button, it will be deleted in the favorite file.
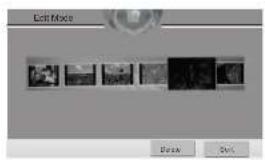
Use the navigation buttons to select the Delete All, press ENTER button it will delete all pictures in the internal memory and if select Return icon, will return to the previous interface.

6
15
Edit
In the main menu, use the navigation buttons to select the Edit menu and press ENTER button, the screen will display as below:

Select desired icon, press ENTER button and use the navigation buttons to activate edit files.
Copy files
In the file list, select the file you want to copy and press ENTER button to confirm the operation. To copy more, continue selecting files. The confirmed files will be in a yellow frame.
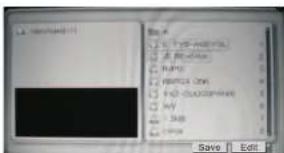
Use the navigation buttons to activate the save icon, the save icon will be in a yellow, then press enter to copy the picture to your favorite files, the screen will display as below:

14
Basic Operations Advanced
Insert a memory card
SD, MMC, MS cards are compatible with this unit.
- Insert the memory card according to the indication of icon beside the slot.
- Misaligning may cause artificial damage. This may nullify the warranty.

USB Removable Storage Devices
Insert USB removable storage devices into the USB OTG port or connect the frame to PC by using the USB cable.

natural_image
Technical line drawing of a door panel with a separate view showing a button and arrow (no text or symbols)Removing the Memory Card
Pull the card straightly out of the unit and avoid bending the card.
7
Basic Operations
Photo
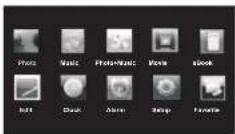

Slide Show Mode
Tip 1: Press SLIDE SHOW button on the remote control to display images in slide show mode.
Tip 2: In the main menu, use the navigation buttons on the remote control to select the PHOTO menu, press ENTER button to select SD/MMC or MS card icon, then press ENTER button again to display images in slide show mode.
Tip 3: In file manager mode, select the Slide Show icon and press ENTER button to begin slide show.
Step Show Mode
Tip 1: In slide show mode, press STEP SHOW button on the remote control to change into the step show mode.
Tip 2: In the main menu, press STEP SHOW button on the remote control to enter into the step show mode.
Tip 3: In file manager mode, use the navigation buttons to select photos, press ENTER button to display the desired photo.
Note: The SLIDE SHOW and STEP SHOW buttons on the remote control will be invalid in thumbnail mode.
Basic Operations
E-Book
In the main menu, use the navigation buttons to select the E-Book menu, and press ENTER button to select SD/MMC or MS card icon, then press Enter button again to enter the file list.

Read a text
In the E-Book file list, use the navigation buttons to select the desired text, and press ENTER button to read the contents.
Previous/ Next row
When reading a text, press the ▲ or ▼ to skip to the previous or next row.
Previous/ Next Page
When reading a text, press the ◀ or ▶ to skip to the previous or next page.
Exit
Press Exit button to return to the previous menu after reading.
Basic Operations
Movie
Play movie
Tip 1: In the main menu, use the navigation buttons to select the MOVIE menu, and press ENTER button to select SD/MMC or MS card icon, then press Enter button again to play movie.
Selecting a movie file
- During movie playing back, press EXIT button to enter the movie file list.
- Use the navigation buttons to select desired folder and desired movie file.
- Press the ENTER button to play.


Adjusting the volume
Use the VOL "+" and "-" buttons to increase or decrease the volume during movie playing back
Exit
Press Exit button to return to the previous menu.
Basic Operations
Photo

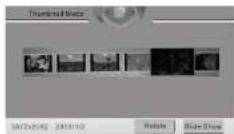
Thumbnail Mode
Tip 1: In slide show mode, press EXIT button to enter into the thumbnail mode.
Tip 2: in slide show or step show mode, press the View button to view the photos in thumbnail mode.
Use the navigation buttons to select photos, press the ▼ button to activate the Rotate icon in the right bottom. Continue to press the ▶ button to activate the Slide Show icon.
Rotate a photo
Tip 1: In slide show or step show mode, press the ROTATE button on the remote control to rotate the displaying photo for 90° at each operation.
Tip 2: In thumbnail mode, activate the Rotate icon, and press ENTER button to rotate the desired photo.
Note: When rotating a photo in thumbnail mode. 1. The Rotate icon will be changed into the Reset icon automatically, press the Reset icon to reset the photos. 2. The slide show icon will be changed into the Return icon, press the Return icon to return to previous mode.
Zoom in/out a photo
Press the ZOOM button repeatedly to zoom in or zoom out the desired photo.
Basic Operations
Music
Play music
In the main menu, use the navigation buttons to select the MUSIC menu, and press ENTER button to select SD/MMC or MS card icon, then press ENTER button again to enter the music file list and play music.


Selecting a song
Use the navigation buttons to select desired folder and desired song, press the ENTER button to play.
Adjusting the volume
Use the VOL "+" and "-" buttons to increase or decrease the volume during music playing back

Exit
Press Exit button to return to the previous menu.
Basic Operations
Photo+Music
Tip 1: In the main menu mode, use the navigation buttons to select the Photo+Music icon, press ENTER button to select SD/MMC or MS card icon, then press ENTER button again to slide show photos in music background.
Tip 2: In the slide show mode, press button MUSIC on the remote control unit to display images in music background.


Mute the sound
When slide show images in music background, press the MUSIC button to mute the sound. Press this MUSIC button once again to continue displaying images in music background.
Adjust the volume
When slide show images in music background, use the VOL "+" or "-" buttons to increase or decrease the volume.
Exit
During play back, press the Exit button to return to the main menu.
Salir
natural_image
Simple line drawing of a cable being connected to a monitor and a power outlet (no text or symbols)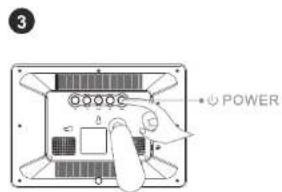
26
35
natural_image
Technical line drawing of a door handle with a separate view showing a button (no text or symbols)Salir
Sair
Sair
natural_image
Simple line drawing of a cable being connected to a monitor and a small electrical outlet (no text or symbols)
46
55
Utilização Avançada
Editar
Borrar archivos
54
Utilização Básica
natural_image
Technical line drawing of a door handle with a separate view showing a button (no text or symbols)- Warranty conditions
- Contents
- User Notice
- Customer Management
- Before Operations
- Package Contents
- Advanced Operations
- Favorite
- Exit
- Setup
- Photo Setting
- Auto-play
- Display Setup
- Custom Setup
- Photo Frame Overview
- Back View
- Right View
- Basic Operations
- Power
- Alarm
- Enable
- Set time
- Clock
- Remote Control
- Navigation Buttons:
- ROTATER
- Power Connection
- Edit
- Delete files
- Copy files
- Basic Operations Advanced
- Insert a memory card
- USB Removable Storage Devices
- Removing the Memory Card
- Photo
- Slide Show Mode
- Step Show Mode
- E-Book
- Read a text
- Previous/ Next row
- Previous/ Next Page
- Movie
- Music
- Play music
- Selecting a song
- Adjusting the volume
- Photo+Music
- Mute the sound
- Adjust the volume
- Salir
- Sair
- Utilização Avançada
- Editar
- Borrar archivos
- Utilização Básica
Brand : Sunstech
Model : DPF1001
Category : Digital photo frame