RK-8100 - Keyboard Rosewill - Free user manual and instructions
Find the device manual for free RK-8100 Rosewill in PDF.

| Product Type | Wired Keyboard |
| Brand | Rosewill |
| Model | RK-8100 |
| Dimensions (L x W x H) | 18.1 x 6.5 x 1.5 inches (46 x 16.5 x 3.8 cm) |
| Weight | 2.2 lbs (1.0 kg) |
| Connection Type | USB 2.0 Type-A |
| Cable Length | 6 ft (1.8 m) |
| Power Source | USB bus-powered |
| Key Switch Type | Membrane |
| Number of Keys | 104 (US layout) |
| Special Keys | Multimedia keys, Windows lock key |
| Key Rollover | 2-key rollover |
| Backlight | None |
| Wrist Rest | Detachable |
| Operating System Compatibility | Windows, macOS, Linux |
| Cleaning Instructions | Unplug, use compressed air or damp cloth. Avoid liquids. |
| Safety Precautions | Do not expose to moisture. Keep away from heat sources. |
| Spare Parts Availability | Contact Rosewill support for replacement keys or cables. |
| Certifications | FCC, CE, RoHS |
Frequently Asked Questions - RK-8100 Rosewill
User questions about RK-8100 Rosewill
0 question about this device. Answer the ones you know or ask your own.
Ask a new question about this device
Download the instructions for your Keyboard in PDF format for free! Find your manual RK-8100 - Rosewill and take your electronic device back in hand. On this page are published all the documents necessary for the use of your device. RK-8100 by Rosewill.
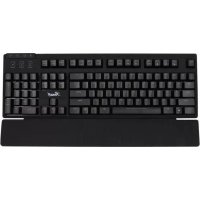
USER MANUAL RK-8100 Rosewill
Gaming Keyboard with fully programmable keys
1 Hardware and Software Installation
Please make sure keyboard is connected to PC before software installation.
1. Connect the keyboard USB connectors to a PC and observe for [Hardware found] notice
2. Place the enclosed CD driver into CD/DVD-ROM and follow the steps on screen to complete software installation and restart the computer.
3. Activate your Interface (GUI) from clicking bottom right side icon on desktop after PC is on
4. When keyboard USB port is unplugged, Octopus Clicker icon will disappear at the same time.
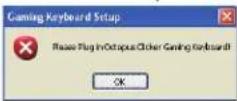
5. If a reminder of software installation compatibility shows up, please click "Continue" to move on to next stage.
* Please make sure keyboard is connected to PC before software installation.
* Please do not connect keyboard to any other USB ports after installation. In case connecting to any other USB ports, users shall install software again.
2 Software Installation Verification
- You need to verify if installation is complete or not through hardware manager
- Please click "My Computer" from mouse right button then click "Attributes" on left button. Then "Hardware" Then "Hardware Manager".
- Please check and ensure two items * gaming keyboard ", " human interface input device" are inclusive in the list of hardware manager.
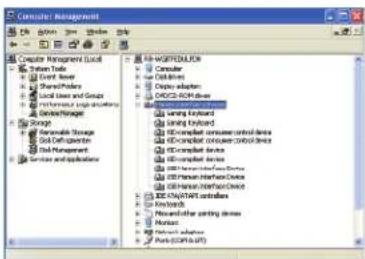
text_image
Computer Management Computer Management Local System Trade Event Table Transport/Transport Local Lines and Groups Performance & Support Systems Storage Renewable Storage Grid Deforestation Grid Management Services and Applications MUSTMENTER Computer Cell Lines Delete Adapters OROS-ROM-Driver DAR-PCAPIC Operating System Switch Interface PCB-Channel Consumer Control Devices PCB-Channel Consumer Control Devices PCB-Channel Devices PCB-Channel Infrastructure Devices PCB-Channel Infrastructure Devices PCB-Channel Infrastructure Devices PCB-Channel Infrastructure Devices PCB-Channel Infrastructure Devices PCB-Channel Infrastructure Devices PCB-Channel Infrastructure Devices PCB-Channel Infrastructure Devices PCB-Channel Infrastructure Devices PCB-Channel Infrastructure Devices PCB-Channel Infrastructure Devices PCB-Channel Infrastructure Devices PCB-Channel Infrastructure Devices PCB-Channel Infrastructure Devices PCB-Channel Infrastructure Devices3 Main Frame of UI
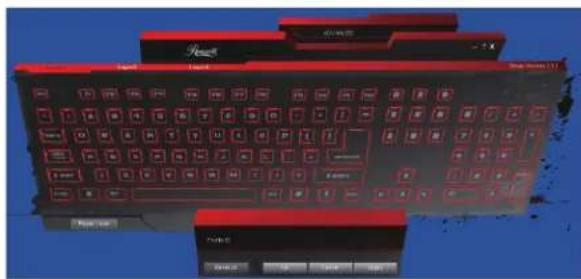
Picture below shows UI. UI is a program to customize users' functions or settings.
text_image
Screenshot of a red computer keyboard with control buttons and status indicators, showing text labels like 'Control' and 'OK'.4 UI Configuration Guide

Set button in the process, when the set position before the pointer button will show three-dimensional effect.

After setting complete, key rim presents in highlighting display. In addition, it will reveal the content of settings when cursor clicks on.

Due to the long Macro setting, Macro will display Marco itself.

Manual

Layer to reset current settings. Dialogue window as below. Please confirm OK to apply setting. Please click Cancel to undo

5 UI main frame includes
UI main frame includes 10 profiles. Each Profile possesses 3 Layers. Layers are classified by colors
Layer1-Red
Layer2-Green
Layer1-Blue
6 Advance
provision of settings as below.

text_image
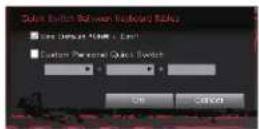
Settings for the most common settings OK CancelCustom Personal Quick Switch:
A quick switch between PC mode and gaming mode. Definitions as follows.
Quick Switch Between Keyboard Tables
1) Use default "shift + ESC"
Use default " shift + ESC" to define
2)Custom Personal Quick Switch:
Users can choose Shift, Ctrl, Alt or any alphabet keys to customize personal quick switch. Please avoid same composition with Microsoft default value. Otherwise, this setting will be invalid. If current setting is complete, please click "OK" or click "Cancel" to undo the setting.
Media Player Option
1) Windows Media Player
2iTunes
3) Real Player
4) Winamp

* If Media Player Option is not installed, this option is not available.
* Update software —( Not activated yet)
7 Profile Selection
Provision of settings as below.
Profile01 :
To modify current settings, please click "Profile01" to activate panel and choose profile from list. After modification complete, please click "OK" or "Apply" to execute. Otherwise, please click "Cancel" to
Undo. Profile can function as Import, Export or reset current settings.
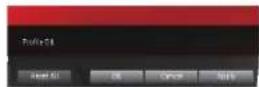
Reset All :
Dialogue window as follows,

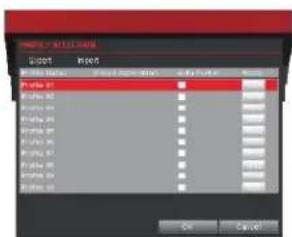
- allows you to execute profiles or log in program to proceed "Auto Switch".
▶ Please click left button on mouse on chosen area to browse till profile or quick switch found.
▶ Please click OK or Cancel to finish this task. * Users have to link files to Linked Application to perform Auto-Switching.
Auto-Swtich
▶ allows you to activate or inactivate "Auto-Swtich" function.
▶ Please click auto-switching dialogue window beside files to execute this function. "V" indicates auto-switching function is activated.
Reset
Dialogue window as below.

8 UI function settings including
Provision of settings as below.
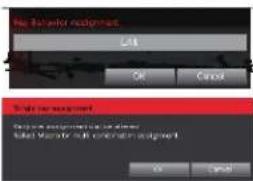
Single Key:
Allows users to swap alphabet keys to other keys. When users is going to set a multi-combination assignment, warning window will appear as below.

text_image
No Driver assignment OK Cancel Sign for assignment Design parameters are closed. Model Manager will confirm assignment.Macro:
allows users to set up sequence of keys and mouse buttons. UI will keep Marco to replay later.
9 Macro items includes
It is a sequence list of replay varieties of keys, delay and other functions when Macro Mouse Button:
Allows users to transform keyboard function to mouse button.
ro, all key behavior composition, sequence and actual delay will reveal in "Key Behavior Assignment".
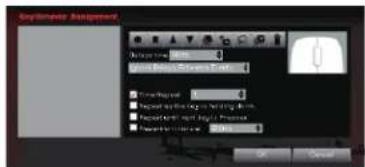
text_image
Options Assignment Options Name: Name Address: Selected Date Time Period: 0 Report to the log on Setting Data Report to the right: Please Print Please Print as follows: OK Cancel
Record :
Start to record Marco

Stop :
Stop record Macro

Move Up :
Click mouse's left button to "move up" any event. It allows you to move up any event to preferred location in the sequence list.

Move Down :
Click mouse right ( left) button to move down any event. It allow you to move down any event to preferred location in the sequence list.

COPY :
Copy one segment of Marco

Add Delays :
Allows users to add delays in sequence list manually. Simply choose one event's delays Once at a time then choose delay time and click "add" button.


Select All :
Select all events in the sequence list.

Select All Delays :
Only select all delays from sequence list. If you like make all delays in same period or cancel all right away, please select the specific option dialogue.

Delete :
Deletece list.
Delays time :
Allows users to add delays time in Macro
Ignored Delays Between Eve
System will not record the time difference between delay time of "click" and "release" button and actual time in the progress of recording Macro.
Record with Auto Delay :
System will record the time difference between delay time of "click" and "release" button and actual time.
Time Repeat :
Input number of time repeat
Repeat as key is holding down:
Allows users to record Macro content when key is holding down
Repeat until next key is Pressed:
Repeat same Macro until next key is Pressed
Repetition interval :
Set up repetition interval between Marco
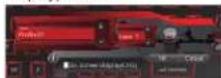
10 Macro items includes


Users can set up mouse button through sketch map. When "press" button, button color becomes red. When "release" button, button color return original white, "Press" and "Release" button is regarded as two motions.
In the progress of setting Marco, there is a maximum of 128 through "press" and "release" method. Warming window will show up if limit is reached.

Click [OK/Cancel] to complete Macro setting
11 Set Up Mouse Button
Mouse Button:
Allows users to transform keyboard function to mouse button.

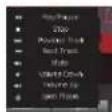
12 Function Selection
Internet HotKeys :
Insert a varieties of operations in compliance with Windows operation system's basic commands.

Office HotKeys:
Insert a varieties of operations in compliance to Windows operation system and Microsoft Office's basic commands.

Media HotKeys :
Insert a varieties of operations in compliance to Windows operation system's basic commands.
Additional
command : Insert a varieties of operations in compliance to Windows operation system 's basic commands.

Profile Switch :
Allows users to switch to designated Profile and Layer. Arrow up means adding to Profile 10 or Layer 3 and choose to perform OSD (On-Screen Display) or not.
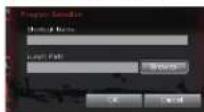
Launch Program :
Users need to find out .exe format file to execute games or launch program after log in program. This setting will reveal file name and location.
Reset Key to Default:
This allows users to reset Macro key, single key or launch program to default.
Disable Button : Allows users to disable specific buttons.
Config : Config is to launch software interface.
Exit: Exit will turn off tray icon and stop launch program in gaming keyboard. If users need to launch program again, please restart PC.
* SPECIFICATION SUBJECT TO CHANGE WITHOUT NOTICE.
* ALL PRODUCTS AND COMPANY NAME REFERENCED HEREIN ARE TRADEMARKS OF THEIR RESPECTIVE COMPANIES.

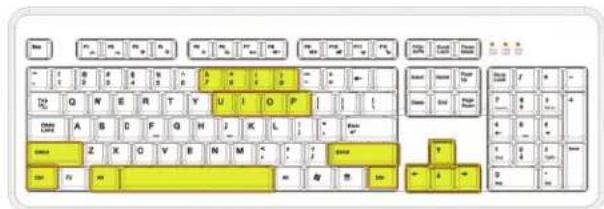
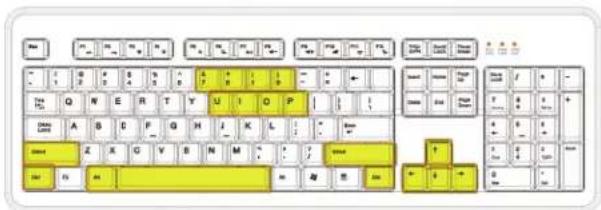
13 Anti Key Combination
text_image
Screenshot of a standard computer keyboard layout with yellow and black keys, showing standard characters like 'T', 'A', 'B', etc.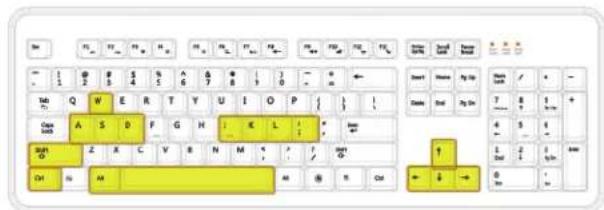
text_image
Close Close Close Close Close Close Close Close Close Close Close Close Close Close Close Close Close Close Close Close Close Close Close Close Close Close Close Close Close Close Close Close Close Close Close Close Close Close Close Close Close Close Close Close Close Close Close Close Close Close Close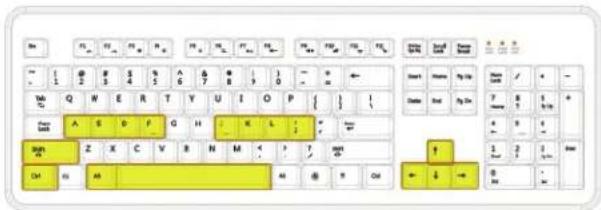
text_image
Cropped image of a standard keyboard layout with yellow and black keys, showing alphanumeric characters and symbols.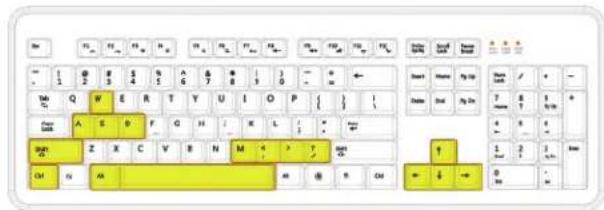
text_image
Keyboard layout diagram with yellow and black keys, showing various letters and symbols on a keyboard layout.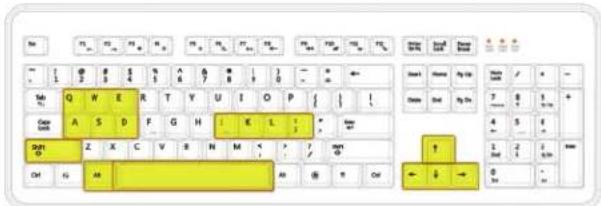
text_image
Keyboard layout diagram with yellow keys and alphanumeric labels, likely for a computer keyboard or keyboard interface.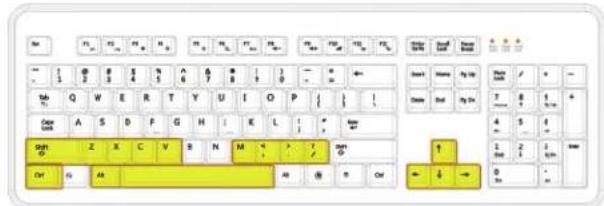
text_image
Screenshot of a standard keyboard layout with yellow keys and control buttons
text_image
Cropped image of a standard keyboard layout showing letter keys, keys, and highlighted yellow keys with alphanumeric codes.
text_image
Sun 1 2 3 4 5 6 7 8 9 10 11 12 13 14 15 16 17 18 19 20 21 22 23 24 25 26 27 28 29 30 31 32 33 34 35 36 37 38 39 40 41 42 43 44 45 46 47 48 49 50 51 52 53 54 55 56 57 58 59 60 Tab Q W E R T Y U I O P { } I Close Back A S D F G H I K L : * / * / * / * / * / * / * / * / * / * / * / * / * / * / * / * / * / * / * / * / * / * / * / * / * / * / * / * / * / * / * / * / * / * / * / * / * / * / * / * / * / * / * / * / * / * / * / * / * / * / * / OR Z X C V R N M < ? ? / OR OR ← ↓ → CHI NV AR AR ⊕ R Cat Start Name My Up Show Change But By On 7 B 4 S 4 S 1/2/2/2/2/2/2/2/2/2/2/2/2/2/2/2/2/2/2/2/2/2/2/2/2/2/2/2/2/2/2/2/2/2/2/2/2/2/2/2/2/2/2/2/2/2/2/2/2/2/2/4 ↑ 1/2/2/2/2/2/2/2/2/2/2/2/2/2/2/2/2/2/2/2/2/2/2/2/2/2/2/2/2/2/2/2/2/2/2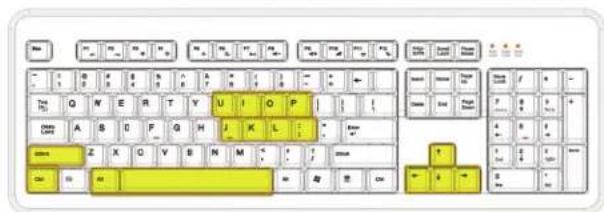
text_image
Screenshot of a classic keyboard layout with yellow and black keys, showing standard alphanumeric codes for typing or language.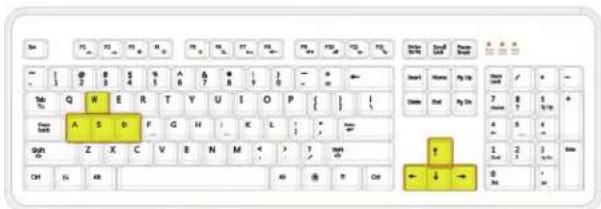
text_image
T 1 2 3 4 5 6 7 8 9 10 11 12 13 14 15 16 17 18 19 20 21 22 23 24 25 26 27 28 29 30 31 32 33 34 35 36 37 38 39 40 41 42 43 44 45 46 47 48 49 50 51 52 53 54 55 56 57 58 59 60 61 62 63 64 65 66 67 68 69 70 71 72 73 74 75 76 77 78 79 80 Tout Name: My Go Name: My Go A S D F G H I K L J ↑ 1/2/2/2/2/2/2/2/2/2/2/2/2/2/2/2/2/2/2/2/2/2/2/2/2/2/2/2/2/2/2/2/2/2/2/2/2/2/2/2/2/2/2/2/2/2/2/2/2/2/2/4 ON CH OR OK OK OK OK OK OK OK OK OK OK OK OK OK OK OK OK OK OK OK OK OK OK OK OK OK OK OK OK OK OK OK OK OK OK OK OK OK OK OK OK OK OK OK OK OK OK OK OK OK OK Ok Ok Ok Ok Ok Ok Ok Ok Ok Ok Ok Ok Ok Ok Ok Ok Ok Ok Ok Ok Ok Ok Ok Ok Ok Ok Ok Ok Ok Ok Ok Ok Ok Ok Ok Ok Ok Ok Ok Ok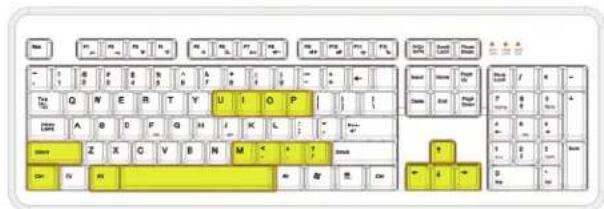
text_image
Screenshot of a classic keyboard layout with yellow and black keys, showing standard numeric keypad connections.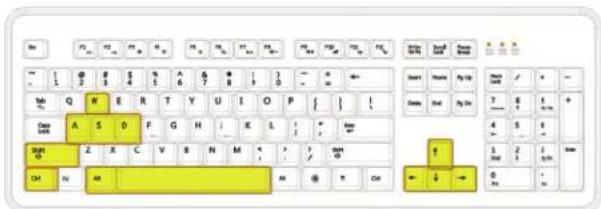
text_image
Keyboard layout diagram showing yellow keys with alphanumeric labels and symbols