Sumo 2 - Bike light Cateye - Free user manual and instructions
Find the device manual for free Sumo 2 Cateye in PDF.

User questions about Sumo 2 Cateye
0 question about this device. Answer the ones you know or ask your own.
Ask a new question about this device
Download the instructions for your Bike light in PDF format for free! Find your manual Sumo 2 - Cateye and take your electronic device back in hand. On this page are published all the documents necessary for the use of your device. Sumo 2 by Cateye.
USER MANUAL Sumo 2 Cateye
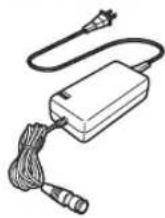
BA-904 Battery unit (lithium-ion batteries) Battery chargerH-34N Bracket

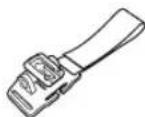
Helmet mount
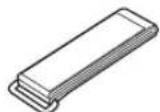
Fixing strap
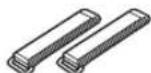
Auxiliary strap (x2) Cable cover (x3)

Extension cable
MOUNTING THE LIGHT UNIT ON A HELMET
1

text_image
Bracket strap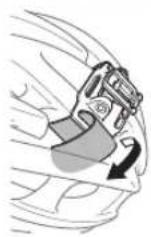
text_image
Light unit Button Light unit Auxiliary strap
text_image
2 Extension cable Plug Light unit Battery unitConnect with the correct line
text_image
Ring Battery unit or extension cable LOCKHOW TO MOUNT TO A BICYCLE
text_image
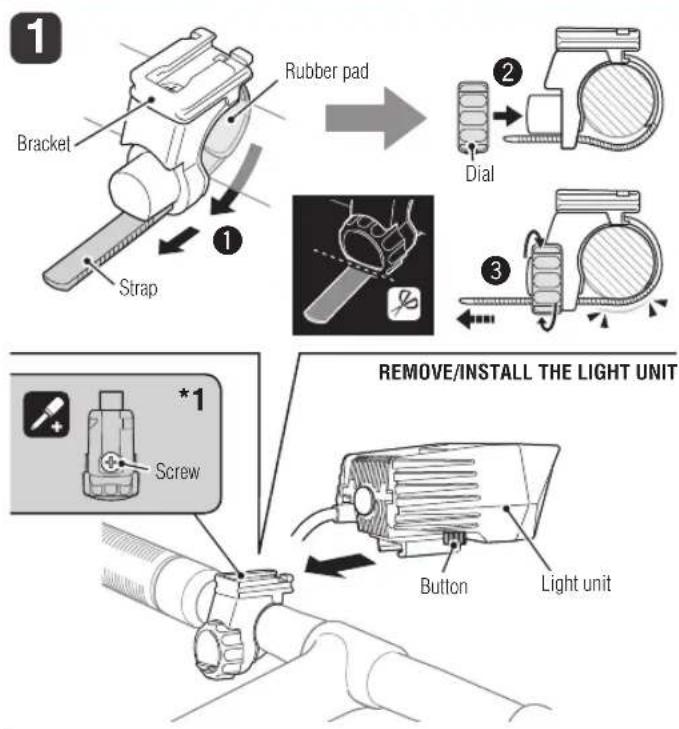
1 Bracket Rubber pad ① Strap ② Dial ③ *1 Screw REMOVE/INSTALL THE LIGHT UNIT Button Light unit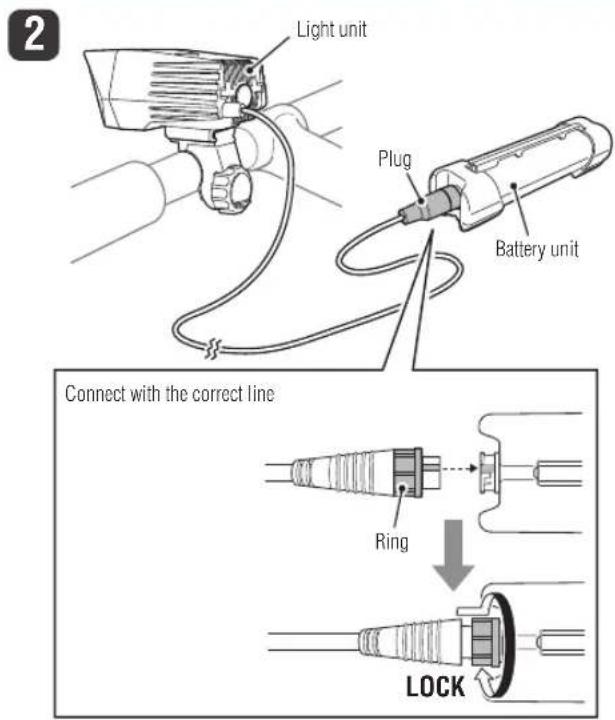
text_image
2 Light unit Plug Battery unit Connect with the correct line Ring LOCK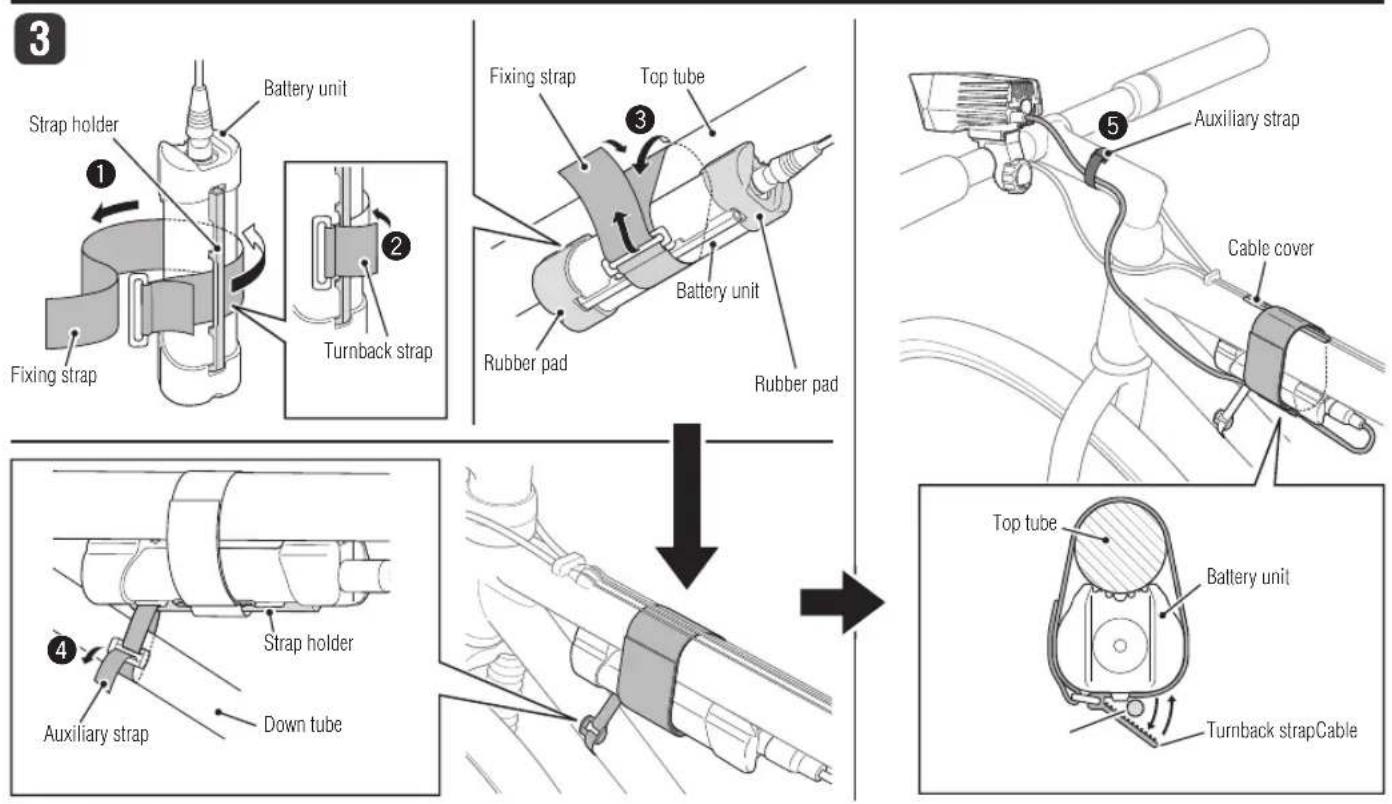
text_image
3 1 Battery unit Fixing strap 2 Turnback strap 3 Fixing strap Top tube Battery unit Rubber pad Rubber pad 4 Auxiliary strap Cable cover Strip holder Down tube Top tube Battery unit Turnback strap Cable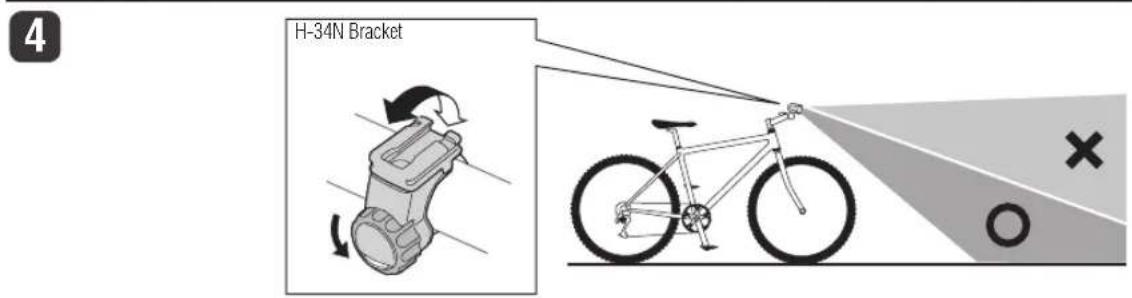
text_image
H-34N Bracket O XHOW TO USE
A

text_image
Switch (Battery indicator / Mode indicator)
flowchart
graph LR
    A["ONON"] --> B["Dynamic Normal"]
    B --> C["Normal"]
    C --> D["All night All"]

text_image
OFFOFF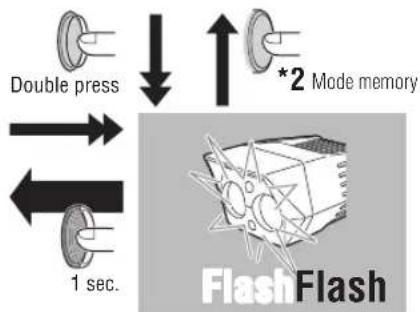
flowchart
graph TD
    A["Double press"] --> B["1 sec."]
    C["*2 Mode memory"] --> D["FlashFlash"]
text_image
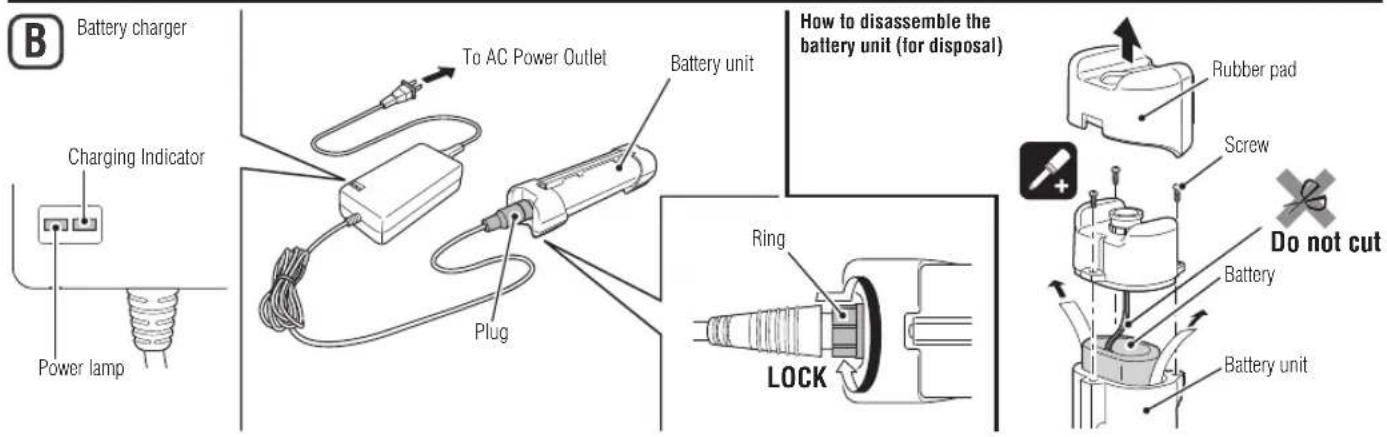
Battery charger Charging Indicator Power lamp To AC Power Outlet Battery unit Plug How to disassemble the battery unit (for disposal) Ring LOCK Rubber pad Screw Do not cut Battery Battery unitSPARE PARTS

Light unit
5342130
BA-908 Battery unit (Li-ion/7.4V 9200mAh)
5342140
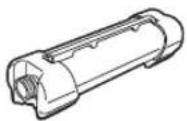
BA-904 Battery unit (Li-ion/7.4V 4600mAh)
5338827
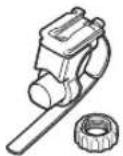
H-34N Bracket
5341831

Helmet mount
5342170
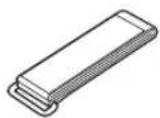
Fixing strap
5342180

Auxiliary strap
5342190

Cable cover (x3)
5342290#5342160
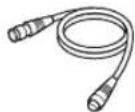
Extension cable
UL: #5342300
AS: #5342304
EC: #5342302
UK: #5342301
Battery charger
INTRODUCTION
Before using the light, be sure to thoroughly read this instruction manual and accompanying “Lithium-ion Batteries”.
Thank you for purchasing our CATEYE "SUMO2 HL-EL920RC".
This product has significantly increased light intensity more than the conventional products, using new multichip LEDs as its light source. It uses high-capacity lithium-ion rechargeable batteries, and is an ideal high-power rechargeable light that delivers superior performance even in a severe environment.
FOR SAFE OPERATION
Do not use it on public roads. This product emits light equivalent to that of automobile headlights, therefore, it is very dangerous depending on the beam angle. When you use it on public roads out of necessity, be sure to adjust the beam angle downward so it does not dazzle the oncoming driver.
Never short-circuit the terminals of the battery unit or the battery charger. It may cause the unit to overheat, resulting in fire or damage to the component.
The battery unit uses lithium batteries. If liquid leaks from the batteries, do not touch them with bare hands and do not bring them close to fire. Securely connect the plug and fasten the strap. Otherwise, they may come off while riding, causing the light to turn off, or you could topple over if the cable gets caught in the wheel. Never use damaged components (e.g., cables, etc.). Send any damaged components to our customer service department for repair.
Do not stare at the light when it is on. Doing so may damage your eyesight. The light unit is hot when it is on or immediately after it is turned off; therefore, be careful not to burn yourself.
Do not place it within children's reach. Never disassemble the light unit, battery unit, or battery charger. Do not store the battery unit in a car or near a heater. Charging, discharging and storing at high temperature may accelerate battery deterioration.
When you leave the battery unit for a long time, it self-discharges over time, decreasing its voltage. Store the battery unit with the plug disconnected, and charge it before use. If you are not going to use the battery unit for a long time, use up the batteries and store them in a cool and dry place. Charge the batteries for about 5 minutes every 6 months.
- If the lamp body or parts become dirty with mud, etc., clean with a soft cloth which is moistened with mild soap. Never apply paint thinner, benzine or alcohol; damage will result.
- When the connecting plug is dirty with mud, etc., clean it with the plug connected and locked. This product is water-resistant under normal daily use and can be used in the rain. However, do not intentionally submerge it in water.
We recommend carrying a flashlight or spare battery unit with you in case • the main battery dies.
Mount the light unit and the battery unit, 3cm and 10cm away from the wire-less computer, respectively. When they are too close to the computer, its transmitting and receiving functions may be affected.
! Before Initial Use
The battery is shipped with a small charge, that is used to test the unit at the factory. It is necessary to charge the battery before initial use. (Refer to the “How to charge battery unit” section in this manual.)
MOUNTING THE LIGHT UNIT ON A HELMET
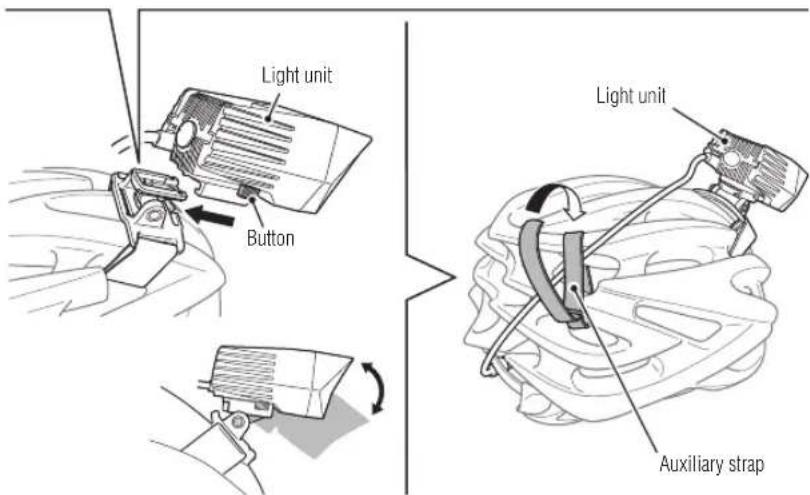
1 Installing the helmet mount, and attaching/removing the light unit
Put the bracket strap through the air vent on the helmet, and secure it firmly.① Install the light unit to the helmet mount.②
③ Secure the cable to the helmet mount using the auxiliary strap
* Insert the light unit to the helmet mount until it clicks, and adjust the beam angle. * To remove the light unit, pull out it forward while pressing the button.
CAUTION!: Make sure the light unit is cool before attaching/removing it.
2 Connecting the cable
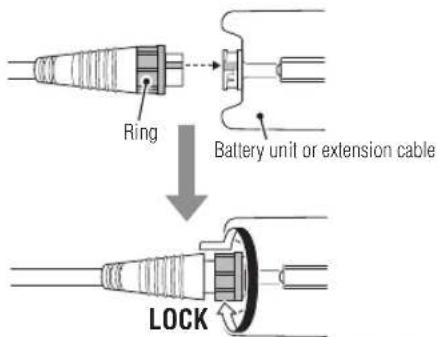
Connect the extension cable between the light unit and the battery unit as shown.
CAUTION!: The plug is locked by turning the ring while pressing. It must remain locked in use.
To disconnect the plug, turn the ring in the reverse direction to unlock the plug, * and then pull out the plug.
How to carry the battery unit
Carry the battery unit in a pocket or bag, with the rubber pad removed. Check the battery unit to see if the cable is connected properly.
HOW TO MOUNT TO A BICYCLE
1 Installing the bracket, and attaching/removing the light unit
① Wind the bracket strap around the handlebar, and put the strap through the opening.
② Screw the dial into the bracket to secure it temporarily.
Insert the light unit to the bracket until it clicks, and then adjust the beam angle * (refer to "How to adjust beam angle").
③ Securely tighten the dial, and cut off any excess bracket strap.
* To remove the light unit, pull out it forward while pressing the button.
CAUTION!:
- Be sure to tighten the dial by hand. When you tighten it too hard with a tool, the screw thread may be stripped.
Check the dial and screw (*1) on the bracket periodically, and use them • without any loosening. - Round off the cut edge of the bracket strap to prevent injury.
• Make sure the light unit is cool before attaching/removing it.
2 Connecting the cable
Connect the plug of the light unit to the battery unit as shown.
CAUTION!: The plug is locked by turning the ring while pressing. It must remain locked in use.
To disconnect the plug, turn the ring in the reverse direction to unlock the plug, * and then pull out the plug.
3 Installing the battery unit and securing the cable
1 Put the fixing strap through the strap holder of the battery unit
• Install the fixing strap so that the turnback strap faces outside.
② Secure the strap holder of the battery unit with the turnback strap of the fixing strap.
3 Put the rubber pad of the battery unit on the top tube, and secure it firmly by wrapping with the fixing strap.
Put the auxiliary strap through the strap holder of the battery unit, and secure ④ it firmly by winding it around the down tube.
Wind the auxiliary strap with the battery unit installed as frontward as possible. * The battery unit will be stably secured during riding.
5 Secure the cable appropriately to the frame and/or stem with another auxiliary strap. *The turnback strap of the fixing strap can be also used for securing the cable. When the battery unit is not installed directly to the frame, the rubber pad of a battery unit can be removed.
CAUTION!
Be sure to firmly secure the battery unit. When the battery unit is secured • insufficiently, it may be dislocated on impact while riding. When some cables are installed along the top tube, attach the cable cover in • advance to protect the cable from any force applied. Otherwise, it may cause trouble in braking or gear shifting.
Pay attention to the arrangement of the cable so that it does not interfere with the handling of the bicycle. Do not secure the cable at an acute angle because the wire inside the cable may break.
Adjust the beam angle before use according to the description in "How to adjust beam angle".
4 How to Adjust Beam Angle
Warning!!!: Do not use this unit on public roads.
Turn on the light in a level place at night, and adjust the beam angle to avoid dazzling any oncoming driver. To attach to your bicycle, slightly loosen the dial of the bracket, and adjust the vertical angle of the light unit. Securely tighten the dial after adjusting the strap.
* Loosen the dial just enough to allow the bracket to move slightly. Do not loosen the dial too much, or the bracket strap may come off.
* It can be adjusted by 10 degrees horizontally.
HOW TO USE
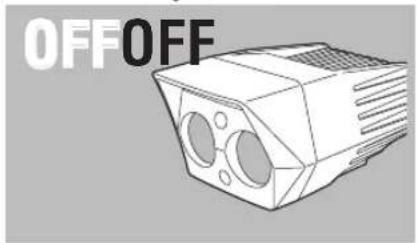
A Switch operation (switching the lighting mode)
Use the switch of the light unit to turn on/off and to switch the lighting mode.
"Press and hold" the switch to turn on/off the power (light on/off)
The flash mode can be triggered even with the light turned off.
| Switching operation | Lighting mode Brightness | Mode indicator | Operating time | |
| Press | Dynamic | Green | Approx. 1.5 hours | |
| Normal Orange Approx. 4 hours | ||||
| All night | ○ | Red Approx. 10 hours | ||
Quick double press Flash None Approx. 35 hours
Mode indicator : *
Immediately after switching the lighting mode, the switch flashes
for 5 seconds and indicates the current lighting mode.
Mode memory function (* *2)The light unit turns on at the previous mode.
Temperature control
When the light unit becomes hot while it is turned on in the dynamic mode, the protection function switches automatically to the normal mode. In such a case, it returns to the previous dynamic mode when the light unit becomes cooler by air-cooling effects, etc.
* When the light unit increases in temperature abnormally, its safety function becomes active and turns off the light. When it decreases in temperature, it can be turned on again by switch operation. It is recommended to use in the All night mode when there is no wind, e.g., when you are not riding.
Remaining battery level
When the light unit is on, the color of the switch shows how much battery power remains.
Guideline for the battery indicator
Green light : The remaining battery level is sufficient.
Orange light : The remaining battery level is low. Charge the battery unit.
Red light : Stop using the light unit, and charge the battery unit.
* The indicator is only an estimation of the remaining battery run-time, and varies with the environment or conditions of use.
* Make it a habit to charge the battery unit when the indicator changes to orange.
Low battery charge warning function
To prevent the light unit from being turned off unexpectedly due to low battery charge, this function turns on the indicator red, and switches the lighting mode from normal lighting to intermittent flashing.
B How to Charge Battery unit
Important!
- If the battery unit is wet, wipe dry with a dry cloth before charging the batteries.
- Be sure to use only the supplied battery charger (applicable to 100 - 240 volts). The battery charger is indoor use only.
- When the charging indicator of the battery charger flashes green, there may be a circuit failure. Unplug the charger and remove the cause.
- When the charging indicator of the battery charger flashes green quickly within a few minutes after charging starts, unplug the charger from the outlet, and charge the battery again according to the procedure. Similar behavior may be seen when the battery is hot immediately after use. Charge the battery unit after cooling it sufficiently.
When the same results occur repeatedly, the battery may be deteriorated.
- When the battery unit repeatedly does not meet the proper operating time even though it is fully charged, it might be at the end of its operating life. Replace the old battery unit with a new one.
- Lithium-ion rechargeable batteries are recyclable. Remove the used batteries from the battery unit, apply insulating tape on the plug, and take them to stores supporting rechargeable battery recycling (refer to "How to disassemble the battery unit (for disposal)").
* The battery charge can be checked with the charging indicator of the battery charger. Charge the battery unit with the following procedure.
① Plug the battery charger to an AC outlet.
Check that the charging indicator flashes red three times as the power lamp turns red. The power lamp turns red while the unit is connected to an outlet.
② Connect the plug of the battery charger to the plug of the battery unit.
* Charge the batteries with the plug locked.
* When the charging indicator continues flashing red, disconnect the unit and then re-connect it according to the specified procedure.
* When charging is complete, the indicator light changes from red to green.
③ After charging is complete, make sure to unplug the charger from the AC outlet.
Charging indicator state
Standard charging time
Red light : Charging
Green light : Charging is completed
Approx. 5 hours
Flashing red light / Flashing green light : Charge error
* The standard charging time and run time are guideline values and depend on the operating environment.
* The supplied BA-904 battery unit (4600 mAh) is charged with about 80% of its capacity in 2.5 hours after charging starts.
* Directly connect the battery unit to the battery charger to charge, without using the extension cable. Doing so may extend the charging time.
SPECIFICATIONS
Light source ....Multichip white LED (x2)
Battery unit ....Lithium-ion rechargeable battery BA-904 Li-ion/7.4V 4600mAh
Battery charger ....CHR-001 Li-ion (AC100V - 240V 50/60Hz)
Operating time ...... Dynamic: Approx. 1.5 hours, Normal: Approx. 4 hours,
All night: Approx. 10 hours, Flash: Approx. 35 hours
* The optional BA-908 doubles the operating time.
Standard charging time ....Approx. 5 hours (Optional BA-908: Approx. 10 hours)
Temperature range ....Charging: 5°C - 40°C, Operating: -10°C - 40°C
Recharge/discharge number of times ...About 300 times (until the rated capacity drops to 70%)
* The specifications and design are subject to change without notice.
LIMITED WARRANTY
2-year Warranty: Light unit / Battery unit / Battery charger (Deterioration of the battery is excluded.)
CatEye products are warranted to be free of defects from materials and workmanship for a period of 2 years from original purchase. If the product fails to work during normal use, CatEye will repair or replace the defect at no charge. Service must be performed by CatEye or an authorized retailer. To return the product, pack it carefully and enclose the warranty certificate (proof of purchase) with instruction for repair. Please write or type your name and address clearly on the warranty certificate. Insurance, handling and transportation charges to CatEye shall be borne by person desiring service. For UK and REPUBLIC OF IRELAND consumers, please return to the place of purchase. This does not affect your statutory rights.
CATEYE CO., LTD.
2-8-25, Kuwazu, Higashi Sumiyoshi-ku, Osaka 546-0041 Japan
Attn: CATEYE Customer Service Section
Phone : (06)6719-6863
Fax : (06)6719-6033
E-mail : support@cateye.co.jp
URL : http://www.cateye.co.jp
Service & Research Address for USA
CATEYE Service and Research Center
1705 14th St. 115 Boulder, CO 80302
Phone : 303.443.4595
Toll Free : 800.5CATEYE
Fax : 303.473.0006
E-mail : service@cateye.com
URL : http://www.cateye.com