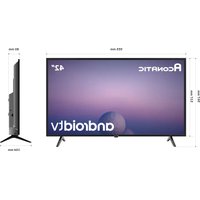
42HS600AN - Television Aconatic - Free user manual and instructions
Find the device manual for free 42HS600AN Aconatic in PDF.


| Product Type | Television |
| Brand | Aconatic |
| Model | 42HS600AN |
| Screen Size | 42 inches (106.7 cm) |
| Display Type | LED |
| Resolution | 1920 x 1080 (Full HD) |
| Aspect Ratio | 16:9 |
| Contrast Ratio | 1200:1 (typical) |
| Brightness | 250 cd/m² |
| Viewing Angle | 178° horizontal / 178° vertical |
| Refresh Rate | 60 Hz |
| Tuner | DVB-T/T2/C |
| Dimensions Without Stand | 96.5 x 56.5 x 8.0 cm |
| Dimensions With Stand | 96.5 x 61.5 x 20.0 cm |
| Weight Without Stand | 8.0 kg |
| Weight With Stand | 8.5 kg |
| Power Consumption (Typical) | 75 W |
| Power Supply | AC 100-240 V, 50/60 Hz |
| Inputs | 2x HDMI, 1x USB, 1x VGA, 1x Component, 1x Composite, 1x RF |
| Audio Output | Built-in speakers (2 x 8 W) |
| VESA Mount Pattern | 200 x 200 mm |
| Stand Included | Yes |
| Cleaning Instructions | Wipe gently with a soft, dry cloth. Do not use liquids or abrasive cleaners. |
| Safety Warning | Do not open the cabinet. Keep away from water and moisture. Only use the provided power cord. |
| Spare Parts | Remote control, stand base |
| Reparability | Contact a professional technician for repairs. Do not attempt self-repair. |
Frequently Asked Questions - 42HS600AN Aconatic
User questions about 42HS600AN Aconatic
0 question about this device. Answer the ones you know or ask your own.
Ask a new question about this device
Download the instructions for your Television in PDF format for free! Find your manual 42HS600AN - Aconatic and take your electronic device back in hand. On this page are published all the documents necessary for the use of your device. 42HS600AN by Aconatic.
USER MANUAL 42HS600AN Aconatic
การระบายอากาศ
Chromecast built-in™
Important Safety Instructions and Maintenance 1
Mounting and Connecting....3
Packing list....3
Mounting the TV set....3
Connecting peripheral equipment……4
Panel Control Keys 4
Remote Control 5
Basic Operations 6
Turning on/Standby....6
Signal source selection....6
Menu operation description 6
Channel scanning....7
REC option 7
Time Shift option....7
Instructions for quick start....7
Basic Operations....7
Quick Start 7
Smart Applications 8
Network Settings 8
Bluetooth Setting 8
Recommendations 9
Troubleshooting....9
Base Installation Instructions....10
Use of a TV wall mounting....10
Important Safety Instructions and Maintenance
Important Safety Instructions
CAUTION
Risk of electronic shock,
do not open.Do not attempt
to service this product yourself as opening
or removing covers may expose you to
dangerous voltage or other hazards.
Refer all servicing to qualified service personnel.
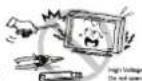
If the following problems occur:
Turn off the TV set and unplug the AC power
cord immediately if any of the following
problems occur. Ask your dealer or ser
centre to have it checked by qualified service personnel
When:
- AC power cord is damaged.
- Poor fitting of AC power outlet.
- TV set is damaged by being dropped, hit or having something
thrown at it.
- Any liquid or solid object falls through openings in the cabinet.
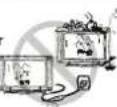
To reduce the risk of fire or electric shock, do not
expose this product to rain or moisture.
The apparatus shall not be exposed to dripping or splashing and no objects filled with liquids.
such as vases, shall be placed on the apparatus.

The screen and cabinet get warm when the TV
is in use. This is not a malfunction. In case
of smoke, strange noise or strange smell from the unit:
Turn off the power switch immediately;
- Disconnect the power plug from the power outlet;
Contact your dealer or service centre. Never attempt to make
repairs
yourself because this could be dangerous.
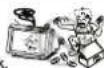
Never push objects of any kind into the set
through the cabinet slots as they may touch
dangerous voltage points or short-circuit
parts that could result in a fire or electric shock.
Never spill liquid of any kind on the set. Use special caution in households where children are present. The apparent is not
households where children are present. The apparatus is not suitable for children under 3-year to operate.
Do not overload wall outlets, extension cords or
adaptors beyond their capacity, this can result in
fire or electrical shock. Power-supply cords
should be routed so that they are not likely to be walked on or pinched by items placed upon
be walked on or pinched by items placed upon or against them, paying particular attention to cords at plug end.
adaptors and the point where they exit from the appliance.
The mains plug is used as the disconnect device. It shall remain
readily accessible and should not be obstructed during intended use. Make sure to give the power cord in until it is firmly inserted.
Use. Make sure to plug the power cord in which it is firmly inserted. When removing the power cord, make sure to hold the power plug
when pulling the plug from the outlet, do not pull the plug out by the
wire. NEVER touch the plug or power cord with wet hands.
To disconnect the apparatus from the mains power, the plug must be
pulled out from the mains socket, therefore make sure the mains plug is always easily accessible.

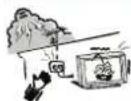
An outside antenna system should not be located
in the vicinity of overhead power lines or other
electric light or power circuits, or where it can fall into such power lines or circuits. When installing
into such power lines of circuits. When installing an outside antenna system, extreme care should
be taken to keep from touching such power lines.
or circuits as contact with them might be fatal.
Ensuring the television is not overhanging the
edge of the supporting furniture.
When not in use
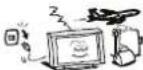
If you will not be using the TV set for several
days, the TV set should be disconnected from
the AC mains for environmental and safety
reasons. As the TV set is not disconnected from the AC power when the TV is turned off
at the standby switch, pull the plug from the
AC power outlet to disconnect the TV completely.
However, some TV sets may have features that
require the TV set to be left in standby to function correctly, in the case of lightning valve the TV/
correctly. In the case of lightning, unplug the TV set from the outlet immediately. Never touch the
antenna wire during lightning.

Do not pull the plug out by the wire;
Never touch the plug with wet hands.

Excessive volume from earphones and headphones
can cause hearing loss.
| Installation | |
| The ventilation should not be impeded by covering the ventilation opening with items, such as newspapers, tablecloths, curtains, etc. At least 10 cm space should be left around the apparatus for sufficient ventilation. | |
| The product should be situated away from heat sources such as radiators, heat registers, stoves, or other products (including amplifiers that produce heat. Place the apparatus in such a position that the screen is not exposed to direct sunlight. It is best to have soft indirect lighting while watching and avoid completely dark environments and reflection from the screen as these may cause eye fatigue. Keep the TV set away from any equipment emitting electromagnetic radiation. | |
| Installation | |
| Do not place the set on an unstable cart, stand, table or shelf. The set may fall, causing serious personal injury as well as damage to the product. Use only with the cart, stand, tripod, bracket, or table specified by the manufacturer, or sold with the apparatus. An appliance and cart combinations should be moved with care. Quick stops, excessive force, and uneven surfaces may cause the appliance and cart combination to overturn. | |
| Do not place this apparatus near water, for example, near a bath tub, wash bowl, kitchen sink, or laundry tub; in a wetbasement; or a swimming pool; and the like; | |
| When the TV being moved in from cold places it needs some right time for dew inside unit evaporating fully before turn on the unit; | |
| To prevent injury, this apparatus must be securely attached to the floor/wall in accordance with the installation instructions. | |
| Cleaning | |
| Cleaning and handling the screen surface and cabinet. Disconnect the unit from the AC outlet before cleaning. To remove dust, wipe gently with a soft, lint free cloth. If required use a slightly damp cloth. | |
Google, Google Play, YouTube and Android TV are trademarks of Google LLC. Google Assistant is not available in all languages and countries.
Google Assistant is not available in certain languages and countries. Availability of services varies by country and language.
HDMI™ HIGH-DEFINITION MULTIMEDIA INTERFACE
The terms HDMI, HDMI High-Definition Multimedia Interface, HDMI trade dress and the HDMI Logos are trademarks or registered trademarks of HDMI Licensing Administrator, Inc.
Mounting and Connecting
Packing list
- The TV set.
- User Manual.
- Remote control.
- Power cord (or attached to TV set).
- AV transfer cable (option).
Mounting the TV set
Tips on Installation
● The TV set should be mounted near the AC power socket for easy plugging and unplugging.
- For your safety, please select appropriate wall mount bracket or base.
● To avoid hurt, it is required to place the TV set on stable plane, or fix on firm wall.
- Ask qualified personnel to mount the TV set on the wall. Improper mounting may result in instable TV set.
- Do not place the TV set at any place susceptible to mechanical vibration.
- Do not place the TV set at any place that insects may enter.
- Do not mount the TV set against air conditioner, or else the internal panel of the display may condense moisture and cause failure.
- Do not place the TV set at any place with strong magnetic field, or else it may be interfered with and damaged by electromagnetic wave.
Mount on the base

Mount on the wall

Ventilation
- Please keep this space at least around the TV, as shown in the figure.
- Do not cover the air vents or insert any object into the enclosure.
- Do not put the device in limited space, e.g. bookcase or embedded closet, unless the TV set is properly ventilated.
Warning
Never place a television set in an unstable location. A television set may fall, causing serious personal injury or death. Many injuries, particularly to children, can be avoided by taking simple precautions such as:
● Using cabinets or stands recommended by the manufacturer of the television set.
- Only using furniture that can safely support the television set.
● Ensuring the television set is not overhanging the edge of the supporting furniture.
● Not placing the television set on tall furniture (for example, cupboards or bookcases) without anchoring both the furniture and the television set to a suitable support.
● Not placing the television set on cloth or other materials that may be located between the television set and supporting furniture.
● Educating children about the dangers of climbing on furniture to reach the television set or its controls.
If your existing television set is being retained and relocated, the same considerations as above should be applied.
Connecting peripheral equipment
Remark:
- USB interfaces support peripheral equipment, including USB mass storage device, USB mouse, keyboard, etc.
- When you need to connect the device which support the ARC function, please select the HDMI-1 interface.
- HDMI connector can realize DVI connector function with external HDMI/DVI commutator.
- The peripheral equipment and cables described in this manual should be purchased separately.
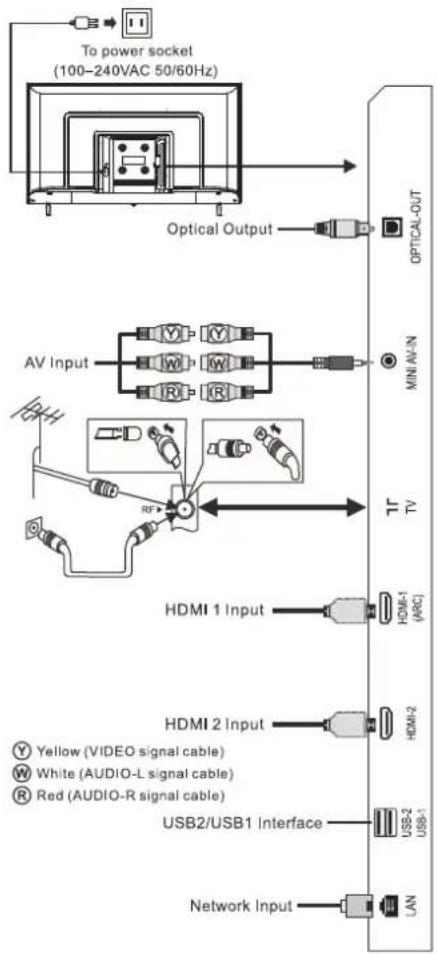
flowchart
graph TD
    A["To power socket (100-240VAC 50/60Hz)"] --> B["Optical Output"]
    B --> C["AV Input"]
    C --> D["TV"]
    D --> E["HDMI 1 Input"]
    E --> F["HDMI 2 Input"]
    F --> G["USB2/USB1 Interface"]
    G --> H["Network Input"]
    style A fill:#f9f,stroke:#333
    style B fill:#ccf,stroke:#333
    style C fill:#cfc,stroke:#333
    style D fill:#fcc,stroke:#333
    style E fill:#cff,stroke:#333
    style F fill:#ffc,stroke:#333
    style G fill:#cfc,stroke:#333
    style H fill:#fcc,stroke:#333

Warning
When connecting outdoor antenna to signal port of the TV set, please turn off the main power switch of the TV set first. Do not approach the outdoor antenna to high voltage mains power line to avoid electric shock. The wired network antenna connected to this TV set must be isolated from the protective grounding, or else it will cause fire or other hazards.
Panel Control Keys

- Power LED indicator and remote receiving window.
- ⏻ Standby: To switch the TV on or back to standby. Remark:
①. The appearance varies depending on the model, and the actual product shall prevail.
②. Please use the remote control for more operation.
Remote Control
Method for Installation of Remote Control Battery
Remove the battery compartment cover and insert two AAA (No. 7, 1.5V) batteries; make sure the polarity of the batteries is in compliance with the polarity mark "+" and "-" in the battery compartment of the remote control.
Precautions for using the remote control
● The remote control should be pointed at the remote control sensor during operation. An object placed between the remote control and the remote control sensor may impede normal operation.
● The remote control should be prevented from strenuous vibration. Besides, please do not set or place the remote control under direct sunshine, as heating power may result in deformation of the remote control.
- Remote control failure may occur when the remote control sensor of the main unit is under direct sunshine or strong lighting; in this case, please change the angle of lighting or this TV set, or operate the remote control near the remote control sensor.
● Low battery will influence the remote control distance, in which case, the battery should be replaced with a new one. If the remote control is going to be idle for a long time or the battery runs out, please take the battery out to prevent the remote control from being corroded by battery leakage which may result in damage and failure of the remote control.
- Please do not use batteries of different types. It is not allowed to use old and new batteries together; the batteries should be replaced in pair.
- Please do not throw the batteries into fire or charge or decompose the batteries; do not charge, short-circuit, disassemble/assemble, heat or burn used batteries. Please dispose the waste batteries pursuant to relevant regulations on environmental protection.
Bluetooth voice remote control operation manual
Bluetooth Pairing
If the Bluetooth of remote control is not paired, press the Google Assistant key, then long press [VOL-] +[←] keys to pair. When the TV show the device, select it and press [OK] key to finish.
Note:
- Some models may not be supported.
- Your Location must correspond to the language for exact search results. Some functions may not
be available if your location settings and language settings are different.
- You can change the language according to language input settings. The languages available for voice recognition features may be changed in accordance with service operation policy.
- Details of service may vary by model.
- Before you use voice recognition, you should make sure remote control paired.

Keys of the Remote Control
Note: The appearance of the remote control may be different from this diagram; please refer to the real object as standard.
| Keys | Function |
| Power (⋯) | Switch between working and standby status. |
| Mute ( ⌘ ) | Turn on/off the sound. |
| Number keys | Select the channel or input numbers. |
| ➊ | Show information bar. |
| ➍ | Return to the previous channel |
| NETFLIX | Open application. |
| YouTube | Open application. |
| prime video | Open application. |
| Google Play | Open application. |
| On the smart home page, manage the location of apps and videos. | |
| Turn on Bluetooth remote control pairing or press the Google Assistant key to control your TV with your voice. (Google Assistant is not available in certain languages and countries. Availability of services varies by country and language.) | |
| Setup (➊ ) | Open setting menu. |
| ◀,▶,▲,▼ | Select items or adjust values. |
| OK | In TV mode, open channel list. In OSD menu operation, confirm the operation. |
| Back (←) | Return to previous menu interface. |
| Home ( 🔗 ) | Show home page. |
| Electronic program guide. | |
| VOL+/- | Turn up/down the volume. |
| Source (➋ ) | Show signal source menu. |
| Menu ( ≡ ) | Show OSD menu. (Non-smart mode.) |
| CH+/- (∧CH∨) | Change channel. |
| R | Special function keys. |
| G | |
| Y | |
| B | |
| MTS | ATV: select NICAM mode; DTV: select audio language. |
| SUBTITLE | Open subtitle language menu. |
| AD | Open the associated audio menu. |
| Record (*) | Start to record current program. |
| ▶ (play) | Play. |
| II | Time shift key. (Pause) |
| Stop. |
Basic Operations
Remark:
- The keys operation here refers to remote control operation, as for panel control keys operation, please refer to "Panel Control Keys".
- The [▶] key means direction key and the ▶ key means play function key
- Menu Operation Instruction in this manual explains the operation under TV mode, which could also be the reference to other modes.
- Before powering on platform, please make sure that the power supply is stable.
- The software of different countries is different. The specific software operation should be subject to the actual situation.
- Because the product is constantly updated, the software is upgraded at any time, if the software operation is different from the actual operation, please refer to the actual product.
Turning on/Standby
Plug power cord into the electrical socket, then press [POWER] key to turn on the TV. When it is the first time to turn on the TV, the Initialization Settings interface appears, please set it as needed.
In power on state, press [POWER] key to switch to standby mode.
Signal source selection
You can connect various devices to the TV set and view high quality images. If the video device has HDMI, Composite and other video output ports. You can select one of them and connect to corresponding input ports of the TV set. After connection, turn on the device and press [☐] key, then menu of signal source will be displayed on the screen. Press the [▲]/[▼] key to select the input signal, and press [OK] key to confirm.
Menu operation description
Press [≡] key to show the main menu on the screen:
- Press [▲]/[▼] key to select a menu from Channels, TV options, Record.
- Press [◀]/[▶] key to select an item in the menu
- Press [OK] key to enter the submenu.
-
Press [▲]/[▼] key to adjust the value or setting.
-
When the main menu is shown on the screen, press [≡] key to exit the main menu; Press [←] key to return to previous menu when the TV display the submenu.
-
During menu operation, the icons of invalid options are gray.
Channel scanning
Scan the channels before watching the TV for the first time. Before scanning, please make sure that the antenna has been connected properly.
Antenna
Press [→] key, and select Antenna. Press [:≡] key, and press [▲]/[▼]/[◀]/[▶] key to select Channel >Channels, then press [OK] key to enter.
- Select Channel Scan, then press [OK] key to start auto scanning.
- Select Single RF Scan. Press [◀]/[▶] key to set RF Channel, then press [OK] key to start manual scanning.
Cable
Press [→] key, and select Cable. Press [:≡] key, and press [▲]/[▼]/[◀]/[▶] key to select Channel > Channels, then press [OK] key to enter.
- Select Channel Scan > Others, then press [OK] key. Set Frequency(KHz), Network ID, Scan Mode, and select Scan, then press [OK] key to start scanning.
- Select Single RF Scan, then press [OK] key. Set Frequency(KHz), and select Scan, then press [OK] key to start scanning.
ATV
(Note: This function is optional, please refer to the actual product.)
Press [→]key, and select ATV. Press [:≡] key, and press [▲]/[▼]/[◀]/[▶] key to select Channel >Channels, then press [OK] key to enter.
- Select Channel Scan, then press [OK] key to start auto scanning.
- Select Analog Manual Scan, and set Start Frequency(MHZ). Select Scan Up or Scan Down, then press [OK] key to start scanning.
REC option
In DTV mode, press [●] key, then system begins recording right now. Press [■] key to stop and exit recording. Press [≡] key and select Record > Record List, then you can select the file you want to play, and press [OK] key to play it.
While playing, you can press [←] key to exit playing, or press ▶/[II]/[■]/[OK] key to perform shortcut operation.
Note: Only the memorizer with FAT32 file system supports the recording function. Memorizer with other file systems need to be formatted; Before formatting memorizer, please back up useful data because the content of memorizer can not recover after formatting.
Time Shift option
In DTV mode, press [≡] key, and select Record > Time Shift Mode, then press [OK] key to turn on the time shift function. Press [II] key to show Time Shift option menu on the screen and the program is in suspended state. Press ▶ key to resume playing the program. Press [■] key to stop and exit time-shift.
When user pauses program for a short time, time-shift function can suspend and cache the playing program to U disk. When user resumes playing, the program can continue to be played. In the process of the time shift, press ▶/[II]/[■]/[OK] key to perform shortcut operation.
Instructions for quick start
Basic Operations
Press [▲] key to show the home page.
- Press [◀]/[▶] key to select an application;
- Press [OK] key to run the application;
- Press [←] key to return to previous page;
- Long press [♠] key to open all Apps.
Quick Start
Before using this device, please get familiar with the operations below for better experience.
Language input setting
Language: In the smart mode, select the system language. Press [★] key, and select Device Preferences > Language, and press [OK] key. Press [▲]/[▼] key to select the desired language, and then press [OK] key.
Selecting Input Method: In the smart mode, press [★] key, and select Device Preferences > Keyboard > Current keyboard, and press [▲]/[▼] key to choose input method.
Setting System Time: In the smart mode, press [⚙️] key, and select Device Preferences > Date & Time > Automatic date & time, then select Use network-provided time. You can also set the system time manually.
Smart Applications
Apps: The Apps helps users manage applications, and allows users to install or uninstall apps in local disk.
Press [▲] key, then press [◀]/[▶] key to select an application and press [OK] key to enter.
■ How to install an application?
Long press [â] key, and select Get more apps, then press [OK] key to enter, search apps you want and install them.
■ How to uninstall an application?
Long press [â] key, and select the app that you want to uninstall, long press [OK] key and select to uninstall it.
MultiMediaPlayer: Open MultiMediaPlayer app, and press [OK] key to enter and select VIDEO, PHOTO, MUSIC and TEXT.
■ Playing Files in local disk device: Before playing files in the local disk, insert the USB mass storage device into the USB interface.
Open MultiMediaPlayer app, and press [OK] key to enter. Select the target folder or file, press [OK] key to enter the folder or play the file, and press [←] key to return to the desktop.
Attention:
-
Non-standard USB devices can't be recognized probably; in this case, please replace a standard USB device;
-
The stream media system has certain restriction on the format of files; the playing will be abnormal if it is out of the system restriction;
-
Do not remove the USB device while playing, or else the system or device may have problem; Before replacing the USB device, please turn off the machine's power supply;
-
The system supports standard USB1.1 and USB2.0 devices, such as USB mass storage devices and mobile hard disks;
-
The maximum output current of the USB port of this device is 500mA, and the self-protection will be enabled if it is beyond this limit; please use external power supply if an external device of higher current will be connected;
-
The system is complicated; when it is reading or playing files, the screen may be still or certain functions may be invalid due to the compatibility and stability of the USB device; in this case, please turn off the device and re-initialize the system.
Press [≡] key to display toolbar, While playing, select the menu option which you want, and press [OK] key to perform the operation; you can press [←] key to exit playing, or press ▶/[II]/[■]/[OK] key on the remote control to perform shortcut operation.
Network Settings
Wi-Fi
- In smart mode, select Settings > Network & Internet > Wi-Fi, and press [OK] key. Press [▲]/[▼] key to select OK, and press [OK] key, then the machine automatically searches for nearby wireless network signal. The network searched without 🔒 icon indicate that the machine can connect to the network without a password. The network with 🔒 icon indicate that it is encrypted and you must enter the correct password to connect to the network;
- Select the desired network from the list, and press [OK] key;
- Enter the password in the password box, then select √ and press [OK] key to connect to network.
Ethernet
- Select Settings > Network & Internet > Ethernet;
- Set Proxy settings and IP settings then press [OK] key to connect to the internet.
Wow/Wol
It allows remote systems to wake up the sleeping TV by sending a frame of a specific format which the client anticipates. (It is available when network is connected.)
Select Settings > Network & Internet > Wol / Wow, and press [OK] key to enter. Press [OK] key to set it to "On" or "Off", and press [OK] key to confirm.
Bluetooth Setting
In smart mode, select Settings > Remotes & accessories, and press [OK] key to enter. Select the device which you want to connect to and press [OK] key, then follow the prompt to connect.
Note: Select Settings > Device Preferences > About > Device name, and you can check the TV name.
Recommendations
Android TV™
Android TV gives you a smarter, easier way to get more from your TV.
Google Assistant
Use your voice to search for shows, control devices, and more - just ask Google.
Google Play
Google Play brings your favorite apps and games to your TV. Watch, play, and do-whatever you want, whenever you want.
Chromecast built-in™
Easily cast your favorite movies, music, and more to your TV with Chromecast built-in.
Troubleshooting
■ Snowflake spots occur in the TV images and there is noise in accompanying sound.
- Check if the antenna plug is loose or the cable is in good condition.
- Check the antenna type (VHF/UHF).
- Adjust the direction and position of the antenna.
- Try to use signal enhancer.
■ There is neither display nor sound on the screen. The indication light is not on.
Check if the power line is connected.
■ Dotted line or strip disturbance occurs in TV images.
Do not use electric hair dryer aside the TV set and adjust the antenna direction to reduce disturbance.
■ Double images occur on the TV screen.
- Use high oriented antenna.
- Adjust the direction of the antenna.
■ The images are colorless.
Press [≡] key and select Picture > Saturation to increase color saturation.
■ The TV has no accompanying sound.
- Adjust the volume to a proper degree.
- Press [◀×] key on the remote control to cancel mute mode.
■ No signal input images show on the machine screen. The indicator light is blinking.
- Check if the signal connecting cable is loose or falls off. Reconnect it.
- The machine may be in standby mode, please reboot.
■ The remote control distance is short or out of control.
- Remove the object to avoid blocking the remote control receiving window.
- Replace the battery.
■ The browser cannot access any link.
- Ask the network administrator to obtain available IP address and other parameters.
- Check if the network connecting cable is normally connected.
- Consult the network service provider.
■ Online video play is very slow.
- Please upgrade your network bandwidth to a higher one.
- Please try to replace with other addresses to obtain better resources.
■ Machine is slow, system crash, can't operate the machine.
Disconnect the power supply first, and connect the power supply after about 1-2 minutes, then turn on the TV again.
Base Installation Instructions
Put the machine flat first, distinguish left and right base and base installation front and back direction, then install the bases in the bottom of the machine back cover as arrow direction in figure. Align screw holes, then fasten screws (notice that base module has to be adjusted at figure status, otherwise it cannot be installed in.)

Remark: The actual base and machine appearance may be different from pictures; please refer to the actual device.
Use of a TV wall mounting

Warning
- Please purchase a suitable TV wall mount when mounting your TV on the wall.
-
Ensure that the bearing capacity of the wall for mount installation is no less than 4 times the weight of the TV set and the wall mount so as to avoid falling.
-
Please refer to the instructions provided with the TV set and wall mount for installation.
- Make sure there is no cable or conduit in the wall section where a wall mount will be installed.
- Please entrust a professional technician to complete installation. The company shall not be liable for accidents, personal injury or damage caused by improper installation of TV set.

Wall mount

Wall mount
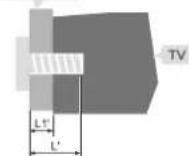

L1: Thickness of wall mount
L1: Thickness of wall mount
| Distance between holes on the wall(H×V)(mm) | Required screws (recommended bolt length)(mm) |
| 42": 100 x 100 | Up: 2 x M4 (L=8+L1), Machine screws Bottom: 2 x ST4 (L'=8+L1'), Flat tail self-tapping screws |
Note:
- If any screws are found in the screw hole for wall mount behind the TV set before installing the wall mount, the screws shall be removed and put in place for later use.
- Please buy the wall screws according to the actual situation.
- If there are flat tail self-tapping screws in the accessories, please decide whether it is suitable for use according to the actual situation of the wall mount.
ST4x10mm flat tail self-tapping screws 2pcs(option)


- การระบายอากาศ
- Chromecast built-in™
- Important Safety Instructions and Maintenance
- CAUTION
- HDMI™ HIGH-DEFINITION MULTIMEDIA INTERFACE
- Mounting and Connecting
- Packing list
- Mounting the TV set
- Tips on Installation
- Ventilation
- Warning
- Connecting peripheral equipment
- Remark:
- Remote Control
- Method for Installation of Remote Control Battery
- Precautions for using the remote control
- Bluetooth voice remote control operation manual
- Bluetooth Pairing
- Note:
- Keys of the Remote Control
- Basic Operations
- Turning on/Standby
- Signal source selection
- Menu operation description
- Channel scanning
- Antenna
- Cable
- ATV
- REC option
- Time Shift option
- Instructions for quick start
- Quick Start
- Language input setting
- Smart Applications
- ■ How to install an application?
- ■ How to uninstall an application?
- Attention:
- Network Settings
- Wi-Fi
- Ethernet
- Wow/Wol
- Bluetooth Setting
- Recommendations
- Android TV™
- Google Assistant
- Google Play
- Troubleshooting
- Base Installation Instructions
- Use of a TV wall mounting
Brand : Aconatic
Model : 42HS600AN
Category : Television