
Pico T1 - Video projector Yaber - Free user manual and instructions
Find the device manual for free Pico T1 Yaber in PDF.

| Product Type | Video Projector |
| Model | Pico T1 |
| Native Resolution | 960 × 540 pixels |
| Display Technology | DLP |
| Light Source | LED |
| Aspect Ratio | 16:9 |
| Recommended Projection Distance | 1 – 6.6 ft (0.3 – 2 m) |
| Minimum Projection Distance | 1 ft (0.3 m) |
| Projection Method | Front / Rear on Desk |
| Keystone Correction | Manual Vertical & Auto Horizontal |
| Weight | 0.33 lb (150 g) |
| Power Voltage | DC 9V/2A or 12V/1.5A |
| Interfaces | USB-C (1), HDMI Mini (1), USB-A (1) |
| Wireless Connectivity | WiFi (screen mirroring), Bluetooth |
| Bluetooth Compatibility | Headsets, speakers, AirPods (not keyboards or phones) |
| Picture File Support | JPG, BMP, PNG |
| Video File Support | H.264, H.265, MPEG1, MPEG2, MPEG4, MVC, VP6, VP8, VP9 |
| Audio File Support | AAC_LC, HE_AAC, HE_AACV2, LPCM, MP3, APE |
| Lens | Optical coated glass lens |
| Focus Adjustment | Manual focus ring |
| Remote Control | Included (requires button cell battery) |
| Smart Applications | Built-in app store with favorites, apps, movie, music recommendations |
| Warranty | 3 years |
Frequently Asked Questions - Pico T1 Yaber
User questions about Pico T1 Yaber
0 question about this device. Answer the ones you know or ask your own.
Ask a new question about this device
Download the instructions for your Video projector in PDF format for free! Find your manual Pico T1 - Yaber and take your electronic device back in hand. On this page are published all the documents necessary for the use of your device. Pico T1 by Yaber.
USER MANUAL Pico T1 Yaber
Projector Specifications 3
Projector Overview 3
Remote Contol 5
Installation 6
Starting Projector 7
Image Adjustment 7
- Focus Adjustment 7
- Digital 4D Keystone Correction 8
Setting Up The Projector 8
- Select The Insert Signal Source 8
- WiFi Setting 8
2.1 iOS Cast (for iOS Devices) 9
2.2 Screencast for Android Devices 10
2.3 Eshare Wireless Connection 11
- Bluetooth Setting 11
- Projector Image Setting 12
4.1 Projection Mode 12
4.2 Automatic Keystone & 4-Point Keystone 13
4.2.1 Automatic Horizontal Keystone Correction 13
4.2.2 Manual Vertical Keystone Correction 13
5. Date and Time 14
- Language Settings 14
- Wallpaper Settings 14
SIGNAL LINES CONNECTION 15
- Connect the Devices via the HDMI Ports 15
- Connect the Type-C 15
Safe Shutdown 15
Warranty 15
TROUBLESHOOTING 16
YABER Lifetime Professional Support
Dear customer,
Thank you very much for supporting YABER!
Please read this manual thoroughly before using the projector. If you have any issues, email your order number and the problem to Support@yabertech.com We will provide a fast solution in 24 hours.
Actually, many problems can be easily solved by setting, such as no signal, no sound, bluetooth connection failed, WiFi connection failed, dark spots, choppy animation etc. We promise all the projectors have been 100% carefully checked and packaged before shipping.
If you have any questions, could you please contact us so that the problem can be solved. And give us an opportunity to improve. We guarantee we will provide you a satisfactory solution.
Thanks for your understanding!
YABER Service Team
Tips
- Do not place projector in too warm or too cold room, because the high temperature or low temperature will shorten lifespan of the device. The working environment would be 5°C \~35°C better.
- If there are black spots on the projection screen, please don't worry, please contact Support@yabertech.com via email, we can send you a video about how to remove the dust.
- The projector shall be strictly protected from strong impact, extrusion and vibration. Do not try to move and on strong impact, extrusion and vibration. Do not try to move and the internal circuit faults.
- Lens, as the core component of the projector, is directly related to the picture definition and effect. The excessive dust thereon will affect image quality. The dirty lens shall be wiped with soft cotton cloth for the glass lens surface. Hard cloth or abrasives shall not be used.
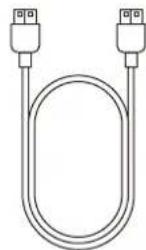
Package List

natural_image
Simple line drawing of a rectangular device with a circular button and 'Yaber' label (no additional text or symbols)
natural_image
Simple line drawing of a rectangular object with a circular top and horizontal line (no text or symbols)
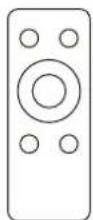
Yaber Pico T1 Remote CounterBank Magnetic Tripod
(with button cell)

USB Type-C Cable
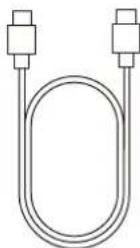
Double-ended Type-C Cable
(mini) Cable
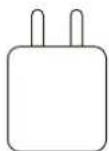
Type-C ChargerHDMI-HDI

natural_image
Simple line drawing of a rectangular object with a loop handle, resembling a stylized letter or icon (no text or symbols)Organizer

Quick Start Guide
Projector Specifications
| Model No. Ace K1 | |||
| Native Resolution | 960*540P | Keystone Correction | Manual Vertical & Auto Horizontal |
| Display Technology | DLP | Light Source | LED |
| Recommended Projection Distance | 1-6.6ft | Aspect Ratio | 16:9 |
| Power Voltage | DC 9V/2A 12V/1.5A | Minimum Projection Distance | 1ft |
| Picture File | JPG/BMP/PNG | Projector Weight | 0.33lb |
| Interfaces | USB C*1, Hdmi Mini*1, USB A*1 | ||
| Projection Method | Front/Rear on Desk | ||
| Video File | H.264/H.265/MPEG1/MPEG2/MPEG4/MVC/VP6/VP8/VP9 | ||
| Audio File | AAC_LC/HE_AAC/HE_AACV2/ LPCM/MP3/APE | ||
Projector Overview
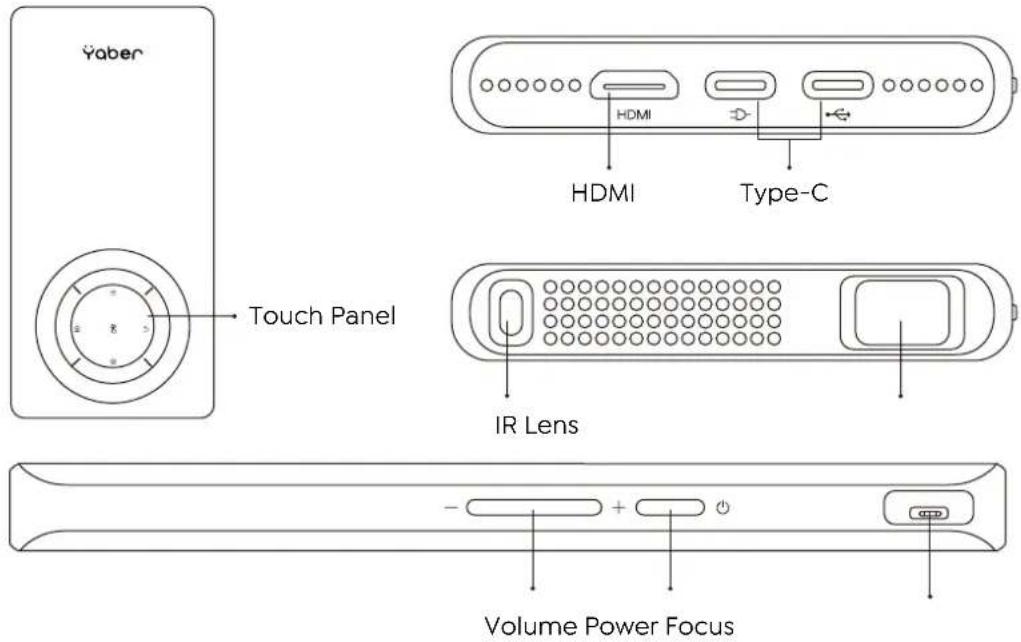
| Touch Panel | Operation panel |
| Volume Panel | To adjust volume |
| Power Key | Turn on/off the power |
| Focus Ring | Adjust the focus ring to get the clearest image |
| HDMI Port | Connect your devices |
| Type-C Port | Connect your devices |
| IR Window | Infrared signal receiver |
| Projector lens | Optical coated glass lens |
| Menu | Enter the menu interface |
| Homepage | Enter the home page |
| OK | Enter the signal source selection interface |
| Return | Return to the previous menu |
| Setting | Confirm the option |
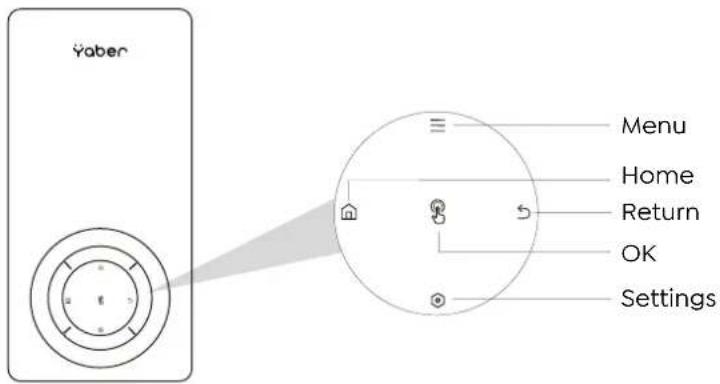
Remote Contol

| Power | Turn on/off the power |
| Reture | Return to the previous menu |
| Navigation | Used to adjust the parameter of the projector in the menu mode |
| OK | Confirm the option |
| Vol - | Volume up |
| Vol + | Volume down |
Note:
- When using the remote controller, please make sure that the signal transmitter of the remote controller aims at infrared signal receiver of the projector.
- If you are not using the remote controller for an extended period, please take out batteries to prevent batteries leakage.
Installation
The projector can be placed on the stable desk to project the image according to the operating environment and requirements. Keep the projector at a height where its lens is axial symmetry to the screen. If this is not possible, use the keystone correction function to adjust the projection image.
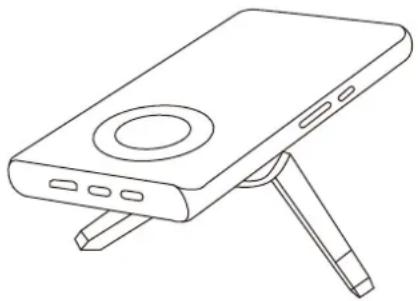
natural_image
Line drawing of a portable electronic device with a circular vent and adjustable legs (no text or symbols)Keep the projector at a height where its lens is axial symmetry to the screen. If this is not possible, use the keystone correction function to adjust the projection image. If you want to get a free projection screen, please contact us via support@yabertech.com.
| Aspect Ratio: 16:9 | |
| Distance (ft.) | Screen Size |
| 3.1 | 35" |
| 4.4 | 50" |
| 6.1 | 70" |
| 8.7 | 100" |
| 10.5 | 120" |
| 13.1 | 150" |
| 17.5 | 200" |
The recommended projection distance is about 8.7ft, the shortest projection distance is 3.1ft. The image size depends on the distance between projector and screen, there may be 3% deviation among above listed data. Different settings cause various distances.
Starting Projector
- Connect the power bank and Yaber Pico TI with a Type C cable-press the power button of the power bank-press the power button of the projector. Or Connect the Charger and Yaber Pico TI with a Type C cable-Plug the Charger into a power socket-Press the power button of the projector.
- Use the focus function of the projector to get the best image performance.(If it is still blurry, please try to adjust the projection distance.)
- Use the keystone function of the projector to get a rectangle projection screen.
- Connect the external device (Smart phone, iPad, Fire TV, TV box, DVD player, Computer, etc.) in the corresponding interfaces of the projector, please be sure to select the corresponding source. If you do not select the correct source, the projector will not be able to detect the signal.
- Select the "💡" menu, enter the [ Other Setting ], then you can select the option [ Language Setting ] to set your preferred language.
Image Adjustment
When using the projector for the first time, it normally displays an unclear image. This is due to the lens being out of focus or the incorrect trapezoid setting.
Please follow the below steps to correct:
1. Focus Adjustment


flowchart
graph LR
    A["Tree"] --> B["Tree"]
    B <--> C["Tree"]
Rotate the focus ring or lens slowly. At the same time, check the focus point carefully. The best focus point for the lens would be where the image most clear.
Note: If it is still blurry, please try to adjust the projection distance.
2. Digital 4D Keystone Correction
Use the digital 4D keystone correction of the projector to change the image to be rectangle (vertical and horizontal). Detail please refer the page 13 of this manual.
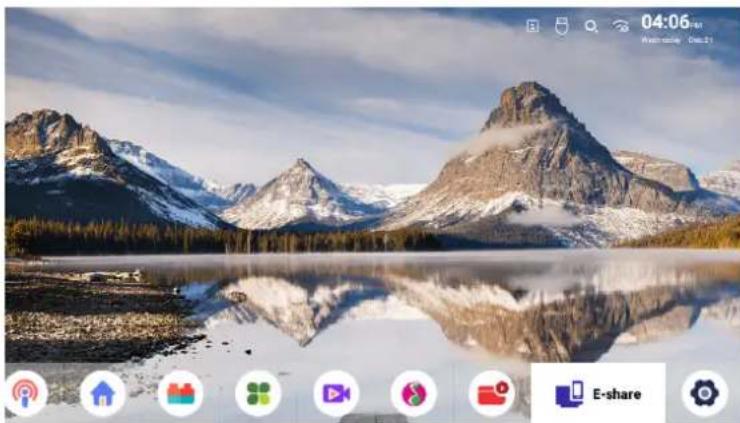
Setting Up The Projector
The projector's home page is as follow.

natural_image
Scenic mountain landscape with snow-covered peaks reflected in a calm lake, no visible text or symbols on the landscape itself.1. Select The Insert Signal Source
Select the desired insert signal source (HDMI/File) on the home-page.
2. WiFi Setting
Wireless Connection
Warming Tips:
-
The fluency of screen mirroring with wireless connection will be affected by the network environment. A bandwidth of 100Mbit or more is recommended when using screen mirroring.
-
Make sure your mobile device is close to the projector when using wireless connection. A distance within 1 meter is recommended.
- Some mobile devices may not support screen mirroring due to the compati- bility.
- Any questions, please feel free to email YABER via Support@yabertech.com.
2.1 iOS Cast (for iOS Devices)
2.1.1 Wired Connection for iOS
- Turn on Yaber Pico Tl.
- Connect the Yaber Pico TI to iOS devices with a USB cable(Type-C connector on one end and Lightning connector on the other After connecting iOS devices please click"Trust" in the trust pop-up window of iOS devices if iOS devices have a password, please enter it.
- Start screen casting.

natural_image
Two connected devices, one with a Yaber logo and the other with a battery icon (no text or symbols on the devices themselves)2.1.2 Wireless Connection for iOS
- Please make sure your iOS devices and Yaber Pico T1 are connected with the same WiFi.
- Down slide iOS devices screen from top click Screen Mirroring then choose device in the list to share screen with iOS devices.


2.2 Screencast for Android Devices
2.2.1 Wired Connection for Android
- Turn on Yaber Pico Tl.
- Connect the Yaber Pico TI to Android devices with a Double-ended Type-c cable.
- Start screen casting.
- Go to Google Play to download Eshare App and install it.
- Start screen casting.

natural_image
Diagram showing two devices connected by a cable, one labeled 'Yaber' and the other empty (no text or symbols on devices)2.2.2 Wireless Connection for Android
Go to home page -- Select the [ ScreenCast ] menu -- Press the OK button to enter the screencast interface--Select the [ Android Wireless] function -- Select your Miracast receiver named [ Android 8821]-- your Android device screen will be displayed on the projection screen after 3 seconds.
2.3 Eshare Wireless Connection
- Please make sure your device and Yaber Pico TI are connected with the same WiFi.
- Go to Google Play or https://h.eshareapp to download Eshare App and install it.
- Run Eshare App, search for the device you can see the device number click the number to enter the connection list click "Start Mirror", you can share the phone screen to the projection device.
natural_image
Scenic mountain lake with snow-covered peaks reflected in calm water, no visible text or symbols on the landscape itself.Note:
- Different brands of Android phones have different operations for select screen mirroring display, please refer to your phone's manual. [ Multiscreen/Wireless display/WLAN display/Screen mirroring/Wireless projection/Smart view etc. ]
- Not all Android phones support this function. Please make sure it is support- ed before use.
3. Bluetooth Setting
Go to home page -- Select the [💡] menu -- Select the [ Bluetooth ] Option -- Open the Bluetooth function and your Bluetooth device -- Scan the Bluetooth devices nearby automatically -- Choose the Bluetooth device desired -- it will be paired and connected automatically.
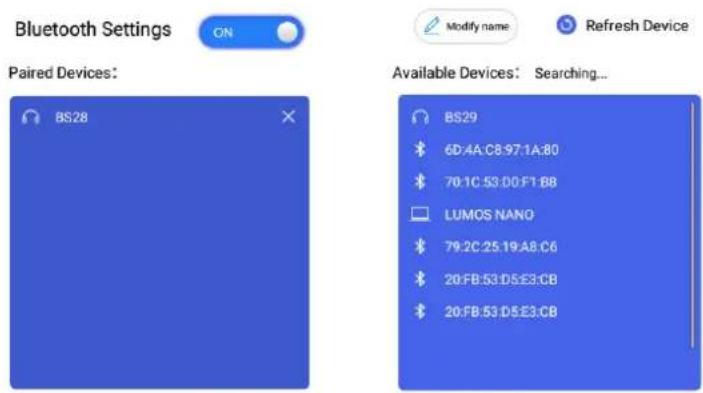
Note:
- The Pico TI projector is compatible with the Bluetooth headsets, Bluetooth speakers and Airpods, but not the Bluetooth keyboards or Bluetooth phones.
- If you have any question, please feel free to email YABER via: Support@yabertech.com.
4. Projector Image Setting
4.1 Projection Mode
You can choose four projection modes, the device supports standard view, standard ceiling view, rear projection view rear projection ceiling view.
Note:
The default mode is standard view, if you want to switch to other modes, you need to turn off auto keystone correction settings first.

4.2 Automatic Keystone & 4-Point Keystone
4.2.1 Automatic Horizontal Keystone Correction
When you start the projector, the projector will adjust horizontal keystone automatically. If the image is not rectangle, you can use the digital 4D keystone correction to change the image to be rectangle.
4.2.2 Manual Vertical Keystone Correction
When the projection screen is not rectangular, it can be adjusted by 4-point keystone correction.
Step 1: select the [ Settings ] menu-select [ Projection ] menu-turn off [ Auto keystone correction settings ]-select [ Manual keystone correction ] menu.
Step 2: Press the arrow keys on the remote controller or projector to adjust the horizontal or vertical parameters, until the projection screen becomes the desired rectangle.
OK Pick point : press the OK button on the remote controller or projector to enter the adjustment interface.
Adjustment: Press the arrow keys on the remote controller or projector to adjust the horizontal or vertical parameters.
Back: Press the key on the remote controller to back to previous page.
Keystone Correction Settings

5. Date and Time
Select the [ Settings ] menu-select [ Date and Time ] menu. Then you can adjust date and time according to your requirement.
Date And Time Settings

6. Language Settings
Select the [ Settings ] menu-select [ Language ] menu.then you can adjust date and time according to your requirement.

SMART APPLICATION
The projector built-in smart application, select the [Home] menu-select [App store] menu, you can download your favorite application.
| Menu | Function |
| Home | App store menu |
| Favorite | Add your favorite apps |
| Apps | List of downloaded apps |
| Movie | Movie Recommendation List |
| Music | Music Recommendation List |
SIGNAL LINES CONNECTION
YABER Pico TI projector has 3 interfaces, HDMI(mini)/ USB C/ USB A. Please select the correct connecting port to connect your device (PC, Phone, DVD Player, PS4 etc.)

1. Connect the Devices via the HDMI Ports
1) Connect your TV stick or laptop to HDMI port of the projector.
2) Enter the home page to select the corresponding HDMI as the signal source.
2. Connect the Type-C
Type-C cable mirroring supports mainstream devices. Type-C supports PD3.QC2.0 backward compatibility, charger 9V2A/12V1.5A.
Safe Shutdown
- Press the ⏻ button on the projector or remote controller, then press OK key to power off the projector.
- Unplug the power cord of the projector.
- Store the projector in a cool and dry place.
Warranty
Thank you so much for your purchase and support! We provide 3-year warranty for Pico TI projector. If you have any questions, please feel free to contact us via
Support@yabertech.com.
TROUBLESHOOTING
Problems listed below might occur during the operation of your projector. Please refer to the possible factors which might cause the issue to do troubleshooting.
- When turning on the power switch, the indicator light does not work.
1) The power might not be connected well.
2) Check the over-heat protection system.
- The remote controller does not communicate with the projector.
1) The power switch at the back of the projector is turned on or off?
2) The remote controller's batteries are depleted?
3) Something obstructing the signal between the remote and IR
4) Strong light on IR directly.
- No image on the screen.
1) Is the channel set-up correct?
2) Is there an input signal?
3) Is the input cable plugged well?
4) Under PC mode, is the refresh rate >75KHz?
-
Blue screen, no picture, no sound. Input cables connected right?
-
Picture right, no sound.
1) Input cables connected right?
2) Volume at min or on Mute.
- Can't play the movies.
1) The format of the video is right?
2) Files are broken?
3) Device is broken?
- There is picture, no sound?
The decode system doesn't match.
-
Can't find devices when connected with hard drive or flash drive. Check if the device is broken.
-
Auto-off after working for a while.
1) The projector ventilation is blocked.
2) The over-heat protection system.

Scan and download the PDF user manual
Where to Get More Help
Support@yabertech.com
@Yaber Entertainment Projector
www.yaberglobal.com
@Yaber Entertainment Projector


- Projector Specifications 3
- Projector Overview 3
- Remote Contol 5
- Installation 6
- Starting Projector 7
- Image Adjustment 7
- Setting Up The Projector 8
- Date and Time 14
- SIGNAL LINES CONNECTION 15
- Safe Shutdown 15
- Warranty 15
- TROUBLESHOOTING 16
- YABER Lifetime Professional Support
- Tips
- Package List
- Projector Specifications
- Projector Overview
- Remote Contol
- Note:
- Installation
- Starting Projector
- Image Adjustment
- Focus Adjustment
- Digital 4D Keystone Correction
- Setting Up The Projector
- Select The Insert Signal Source
- WiFi Setting
- Wireless Connection
- iOS Cast (for iOS Devices)
- Wired Connection for iOS
- Wireless Connection for iOS
- Screencast for Android Devices
- Wired Connection for Android
- Wireless Connection for Android
- Eshare Wireless Connection
- Bluetooth Setting
- Projector Image Setting
- Projection Mode
- Automatic Keystone & 4-Point Keystone
- Automatic Horizontal Keystone Correction
- Manual Vertical Keystone Correction
- Date and Time
- Language Settings
- SMART APPLICATION
- SIGNAL LINES CONNECTION
- Connect the Devices via the HDMI Ports
- Connect the Type-C
- Safe Shutdown
- Warranty
- TROUBLESHOOTING
- Where to Get More Help
Brand : Yaber
Model : Pico T1
Category : Video projector