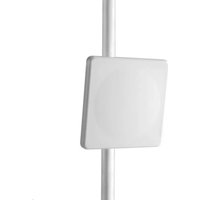
PTP 450i - Network Equipment Cambium Networks - Free user manual and instructions
Find the device manual for free PTP 450i Cambium Networks in PDF.


| Product Type | Point-to-Point Wireless Bridge |
| Brand | Cambium Networks |
| Model | PTP 450i |
| Frequency Band | 5 GHz (5.15-5.85 GHz) |
| Maximum Data Rate | 450 Mbps (aggregate) |
| Range | Up to 20 km (line of sight) |
| Power Input | PoE (Power over Ethernet) 48V DC |
| Power Consumption | 15 W (typical) |
| Operating Temperature | -40°C to +60°C |
| Weight | 1.5 kg (3.3 lbs) |
| Dimensions (W x H x D) | 30.0 x 30.0 x 7.5 cm (11.8 x 11.8 x 3.0 in) |
| Antenna Type | Integrated dual-polarized (19 dBi) |
| Security | WPA2-PSK, AES encryption |
| Management | Web interface, SNMP, CLI |
| Mounting | Pole mount (included) |
| Weatherproofing | IP65 rated |
| Ethernet Interface | 1x 10/100/1000 Base-T (RJ-45) |
| Surge Protection | Built-in surge arrestor |
| Regulatory Compliance | FCC, IC, CE |
| Included Accessories | PoE injector, pole mount kit, grounding kit |
Frequently Asked Questions - PTP 450i Cambium Networks
User questions about PTP 450i Cambium Networks
0 question about this device. Answer the ones you know or ask your own.
Ask a new question about this device
Download the instructions for your Network Equipment in PDF format for free! Find your manual PTP 450i - Cambium Networks and take your electronic device back in hand. On this page are published all the documents necessary for the use of your device. PTP 450i by Cambium Networks.
USER MANUAL PTP 450i Cambium Networks
Quickly connect and configure Cambium Access Points (AP) on cnMaestro.
Note: Account creation is required only for first time users. You can skip to Step 2 if your account already exists. To add another device to the same WLAN, skip to Step 3.
Getting Started
1. Creating a cnMaestro Account:
a. Open https://cloud.cambiumnetworks.com and create an account by clicking Register.
b. Once registered, Sign in with your credentials at https://cloud.cambiumnetworks.com.
c. Create a Cambium ID; choose Account Type NMS and Account View Enterprise.
2. Creating a WLAN and AP Group:
a. From your cnMaestro Dashboard, click Wi-Fi Profiles -> WLANs -> New.
b. Choose your preferred SSID and Security (recommended: WPA2 Enterprise) and other required details, then click Save.
Your WLAN is created successfully.
c. From your cnMaestro Dashboard, click Wi-Fi Profiles 1 -> AP Groups -> New.
d. On the Basic Tab, Enter AP Group Name (example: Shop Floor Indoor).
e. On the Basic Tab, click Add WLAN. Choose the WLAN created in step 2.b, then click Add.
f. Navigate to the Management Tab and create an Admin Password, then click Save.
Your AP Group is created successfully.
3. Onboarding Your Device:
a. Unpack and power on your Access Point.
b. To connect the AP to your network, plug in a LAN cable with an active internet connection to Ethernet port.
c. From the cnMaestro Home Navigation Menu, click Onboard -> Claim Device -> Enter MSN (Serial Number of Device).
d. Once the device has been claimed, click the Edit icon next to the device to configure.
e. From the Configure tab, select the AP group created in Step 2 and click Save.
f. Click the Approve icon next to the newly added AP.
Congratulations, you have successfully set up your device. You can now go to the Main Dashboard to start monitoring your device!

- Verifying the Operating Status:
| LED Color | Status Indication |
| The device is booting up.If LEDs remain amber for more than 5 minutes, device failed to boot up. | |
| • The device is successfully up and accessible.• Wi-Fi services are up, if configured. | |
| cnMaestro connection is successful. |
Glossary
| Term | Description |
| System Dashboard | Displays connection health, vulnerabilities of devices connected. |
| Device Dashboard | Displays connected clients by radio, throughput, SNR, and performance details |
| Notifications | Real-time system status alarms, alarms history, and events |
| Configuration | Single place to configure device location, radios, and status |
| Details | Overview of device, network, and neighbors list |
| Performance | Detailed performance reports for past 7 days |
| Sites | Deploy APs at multiple sites |
| Guest Portal | Create captive portals for guests |
| Software Update | Update device firmware |
| Tools | Various tools, including Wi-Fi Analyzer to optimize network |
| Clients | List of clients connected to the network and usage details |
| SSID | 32-character name that identifies your wireless network |
| WLAN | Wireless network in your home for devices to connect to the interne! |
| AP Group | A group of APs that share the same configuration |
| Admin Password | Password needed to access critical information and change rights for your network |
Contacting Support
| Main Site https://www.cambiumnetworks.com |
| Support Site https://support.cambiumnetworks.com |
| Community https://community.cambiumnetworks.com |
| Support Phone https://www.cambiumnetworks.com/support/contact-support |
To learn more about cnMaestro, see cnMaestro User Guide


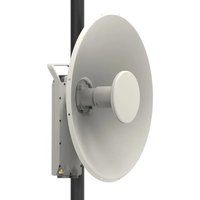
Brand : Cambium Networks
Model : PTP 450i
Category : Network Equipment