15490CBR - Lighting Kichler - Free user manual and instructions
Find the device manual for free 15490CBR Kichler in PDF.

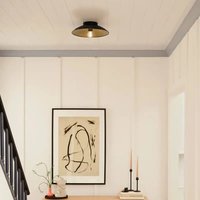
| Product Type | Ceiling Light Fixture |
| Brand | Kichler |
| Model | 15490CBR |
| Finish | Bronze |
| Material | Steel |
| Dimensions (L x W x H) | 12 in x 12 in x 8 in |
| Weight | 3.5 lbs |
| Voltage | 120V AC |
| Max Wattage | 60W |
| Bulb Type | Medium Base (E26) Incandescent, LED, or CFL |
| Number of Bulbs | 1 |
| Location Rating | Damp Location (Covered Outdoor) |
| Installation Type | Ceiling Mount (Flush or Semi-Flush) |
| Safety Rating | UL Listed |
| Warranty | 1 Year Limited Warranty |
| Maintenance | Wipe with a soft, dry cloth. Do not use abrasive cleaners. |
| Compatibility | Compatible with standard dimmer switches (for dimmable bulbs) |
| Energy Efficiency | LED Compatible |
| Certifications | cULus, Energy Star (if applicable) |
| Included Parts | Mounting hardware, installation instructions |
Frequently Asked Questions - 15490CBR Kichler
User questions about 15490CBR Kichler
0 question about this device. Answer the ones you know or ask your own.
Ask a new question about this device
Download the instructions for your Lighting in PDF format for free! Find your manual 15490CBR - Kichler and take your electronic device back in hand. On this page are published all the documents necessary for the use of your device. 15490CBR by Kichler.
USER MANUAL 15490CBR Kichler
INSTRUCTIONS PERTAINING TO A RISK OF FIRE, OR INJURY TO PERSONS IMPORTANT SAFETY INSTRUCTIONS
Lighted lamp is HOT!
WARNING — To reduce the risk of FIRE OR INJURY TO PERSONS.
1) Turn off / unplug and allow to cool before replacing lamp.
2) Lamp gets HOT quickly!
3) Do not touch hot lens or cowl.
4) Do not touch lamp or fixture if warm.
5) Do not look directly at lamp when on.
6) Keep lamp away from combustible materials.
7) Use only with wattage and lamp marked on fixture.
8) Do not touch the inner glass envelope of the lamp at any time. Use a soft cloth. Oil from skin may damage lamp.
9) Do not operate the fixture with a damaged or missing lens.
SAFETY INSTRUCTIONS
READ THIS FIRST
KEEP THESE INSTRUCTIONS
This fixture is intended for installation in accordance with the National Electric Code (NEC) and Local code specifications. Failure to adhere to these codes and instructions may result in serious injury and/or property damage and will void the warranty.
1) WARNING: This fixture is not to be installed within 10 feet (3M) of a pool, spa or fountain.
2) This fixture is to be used only with a power unit (transformer) rated a maximum of 300 W (25 AMPS) 15 volts per circuits.
3) The #18 ga. fixture wire is not intended for direct burial or direct connection to transformer.
4) Direct burial rated wire is to be buried a minimum of 6" (152mm) beneath the surface of the ground. NOTE: If additional Direct Burial wire is needed, contact your local Kichler® landscape distributor.
- 8 GA wire can be purchased in length of 250' (76 M), 15503-BK.
- 10 GA wire can be purchased in length of 250' (76 M), 15504-BK.
- 12 GA wire can be purchased in lengths of 100' (30 M), 15501-BK; 250' (76 M), 15502-BK; 500' (152M), 15505-BK; and 1000' (304 M), 15506-BK.
5) Fixture shall not use a tungsten halogen lamp unless the fixture is marked for use with such lamps.
6) Wiring connections must be made with approved/listed wire connection device(s) suitable for the application. Do not exceed manufacturers' wiring combination specifications for size and quantity of conductors.
MR8 RECESSED BASIC TRIM - 15490CBR
MR8 RECESSED WITH COWL - 15491CBR
MR8 RECESSED LOUVERED - 15492CBR
FIXTURE DETAILS:

text_image
1 2 3 4 5 6 7 8 Pre-mounting sleeve Open cover 15490CBR Eyelid cover 15491CBR Grill cover 15492CBR- Cover 2. Glass 3. Socket 4. Spring 5. O-Ring 6. Housing
- Cable gland 8. Wire
CAUTION
WHEN INSTALLING KICHLER LANDSCAPE LIGHTING (LINE VOLTAGE OR LOW VOLTAGE), CARE SHOULD BE TAKEN TO KEEP CLEAR OF POTENTIALL Y COMBUSTIBLE MATERIALS.
WHEN MAINTAINING THE FIXTURES, BE SURE TO REMOVE LEAVES, PINE NEEDLES, GRASS CLIPPINGS, MULCH, OR ANY DEBRIS THAT HAS ACCUMULATED ON THE LIGHT BULB, LENS, OR BODY OF THE FIXTURE.
ASSEMBLY AND INSTALLATION
1. TURN OFF POWER
- Determine desired location. Check area for obstructions such as sprinklers, plant material, etc. Assess soil conditions.
- Unscrew the cover and install lamp into socket, then screw the cover back on. (Take spring out if you would like lamp to be more recessed.)
- Dig a hole approximately 12" deep by 3" wider than the well light. This allows approximately 3" of pea gravel or sand to surround ABS housing.
a. For concrete applications, use a 1 3/4 inch core drill at least 6 inches deep.
- Strip the two leads from luminaire pigtail wire. Using the wire connectors (not included), connect the leads from the luminaires to the main supply cable leads. Allow 12-18" of extra wire (coiled inside the bottom of the well light) to allow for lamp removal / replacement.
- Place fixture at final height leaving 1-2 inches of the fixture above grade to minimize debris collection (in lawn areas they should be flush with grade).
- Install luminaire in hole and fill hole after installation with pea gravel or sand. Backfill and compact the soil around the fixture thus securing it in the ground.
- Power luminaire and check for proper operation.
- Call Factory for additional installation options.