
HLS-X485B - Oven PANASONIC - Free user manual and instructions
Find the device manual for free HLS-X485B PANASONIC in PDF.
| Brand | PANASONIC |
| Model | HLS-X485B |
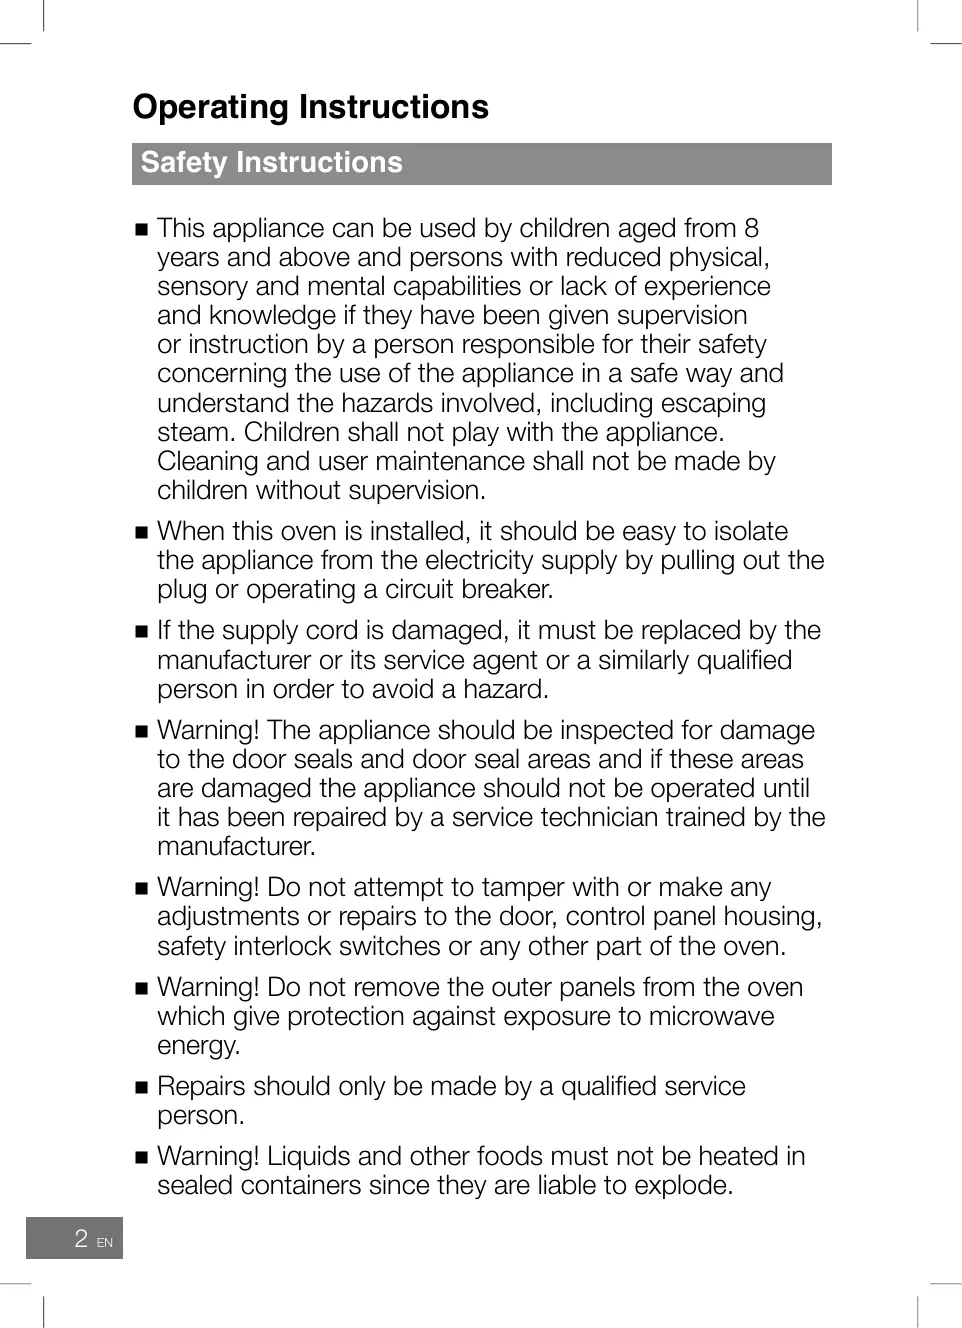
| Product type | Built-in combination microwave oven |
| External dimensions (W x D x H) | 595 x 565 x 455 mm |
| Internal dimensions (W x D x H) | 445 x 347 x 242 mm |
| Net weight | 36 kg |
| Power supply | 220-240 V, 50 Hz |
| Maximum power consumption | 3000 W |
| Microwave power | 1000 W (IEC-60705) |
| Grill power | 2100 W (3 levels) |
| Convection power | 2030 W (40 °C, 100-230 °C) |
| Steam power | 1050 W (3 levels) |
| Cooking modes | Microwave, Grill, Convection, Steam, Combinations, Turbo defrost, Automatic programs, Steam jet, Turbo cooking |
| Memory capacity | 1 custom program |
| Display | Screen with user guide |
| Child lock | Yes |
| Energy saving function | Yes |
| Included accessories | Enameled tray, glass tray, metal rack, plastic tripod |
| Cleaning | System cleaning program + manual cleaning, catalytic coating of the cavity floor |
| Safety | Automatic shut-off, door safety, empty tank detection |
| Manufacturer | Panasonic Manufacturing UK Ltd, Cardiff |
| Electromagnetic standard | EN 55011, group 2 class B |
Frequently Asked Questions - HLS-X485B PANASONIC
User questions about HLS-X485B PANASONIC
0 question about this device. Answer the ones you know or ask your own.
Ask a new question about this device
Download the instructions for your Oven in PDF format for free! Find your manual HLS-X485B - PANASONIC and take your electronic device back in hand. On this page are published all the documents necessary for the use of your device. HLS-X485B by PANASONIC.
USER MANUAL HLS-X485B PANASONIC
Model No. HL-SX485S HL-SX485B
HL-SX485S
IMPORTANT SAFETY INSTRUCTIONS: Before operating this appliance, please read these instructions carefully and keep for future reference.
Operating Instructions. 2-57
Safety Instructions 2-6
Disposal of Waste Products 7
Use of Your Oven 8
Important Safety Instructions. 8-10
Parts of your Oven. 10-11
Oven Accessories. 12-13
Control Panel. 14
Cooking Modes. 15
Combination Cooking Modes 16
User Settings. 17-19
Home Key. 19
Child Lock. 19
Microwave Cooking and Defrosting. 20
Grilling 21-22
Convection Cooking 23-24
Steam Cooking. 25-26
Steam Shot 27
Combination Cooking 28-29
Combination Cooking with Steam.....30-31
Turbo Cook. 32-33
Using the Timer 34
Multi-Stage Cooking 35
Memory. 36
Defrosting Guidelines 37
Turbo Defrost. 38-39
Auto Cook Programs 40-44
Auto Steam Programs 45-48
Auto Steam Programs with
Turbo Cook. 49-52
System Cleaning Programs 53
Cleaning the Water Tank and
Drain Tank 54
Questions and Answers. 55-56
Care of your Oven 57
Installation Instructions.. 58-62
Installation and connection. 58
Safety Instructions. 58-59
Dimensions. 60
Installing the Appliance. 61-62
Specifications 63
Operating Instructions
Safety Instructions
- This appliance can be used by children aged from 8 years and above and persons with reduced physical, sensory and mental capabilities or lack of experience and knowledge if they have been given supervision or instruction by a person responsible for their safety concerning the use of the appliance in a safe way and understand the hazards involved, including escaping steam. Children shall not play with the appliance. Cleaning and user maintenance shall not be made by children without supervision.
- When this oven is installed, it should be easy to isolate the appliance from the electricity supply by pulling out the plug or operating a circuit breaker.
If the supply cord is damaged, it must be replaced by the manufacturer or its service agent or a similarly qualified person in order to avoid a hazard. - Warning! The appliance should be inspected for damage to the door seals and door seal areas and if these areas are damaged the appliance should not be operated until it has been repaired by a service technician trained by the manufacturer.
■ Warning! Do not attempt to tamper with or make any adjustments or repairs to the door, control panel housing, safety interlock switches or any other part of the oven.
■ Warning! Do not remove the outer panels from the oven which give protection against exposure to microwave energy.
Repairs should only be made by a qualified service person.
■ Warning! Liquids and other foods must not be heated in sealed containers since they are liable to explode.
Safety Instructions
- Warning! Only allow children to use the oven without supervision when adequate instructions have been given so that the child is able to use the oven in a safe way and understands the hazards of improper use.
- When heating food in plastic or paper containers, check the oven frequently as these types of containers can ignite if overheated.
- If smoke is emitted or a fire occurs in the oven, touch On/ Off and leave the door closed in order to stifle any flames. Disconnect the power cord, or shut off power at fuse or circuit breaker panel.
This appliance is intended to be used in household applications only. - When heating liquids, e.g. soup, sauces and beverages in your oven, overheating the liquid beyond boiling point can occur without evidence of bubbling. This could result in a sudden boil over of the hot liquid.
- The contents of feeding bottles and baby food jars are to be stirred or shaken. The temperature has to be checked before consumption to avoid burns.
- Do not cook eggs in their shells and whole hard-boiled eggs by MICROWAVE. Pressure may build up and the eggs may explode, even after the microwave heating has ended.
- Clean the inside of the oven, door seals and door seal areas regularly. When food splatters or spilled liquids adhere to the oven walls, base of the oven, door seals and door seal areas wipe off with a damp cloth. Mild detergent may be used if they get very dirty. The use of harsh detergent or abrasive cleaners is not recommended.
DO NOT USE COMMERCIAL OVEN CLEANERS.
Safety Instructions
- When using the GRILL, CONVECTION, STEAM or COMBINATION modes, some foods may splatter grease on to the oven walls. If the oven is not cleaned occasionally, it may start to "smoke" during use.
- Failure to maintain the oven in a clean condition could lead to deterioration of surfaces that could affect the life of the appliance and possibly result in a hazardous situation.
- Warning! The accessible parts may become hot in GRILL, CONVECTION, STEAM and COMBINATION use. Young children less than 8 years of age should be kept away. Children should only use the oven under adult supervision due to the temperatures generated.
A steam cleaner is not to be used for cleaning the appliance. - Do not use harsh, abrasive cleaners or sharp metal scrapers to clean the oven door glass since they can scratch the surface, which may result in shattering of the glass.
- Exterior oven surfaces, including air vents and the oven door will get hot during GRILLING, CONVECTION, STEAM, and COMBINATION modes, take care when opening or closing the door and when inserting or removing food and accessories.
This appliance is not intended to be operated by means of an external timer or separate remote-control system. - Only use utensils that are suitable for use in microwave ovens.
- Warning! This appliance produces boiling hot steam.
Safety Instructions
- During and after cooking with steam function, do not open the oven door when your face is very close to the oven. Care must be taken when opening the door as steam may cause injury.
■ Warning! Steam may billow out when you open the door. If there is steam in the oven, do not reach in with your bare hands! Risk of burns! Use oven gloves. - Please refer to pages 12-13 for correct installation of the oven accessories.
- Warning! The oven has four grill heaters situated in the top of the oven and a convection heater situated in the back of the oven. After using the GRILL, CONVECTION, STEAM and COMBINATION functions, the inside surfaces of the oven will be very hot. Care should be taken to avoid touching the heating elements inside the oven. To prevent burns, care should be taken to avoid touching the inside surfaces of the oven.
- This combination oven is intended for heating food and beverages only. Take care when heating foods low in moisture, e.g. bread items, chocolate, biscuits and pastries. These can easily burn, dry out or catch on fire if cooked too long. We do not recommend heating foods low in moisture such as popcorn or poppadoms. Drying of food, newspapers or clothing and heating of warming pads, slippers, sponges, damp cloths, wheat bags, hot water bottles and similar may lead to risk of injury, ignition or fire.
- Warning! The oven lamp must be replaced by a service technician trained by the manufacturer. DO NOT attempt to remove the outer panels from the oven.
Safety Instructions
- Before using the oven, place the drain tank in position. Refer to page 10 for correct installation.
- The purpose of the drain tank is to collect excess water during STEAM and STEAM COMBINATION mode. It should be emptied after each STEAM and STEAM COMBINATION operation.
- Do not use the water tank if it is cracked or broken, as leaking water could result in electrical failure and danger of electric shock. If the water tank becomes damaged, please contact your dealer.
- This oven is intended for built-in use only. This appliance is not designed to be used as a tabletop appliance or inside a cupboard.
- CAUTION! In order to avoid a hazard due to inadvertent resetting of the thermal cut-out, this appliance must not be supplied through an external switching device, such as a timer, or connected to a circuit that is regularly switched on and off by the utility.
Disposal of Waste Products

Information on disposal for users of Waste Electrical & Electronic Equipment (private households)
This symbol on the products and/or accompanying documents means that used electrical and electronic products should not be mixed with general household waste.
For proper treatment, recovery and recycling, please take these products to designated collection points, where they will be accepted on a free of charge basis. Alternatively, in some countries you may be able to return your products to your local retailer upon the purchase of an equivalent new product.
Disposing of this product correctly will help to save valuable resources and prevent any potential negative effects on human health and the environment which could otherwise arise from inappropriate waste handling. Please contact your local authority for further details of your nearest designated collection point.
Penalties may be applicable for incorrect disposal of this waste, in accordance with national legislation.
For business users in the European Union
If you wish to discard electrical and electronic equipment, please contact your dealer or supplier for further information.
Information on disposal in other countries outside the European Union
This symbol is only valid in the European Union.
If you wish to discard this product, please contact your local authorities or dealer and ask for the correct method of disposal.
Read carefully and keep for future reference

WARNING! Important safety instructions
-
The door seals and seal areas should be cleaned with a damp cloth. The appliance should be inspected for damage to the door seals and door seal areas and if these areas are damaged the appliance should not be operated until it has been repaired by a service technician trained by the manufacturer.
-
Do not operate this appliance if it has a damaged cord or plug, if it is not working properly, or if it has been damaged or dropped. It is dangerous for anyone other than a service technician trained by the manufacturer to perform repair service.
Use of Your Oven
- After plugging in the oven you will be prompted to select a language and to set the time. These settings can be changed at any time, see page 17.
- Do not use the oven for any reason other than the preparation of food and beverages. This oven is specifically designed to heat or cook food. Do not use this oven to heat chemicals or other non-food products.
- Before use, check that utensils/ containers are suitable for use in microwave ovens.
- When the oven is not being used, do not store any objects inside the oven in case it is accidentally turned on.
- The appliance must not be operated by MICROWAVE or COMBINATION WITHOUT FOOD IN THE OVEN. Operation in this manner may damage the appliance.
Heater operation
Before using CONVECTION, STEAM, GRILL or COMBINATION function for the first time, wipe excessive oil off in the oven cavity and operate the oven without food and accessories on GRILL 1 for 15 minutes. This will allow the oil that is used for rust protection to be burned off.

CAUTION! Hot surfaces After cooking the oven accessories will be very hot.
Fan motor operation
After using the oven, the fan motor may rotate for a few minutes to cool the electric components. This is normal and you can remove food even though the fan motor operates. You can continue using the oven during this time.
Water tank
Do not use the water tank if it is cracked or broken, as leaking water could result in electrical failure and danger of electric shock. If the water tank becomes damaged, please contact your dealer.
Oven light
When it becomes necessary to replace the oven light, please consult your dealer.
Cooking times
The cooking times given in the cookbook are approximate. The cooking time depends on the condition, temperature, amount of food and on the type of cookware.
Begin with the minimum cooking time to help prevent overcooking. If the food is not sufficiently cooked you can always cook it for a little longer.

IMPORTANT!
If the recommended cooking times are exceeded the food will be spoiled and in extreme circumstances could catch fire and possibly damage the interior of the oven.
Meat thermometer
Use a meat thermometer to check the degree of cooking of roasts and poultry only when the meat has been removed from the oven. Do not use a conventional meat thermometer in the microwave oven because it may cause sparking.
Small quantities of foods
Small quantities of food or foods with low moisture content can burn, dry out or catch on fire if cooked too long. If materials inside the oven should ignite, touch On/Off and leave the door closed in order to stifle any flames. Disconnect the power cord, or shut off power at fuse or circuit breaker panel.
Eggs
Do not cook eggs in their shells and whole hard-boiled eggs by MICROWAVE. Pressure may build up and the eggs may explode, even after the microwave heating has ended.
Piercing skin
Food with non porous skins, such as potatoes, egg yolks and sausages must be pierced before cooking by MICROWAVE to prevent bursting.
Liquids
When heating liquids, e.g. soup, sauces and beverages in microwave mode, overheating the liquid beyond boiling point can occur without evidence of bubbling. This could result in a sudden boil over of the hot liquid.
To prevent this possibility the following steps should be taken:
a. Avoid using straight-sided containers with narrow necks.
b. Do not overheat.
c. Stir the liquid before placing the container in the oven and again halfway through the cooking time.
d. After heating, allow it to stand in the oven for a short time, stir again before carefully removing the container.
Paper/plastic
When heating food in plastic or paper containers, check the oven frequently as these types of containers ignite if overheated.
Do not use recycled paper products (e.g. kitchen roll) unless the paper product is labelled as safe for microwave oven use. Recycled paper products may contain impurities which may cause sparks and/or fires during use.
Remove wire twist-ties from roasting bags before placing the bags in the oven.
Important Safety Instructions
Utensils/foil
Do not heat any closed cans or bottles because they might explode.
Metal containers or dishes with metallic trim should not be used during microwave cooking. Sparking will occur.
If you use any aluminium foil, meat spikes or metalware the distance between them and the oven walls and door should be at least 2 cm to prevent sparking.
Feeding bottles/baby food jars The top and teat or lid must be removed from feeding bottles or baby food jars before placing in the oven.
After heating the contents of feeding bottles and baby food jars are to be stirred or shaken.
The temperature has to be checked before consumption to avoid burns.
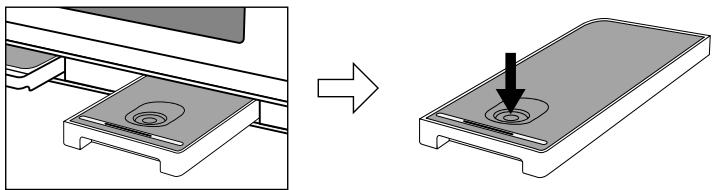
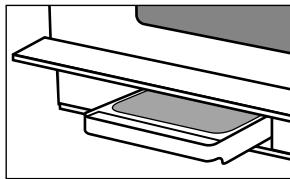
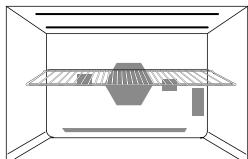
Parts of Your Oven
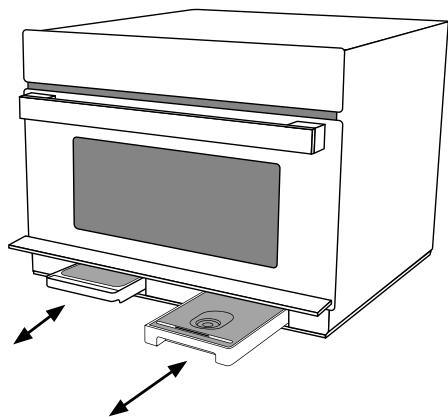
Water tank and drain tank
- Before using the oven, the drain tank must be fitted as it collects excess water during cooking. The drain tank should be removed, emptied and cleaned after each use.
- Remove and re-fit the water tank and drain tank as illustrated.
- DO NOT USE A DISHWASHER TO CLEAN THE DRAIN TANK OR WATER TANK. See page 54 for cleaning instructions.
For further guidelines on using the water tank see page 26.
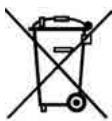
Press and release the panel below the oven door to access the drain tank and water tank.

1. Control panel
- Door handle. Pull the door handle downwards to open. When you open the oven door during cooking, the cooking is stopped temporarily without clearing earlier made settings. The cooking is resumed as soon as the door is closed and Stop/Start is touched. The oven lamp lights as soon as the oven door is opened. Open the door if the oven has been in stand by mode. The display will indicate 'OPEN DOOR'. In no word mode the accessories in the display will blink.
-
Door safety lock system. To prevent injury, do not insert finger, knife, spoon, or other object into the latch hole.
-
Oven lamp. When the oven lamp key is available in the display it is possible to turn the oven lamp on and off.
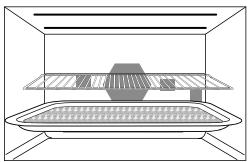
- Grill elements
- Shelf positions. 1-4 as shown.
- Power supply cord
- Plug
- Door hinges. To prevent injury when opening or closing the door, keep fingers away from the door hinges.
- Bottom microwave feeding (see page 20)
- Oven window
- Convection heater
- Steam outlet
- Rating plate
- Air exhaust vent
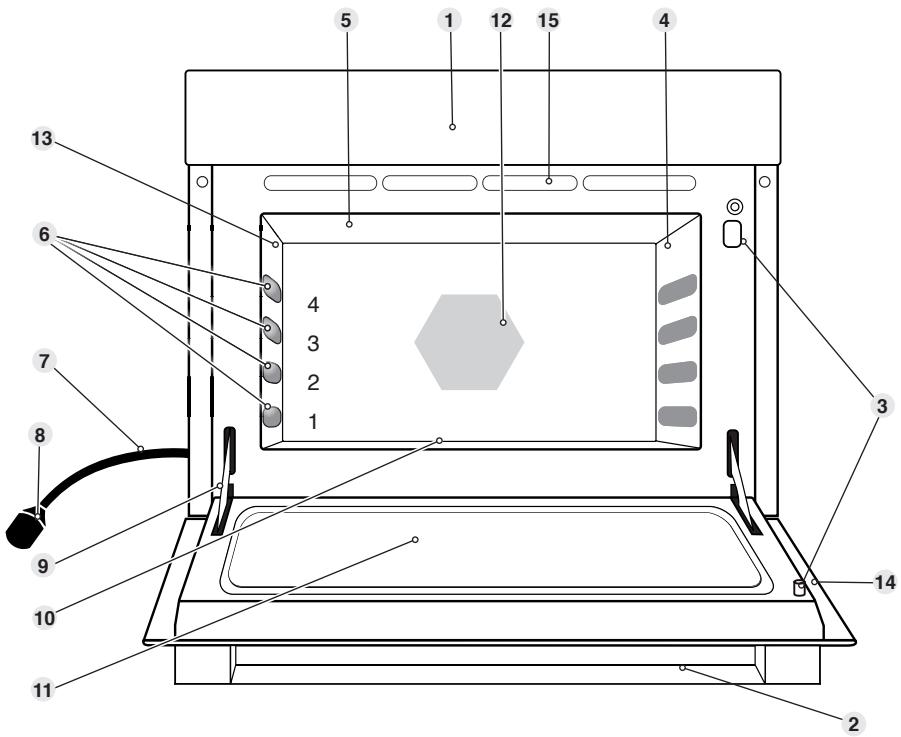

NOTE
This illustration is for reference only.
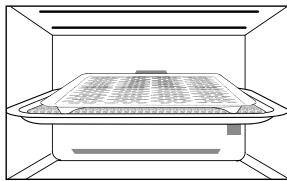
Oven Accessories
Accessories
The oven comes equipped with a variety of accessories. Always follow the directions given for use of the accessories.
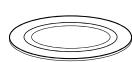
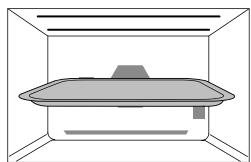
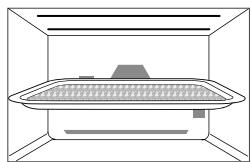
Enamel shelf
- The enamel shelf is for cooking on CONVECTION or GRILL mode only. Do not use on MICROWAVE or COMBINATION modes. Do not use the enamel shelf in shelf position 4 on grill only mode.
- For 2 level CONVECTION cooking, the enamel shelf can be used in shelf position 1 and the wire shelf can be used in shelf position 3.
- The maximum weight that can be placed on the enamel shelf is 4kg (this includes total weight of food and dish).
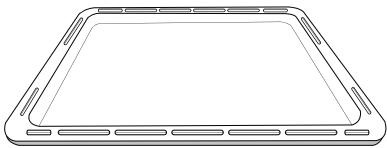
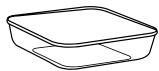
Enamel shelf
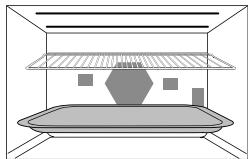
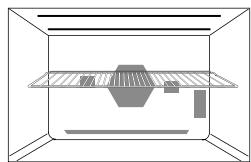
Glass shelf
- The glass shelf can be used in any of the shelf positions to cook using STEAM, MICROWAVE, GRILL, CONVECTION or COMBINATION modes.
- The glass shelf is used together with the plastic trivet for STEAM or STEAM and MICROWAVE mode.
- If the glass shelf is hot, allow to cool before cleaning or placing in cold water, as this could crack or shatter the glass.
- The maximum weight that can be placed on the glass shelf is 4kg (this includes total weight of food and dish).
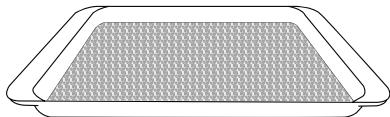
Glass shelf
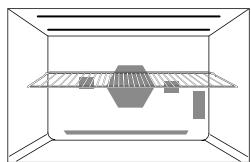
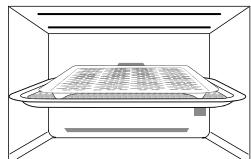
Wire shelf
- The wire shelf can be used in shelf position 3 or 4 for GRILLING foods. It can be used in any of the shelf positions for CONVECTION or COMBINATION cooking.
- Do not use any metal container directly on the Wire shelf in COMBINATION with MICROWAVE.
- Do not use the Wire shelf in MICROWAVE only mode.
- The maximum weight that can be placed on the wire shelf is 4kg (this includes total weight of food and dish).
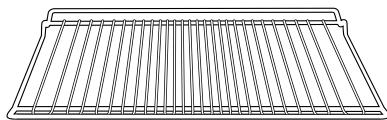
Wire shelf
Plastic trivet
- The plastic trivet is placed inside the glass shelf to cook on STEAM or STEAM and MICROWAVE mode. Food can be placed directly on the plastic trivet.
- Do not use the plastic trivet for GRILL, CONVECTION or COMBINATION modes.
- The plastic trivet is dishwasher safe.
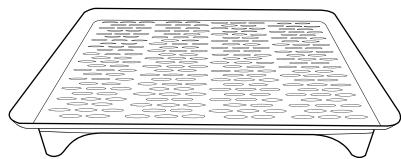
Plastic Trivet
The following chart shows correct use of the accessories in the oven
| Wire shelf | Glass shelf | Enamel shelf | Plastic Trivet | |
| Microwave | x | ✓ | x | x |
| Grill | ✓ | ✓** | ✓** | x |
| Convection | ✓ | ✓ | ✓ | x |
| Steam | x | ✓ | x | ✓ |
| Grill + Convection | ✓ | ✓** | ✓** | x |
| Grill + Microwave | ✓* | ✓** | x | x |
| Convection + Microwave | ✓* | ✓ | x | x |
| Convection + Microwave + Grill | ✓* | ✓** | x | x |
| Steam + Microwave | x | ✓ | x | ✓ |
| Steam + Grill | ✓ | ✓** | ✓** | x |
| Steam + Convection | ✓ | ✓ | ✓ | x |
| Grill or Convection + Microwave + Steam | ✓* | ✓** | x | x |
| Turbo Cook | ✓* | ✓ | x | x |
: Metal containers can not be placed directly on the wire shelf. Either place food directly on the wire shelf or place a glass dish directly on the wire shelf.
*: Do not use the enamel shelf or glass shelf in shelf position 4.
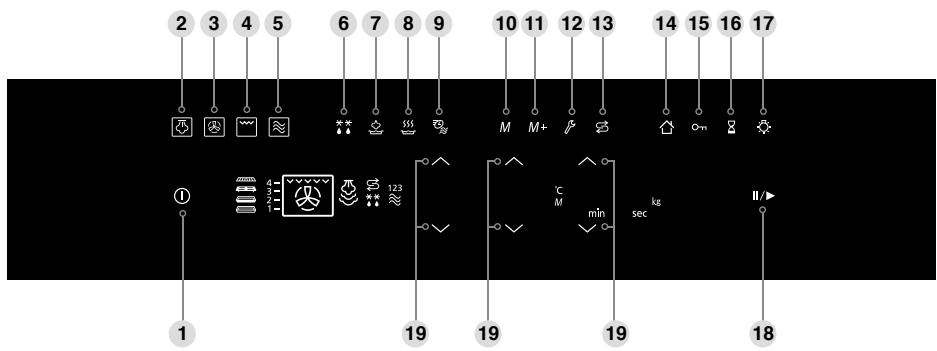
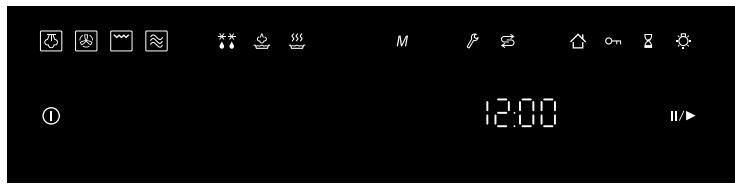
- On/Off
- Steam
- Convection
- Grill
- Microwave
- Turbo defrost
- Steam auto programs
- Auto cook programs
- Turbo cook
-
Memory recall
-
Memory store
- User settings
- Cleaning programs
- Home
- Child lock
- Timer
- Oven lamp
- Stop/Start
- Up and down selection arrows
This oven is equipped with an energy saving function.

NOTE
The oven will enter stand-by mode after 6 minutes of no operation.
If an operation is set and Stop/Start is not touched within 6 minutes, the oven will automatically cancel the operation. The display will revert back to stand-by mode.
- When in stand-by mode, it is necessary to open and close the oven door or touch On/Off key before operating the oven.

BEEP SOUND
A beep sounds when a key is touched. To adjust volume of beep sounds refer to page 18. After the completion of the preheating on GRILL, CONVECTION, or COMBINATION mode, three beeps sound. On some auto programs 3 beeps sound during cooking to stir or turn the food (refer to pages 38-52). After completion of cooking, the oven will beep 5 times.
Cooking Modes
The diagrams shown below are examples of the accessories. It may vary depending on recipe/ dish used.
| Cooking modes | Uses | Accessories to use | Containers |
| MICROWAVE | ·Defrosting ·Reheating ·Melting: butter, chocolate, cheese. ·Cooking fish, vegetables, fruits, eggs (except for eggs in their shell, and whole hard-boiled eggs). ·Preparing: stewed fruits, jam, sauscs, custards, pastry, caramel, meat, fish or vegetarian loaves. ·Baking cakes with eggs and baking powder without colour. (Victoria sandwich, clafoutis etc.) | Use your own Pyrex® dishes, plates or bowls, directly on the base of the oven. | Microwaveable, no metal. |
| GRILL | ·Grilling of meat or fish. ·Toast grilling. ·Browning of gratin dishes or meringue pies. | Wire shelf and enamel shelf. Do not use the enamel shelf in shelf position 4 on grill only mode. | Heatproof, metal tin / tray can be used. |
| CONVECTION | ·Baking of small pastry items with short cooking times: puff pastry, cookies, choux, short pastry, roll cakes. ·Special baking: souffles, meringues, vol-au-vent, small loaves of bread or brioches, sponge cake, meat pie, etc. ·Baking of quiches, pizzas and tarts. | Enamel shelf, glass shelf and wire shelf. | Heatproof, metal tin / tray can be used. |
| STEAM | ·Cooking fish, vegetables, chicken, rice, potatoes and sponge puddings. | Plastic trivet and glass shelf. | Microwaveable. |
Combination Cooking Modes
| Cooking modes | Uses | Accessories to use | Containers |
| GRILL + CONVECTION | · Roasting red meats, thick steak (rib of beef, T bone steaks) · Cooking fish. | Enamel shelf, glass shelf and wire shelf. | Heatproof, metal tin / tray can be used. |
| GRILL + MICROWAVE | · Roasting meat and poultry. · Defrosting and reheating crunchy foods (quiche, pizza, bread, viennoiserie, lasagne, gratin.) · Cooking lasagne, meat, potatoes or vegetable gratins. · Baking cakes and puddings with eggs or baking powder ingredients with browning, baking of quiches, pies and tarts. | Wire shelf and / or glass shelf. | Microwaveable and heatproof. Metal cake tin to be used on glass shelf only. DO NOT USE spring form tins. |
| CONVECTION + MICROWAVE | |||
| GRILL + CONVECTION + MICROWAVE | |||
| STEAM + MICROWAVE | · Cooking fish, vegetables, chicken, rice, and potatoes. | Plastic trivet and glass shelf. | Microwaveable. |
| GRILL + STEAM | · Cooking gratins · Kebabs · Baking cakes · Pastry tarts · Souffles · Whole fish | Wire shelf or enamel shelf. | Heatproof, metal tin / tray can be used. |
| CONVECTION + STEAM |
Access the user settings menu to change the following settings.

Touch user settings key to access the user settings menu.

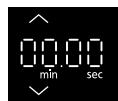
CLOCK (1)
TIME (2)
LANG (3)
GUIDE (4)
VOLUME (5)
BLUE (6)
WHITE (7)
DEMO (8)
Language
These models have a unique function "Word Prompting" which guides you through the operation of your oven. As you tap the keys, the display will scroll the next instruction reducing the opportunities for mistakes.
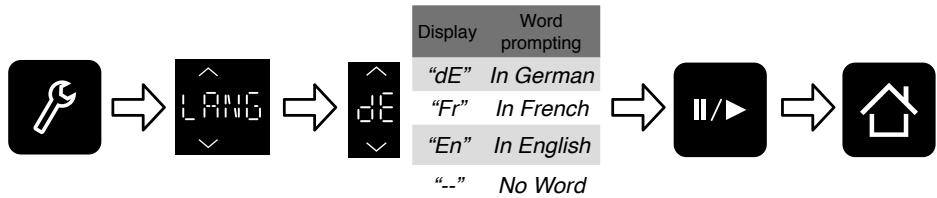
Touch user settings key to access the user settings menu.
Select "LANG" by tapping the up and down keys.
Tap the up and down arrows to select a language.
Touch Stop/ Start to store this setting.
Touch Home key to exit user settings.
Turning the user guide off and on
The user guide is on by default.

Touch user settings key to access the user settings menu.


Select "GUIDE" by tapping the up and down keys.


Select "OFF" to turn the operation guide off.
Touch Stop/Start to store this setting.
Touch Home key to exit user settings.
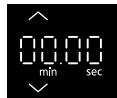
Setting the time of day
The clock can be set by accessing the user settings.


Touch user settings key to access the user settings menu.
Select "TIME" using the up and down keys.
Set the time by tapping up and down keys.
Touch Stop/Start to store this setting.
Touch Home key to exit user settings.

NOTE
The clock will keep the time of day as long as the oven is plugged in and electricity is supplied.
One touch will increase or decrease the time by 1 minute, you can also adjust the time quickly by touching and holding the up or down keys.
This is a 24 hour clock, i.e. 2pm = 14:00 not 2:00.
The clock can be turned off in the user settings, see below.
Turning clock display off and on


To turn the clock display on and off touch the user settings key to access the user settings menu.
Select "CLOCK" by tapping the up and down keys.
Select "OFF" to turn the clock display off.
Touch Stop/ Start to store this setting.
Touch Home key to exit user settings.
Volume
The volume can be set between 0 and 3. 0 is silent mode and 3 is the highest volume.


Touch user settings key to access the user settings menu.
Select "VOLUME" by tapping the up and down keys.
Select desired volume settings from 0-3.
Touch Stop/ Start to store this setting.
Touch Home key to exit user settings.

NOTE
In silent mode the oven will still beep when cooking has ended for turn / stir prompts, for error codes and if the On/Off key is touched.
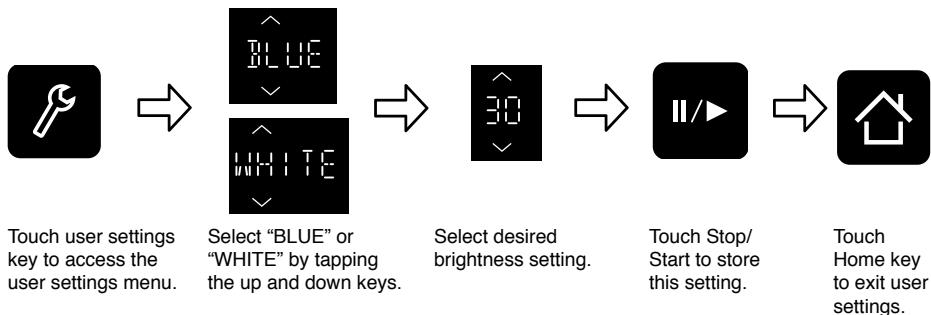
Brightness
The brightness of the blue and white display icons can be changed independently.
Demo mode
This mode is designed for retail store display.

Touch user settings key to access the user settings menu.


Select "DEMO" by tapping the up and down keys.

Select "OFF" to turn demo mode off.


Touch Stop/ Start to store this setting.


Touch Home key to exit user settings.
Home Key

Touch home key to return to the home screen.
Child Lock
Using this system will make the oven controls inoperable; however, the door can be opened.
To Set:

Touch and hold the child lock key for 5 seconds to set the child lock. The key is fully illuminated when the child lock is on.
To Cancel:

Touch and hold the child lock key for 5 seconds to turn the child lock off. The child lock key is partially illuminated when the child lock is off.
Microwave Cooking and Defrosting
There are 6 different microwave power levels available (see the chart below).


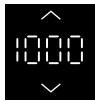


Tap Microwave.
Select the microwave power
level by tapping the up and down keys. The default power is 1000 W.
Select the cooking time by tapping the up and down keys.
Touch Stop/Start.
The cooking program will start and the time in the display will count down.
| Power | Wattage | Max time |
| Max | 1000 Watts | 30 mins |
| Medium | 600 Watts | 90 mins |
| Low | 440 Watts | 90 mins |
| Simmer | 300 Watts | 90 mins |
| Defrost | 270 Watts | 90 mins |
| Warm | 100 Watts | 90 mins |
Use of accessory:
Use your own Pyrex® dishes, plates or bowls covered with a lid or pierced cling film directly on the base of the oven. Do not place food directly on the base of the oven.


NOTE
For multi-stage cooking refer to page 35.
- Stand time can be programmed after microwave power and time setting. Refer to using the timer page 34.
- You can change the cooking time during cooking if required by a maximum of 10 minutes. Tap up and down keys to increase or decrease the cooking time. Touch and hold the up or down key to increase or decrease time more quickly. Tapping down to zero will end cooking.
Maximum time that can be set on Max power is 30 mins. On all other power levels the maximum time that can be set is 90 mins.
- DO NOT attempt to use the microwave only mode with any metal accessory in the oven.
Bottom feeding technology
Please note that this product uses bottom feeding technology for microwave distribution which differs from traditional turntable side feeding methods and creates more useable space for a variety of different sized dishes. This microwave feeding style can give a difference in heating times (in microwave mode) when compared against side feeding appliances. This is quite normal and should not cause any concern.
There are 3 different Grill settings available.

Tap Grill key once, twice or three times to select the desired grill power.
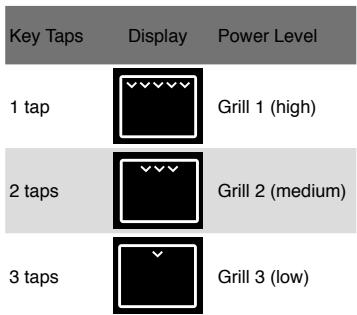


After preheating, place the food in the oven.


Touch Start to preheat. A "P" will appear in the display window. When the oven is preheated the oven will beep and the "P" will flash. Then open the door and place the food inside. *When preheat is not required skip this step by setting the grilling time.
Select the cooking time by tapping up and down keys. Maximum cooking time is 90 minutes.
Touch Stop/Start. The cooking program will start and the time in the display will count down.
Use of accessory:
Place wire shelf with food in shelf position 3 or 4.
Place glass shelf in shelf position 2 or 3 to catch fat and drips. Do not use the enamel shelf in shelf position 4 on grill only mode.

NOTE
Never cover foods when grilling.
The grill will only operate with the oven door closed.
- Most foods require turning halfway through cooking. When turning food, open oven door and CAREFULLY remove wire shelf using oven gloves. After turning, return food to the oven and close door. After closing oven door, touch Stop/Start. The oven display will continue to count down the remaining grilling time. It is safe to open the oven door at any time to check the progress of the food as it is grilling.
The grill will glow on and off during cooking - this is normal. Always clean the oven after using the Grill and before using microwave or combination.
- You can change the cooking time during cooking if required by a maximum of 10 minutes. Tap up and down keys to increase or decrease the cooking time. Touch and hold the up or down key to increase or decrease time more quickly. Tapping down to zero will end cooking.

CAUTION!
Use oven gloves when removing accessories. Never touch the outside window or inside metal parts of the door or oven when taking food in or out due to the high temperatures involved.
Convection Cooking
This key offers a choice of convection temperatures, 40^ and 100 - 230^ , in 5^ increments. For quick selection of the most commonly used cooking temperatures, the temperature starts at 150^ and counts up and down.

Tap Convection key.

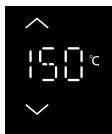
Set the desired convection temperature by tapping the up and down keys.


After preheating, place the food in the oven.


Touch Stop/Start to preheat. A "P" will appear in the display window. When the oven is preheated the oven will beep and the "P" will flash. Open the door and place the food inside.
- Skip this step when preheating is not required.
Select the cooking time by tapping up and down keys (up to 9 hours).
Touch Stop/Start.
The cooking program will start and the time in the display will count down.
Use of accessory:
For 1 level CONVECTION cooking use the enamel shelf or wire shelf in any shelf position.
For 2 level CONVECTION cooking, the enamel shelf can be used in shelf position 1 and the wire shelf can be used in shelf position 3.

NOTE
The oven cannot preheat at 40^ .
For two level cooking, baking times can differ. The food on the upper level may be cooked sooner than that on the lower one.
Convection Cooking

NOTE on preheating
- Do not open the door during preheating. After preheating 3 beeps will be heard and the "P" will flash in the display window. If the oven door is not opened after preheating, the oven will maintain the selected temperature. If the door is not opened within 30 minutes of starting preheating, preheating will end.
If you want to cook without preheating, after selecting the desired temperature, set the cooking time then touch Stop/Start.

NOTE
- When the selected cooking time is less than one hour, the time counts down second by second.
- When the selected cooking time is over one hour, the time counts down minute by minute until only "1H 00" (1 hour) remains. The display then indicates minutes and seconds and counts down second by second.
- You can change the cooking time during cooking if required by a maximum of 10 minutes. Tap up and down keys to increase or decrease the cooking time. Touch and hold the up or down key to increase or decrease time more quickly. Tapping down to zero will end cooking.
After touching Stop/Start, the selected temperature can be changed by tapping the up and down keys This does not include 40^ .
Depending on the recipe, you can preheat with or without the shelves in position. The shelves are ideal for batch baking and when cooking in a large dish.

CAUTION!
Always use oven gloves when removing the food and accessories after cooking as the oven and accessories will be very hot.
Steam Cooking
There are 3 different steam settings available. Use the steam mode to cook vegetables, fish, chicken and rice.

Tap Steam until the power you require appears in the display window.


Select the cooking time by tapping up and down keys. Maximum cooking time is 30 minutes.
Touch Stop/Start. The cooking program will start and the time in the display will count down.

NOTE
- Fill the water tank before using the steam function.
The maximum time for cooking in this mode is 30 minutes. If required to cook for longer than this time, re-fill the water tank and repeat the above operation for the remaining time.
If during operation the water tank becomes empty, the oven will stop operation. The prompt in the display will ask you to re-fill the water tank. After re-filling the water tank and positioning back in the oven, touch Stop/Start. The oven will not continue cooking until the water tank has been re-filled and Stop/Start touched. - You can change the cooking time during cooking if required by a maximum of 10 minutes. Tap up and down keys to increase or decrease the cooking time. Touch and hold the up or down key to increase or decrease time more quickly. Tapping down to zero will end cooking.
It is possible to refill water tank at any time during cooking, without having to touch Stop/Start first.
■ Wipe away excess water in the cavity and around the water tanks after cooking with steam.

CAUTION
The accessories and surrounding oven will get very hot. Use oven gloves.
- When removing the food or cooking accessories, hot water may drip from the oven top.
Steam may billow out when you open the door. If there is steam in the oven, do not reach in with your bare hands! Risk of burns! Use oven gloves.
Take care when removing the drain tank.
Steam Cooking
Guidelines for water tank
Carefully remove the water tank from the oven. Fill with tap water (do not use mineral water) and position back in the oven. It is recommended to clean the water tank in warm water once a week.
Oven accessories to use:
When steaming food the plastic trivet is placed inside the glass shelf in shelf position 3. Food can be placed directly on the plastic trivet.
Use oven gloves when removing accessories as they will be very hot, and so will the roof and walls of the oven.
Place food on plastic trivet, on the glass shelf in shelf position 3.
Guidelines
- Use the accessories provided, as explained above.
- The steam will only operate with the oven door closed.
- During and after cooking with steam function, do not open the oven door when your face is very close to the oven. Care must be taken when opening the door as steam may cause injury.
-
Always use oven gloves when removing the food and accessories after steaming as the oven and accessories will be very hot.
-
After each steam operation carefully remove and empty the drain tank. After emptying, wash in warm soapy water.
Re-position the drain tank as described on page 10.
This feature allows you to add steam during cooking (for 1, 2 or 3 minutes). There are seven combinations that you can use steam shot -
MICROWAVE
GRILL
CONVECTION
GRILL + CONVECTION
GRILL + MICROWAVE
CONVECTION + MICROWAVE
GRILL + CONVECTION + MICROWAVE
Adding steam during cooking enhances the heat distribution and aids the rising process of breads, cakes and pastries.
Set and operate the desired program.


Optional
As required during operation, hold steam for 2 seconds and 1 minute will be added.
If you want to add 2 or 3 minutes, tap Steam 2 or 3 times within 3 seconds after step 2. The remaining time displayed includes steam shot time.

NOTE
Steam shot is not available during preheating mode or at 40^ convection.
Fill the water tank before use.
The original program still counts down when operating steam shot.
The steam shot time can not exceed the remaining cooking time.
If adding 2 or 3 minutes, steam must be tapped 2 or 3 times within a 3 second time period.
■ Wipe away excess water in the cavity and around the water tanks after cooking with steam.

CAUTION
The accessories and surrounding oven will get very hot. Use oven gloves.
- When removing the food or cooking accessories, hot water may drip from the oven top.
Steam may billow out when you open the door. If there is steam in the oven, do not reach in with your bare hands! Risk of burns! Use oven gloves.
| Food | Cooking mode | Steam Shot |
| Pastries | Convection | 2/3total time add 3 mins. Steam Shot |
| Breads | Convection | 2/3total time add 3 mins. Steam Shot |
| Sponge cakes | Convection | 1/2total time add 3 mins. Steam Shot |
| Part baked rolls | Convection and Grill | 2/3total time add 3 mins. Steam Shot |
Combination Cooking
There are 4 combination settings; 1) Grill + Microwave, 2) Grill + Convection,
3) Convection + Microwave, 4) Grill + Convection + Microwave. 1000 W Microwave power level is not available in Combination cooking. This would not be useful in normal use (the food would be cooked before browning is achieved). 270 W Defrost can not be set in combination.
| Cooking modes Grill or convection must be selected before microwave | Display |
| + Grill + Microwave (Maximum cooking time is 1 hour 30 minutes) | ≈ |
| or + Convection + Grill (Maximum cooking time is 9 hours) | |
| + Convection + Microwave (Maximum cooking time is 9 hours) | ≈ |
| + Convection + Grill + Microwave (Maximum cooking time is 9 hours) | ≈ |

Touch if preheating
Select the cooking time by tapping up or down keys.
Touch Stop/Start. The time counts down in the display.

NOTE on preheating
The oven can be preheated in Combination mode with Convection or Grill/ Convection cooking.
- Touch Stop/Start before setting the cooking time and follow the NOTE ON PREHEATING on page 24.
NO MICROWAVES ARE EMITTED DURING COMBINATION PREHEATING.

NOTE
Combination modes are not available with convection 40^
Preheating is not available for Grill + Microwave mode.
- When the selected cooking time is less than one hour, the time counts down second by second.
■ When the selected cooking time is over one hour, the time counts down minute by minute until only "1H 00" (1 hour) remains. The display then indicates minutes and seconds and counts down second by second.
- You can change the cooking time during cooking if required by a maximum of 10 minutes. Tap up and down keys to increase or decrease the cooking time. Touch and hold the up or down key to increase or decrease time more quickly. Tapping down to zero will end cooking.
1000 W or 270 W (Defrost) microwave power settings are not available in combination.

CAUTION!
Use oven gloves when removing accessories. Never touch the outside window or inside metal parts of the door or oven when taking food in or out due to the high temperatures involved.
Use of accessories:
Use the wire shelf in any of the shelf positions. Use the glass shelf
in shelf positions 1 to 3.
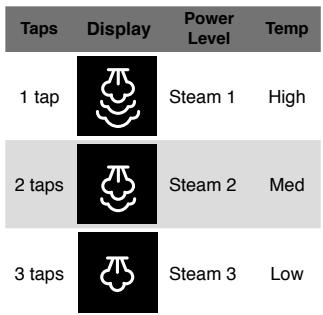
Combination Cooking with Steam
Steam can be used to cook foods simultaneously with microwave, grill or convection mode. This can often reduce traditional oven cooking times and keep the food moist.
| Taps | Display | Power Level | Temp |
| 1 tap | Steam 1 | High | |
| 2 taps | Steam 2 | Med | |
| 3 taps | Steam 3 | Low |
| Cooking modes The cooking modes can be selected in any order. | Available power levels | Display |
| + Steam + Microwave | Microwave power 440 W, 300 W or 100 W can be set. | ≈ |
| or + Steam + Grill | Grill levels 1, 2 or 3 can be set. | √√√√√ |
| or + Steam + Convection | Convection 100 °C - 230 °C can be set. | √√√√ |


Select the cooking time by tapping up or down keys. Maximum cooking time is 30 minutes.
Touch Stop/Start.
The cooking program will start and the time in the display will count down.
Use of accessories:
Steam + microwave
Plastic trivet on glass shelf in shelf position 3.
Steam + grill or convection
Wire shelf or enamel shelf in any shelf position.

NOTE
The maximum time for cooking in this mode is 30 minutes. If required to cook for longer than this time, re-fill the water tank and repeat the above operation for the remaining time.
If during operation the water tank becomes empty, the oven will stop operation. The prompt in the display will ask you to re-fill the water tank. After re-filling the water tank and positioning back in the oven, touch Stop/Start. The oven will not continue cooking until the water tank has been re-filled and Stop/Start touched.
Preheating is not available with Steam + Microwave and Steam + Grill mode.
- You can change the cooking time during cooking if required by a maximum of 10 minutes. Tap up and down keys to increase or decrease the cooking time. Touch and hold the up or down key to increase or decrease time more quickly. Tapping down to zero will end cooking.
It is possible to refill water tank at any time during cooking, without having to touch Stop/Start first.
■ Wipe away excess water in the cavity and around the water tanks after cooking with steam.
Guidelines
- During and after cooking with steam function, do not open the oven door when your face is close to the oven. Care must be taken when opening the door as steam may cause injury.
-
Always use oven gloves when removing the food and accessories after cooking as the oven and accessories will be very hot.
-
After each steam operation carefully remove and empty the drain tank. After emptying, wash in warm soapy water.


CAUTION
The accessories and surrounding oven will get very hot. Use oven gloves.
- When removing food or cooking accessories, hot water may drip from the oven top.
Steam may billow out when you open the door. If there is steam in the oven, do not reach in with your bare hands! Risk of burns! Use oven gloves.
- Do not use the plastic trivet when using combination steam + grill or convection modes.
Turbo Cook
The oven can be programmed to cook or reheat food more efficiently by using the Turbo Cook function to support steam, convection, grill and grill + convection cooking. Selecting Turbo Cook after any of these cooking modes will simultaneously add 300 W microwave power to reduce cooking time.
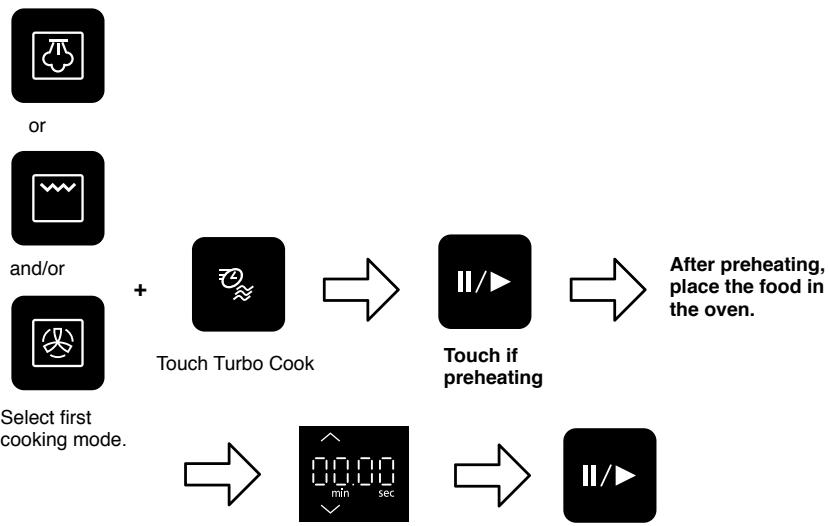
Select the cooking time by tapping up and down keys.
Touch Stop/Start. The cooking program will start and the time in the display will count down.
Cooking guidelines
| Food | Weight | Combination | Time |
| Croque monsieur | 200 g (2 pcs) | Grill 1 + Turbo Cook then Grill 1 | 4 - 5 mins 1 min |
| Frozenbreaded fish fillets | 100 g (1 pce) | Grill 1 + Turbo Cook | 6 mins |
| Beef rib (well done) | Per 400 g | 230 °C + Grill 1 + Turbo Cook | 10 - 11 mins |
| Poussin | Per 500 g | 230 °C + Grill 1 + Turbo Cook | 13 - 14 mins |
| Frozen spring rolls (chicken) | 360 g (4 pcs) | 200 °C + Grill 1 + Turbo Cook | 7 - 8 mins |
| Apple Strudel (frozen, raw) | 300 g | 230 °C + Turbo Cook | 11 mins |
| Lasagne (fresh) | 600 g | 230 °C + Grill 1 + Turbo Cook | 8 - 9 mins |
| Whole fresh fish | 300 - 400 g (1 pce) | 180 °C + Turbo Cook | 17 - 18 mins |
| Quiche | 300 g | 220 °C + Turbo Cook | 7 mins |
| Sausage roll | 250 g (2 pcs) | 200 °C Grill 1 + Turbo Cook | 6 mins |

NOTE
Turbo cook is not available with Convection 40^
Preheat is only available with Turbo Cook and convection or with Turbo Cook, grill and convection.
- You can change the cooking time during cooking if required to a maximum of 10 minutes. Tap up and down keys to increase or decrease the cooking time. Touch and hold the up or down key to increase or decrease time more quickly. Tapping down to zero will end cooking.

CAUTION!
Always use oven gloves when removing the food and accessories after cooking as the oven and accessories will be very hot.
Using the Timer
Delay start cooking
By using the Timer, you are able to program Delay Start cooking.
example


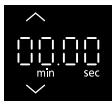
Touch Timer.
Set the delay time by tapping the up and down keys (up to 9 hours).
Set the desired cooking program and cooking time.
Touch Stop/Start

NOTE
Three stage cooking can be programmed including Delay start cooking.
If the programmed delay time exceeds one hour, the time will count down in units of minutes. If less than one hour, the time will count down in units of seconds.
Delay start cannot be programmed before an auto program.
example
Delay Start: 1 hour

Max Power (1000 W): 10 mins

Simmer Power (300 W): 20 mins
Stand time
By using the Timer, you can program stand time after cooking is completed or use to program the oven as a minute timer.
example


Set the desired cooking program and cooking time.
Touch Timer
Set desired amount of time by tapping the up and down arrows (up to 9 hours).
Touch Stop/Start

NOTE
Three stage cooking can be programmed including stand time.
This feature may also be used as a kitchen timer. In this case touch the Timer, set time and touch Stop/Start.
If the oven door is opened during the stand time or kitchen timer, the time in the display window will continue to count down.
Stand time cannot be programmed after an auto program.
example
Max Power (1000 W): 4 mins

Stand Time: 5 mins

Max Power (1000 W): 2 mins
2 or 3 stage cooking
example

example
To DEFROST (270 W) for 2 minutes and cook food on MAX (1000 W) power for 3 minutes.

Select Microwave defrost power (270 W).
Set the cooking time to 2 minutes.
Touch Microwave Power to select max power (1000 W).
Set the cooking time to 3 minutes.
Touch Stop/Start.
example
To GRILL at LOW (grill 3) for 4 minutes and cook food on LOW power (440 W) for 5 minutes.

Tap Grill Power 3 times to select Grill level 3 (low).
Set the cooking time to 4 minutes.
Select Microwave low power (440 W).
Set the cooking time to 5 minutes.
Touch Stop/Start.

NOTE
For 3 stage cooking, enter another cooking program before touching Stop/Start.
- During operation, touching Stop/Start once will stop the operation. Touching Stop/Start will resume the programmed operation.
■ Whilst not operating, touching Home will clear the selected program.
■ Auto programs cannot be used with multi-stage cooking.
Using the memory function
This feature allows you to pre-program your oven for a frequently used reheating or cooking task. You are able to pre-program your oven for a specific power level and time that is convenient for you. You can only pre-program one memory task with this oven.
To set a memory program
Set the desired cooking program.


Touch and hold M+ to store the cooking program. A beep will sound to confirm the program has been stored.
To use a memory program


Touch M to recall your stored memory cooking program.
Press Stop/Start to begin cooking.

NOTE
Auto programs cannot be programmed into memory.
- Setting a new cooking program into memory will cancel the cooking program previously stored.
If M+ key is not illuminated, memory cannot be stored.
If M key is not illuminated, memory cannot be recalled.
The biggest problem when defrosting food in a microwave is getting the inside defrosted before the outside starts to cook. For this reason Panasonic have made the defrosting on the oven CYCLIC DEFROST, just select the 270 W power level and set the required time. The oven then divides this time into 8 stages. These stages alternate between defrosting (total of 4) and standing (total of 4).
During the standing stages there is no microwave power in the oven, although the light will remain on. The automatic stand times ensure a more even defrost and for small items the usual stand time can be eliminated.
Tips for defrosting
Check the defrosting several times, even if you use the auto programs. Observe the standing times.
Standing times
Individual portions of food may be cooked almost immediately after defrosting. It is normal for large portions of food to be frozen in the centre. Before cooking, allow to stand for a minimum of one hour. During this standing time, the temperature becomes evenly distributed and the food is defrosted by conduction. N.B. If the food is not going to be cooked immediately, store it in the refrigerator. Never refreeze defrosted food without first cooking it.
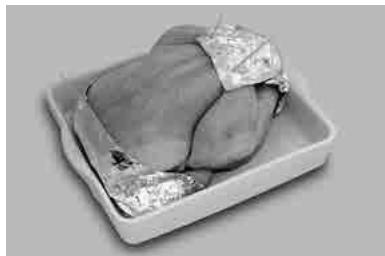
Joints and poultry
It is preferable to place the joints on an upturned plate or plastic rack so that they are not resting in the juices. It is essential to protect delicate or projecting parts of this food with small pieces of foil to prevent these parts from cooking.
It is not dangerous to use small pieces of foil in your oven, provided they do not come into contact with the oven walls.
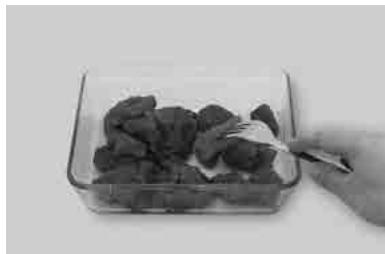
Minced meat or cubes of meat and seafood
Since the outside of these foods quickly defrosts, it is necessary to separate them, break the blocks into pieces frequently while defrosting and remove them when they have defrosted.
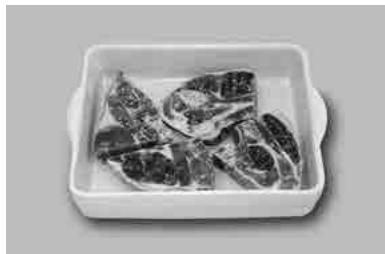
Small portions of food
Chops and chicken pieces must be separated as soon as possible so that they defrost evenly throughout. Fatty parts and the ends defrost more quickly. Place them near the centre of a Pyrex® dish or protect them with small pieces of foil.
Bread
Loaves will require a standing time of 15 - 30 minutes to allow the centre to thaw. Standing time can be shortened if slices are separated and rolls and loaves cut in half.
Beep Sounds
Beeps will sound during the Auto Defrost programs. The beeps are to remind you to check, stir, separate the pieces, or shield small parts. Failure to do this may result in uneven defrosting.
Turbo Defrost
With this feature you can defrost frozen food according to the weight. For quick selection, the weight starts from the most commonly used weight for each program.


Select the desired Turbo Defrost program. Place food in a suitable dish/plate on the base of the oven.
Select the cooking weight by tapping the up and down keys.
Touch Stop/Start. Remember to stir or turn the food during defrosting.

NOTE
■ When the defrosting time is longer than 60 minutes, the time will appear in hours and minutes.
The shape and size of the food will determine the maximum weight the oven can accommodate.
■ Allow standing time to ensure the food is completely defrosted.

IMPORTANT!
See page 37 for defrosting guidelines.
| Program | Min./Max. Weight | Suitable Food |
| 1. MINCED MEAT | 0.10 kg - 1.20 kg | To defrost minced beef, lamb, pork or chicken. Select turbo defrost program 1. Enter the weight. Break up mince at beeps. Allow to stand 20 - 30 mins. Larger quantities may require longer stand times. |
| 2. CHOPPS | 0.10 kg - 1.10 kg | To defrost pork or lamb chops (each 100 g to 400 g). Select turbo defrost program 2. Enter the weight. Turn and shield at beeps. Allow to stand 20 - 30 mins. Larger quantities may require longer standing |
| 3. FISH FILLETS | 0.10 kg - 1.20 kg | To defrost fish fillets (each 100 g - 400 g). Select turbo defrost program 3. Enter the weight. Turn and shield at beeps. Allow to stand 20 - 30 mins. Larger quantities may require longer standing. |
| 4. CHICKEN WHOLE | 0.50 kg - 2.50 kg | To defrost whole poultry. Select turbo defrost program 4. Enter the weight. Whole poultry will require turning and shielding at beeps. Protect wings, breast and fat with smooth pieces of aluminium foil secured with cocktail sticks. Do not allow the foil to touch the walls of the oven. Allow to stand 1 - 2 hours. |
| 5. CHICKEN WITH BONES | 0.10 kg - 1.20 kg | To defrost chicken pieces with bones (each 100 g - 400 g). Select turbo cook program 5. Enter the weight. Turn and shield at beeps. Allow to stand 20 - 30 mins. Larger quantities may require longer standing. |
| 6. CHICKEN WITHOUT BONES | 0.10 kg - 1.20 kg | To defrost chicken pieces without bones (each 100 g - 400 g). Select turbo cook program 6. Enter the weight. Turn and shield at beeps. Allow to stand 30-40 mins. Larger quantities may require longer standing. |
| 7. BEEF | 0.50 kg - 2.00 kg | To defrost beef joints. Select turbo cook program 7. Enter the weight. Beef joints will require turning and shielding at beeps. Protect fat and thin edges with smooth pieces of aluminium foil secured with cocktail sticks. Do not allow the foil to touch the walls of the oven. Allow to stand 1 - 2 hours. |
| 8. PORK | 0.50 kg - 2.00 kg | To defrost pork joints. Select turbo cook program 8. Enter the weight. Pork joints will require turning and shielding at beeps. Protect fat and thin edges with smooth pieces of aluminium foil secured with cocktail sticks. Do not allow the foil to touch the walls of the oven. Allow to stand 1 - 2 hours. |
| 9. LAMB | 0.50 kg - 2.00 kg | To defrost lamb joints. Select turbo cook program 9. Enter the weight. Lamb joints will require turning and shielding at beeps. Protect fat, thin edges and tip by bone with smooth pieces of aluminium foil secured with cocktail sticks. Do not allow the foil to touch the walls of the oven. Allow to stand 1 - 2 hours. |
| 10. BREAD ROLLSS | 0.10 kg - 0.50 kg | To defrost white, brown or multi-grain bread rolls. Place on a large plate or shallow glass dish. Select turbo cook program 10. Enter the weight. Turn and separate at beeps. Allow bread rolls to stand for 10 min (white light bread rolls) to 30 min (dense rye bread rolls). |
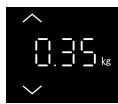
| 11. BREAD SLICES | 0.10 kg - 0.35 kg | To defrost white, brown or multi-grain bread slices. Separate where possible and place on a large plate or shallow glass dish. Select turbo cook program 11. Enter the weight. Turn and separate at beeps. Allow bread to stand for 10 - 30 mins. |
Auto Cook Programs
A variety of food may be cooked without having to enter the cooking time or the power level.

example

Select the desired Auto Cook Program.

Select the cooking weight by tapping the up and down keys.


Touch Stop/Start.
The cooking program will start and the time in the display will count down.

NOTE
The auto cook programs must ONLY be used for foods described.
Only cook foods within the weight ranges described.
Always weigh the food rather than relying on the package weight information.
The temperature for frozen food is assumed to be -18^ to -20^ . The temperature of chilled food is assumed to be +5^ to +8^ (refrigerator temperature).
Only use the accessories as indicated on pages 40-44.
- Most foods benefit from a STANDING time after cooking on an auto program, to allow heat to continue conducting to the centre.
- To allow for some variations that occur in food, check that food is thoroughly cooked and piping hot before serving.
| Program | Weight | Accessories | Instructions |
| 12. PASTABAKE | 0.35 kg - 0.45 kg | - | For reheating, browning and crisping the top of pre-cooked crispy top pasta meals. This program is suitable for lasagne, cannelloni and pasta bakes. Remove all packaging and place in a suitable sized Pyrex® dish on base of oven. Select auto combi program 12. Enter the weight of the crispy top pasta and touch Stop/Start. |
| 13. POTATOBAKE | 0.35 kg - 0.45 kg | - | For reheating, browning and crisping the top of pre-cooked crispy top potato meals. This program is suitable for shepherds pie, fish pie and potato topped bakes. Remove all packaging and place in a suitable sized Pyrex® dish on base of oven. Select auto combi program 13. Enter the weight of the crispy top pasta and touch Stop/Start. |
| 14. JACKETPOTATOES | 0.20 kg - 1.50 kg | To cook jacket potatoes with a crispier drier skin. Choose medium-sized potatoes 200 g - 250 g per potato, for best results. Wash and dry potatoes and prick with a fork several times. Place on wire rack in shelf position 2. Select auto cook program 14. Enter the weight of the potatoes. Touch Stop/Start. | |
| 15. ROAST POTATOES | 0.20 kg - 0.80 kg | Peel and cut potatoes into even sized pieces. Place on glass shelf. Add 1-3 tbsp (15-45 ml) olive oil. Place glass shelf in shelf position 1. Select auto cook program 15. Enter the weight of the potatoes. Touch Stop/Start. Turn twice during cooking at beeps. | |
| 16. FRIES (FROZEN) | 0.20 kg - 0.80 kg | To cook FROZEN fries/oven chips. Spread frozen fries/oven chips out on glass shelf and place in shelf position 2. Select auto cook program 16. Enter the weight of frozen fries/oven chips. Touch Stop/Start. Turn twice during cooking at beeps. For best results cook in a single layer. NOTE: Fries/oven chips vary considerably. We suggest checking a few minutes before the end of cooking to assess level of browning. | |
| 17. CROQUETTS (FROZEN) | 0.25 kg - 0.80 kg | To cook FROZEN potato croquettes. Spread frozen potato croquettes out on glass shelf and place in shelf position 2. Select auto cook program 17. Enter the weight of frozen potato croquettes. Touch Stop/Start. Turn twice during cooking at beeps. For best results cook in a single layer. NOTE: Potato croquettes vary considerably. We suggest checking a few minutes before the end of cooking to assess level of browning | |
| 18. PIZZA (CHILLED) | 0.10 kg - 0.60 kg | For reheating and browning CHILLED, purchased pizza. Remove all packaging and place on wire shelf in shelf position 1. Select auto cook program 18. Enter the weight of the chilled pizza. Touch Stop/Start. This program is not suitable for deep pan pizzas or very thin pizzas. | |
| 19. PIZZA (FROZEN) | 0.10 kg - 0.55 kg | For reheating and browning FROZEN, purchased pizza and cheese baguette. Remove all packaging and place on wire shelf in shelf position 1. Select auto cook program 19. Enter the weight of the frozen pizza. Touch Stop/Start. This program is not suitable for deep pan pizzas or very thin pizzas. |
Auto Cook Programs
| Program | Weight | Accessories | Instructions |
| 20. BREADDED FISH | 0.10 kg - 0.80 kg | To cook pre-purchased FROZEN breaded fish. Place frozen breaded fish on glass shelf in shelf position 2. Select auto cook program 20. Enter the weight of frozen breaded fish. Touch Stop/Start. Turn at beeps. Thicker, heavier pieces of breaded fish may need longer cooking. | |
| 21. ROASTED VEGETABLES | 0.40 kg - 1.00 kg | To ROAST assorted vegetables (e.g. peppers, mushrooms, courgettes, onions). Cut vegetables into even sized chunks and toss with 45 ml (3 tbsp) oil. Place vegetables on glass shelf in shelf position 3. Select auto cook program 21. Enter the weight of the roasted vegetables. Touch Stop/Start. Turn twice during cooking at beeps. | |
| 22. BEEF RARE | 0.50 kg - 2.00 kg | For cooking rare FRESH roast beef (topside, rump or silverside). Place on enamel shelf in shelf position 1. Select auto cook program 22. Enter the weight of beef and touch Stop/Start. Stand for 10 to 15 mins. | |
| 23. BEEF MEDIUM | 0.50 kg - 2.00 kg | For cooking medium FRESH roast beef (topside, rump or silverside). Place on enamel shelf in shelf position 1. Select auto cook program 23. Enter the weight of beef and touch Stop/Start. Stand for 10 to 15 mins. | |
| 24. BEEF WELL DONE | 0.50 kg - 2.00 kg | For cooking well done FRESH roast beef (topside, rump or silverside). Place on enamel shelf in shelf position 1. Select auto cook program 24. Enter the weight of beef and touch start. Stand for 10 to 15 mins. | |
| 25. LAMB MEDIUM | 1.00 kg - 2.00 kg | For cooking medium FRESH leg of lamb with bone. Place on enamel shelf in shelf position 1. Select auto cook program 25. Enter the weight of the lamb. Touch Stop/Start. Turn at beeps. Stand wrapped in aluminium foil for 10 to 15 minutes. | |
| 26. LAMB WELL DONE | 1.00 kg - 2.00 kg | For cooking well done FRESH leg of lamb with bone. Place on enamel shelf in shelf position 1. Select auto cook program 26. Enter the weight of the lamb. Touch Stop/Start. Turn at beeps. Stand wrapped in aluminium foil for 10 to 15 minutes. Due to the seasonal variation with lamb, irregular shaped joints may need a longer cooking time to obtain desired end result. If necessary return to the oven on 200 °C for 5-10 minutes. |
Auto Cook Programs
| Program | Weight | Accessories | Instructions |
| 27. CASSEROLE | 0.90 kg - 2.00 kg | - | For cubed meat (e.g. braising steak, lamb, pork, not chicken) and vegetables. Place in a suitable sized casserole dish with stock. Use a minimum of 400 ml of stock. If you use a cook-in sauce, also add the same quantity of water. Cover with lid. Place on base of oven. Select auto cook program 27. Enter the weight of the casserole. Touch Stop/Start. Stir during cooking at beeps. |
| 28. MEAT SAUCE | 0.45 kg - 2.00 kg | - | To cook raw mince beef based sauce i.e. Bolognese sauce and also very finely diced chicken or pork fillet to be cooked in a sauce. Ensure a minimum quantity of 300 ml of liquid or sauce. If using a cook-in sauce add equal quantity of water to cook-in sauce. Cover with a lid. Place on base of oven. Select auto cook program 28. Enter the weight of the meat sauce. Touch Stop/Start. Stir during cooking at beeps. |
| 29. PASTA | 0.10 kg - 0.50 kg | - | To cook dried pasta. Use a large bowl. Add 1 tbsp oil and boiling water. For 100 g - 290 g pasta add 1 litre of boiling water. For 300 g - 500 g pasta add 1.5 litre of boiling water. 1/2 - 1 tsp (2.5 - 5 ml) salt may be added if desired. Cover with a lid. Place container on base of oven. Select auto program number 29. Enter the weight of the pasta. Touch Stop/Start. Stir at beeps. For a softer texture, stand up to 5 mins after cooking. Drain after cooking. |
Auto Cook Programs
| Program | Weight | Accessories | Instructions |
| 30. MEAL (CHILLED) | 0.20 kg - 1.00 kg | - | To reheat a fresh pre-cooked meal. All foods must be pre-cooked. Foods should be at refrigerator temperature approx. +5 °C. Reheat in container as purchased. Pierce covering film with a sharp knife once in the centre and four times around the edge. If transferring food to dish, cover with pierced cling film. Place food in container on base of oven. Select auto cook program 30. Enter the weight of the chilled meal. Touch Stop/Start. Stir at beeps. Stir again at end of program and allow a few minutes standing time. Large pieces of meat/fish in a thin sauce may require longer cooking. This program is not suitable for starchy food such as rice, noodles or potatoes. |
| 31. MEAL (FROZEN) | 0.20 kg - 0.80 kg | - | To reheat a frozen pre-cooked meal. All foods must be pre-cooked and frozen -18 °C. Reheat in container as purchased or in a Pyrex® dish. Meals in irregular shaped containers may need longer cooking. Pierce covering film with a sharp knife once in the centre and four times around the edge. If transferring food to dish, cover with pierced cling film. Place food in container on base of oven. Select auto cook program 31. Enter the weight of the frozen meal. Touch Stop/Start. Stir at beeps and cut the blocks into pieces. Stir again at end of program and allow a few minutes standing time. Check temperature and cook further minutes if necessary before eating. This program is not suitable for portionable frozen foods. |
Auto Steam Programs
This feature allows you to steam some of your favourite foods by setting the weight only. The oven determines the steam level and the cooking time automatically. Select the category and set the weight of the food. For quick selection, the weight starts from the most commonly used weight for each category.


Select the desired auto steam program.
Select the cooking weight by tapping the up and down keys.
Touch Stop/Start.
The cooking program will start and the time in the display will count down.

NOTE
The auto steam programs must ONLY be used for foods described.
Only cook foods within the weight ranges described.
Always weigh the food rather than relying on the package weight information.
Only use the accessories as indicated on pages 45-48.
- Do not cover foods on the auto steam programs.
- Most foods benefit from a STANDING time after cooking on an auto program, to allow heat to continue conducting to the centre.
- To allow for some variations that occur in food, check that food is thoroughly cooked and piping hot before serving.
■ Wipe away excess water in the cavity and around the water tanks after cooking with steam.
| Program | Weight | Accessories | Instructions |
| 32. CARROS (FRESH) | 0.20 kg - 0.32 kg | To steam FRESH carrots. Fill water tank. Place prepared carrots onto plastic trivet. Place plastic trivet on glass shelf in shelf position 3. Select auto steam program 32. Enter the weight of the fresh carrots. Touch Stop/Start. | |
| 33. BROCCOLI / CAULIFLOWER (FRESH) | 0.20 kg - 0.32 kg | To steam FRESH broccoli or cauliflower. Fill water tank. Place prepared broccoli or cauliflower onto plastic trivet. Place plastic trivet on glass shelf in shelf position 3. Select auto steam program 33. Enter the weight of the fresh broccoli or cauliflower. Touch Stop/Start. | |
| 34. POTATOES WITH SKIN | 0.20 kg - 0.50 kg | To steam potatoes with skins. Fill water tank. Cut potatoes into even sized pieces. Place prepared potatoes onto plastic trivet. Place plastic trivet on glass shelf in shelf position 3. Select auto steam program 34. Enter the weight of the potatoes. Touch Stop/Start. | |
| 35. POTATOES | 0.20 kg - 0.50 kg | To steam potatoes without skins. Fill water tank. Peel potatoes and cut into even sized pieces. Place prepared potatoes onto plastic trivet. Place plastic trivet on glass shelf in shelf position 3. Select auto steam program 35. Enter the weight of the potatoes. Touch Stop/Start. | |
| 36. CARROS (FROZEN) | 0.20 kg - 0.32 kg | To steam FROZEN carrots. Fill water tank. Place frozen carrots onto plastic trivet. Place plastic trivet on glass shelf in shelf position 3. Select auto steam program 36. Enter the weight of the frozen carrots. Touch Stop/Start. | |
| 37. BROCCOLI (FROZEN) | 0.20 kg - 0.32 kg | To steam FROZEN broccoli. Fill water tank. Place frozen broccoli onto plastic trivet. Place plastic trivet on glass shelf in shelf position 3. Select auto steam program 37. Enter the weight of the frozen broccoli. Touch Stop/Start. | |
| 38. PEAS/SWEETCORN (FROZEN) | 0.20 kg - 0.32 kg | To steam FROZEN peas / sweetcorn. Fill water tank. Place frozen peas / sweetcorn onto plastic trivet. Place plastic trivet on glass shelf in shelf position 3. Select auto steam program 38. Enter the weight of the frozen peas and sweetcorn. Touch Stop/Start. | |
| 39. COD/HADDOCK (FRESH) | 0.20 kg - 0.50 kg | To cook FRESH cod or haddock fillets. Fill water tank. Place fresh cod or haddock onto plastic trivet. Place plastic trivet on glass shelf in shelf position 3. Select auto steam program 39. Enter the weight of the fresh cod or haddock. Touch Stop/Start. | |
| 40. SALMON (FRESH) | 0.20 kg - 0.50 kg | To cook FRESH salmon fillets. Fill water tank. Place fresh salmon onto plastic trivet. Place plastic trivet on glass shelf in shelf position 3. Select auto steam program 40. Enter the weight of the fresh salmon. Touch Stop/Start. | |
| 41. PLAICE (FRESH) | 0.20 kg - 0.50 kg | To cook FRESH plaice fillets. Fill water tank. Place fresh plaice onto plastic trivet. Place plastic trivet on glass shelf in shelf position 3. Select auto steam program 41. Enter the weight of the fresh plaice. Touch Stop/Start. | |
| 42. COD / HADDOCK (FROZEN) | 0.20 kg - 0.50 kg | To cook FROZEN cod or haddock fillets. Fill water tank. Place frozen cod or haddock onto plastic trivet. Place plastic trivet on glass shelf in shelf position 3. Select auto steam program 42. Enter the weight of the frozen cod or haddock. Touch Stop/Start. | |
| 43. SALMON (FROZEN) | 0.20 kg - 0.50 kg | To cook FROZEN salmon fillets. Fill water tank. Place frozen salmon onto plastic trivet. Place plastic trivet on glass shelf in shelf position 3. Select auto steam program 43. Enter the weight of the frozen salmon. Touch Stop/Start. | |
| 44. RICE | 0.10 kg - 0.20 kg | For cooking rice for savoury dishes not rice pudding (Thai, Basmati, Jasmine, long grain). Fill water tank. Place rice in a shallow Pyrex® bowl. Add 2.5 parts water to 2 parts rice. Do not cover. Place bowl on glass shelf in shelf position 3. Select auto steam program 44. Enter the weight of the rice only. Touch Stop/Start. | |
| 45. RISOTTO | 0.50 kg (2 portions) 1.00 kg (4 portions) | For cooking risotto, 500 g or 1000 g. Prepare as outlined in the recipe below. Fill water tank. Place on the glass shelf in shelf position 3. Do not cover. Select auto steam program 45. Select 500 g or 1000 g. Touch Stop/Start. Stir at beeps. Check water tank during cooking and re-fill as necessary. |
Half the ingredients for 500g (2 portions)
- Soak mushrooms as per manufacturer's instructions using 400ml water for 40g, 200ml for 20g .
- Add rice, chopped onion, butter, crushed garlic glove and chopped soaked porcini mushrooms to glass shelf.
- Add vegetable stock and mushroom soaking water (150 ml for 4 portion recipe, 75 ml for 2 portion recipe).
- Place on shelf level 3 and ensure water tank is filled.
- Stir in parmesan at end of cooking.
| Program | Weight | Accessories | Instructions |
| 46. MACKEREL (FRESH) | 0.20 kg - 0.60 kg | To cook FRESH whole mackerel. Each whole fish should weigh between 100 - 300 g each. Fill water tank. Place whole fish directly onto plastic trivet. Place plastic trivet on glass shelf in shelf position 3. Select auto steam program 46. Enter the weight of the whole fresh mackerel. Touch Stop/Start. | |
| 47. SEABASS (FRESH) | 0.20 kg - 0.60 kg | To cook FRESH whole seabass. Each whole fish should weigh between 100 - 300 g each. Fill water tank. Place whole fish directly onto plastic trivet. Place plastic trivet on glass shelf in shelf position 3. Select auto steam program 47. Enter the weight of the whole fresh seabass. Touch Stop/Start. | |
| 48. CHICKEN BREAST | 0.20 kg - 0.65 kg | To cook FRESH chicken breasts. Each breast should weigh between 100 - 250 g each. Fill water tank. Place chicken breasts onto plastic trivet. Place plastic trivet on glass shelf in shelf position 3. Select auto steam program 48. Enter the weight of the chicken breasts. Touch Stop/Start. |
Auto Steam Programs with Turbo Cook
This feature combines the benefits of steam cooking with microwave power to speed up the cooking process. By setting the weight only, the oven determines the steam level and microwave power level and automatically calculates the cooking time. Select the category and set the weight of the food. For quick selection, the weight starts from the most commonly used weight for each category.

Select the desired auto steam program.


Touch the microwave assist (turbo cook button) once.


Select the cooking weight by tapping the up and down keys.


Touch Stop/Start. The cooking program will start and the time in the display will count down.

NOTE
The auto steam programs with turbo cook must ONLY be used for foods described.
Only cook foods within the weight ranges described.
Always weigh the food rather than relying on the package weight information.
Only use the accessories as indicated on pages 49-52.
- Most foods benefit from a STANDING time after cooking on an auto program, to allow heat to continue conducting to the centre.
To allow for some variations that occur in food, check that food is thoroughly cooked and piping hot before serving.
- Do not cover the food for the auto steam programs with turbo cook except for the rice program. Cover with cling film. Pierce the cling film with a sharp knife once in the centre and four times around the edge.
Wipe away excess water in the cavity and around the water tanks after cooking with steam.
| Program | Weight | Accessories | Instructions |
| 32. CARROS (FRESH) | 0.20 kg - 0.32 kg | To steam + microwave FRESH carrots. Fill water tank. Place prepared carrots onto plastic trivet. Place plastic trivet on glass shelf in shelf position 3. Select auto steam program with turbo cook 32. Enter the weight of the fresh carrots. Touch Stop/Start. | |
| 33. BROCCOLI / CAULIFLOWER (FRESH) | 0.20 kg - 0.32 kg | To steam + microwave FRESH broccoli or cauliflower. Fill water tank. Place prepared broccoli or cauliflower onto plastic trivet. Place plastic trivet on glass shelf in shelf position 3. Select auto steam program with turbo cook 33. Enter the weight of the fresh broccoli or cauliflower. Touch Stop/Start. | |
| 34. POTATOES WITH SKIN | 0.20 kg - 0.50 kg | To steam + microwave potatoes with skins. Fill water tank. Cut into even sized pieces. Place prepared potatoes onto plastic trivet. Place plastic trivet on glass shelf in shelf position 3. Select auto steam program with turbo cook 34. Enter the weight of the potatoes. Touch Stop/Start. | |
| 35. POTATOES | 0.20 kg - 0.50 kg | To steam + microwave potatoes without skins. Fill water tank. Peel potatoes and cut into even sized pieces. Place prepared potatoes onto plastic trivet. Place plastic trivet on glass shelf in shelf position 3. Select auto steam program with turbo cook 35. Enter the weight of the potatoes. Touch Stop/Start. | |
| 36. CARROS (FROZEN) | 0.20 kg - 0.32 kg | To steam + microwave FROZEN carrots. Fill water tank. Place frozen carrots onto plastic trivet. Place plastic trivet on glass shelf in shelf position 3. Select auto steam program with turbo cook 36. Enter the weight of the frozen carrots. Touch Stop/Start. | |
| 37. BROCCOLI (FROZEN) | 0.20 kg - 0.32 kg | To steam + microwave FROZEN broccoli. Fill water tank. Place frozen broccoli onto plastic trivet. Place plastic trivet on glass shelf in shelf position 3. Select auto steam program with turbo cook 37. Enter the weight of the frozen broccoli. Touch Stop/Start. | |
| 38. PEAS / SWEETCORN (FROZEN) | 0.20 kg - 0.32 kg | To steam + microwave FROZEN peas / sweetcorn. Fill water tank. Place frozen peas / sweetcorn onto plastic trivet. Place plastic trivet on glass shelf in shelf position 3. Select auto steam program with turbo cook 38. Enter the weight of the frozen peas / sweetcorn. Touch Stop/Start. | |
| 39. COD/HADDOCK(FRESH) | 0.20 kg - 0.50 kg | To steam + microwave FRESH cod or haddock fillets. Fill water tank. Place fresh cod or haddock onto plastic trivet. Place plastic trivet on glass shelf in shelf position 3. Select auto steam program with turbo cook 39. Enter the weight of the fresh cod or haddock. Touch start. | |
| 40. SALMON(FRESH) | 0.20 kg - 0.50 kg | To steam + microwave FRESH salmon fillets. Fill water tank. Place fresh salmon onto plastic trivet. Place plastic trivet on glass shelf in shelf position 3. Select auto steam turbo cook program 40. Enter the weight of the fresh salmon. Touch start. | |
| 41. PLAICE(FRESH) | 0.20 kg - 0.50 kg | To steam + microwave FRESH plaice fillets. Fill water tank. Place fresh plaice onto plastic trivet. Place plastic trivet on glass shelf in shelf position 3. Select auto steam turbo cook program 41. Enter the weight of the fresh plaice. Touch start. | |
| 42. COD/HADDOCK(FROZEN) | 0.20 kg - 0.50 kg | To steam + microwave FROZEN cod or haddock fillets. Fill water tank. Place frozen cod or haddock onto plastic trivet. Place plastic trivet on glass shelf in shelf position 3. Select auto steam program with turbo cook 42. Enter the weight of the frozen cod or haddock. Touch start. | |
| 43. SALMON(FROZEN) | 0.20 kg - 0.50 kg | To steam + microwave FROZEN salmon fillets. Fill water tank. Place frozen salmon onto plastic trivet. Place plastic trivet on glass shelf in shelf position 3. Select auto steam program with turbo cook 43. Enter the weight of the frozen salmon. Touch start. | |
| 44. RICE | 0.10 kg - 0.20 kg | To steam + microwave rice for savoury dishes not rice pudding (Thai, Basmati, Jasmine, long grain). Fill water tank. Place rice in a shallow Pyrex® bowl. Add 4 parts water to 2 parts rice. Cover with pierced cling film. Place bowl on glass shelf in shelf position 3. Select program turbo cook 44. Enter the weight of the rice only. Touch start. |
Auto Steam Programs with Turbo Cook
| Program | Weight | Accessories | Instructions |
| 45. RISOTTO | 0.50 kg (2 portions) 1.00 kg (4 portions) | To steam + microwave risotto, 500 g or 1000 g. Prepare as outlined in the recipe below. Fill water tank. Place on the glass shelf in shelf position 3. Do not cover. Select auto steam program 45. Select 500 g or 1000 g portions. Touch Stop/Start. Stir at beeps. Check water tank during cooking and re-fill as necessary. |
500 ml hot water with
1 vegetable stock cube
30g parmesan
Half the ingredients for 500g (2 portions)
- Soak mushrooms as per manufacturer's instructions using 400ml water for 40g, 200ml for 20g .
- Add rice, chopped onion, butter, crushed garlic glove and chopped soaked porcini mushrooms to glass shelf.
- Add vegetable stock and mushroom soaking water (150 ml for 4 portion recipe, 75 ml for 2 portion recipe).
- Place on shelf level 3 and ensure water tank is filled.
- Stir in parmesan at end of cooking.
| Program | Weight | Accessories | Instructions |
| 46. MACKEREL (FRESH) | 0.20 kg - 0.60 kg | To steam + microwave FRESH whole mackerel. Each whole fish should weigh between 100 - 300 g each. Fill water tank. Place whole fish directly onto plastic trivet. Place plastic trivet on glass shelf in shelf position 3. Select auto steam program with turbo cook 46. Enter the weight of the whole fresh mackerel. Touch Stop/Start. | |
| 47. SEABASS (FRESH) | 0.20 kg - 0.60 kg | To steam + microwave FRESH whole seabass. Each whole fish should weigh between 100 - 300 g each. Fill water tank. Place whole fish directly onto plastic trivet. Place plastic trivet on glass shelf in shelf position 3. Select auto steam program with turbo cook 47. Enter the weight of the whole fresh seabass. Touch Stop/Start. | |
| 48. CHICKEN BREAST | 0.20 kg - 0.65 kg | To steam + microwave FRESH chicken breasts. Each breast should weigh between 100 - 250 g each. Fill water tank. Place chicken breasts onto plastic trivet. Place plastic trivet on glass shelf in shelf position 3. Select auto steam program with turbo cook 48. Enter the weight of the chicken breasts. Touch Stop/Start. |
F1. DRAIN WATER
Water is pumped through the system to clean the pipes. The water is drained into the drain tank.

Add 200g of water to the water tank.
Touch system cleaning key.
Select "F1 DRAIN WATER".
Empty the drain tank after the program has finished.

NOTE
Only run this program with 200g of water in the tank.
- Do not remove the drain tank during the drain water program. If the drain tank is removed during the program, 'INSERT DRAIN TANK' is displayed and the program will stop.
- Empty the drain tank and rinse with running water after the program has finished.

CAUTION
If the 'Drain water' program is used directly after a steam cooking program, hot water may be drained into the drain tank.
F2. SYSTEM CLEANING
The first stage of this program cleans the system with a citric acid solution. The second stage runs water through the system to rinse the pipes.

Make a solution of 8g citric acid and 200g of water, add the solution to the water tank.
Touch system cleaning key.
Select "F2 SYSTEM CLEANING".


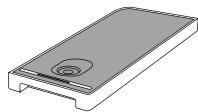


Touch Stop/Start. The program will run for 29 mins.
After the program has paused, empty the drain tank. Rinse the water tank and re-fill with 200g of water.
Touch Stop/Start. The program will run for approx. 1 min. Empty the drain tank after the program has finished.

NOTE
When blinks in the display, run the 'system cleaning' program.
If the system cleaning program is not used regularly, the pipe will get blocked and the steaming performance will be less effective.
- Do not remove the drain tank during the system cleaning program. If the drain tank is removed during the program, 'INSERT DRAIN TANK' is displayed and the program will stop.
- Empty both tanks and rinse with running water after the program has finished.
Cleaning the Water Tank and Drain Tank
Clean with a soft sponge in water.
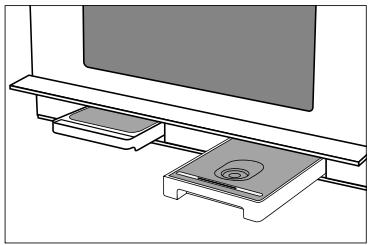
Remove the water tank/drain tank and clean the compartments where the tanks are inserted.
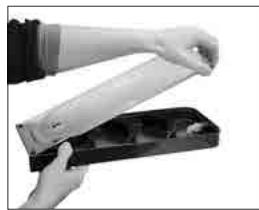
Remove the lid and clean.
The rubber seal can also be removed for cleaning.
Removing the rubber seal
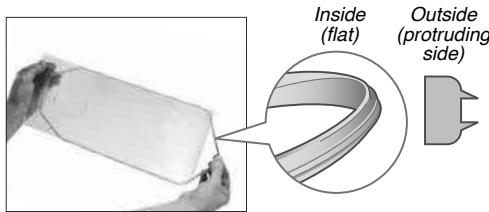
Ensure that the rubber seal is not inside out when re-fitting. If the seal is not fitted correctly the lid will not close securely and it will leak.

NOTE
Clean the water tank and drain tank at least once a week to prevent build up of limescale.
- Do not use a dishwasher to clean the water tank and drain tank or parts of the water and drain tanks.
Q: Why won't my oven turn on?
A: When the oven does not turn on, check the following:
1. Is the oven plugged in securely? Remove the plug from the outlet, wait 10 seconds and reinsert.
2. Check the circuit breaker and the fuse. Reset the circuit breaker or replace the fuse if it is tripped or blown.
3. If the circuit breaker or fuse is functioning, plug another appliance into the outlet. If the other appliance works, there may be a problem with the oven. If the other appliance does not work, there may be a problem with the outlet. If there is a problem with the oven, contact an authorised Service Centre.
Q: My oven causes interference with my TV. Is this normal?
A: Some radio and TV interference might occur when you cook with the oven. This interference is similar to the interference caused by small appliances such as mixers, vacuums, blow dryers, etc. It does not indicate a problem with your oven.
Q: The oven won't accept my program. Why?
A: The oven is designed not to accept an incorrect program. For example, the oven will not accept a fourth stage.
Q: Sometimes warm air comes from the oven vents. Why?
A: The heat given off from the cooking food warms the air in the oven cavity. This warmed air is carried out of the oven by the air flow pattern in the oven. There are no microwaves in the air. The oven vents should never be blocked during cooking.
Q: I can't set an auto program and 'HOT' appears in the display. Why?
A: If the oven has previously been used and it is too hot to be used with an Auto Program, 'HOT' will appear in the display window. After the 'HOT'
disappears, the Auto Programs may be used. If in a hurry, cook food manually by selecting the correct cooking mode and cooking time yourself.
Q: Can I use a conventional oven thermometer in the oven?
A: Only when you are using CONVECTION/GRILL cooking mode. The metal in some thermometers may cause arcing in your oven and should not be used on MICROWAVE and COMBINATION cooking modes.
Q: There are humming and clicking noises from my oven when I cook by COMBINATION. What is causing these noises?
A: The noises occur as the oven automatically switches from MICROWAVE power to CONVECTION/ GRILL to create the combination setting. This is normal.
Q: My oven has an odour and generates smoke when using the COMBINATION and GRILL function. Why?
A: After repeated use, it is recommended to clean the oven and then run the oven without food. This will burn off any food, residue or oil which may cause an odour and/or smoking.
Q: The oven stops cooking by microwave and "H97" or "H98" appears in the display. Why?
A: This display indicates a problem with the microwave generation system. Please contact an authorised Service Centre.
Q The fan continues to rotate after cooking. Why?
A After using oven, the fan motor may rotate to cool the electrical components. This is normal and you can continue using the oven at this time.
Questions and Answers
Q “D” appears or a dot blinks in the display and the oven does not cook. Why?
A: The oven has been programmed in DEMO MODE. This mode is designed for retail store display. To de-activate demo mode see page 19.
Q. The word prompt has disappeared on my display?
A: See user settings page 17 to re-activate the word prompt.
Q. The oven stops cooking by steam or combination with steam and "U14" appears in the display
A: The water tank is empty and the operation guide has been turned off. Re-fill the water tank, position back in the oven and touch Stop/Start to resume cooking.
Q. The oven stops program and "U12" appears in the display.
A: The drain tank is not in position, position back in the oven. Restart program.
Q. The keys do not respond. The display is frozen.
A: Turn the oven off and clean the control panel. Open and close the door to re-set the keys. Do not touch the control panel whilst opening and closing the door.
Care of your Oven
- Turn the oven off before cleaning.
- Clean the inside of the oven, door seals and door seal areas regularly. When food splatters or spilled liquids adhere to the oven walls, base of the oven, door seals and door seal areas wipe off with a damp cloth. Mild detergent may be used if they get very dirty. The use of harsh detergent or abrasive is not recommended. DO NOT USE COMMERCIAL OVEN CLEANERS.
- Do not use harsh, abrasive cleaners or sharp metal scrapers to clean the oven door glass since they can scratch the surface, which may result in shattering the glass.
- The outside oven surface should be cleaned with a damp cloth. To prevent damage to the operating parts inside the oven, water should not be allowed to seep into the ventilation openings.
- If the Control Panel becomes dirty, clean it with a soft, dry cloth. Do not use harsh detergents or abrasives on the Control Panel. When cleaning the Control Panel set the child lock (see page 19). After cleaning cancel the child lock (see page 19).
-
If steam accumulates inside or around the outside of the oven door, wipe with a soft cloth. This may occur when the oven is operated under high humidity conditions and in no way indicates a malfunction of the unit.
-
The base of the oven should be cleaned regularly. Simply wipe the bottom surface of the oven with mild detergent and hot water then dry with a clean cloth.
- When using the CONVECTION/GRILL, STEAM or COMBINATION mode, some foods may inevitably splatter grease on to the oven walls. If the oven is not cleaned occasionally, it may start to "smoke" during use.
- A steam cleaner is not to be used for cleaning.
- This oven should only be serviced by qualified personnel. For maintenance and repair of the oven contact the nearest authorised dealer.
- Failure to maintain the oven in a clean condition could lead to deterioration of surfaces that could affect the life of the appliance and possibly result in a hazardous situation.
- Keep air exhaust vents clean at all times. Check that no dust or other material is blocking the air exhaust vents. If the air exhaust vents become blocked this could cause overheating which would affect the operation of the oven and possibly result in a hazardous situation.
- The back of the oven cavity has a self-clean catalytic lining. It is therefore not necessary to clean this area.
Installation Instructions
Installation and Connection
Please fully observe the following safety precautions.

IMPORTANT
- Unpack the appliance, remove all packing material, and examine for any damage. If the appliance is damaged DO NOT install and notify your dealer immediately.
- Install the appliance in accordance with the Installation Instructions. Otherwise, the performance of the appliance may be affected.
After installation perform a test run and explain to the customer how to operate the appliance. - Correct installation is the responsibility of the installer. Any malfunction or accident resulting from the failure to follow the Installation Instructions is not covered by the warranty.
The rating plate indicating the basic information of the appliance is attached to the inside of the oven and is visible when you open the door. Do not remove.
Safety Instructions
This appliance can be built above or alongside a standard Panasonic oven.
- When the appliance is installed with another suitable appliance, it must be fitted above a fixed shelf in the housing unit that is able to support the weight of both appliances.
- When built in directly above a warming drawer, an interim shelf between the two appliances is not necessary.
Safety Instructions
- The appliance must be installed in a position where it can be fully opened and the contents can be clearly viewed. This is to avoid burns and other injuries.
- For the appliance to function correctly, it is important that the base of the appliance is level. A spirit level should be used.
- The appliance must only be operated when built-in. This is to ensure that all electrical parts are shielded and live parts are not exposed.
- Ensure power is not supplied to the appliance until after installation work has been carried out.
- The manufacturer will not be held liable for any damages resulting from incorrect or improper installation.
Dimensions
(measurements: mm)
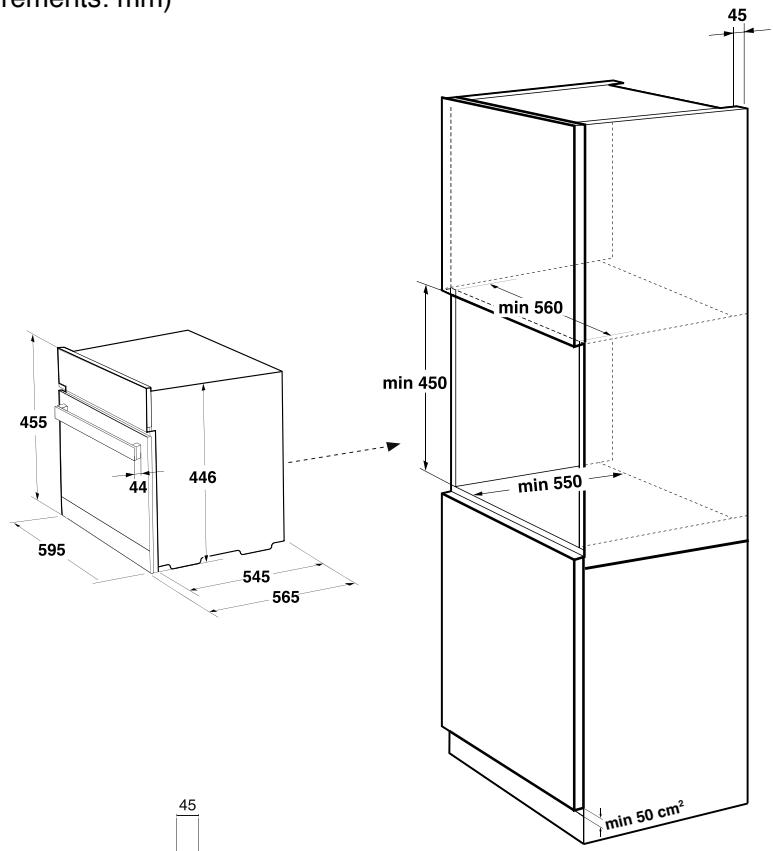
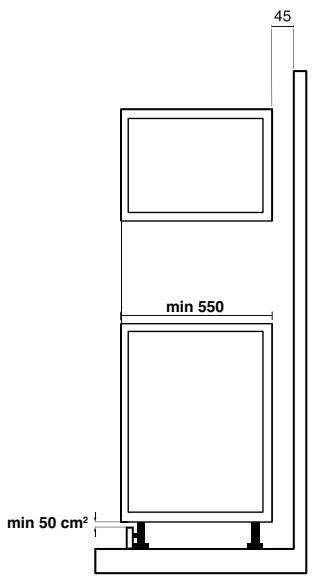
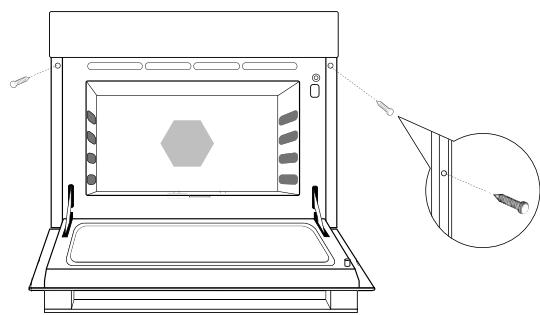
Installing the Appliance
Electrical connection
- Before connection, check that the mains voltage corresponds to that indicated on the rating label fixed to the inside of the appliance. This data must correspond in order to avoid the risk of damage to the appliance.
- Check that the domestic power supply guarantees adequate earthing.
- Once installed, it should be easy to isolate the appliance from the electricity supply by pulling out the plug or operating a circuit breaker.
The appliance must only be connected with the power cable provided. - DO NOT use multi-plug adaptors power strips or extension leads. There is a risk of fire in the event of overloading.
Installing the Appliance
Installation
- Veneer or other finish of the furniture the appliance is being built into should be processed with heat-resistant glue (100^) ; otherwise, high temperatures may cause them to deform.
- There must be no rear wall fitted to appliance housing.
- There must be a gap of at least 45mm between the wall and the back of the unit to enable adequate air circulation.
- The fitted cabinet must have a ventilation opening of 50~cm^2 on the front. To achieve this, cut back the plinth or fit a ventilation grille. Ventilation slots and intakes must not be covered.
Level the piece of furniture the appliance was built into with a spirit level. - The piece of kitchen furniture the appliance is built into must be secured against movement, e.g. Attached to the adjacent pieces of kitchen furniture.
- Align the appliance flush with the units and screw it in place.
- When attaching the appliance, make sure the screws are not fastened too strongly as this may damage the furniture.
- The ventilation slots and air intake points must not be covered. To ensure that they remain uncovered also observe the installation instructions of any appliance installed with this oven.

NOTE
■ Ensure that the connector lead does not become trapped or bent.
After installation the connector lead must not be in contact with the back or the base of the appliance.
Specifications
| Manufacturer | Panasonic | |
| Model | HL-SX485S HL-SX485B | |
| Power Supply | 220-240 V ~ 50 Hz | |
| Maximum Power Consumption | Maximum | 3000 W |
| Microwave | 1200 W | |
| Grill | 2100 W | |
| Convection | 2030 W | |
| Steam | 1050 W | |
| Output Power | 1000 W (IEC-60705) | |
| External Dimensions | 595 mm (W) 565 mm (D) 455 mm (H) | |
| Interior Dimensions W x D x H (mm) | 445 mm (W) 347 mm (D) 242 mm (H) | |
| Uncrated Weight (approx.) | 36 kg | |
This product is an equipment that fulfills the European standard for EMC disturbances (EMC = Electromagnetic Compatibility) EN 55011. According to this standard this product is an equipment of group 2, class B and is within required limits. Group 2 means that radio-frequency energy is intentionally generated in the form of electromagnetic radiation for purpose of warming or cooking food. Class B means that this product may be used in normal household areas.
Manufactured by: Panasonic Manufacturing U.K. Ltd.
Wyncliffe Road, Pentwyn Industrial Estate, Cardiff, S.Glam. CF23 7XB U.K.
REP. EU: Panasonic Testing Centre
Winsberging 15, 22525 Hamburg, Germany
Inhalt
Stopp/Start antippen.


Stopp/Start antippen.
Antippen Stopp/ Start

HINWEIS
This feature allows you to steam some of your favourite foods by setting the weight only. The oven determines the steam level and the cooking time automatically. Select the category and set the weight of the food. For quick selection, the weight starts from the most commonly used weight for each category.


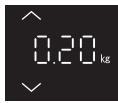


Select the desired auto steam program.
Select the cooking weight by tapping the up and down keys.
Touch Stop/Start.
The cooking program will start and the time in the display will count down.

NOTE
The auto steam programs must ONLY be used for foods described.
Only cook foods within the weight ranges described.
Always weigh the food rather than relying on the package weight information.
Only use the accessories as indicated on pages 45-48.
- Do not cover foods on the auto steam programs.
- Most foods benefit from a STANDING time after cooking on an auto program, to allow heat to continue conducting to the centre.
- To allow for some variations that occur in food, check that food is thoroughly cooked and piping hot before serving.
■ Wipe away excess water in the cavity and around the water tanks after cooking with steam.
| Program | Weight | Accessories | Instructions |
| 32. CARROS (FRESH) | 0.20 kg - 0.32 kg | To steam FRESH carrots. Fill water tank. Place prepared carrots onto plastic trivet. Place plastic trivet on glass shelf in shelf position 3. Select auto steam program 32. Enter the weight of the fresh carrots. Touch Stop/Start. | |
| 33. BROCCOLI / CAULIFLOWER (FRESH) | 0.20 kg - 0.32 kg | To steam FRESH broccoli or cauliflower. Fill water tank. Place prepared broccoli or cauliflower onto plastic trivet. Place plastic trivet on glass shelf in shelf position 3. Select auto steam program 33. Enter the weight of the fresh broccoli or cauliflower. Touch Stop/Start. |