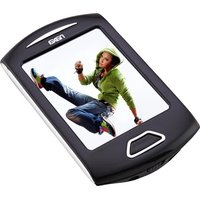
NMV-179 - Mp3 player Naxa - Free user manual and instructions
Find the device manual for free NMV-179 Naxa in PDF.


| Product Type | MP3 Player |
| Brand | Naxa |
| Model | NMV-179 |
| Dimensions | Approximately 4.3 x 2.4 x 0.5 inches |
| Weight | Approximately 1.4 oz (without batteries) |
| Power Source | 1 x AAA battery (not included) |
| Battery Life | Up to 12 hours of continuous playback |
| Storage Capacity | Internal memory: 8GB (expandable via microSD card up to 32GB) |
| Supported Audio Formats | MP3, WMA, WAV |
| Display | 1.8-inch color TFT screen |
| Playback Modes | Normal, Repeat One, Repeat All, Random, Intro |
| Equalizer Presets | Normal, Rock, Pop, Classical, Jazz, Bass |
| Connectivity | USB 2.0 (for file transfer), 3.5mm headphone jack |
| Additional Functions | FM radio, voice recording, e-book reader, photo viewer |
| Package Contents | MP3 player, USB cable, earphones, user manual |
| Maintenance | Clean with a soft dry cloth. Do not use liquids or abrasives. |
| Safety Warnings | Keep away from water. Do not disassemble. Remove battery if not used for long periods. |
| Spare Parts & Repairability | Battery user-replaceable. No other spare parts available; device not serviceable by user. |
| General Information | Portable music player for everyday use. Compatible with Windows and Mac OS. |
Frequently Asked Questions - NMV-179 Naxa
User questions about NMV-179 Naxa
0 question about this device. Answer the ones you know or ask your own.
Ask a new question about this device
Download the instructions for your Mp3 player in PDF format for free! Find your manual NMV-179 - Naxa and take your electronic device back in hand. On this page are published all the documents necessary for the use of your device. NMV-179 by Naxa.
USER MANUAL NMV-179 Naxa
natural_image
Black and red portable electronic device with a blank screen, no visible text or symbols on the device body.INSTRUCTIONMANUAL
TableofContents ...... 1
Precautions 3
BasicFeatures 3
BasicOperation 4
SystemConfiguration 4
PowerOn 4
PowerOff 4
VolumeAdjustment 4
ConnectiontoPCandDataExchange 4
Charging 5
LowPower 5
FileStorage 5
HowtouseTFcard 5
HowtoinsertandpulloutTFcard 6
GeneralButton/IconDescription 6
MainMenuInterface 6
MusicMode 7
MusicInterfaceDescription 7
MusicSettingInterface 7
LyricsDisplay 8
VideoMode 8
Picturemode 9
RadioMode 11
FMRecordingInterface 12
EbookMode 12
CameraMode 13
CameraSettingInterface 14
VideoCameraSettingInterface 15
VideoCameraInterface 16
PCCamera 16
ExplorerMode 16
Application 17
Recorder 17
Calendar 17
Stopwatch 18
Calculator 18
Notebook 18
InputMethod 19
SystemSetting 19
PlayerInformation 20
SetTime 20
Language 20
Display 20
Calibrate 20
PowerOffSetting 20
DefaultSettings 21
Upgrade 21
OtherSetting 21
VideoConversionTool 21
OperatingPlatform 22
Whatformatcanvideofilesberecordedinto 22
Whatformatcanpicturefilesbetakeninto 22
AutomaticInstallation 22
ManualInstallation 22
VideoFileConversion 22
RecordingVideoandTakingPictures 25
Notices 26
Precautions
Forthecorrectuseandgoodperformanceoftheplayer,theuser mustfullyunderstandthemanualaswellasstrictlyfollowthe instructionsprovided.
- Avoidhightemperature(above35C)orlowtemperature(below-5C).
- Neverknockthemainmachineviolently.
- Nevercontactwithchemicalssuchasbenzene,thinneretc.
- Donotclosetostrongmagneticfield,electricfieldetc.
- Keepawayfromdirectsunlightorheatingappliances.
- Neverprivatelydissemble,repairormodifytheplayer.
- Using the player and the ear pieced during bicycling, car and motorcledriving is likely to cause danger.
- Neverusehighervolume, which may damage your hearing ability.
- Dividescrapedpacking, batteries, oldelectronicproducts and disposethemproperly.
BasicFeatures
- BrandnewtouchscreenOSfordirectandconvenientoperation
• 240*320,260,000colorhighspeedTFTscreen - Musicplayer:compatiblewithMP3WMA,andWAVformats,
- Recorder:forFMandMICrecordingandcompatiblewithMP3 and WAV formats
• Picturebrowser:forJPEG,BMP, formats
• Videoplayer:forplayingvideoofAVI,RMVB,3GPformat
• SupportCamera, VideocameraorPCcamera
- FMRadio
E-Bookbrowser
• CompatiblewithTFCard
- Settings:forsettingandactivatingvariousfeatures
- ADFUrestorationandUSBupgradingmodeenabled
- USB2.0highspeedtransmission
BasicOperation
SystemConfiguration
OS:WindowsXP/2K/ME/98(driverinstallationneeded)/Linux
9andabove/MacOS10/Windows7
CPU:Pentium-133MHzatleast
Memory:32MBatleast
Harddiskfreespace,100MBatleast
Videocard:above640*480,enhancedcoloratleast(16bits)
PowerOn
SlidetheswitchtoOnandtheplayerwillbepoweredonin3
second.Theplayerwillprompt"Welcome"andthenenterthe
maininterface.
PowerOff
Whentheplayerison, slidetheswitchtoOffandtheplayer
willbepoweredoffin3seconds.
VolumeAdjustment
UnderMusic,FMradioorVideomode,press+,-buttonto
adjustvolume.Press+toaddvolume,andpress-toreducevolume.
ConnectiontoPCandDataExchange
ConnecttheplayertoPCwiththeUSBcable,andtheplayerwill enterUdiskmode.PressMENUbuttonorsafelyremoveU disk,andtheplayerwillbeunderUSBchargingmode.InUSB chargingmode,touchthescreenorpressMENUtoenterthe
mainapplicationsinterface.

natural_image
Black-and-white image of a desktop computer setup with monitor, keyboard, and mouse (no visible text or symbols)
natural_image
Black and white photo of a cylindrical battery with a label 'Shanghai' visible below it (no other text or symbols)Charging
Thisplayerhashighcapacitylithiumbattery.Forcharging, connecttheplayertotheUSBportofthePCortoacharger.
LowPower
When batterypowerislow, the player will prompt and power off and enter Standbymode automatically. Donot power on and charge the player instead.
Chargercurrentspecificationrecommended:400-500mA.
FileStorage
Filesofdifferenttypesshouldbestoredunderdifferentdirectories. Forexample,musicfileshouldbestoredunderMUSICdir. RecordfilestoredunderRECORDdir.Picturefilesunder PICTUREdir.VideosfilesVIDEOdir.TextfilesTXTdir.the correspondingapplicationunabletofindthefileIfitisnotsaved inthisway,
HowtouseTFcard
WhenthisplayerisconnectedtoPC,twomovablediskswillbe found.Thefirstoneistheinternalmemory,andthesecondoneis TFcard.Ifnocardinserted,theseconddiskcannotbe
opened. Thisplayeriscompatiblewithmaximum8GBTF card.
HowtoinsertandpulloutTFcard
Howtoinsert:withthefront(thesidewithcharacters)ofthe TFcardup(towardsthescreenoftheplayer),slightly pushtoinsertintothecardholderoftheplayertoconnect. Afterthecardisinserted,theplayercanplaythefilesinthe TFcard.
Howtopullout:slightlypushtheTFcardandtheTF cardwillpartlycomeout,andthenpullthecardout.
Note: pleaseinsertorpulloutthecardwhentheplayerisoff, or theinternalfilesoftheplayerwillbelostordamaged.
GeneralButton/IconDescription
| Button/Icon | Description | |
 | Returntoupperdirectory | |
 | Returntomainmenu | |
 | Deletefileorfolder | |
 | Returntopreviousoperationinterface | |
MainMenuInterface
Thisplayerprovidesatouchscreen OSfordirectoperation. Themain menuinterfaceisshowninthe picturebelow:

- Thesystemdateandtimeisshownontheupperleftcornerof themainmenuinterface. The batteryisshownonthe upperrightcornerofthemainmenuinterface.
- Underthemainmenuinterface, touchanicononthescreen, and theplayerwillentertheselectedmode.
- After the player enters a mode, touch the icon phone
bottomrightcornerorpressandholdtheMENUbuttontoreturn tothemainmenuinterface.
MusicMode
Inthemaininterface,touchtheMusicicontoentermusicmode.
MusicInterfaceDescription

| Button/icon | Description |
 | Numberofthesongbeingplayed/Totalsongs |
 | Playingmode |
 | Playingsequence |
 | Playingstyle |
 | Songplayingprogressbar.Dragthebarto adjustplayingprogress. |
 | Volumebar.Dragthebartoadjustvolume. |
 | Touchittoswitchtoprevioussong,long pressforfastrewind |
 | Play/pause/stopthecurrentsong.Clickthe playbutton,andthebuttonwillbechangeto pausebutton.Afterasongisfinished,itwill changetostopbutton. |
 | Touchittoswitchtothenextsong,pressand longpressforfastforward |
MusicSettingInterface
Clickoneofthe4buttonsatthebottomoftheinterfacetoenable
anappropriatefunction.
| Icon | Description | |
 | ClickBrowsertoenterdifferentsonglists-maindirectory,carddirectory,allsongs,ID3 list,playlist,andtaglist. | |
 | ClickSettingstochooseSRSsetting: WOW,WOWHD, USERClickUSERtoenteruser settinginterface.Dragthebaror chicktheoptionstosetthe functions.ClickOKtoconfirm thesettings.EQsetting:clicktoenterUser EQsettinginterface,moveup ordownthebartoselectsound effect,andclickOKtoconfirm.AddlistAddtagClickre:playscreen. |  |
 | ||
 | Songinformationdisplay. | |
LyricsDisplay
Theplayeriscompatiblewithlyricsfilesof “*.LRCformatand enablesplayingsongwithsynchronouslylyrics. Thenameofthe lyricsfileshouldbethesameasthatofthesongfile. Whenthere arethelyricswiththesamenameofthesongbeingplayedunder theplaylistdirectory,thelyricsofthesongwillbedisplayedon theplayinginterface.
VideoMode
Inmaininterface, click the videoicontoenter Videomode.
Directlyclickthevideoofileonthescreentostartplayingthe selectedvideo.
Whenplayavideofile,theup/downbuttonsandtheprogressbar willappearautomaticallybytouchingthescreen.

natural_image
Black-and-white photo of a rural field with parallel tracks, no visible text or symbols| Button | Description |
 | Browse:localdirectory,carddirectory,taglist |
 | Tag:directlyclicktheicon andaboxpopsoutand promptstagsaved. ” 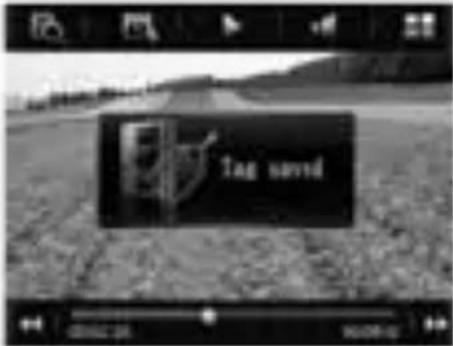 |
 | Play:clickanditwillchangetopausebutton, andclickagaintocontinueplaying. |
 | TouchitandtheVolumebarwillpopoutatthe bottom.Dragthebartoadjustvolume. |
 | Returnomainmenu |
 | Fastrewind:longpressforfastrewind.Shortpress forthepreviousvideofile. |
 | Fastforward:longpressforfastforward.Shortpress forthenextvideofile. |
Picturemode
- Inmaininterface, click the PhotoicontoenterPicturemode.
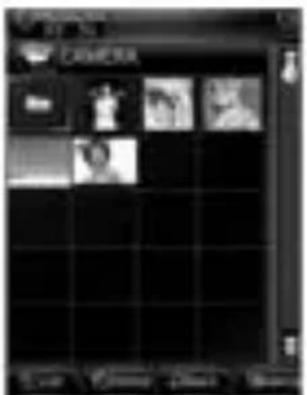
ClicktoC vangetotheListmode.

- Directlyclickthethumnailtobrowsepictures.Clickthe picture, and the buttons will appear automatically at the bottom of the screen.

natural_image
Black-and-white landscape photo of snow-capped mountains under a cloudy sky (no text or symbols visible)| Button | Description |
 | Manualplay:clickthebutton,andthebuttonwill changeto,andclickagaintoenterautoplaymode. |
 | Maindirandcarddir.returntoupperdirectoryto browsepicturelist. |
 | Slideinterval:1-5seconds |
 | Previouspicture |
 | Nextpicture |
 | Returntothemainmenu |
RadioMode
- Inthemaininterface, clicktheRadioiconto enterradioMode.
- If no headphone, the player will prompt the userto insert a headphone.

| Button/Icon | Description |
 | Radiochannellist,clicktoshowradiochannellist. |
 | Manualsearch:clicktoentermanualsearchmode;shortpresso button to manuallysearchup/downforradiochannels,andtheplayerismute wherenochannelbeingfound. |
 | Autosearch:clicktoenterautosearchmode.All channelscanbeautomaticallysearchedandsaved.Aftersearchiscompleted,theplayerwillplayradioatthepresetchannel1.Duringchannelsearch,clicko button mostopautosearch. |
 | Savechannel |
 | Deletechannel |
 | Changetochanneloflowerfrequency |
 | Changetochannelofhigherfrequency |
 | Radiomodechange:clickandthebuttonwill changeto, dchannelsearchwillbepaused. |
 | EnterFMstationrecordinginterface |
 | Selectfrequencyrange:China,Japan,EuropeandUS. |
FMRecordingInterface
- In Radiomode, clickto
enterFMstationrecording interface.

| Button/Icon | Description |
 | Stop,clickitanditwillchangetoplayicon toenterrecordingmode |
 | Savetherecordedfile. |
 | Viewrecordedfile. |
 | Recordsettings1.Recordingformat:WAV&MP3 formats.2.Quality:high,medium,low.3.Recodinggainvolume:level1,2,3. |
E-bookMode
-
Inthemaininterface, clicktheE-book icontoenterthemode.
-
SelectaTXTfiletoenterE-book browserinterface.
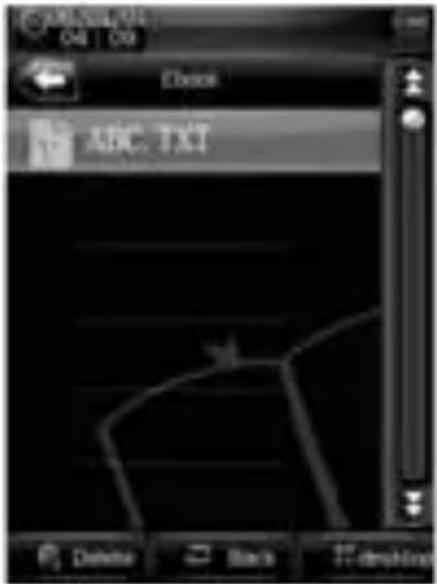

| Button/Icon | Description | |
 | Manualbrowse:clickitanditwillchangetoto  enterautobrowsermode. enterautobrowsermode. | |
 | Autobrowsertimesetting:10seconds,15seconds,20seconds,25seconds,30seconds. | |
 | Saveandpicktag,clicktoshowthetaglist,andthenclicktosaveorselecttag.ClickorpartoutsideSavetagboxtoexitfromthetagsettingbox. | 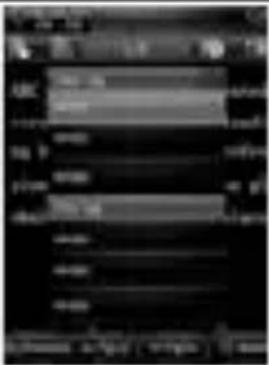 |
 | Skipto:clicktoshowSkiptodialoguebox,andclicko   toselecttheskippercentage.ClickoutsidepartoftheSkiptoboxtoexit. toselecttheskippercentage.ClickoutsidepartoftheSkiptoboxtoexit. |  |
 | TXTfilebrowser:localdirectory,carddirectory. | |
 | Previouspage | |
 | Nextpage | |
CameraMode
- Inthemaininterface, click the Cameraicontoenterthemode.
- Inthemenu, selectoneof3 functions: camera, videocamera
andPCcamera.

CameraSettingInterface
-
Clickcameratoenterthemode.
-
Inframe interface, touch the screen and top & bottom button bar will appear. Touch again, and the up/down button will disappear.
| Button | Description | |
 | Switchtovideocameramode. | |
 | Numberofpicturesthatcanbetaken. | |
 | SelfShootingtimesetting:5seconds,15seconds,20seconds,off.Defaultsettingisoff. | |
 | Returntothemainmenu. | |
 | Viewthepictures. | |
 | Picturemodesettings1.Specialeffect:Whitebalance:auto,indoor,outdoor.Default settingisautoBrightness:valuerange-3to+3.Defaultsettingis0.Exposuremode:auto,indoor,outdoor.Default settingisautoSpecialeffect:off,black&white,sepia,negative.Defaultsettingisoff.2.Savepath:localdevice,carddevice.Thedefault islocaldeviceShuttersound:off,soundeffect1, soundeffect2andsoundeffect3;Defaultsetting issoundeffect1. | |
| 3. Datestamp: off, datestampordateandtime stamp. Defaultsettingisoff.Tomakenosettings,touchthescreenoutside themenutoexit. | |
 | Resolutionswitch: 320x240,640x480,1024x768,1280x960.2048*1536 |
 | Takepicture |
Takewhitebalance settingasanexample:
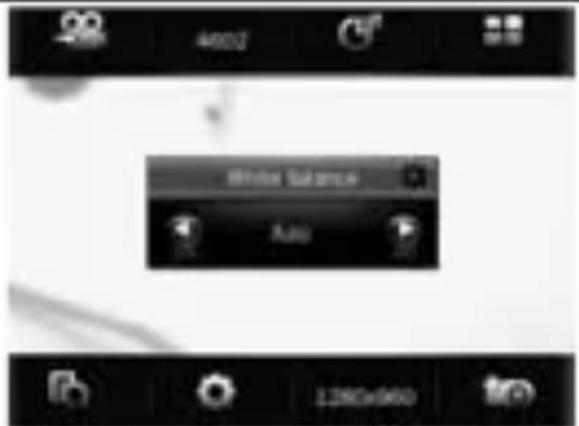
Clickoroselectamongdifferentmode,thenclickscreen toconfirmselectionandexit.
VideoCameraSettingInterface
- Touch the screen and top/bottom button bar will appear. Touch again and the button bar will disappear.
| Button | Description | |
 | Changetocameramode. | |
 | 3exposuremodes:Auto(default),indoor(lamp) andoutdoor(sun). | |
 | 4typesofspecialeffects:black&white,negative,sepia,off(default). | |
 | Returntothemainmenu. | |
 | Viewvideofile. | |
 | Videocameramodesetting1.Brightness:valuerange-3to+3.Defaultsetting is0. | |
| 2.Savepath:localdevice,carddevice. Thedefault islocaldevice.Tomakenosettings,touchthescreenoutsidethe menutoexit. | ||
 | Resolutionswitch:176x144,224x176,320x240. | |
 | Startvideorecording | |
VideoCameraInterface
Clicktoentervideorecordinginterface,touchthescreenand abuttonbarwillbedisplayedatthebottom.
| Button | Description |
 | Videorecording:clicktopausevideorecording. |
 | Savevideofile,andreturntovideosettinginterface. |
| Note:thevideorecordingtimeisshowninthemiddle,onthe leftistherecordedtime,andontherightistheavailabletime remainingforvideorecording. | |
PCCamera
SelectPCCamera functiontoenterPCcameramode, theplayerwilldetectifUSB cablehasbeenconnected.

natural_image
Black and white image of a stylized camera on a stand (no text or symbols visible)Withthevideoconversiontool,thisplayercanbeusedasaPC cameraonPCtoproducevideoorpicturefiles.Pleasereferto ChapterVideoConversionToolformoredetailsonhowtouse thetool.
ExplorerMode
Inthemaininterface, clicktheExplorericontoenterthemode: FlashMemoryandCardMemory (notdisplayedifnocard inserted). Allfilesandfilefoldersintheplayercanbelisted, and theusermayplaythecompatiblemusic, video, e-bookand picturefilesunderthisinterface; or, theusermaydirectlydelete theselectedfiles.

Application
Inthemaininterface,clicktheApplicationontoenterthemode.
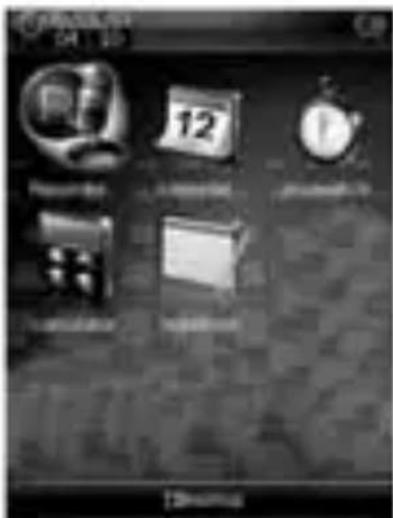
Recorder
ClickrecordertoenterinternalMICrecorderinterface.The operationisthesameasthatofFMrecorder.
Calendar
Clickorbuttontoselectmonthandyear.Selectdateby directlyclickingthenumberonthescreenandthenumberwill becomebluecolor.

Stopwatch
ClickStartcountingNextorClearatthebottomtorealize differentfunctions.Ascountingbegins,Startcountingwill”
changetoPause.

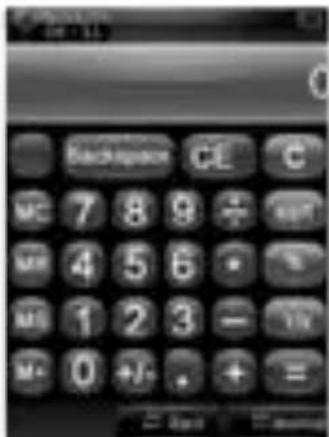
Calculator
Simplypressthecorrespondingbutton.
Notebook
OnlyvalidinSimplifiedChinese and Englishwriting.
Inputcharactersintheinputbox.

InputMethod
 | Switchinputmethods,fromlefttoright: English,numbers&symbols,Chinese,all inputmethods(canbeusedtorecognizethree typesofcharacters). |
| 1.ClickChinesebuttontouseChineseinputmode,asshown above.Afterinput,choosetheappropriateChinesecharacteron thekeyboard. | |
 | Fromlefttoright:deletethecharacterbefore cursor,spaceandenter. |
2.Clickbuttontoenternumbers&symbolsinputmode, andthekeyboarddisasfollows:  | |
| [5WDS] | Deleteallcharacters |
 | Deletethepreviouscharacter |
3.ClickreturntoreturntoChineseinputinterface,orclick  toenter Englishinputinterface. toenter Englishinputinterface. 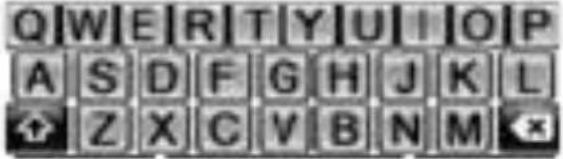 | |
| 4.Afterinput,clickbuttoandtheleftbottomtosave, andtheplayerwillautomaticallyjumptonotebookfilelist interface.Clicktoretwitotheinputinterface. | |
SystemSetting
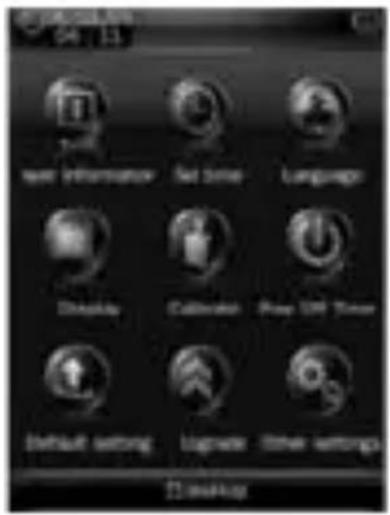
Inthemaininterface, clickthesystem settingsicontoenterthemode.
PlayerInformation
Relevantread-onlyproductinformation
SetTime
1.Timeformat:onoroff.
2.Timeanddate:clickandroset.

Language
languagesavailableforselection:English,SimplifiedChinese,TraditionalChinese,Japanese,Korean,France,German,Spanish,Portugal,Dutch,Italian.Simplyclicktoselecttheappropriate language.
Display
- Backlighttime
Clickandtoset.
Thereare9options:0second,5seconds,10seconds,15seconds,30seconds,1 minute,5minutes,15minutesand30minutes.
2.Brightnessadjustment
Thereare5options:1,2,3,4,5. The higher the level is, the brighter the LCD is. Click the corresponding to a -onset.
Calibrate
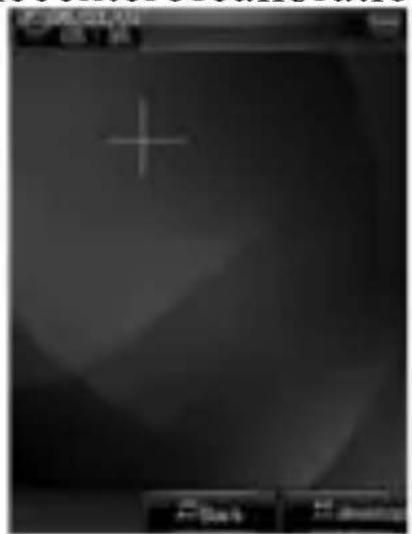
Whenthetouchscreenpositionisnotaccurate, recalibrate with this function.
After the player enter this mode, touch the center of calibration sign + to calibrate.
PowerOffSetting
Sleeptime:clickandposet.

Thereare6options:off,10minutes,15minutes,30minutes,60
minutesand120minutes. Thesettingwillchangetothedefault valueOffifre-starttheplayer.
DefaultSettings
Aftertheplayerentersthismode,theplayerwillpromptanauto warningaboutwhethertorestosystemdefaultsettingornot.
ClickOktorestofactorydefaultsettings.ClickCanceltoabandonthisrestoration.
Upgrade
Afterclickingthisicon,theplayerwillenterhardware upgrading"warninginterface.Atthispoint,connecttheplayerto theUSBportofaPCtoupdatethefirmwareoftheplayer.Touch "cancelonthescreentoabortthisupgrading.
OtherSettings
Formatdevice:clickformatsystemdiskorformatcardto startformatting,andtheselecteditemwillbecomebluecolor.
Thesystemwillpopupconfirmationboxesfollows:
Selectdevice:clickUdiskor
“MTPdevicetoselectthe deviceconnectionmodewithPC, andtheselecteditemwill becomebluecolor.

VideoConversionTool
VideoconversiontoolisusedtoconvertAVfilesintoadvancedAVIorWMVvideofileformattomakethemviewableonthisplayer;ortotakepicturesorrecordvideofileswhenthisplayer
isusedasaPCCamera.
OperatingPlatform
ForWindows2000, WindowsXP, Vista, DirectX, Version9.0or aboveshouldbeused.Itisnotrecommendedtousethistool underWindows98orWindowsMe.
Whatformatcanvideofilesberecordedinto
Thistoolcanbeusedtorecordvideofilesof320*240,30-frame AVIformat.
Whatformatcanpicturefilesbetakeninto
Thistoolcanbeusedtotakepicturefilesof320*240,JPG formatfile.
AutomaticInstallation
StartPC, enterWindowssystem, placethetoolinstallationCD intotheCD-Rom, and the installation will be automatically run. Please follow instruction to click next step button, and click off button when installation is completed successfully.
ManualInstallation
If automaticrunisnotsetupinthePC, thentheinstallation needstobestartedmanually:
First, doubleclick the Setup.ex efileundertherootdirectory of theCDtostarttheinstallationguide;followinstructionstoclick "nextstepbutton,andclickoffbuttonwheninstallationis
completedsuccessfully.
VideoFileConversion
- Runningthistool.

2.AddingAVfiles
Runsoftware, clicktheaddfilebuttonontherightsideof theinputfilecolumntoaddAVfilestobeconverted, anda dialogueboxwillautomaticallypopoutforaddingoneormore AVfiles.
After the file is added, the path of the AV file will be displayed in the input file field as shown below; and, relevant information of the added file, such as the checkbox, filename and path, status and file length, will be displayed in the status column.

3.Fileconversion
1) Select the file to be converted
Instatuscolumn,ontheleftsideofeachAVfilename,thereisa checkboxandasequencenumber.Thecheckboxisusedto chooseapluralityofAVfilestobeconverted,andthenewly addedAVfilesarecheckedasdefaultsetting.Ifafileisnot checked,itindicatesthatthisAVfilewillnotbeconverted.In additiontodirectlytickthecheckbox,theAVfilemayalsobe selectedorremovedbyrightclickingthemouseoverthefileand choosingselectorremoveinthepop-outwindow.Toremove anyAVfilefromtheaddinglist,simplyrightclickthemouseover oneormoreAVfiles,selectremove,andthefileswillbe removedfromthelist.
2)Selectthestoragepathofthevideofiles
ThisconversiontoolusesC:\asthedefaultpathforstorageof videofiles.Beforefileconversion,clickthevideostoragepath buttonontherightsideoftheoutputfilecolumntospecify thelocationforsavingthevideofile.Whenthebrowsefile
folderdialogueboxpopsout,selectthespecifiedstorageepath,
andthenclickconfirmbutton.

Afterwards, the pathin which the video of files are stored will be displayed in the output file column of the conversion tool interface.
3) Propertiesetting
BeforeconvertingAVfiles, some important parameters of the videofilesneedtobeset, suchasthetype(AVIorWMV), the intercepted part and the length of the videofile, imageexchange, imagequality. There are twomethodstoentertheproperties setting interface:
A. AfterselectingoneormoreAVfiles, clickthesettingsbutton intheoutputinformationcolumntoenter;
B. AfterselectingoneormoreAVfiles,rightclickthemouseand selectsettingstoenter;
“SelectheredoesnotmeancheckingtheAVfileinthecheckbox,butusingthemousetoclickfilenametomakethefilebackgroundcolorblue.
4) Startconvertingfile
ConfirmthatthecheckboxoftheAVfiletobeconvertedis checked.Presstheconversionbuttoninthetoolinterface tostart,thetoolbeginstoconvertallselectedAVfilesofwhich thecheckboxhasbeenchecked,andthefilestatuswillbe changedfromnotprocessedintobeingconverted,andthe conversionprogressbarwillbedisplayedintheconversion progresscolumnatthesametime.
Inadditiontotheabovefileconversionmethods,theAVfiles storedintheharddiskmayalsobeselectedandconvertedby rightclickingthemouseandselectingthestartvideoconversion inthepop-outmenu,andthetoolwillautomaticallyrunand directlystartfileconversion.
RecordingVideoandTakingPictures
-
Openingthevideowindow WhenthePCcameraisconnected, thetoolwillautomatically popoutthevideowindow; whenthePCcameraconnectionis completed, andthevideowindowisinhiddenstatus, clickthe iconontherightsideofthetoolinterfacetomakethevideo windowshown. IfthePCcameraisnotconnected, click thebuttonandthetoolwillpromptPCcameranotconnected.
-
Recordingvideoandtakingpictures Defaultstoragedirectoryisthesame asthestoragedirectoryofthe convertedvideofiles,whichcanbe specifiedbyclickingtheiconin theselectdirectorywindow.The changedpathwillbedisplayedinthe
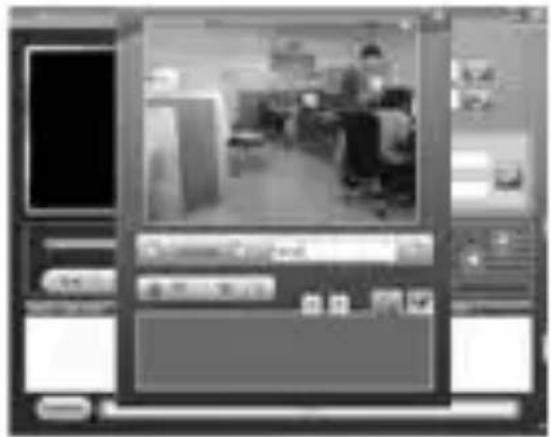
pathcolumn.ClickicontoenterthePCcamerasetting interfacetochangeparametersforrecordingvideoortakingpictures. 3.Recordingandplayingvideo Record:intheviewfinderstatusofthevideointerface,clickthe icontostartrecordingvideofiles,andvideorecordingwill bedisplayedatthebottomofthevideointerface.Whenavideo fileisbeingrecorded,thestarticonbecomesapauseicon,andat thesametimethestopiconisactive. Pause:undertherecordingmode,clicktheicontopause recording,andatthesametimetestartandstoprecordiconsare active.
Stop:underrecordingorpauserecordingmode,clicktheicon tostoprecordingandsavethevideofiletothespecified directory,andatthesametimetestarticonisactive;returnto theviewfinderinterface,thethumbnailiconofthevideofilewill bedisplayedatthebottomoftheviewfinderinterface.
Playvideo:whentherecordedvideofileissaved,clickthe iconinthevideointerfacetopreviewthethumbnailiconofthe videofile,andclickicontoswitchbetweenthumbnails; doubleclickthethumbnailiconofthefiletoopenaplaywindow andstartplayingthevideofiles.
- Taking and previewing pictures
Takingpictures:inthevideointerfaceunderviewfindermode, directlyclicktheicontotakepictures,andatthesametime picturefilesaresavedunderthespecifieddirectory.
Previewingpictures:uponcompletionofstorage,picturesare displayedinthumbnailiconsatthebottomoftheinterface;clickicontoswitchbetweenthumbnails,anddoubleclickthethumbnailiconofthepicturestostartpreview.
Notices
-
ToconvertfilesofRealPlay,QuickTimeorMPEG2 formats, pleasefirstinstallappropriatedecoder.
-
ToconvertfilesofRealPlay,QuickTimeorMPEG2(DVD) formats,ifthefilescannotbedirectlyplayedwiththeWindowsMediaPlayerinthePC,thenanappropriateddecoderfortheWindowsMediaPlayershallbeinstalled.Untilthefilescanbe playedproperlywiththeWindowsMediaPlayercanproper conversionbecompleted,orthistoolwillnotrunproperly.
-
Thistool cannot be used to produce soundordisplay Chinese characters in the AVI videofile converted from Flashanimation (SWFfile).

- TableofContents ...... 1
- Precautions 3
- BasicFeatures 3
- BasicOperation 4
- SystemConfiguration 4
- PowerOn 4
- PowerOff 4
- VolumeAdjustment 4
- ConnectiontoPCandDataExchange 4
- Charging 5
- LowPower 5
- FileStorage 5
- HowtouseTFcard 5
- HowtoinsertandpulloutTFcard 6
- GeneralButton/IconDescription 6
- MainMenuInterface 6
- MusicMode 7
- MusicInterfaceDescription 7
- MusicSettingInterface 7
- LyricsDisplay 8
- VideoMode 8
- Picturemode 9
- RadioMode 11
- FMRecordingInterface 12
- EbookMode 12
- CameraMode 13
- ExplorerMode 16
- Application 17
- SystemSetting 19
- VideoConversionTool 21
- Precautions
- BasicFeatures
- BasicOperation
- SystemConfiguration
- PowerOn
- PowerOff
- VolumeAdjustment
- ConnectiontoPCandDataExchange
- Charging
- LowPower
- FileStorage
- HowtouseTFcard
- HowtoinsertandpulloutTFcard
- MainMenuInterface
- MusicMode
- MusicInterfaceDescription
- MusicSettingInterface
- LyricsDisplay
- VideoMode
- Picturemode
- RadioMode
- FMRecordingInterface
- E-bookMode
- CameraMode
- CameraSettingInterface
- VideoCameraSettingInterface
- VideoCameraInterface
- PCCamera
- ExplorerMode
- Application
- Recorder
- Calendar
- Stopwatch
- Calculator
- Notebook
- InputMethod
- SystemSetting
- PlayerInformation
- SetTime
- Language
- Display
- Calibrate
- PowerOffSetting
- DefaultSettings
- Upgrade
- OtherSettings
- VideoConversionTool
- OperatingPlatform
- Whatformatcanvideofilesberecordedinto
- Whatformatcanpicturefilesbetakeninto
- AutomaticInstallation
- ManualInstallation
- VideoFileConversion
- 3.Fileconversion
- RecordingVideoandTakingPictures
- Notices
Brand : Naxa
Model : NMV-179
Category : Mp3 player