GDDEYS40A - Dehumidifier DIMPLEX - Free user manual and instructions
Find the device manual for free GDDEYS40A DIMPLEX in PDF.

| Product Type | Dehumidifier |
| Brand | Dimplex |
| Model | GDDEYS40A |
| Dehumidification Capacity (at 30°C, 80% RH) | 40 pints (18.9 L) per day |
| Recommended Room Size | Up to 2,500 sq ft (232 m²) |
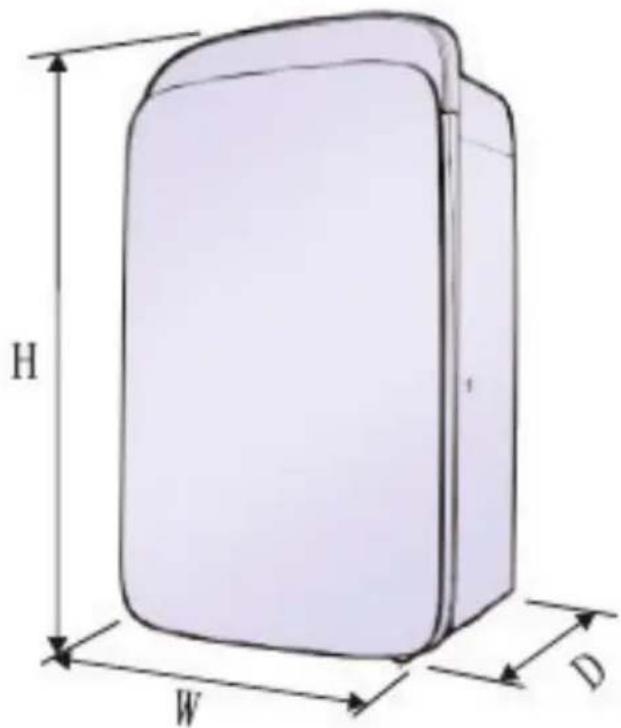
| Dimensions (W x H x D) | 15.2 x 23.4 x 11.2 inches (38.6 x 59.4 x 28.4 cm) |
| Weight | 42 lbs (19.1 kg) |
| Power Supply | 120 V / 60 Hz |
| Power Consumption | 560 W (approx.) |
| Energy Star Rated | Yes |
| Water Tank Capacity | 1.6 gallons (6 L) |
| Continuous Drainage Option | Yes (with garden hose, not included) |
| Control Type | Electronic touch panel with digital display |
| Fan Speeds | 2 (High/Low) |
| Humidity Setting Range | 35% to 85% relative humidity |
| Auto Restart After Power Failure | Yes |
| Timer Function | 1-24 hours |
| Filter Type | Washable, reusable mesh filter |
| Filter Cleaning Indicator | Yes |
| Noise Level | 48-52 dB (approx.) |
| Refrigerant Type | R-410A |
| Operating Temperature Range | 41°F to 95°F (5°C to 35°C) |
| Certifications | ETL, Energy Star |
| Warranty | 1 year limited warranty |
Frequently Asked Questions - GDDEYS40A DIMPLEX
User questions about GDDEYS40A DIMPLEX
0 question about this device. Answer the ones you know or ask your own.
Ask a new question about this device
Download the instructions for your Dehumidifier in PDF format for free! Find your manual GDDEYS40A - DIMPLEX and take your electronic device back in hand. On this page are published all the documents necessary for the use of your device. GDDEYS40A by DIMPLEX.
USER MANUAL GDDEYS40A DIMPLEX
Dehumidifies a large home and purifies air
CONTENTS
Safety and usage notices 5
Components 9
Control panel 10
Display screen 11
Setting Timer 12
Dehumification instructions 13
Automatic dehumification 13
Continuous dehumification 13
Clothes drying 13
Emptying the tank and drainage 14
Air purification and filters 16
Ventilation 16
Air purification function 16
Inserting a filter 17
Filter information 18
Maintenance 19
Self-cleaning mode 20
Troubleshooting 21
Technical specifications 22
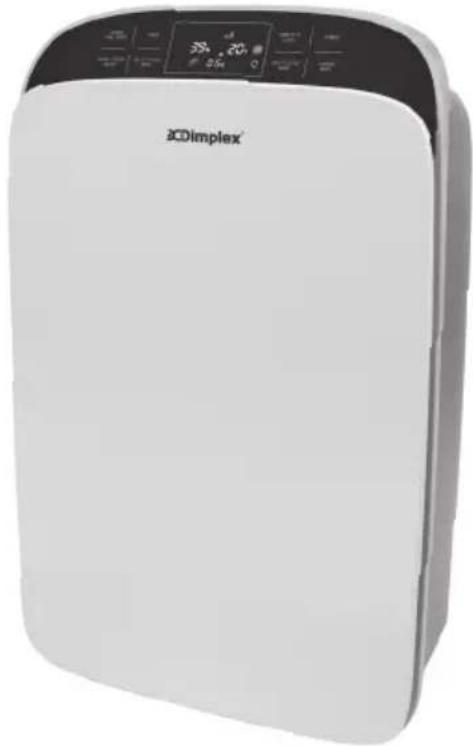
natural_image
White outdoor air purifier with digital display and control buttons (no visible text or symbols on body)Before operating this appliance, please read this instruction manual carefully. Please also keep for future reference.
SAFETY AND USAGE NOTICES
Technical Specifications
The power supply for this appliance is 220-240V\~ If the voltage is 10% higher or lower than the normal voltage, the appliance will not operate. It is suggested that a voltage stabilizer be equipped.
The working range of this appliance is between 5-32°C, outside of these temperatures the appliance will not operate normally. However the optimum working temperature is between 16-32°C. The unit will dehumidify between 30%-85% relative humidity.
Usage
Please do not use the appliance if plug or electrical cord is damaged.

natural_image
Simple line drawings of a switch and a magnifying glass (no text or symbols)Please do not position your appliance near flames or heating appliances.
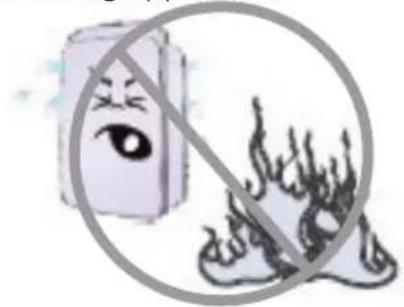
natural_image
Illustration of a smiling eye next to a fire with smoke, enclosed in a circle (no text or symbols)Multi-socket plug adapters are not recommended for use with this appliance.
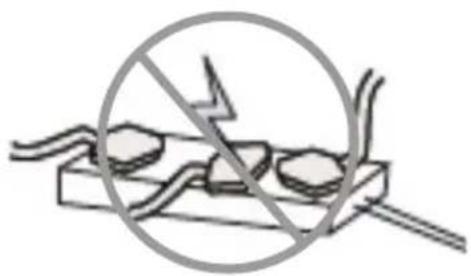
natural_image
Diagram of a crossed-out electrical socket with no text or symbolsPlease position the appliance on a flat and stable surface to reduce vibration and noise.
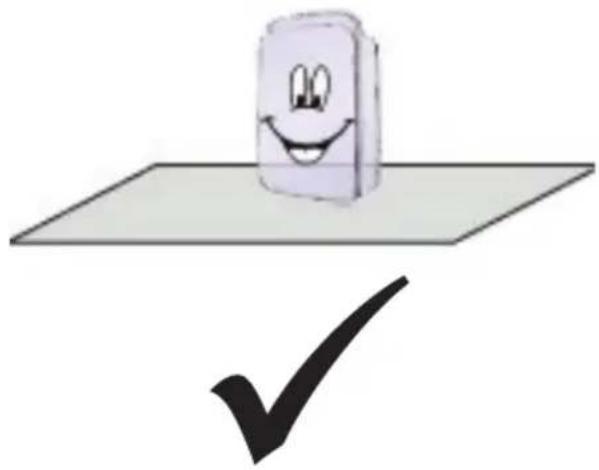
natural_image
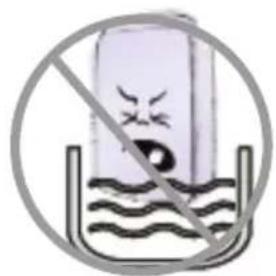
Cartoon illustration of a smiling document on a flat surface with a checkmark below (no text or symbols)Please do not immerse the appliance in water.
SAFETY AND USAGE NOTICES
Usage
The appliance is designed for domestic use only, not for commercial purposes.  | Please do not tilt the appliance when in use.  |
Please do not place anything on top of the appliance. 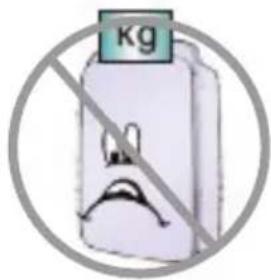 | Please do not use aerosols or other flammable substances near the appliance. 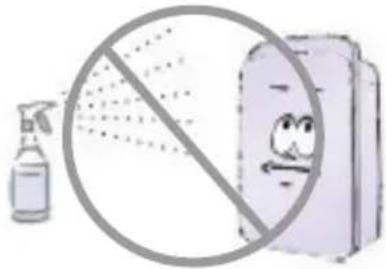 |
Please do not use sharp objects on the appliance to prevent scratching. 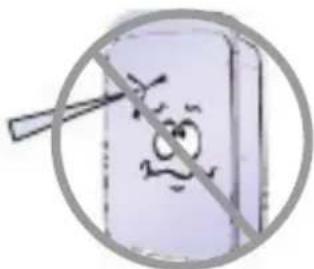 | Please do not knot, or fold the power cord, also ensure the power cord is free from tangle and nothing is place on top of it while in operation.  |
Please do not hang anything over the air outlet, by doing this you will reduce the dehumidification capacity and increase the noise. 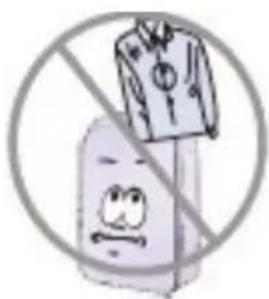 | Please do not put the automatic drainage pipe directly in the cold outdoors. 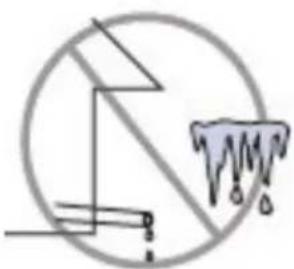 |
SAFETY AND USAGE NOTICES
Usage
When operating the appliance, please keep a clearance of 50cm above and over 30cm surrounding. Please refer to the following figure.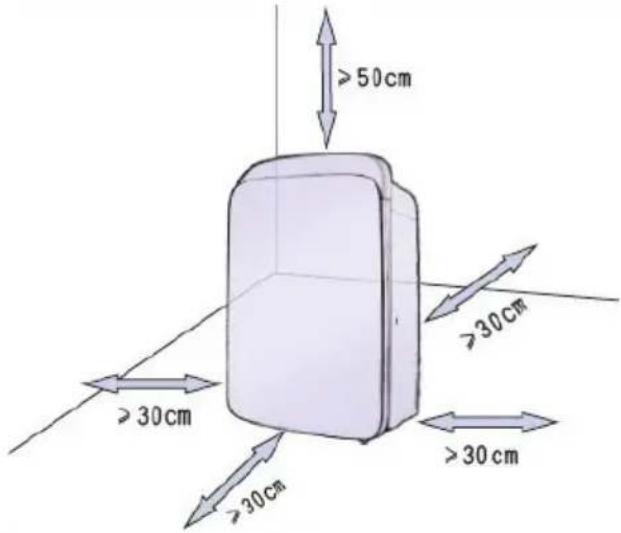 | Please do not direct your appliance towards plants or pets for long periods of time.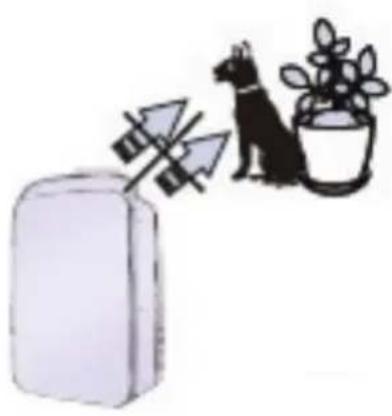 |
Please do not operate in direct sunlight, this will influence the dehumidification capacity.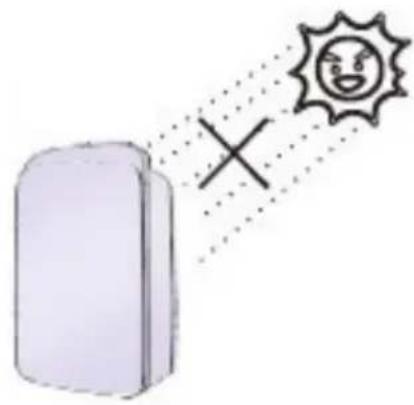 | Please keep windows closed when appliance is in use.Please clean the mesh filter regularly to prevent clogging and maintain optimal performance (see page 19 for instructions). |
SAFETY AND USAGE NOTICES
Maintenance and Storage
If the unit is faulty (e.g., burning smells, smoke detected), please turn off the appliance and unplug it, then contact a qualified service agent for maintenanc | Repairs are to be done by a qualified electrician or service agent. |
If the appliance is not to be used, or is to be stored for a period of time, please activate the self-cleaning function, which will dry the internal components of the appliance and prevent mildew growth. | Please unplug the appliance when not in use for long periods of time. |
If the power cord is damaged, it must be replaced by a qualified electrician, service agent or similarly qualified persons in order to avoid malfunction.This appliance is not intended for use by persons (including children) with reduced physical, sensory or mental capabilities, unless they have are supervised or given instruction concerning use of the appliance by a person responsible for their safety.Children should be supervised at all times.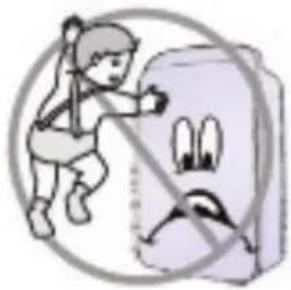 | Please do not use chemical solvents (e.g., benzene, gasoline, alcohol,etc.) to clean the appliance. Instead, use warm soapy water.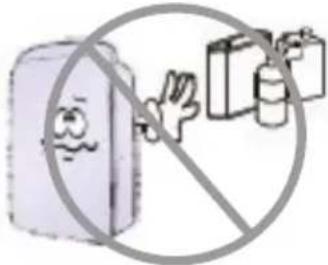 |
Please do not hose down the appliance. |
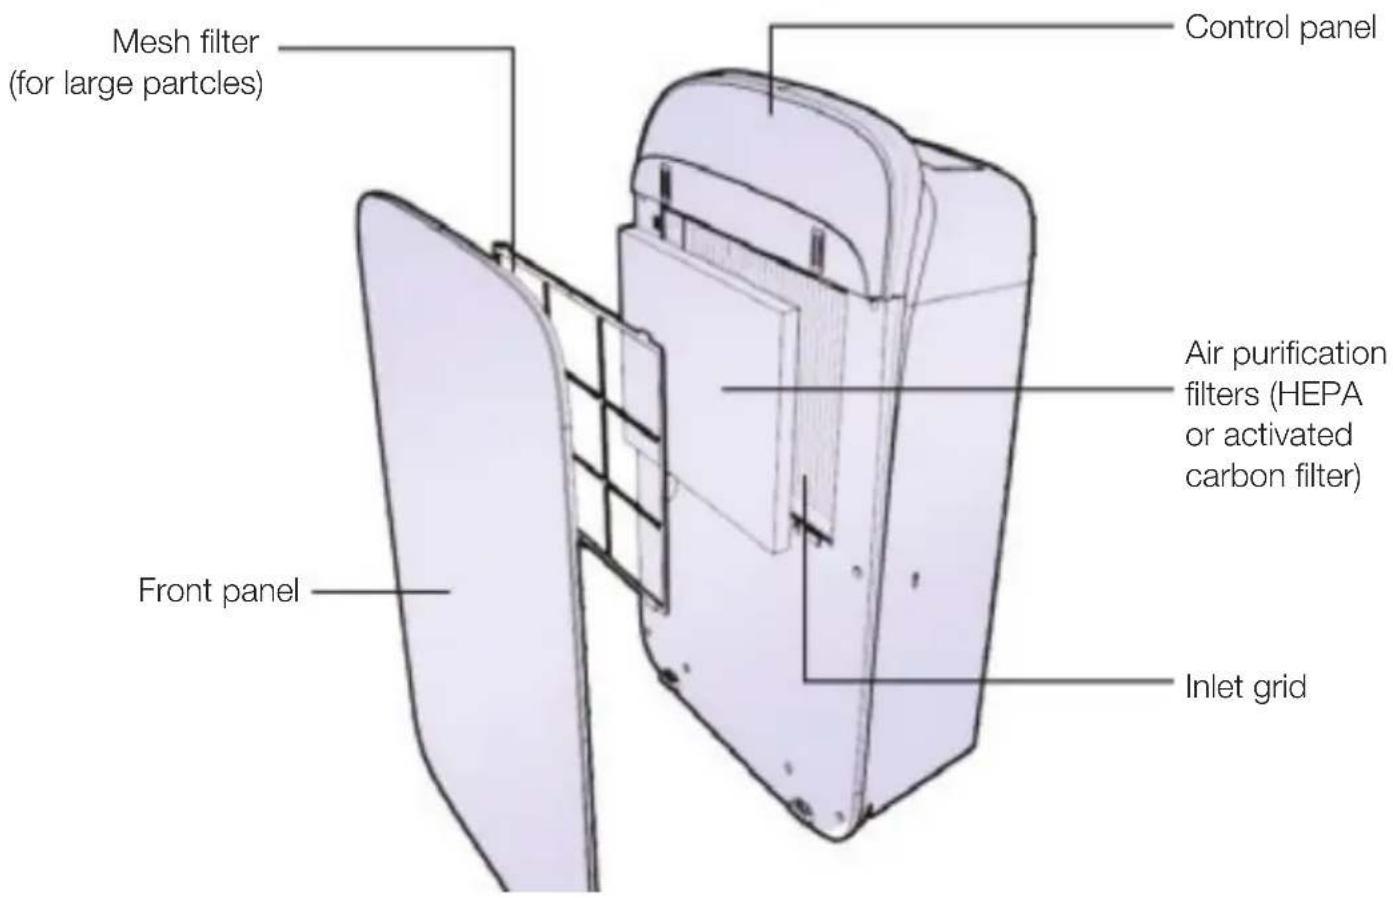
COMPONENTS
Front side
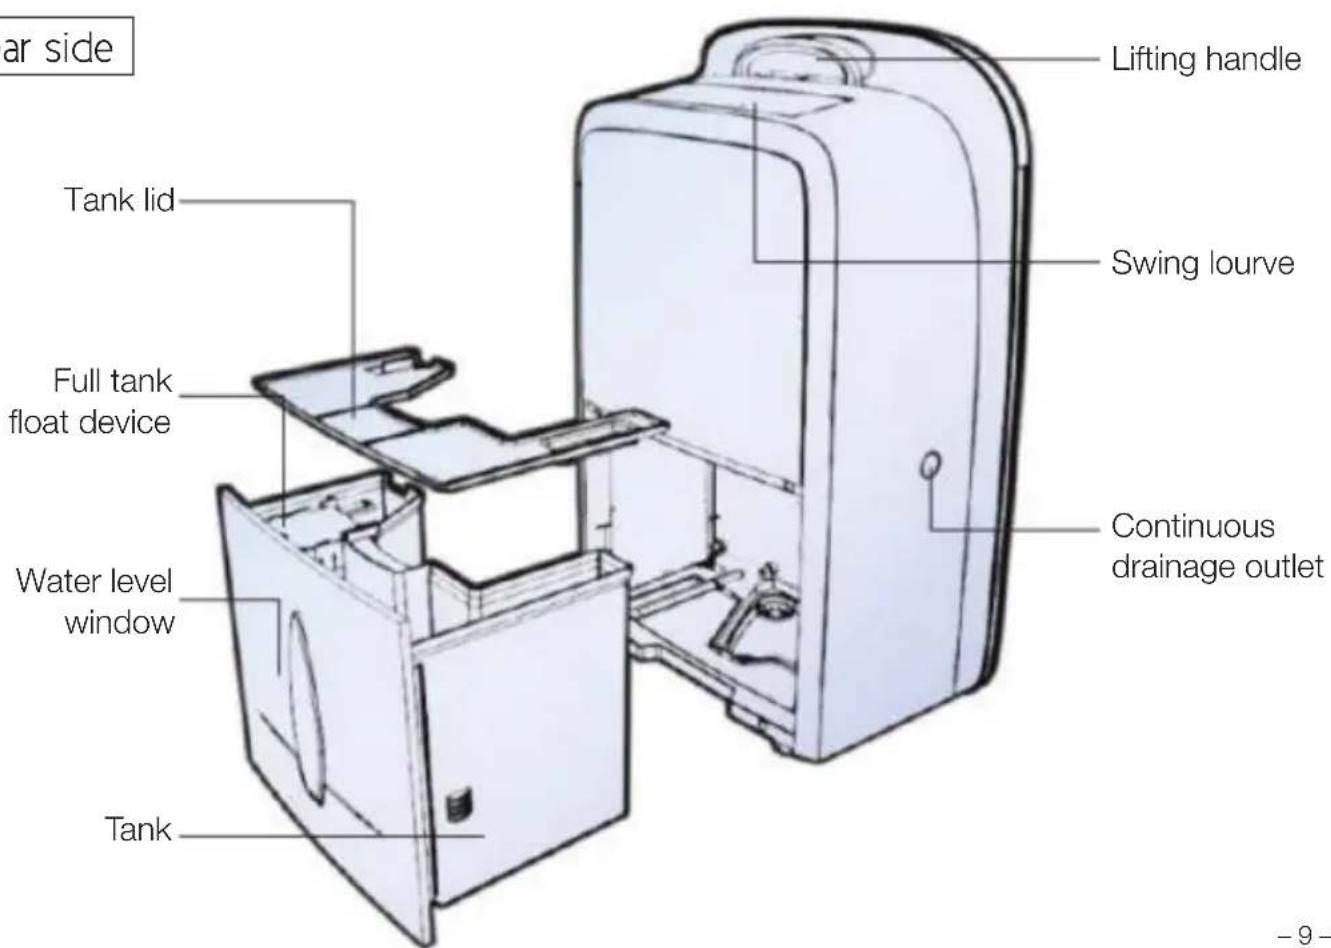
Rear side
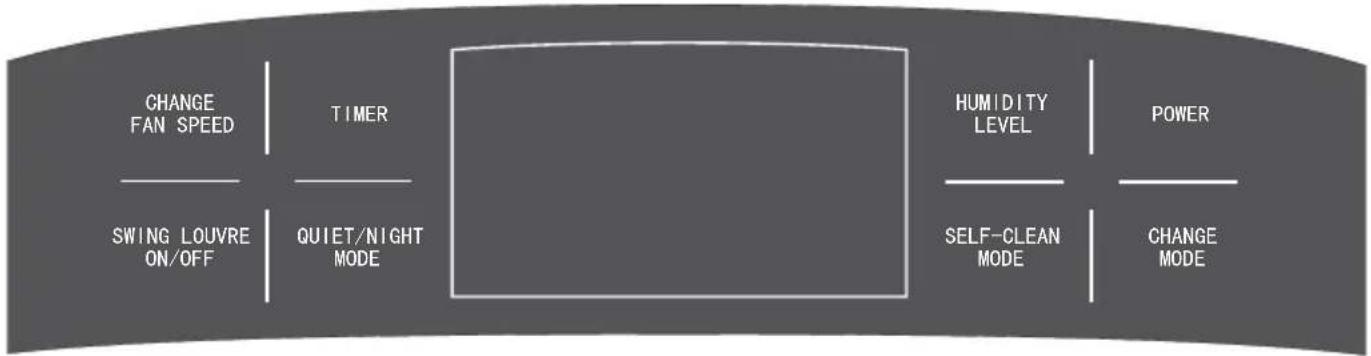
CONTROL PANEL
flowchart
graph LR
    A["CHANGE FAN SPEED"] --> B["TIMER"]
    B --> C["SWING LOUVRE ON/OFF"]
    B --> D["QUIET/NIGHT MODE"]
    C --> E["HUMIDITY LEVEL"]
    D --> E
    E --> F["SELF-CLEAN MODE"]
    E --> G["CHANGE MODE"]
    F --> H["POWER"]
POWER: turn on or turn off the appliance.
CHANGE MODE: cycles between different modes: automatic dehumidification, continuous dehumidification, clothes drying, air purification or ventilation. You can also press this button for 3 seconds to activate child lock mode.
QUIET/NIGHT MODE: minimises fan noise and dehumidification rate.
SELF CLEAN MODE: dries the internal components of the appliance. Press for 3 seconds to activate seconds.
SWING LOUVRE ON/OFF: activate oscillation of the wind vent louvres for wider air movement.
TIMER: set the number of hours until the appliance turns on or off.
HUMIDITY LEVEL: Set desired humidity level for "automatic dehumidification" mode;
CHANGE FAN SPEED: changes speed of fan and air that is emitted from the appliance.
Press this button and the "TIMER" button together to toggle between °C and °F temperature displays.
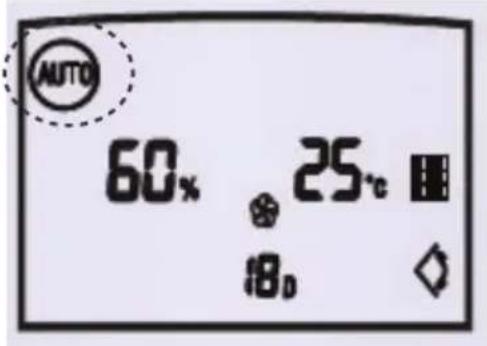
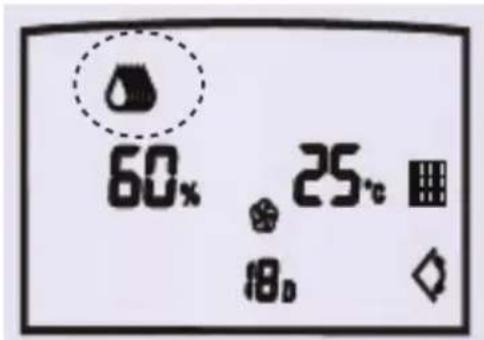
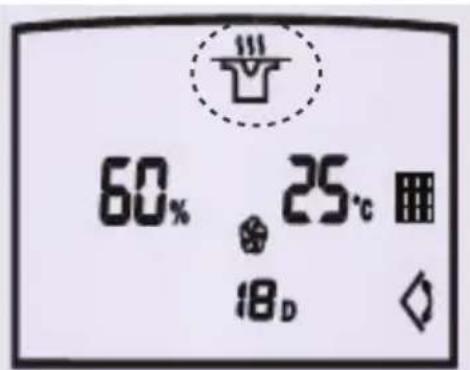
DISPLAY SCREEN
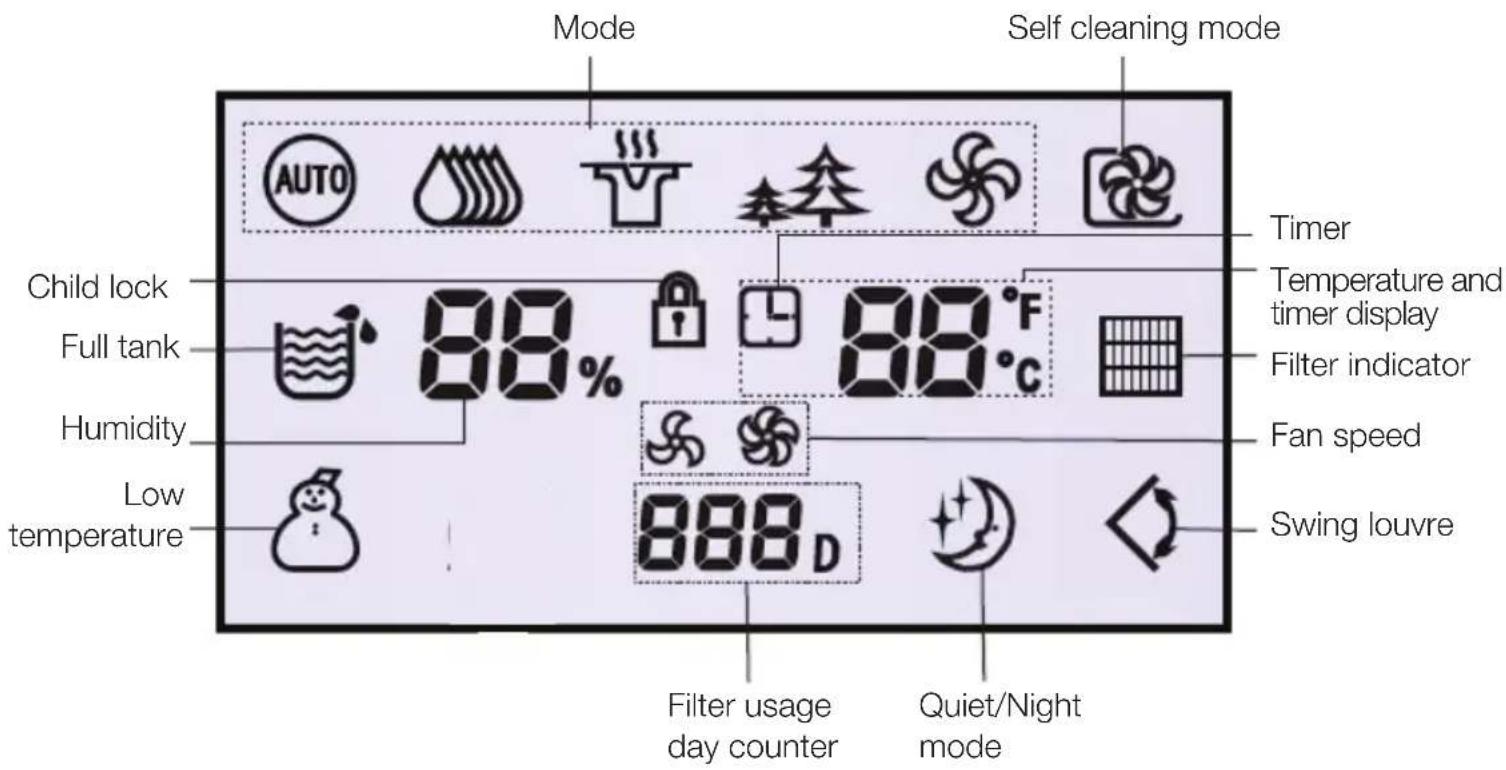
Self cleaning mode: lights up when self cleaning function is activated.
Mode: shows which functions are selected. The modes shown, from left to right are: automatic dehumidification Ⓗ, continuous dehumidification 🌐, clothes drying , air purification 🌐, ventilation 🌐.
Child lock: you can activate the child lock by pressing the "CHANGE MODE" button for 3 seconds.
Full tank: indicator will turn on when the water tank is full, then will beep to remind you to empty the tank.
Humidity: displays the current humidity level in your room.
Low temperature: displays when the temperature is lower than 15^ C. This indicator will flash when the room temperature is lower than 2^ C.
Swing louvre: displays when swing louvre is in operation.
Fan speed: shows high vs low fan speed.
Quiet/Night Mode: minimises fan noise and/or dehumidification rate for quieter functioning.
Filter usage day counter: indicates the number of days the filter has been used for.
Filter in use indicator: shows when a filter is inserted.
Temperature and timer display: shows current room temperature. When setting the timer this display shows the number of hours for timer function.
Timer: Timer function is activated.
OPERATION INSTRUCTIONS
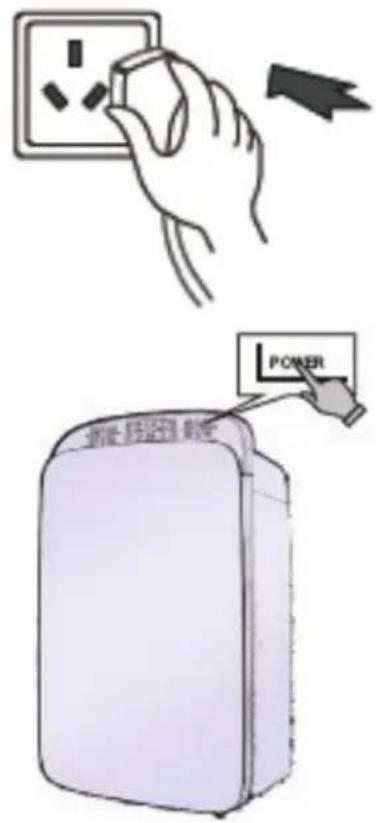
Turning on the appliance
Plug in the appliance
Press the "POWER" button to turn appliance on
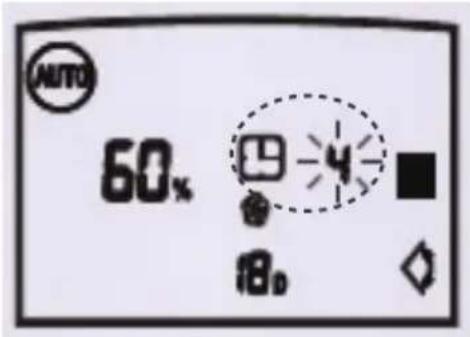
Setting timer to turn the appliance on
When the appliance is on standby, press the "TIMER" button – the Timer display will light up and start flashing.
Press the "TIMER" button the right number of times to set the number of hours until the appliance turns on. The Timer display will flash with the number of hours you have set and stop flashing after 5 seconds when the timer function is set.
If you want to change the preset time after you have set it, press the "TIMER" button to cancel the preset time and you can start over.
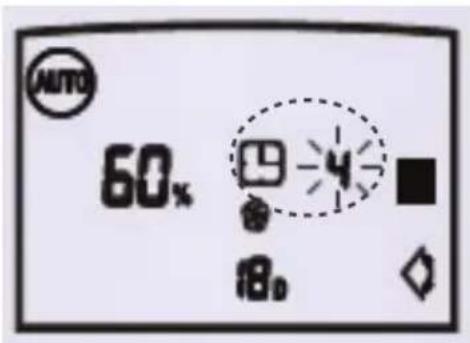
Setting timer to turn the appliance off
When the appliance is operating, press the "TIMER" button to activate the "timer off" function. The timer display will start to flash. Press the "TIMER" button the right number of times to set the number of hours until the appliance automatically turns off.
The Timer display will flash with the number of hours you have set and stop flashing after 5 seconds when the timer function is set.
If you want to change the preset time after you have set it, press the "TIMER" button to cancel the preset time and you can start over.
DEHUMIDIFICATION INSTRUCTIONS
Automatic dehumidification
Under this mode, the dehumidifer will dehumidify the room according to the humidity setting you have chosen (press "HUMIDITY LEVEL" to adjust). The ideal humidity for a room is between 50%-60%. The dehumidifier will only operate if the room humidity is higher than what you have set.
Continuous dehumidification
Under this mode, the dehumidifier will continuously dehumidify the room, regardless of the room's humidity. This function is particularly useful if you are trying to dry up a wet area.
When humidity is low, the dehumidifier fan will operate on a low speed, dehumidifying slower. When humidity is high, the dehumidifier fan will operate on a high speed, dehumidifying faster.
Clothes-drying
This function will assist in drying your clothing.
Position the dehumidifier with the back of the unit facing your wet clothes.
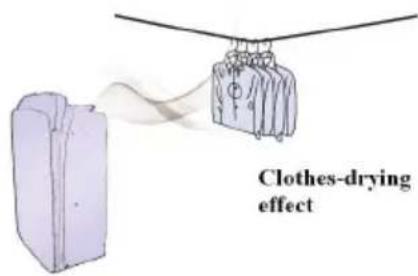
Use the "MODE" button to select clothes-drying mode. The compressor and fan operate on high settings to blow high-speed air over your clothes, aerating and drying them.
You can also activate the swing louvre to widen the angle of drying.
At the same time, the moisture that is aerated off your clothes is removed from the air through the dehumidifier.
DEHUMIDIFICATION INSTRUCTIONS
Dehumidification Tips
While operating automatic or continuous dehumidification or clothes drying mode, you can also insert one of the HEPA or activated carbon filters to simultaneously purify the air. The appliance will tell you if there is a filter in use by illuminating the air purification indicator. See “Air purification and filters” section for more information on air purification.
EMPTYING THE TANK AND DRAINAGE
Emptying the tank
The tank-full light on the display panel will illuminate when the tank is full. The unit will also beep ten times to remind the user to empty the tank
To do so, gently remove the tank via the hand-hold at the bottom of the tank.
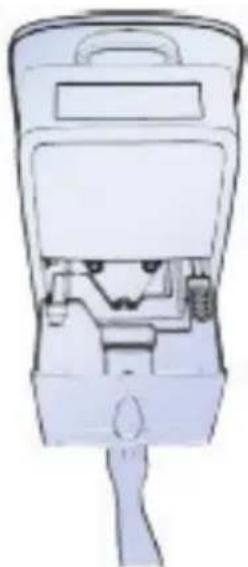
natural_image
Technical line drawing of a mechanical device with internal components (no text or symbols)Then take off the tank lid and drain the water.
Put the tank lid back on, reposition the tank and restart your appliance.
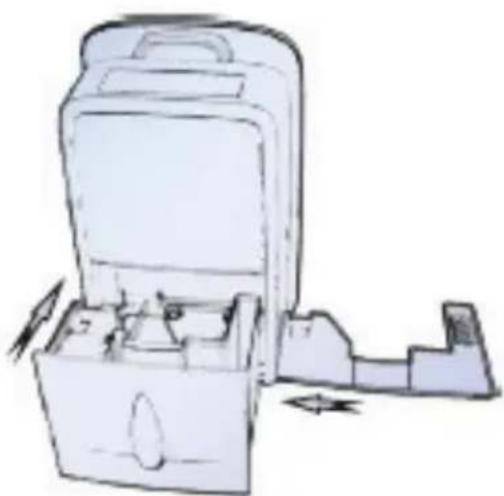
natural_image
Illustration of a mechanical device with open lid and internal compartments, showing no text or symbolsPlease note:
Please make sure that the tank lid is installed firmly ontank and that the full tank float device is free to move.
EMPTYING THE TANK AND DRAINAGE
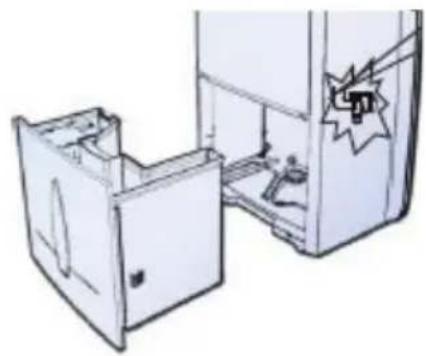
Continuous drainage
If your house suffers from constant high humidity and you do not want to empty the tank frequently, you can connect a drain-pipe (internal pipe diameter is 9mm) into the side of the appliance to continuously drain the dehumidified water.
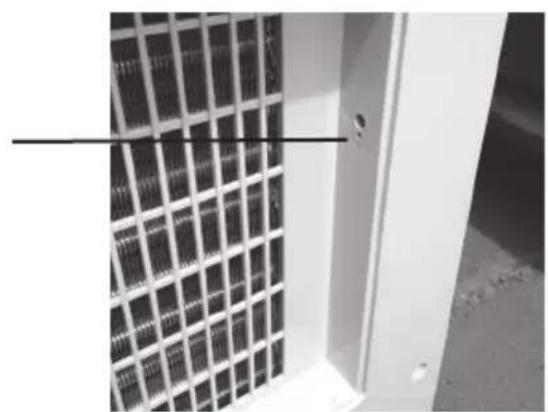
1) Locate the drainage outlet, shown below on the side of your appliance and insert a screwdriver into the circular groove and break off the drain hole cover.
2) Remove the tank and in the back of the drainage cavity of the appliance towards the right, there should be a lever, push that lever to the side to expose the drainage outlet nozzle.
3) While pushing that lever open, connect a drainpipe firmly to the drainage outlet nozzle through the whole in the side of the appliance that you have made.
Please note:
The continuous drainage pipe is gravity fed. Make sure that the height of the drainage pipe is lower or equal to the height of water outlet.

natural_image
Illustration of a refrigerator with open doors and a star-shaped sticker on the door (no text or symbols)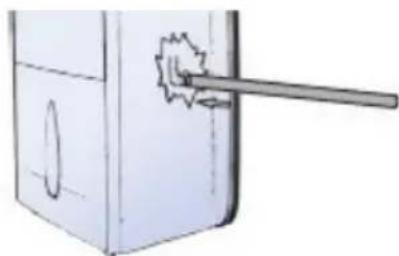
natural_image
Diagram of a mechanical component with a lever and circular feature (no text or symbols)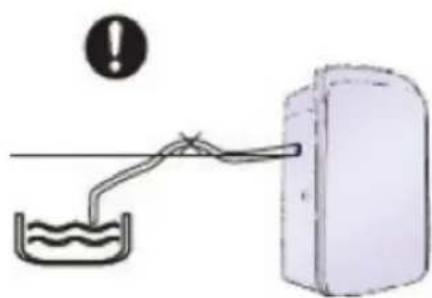
natural_image
Simple line drawing of a water tank connected to a container with an exclamation mark (no text or symbols)AIR PURIFICATION AND FILTERS
Ventilation
This mode moves air around the room. Before activating ventilation mode, remove any HEPA or activated carbon filters to ensure the lifespan of the filters. If you do not remove the filter, the filter indicator will flash to remind you to remove it. Press the “MODE” button to select ventilation mode.
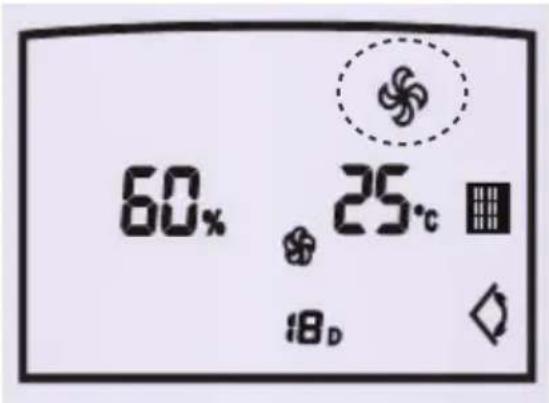
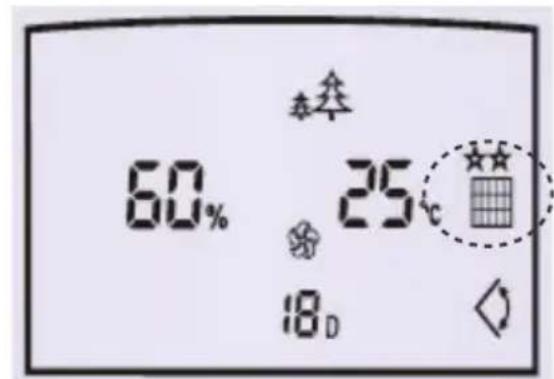
Air purification function
Press the "MODE" button to select the Air purification mode (as indicated by the two trees icon).
Ensure a filter (HEPA filter or activated carbon filter) is installed (see next page on how to insert a filter). If it is installed, the air purification icon will flash.
You can alternate between high and low fan speeds by pressing the "CHANGE FAN SPEED" button.

If no filter is detected, the appliance will not operate. The filter light will flash to remind you to insert a filter.
Inserting a filter
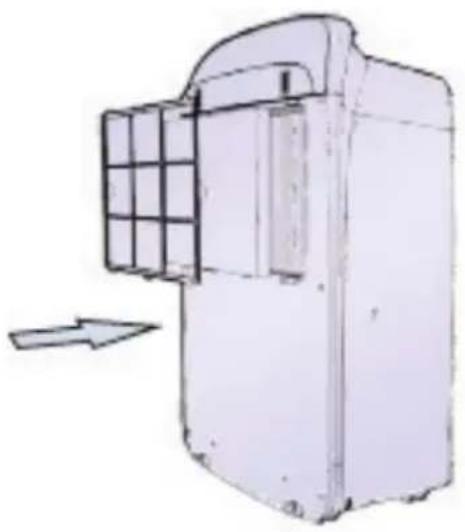
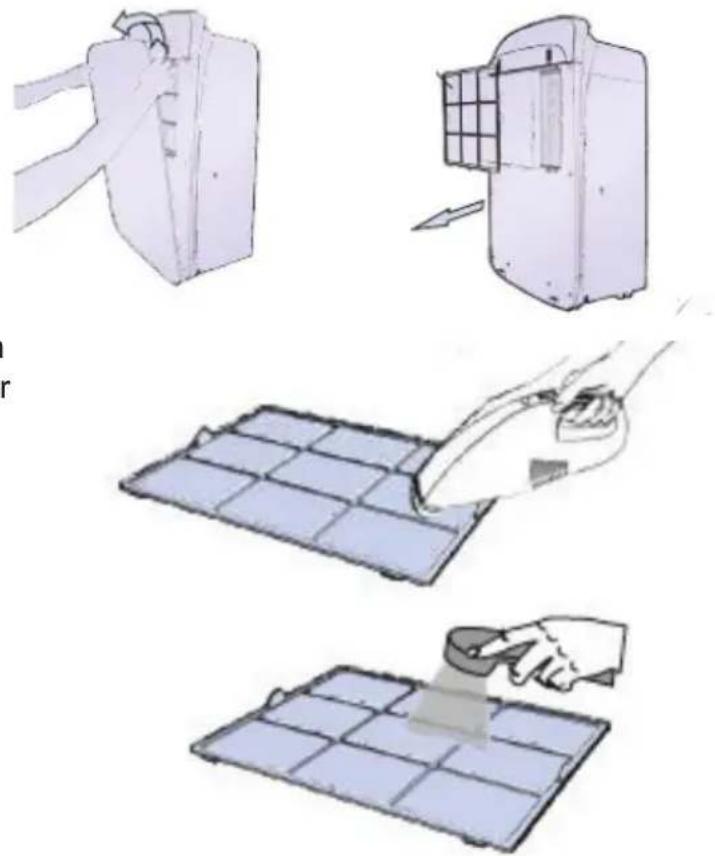
1) Open the front panel
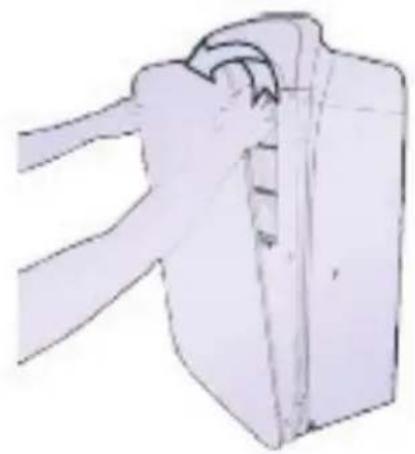
natural_image
Illustration of a mechanical component with a curved handle and flange (no text or symbols)2) Remove the plastic mesh filter and insert an air purification filter (activated carbon or HEPA). Then replace the plastic mesh filter back into the appliance.
natural_image
Diagram of a mechanical device with a grid panel and directional arrow (no text or symbols)3) Replace the front panel
natural_image
Simple line drawing of a bag with a handle and clasp (no text or symbols)Note: See the “care and maintenance of activated carbon and HEPA filters” section for information on when to replace filters.
Plastic mesh filter
The plastic mesh filter is designed to trap large particles (such as dust and hair). This can be cleaned and reused. Please see the Maintenance section for instruction on cleaning the dust off this filter.
Activated carbon filter information
Activated carbon has a wide range of applications such as in medical and environmental applications where it is used to remove poisons and pollutants and filter drinking water.
In your home, the activated carbon filter can remove certain chemicals, volatile organic compounds, odours and impurities from the atmosphere in your home. Examples of these are pet or cigarette smells, paint and petrol fumes, burnt food smells/smoke, ammonia, CFCs, microbes and fungi.
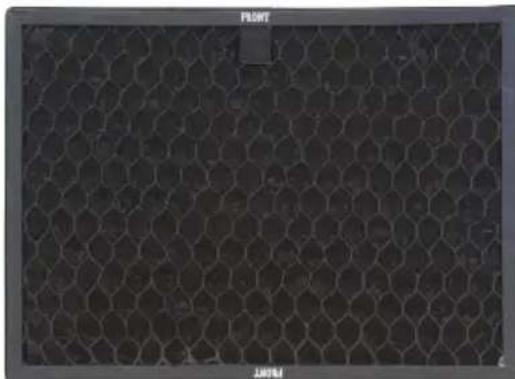
natural_image
Hexagonal grid pattern with no visible text, numbers, or symbolsActivated carbon filter
HEPA 13 filter information
Your HEPA 13 filter removes 99.95% of the smallest particles (MPPS) from the air. This includes allergens such as dust, mould spores, pollen, dust mites as well as bacteria and viruses.
HEPA filters have been shown to reduce the spread of diseases and allergic reaction. The HEPA filter prevents the dehumidifier from re-circulating and spreading airborne bacteria and viruses that are often common in winter. The result is a healthier home and family.
Please note: You can only use one of the HEPA or activated carbon filters at a time.
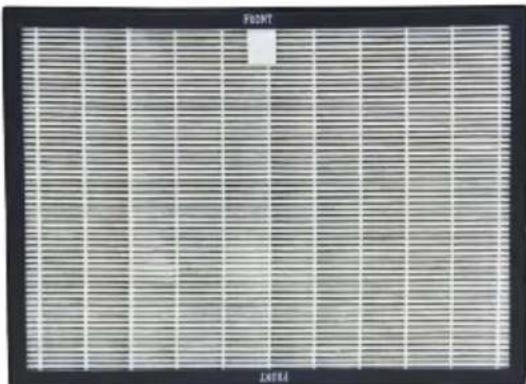
HEPA 13 filter
MAINTENANCE
Cleaning plastic mesh filter
The mesh filter should be cleaned regularly to prevent clogging and maintain optimal performance.
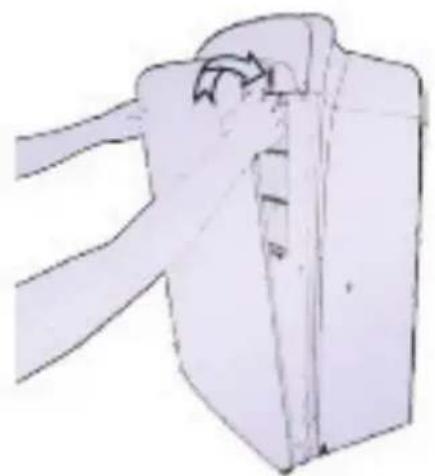
First remove the front panel. It should be held on magnetically. Then remove the plastic mesh filter by pulling on the tabs on the side.
Remove dust by vacuuming.
If the mesh filter is particularly dirty, wash it with warm, clean, soapy water. Do not use chemical solvents. Air-dry the filter out of direct sunlight. After cleaning, re-insert plastic mesh filter so it sits flat and isn't buckled.
natural_image
Illustration of four steps of a solar panel installation: slicing, cleaning, polishing, and cutting (no text or symbols)Replacing activated carbon and HEPA filters
Activated carbon and HEPA filters cannot be washed. Instead they need to be replaced every 9 – 18 months (depending on the air quality in your home). An average home will need filters changed once per year. Replacement filters can be found at the retailer where you purchased this appliance.
The appliance will keep track of the number of days you have used a filter on the filter usage day counter to indicate when you should change it.
To replace a filter, turn off the appliance and remove the front panel and plastic mesh filter. Remove the activated carbon or HEPA filter by the fabric tab.
Before inserting a new filter, press the very small button in the filter cavity to reset the filter usage day counter. You may need a pen or a needle to poke the button.
Now insert your new filter taking note of the "FRONT" side of the filter. Replace plastic mesh filter and front panel.

natural_image
Close-up of a solar panel array with grid pattern, no visible text or symbolsMAINTENANCE
Cleaning of the appliance's exterior
Wipe down the appliance with warm, clean, soapy water and ensure you dry it thoroughly afterwards.
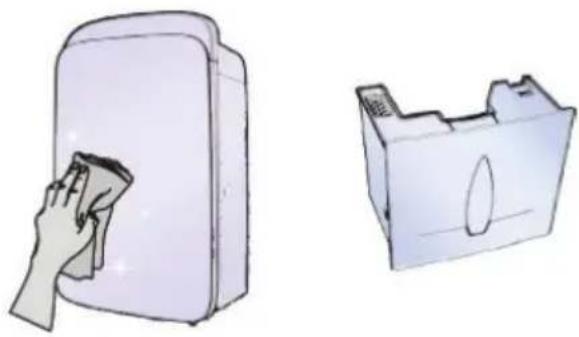
natural_image
Illustration of a hand cleaning a rectangular device with a cloth, next to a separate 3D model (no text or symbols)Self cleaning mode
This dries out the internal components of the appliance to ensure mildew does not grow on the inside of it. Use this function before any long period in which the appliance will not be in use.
Activate this mode by holding down the “SELF CLEAN MODE” button for 3 seconds. This drying procedure will take approximately 1 hour. In this time, the appliance fan settings will increase and decrease and the swing louvre will open and close at different stages.
To stop self cleaning, press the "SELF CLEAN MODE" button for over 3 seconds. The appliance will go back to the operating mode it was in before self cleaning began.
Alternatively, press the "POWER" button to stop the self clean mode and go back to standby mode.

Storage
Before storing away, remember to clean the unit both externally and internally (using the self-clean mode). When storing away, cover the unit so that it does not get dusty in storage.
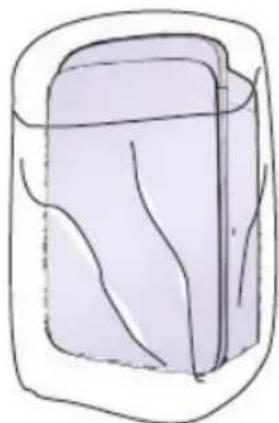
natural_image
Simple line drawing of a rectangular container with internal wavy lines (no text or symbols)TROUBLESHOOTING
If the following problems appear, please follow the solutions suggested.
| Problem Cause Solution | ||
| The appliance does not work | · check the appliance is plugged in· the tank may be full of water or incorrectly positioned | · plug into mains power supply· empty the tank and position the tank correctly |
| The unit isn't dehumidifying | · the temperature or humidity in the room is too low· the air inlet or outlet is blocked· the room atmosphere is filling up with moisture too quickly | · in dry seasons, the humidification capacity may be weakened· clean the air inlet and outlet· ensure that all windows are closed and prevent any other sources of moisture |
| The fan does not blow any air | · the fan blade is blocked· air filter is blocked· there is no filter while in “air purification” mode | · turn off the appliance and clean blockages from the outside. Please notify a qualified electrician if disassembling is required.· clean mesh filter according to filter cleaning instructions· install filter(HEPA or activated carbon filter) |
| The appliance is too noisy | · unit may be unbalanced and causing excess vibration· air filter is blocked· the fan speed is too high | · position the appliance in stable surfaces· clean mesh filter according to filter cleaning instructions· Turn the fan speed down or activate quiet/night mode |
TECHNICAL SPECIFICATIONS
| Model GDDEYS40A | |
| Operating Voltage 220V-240V~50Hz | |
| Dehumidification Capacity 40L/DAY | |
| Rated Power 620W | |
| Weight 18.1KG | |
| Dimensions (W*H*D) 410mm×665mm×265mm | |
The company reserves the right to alter the product design and specifications. For product technical parameters, please refer to the nameplate.
NOTES
DCimplex®
Glen Dimplex New Zealand Ltd
38 Harris Road, East Tamaki
Auckland, New Zealand
P.O. Box 58473, Botany
Manukau 2163, New Zealand
Phone: 09 274 8265
Fax: 09 274 8472
Email: sales@glendimplex.co.nz
Web: www.dimplex.co.nz