PRJG65 - Video projector Pyle - Free user manual and instructions
Find the device manual for free PRJG65 Pyle in PDF.


| Product Type | Mini Projector / Video Projector |
| Model | PRJG65 |
| Display Technology | TFT LCD |
| Light Source | 30,000 hours RBG-LED lamp |
| Brightness | 150 lumens |
| Contrast Ratio | 500:1 |
| Native Resolution | 1920 x 1080 pixels (support) |
| Projection Size | 30 - 120 inches |
| Projection Distance | 1.07 - 3.31 meters |
| Keystone Correction | ±15° manual adjustment |
| Input Interfaces | AV, VGA, USB, SD, HDMI, Micro USB |
| Speaker | 2 x (8Ω 2W) |
| Power Supply | 12V-2.5A / 5V-2A (adapter included) |
| Power Consumption | 30W |
| Dimensions (L x W x H) | 285 x 180 x 115 mm |
| Weight | 0.68 kg |
| Cooling Design | All sealed & high efficient cooling, dust-free |
| Security Features | Use grounded outlet; do not look into lens; keep away from water |
| Maintenance | Do not dismantle; use anti-shock materials for transport; unplug when not in use |
| Repairability | Contact distributor for repairs; do not attempt self-repair |
| Operating Temperature | -10°C to 28°C |
| Included Accessories | Remote control, power adapter, user manual, warranty card, 3-in-1 AV cable |
Frequently Asked Questions - PRJG65 Pyle
User questions about PRJG65 Pyle
0 question about this device. Answer the ones you know or ask your own.
Ask a new question about this device
Download the instructions for your Video projector in PDF format for free! Find your manual PRJG65 - Pyle and take your electronic device back in hand. On this page are published all the documents necessary for the use of your device. PRJG65 by Pyle.
USER MANUAL PRJG65 Pyle
natural_image
Black and white photo of a projector with a camera lens, showing layered screen structure (no text or symbols visible)ATTENTION
-
Please read this manual carefully before using it.
-
To ensure stable power supply, please use good supply line and outlet with grounding.
-
Please use the power supply indicated on the projector and the wire provided with the projector.
-
Please do not dismantle the projector without authorization; otherwise the supplier bears no responsibility for maintenance service.
-
Do not look into the lens while the projector is on working to prevent eyes from hurting.
-
Do not place the projector on the articles which may become obstacles for ventilation.
-
This projector has no waterproof function; you need to keep it away from water. And vessels with water should not be placed around it.
-
To avoid electric shock, please keep the projector from rain and dampness.
-
Please shut off the projector and unplug the adapter if the projector will not be used for a long time.
-
When the projector is transported, please use the plastic foam and other anti-shock materials provided with the projector.
-
If the projector is found to be damaged, please do not try to repair by yourself and please contact the distributor.
*** This manual is for reference only. If you have any question, please contact the distributor.
T Able of contents
1、Production files
Product Features 1
Specification 2
Fittings 2
2、User Guide
Connection 3
Function operation 5
Menu use guide 6
Remote Control 11
3、Fault removal 12
1. Product Profiles
1.1 Product Features
1 All sealed & high efficient cooling design, enhance product stability and life time.
2 Using of the 30 thousand hours long life RBG-LED lamp, which makes it more colorful and abundant details.
3 Electronics zooming function and free image size setting.
4 Professional trouble shooting and protection design.
5 Optical keystone function, picture proportion is not distortion after adjustment.
6 Mode shift freely.
7 Super low noise and dust-free design, free you from internal cleaning.
8 Image rolling function support upwards and downwards installing
9 Power consumption lower to 30W.
10 Multi input interface: AV, VGA, USB, SD, HDMI vehicle power supported
11 Mini USB slot, could connect with power bank (note: must be 2A power bank).
1.2 Specification
| Model NO. | Mini Projector | Image System | TFT LCD |
| Input terminal | AV, VGA, USB, SD, HDMI, Micro USB | Support Resolution | 1920*1080 |
| Lamp | LED | Voltage input | 12V-2.5A/5V-2A |
| Menu Language | English, Chinese, etc. (23 languages) | Brightness | 150LUMEN |
| Contrast | 500:1 | Lens | F=125 |
| Projection size | 30-120 inches | Projection Distance | 1.07-3.31meters |
| Color | 16770K | Power consumption | 30W |
| Speaker | 2 x (8Ω2W) | Weight | 0.68KG |
| Size | 285X180X115MM | Operation model | Manual & Remote control |
| Working Temp. | -10°C - 28°C | Max. supported SD card memory | 32G |
| System | Multimedia (Andriod OS: optional ) | Keystone | ±15° hand adjustment |
1.3 Fittings
Please check if the fitting is complete before you buy this projector:
| Remote control | 1 | User Manual | 1 |
| Power adapter | 1 | warranty card | 1 |
| 3 in 1 AV cable | 1 | ||
2. USER GUIDE
2.1 Connection


2.2 Function operation
2.2.1 Switch-on and off
After powering though the power adaptor, then projector is under standby status.
Switch on: Press the power button or the power button on the remote control once, and then the projector is powered on.
Switch off: When you want to shut the projector, please press the power button beside the indicate light or the power button on the remote control once, and then the projector is off.
Image focus
Place the projector vertical to the projection screen, and then rotate the lens slightly, until the brilliant image presented.
Attention:
Please connect the power adapter with the projector first, then plug the socket into the outlet. Finally power on the projector..
2.3 Menu use guide
A. Signal channel choose

press the source button in the remote control, then use “▲” or “▼” button to choose the different signal channel, press OK button to confirm
1. Connect laptop
Before connecting laptop, please confirm your laptop if have VGA card drive, then adjust your laptop to be copied model, pc no need to adjust, use VGA cable connect is ok

natural_image
Diagram showing three connected cables: a VGA connector, a USB cable, and a laptop (no text or symbols present)VGA cable connect with projector and the computer

Press projector or remote control input button, get the signal out, choose computer channel
2. HDMI connect HD device or mobile
(1) use HDMI cable connect projector with computer or laptop

(2) MHL cable connect with mobile

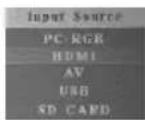
press projector or remote control input button, get the signal, then choose HDMI channel
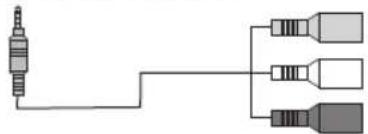
3. AV slot connect
natural_image
Pure electrical circuit lines without any symbolsconnect the device with AV slot

Press projector or remote control input button, get the signal, then choose Video channel
4. USB SD connection

natural_image
Illustration of a device with a USB port and two connectors (no text or symbols)Put the USB or SD card insert corresponding slot, then choose corresponding channel in the signal
B. Menu image

press the menu button in the remote control come to menu, choose the left “◀/▶” choose the right “▲/▼” Press OK button come to adjustment menu
C. Upgrade software
Software upgrade procedures:
Insert the flash drive which with firmwell software, open and come to projector, press input button, come to signal source choose USB channel, press “◀” ok button, come to USB channel, then press MENU button, press
D. Projector image reverse
- Press remote control MENU button come to menu, choose the left_right reverse in the image button, press OK button confirm
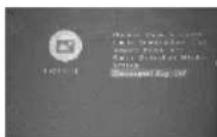

- Left _right reverse, then press "▼" button then you could find the up&down reverse button, press OK button conform.
E. Language shift
Use remote control MENU button come to menu, find the menu language in the setup, choose language
c. USB menu

natural_image
Four grayscale app icons: video camera, musical note, camera, and letter T, arranged horizontally (no text or symbols beyond icons)After you choose Media signal source, the interface change to the above picture, and then you can play correspondent files through "photo", "music", "movie", "text" icon by the projector accordingly..
2.4 Remote control

Don't use the new and old battery at the same time in remote control, otherwise power shortage and will affect remote control use. please pick the battery out if no use for long time. when operating remote control, please make sure that the signal emission of the remote control aims the infrared receiving interface of projector.
3.FAULT REMOVAL
as your projector occurred the following situation, please make a check and deal with it.
| Fault | check |
| Out of power/can't open the projector | Please check if the power adaptor connect ok,if put the remote control battery |
| No image and sound | Please check the signal input connection if ok, check the signal source if workable |
| have sound no image | Please check the signal if connect right, check the brightness, contract ration if was adjusted to be the lowest |
| Have image no sound | Please check the input slot if connect right, the sound if was adjusted to be lowest |
| Image is dim | Check the lens if zoom right, the project distance if too far, check the signal if workable |
| Color dim | Check the color and color temperature of ok |
| Close automatically | Take off the power supply , and restart it |

- ATTENTION
- T Able of contents
- 1、Production files
- 2、User Guide
- 3、Fault removal 12
- Product Profiles
- Product Features
- USER GUIDE
- Connection
- Function operation
- Switch-on and off
- Attention:
- Menu use guide
- Connect laptop
- HDMI connect HD device or mobile
- AV slot connect
- USB SD connection
- Menu image
- Upgrade software
- c. USB menu
- Remote control
- 3.FAULT REMOVAL
Brand : Pyle
Model : PRJG65
Category : Video projector