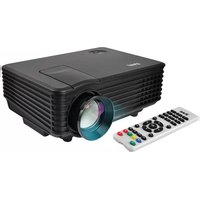
PRJG88 - Video projector Pyle - Free user manual and instructions
Find the device manual for free PRJG88 Pyle in PDF.


| Product Type | Mini Video Projector |
| Brand | Pyle |
| Model | PRJG88 |
| Display Technology | LCD |
| Native Resolution | 800 x 480 |
| Supported Resolution (Max) | 1920 x 1080 |
| Brightness | 800 Lumens |
| Contrast Ratio | 1000:1 |
| Lamp Type | LED |
| Lens | F=140 |
| Image Size | 36 - 110 inches |
| Projection Distance | 1.19 - 4.00 m |
| Color Temperature | 18000K |
| Projection Mode | Front Projection |
| Dimensions (W x D x H) | 210 x 145 x 80 mm |
| Weight | 1 kg |
| Power Consumption | 38W |
| Input Voltage | 100-240V AC |
| Built-in Speaker | 2.0W x 1 |
| Inputs | HDMI, USB, VGA, AV |
| Output | Headphone |
| Multimedia Formats | AVI, MPG, DAT, MP3, M4A, AAC, JPG, BMP |
| Operating Temperature | -10°C to 38°C |
| Remote Control | Yes (included) |
| Warranty | 1 Year |
| Safety | Do not stare at lens; keep away from water; use original foam for transport. |
| Maintenance | Clean lens with soft cloth; avoid blocking ventilation. |
| Repairability | Do not disassemble; contact authorized service agent. |
Frequently Asked Questions - PRJG88 Pyle
User questions about PRJG88 Pyle
0 question about this device. Answer the ones you know or ask your own.
Ask a new question about this device
Download the instructions for your Video projector in PDF format for free! Find your manual PRJG88 - Pyle and take your electronic device back in hand. On this page are published all the documents necessary for the use of your device. PRJG88 by Pyle.
USER MANUAL PRJG88 Pyle
natural_image
Line drawing of a projector with ventilation slots and a central lens (no text or symbols)Model Number : PRJG88
MINI PROJECTOR USER MANUAL
1. Accessories List
| AV signal cable | 1pc |
| Remote control | 1pc |
| Power cord | 1pc |
| User manual | 1pc |
| Warranty Card | 1pc |
2. Important Safeguards
I. Please read the manual carefully before operating projector. To ensure stable power supply, please use standard power cord.
II. Please use the power supply and cable indicated on the rating label.
The projector should be kept away from cloths, sofas and anything that may block the ventilation scoop. Please keep the unit away from flammable and explosive materials.
III. Please do not disassemble the unit yourself as this will invalidate the warranty service. To protect your eyes, do not stare directly at the lens when the projector is on. The projector must be kept away from water and any other liquids.
IV. To prevent electric shock, please keep the projector out of the rain and away from moisture. It is recommended to switch off the projector after it has run for 6 hours non-stop. Please use the original foam and other cushioning materials when transporting the projector
V. If the projector does not work, please contact the authorized service agent.
- Specification
| Model | Mini projector | Image system | LCD |
| Native resolution | 800*480 | Support resolution | Max 1920x1080 |
| Lamp | LED | Input voltage | 100-240V |
| Language | English, 23 languages | Brightness | 800lumens |
| Contrast | 1,000:1 | Lens | F=140 |
| Image size | 36-110 inch | Projection distance | 1.19-4.00m |
| Color | 18000K | Projection mode | Front projection |
| Power waster | 38W | Speaker | 2.0W*1 |
| Weight | 1KG | Size | 210*145*80mm |
| Operation mode | Manual/Remote control | Working temp | -10~38°C |
| Output | Headphone | Input | HDMI/USB/VGA/AV |
- Multimedia Supported Files
| Task | Format | Video Decode | Audio Decode |
| Movie | .avi | MPEG-4 | Mp3, AAC |
| .mpg | MPEG-1, MPEG-2 | ||
| .dat | MPEG-1 | ||
| Music | .mp3 | --- | Mp3 |
| .m4a/.aac | --- | AAC | |
| Picture | .jpg/jpeg | Progressive .JPEG Baseline JPEG | --- |
| .bmp | BMP | --- |

The projector does not support Dolby audio decoding
- Structural Diagram

6.Panel Functions


7.Function Operation
1.Power
2.Mute
-
Backward
-
Forward
5.Previd 6.Next
7.Play
8.Stop
9.Audio Language
(Only apply for European DVB-T)
- Record digital TV channel and playback
(Only apply for European DVB-1)
11.Source 12 Electro
12.Electronic Menu (Only apply for Euv
(Only apply for European DVB-1) 13. Confirm
-
Confirm 14. Up/dow
-
Up/down/let/right(channel+/-Volume-/+)
-
Menu
-
exit
-
numbers
The Ground Truth image displays a single, solid horizontal line. According to Rule 2 (UNDERSCORE & LINE RULES), this is a stylistic or background line, not a placeholder underscore. Therefore, the OCR result must ignore it. The provided OCR content is "____", which consists of four underscores. This is an incorrect interpretation of the line as a placeholder, violating the rule that stylistic lines must be ignored. The OCR has hallucinated text (underscores) where none should exist, violating the rule to ignore such lines. Hence, the OCR result is inconsistent with the Ground Truth.
- Menu Setting

Press "MENU" key to enter the main menu, then press "◀/▶".
key to enter each sub-menu.
Press "▲/▼" key to select the sub-menu, then adjust the
parameters as per your requirements, and press the "OK" key to confirm.
Sub-Menu Functions
I. Picture sub-menu:
Picture Mode Standard, Color Temperature, Aspect Ratio, Noise Reduction, PC Setup, HDMI Mode.
II. Sound sub-menu:
Sound Mode Standard, Balance, Auto Volume, Surround Sound, EQ.
III.Time sub-menu
Clock, Off Time, On Time, Sleep Timer, Auto Sleep
IV. Option sub-menu:
OSD Language, Restore Factory Default, OSD Blending, OSD Duration, Flip, Focus
V. Software update menu
Software update is the firmware updating

8.Function Operation
- Power on/off
Once the projector is plugged in, it will be in Standby mode.
Power on: Press the power button on the remote control once to turn the projector on. Power off: Press the power button on the remote control once to turn the projector off.
II. Focusing
Place the projector in a certain place within the required distance so that the lens is perpendicular to the screen then rotate the lens until the image is clear.
III. Signal Source Selection
Press "SOURCE" key on the remote and press "▲/▼" to find the required source, then press "OK" key to confirm.

10. Multimedia Player
Insert the U-Disk and select USB from the source menu, the image on the screen will be like below:
Through this interface, you can choose the corresponding "PHOTO", "MUSIC", "MOVIE" or "TEXT" icon to play the required files.
For example : choose "MOVIE" by pressing the "OK" key on remote control, then all of video files will be displayed. Please
press "OK" key to choose the one you like, the video then press ▶ "play"key to get a full screen video.
Remarks: red tick is a selection function, you can select favor video by mark red tick "√", then the projector will play your favor.

We offer 1 year warranty for the product.

Brand : Pyle
Model : PRJG88
Category : Video projector