002-349 - Coffee maker Menuett - Free user manual and instructions
Find the device manual for free 002-349 Menuett in PDF.


| Brand | Menuett |
| Model | 002-349 |
| Product Type | Coffee Maker |
| Dimensions (W x H x D) | Approx. 25 x 30 x 20 cm |
| Weight | Approx. 1.5 kg |
| Power Supply | 220-240 V ~ 50/60 Hz |
| Power Consumption | 800 W |
| Capacity | 1.25 L (approx. 10 cups) |
| Water Tank | Removable, transparent with level markings |
| Filter Type | Permanent mesh filter (reusable) or paper filter No. 4 |
| Keep Warm Function | Automatic keep warm for 40 minutes |
| Auto Shut-off | After 40 minutes of inactivity |
| Anti-drip System | Yes, allows removing carafe before brewing cycle ends |
| Carafe Material | Glass |
| Housing Material | Plastic |
| Cleaning | Wipe exterior with damp cloth; descale regularly with vinegar or descaling solution |
| Safety Features | Auto shut-off, boil-dry protection |
| Spare Parts Availability | Carafe, filter basket, water tank lid available online |
| Repairability | Modular design; replaceable heating element and power cord |
| Warranty | 2 years |
Frequently Asked Questions - 002-349 Menuett
User questions about 002-349 Menuett
0 question about this device. Answer the ones you know or ask your own.
Ask a new question about this device
Download the instructions for your Coffee maker in PDF format for free! Find your manual 002-349 - Menuett and take your electronic device back in hand. On this page are published all the documents necessary for the use of your device. 002-349 by Menuett.
USER MANUAL 002-349 Menuett
natural_image
Black coffee maker with clear glass and digital display, no visible text or symbols
SE KAFFEBRYGGARE
Operating instructions (Translation of the original instructions) Important! Read the user instructions carefully before use. Save them for future reference.
Värna om miljön!
Care for the environment!
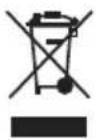
Must not be discarded with household waste! This product contains electrical or electronic components that should be recycled. Leave the product for recycling at the designated station e.g. the local authority's recycling station.
Jula reserves the right to make changes. In the event of problems, please contact our service department.
www.jula.com
Tillverkare/ Produsent/ Produenci/ Manufacturer
Jula AB, Box 363, 532 24 SKARA
Distributör/ Distributør/ Dystrybutor/ Distributor
Jula Poland Sp. z o.o., ul.
natural_image
Two black plastic filter devices with grid patterns, one showing a mesh and the other a plug (no text or symbols visible)SÄKERHETSANVISNINGAR
• Always follow these basic safety instructions when using electrical appliances.
- Read all the instructions carefully before use.
- Check that the mains power supply corresponds to the rated voltage on the rating plate.
- Do not use the appliance if it is damaged or not working properly, or if the power cord or plug are damaged. A damaged power cord and/or plug must be replaced by an authorised service centre, or other qualified personnel, to ensure safe use.
- The appliance gets hot when in use. – risk of burn injuries. Use the handle and knobs.
- Do not immerse the appliance, the power cord or plug, in water or any other liquid – risk of fire, electric shock and/or personal injury
- Pull out the plug before cleaning and when the appliance is not in use.
Switch off the appliance and allow it to cool before removing the filter, etc. and prior to cleaning.
- Do not use any accessories other than those recommended by the manufacturer. The use of other accessories can result in fire, electric shock and/or personal injury. The pot is only designed for use with this appliance. Never use this pot on a stove.
- Do not use strong or abrasive detergents.
- Do not allow the power cord to hang over the edge of a table or worktop, or to come into contact with hot surfaces.
- Do not place the appliance on, or close to a heat source.
- To disconnect the power to the appliance, put the power switch in the OFF position and pull out the plug. Do not pull the power cord to pull out the plug.
• Never use the appliance for
anything other than its intended purpose. Do not expose the appliance to rain or moisture.
- Close supervision is required when the appliance is used near children.
- Do not use the appliance without water.
- Never use the appliance if there are cracks in the pot or if the handle is loose. Only use the pot that comes with the appliance. Handle the pot with care.
- Do not use strong or abrasive detergents.
- Never open the lid when brewing – risk of scalding.
- Never leave the pot empty on the hot hob; the pot can crack.
- Do not place a warm pot on a hot, cold or wet surface.
- The appliance is not intended to be used by persons (children or adults) with any form of functional disorders, or by persons who do not have sufficient
experience or knowledge on how to use it, unless they have received instructions concerning the use of the appliance from someone who is responsible for their safety. Keep children under supervision to make sure they do not play with the appliance. Do not allow children under 8 to use, clean or maintain the appliance without supervision.
- The appliance is intended for use in a home or other similar places.
- Do not use the appliance outdoors.
WARNING!
Never open the appliance lid when brewing – risk of scalding.
Symbols
 | Safety class II. |
 | Approved as per applicable directives. |
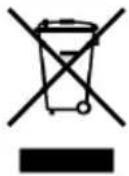 | Recycle a discarded product in accordance with applicable regulations. |
TECHNICAL DATA
| Rated voltage 230 V | ~50 Hz |
| Output | 750 W |
| Safety class II | |
| Filter size 1x4 | |
| Volume 1.25 l | |
| Cord length 0.7 m |
DESCRIPTION
- Level indicator
- Power switch
- Jug
- Drip stopper
- Filter holder
- Lid
FIG. 1
USE
Before using for first time
Check that all the accessories are included and that the coffee maker is undamaged.
-
Fill up with fresh water to the MAX mark.
-
Start the coffee maker and allow the water to run through without using any coffee.
- Pour out the water.
- Repeat several times.
- Wash all detachable parts carefully in warm water.
Brewing coffee
- Open the lid and fill the water tank with drinking water. Do not fill above the MAX marking on the level indicator.
- Place the filter funnel in the filter holder.
FIG. 2
- Place a filter in the filter funnel.
- Fill ground coffee in the filter. As a rule use one level tablespoon of ground coffee per cup, but this can be adjusted according to personal taste.
- Close the cover over the filter holder.
- Put the pot on the hob.
- Plug the plug in a wall socket.
- Press the power switch. The status lamp comes on and brewing starts.
- The coffee maker has a function for taste setting. For stronger coffee, press and hold the power switch for 4 seconds to start brewing. The status lamp flashes until brewing is complete.
NOTE:
The coffee maker is equipped with a non-drip feature and the pot can be removed at most for up to 30 seconds during brewing without coffee dripping from the filter. If the pot is not replaced within 30 seconds the coffee will overflow in the funnel.
-
Wait one minute after the water tank is empty before removing the pot to make sure all the coffee has run through the filter.
-
You can keep the coffee hot on the hob for up to 40 minutes after the brewing. The hob switches off after 40 minutes. Serve freshly brewed coffee for the best taste.
- Switch off the coffee maker and pull out the plug after use.
NOTE:
- The volume of brewed coffee is slightly less than the added water volume, as the coffer powder absorbs some of the water.
- Parts of the appliance get very hot during use – risk of scalding and/or burn injuries.
Tips for good coffee
- For best results and taste it is important to keep the coffee maker clean. Clean the coffee maker regularly according to the instructions. Use only fresh, cold water in the appliance.
- Store ground coffee in a dry and cool place. Close the packet properly, and store in the fridge for best shelf life.
- For optimum coffee taste, use whole coffee beans and grind them just before brewing.
- Never brew coffee more than once with the same ground coffee. It is not advisable to warm up coffee that has gone cold – coffee tastes best immediately after brewing.
- Small drops of oil on the surface of the brewed coffee come from oils in the coffee. You may notice them after brewing very dark roast coffee.
MAINTENANCE
NOTE:
- Pull out the plug and allow the coffee maker to cool before cleaning.
- Never immerse the coffee maker, the power cord or plug in water or any other liquid.
Cleaning
- Wash all the loose parts in hot water and washing-up liquid after use.
- Wipe down the coffee maker with a soft, damp cloth.
- Water droplets may collect above the funnel and drip down onto the hot plate when brewing. To avoid this, wipe with a clean dry cloth after use.
- Carefully wipe the hob with a damp cloth. Never use abrasive detergents.
- Replace all the parts so that the coffee maker is ready to use again.
Descaling
Clean and descale the appliance regularly for best functionality. Use 30 ml of vinegar to one pot of cold water.
- Fill the water tank to the MAX mark with the vinegar solution.
- Put the pot on the hob.
- Check that the filter holder (without ground coffee and filter) is fitted correctly.
- Start the coffee maker and allow the descaling mixture to run through.
- When one cup of the mixture has run through, switch off the coffee maker.
- Wait 15 minutes and repeat steps 3–5.
- Start the coffee maker and allow the rest of the mixture to run through, so that the water tank is empty.
- Rinse by filling the container with cold water and allow this to run through. Repeat this at least three times.
Brand : Menuett
Model : 002-349
Category : Coffee maker