
KD-G847EE - Car radio JVC - Free user manual and instructions
Find the device manual for free KD-G847EE JVC in PDF.


| Product Type | Car Stereo (CD Receiver) |
| Brand | JVC |
| Model | KD-G847EE |
| Dimensions (W x H x D) | 182 x 53 x 159 mm |
| Weight | 1.2 kg |
| Power Supply | 12V DC, negative ground |
| Max Power Output | 4 x 50 Watts |
| Playback Formats | CD, CD-R/RW, MP3, WMA |
| Tuner Bands | FM (87.5-108 MHz), AM (531-1611 kHz) |
| USB Input | Yes (front panel) |
| Auxiliary Input | 3.5 mm stereo jack (front) |
| Detachable Faceplate | Yes |
| Display | LCD with multi-color illumination |
| Audio Features | EQ presets, Bass/Treble control, Loudness |
| Remote Control | Included (IR) |
| Recommended Cleaning | Use soft dry cloth; avoid solvents |
| Safety Note | Disconnect battery before installation |
| Spare Parts Availability | Faceplate, wiring harness, remote control |
| Repairability Index | User-replaceable fuse, professional service for internal repairs |
Frequently Asked Questions - KD-G847EE JVC
User questions about KD-G847EE JVC
0 question about this device. Answer the ones you know or ask your own.
Ask a new question about this device
Download the instructions for your Car radio in PDF format for free! Find your manual KD-G847EE - JVC and take your electronic device back in hand. On this page are published all the documents necessary for the use of your device. KD-G847EE by JVC.
USER MANUAL KD-G847EE JVC
For canceling the display demonstration, see page 4.
For installation and connections, refer to the separate manual.
natural_image
Abstract black and white diagonal striped pattern with no text or symbolsINSTRUCTIONS
Thank you for purchasing a JVC product.
Please read all instructions carefully before operation, to ensure your complete understanding and to obtain the best possible performance from the unit.
IMPORTANT FOR LASER PRODUCTS
- CLASS 1 LASER PRODUCT
- CAUTION: Do not open the top cover. There are no user serviceable parts inside the unit; leave all servicing to qualified service personnel.
- CAUTION: Visible and/or invisible class 1M laser radiation when open. Do not view directly with optical instruments.
- REPRODUCTION OF LABEL: CAUTION LABEL, PLACED OUTSIDE THE UNIT.
| CAUTIONVISIBLE AND/ORINVISIBLE CLASS 1MLASER RADIATIONWHEN OPEN. DO NOTVIEW DIRECTLY WITHOPTICAL INSTRUMENTS.EC:60825-4:2001(ENG) | ATTENTIONRAYONNEMENT LASERVISIBLE ET/OUNVISIBLE DE CLASSE1M UNI FOIS OUVERT,NE PAS REGARDERDIRECTMENT AVECDES INSTRUMENTSOPTIQUES. (IRA) | AVISORADIACIÓN LASERDE CLASE 1MVISIBLE Y/O INVISIBLECUANDO ESTABERTO, NO MIPARDIRECTAMENTECON INSTRUMENTALOPTICO. (ESP) | VARNINGSYNUG OCH/ELLERSYNLGBLASERSTRALING,KLASS 1M, NÁR DENNADEL, ÁR ÖPPNAD,BETRAKTA EJSTRALEN MED OPTEKAINSTRUMENT. (SWB) | 注意ここを聞くと可視及び/または不可視のクラス1MLーザー放射が出ます。光学装置で直接見ないでください。(JPN) | CAUTIONVISIBLE AND/ORINVISIBLE CLASS 1MLASER RADIATIONWHEN OPEN.DO NOT STOREINTO BEAM,ROA 21 CIR(ENG) |

[European Union only]
Available characters on the display
This unit can display Romans alphabets (A - Z, a - z), Cyrillic alphabets, numbers, and symbols (see below).
These characters are also used to show the various information on the display.
Upper case (Cyrillic alphabets)
Lower case (Cyrillic alphabets)
How to use the M MODE and SEL buttons
If you use M MODE or SEL (select), the display and some controls (such as the number buttons,
|◀◀ ▼ /▶▶ | ∧ buttons, ▲/▼ buttons, and the control dial) enter the corresponding control mode.
Ex.: When you press number button 1 after pressing M MODE, to operate the FM tuner.

flowchart
graph TD
    A["M"] --> B["Down"]
    B --> C["MODE"]
    C --> D["Mono Off"]
    D --> E["MONO"]
    D --> F["PTY"]
    D --> G["SSM"]
    D --> H["LIST"]
    I["1"] --> J["2"]
    J --> K["3"]
    K --> L["4"]
    L --> M["5"]
    M --> N["6"]
To use these controls for original functions, press M MODE again.
• However, pressing SEL makes the unit enters a different mode.
- Waiting for about 15 seconds (or 30 seconds for Bluetooth sources) without pressing any of these buttons will automatically cancels the control.
How to reset your unit

natural_image
Diagram showing a device being inserted into a housing, with no visible text or symbols- Your preset adjustments will also be erased (except the registered Bluetooth device, see pages 14 and 15).
How to forcibly eject a disc
![SOURCE + [Hold] SEL](/content/2026/05/1046316/images/3c2273b5e5cec2919e55af054c80b25ca169fb221df77c2f910a7961f7fe3396.jpg)
"Please Eject" appears on the display.

- Be careful not to drop the disc when it ejects.
• If this does not work, reset your unit.
Warning:
If you need to operate the unit while driving, be sure to look around carefully or you may be involved in a traffic accident.
For safety...
- Do not raise the volume level too much, as this will block outside sounds, making driving dangerous.
- Stop the car before performing any complicated operations.
Temperature inside the car...
If you have parked the car for a long time in hot or cold weather, wait until the temperature in the car becomes normal before operating the unit.
CONTENTS
INTRODUCTIONS
Preparation 4
OPERATIONS
Basic operations 5
• Using the control panel 5
• Using the remote controller (RM-RK50) ..... 6
Listening to the radio 7
Disc operations 11
Listening to the USB device 13
EXTERNAL DEVICES
Using the Bluetooth® devices 14
• Using the Bluetooth cellular phone ..... 16
• Using the Bluetooth audio player ..... 18
Listening to the CD changer 19
Listening to the iPod 20
Listening to the other external components 22
SETTINGS
Selecting a preset sound mode 23
General settings — PSM 25
Bluetooth settings 30
REFERENCES
More about this unit 31
Troubleshooting 35
Maintenance 39
Specifications 40
For detaching/attaching the control panel, see page 38.
Preparation
Cancel the display demonstration and set the clock
• See also pages 25 and 26.
| 1 |  ⏻/I/ATT ⏻/I/ATT | Turn on the power. | |
| 2 |  | [Hold] | Enter the PSM settings. |
| 3 |   | SOURCE[Turn] | Cancel the display demonstrationsSelect “Demo,” then “Off.”Set the clockSelect “Clock Hr” (hour), then adjust the hour.Select “Clock Min” (minute), then adjust the minute.Select “24H/12H,” then “24Hours” or “12Hours.” |
| 4 |  | Finish the procedure. | |
Changing the display information and pattern
When the power is turned off: Check the current clock time
Ex.: When tuner is selected as the source
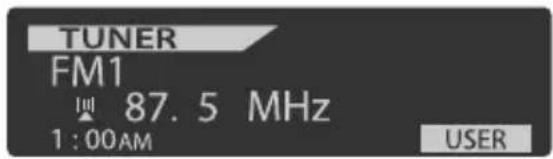
Source operation display

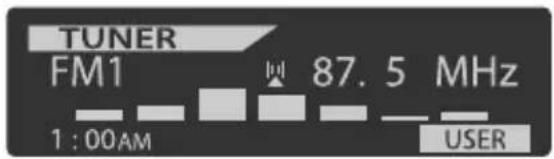
Audio level meter display
(see "LevelMeter" on page 25)
Caution:
If the temperature inside the car is below 0^ C, the movement of animation and text scroll will be halted on the display to prevent the display from being blurred. Appears on the display.
When the temperature increases, and the operating temperature is resumed, these functions will start working again.
Caution on volume setting:
Digital devices (CD/USB) produce very little noise compared with other sources. Lower the volume before playing these digital sources to avoid damaging the speakers by sudden increase of the output level.
Basic operations
Using the control panel

1 • TUNER: Select preset station.
• CD/USB/CD-CH: Select folder.
• USB-iPod: Enter the main menu [Hold].
- iPod: Enter the main menu/Pause playback/Confirm selection.
• BT-PHONE/BT-AUDIO: Select a registered device.
2 · Turn on the power.
- Turn off the power [Hold].
- Attenuate the sound (if the power is on).
3 Display window
4 USB (Universal Serial Bus) input jack
5 • Activate/deactivate TA Standby Reception.
- Enter programme type searching mode [Hold].
6 Flip down the control panel.
- To eject the disc, flip down the control panel then press ▲ on the unit.
7 AUX (auxiliary) input jack
8 • TUNER: Search for station.
• CD/USB/CD-CH/USB-iPod/iPod: Select track.*1 Holding SOURCE will enter the Bluetooth menu.
• BT-AUDIO: Reverse skip/forward skip. *2 You cannot select these sources if they are not ready or not connected.
9 • Volume control [Turn].
- Select the source [Press] * 1. TUNER → CD *2 → USB *2 (or USB-iPod) *2 → CD-CH *2/iPod *2 (or EXT IN) → BT-PHONE *2 → BT-AUDIO *2 → AUX IN → (back to the beginning)
10 • Select/adjust the sound mode.
- Enter the PSM settings [Hold].
11 • TUNER: Select preset station.
- CD/USB/CD-CH: Select folder/track/disc (for CD changer).
• USB-iPod: Select preset top menu items.
• BT-PHONE: Dial preset phone number *
12 • Enter functions mode.
• BT-PHONE: Activate Voice Dialing [Hold].
13 Change the display information and pattern.
14 • TUNER: Select the bands.
• USB-iPod/BT-AUDIO: Start/pause playback.
.*1 Holding SOURCE will enter the Bluetooth menu.
*2 You cannot select these sources if they are not ready or not connected.
*3 For storing preset phone number, see page 18.
Using the remote controller (RM-RK50)
Installing the lithium coin battery (CR2025)

Before using the remote controller:
- Aim the remote controller directly at the remote sensor on the unit.
- DO NOT expose the remote sensor to bright light (direct sunlight or artificial lighting).

natural_image
Line drawing of a computer monitor with control buttons and a scroll (no text or symbols)Remote sensor
Warning (to prevent accidents and damage):
- Do not install any battery other than CR2025 or its equivalent.
- Do not leave the remote controller in a place (such as dashboards) exposed to direct sunlight for a long time.
- Store the battery in a place where children cannot reach.
- Do not recharge, short, disassemble, heat the battery, or dispose of it in a fire.
- Do not leave the battery with other metallic materials.
- Do not poke the battery with tweezers or similar tools.
- Wrap the battery with tape and insulate when throwing away or saving it.

1 • Turns the power on if pressed briefly or attenuates the sound when the power is on.
- Turns the power off if pressed and held.
2 • Changes the FM/AM bands with ▲ U.
• Changes the preset stations with D ▼.
• Changes the folder of the MP3/WMA/WAV.
- While playing an MP3 disc on an MP3-compatible CD changer:
– Changes the disc if pressed briefly.
- Changes the folder if pressed and held.
• While listening to an Apple iPod:
Connected to KS-PD100:
- Pauses or resumes playback with D ▼.
- Enters the main menu with ▲ U.
(Now ▲ U/D ▼/◀ R/F ▶ work as the menu selecting buttons.)*
* ▲ U : Returns to the previous menu.
D
▼ : Confirms the selection.
Connected to the USB input jack:
- Enter the main menu if pressed and held.
- Select the desired menu if pressed briefly.
- Fast skip in every layer of the main menu if pressed and held.
3 Adjusts the volume level.
4 Selects the sound mode (iEQ: intelligent equalizer).
5 Selects the source.
6 For Bluetooth cellular phone:
— Answers calls if pressed briefly.
– Rejects calls if pressed and held.
7 • Searches for stations if pressed briefly.
- Fast-forwards or reverses the track if pressed and held.
• Changes the tracks if pressed briefly.
- While listening to an iPod (in menu selecting mode):
Connected to KS-PD100:
- Selects an item if pressed briefly. (Then, press
D ▼ to confirm the selection.)
- Skips 10 items at a time if pressed and held. Connected to the USB input jack:
- Start play back the selected folder directly if pressed and held.
- Reverse skip/forward skip for Bluetooth audio.
Listening to the radio
| 1 | SOURCE | Select “TUNER.” |
| 2 |  | Select the bands. → FM1 → FM2 → FM3 → AM |
| 3 |  | Search for a station to listen—Auto Search.Manual Search: Hold either one of the buttons until “M” lights up on the display, then press it repeatedly.When receiving an FM stereo broadcast with sufficient signal strength, lights up on the display.Note: FM1 and FM2: 87.5 MHz – 108.0 MHzFM3: 65.00 MHz – 74.00 MHz |
When an FM stereo broadcast is hard to receive
1
MODE

2
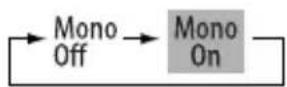
Reception improves, but stereo effect will be lost.
• MO lights up on the display.
3 Exit from the setting.
MODE
M
■ FM station automatic presetting — SSM (Strong-station Sequential Memory)
You can preset up to six stations for each band.
1 While listening to a station...
MODE
M
Continued on the next page
2


3

Local FM stations with the strongest signals are searched and stored automatically in the selected FM band.

Manual presetting
Ex.: Storing FM station of 92.5 MHz into preset number 4 of the FM1 band.
Using the number buttons
1

2


3


Preset number flashes for a while.
Using the Preset Station list
- When i ^s show on the display, you can move back to the previous screen by pressing number button 3.
1 Follow steps 1 and 2 of "Using the number buttons" above.
- By holding ▲ / ▼, the Preset Station List will also appear (go to step 4).
2

3 Display the Preset Station List.

flowchart
graph LR
    A["LIST\n12\n6"] --> B["ENTER\n7\n1"]

4 Select the preset number you want to store into.

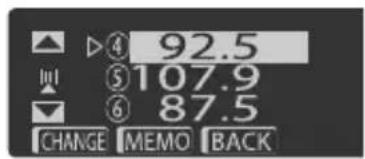
- You can move to the lists of the other FM bands by pressing number button 5 (←) or 6 (.) repeatedly.
5 Store the station.

■ Listening to the preset station on the Preset Station List
1 Display the Preset Station List, then select the preset station you want to listen to.
2 Change to the selected station.

The following features are available only for FM RDS stations.
Searching for FM RDS programme — PTY Search
You can search for your favorite programmes being broadcast by selecting the PTY code for your favorite programmes.
- When appears on the display, you can move back to the previous display by pressing number button 3.
- When / appears on the display, you can move to the other lists by pressing number button 5 or 6 repeatedly.
1 T/P [Hold]
2 Select "Search."

The three preset PTY codes appears on the display.
3 Select a PTY code.
You can select a PTY code from the 29 preset PTY codes or from the six stored PTY codes.
• To store your favorite programme types, see the following.
4 Start searching for your favorite programme.
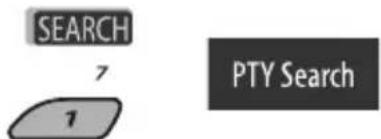
flowchart
graph TD
    A["SEARCH"] --> B["7"]
    B --> C["1"]
    D["PTY Search"]
If there is a station broadcasting a programme of the same PTY code as you have selected, that station is tuned in.
Storing your favorite programme types
You can store six favorite programme types.
- When appears on the display, you can move back to the previous display by pressing number button 3.
1 T/P [Hold]
2 Select "Memory."

3 Select a preset number ("Preset1" - "Preset6") you want to store into.
![SOURCE [Turn]](/content/2026/05/1046316/images/1de8777da5448bef80529a8d4c06279fe58aaa9d78fcde3a6561ff098679e101.jpg)
4 Select one of the PTY codes.

5 Store the selected PTY code.
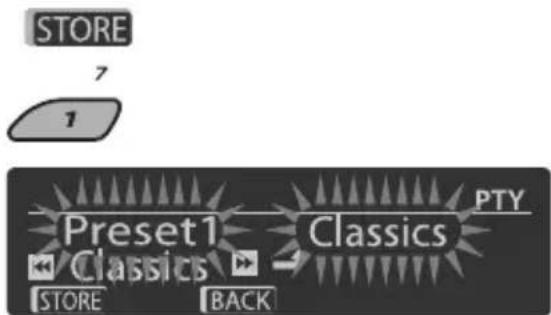
Ex.: When "Classics" is selected in step 5
6 Repeat steps 3 to 5 to store other PTY codes into other preset numbers.
7 Exit from the setting.

Continued on the next page
Activating TA/PTY Standby Reception
TA Standby Reception
T/P
TP either lights up or flashes on the display.
- If lights up, the unit temporarily will switch to Traffic Announcement (TA), if available, from any source other than AM.
The volume changes to the preset TA volume level if the current level is lower than the preset level (see page 27).
- If flashes, TA Standby reception is not yet activated. Tune in to another station providing the RDS signals.
To deactivate TA Standby Reception, press T/P again. Tgoes off.
PTY Standby Reception
1

2
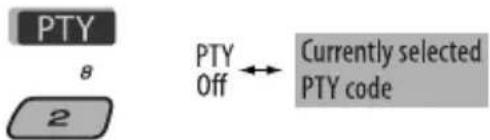
3 Select a PTY code.
![SOURCE [Turn]](/content/2026/05/1046316/images/530431c1626f20a69f3daa0c5a735bf58624713474a46a717c38927086aa3bf5.jpg)
4 Exit from the setting.

either lights up or flashes on the display.
- If lights up, the unit temporarily will switch to your favorite PTY programme from any source other than AM.
- If flashes, PTY Standby reception is not yet activated. Tune in to another station (or service) providing the RDS signals.
To deactivate PTY Standby Reception, select "Off" in step 2. PTY goes off.
- The unit will not switch to Traffic Announcement or PTY programme when a call connection is established through "BT-PHONE."
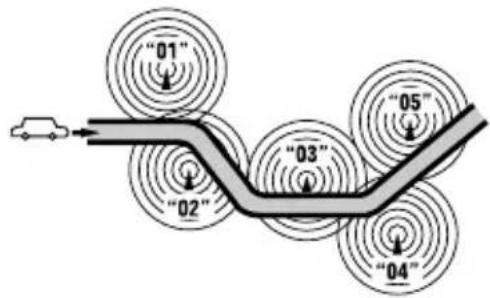
Tracing the same programme—Network-Tracking Reception
When driving in an area where FM reception is not sufficient enough, this unit automatically tunes in to another FM RDS station of the same network, possibly broadcasting the same programme with stronger signals (see the illustration below).
Programme A broadcasting on different frequency areas (01 – 05)
flowchart
graph TD
    A["Car"] --> B["Sensor Input 01"]
    A --> C["Sensor Input 02"]
    A --> D["Sensor Input 03"]
    A --> E["Sensor Input 04"]
    A --> F["Sensor Input 05"]
    style A fill:#f9f,stroke:#333
    style B fill:#ccc,stroke:#333
    style C fill:#ccc,stroke:#333
    style D fill:#ccc,stroke:#333
    style E fill:#ccc,stroke:#333
    style F fill:#ccc,stroke:#333
When shipped from the factory, Network-Tracking Reception is activated.
To change the Network-Tracking Reception setting, see "AF-Regn'l" on page 27.
Automatic station selection—Programme Search
Usually when you press the number buttons, the preset station is tuned in.
If the signals from the FM RDS preset station are not sufficient for good reception, this unit, using the AF data, tunes in to another frequency broadcasting the same programme as the original preset station is broadcasting.
- The unit takes some time to tune in to another station using programme search.
• See also page 27.
Disc operations
All tracks will be played repeatedly until you change the source or eject the disc.
Caution:
Make sure to detach the USB device before opening the control panel, as it might block the opening mechanism.
• To detach the USB device, see page 13.

To stop play and eject the disc
- Press SOURCE to listen to another playback source.
Prohibiting disc ejection
![SOURCE + [Hold] - O/I/ATT](/content/2026/05/1046316/images/2d896ac88895aa3d47c474cca056236bfe3cb55c4e8ef8cf16e471ff9c6e3e50.jpg)
To cancel the prohibition, repeat the same procedure.
Pressing (or holding) the following buttons allows you to...


(Number buttons) *2
*1 By holding either one of the buttons, you can display the Folder List (see page 12).
*2 Press to select number 1 to 6; hold to select number 7 to 12.
*3 It is required that folders be assigned with 2-digit numbers at the beginning of their folder names—01, 02, 03, and so on.
After pressing M MODE, press the following buttons to...


- You can also cancel the playback mode by selecting "Off" or press number button 4 (OFF).
Selecting a folder/track on the list (only for MP3/WMA file)
- When B show on the display, you can move back to the previous screen by pressing number button 3.
1

2 Select "LIST."

3 Select the list type.

flowchart
graph LR
    A["SOURCE"] --> B["[Turn"]]
    B --> C["Folder ← File"]
    C --> D["ENTER"]
    D --> E["7/1"]
4 Select an item.
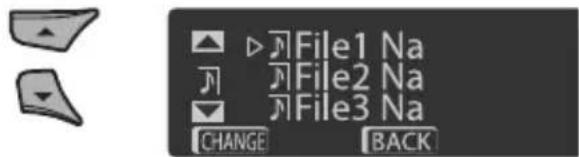
Ex.: When "File" is selected in step 3
• You can move to the other lists by pressing
number button 5 ( ) or 6 ( ) repeatedly.
5 Change to the selected item.
Ⓐ If File List is selected
The list disappears and playback starts.
⑧ If Folder List is selected

- If the current folder is selected, File List appears, then repeat steps 4 and 5 Ⓐ to start playback.
- If another folder is selected, playback starts from the 1st file of the selected folder.
Listening to the USB device
You can connect a USB mass storage class device such as a USB memory, Digital Audio Player*, portable HDD, etc. to the unit.
- You can also connect an Apple iPod to the USB input jack. For details of the operations, see pages 20 and 21.
This unit can play MP3/WMA/WMA-DRM10*/WAV tracks stored in a USB device.
* You can connect both MTP (Media Transfer Protocol) devices and USB mass storage class devices. See also page 33.
All tracks will be played repeatedly until you change the source or detach the USB device.
1

natural_image
Line drawing of a hand inserting a device into a panel, with an arrow indicating the action (no text or symbols present)2

If a USB device has been attached...
SOURCE
Playback starts from where it has been stopped previously.
USB device is
currently attached, playback starts from the beginning.
To stop play and detach the USB device
Straightly pull it out from the unit.
- Press SOURCE to listen to another playback source.
You can operate the USB device in the same way you operate the files on a disc. (See pages 11 and 12.)
- You can listen to WAV files by following the MP3/WMA files operations listed on pages 11 and 12.
Cautions:
- Avoid using the USB device if it might hinder your safety driving.
- Do not pull out and attach the USB device repeatedly while "Reading" is shown on the display.
- Do not start the car engine if a USB device is connected.
- This unit may not be able to play the files depending on the type of USB device.
• Operation and power supply may not work as intended for some USB devices. - You cannot connect a computer to the USB input terminal of the unit.
- Make sure all important data has been backed up to avoid losing the data.
- Do not leave a USB device in the car, expose to direct sunlight, or high temperature to avoid deformation or cause damages to the device.
- Some USB devices may not work immediately after you turn on the power.
- For more details about USB operations, see page 33.
Using the Bluetooth ^® devices
For Bluetooth operations, it is required to connect the Bluetooth Adapter (KS-BTA200) to the CD changer jack on the rear of this unit.
• Refer also to the instructions supplied with the Bluetooth adapter and the Bluetooth device.
- Refer to the list (included in the box) to check the countries where you may use the Bluetooth® function.
To use a Bluetooth device through the unit ("BT-PHONE" and "BT-AUDIO") for the first time, you need to establish Bluetooth wireless connection between the unit and the device.
- Once the connection is established, it is registered in the unit even if you reset your unit. Up to five devices can be registered in total.
- Only one device can be connected at a time for each source ("BT-PHONE" and "BT-AUDIO").
Registering a Bluetooth device
Registration (Pairing) methods
Use either of the following items in the Bluetooth menu to register and establish the connection with a device.
- Select "BT-PHONE" or "BT-AUDIO" as the source to operate the Bluetooth menu.
| Open Make the unit ready to establish a new Bluetooth connection.Connection is established by operating the Bluetooth device. |
| Search Make the unit ready to establish a new Bluetooth connection.Connection is established by operating the unit. |
- When BACK is shown on the display, you can move back to the previous screen by pressing number button 3.
Registering using "Open"
Preparation: Operate the device to turn on its Bluetooth function.
1 Select "BT-PHONE" or "BT-AUDIO."
2 Select "NEW."
3 Enter setting menu.

4 Select "Open."


5 Enter a PIN (Personal Identification Number) code to the unit.
- You can enter any number you like (1-digit to 16-digit number). [Initial: 0000]
- To enter a PIN code less than 4-digit, firstly delete the initial PIN code (0000) by pressing number button 5 ( CLEAR
* Some devices have their own PIN code. Enter the specified PIN code to the unit.
1 Move to the next (or previous) number position.

2 Select a number or blank space.
![SOURCE [Turn]](/content/2026/05/1046316/images/f8ad4620128700a5389e6e7086b676640aa33602da22332a1079c09f4e8068b5.jpg)
3 Repeat steps 1 and 2 until you finish entering a PIN code.
4 Confirm the entry.
ENTER
"Open..." flashes on the display.

6 Use the Bluetooth device to search and connect.
On the device to be connected, enter the same PIN code you have just entered for this unit. "Connected (and device name)" appears on the display.
Now connection is established and you can use the device through the unit.
The device remains registered even after you disconnect the device. Use "Connect" (or activate "Auto Connect") to connect the same device from next time on. (See the following and page 30.)
Connecting a device
Perform steps 1 - 3 on page 14, then...
1 • Select "Search" to search for available devices.
The unit searches and displays the list of the available devices.
If no available device is detected, "Device Not Found" appears.
- Select "Special" to connect a special device. The unit displays the list of the preset devices.

2 Select a device you want to connect.

flowchart
graph LR
    A["Two shaded shapes"] --> B["→"]
    C["ENTER"] --> D["7"]
    E["1"]
3 · For available devices...
1 Enter the specific PIN code of the device to the unit.
Refer to the instructions supplied with the device to check the PIN code.
2 Use the Bluetooth device to connect.
Now connection is established and you can use the device through the unit.
- For special device...
Use "Open" or "Search" to connect.
Connecting/disconnecting/deleting a registered device
1 Select "BT-PHONE" or "BT-AUDIO."

2 Select a registered device you want to connect/disconnect/delete.

3 Enter setting menu.

4 · Select "Connect" or "Disconnect" to connect/disconnect the selected device.
Continued on the next page
- Select "Delete," then confirm the selection.

flowchart
graph LR
    A["User Interface"] --> B["ENTER 7"]
    B --> C["1"]
    C --> D["Delete Ok? Yes: P1 No: P3"]
    D --> E["ENTER 7"]
    E --> F["1"]
Press number button 3 to select "No" or return to the previous screen.
You can set the unit to connect the Bluetooth device automatically when the unit is turned on. (See "Auto Connect" on page 30.)
Using the Bluetooth cellular phone
| 1 |  | Select “BT-PHONE.” |
| 2 |  | Enter Bluetooth menu. |
| 3 | — | Establish the connection with a device, then make a call (or settings using the Bluetooth menu). |
When a call comes in....
The source is automatically changed to "BT-PHONE."
When "Auto Answer" is activated....
The unit answers the incoming calls automatically, see page 30.
- When "Auto Answer" is deactivated, press any button (except control dial) to answer the incoming call.
To end the call
Hold any button (except control dial).
- You can adjust the microphone volume level (see page 30).
When an SMS comes in....
If the cellular phone is compatible with SMS (Short Message Service) and "Message Info" is set to "Auto" (see page 30), the unit rings and "Received Message" appears on the display to inform you of the message arrival.
Making a call
You can make a call using one of the Dial Menu items.
- When is shown on the display, you can move back to the previous screen by pressing number button 3.
1 Select "BT-PHONE."
2 Enter setting menu.

3 Select "Dial Menu."

4 Select the method to make a call.
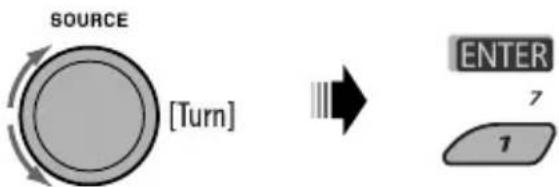
flowchart
graph LR
    A["SOURCE"] --> B["Turn"]
    B --> C["ENTER"]
    C --> D["7"]
    C --> E["1"]
- Redial*: Shows the list of the phone numbers you have dialed. Go to the following step.
- Received*: Shows the list of the received calls. Go to the following step.
- Phonebook*: Shows the phone book of the connected cellular phone. Go to the following step.
- Missed*: Shows the list of the missed calls. Go to the following step.
Number: Shows the phone number entry screen. See "How to enter phone number" on the right column.
• Voice Dial (Only accessible when the connected cellular phone has the voice recognition system): Speak the name (registered words) you want to call.
* Displayed only when your cellular phone is equipped with these functions.
- If not displayed, try to transfer the phone book memory of the cellular phone to this unit. (Refer to the instruction manual supplied with your cellular phone.)
- With some cellular phones, the phone book memory is transferred automatically.
5 Select the name/phone number you want to call.
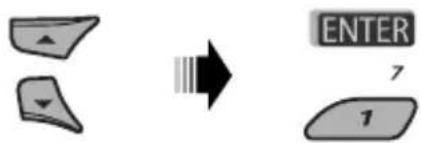
flowchart
graph LR
    A["▲"] --> C["→"]
    B["▼"] --> C["→"]
    C --> D["ENTER"]
    D --> E["7"]
    D --> F["1"]
How to enter phone number
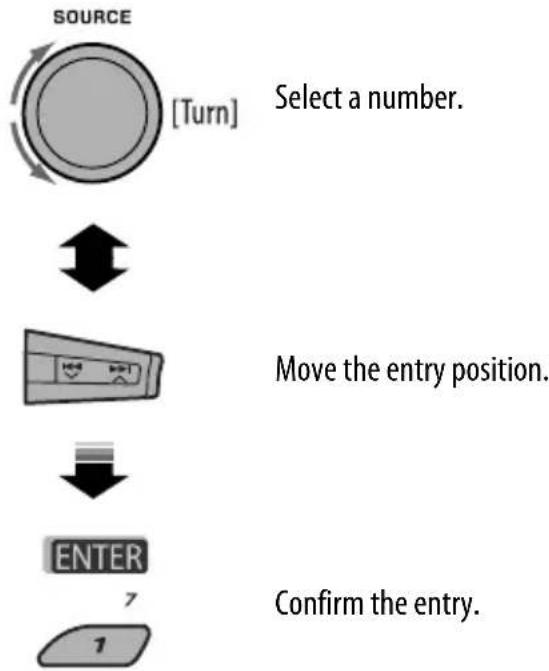
flowchart
graph TD
    A["SOURCE [Turn"]] --> B["Select a number."]
    B --> C["Move the entry position."]
    C --> D["ENTER 7"]
    D --> E["Confirm the entry."]
Continued on the next page
Using voice command
1 "Say..." appears on the display.

2 Speak the name (registered words) you want to call.
- You can also use voice command from the Dial Menu. Select "Voice Dial" from the Dial Menu.
- If your cellular phone does not support the voice recognition system, "Error" appears on the display.
| Presetting the phone number
You can preset up to six phone numbers.
- When Show on the display, you can move back to the previous screen by pressing number button 3.
1 Display the phone number you want to preset by using one of the "Dial Menu" items.
2 Select a phone number.

You can also enter a new phone number (see also "How to enter phone number" on page 17) to store.
3 Select a preset number to store.
![7 8 9 10 11 12 1 2 3 4 5 6 [Hold]](/content/2026/05/1046316/images/4bd8293b03a4a7e351c742bd1e6740c48fcc4680820e2ed4a350dfadebc13729.jpg)
To call a preset number
While in Bluetooth phone....

Using the Bluetooth audio player
- Operations and display indications differ depending on their availability on the connected audio player.
| SOURCE | Select “BT-AUDIO.”If playback does not start automatically, operate the Bluetooth audio player to start playback. |
 | Reverse skip/forward skip |
 | Start/pause playback |
 | Enter setting menu (Device list) |
• Refer also to pages 15 and 16 for connecting/disconnecting/deleting a registered device.
Bluetooth Information:
If you wish to receive more information about Bluetooth, visit the following JVC web site: http://www.jvc-victor.co.jp/english/car/.
Listening to the CD changer
It is recommended to use a JVC MP3-compatible CD changer with your unit. You can connect a CD changer to the CD changer jack on the rear of the unit.
- You can only play conventional CDs (including CD Text) and MP3 discs.
Preparation: Make sure "Changer" is selected for the external input setting, see page 27.
| 1 | SOURCE | Select “CD-CH.” |
| 2 |  | Select a disc to start playing.[Press] For selecting disc number 1 – 6.[Hold] For selecting disc number 7 – 12. |


* By holding either one of the buttons, you can display the Disc List (see page 12).
To select a disc/folder/track on the list
See "Selecting a folder/track on the list (only for MP3/WMA file)" on page 12.
Select "Disc" in step 3 to display the Disc List of the CD changer.
After pressing M MODE, press the following buttons to...
 | Skip 10 tracksMP3: Within the same folder |
 | Repeat Track:Repeat current trackRepeat Folder:MP3: Repeat all tracks of current folderRepeat Disc:Repeat all tracks of the current disc |
 | Random Folder:MP3: Randomly play all tracks of the current folder, then tracks of the next folderRandom Disc:Randomly play all tracks of current discRandom All:Randomly play all tracks of the discs in the magazine |
- You can also cancel the playback mode by selecting "Off" or press number button 4 (OFF).
Listening to the iPod
You can play songs in an Apple iPod by:
- Connecting it with the USB cable supplied with your iPod to the USB input jack on the control panel.
- Connecting the Interface adapter for iPod, KS-PD100 (separately purchased) to the CD changer jack on the rear of the unit.
Preparation: Make sure "Changer" is selected for the external input setting, see page 27.
- You can control playback from the unit.
- Disconnecting the iPod will stop playback. Press SOURCE to listen to another playback source.
- For details, refer also to the manual supplied for your iPod.
Caution:
- Avoid using the iPod if it might hinder your safety while driving.
- Make sure all important data has been backed up to avoid losing the data.
| 1 | — | Connect an iPod to the USB input jack or through KS-PD100.Playback starts automatically from where it had been paused previously.If an iPod has been connected, press SOURCE to select “USB-iPod” or “iPod” as the playback source. |
| 2 |  | Select a track. |
| 3 | — | Adjust the volume and sound as you want. (See pages 23 and 24.) |
Playback control from the unit
| Button For iPod connected through KS-PD100 For iPod connected to the USB input jack | ||
 | [Press] Go to the next or previous track [Hold] Fast-forward or reverse the track during playback | [Press] Go to the next or previous track [Hold] Fast-forward or reverse the track during playback |
  | [Press] Enter main menu when you press ▲. Pause/resume playback when ▼ is pressed. | [Hold] Enter main menu [Press] Go to the top menu of “Playlists,” “Artists,” “Albums,” “Songs,” “Podcasts,” “Genres,” “Composers,” or “Audiobooks” in the main menu.• Pressing the number buttons (1 – 6) or holding 1 (7) and 2 (8) can also select the preset top menus |
 | — [Press] Pause/resume playback. | |
Selecting a track from the menu
| No. | Operation For iPod connected through KS-PD100 | For iPod connected to the USB input jack |
| 1 | Enter the main menu. |   [Hold] [Hold]  |
| 2 | Select the desired menu. |  Playlists ↔ Artists ↔ Albums ↔ Songs ↔ Genres ↔ Composers Playlists ↔ Artists ↔ Albums ↔ Songs ↔ Genres ↔ Composers   Playlists ↔ Artists ↔ Albums ↔ Songs ↔ Podcasts ↔ Genres ↔ Composers ↔ Audiobooks Playlists ↔ Artists ↔ Albums ↔ Songs ↔ Podcasts ↔ Genres ↔ Composers ↔ Audiobooks |
| 3 | Confirm the selection. |  By holding ↓↓↓ ↓↓↓ ↓, you can fast skip during song search in the main menu. By holding ↓↓↓ ↓↓↓ ↓, you can fast skip during song search in the main menu.  By holding ▶▶↓ ↓, you can start play back the selected item directly. By holding ↓↓↓ ↓, you can go back to the previous menu. By holding ▲/▼, you can fast skip in every layer of the main menu. By holding ▶▶↓ ↓, you can start play back the selected item directly. By holding ↓↓↓ ↓, you can go back to the previous menu. By holding ▲/▼, you can fast skip in every layer of the main menu. |
| · If a track is selected, playback starts automatically. · If the selected item has another layer, you will enter the layer. Repeat steps 2 and 3 until the desired track is played. |
After pressing M MODE, press the following buttons to...
| Repeat One:Same as “Repeat One.”Repeat All:Same as “Repeat All.”Repeat Off: Cancels. | |
| Random Album *:Same as “Shuffle Albums.”Random Song:Same as “Shuffle Songs.”Random Off: Cancels. |
* Functions only if you select "All Albums" or "All" in "Albums" of the main "MENU."
The menu selecting mode will be canceled:
• If no operations are performed for about:
- 5 seconds for iPod connected through KS-PD100.
- 15 seconds for iPod connected to the USB input jack.
- When you confirm the selection of a track.
Listening to the other external components
You can connect an external component to:
- CD changer jack on the rear of this unit using the following adapters:
— Line Input Adapter, KS-U57
— AUX Input Adapter, KS-U58
Preparation: Make sure "Ext Input" is selected for the external input setting, see page 27.
- AUX (auxiliary) input jack on the control panel.
| 1 | SOURCE | Select “EXT IN” or “AUX IN.” |
| 2 | — | Turn on the connected component and start playing the source. |
| 3 |  | Adjust the volume. |
| 4 | — | Adjust the sound as you want (see pages 23 and 24). |
Connecting an external component to the AUX input jack

Selecting a preset sound mode
You can select a preset sound mode suitable to the music genre (iEQ: intelligent equalizer).
| 1 | SEL | Enter setting menu. |
| 2 |  | Select “EQ.” |
| 3 |  | Select a sound mode.USER, ROCK, CLASSIC, POPS, HIP HOP, JAZZ |
Preset value setting for each sound mode
| Sound mode | Preset value | ||||||||
| Bass Mid (mid-range) Treble | |||||||||
| Freq. Level Q Freq. Level Q | Freq. Level Q | ||||||||
| USER 60 Hz 00 | Q1.25 1.0 kHz 00 Q1.25 10.0 kHz 00 - | ||||||||
| ROCK 100 Hz + | +03 Q1.0 1.0 kHz 00 Q1.25 10.0 kHz +02 - | ||||||||
| CLASSIC 80 Hz | +01 Q1.25 1.0 kHz 00 Q1.25 10.0 kHz +03 - | ||||||||
| POPS 100 Hz + | +02 Q1.25 1.0 kHz +01 Q1.25 10.0 kHz +02 - | ||||||||
| HIP HOP | 60 Hz | +04 | Q1.0 | 1.0 kHz | -02 | Q1.0 | 10.0 kHz | +01 | - |
| JAZZ | 80 Hz | +03 Q1.25 | 1.0 kHz 00 Q1.25 10.0 kHz +03 - | ||||||
Freq.: Frequency Q: Q-slope
Adjusting the sound
You can adjust the sound characteristics to your preference.
- When BACK is shown on the display, you can move back to the previous screen by pressing number button 3 or 6.


flowchart
graph LR
    A["Device Icon"] --> B["EQ"]
    B --> C["Fad/Bal"]
    C --> D["Subwoofer*"]
    D --> E["Loudness"]
    E --> F["VolAdjust"]
- For "EQ" setting, see above.
* Displayed only when "L/O Mode" is set to "Woofer" (see page 27).
3 Adjust the selected setting item.
A Fad/Bal (Fader/Balance)
1 Press number button 1 (SELECT) to move to the "Fad/Bal" adjustment display.
2 Adjust the speaker output balance by pressing:
▲ / ▼: between the front and rear speakers. [F6 to R6]
|◀◀ ▼/▶▶| ∧: between the left and right speakers. [L6 to R6]
Continued on the next page
B Subwoofer
1 Press number button 1 ( ) to SELECT move to the "Subwoofer" adjustment display.
2 Use |◀◀∨/▶▶|∧ to select a cutoff frequency to the subwoofer.
• OFF: All signals are sent to the subwoofer.
- 80Hz: Frequencies higher than 80 Hz are cut off.
- 120Hz: Frequencies higher than 120 Hz are cut off.
- 160Hz: Frequencies higher than 160 Hz are cut off.
3 Turn the control dial to adjust the subwoofer output level. [0 to 8]
4 Press number button 1 ( ) MORE to select the subwoofer phase. [0deg (normal) or 180deg (reverse)]
© VolAdjust, [-5 to +5]
Turn the control dial to adjust the input level of each source (except FM).
Adjust to match the input level of the FM sound level.
- Before making an adjustment, select the source you want to adjust.
(D) Loudness, [Off or On] Turn the control dial to select "Off" or "On." When "On" is selected, low and high frequencies sound are boosted to produce a well-balanced sound at low volume level.
4 Exit from the setting.

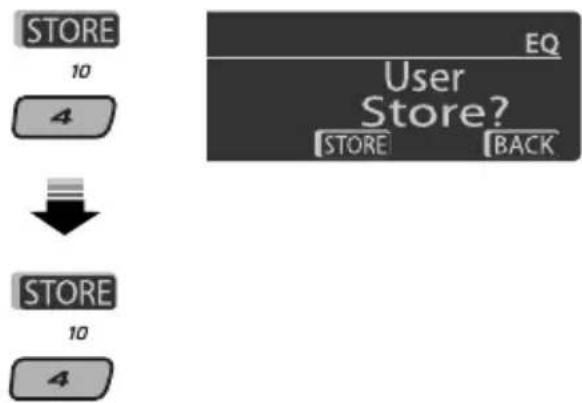
Storing your own sound modes
You can adjust the sound modes and store your own adjustments in memory.
- When Bshok on the display, you can move back to the previous screen by pressing number button 6.
1

2 Select a sound mode.

3 Select a frequency range.

4 Adjust the sound elements of the selected frequency range.
1 Use ▲ / ▼ to adjust the level.
2 Press number button 5 ( ), then turn the control dial to select the frequency.
3 Press number button 5 ( ), then turn the control dial to select the quality slope (Q).
| Sound elements | Range/selectable items | ||
| Low Mid High | |||
| Frequency 60 Hz | 500 Hz | 10 kHz | |
| 80 Hz | 1 kHz | 12.5 kHz | |
| 100 Hz | 1.5 kHz | 15 kHz | |
| 200 Hz | 2.5 kHz | 17.5 kHz | |
| Level | -6 to +6 | -6 to +6 | -6 to +6 |
| Q (Q-slope) | Q1.0 | Q0.5 | Fix |
| Q1.25 | Q0.75 | ||
| Q1.5 | Q1.0 | ||
| Q2.0 | Q1.25 | ||
5 Repeat steps 3 and 4 to adjust the other frequency bands.
6 Store the adjustments.
General settings — PSM
You can change PSM (Preferred Setting Mode) items listed in the table below and on pages 26 – 28.
1 Enter the PSM settings.
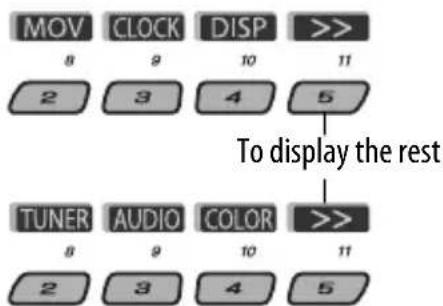
2 Select a PSM category.
flowchart
graph TD
    A["MOV 8"] --> B["CLOCK 9"]
    B --> C["DISP 10"]
    C --> D[">> 11"]
    E["2"] --> F["3"]
    G["4"] --> H["5"]
    I["To display the rest"] --> J["TUNER 8"]
    K["AUDIO 9"] --> L["COLOR 10"]
    M["2"] --> N["3"]
    O["4"] --> P["5"]
    Q["11"] --> R[">>"]
3 Select a PSM item.

By pressing either one of the buttons repeatedly, you can also move to the item of the other categories.
4 Adjust the selected PSM item.
![SOURCE [Turn]](/content/2026/05/1046316/images/5e65fe239f2d9f80715ee0b44d48dc6f3eb14b6998e9dd25bbae10cc3debfc0e.jpg)
5 Repeat steps 2 – 4 to adjust other PSM items if necessary.
6 Finish the procedure.

| Category | Indication Item | ( _ : Initial) | Setting, [reference page] |
| MOV (movie) | DemoDisplaydemonstration | • On• Off | : Display demonstration will be activated automatically if no operation is done for about 20 seconds, [4].: Cancels. |
| LevelMeterAudio level meter | • Meter 1• Meter 2 | : Select the different level meter patterns.• Press DISP to show the selected level meter. | |
| CLOCK | Clock Disp*1Clock display | • On• Off | : Clock time is shown on the display when the power is turned off.: Cancels; pressing DISP will show the clock time for about 5 seconds when the power is turned off, [4]. |
*1 If the power supply is not interrupted by turning off the ignition key of your car, it is recommended to select "Off" to save the car's battery.
Continued on the next page
| Category | Indication Item | (__: Initial) | Setting, [reference page] |
| CLOCK | Clock HrHour adjustment | 0 – 23(1 – 12AM/1 – 12PM) | : Initial: 0 (0:00AM), [4]. |
| Clock MinMinute adjustment | 00 – 59 : Initial: 00 (0:00AM), [4]. | ||
| 24H/12HTime display mode | • 12Hours• 24Hours | : See also page 4 for setting. | |
| Clock AdjClock adjustment | • Auto• Off | : The built-in clock is automatically adjusted using the CT (clock time) data in the RDS signal.: Cancels. | |
| DISP (display) | Scroll *2Scroll | • Once• Auto• Off | : Scrolls the track information once.: Repeats scrolling (at 5-second intervals).: Cancels. (Holding DISP can scroll the display regardless of the setting.) |
| DimmerDimmerFrom – To *3 | • Auto• Off• On• Time Set— | : Dims the display when you turn on the headlights.: Cancels.: Dims the display and button illumination.: Set the timer for dimmer, [28].Any hour – Any hour: Initial: 18 – 7. | |
| ContrastContrast | 1 – 8Initial: 5 | : Adjust the display contrast to make the display indications clear and legible. | |
| LCD TypeDisplay type | • Auto• Positive• Negative | : Positive pattern will be selected during the day time * 4; while negative pattern will be used during the night time *4.: Positive pattern of the display.: Negative pattern of the display. | |
| TagTag display | • On• Off | : Shows the tag while playing MP3/WMA/WAV tracks.: Cancels. | |
*2 Some characters or symbols will not be shown correctly (or will be blanked) on the display.
^*3 Adjustable only when “Dimmer” is set to “Time Set.”
*4 Depends on the "Dimmer" setting.
| Category | Indication Item | (_: Initial) | Setting, [reference page] |
| TUNER | AF-Regn'lAlternative frequency/regionalization reception | · AF· AF REG· Off | : When the currently received signals become weak, the unit switches to another station or service (the programme may differ from the one currently received), [10].: When the currently received signals become weak, the unit switches to another station broadcasting the same programme. : Cancels. |
| TA VolumeTrafficannouncement volume | · Volume 0 –Volume 30· Volume 0 –Volume 50 *5 | : Initial: Volume 15 | |
| P-SearchProgramme search | · On· Off | : Activates Programme Search, [10].: Cancels. | |
| IF BandIntermediate frequency band | · Auto· Wide | : Increases the tuner selectivity to reduce interference noises between adjacent stations. (Stereo effect may be lost.): Subject to interference noises from adjacent stations, but sound quality will not be degraded and the stereo effect will remain. | |
| AUDIO | Ext Input *External input | · Changer· Ext In | : To use a JVC CD changer, [19], or an Apple iPod, [20].: To use any other external component, [22]. |
| TelephoneTelephone muting | · Muting1/Muting2· Off | : Select either one which mutes the sounds while using a cellular phone.: Cancels.: Playback pauses/mutes while telephone muting is working. | |
| AudioBooks *Speed control of “Audiobook” | · Normal· Faster· Slower | : You can select the playback speed of the “Audiobook” sound file in your iPod.· Initial selected item depends on your iPod setting. | |
| L/O ModeLine output mode | · Rear· Woofer | : Select if the REAR LINE OUT terminals are used for connecting the rear speakers (through an external amplifier).: Select if the REAR LINE OUT terminals are used for connecting a subwoofer (through an external amplifier). | |
| Amp GainAmplifier gain control | · High PWR· Low PWR | : Volume 00 – Volume 50: Volume 00 – Volume 30 (Select if the maximum power of each speaker is less than 50 W to prevent damaging the speaker.) |
*5 Depends on the amplifier gain control.
*6 Displayed only when one of the following sources is selected—TUNER, CD, USB, or Bluetooth.
*7 Displayed only when an iPod is connected to the USB input jack and playback is controlled from the unit.
Continued on the next page
| Category | Indication Item | ( _ : Initial) | Setting, [reference page] |
| COLOR | Color SelColor selection | Initial: AllSource;Color: Pale | : Select your favorite display color for each source (or for all sources), [28, 29]. |
| Color SetColor settingRedGreenBlue | —Day ColorNightColor00 — 1100 — 1100 — 11 | : Create your own colors, and select them for the display color, [29].: User color during the day time *8. : User color during the night time *8. : Initial: Day Color: 07, NightColor: 05: Initial: Day Color: 07, NightColor: 05: Initial: Day Color: 07, NightColor: 05 | |
| Key IllumIllumination switch | • Red• Green | : You can select the button illumination according to your preference. |
*8 Depends on the "Dimmer" setting.
| Setting the time for dimmer
- When is shown on the display, you can move back to the previous screen by pressing number button 3.
1 Follow steps 1 to 3 on page 25.
- In step 2, select "DISP."
- In step 3, select "Dimmer."
2 Select "Time Set."
![SOURCE [Turn] SET 7 1 From 18 - 7 BACK PSM](/content/2026/05/1046316/images/790cb76d9ecf452474f24c9b063bcdcb05e0b3a1c56e49481c7ad463a30fd890.jpg)
3 Adjust the dimmer start time.
1 Turn the control dial to set the dimmer start time.
2 Press ▶▶▶1 to select "To." Then, turn the control dial to set the dimmer end time.
4 Exit from the setting.

Changing the display color
You can select your favorite display color for each source (or all sources).
- When is shown on the display, you can move back to the previous screen by pressing number button 3 or 6.
Setting the display color
1 Follow steps 1 to 3 on page 25.
- In step 2, select "COLOR."
- In step 3, select "Color Sel."
2


3 Select a source.

All Source * 1 ↔ CD ↔ Changer*3 (or Ext In *2) ↔ USB *3 ↔ FM ↔ AM ↔ iPod *3 ↔ Aux In ↔ BT Phone*3 ↔ BT Audio*3 ↔ (back to the beginning)
* 1 When you select "All Source," you can use the same color for all the sources.
* 2 Depends on the "Ext Input" setting, see page 27.
* 3 Displayed only when the target component is connected.
4 Select a color.
![SOURCE [Turn]](/content/2026/05/1046316/images/b5ea5991b1912788bab205101585af15031d7b7bfcec19ef87189fc8dc0f4ea2.jpg)
Pale ↔ Aqua ↔ Sky ↔ Sea ↔ Leaves ↔ Grass ↔ Apple ↔ Rose ↔ Amber ↔ Honey ↔ Violet ↔ Grape ↔ Every*4 ↔ User *5 ↔ (back to the beginning)
*4 The color changes every 2 seconds.
*5 The user-edited colors—"Day Color" and "NightColor" will be applied (see the right column for details).
5 Repeat steps 3 and 4 to select the color for each source (except when selecting "All Source" in step 3).
6 Exit from the setting.

Creating your own color—User Color
You can create your own colors—"Day Color" or "NightColor."
1 Follow steps 1 to 3 on page 25.
- In step 2, select "COLOR."
- In step 3, select "Color Set."
2 Select "Day Color" or "NightColor."

flowchart
graph LR
    A["SOURCE"] --> B["[Turn"]]
    B --> C["Day Color ←→ NightColor"]
    C --> D["SET"]
    D --> E["7"]
    D --> F["1"]
3 Select a primary color.

4 Adjust the level (00 to 11) of the selected primary color.
5 Repeat steps 3 and 4 to adjust other primary colors.
6 Exit from the setting.

Bluetooth settings
You can change the settings listed on the right column according to your preference.
- When [SHOW] on the display, you can move back to the previous screen by pressing number button 3.
1 Select "BT-PHONE" or "BT-AUDIO."
2 Enter the Bluetooth menu.

3 Select "Setting."

4 Select a setting item.

flowchart
graph LR
    A["Source [Turn"]] --> B["ENTER 7"]
    B --> C["Auto Connect"]
    C --> D["Version*3"]
    D --> E["MIC Setting*1"]
    E --> F["Message Info*2"]
    F --> G["Auto Answer*1"]
*1 Displayed only when a Bluetooth phone is connected.
*2 Displayed only when a Bluetooth phone is connected and it is compatible with text message.
*3 Bluetooth Audio: Shows only "Version."
5 Change the setting accordingly.

flowchart
graph LR
    A["SOURCE"] --> B["Turn"]
    B --> C["ENTER"]
    C --> D["7"]
    C --> E["1"]
Setting menu ( _ : Initial)
Auto Connect
When the unit is turned on, the connection is established automatically with...
Off: No Bluetooth device.
Last: The last connected Bluetooth device.
Order: The available registered Bluetooth device found at first.
Auto Answer
Only for the device being connected for "BT-PHONE."
On: The unit answers the incoming calls automatically.
Off: The unit does not answer the calls automatically. Answer the calls manually.
Reject: The unit rejects all incoming calls.
Message Info
Only for the device being connected for "BT-PHONE."
Auto: The unit informs you of the arrival of a message by ringing and displaying "Received Message."
Manual: The unit does not inform you of the arrival of a message.
MIC setting (microphone setting)
Only for the device being connected for "BT-PHONE." Adjust the built-in microphone volume, [LEVEL 01/02/03].
Version
The Bluetooth software and hardware versions are shown.
More about this unit
Basic operations
Turning on the power
- By pressing SOURCE on the unit, you can also turn on the power. If the source is ready, playback also starts.
Turning off the power
- If you turn off the power while listening to a track, playback will start from where it had been stopped previously next time you turn on the power.
General
- If you change the source while listening to a disc, playback stops.
Next time you select "CD" as the playback source, playback will start from where it had been stopped previously.
- After ejecting a disc or removing a USB device, "No Disc" or "No USB" appears and you cannot operate some of the buttons. Insert another disc, reattach a USB device, or press SOURCE to select another playback source.
FM/AM/RDS
Storing stations in memory
- During SSM search...
– All previously stored stations are erased and the stations are stored anew.
– Received stations are preset in No. 1 (lowest frequency) to No. 6 (highest frequency).
- When SSM is over, the station stored in No. 1 will be automatically tuned in.
- When storing a station manually, the previously preset station is erased when a new station is stored in the same preset number.
FM RDS operations
- Network-Tracking Reception requires two types of RDS signals—PI (Programme Identification) and AF (Alternative Frequency) to work correctly. Without receiving these data correctly, Network-Tracking Reception will not operate correctly.
- If a Traffic Announcement is received by TA Standby Reception, the volume level automatically changes to the preset level (TA Volume) if the current level is lower than the preset level.
- When Alternative Frequency Reception is activated (with AF selected), Network-Tracking Reception is also activated automatically.
- If you want to know more about RDS, visit http://www.rds.org.uk.
| Disc/USB operations
Caution for DualDisc playback
- The Non-DVD side of a "DualDisc" does not comply with the "Compact Disc Digital Audio" standard. Therefore, the use of Non-DVD side of a DualDisc on this product may not be recommended.
General
- This unit has been designed to reproduce CDs/CD Texts, and CD-Rs (Recordable)/CD-RWs (Rewritable) in audio CD (CD-DA), MP3 and WMA formats.
- When a disc is inserted upside down, "Please Eject" appears on the display. Press OPEN, then ▲ to eject the disc.
- In this manual, words "track" and "file" are interchangeably used.
-
While fast-forwarding or reversing on MP3/WMA/WAV files, you can only hear intermittent sounds.
-
File/folder list may not appear correctly if too many hierarchies and folders are used.
- If the ejected disc is not removed within 15 seconds, the disc is automatically inserted again into the loading slot again to protect it from dust. Playback starts automatically.
Playing a CD-R or CD-RW
- Use only "finalized" CD-Rs or CD-RWs.
- This unit can only play back files of the same type as those which are detected first if a disc includes both audio CD (CD-DA) files and MP3/WMA files.
- This unit can play back multi-session discs; however, unclosed sessions will be skipped while playing.
- Some CD-Rs or CD-RWs may not play back on this unit because of their disc characteristics, or for the following reasons:
– Discs are dirty or scratched.
- Moisture condensation has occurred on the lens inside the unit.
- The pickup lens inside the unit is dirty.
- The files on the CD-R/CD-RW are written using the "Packet Write" method.
– There are improper recording conditions (missing data, etc.) or media conditions (stained, scratched, warped, etc.).
- CD-RWs may require a longer readout time since the reflectance of CD-RWs is lower than that of regular CDs.
- Do not use the following CD-Rs or CD-RWs:
– Discs with stickers, labels, or a protective seal stuck to the surface.
– Discs on which labels can be directly printed by an ink jet printer.
Using these discs under high temperature or high humidity may cause malfunctions or damage to the unit.
Playing an MP3/WMA disc
- This unit can play back MP3/WMA files with the extension code <.mp3> or <.wma> (regardless of the letter case—upper/lower).
-
This unit can show the names of albums, artists (performer), and Tag (Version 1.0, 1.1, 2.2, 2.3, or 2.4) for MP3 files and for WMA files.
-
This unit can display only one-byte characters. No other characters can be correctly displayed.
- This unit can play back MP3/WMA files meeting the conditions below:
MP3:
- Bit rate: 8 kbps — 320 kbps
- Sampling frequency: 48 kHz, 44.1 kHz, 32 kHz, 24 kHz, 22.05 kHz, 16 kHz, 12 kHz, 11.025 kHz, 8 kHz
WMA:
- Bit rate: 32 kbps — 192 kbps
– Sampling frequency: 48 kHz, 44.1 kHz, 32 kHz
– Disc format: ISO 9660 Level 1/Level 2, Romeo, Joliet, Windows long file name
- The maximum number of characters for file/folder names vary depending on the disc format used (includes 4 extension characters—<.mp3> or <.wma>).
– ISO 9660 Level 1: up to 12 characters
– ISO 9660 Level 2: up to 31 characters
– Romeo *: up to 128 characters
– Joliet*: up to 64 characters
- Windows long file name *: up to 128 characters
* The parenthetic figure is the maximum number of characters for file/folder names in case the total number of files and folders is 271 or more.
- This unit can recognize a total of 512 files, 200 folders, and 8 hierarchical levels.
- This unit can play back files recorded in VBR (variable bit rate).
Files recorded in VBR have a discrepancy in the elapsed time display, and do not show the actual elapsed time. In particular, this difference becomes noticeable after performing the search function.
- This unit cannot play back the following files:
- MP3 files encoded in MP3i and MP3 PRO format.
- MP3 files encoded in an inappropriate format.
- MP3 files encoded with Layer 1/2.
– WMA files encoded in lossless, professional, and voice format.
- WMA files which are not based upon Windows Media ^® Audio.
— WMA files copy-protected with DRM.
– Files which have data such as AIFF, ATRAC3, etc.
- The search function works but search speed is not constant.
Playing MP3/WMA/WAV tracks from a USB device
- Connecting a USB device automatically changes the source to "USB."
- While playing from a USB device, the playback order may differ from the one from other players.
- This unit may be unable to play back some USB devices or some files due to their characteristics or recording conditions.
- Depending on the shape of the USB devices and connection ports, some USB devices may not be attached properly or the connection might be loose.
- When connecting a USB mass storage class device, refer also to its instructions.
- Connect one USB mass storage class device to the unit at a time. Do not use a USB hub.
- You can connect two types of USB device to this unit—MTP device and Mass storage class device. If you connect an MTP device featuring "USB digital media streaming" to this unit, you can play back the WMA-DRM10 (Digital Right Management) files purchased through the music distributing web sites, through this unit.
- This unit is compatible with the USB Full-Speed.
- If the connected USB device does not have the correct files, "No File" appears.
- This unit can show ID3 Tag (Version 1.0, 1.1, 2.2, 2.3, or 2.4) for MP3 and WMA/WAV Tag.
- This unit can play back MP3/WMA/WAV files meeting the conditions below:
MP3:
- Bit rate: 32 kbps — 320 kbps (MPEG-1) 8 kbps — 160 kbps (MPEG-2)
- Sampling frequency: 48 kHz, 44.1 kHz, 32 kHz (for MPEG-1)
24 kHz, 22.05 kHz, 16 kHz (for MPEG-2) WMA:
- Bit rate: 5 kbps — 320 kbps
– Sampling frequency: 8 kHz — 48 kHz - Channel: 1 ch/2 ch
WAV:
— Bit rate: Linear PCM at 705 kbps and 1 411 kbps
– Sampling frequency: 44.1 kHz
- Channel: 1 ch/2 ch
- This unit can play back MP3 files recorded in VBR (variable bit rate).
- The maximum number of characters for folder and file names is 25 characters; 128 characters for MP3/WMA/WAV Tag.
- This unit can recognize a total of 20 000 files and 2 000 folders (999 files per folder). However, the display can shows until 9 999 folders/files.
- The unit cannot recognize a USB mass storage class device whose rating is other than 5 V and exceeds 500 mA.
- USB devices equipped with special functions such as data security functions cannot be used with the unit.
- Do not use a USB device with 2 or more partitions.
- This unit may not recognize a USB device connected through a USB card reader.
- This unit may not play back files in a USB device properly when using a USB extension cord.
- This unit cannot assure proper functions or supply power to all types of USB devices.
Bluetooth operations
General
- While driving, do not perform complicated operation such as dialing the numbers, using phone book, etc. When you perform these operations, stop your car in a safe place.
- Some Bluetooth devices may not be connected to this unit depending on the Bluetooth version of the device.
- This unit may not work for some Bluetooth devices.
- Connecting condition may vary depending on the circumstances around you.
- When the unit is turned off, the device is disconnected.

appears when the connection is established.
| Appears when the Bluetooth phone is connected. | |
| Appears when the Bluetooth audio player is connected. | |
| Appears when the Bluetooth phone and Bluetooth audio player are connected. |
Icons for phone types
These icons indicate the phone type set on the device:

: Cellular phone : Gene


: Household phone

: Other than above

:Office

:Unknown
Warning messages for Bluetooth operations
- Connection Error:
The device is registered but the connection has failed. Use "Connect" to connect the device again. (See page 15.)
- Error
Try the operation again. If "Error" appears again, check if the device supports the function you have tried.
- Device Not Found
No available Bluetooth device is detected by "Search...".
- Loading...
The unit is updating the phone book and/or text messages.
- Please Wait...
The unit is preparing to use the Bluetooth function. If the message does not disappear, turn off and turn on the unit, then connect the device again (or reset the unit).
- Reset 08
Check the connection between the adapter and this unit.

iPod
- Controllable iPod (connected through.....):
(A) KS-PD100:
- iPod with dock connector (3rd Generation)
- iPod with click wheel (4th Generation)
- iPod nano (1st & 2nd * 1 Generation)
- iPod mini (1st Generation)
- iPod video (5th Generation) * 2
- iPod photo
(B) USB input jack:
- iPod nano (1st & 2nd Generation)
- iPod video (5th Generation)
*1 When you connect the iPod nano to the interface adapter, be sure to disconnect the headphones; otherwise, no sound is heard.
*2 It is not possible to browse video files on the "Videos" menu while the iPod is connected to the interface adapter.
- Update your iPod to the latest software version before using it with this unit.
- You can check the software version of your iPod under "About" in the "Setting" menu of the iPod.
- For details about updating your iPod, visit http://www.apple.com.
- While the unit is being turned on, the iPod is charged through this unit.
- While connecting an iPod with Video:
- No video shows on the iPod's display or the external monitor (only the audio part is available).
- It is not possible to browse video files on the "Video" menu. (If you connect the iPod during the playback or pausing of a video file, resuming playback will not work.)
- iPod shuffle and iPhone cannot be used with this unit.
- You can control the iPod from this unit when "JVC" or "√" appears on the iPod display after connection.
- The song order displayed on the selection menu of this unit may differ from that of the iPod.
- If playback is stopped, select a track from the selection menu or press BAND to play back the same track again.
• The text information may not be displayed correctly:
- Some characters such as accented letters cannot be shown correctly on the display.
- Communication between the iPod and the unit is not stable.
- If the text information includes more than 16 characters, it scrolls on the display. This unit can display up to 128 characters.
Notice:
When operating an iPod, some operations may not be performed correctly or as intended. In this case, visit the following JVC web site: http://www.jvc.co.jp/english/car/support/ks-pd100/index.html
General settings—PSM
- "Auto" setting for "Dimmer" may not work correctly on some vehicles, particularly on those having a control dial for dimming.
In this case, change the "Dimmer" setting to any other than "Auto."
- If "LCD Type" is set to "Auto," the display pattern will change to the "Positive" or "Negative" pattern depending on the "Dimmer" setting.
- If you change the "Amp Gain" setting from "High PWR" to "Low PWR" while the volume level is set higher than "Volume 30," the unit automatically changes the volume level to "Volume 30."
Available PTY codes
News, Affairs, Info, Sport, Educate, Drama, Culture, Science, Varied, Pop M (music), Rock M (music), Easy M (music), Light M (music), Classics, Other M (music), Weather, Finance, Children, Social, Religion, Phone In, Travel, Leisure, Jazz, Country, Nation M (music), Oldies, Folk M (music), Document
Troubleshooting
What appears to be trouble is not always serious. Check the following points before calling a service center.
| Symptoms Remedies/Causes | ||
| General | • Sound cannot be heard from the speakers. • Adjust the volume to the optimum level.• Check the cords and connections. | |
| • The unit does not work at all. Reset the unit (see page 3). | ||
| • “Connect Error” appears on the display. Remove the control panel, wipe the connector, then attach it again (see page 38). | ||
| FM/AM | • SSM automatic presetting does not work. Store stations manually. | |
| • Static noise while listening to the radio. Connect the aerial firmly. | ||
| Disc playback | • Disc cannot be played back. Insert the disc correctly. | |
| • CD-R/CD-RW cannot be played back.• Tracks on the CD-R/CD-RW cannot be skipped. | • Insert a finalized CD-R/CD-RW.• Finalize the CD-R/CD-RW with the component which you used for recording. | |
| • Disc can neither be played back nor ejected. • Unlock the disc (see page 11).• Eject the disc forcibly (see page 3). | ||
Continued on the next page
Symptoms Remedies/Causes
| Disc playback | ·Disc sound is sometimes interrupted. ·Stop playback while driving on rough roads. ·Change the disc. ·Check the cords and connections. |
| ·Disc cannot be recognized ("No Disc," "CD Loading Error," or "Eject Error" flashes). Eject the disc forcibly (see page 3). | |
| ·"Please Eject" appears on the display. This occurs sometimes due to over-heating. Eject the disc or change to another playback source. | |
| MP3/WMA playback | ·Disc cannot be played back. ·Use a disc with MP3/WMA tracks recorded in a format compliant with ISO 9660 Level 1, Level 2, Romeo, or Joliet. ·Add the extension code <.mp3> or <.wma> to the file names. |
| ·Noise is generated. Skip to another track or change the disc. (Do not add the extension code <.mp3> or <.wma> to non-MP3 or WMA tracks.) | |
| ·A longer readout time is required ("Reading" keeps flashing on the display). Do not use too many hierarchical levels and folders. | |
| ·Tracks do not play back in the order you have intended them to play. The playback order is determined when the files are recorded. | |
| ·The elapsed playing time is not correct. This sometimes occurs during playback. This is caused by how the tracks are recorded on the disc (eg. variable bit rate). | |
| ·"Please Eject" appears on the display. Insert a disc that contains MP3/WMA tracks. | |
| ·"Not Support" appears on the display and track skips. Skip to the next track encoded in an appropriate format or to the next non-copy-protected WMA track. | |
| ·Correct characters are not displayed (e.g. album name). This unit can display Roman alphabets, Cyrillic alphabets, numbers and symbols (see page 2). | |
| USB device | ·Noise is generated. ·The track played back is not a playable file format (MP3/WMA/WAV). Skip to another file. ·Do not add the extension code <.mp3>, <.wma>, or <.wav> to non-MP3/WMA/WAV tracks. |
| ·Tracks cannot play back as you have intended them to play. Playback order may differs from the one played back using other players. | |
| ·"Reading" keeps flashing on the display. ·Readout time varies depending on the USB device. ·Do not use too many hierarchy, folders and empty folders.* ·Turn off the power then on again. ·Do not pull out or connect the USB device repeatedly while "Reading" is displayed on the display. * Folder that is physically empty or folder that contains data but does not contain valid MP3/WMA/WAV track. |
| Symptoms Remedies/Causes | ||
| USB device | “No File” flashes on the display. “No USB” appears on the display. | Connect a USB device that contains tracks encoded in an appropriate format. |
| “Not Support” appears on the display and track skips. | The track is unplayable. | |
| “Read failed” appears on the display. The connected USB device may be malfunctioning, or may not have been formatted correctly. The files included in the USB device are corrupted. | ||
| Correct characters are not displayed (e.g. album name). | For available characters, see page 2. | |
| While playing a track, sound is sometimes interrupted. | The tracks have not been properly copied into the USB device. Copy tracks again into the USB device, and try again. | |
| The sound is interrupted or skipped during playback of a USB device. | Turn off, then turn on the unit. Connect the device again, when the sound is not yet restored. | |
| Bluetooth® | Bluetooth device does not detect the unit. The unit can be connected with one Bluetooth cellular phone and one Bluetooth audio device at a time. While connecting a device, this unit cannot be detected from another device. Disconnect currently connected device and search again. | |
| The unit does not detect the Bluetooth device. | Check the Bluetooth setting of the device. Search from the Bluetooth device. After the device detects the unit, select “Open...” on the unit to connect the device. (See page 14.) | |
| The unit does not make pairing with the Bluetooth device. | Enter the same PIN code for both the unit and target device. Select the device name from “Special,” then try to connect again. (See page 15.) | |
| Phone sound quality is poor. Reduce the distance between the unit and the Bluetooth cellular phone. Move the car to a place where you can get a better signal reception. | ||
| The sound is interrupted or skipped during playback of a Bluetooth audio player. | Reduce the distance between the unit and the Bluetooth audio player. Disconnect the device connected for “BT-PHONE.” Turn off, then turn on the unit. Connect the player again, when the sound is not yet restored. | |
| The connected audio player cannot be controlled. | Check whether the connected audio player supports AVRCP (Audio Video Remote Control Profile). (Operations depend on the connected audio player.) | |
Continued on the next page
| Symptoms Remedies/Causes | ||
| CD changer | “No Disc” appears on the display. Insert a disc into the magazine. | |
| “No Magazine” appears on the display. Insert the magazine. | ||
| “Reset 08” appears on the display. Connect this unit and the CD changer correctly and press the reset button of the CD changer. | ||
| “Reset 01” – “Reset 07” appears on the display. | Press the reset button of the CD changer. | |
| The CD changer does not work at all. Reset the unit (see page 3). | ||
| iPod | The iPod does not turn on or does not work. Check the connecting cable and its connection.Update the firmware version.Charge the battery. | |
| The sound is distorted. Deactivate the equalizer either on this unit or the iPod. | ||
| “Disconnect” appears on the display. Check the connecting cable and its connection.Charge the battery. | ||
| Playback stops. The headphones are disconnected during playback.Restart the playback operation (see page 20). | ||
| No sound can be heard when connecting an iPod nano. | Disconnect the headphones from the iPod nano.Update the firmware version of the iPod nano. | |
| “No File” appears on the display. No tracks are stored. Import tracks to the iPod. | ||
| “Reset 01” – “Reset 07” appears on the display. | Disconnect the adapter from both this unit and iPod.Then, connect it again. | |
| “Reset 08” appears on the display. Check the connection between the adapter and this unit. | ||
| The iPod’s controls do not work after disconnecting from this unit. | Reset the iPod. | |
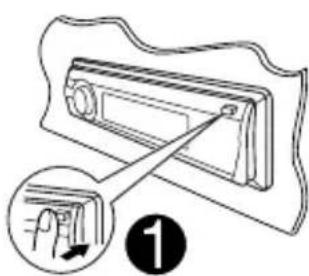
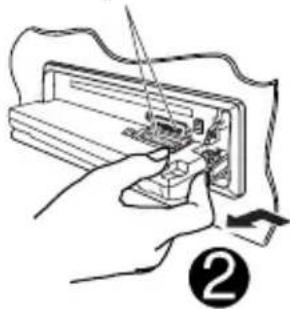
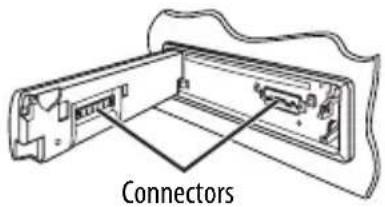
Detaching the control panel Attaching the control panel
Avoid touching the connectors.
natural_image
Illustration of hands using a tool to switch an electronic component into a device (no text or symbols visible)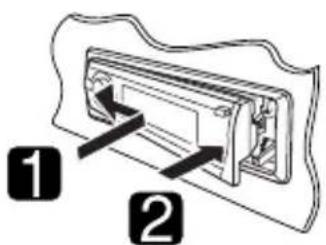
Maintenance
How to clean the connectors
Frequent detachment will deteriorate the connectors. To minimize this possibility, periodically wipe the connectors with a cotton swab or cloth moistened with alcohol, being careful not to damage the connectors.
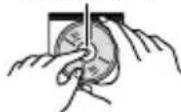
Moisture condensation
Moisture may condense on the lens inside the unit in the following cases:
• After starting the heater in the car.
• If it becomes very humid inside the car.
Should this occur, the unit may malfunction. In this case, eject the disc and leave the unit turned on for a few hours until the moisture has evaporated.
How to handle discs
When removing a disc from its case, press down the center holder of the case and lift the disc out, holding it by the edges.
Center holder
• Always hold the disc by the edges. Do not touch its recording surface.
When storing a disc in its case, gently insert the disc around the center holder (with the printed surface facing up).
• Make sure to store discs in cases after use.
To keep discs clean
A dirty disc may not play correctly. If a disc does become dirty, wipe it with a soft cloth in a straight line from center to edge.

- Do not use any solvents (for example, conventional record cleaner, spray, thinner, benzine, etc.) to clean discs.
To play new discs
New discs may have some rough spots around the inner and outer edges. If such a disc is used, this unit may reject the disc.

To remove these rough spots, rub the edges with a pencil or ball-point pen, etc.
Do not use the following discs:
Single CD (8 cm disc)

Warped disc
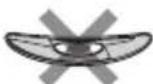
Sticker and sticker residue Stick-on label


Unusual shape

- Microsoft and Windows Media are either registered trademarks or trademarks of Microsoft Corporation in the United States and/or other countries.
- The Bluetooth word mark and logos are owned by the Bluetooth SIG, Inc. and any use of such marks by Victor Company of Japan, Limited (JVC) is under license. Other trademarks and trade names are those of their respective owners.
- iPod is a trademark of Apple Inc., registered in the U.S. and other countries.
Specifications
| AUDIO AMPLIFIER SECTION | Maximum Power Output: | Front/Rear: 50 W per channel | |
| Continuous Power Output (RMS): | Front/Rear: 19 W per channel into 4 Ω, 40 Hz to 20 000 Hz at no more than 0.8% total harmonic distortion | ||
| Load Impedance: 4 Ω (4 Ω to 8 Ω allowance) | |||
| Tone Control Range: Bass: ±12 dB (60 Hz, 80 Hz, 100 Hz, 200 Hz) | |||
| Mid-range ±12 dB (500 Hz, 1.0 kHz, 1.5 kHz, 2.5 kHz) | |||
| Treble: ±12 dB (10.0 kHz, 12.5 kHz, 15.0 kHz, 17.5 kHz) | |||
| Frequency Response: 40 Hz to 20 000 Hz | |||
| Signal to Noise Ratio: 70 dB | |||
| Audio Output Level: Line-Out Level/Impedance: 2.5 V/20 kΩ load (full scale) | |||
| Output Impedance: 1 kΩ | |||
| Subwoofer-Out Level/Impedance: 2.5 V /20 kΩ load (full scale) | |||
| Other Terminals: CD changer jack, AUX (auxiliary) input jack, USB input jack, Aerial input | |||
| TUNER SECTION | Frequency Range: FM1/ | FM2: 87.5 MHz to 108.0 MHz | |
| FM3: 65.00 MHz to 74.00 MHz | |||
| AM: MW: 522 kHz to 1 620 kHz | LW: 144 kHz to 279 kHz | ||
| FM Tuner: | Usable Sensitivity: | 11.3 dBf (1.0 μV/75 Ω) | |
| 50 dB Quieting Sensitivity: | 16.3 dBf (1.8 μV/75 Ω) | ||
| Alternate Channel Selectivity (400 kHz): | 65 dB | ||
| Frequency Response: | 40 Hz to 15 000 Hz | ||
| Stereo Separation: | 30 dB | ||
| MW Tuner: | Sensitivity/Selectivity: | 20 μV/35 dB | |
| LW Tuner: | Sensitivity: | 50 μV | |
| CD PLAYER SECTION | Type: Compact disc player | ||
| Signal Detection System: Non-contact optical | pickup (semiconductor laser) | ||
| Number of Channels: 2 channels (stereo) | |||
| Frequency Response: 5 Hz to 20 000 Hz | |||
| Dynamic Range: 96 dB | |||
| Signal-to-Noise Ratio: 98 dB | |||
| Wow and Flutter: Less than measurable limit | |||
| MP3 Decoding Format: (MPEG1/2 Audio Layer 3) | Max. Bit Rate: 320 kbps | ||
| WMA (Windows Media® Audio) Decoding Format: | Max. Bit Rate: 320 kbps | ||
| USB SECTION | USB Standard: USB 1.1, USB 2.0 | ||
| Data Transfer Rate (Full Speed): Full Speed: | Max. 12 Mbps | ||
| Low Speed: Max. 1.5 Mbps | |||
| Compatible Device: Mass storage class | |||
| Compatible File System: FAT 32/16/12 | |||
| Playable Audio Format: MP3/WMA/WAV | |||
| Max. Current: 500 mA/5V | |||
| GENERAL | Power Requirement: | Operating Voltage: | DC 14.4 V (11 V to 16 V allowance) |
| Grounding System: | Negative ground | ||
| Allowable Operating Temperature: | 0°C to +40°C | ||
| Dimensions (W × H × D): | Installation Size (approx.): | 182 mm × 52 mm × 160 mm | |
| Panel Size (approx.): | 188 mm × 58 mm × 12 mm | ||
| Mass (approx.): | 1.4 kg (excluding accessories) | ||
Design and specifications are subject to change without notice.
natural_image
Diagram of a CD or DVD scanner with an open lid and cable inserted (no text or symbols)natural_image
Line drawing of a computer monitor front panel with control buttons and a screen (no text or symbols)natural_image
Line drawing of a hand inserting a device into a panel, with an arrow indicating the action (no text or symbols present)2

flowchart
graph LR
    EQ --> Fad/Bal --> Subwoofer*
    EQ --> Loudness --> VolAdjust

natural_image
Illustration of a hand inserting a device into a device with a tool, labeled with number 2 (no text or symbols on the diagram itself)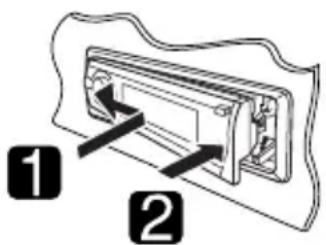
Обслуживание
Очистка разъемов
natural_image
Diagram showing a device's internal structure before and after assembly, with no visible text or symbols.natural_image
Line drawing of a computer monitor front panel with control buttons and a scroll (no text or symbols)Дистанційний датчик
natural_image
Line drawing of a hand inserting a device into a panel with an arrow indicating the button (no text or symbols present)2

3 Вибір джерела.

All Source * 1 ↔ CD ↔ Changer*3 (або Ext In *2) ↔ USB *3 ↔ FM ↔ AM ↔ iPod *8 ↔ Aux In ↔ BT Phone*8 ↔ BT Audio*3 ↔ (назад до початку)
Обслуговування
Having TROUBLE with operation?
Please reset your unit
Refer to page of How to reset your unit

- INSTRUCTIONS
- IMPORTANT FOR LASER PRODUCTS
- Available characters on the display
- How to use the M MODE and SEL buttons
- How to reset your unit
- How to forcibly eject a disc
- Warning:
- For safety...
- Temperature inside the car...
- CONTENTS
- INTRODUCTIONS
- OPERATIONS
- EXTERNAL DEVICES
- SETTINGS
- REFERENCES
- Preparation
- Cancel the display demonstration and set the clock
- Changing the display information and pattern
- Caution:
- Caution on volume setting:
- Basic operations
- Using the control panel
- Using the remote controller (RM-RK50)
- Installing the lithium coin battery (CR2025)
- Before using the remote controller:
- Warning (to prevent accidents and damage):
- Connected to KS-PD100:
- Connected to the USB input jack:
- When an FM stereo broadcast is hard to receive
- Exit from the setting.
- ■ FM station automatic presetting — SSM (Strong-station Sequential Memory)
- While listening to a station...
- Manual presetting
- Using the number buttons
- Using the Preset Station list
- Searching for FM RDS programme — PTY Search
- Storing your favorite programme types
- Activating TA/PTY Standby Reception
- TA Standby Reception
- PTY Standby Reception
- Tracing the same programme—Network-Tracking Reception
- Automatic station selection—Programme Search
- Disc operations
- To stop play and eject the disc
- Prohibiting disc ejection
- Selecting a folder/track on the list (only for MP3/WMA file)
- Change to the selected item.
- Listening to the USB device
- If a USB device has been attached...
- To stop play and detach the USB device
- Cautions:
- Using the Bluetooth ® devices
- Registering a Bluetooth device
- Registration (Pairing) methods
- Registering using "Open"
- Use the Bluetooth device to search and connect.
- Connecting a device
- • Select "Search" to search for available devices.
- Select a device you want to connect.
- · For available devices...
- Connecting/disconnecting/deleting a registered device
- Select "BT-PHONE" or "BT-AUDIO."
- Select a registered device you want to connect/disconnect/delete.
- Enter setting menu.
- · Select "Connect" or "Disconnect" to connect/disconnect the selected device.
- Using the Bluetooth cellular phone
- When a call comes in....
- When "Auto Answer" is activated....
- To end the call
- When an SMS comes in....
- Making a call
- Select "BT-PHONE."
- Enter setting menu.
- Select "Dial Menu."
- Select the method to make a call.
- Select the name/phone number you want to call.
- How to enter phone number
- Using voice command
- | Presetting the phone number
- To call a preset number
- Using the Bluetooth audio player
- Bluetooth Information:
- Listening to the CD changer
- To select a disc/folder/track on the list
- Listening to the iPod
- Playback control from the unit
- Selecting a track from the menu
- The menu selecting mode will be canceled:
- Listening to the other external components
- Connecting an external component to the AUX input jack
- Selecting a preset sound mode
- Adjusting the sound
- Adjust the selected setting item.
- A Fad/Bal (Fader/Balance)
- B Subwoofer
- Exit from the setting.
- Storing your own sound modes
- Select a sound mode.
- Select a frequency range.
- Adjust the sound elements of the selected frequency range.
- Repeat steps 3 and 4 to adjust the other frequency bands.
- Store the adjustments.
- General settings — PSM
- | Setting the time for dimmer
- Follow steps 1 to 3 on page 25.
- Select "Time Set."
- Adjust the dimmer start time.
- Changing the display color
- Setting the display color
- Creating your own color—User Color
- Bluetooth settings
- More about this unit
- Turning on the power
- Turning off the power
- General
- FM/AM/RDS
- Storing stations in memory
- FM RDS operations
- | Disc/USB operations
- Caution for DualDisc playback
- Playing a CD-R or CD-RW
- Playing an MP3/WMA disc
- MP3:
- WMA:
- Playing MP3/WMA/WAV tracks from a USB device
- WAV:
- Bluetooth operations
- Icons for phone types
- Warning messages for Bluetooth operations
- - Connection Error:
- - Error
- - Device Not Found
- - Loading...
- - Please Wait...
- - Reset 08
- iPod
- Notice:
- General settings—PSM
- Available PTY codes
- Troubleshooting
- Detaching the control panel Attaching the control panel
- Maintenance
- How to clean the connectors
- Moisture condensation
- How to handle discs
- To keep discs clean
- To play new discs
- Do not use the following discs:
- Обслуживание
- Очистка разъемов
- Обслуговування
- Having TROUBLE with operation?
- Please reset your unit
Brand : JVC
Model : KD-G847EE
Category : Car radio